
How to Add CAPTCHA to WooCommerce Login
Do you want to add an extra security layer to your online store? You have come to the right place. In this article, we will show you different methods to add CAPTCHA to WooCommerce login and configure it the right way.
What’s CAPTCHA?
CAPTCHA (Completely Automated Public Turing test to tell Computers and Humans Apart) is a modern technique used to add user verification to any website or mobile app. In other words, CAPTCHAs are used to distinguish real humans from bots to make your site more secure. The CAPTCHA creates simple challenges and displays them on the front end, and the user has to solve them to access the site. Since bots can’t solve the CAPTCHA, you can filter undesired traffic and prevent bots from entering your website.
So if you want to keep bots away from your login, registration, and other important pages, adding CAPTCHA is a good option.
CDN providers like Cloudflare have also included this technology and allows you to add a security layer to your website.
Types of CAPTCHA
Now let’s have a look at the different types of CAPTCHA and how they work.
1) Text CAPTCHA

To access a specific page or perform a task such as submitting a form, visitors need to enter the text shown in the image into a submit box. If they enter the text correctly, they will be redirected to the next page. But if the text is not accurate, the system will automatically generate another text CAPTCHA that users will need to enter.
2) Image CAPTCHA

The is the most common and widely used CAPTCHA type. Users have to pick the right image boxes depending on the requirements to verify that they aren’t a robot. If the image or instructions aren’t clear, visitors can skip the CAPTCHA and get a new one.
3) Audio CAPTCHA
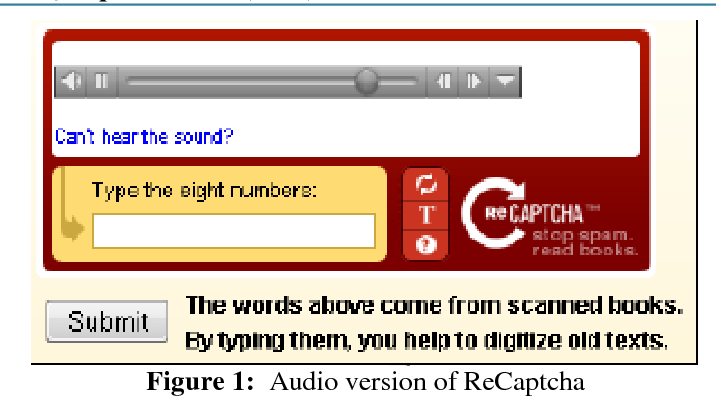
When you use audio CAPTCHA, your website visitors have to listen to a specific audio file and enter the words/numbers they hear on a submit box. This is more secure than image or text CAPTCHA but it’s not as common as the other types.
4) Math CAPTCHA
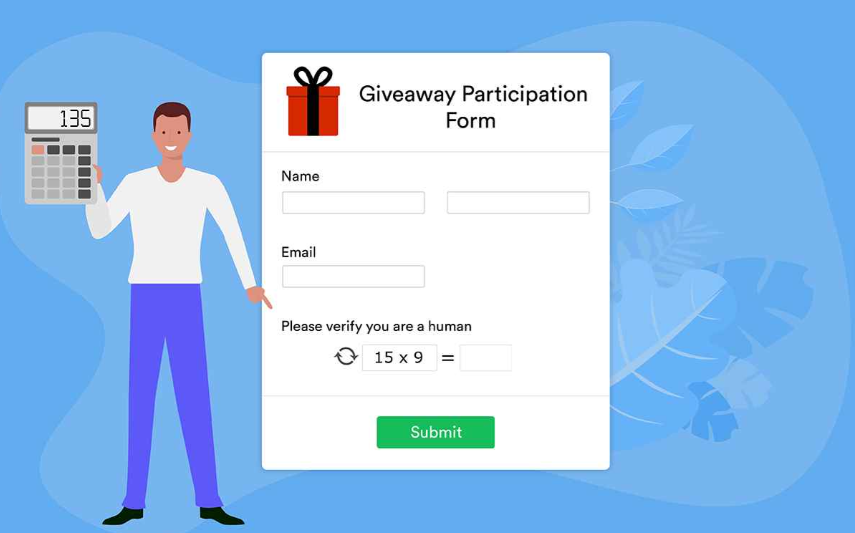
This one is probably one of the most challenging CAPTCHA types on this list. When you configure math CAPTCHA on your site, users need to solve a calculation to access a specific page or perform a certain action. Most times, the calculations are easy but visitors can also refresh the CAPTCHA to get a new one.
Why Add Captcha to the Login in WooCommerce?
If you want to protect your store from spam registrations and bots, you should add CAPTCHA to your WooCommerce login. Login pages and contact forms are some of the pages that hackers target the most. That’s why using the default WordPress login form is not recommended.

As you can see, there are no additional security layers there. By using the proper account credentials, anyone can access the account. Hackers use software that tries different combinations of username and password until they find the right combination. We’ve already seen how to customize the WordPress login page to avoid this but you should also add another security layer.
Adding CAPTCHA to the WooCommerce login page is an excellent way to make your site more secure and protect their websites from hackers. Hackers often use software to brute force the login page and access sites. However, if you add a CAPTCHA verification box to the log-in page, the software won’t be able to complete the operation.
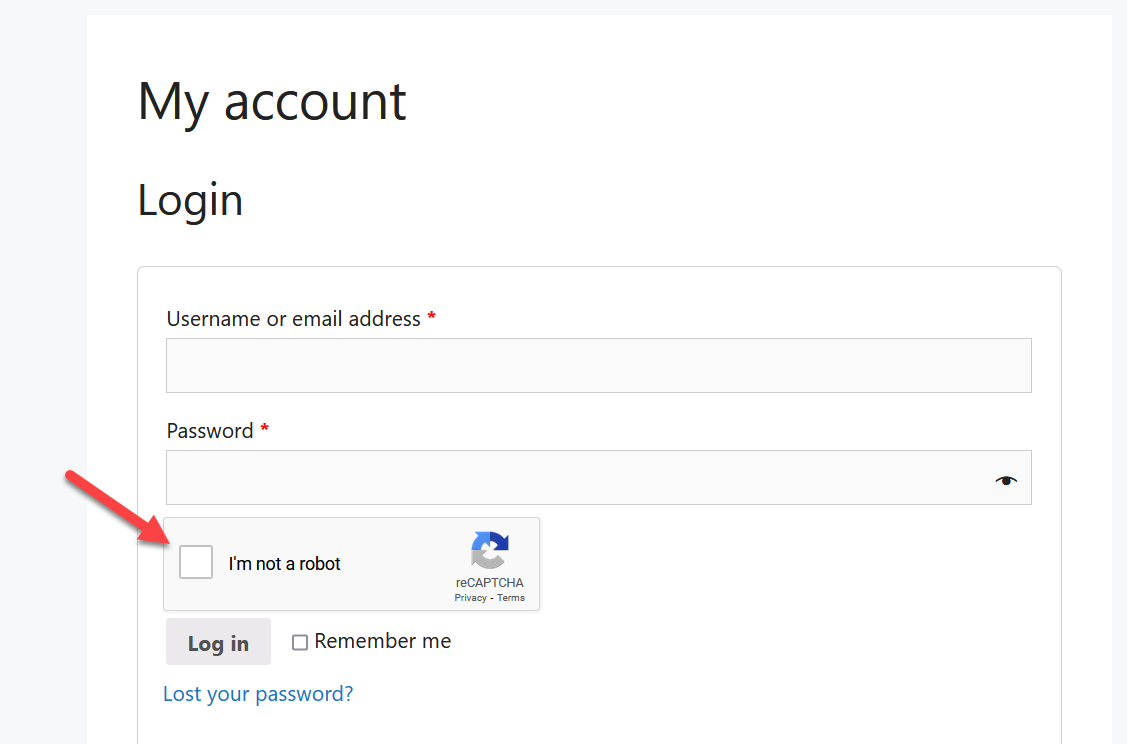
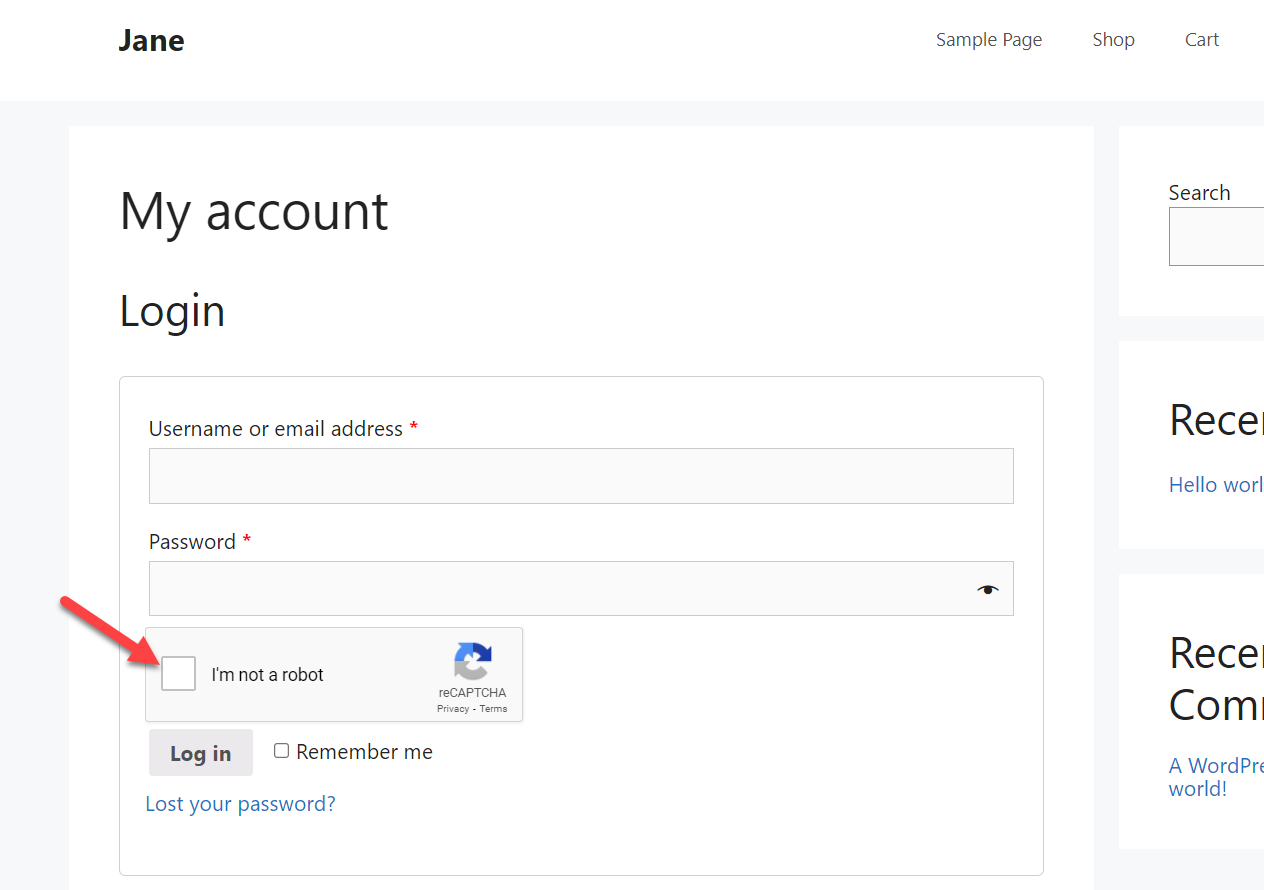
After adding CAPTCHA, your login form will look like this:
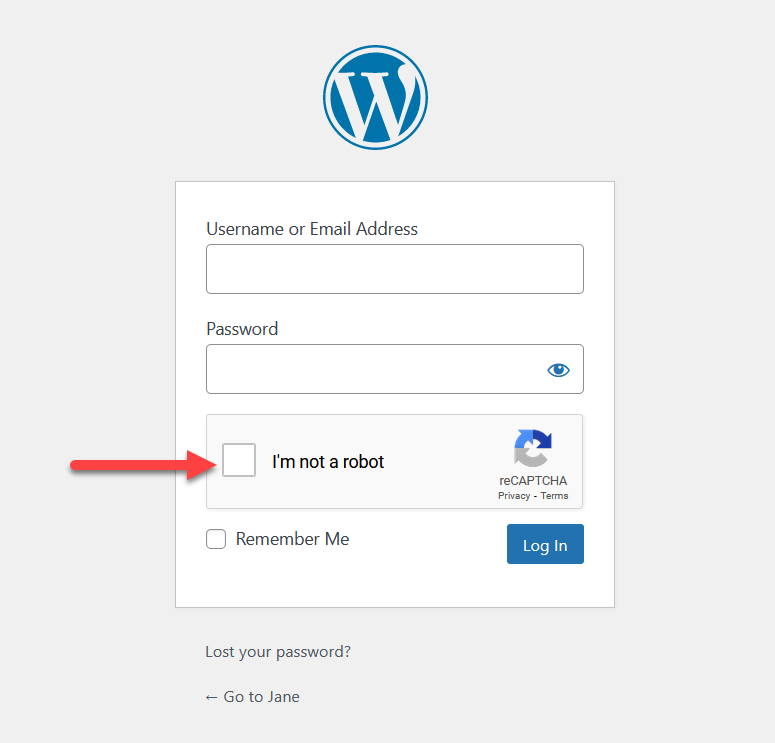
Even if the user has entered the correct login credentials, they must solve the CAPTCHA before logging in to the account dashboard.
Now that you know why you need to add CAPTCHA to the WooCommerce login, let’s learn how to do it and prevent spam.
How to Add CAPTCHA to WooCommerce Login
There are two ways to add CAPTCHA to WooCommerce:
- Using plugins
- Programmatically
Let’s have a look at each method, so you can choose the best one for you.
1) Add CAPTCHA using Plugins
There are several plugins that you can use to add CAPTCHA to your site. In this section, we’ll focus on two tools:
- reCaptcha by BestWebSoft
- Advanced noCAPTCHA & reCAPTCHA
1.1) reCaptcha by BestWebSoft
reCaptcha by BestWebSoft is one of the most popular free CAPTCHA plugins available in the market. Let’s see how to set it up.
1.1.1) Installation and Activation
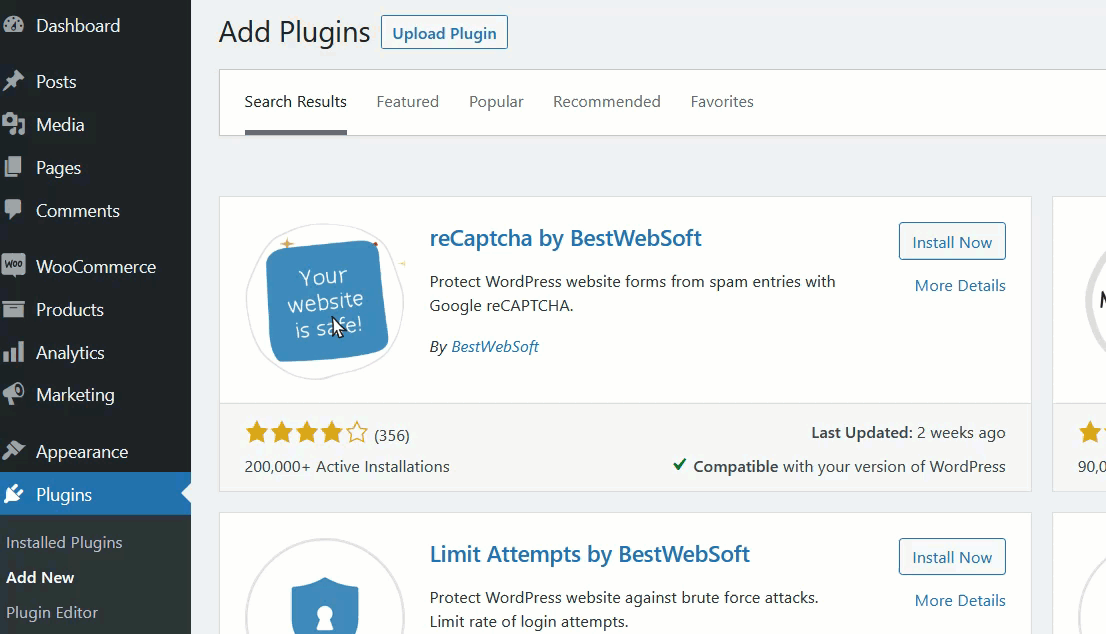
First, log in to your WordPress website and go to Plugins > Add New. Then, search for the reCaptcha by BestWebSoft, press Install Now, and activate it.
1.1.2) Configuration
Once you have activated the plugin, go to the Google reCAPTCHA admin console and complete the registration. To register for a new website, you need to enter:
- Label
- reCAPTCHA type
- Domains
- Owners
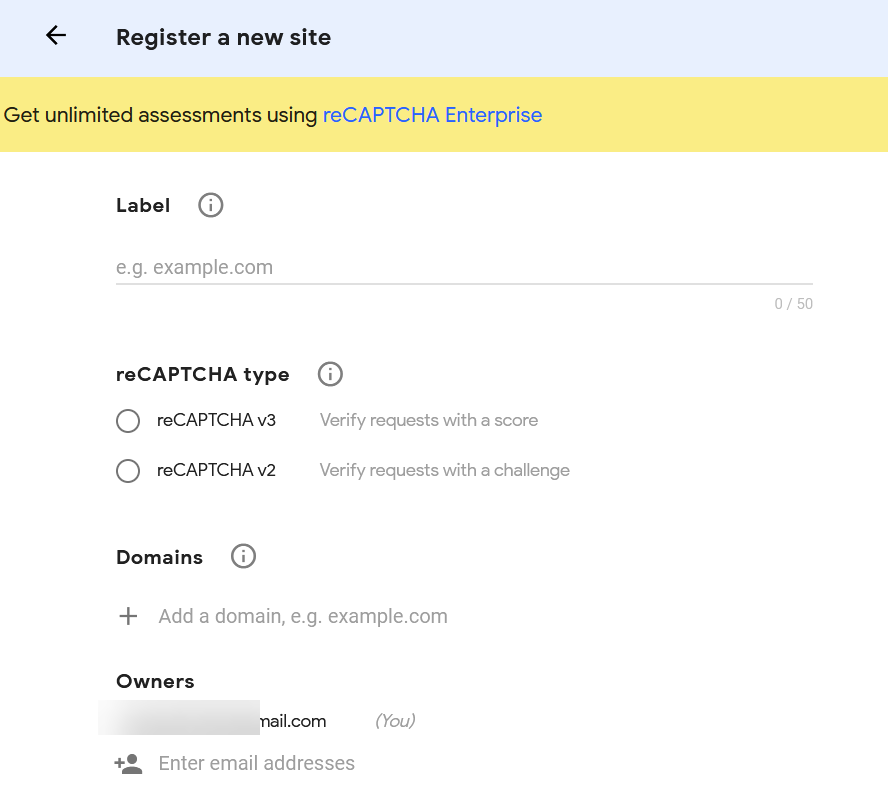
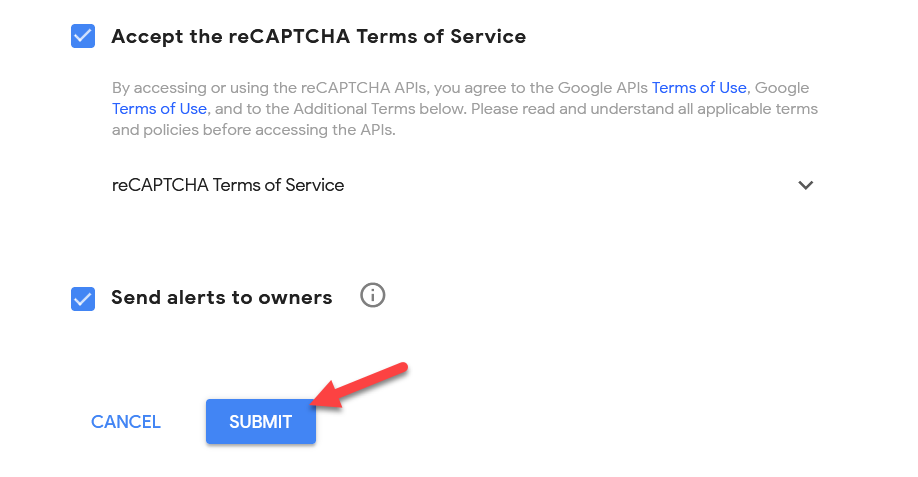
After filling in the required information, submit the form.
In our case, we have selected the reCAPTCHA v2, which is the simplest reCAPTCHA type available in the list.
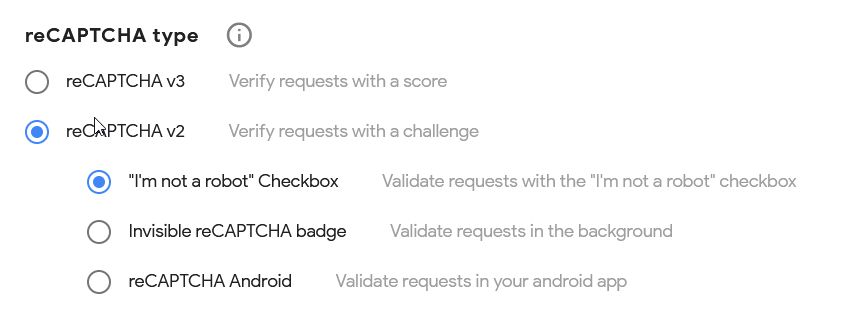
There are 3 options that you can select. We recommend selecting I’m not a robot checkbox which is the most common validation.
Once you have submitted the form, the platform will display two keys on the screen: the site key and the secret key.

Copy them and put them somewhere handy as you’ll use them in a minute.
Now go back to your WordPress dashboard and go to the reCAPTCHA settings.

Paste the keys and before hitting the submit button, make sure that you have selected the same version you chose before.

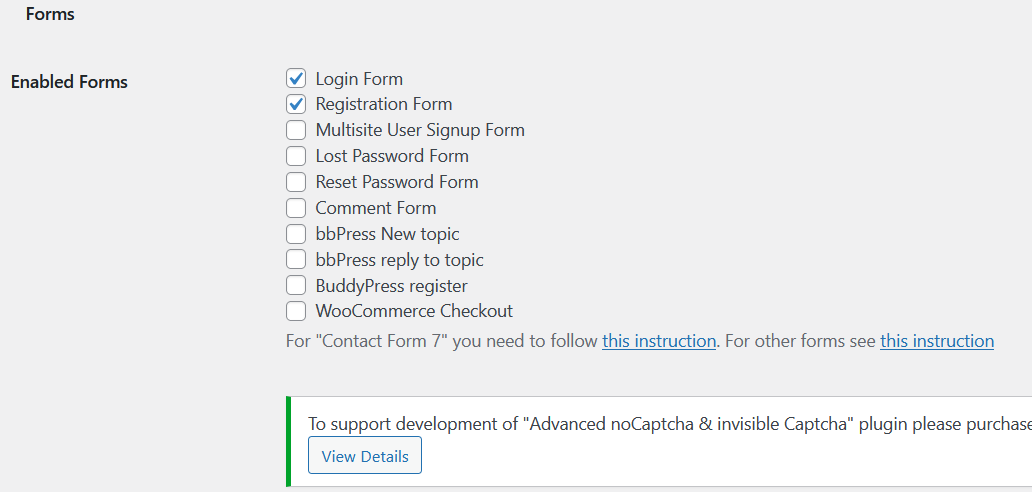
Then, scroll to the bottom of the page and you will see some WordPress default pages. Select the pages you want to add CAPTCHA to. For this demonstration, we are going to select the login page, but you can also select more pages. You can also hide CAPTCHA for certain user roles.
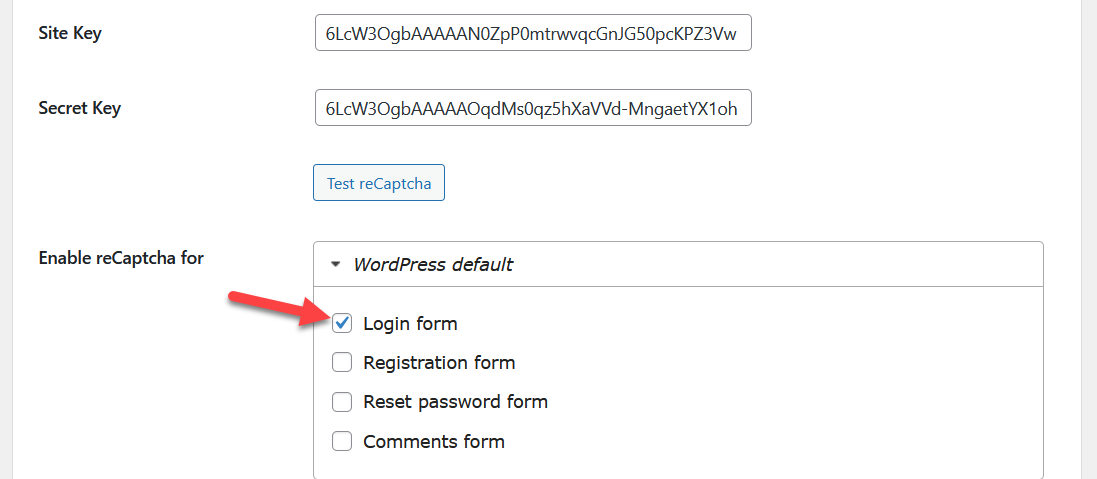
After that, save the settings and that’s it!
1.3) Testing
To verify that everything is working correctly, go to your login page using an incognito window and you will see a CAPTCHA box below the password field.
If you can’t see a checkbox in the front end, it’s because you have entered the wrong keys or selected the wrong reCAPTCHA type. Go back to the settings and double-check the plugin options.
This is how you can add CAPTCHA to the default WordPress login page. If you’re using the default WordPress login page as the WooCommerce login page, this is a great option. However, if you are using a dedicated page generated by WooCommerce, you need to use the premium version of this plugin.
Currently, the free version of reCAPTCHA doesn’t come with WooCommerce integration. The premium version, however, will unlock more powerful integrations and more advanced functionalities for 21 USD per year.
After purchasing it, you need to verify the license key and then add reCAPTCHA options to the WooCommerce login, registration, or password reset fields.
If you want to add a CAPTCHA field to the WooCommerce login page without paying anything, we’ve got another plugin for you.
1.2) Advanced noCAPTCHA & reCAPTCHA (V2 & V3)
Advanced noCAPTCHA & reCAPTCHA is an excellent free plugin to easily add CAPTCHA to your site. Let’s see how to configure it to protect your site.
1.2.1) Installation and Activation
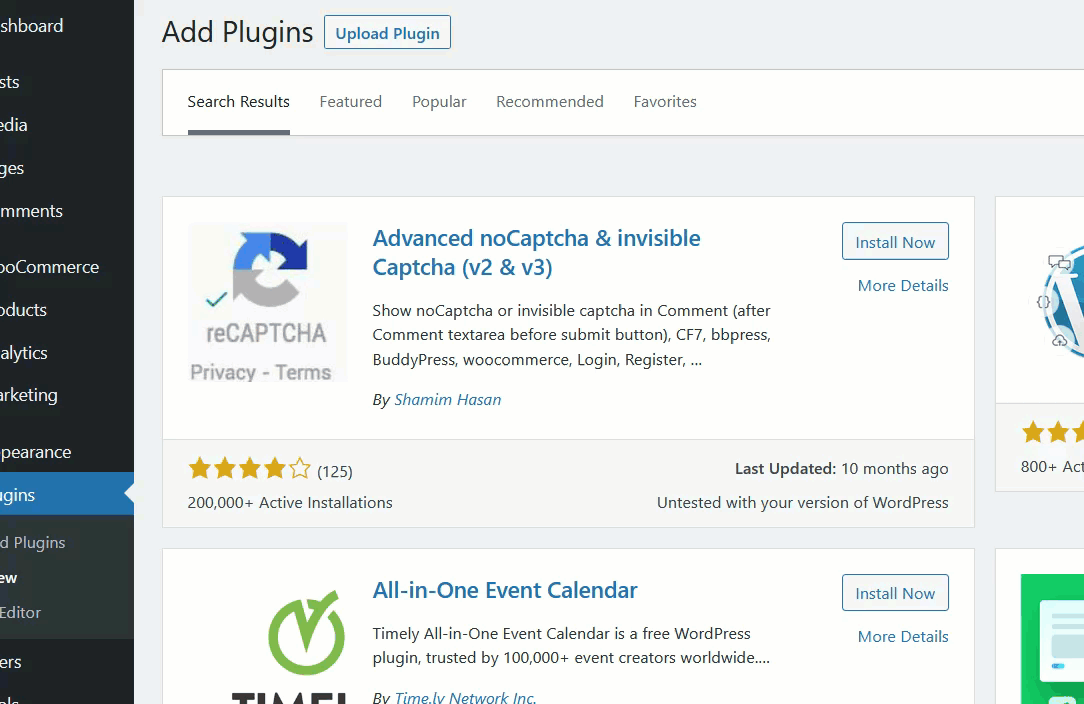
As usual, the first thing you need to do is install and activate the plugin on your website. Go to Plugins > Add New, look for the plugin, and install it.
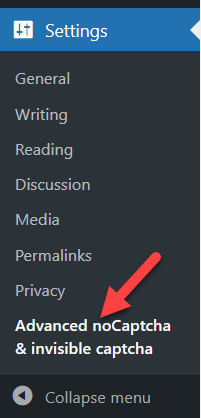
After activating the tool, you will see the plugin’s settings under the Settings section.
1.2.2) Configuration
The configuration of this tool is minimal. Go to the Google reCAPTCHA admin console and complete the registration. Remember to select the type of CAPTCHA you want and copy the site key and secret key.
Then, select the reCAPTCHA type and paste your site key and secret key in the corresponding fields.
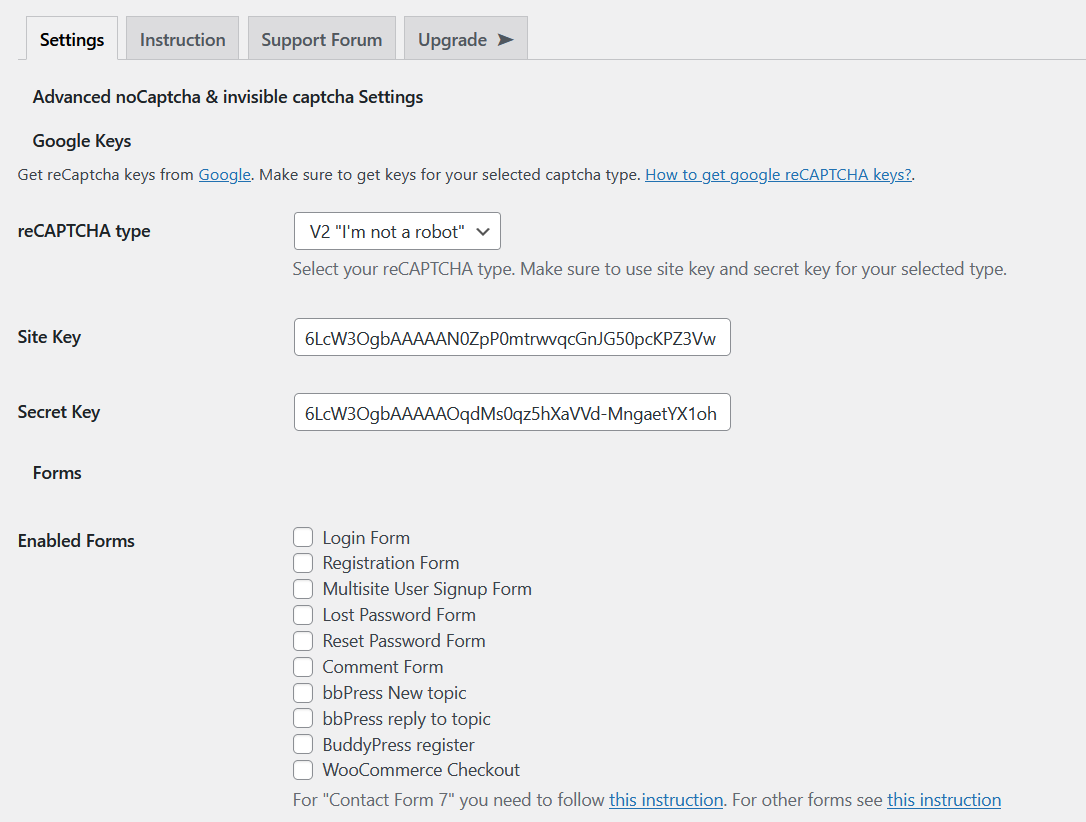
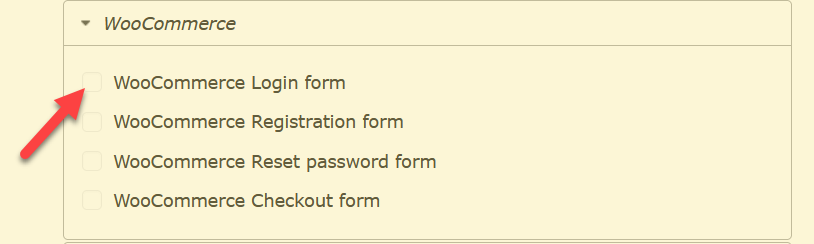
After that, choose the forms you want to protect with reCAPTCHA. In this case, we will select our login and registration form. After that, save the changes.
1.2.3) Testing
After that, it’s time to check your WooCommerce login page. Open the login page on an incognito window and you should see a reCAPTCHA box there.
That’s it! This is how you can easily add a CAPTCHA field to your WooCommerce login page. But what if you don’t want to use any third-party tools for this? You can also do it with a bit of code.
2) Add CAPTCHA Programmatically
If you have some coding skills, you can add CAPTCHA to your WooCommerce login page using PHP snippets. In this section, we will show you how you can include a Google reCAPTCHA box in the login screen.
As we will edit the theme’s functions.php file, before starting you should generate a complete backup of your site. Additionally, we recommend you create a child theme if you haven’t done so already.
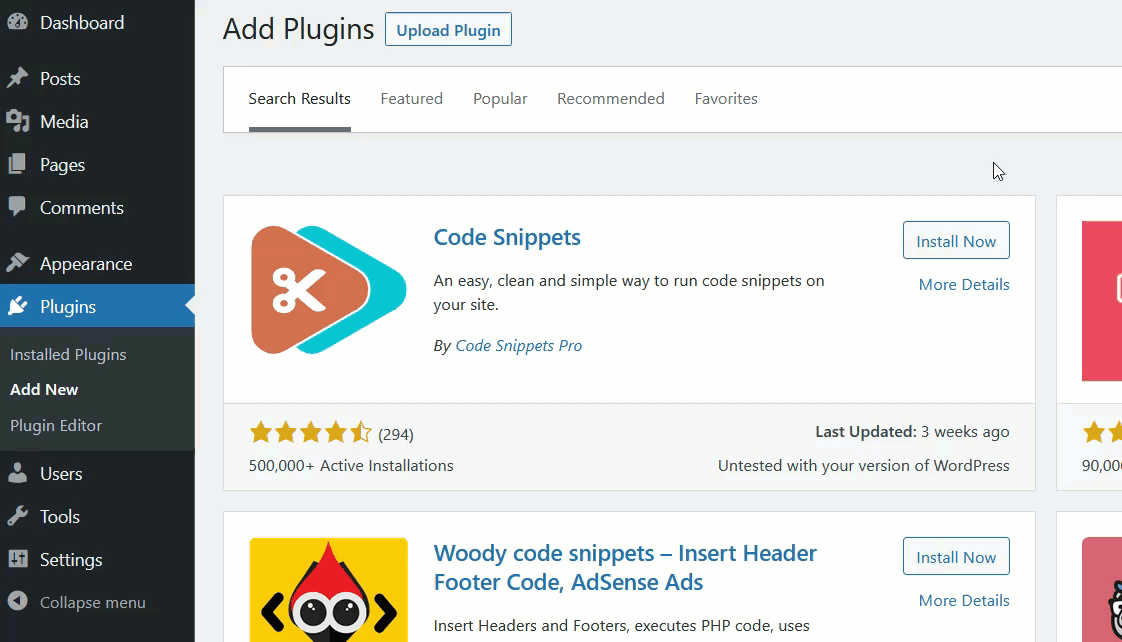
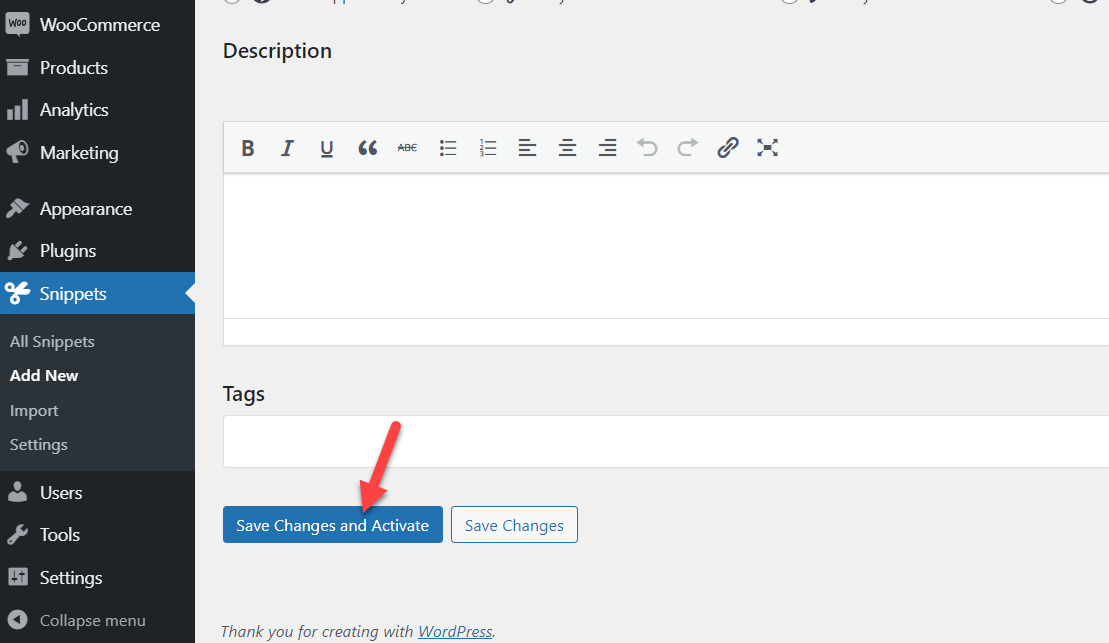
For this tutorial, instead of pasting the code directly into the functions.php file, we will use the Code Snippets plugin. It’s a site-specific tool used by thousands of bloggers and developers to make the process of editing core files easier.
Installation and Activation
First, install and activate Code Snippets on your site as shown below.
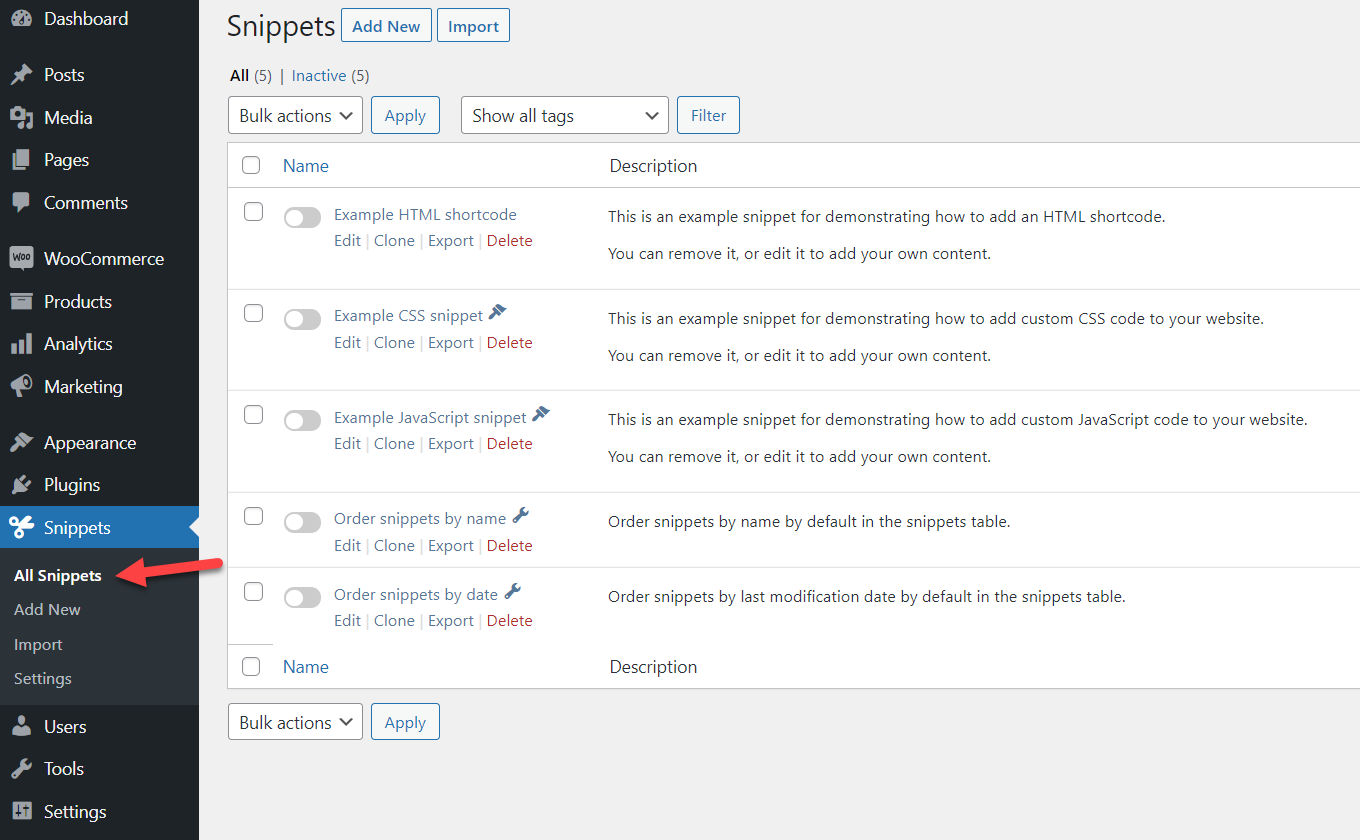
After activating the plugin, you will see its settings on the left-hand side.
Configuration
Click Add New, give the snippet a name, and paste the following code:
add_action('wp_head',function (){echo '<script src="https://www.google.com/recaptcha/api.js" async defer></script>';});
add_action('woocommerce_login_form','add_recaptcha_to_login_form');
function add_recaptcha_to_login_form() {
echo '<div class="g-recaptcha" data-sitekey="YOUR_PUBLIC_KEY"></div>';
} { ?>
<div class="g-recaptcha" data-sitekey="YOUR_PUBLIC_KEY"></div> <p>ACA el captcha</p>
<?php
}
add_action( "login_form", "display_login_captcha" );
function verify_login_captcha($user, $password) {
if (isset($_POST['g-recaptcha-response'])) {
$recaptcha_secret = 'YOUR_SECRET_KEY';
$response = wp_remote_get("https://www.google.com/recaptcha/api/siteverify?secret=". $recaptcha_secret ."&response=". $_POST['g-recaptcha-response']);
$response = json_decode($response["body"], true);
if (true == $response["success"]) {
return $user;
} else {
return new WP_Error("Captcha Invalid", __("<strong>ERROR</strong>: You are a bot"));
}
} else {
return new WP_Error("Captcha Invalid", __("<strong>ERROR</strong>: You are a bot. If not then enable JavaScript"));
}
}
add_filter("wp_authenticate_user", "verify_login_captcha", 10, 2);

Make sure to paste your site key and secret key in the snippet where it says YOUR_PUBLIC_KEY and YOUR_SECRET_KEY respectively. Once you have done that, save the changes and activate the snippet.
Testing
Now, you need to check your WooCommerce login page from an incognito window. You should see a reCAPTCHA box there.
That’s it! This is how you can add CAPTCHA to the WooCommerce login page using a bit of code.
Bonus: How to Customize the Login Page
When running a WooCommerce store, it’s a good practice to customize your login page. Not only will that differentiate from your competitors but also make your site more secure. In this section, we’ll show you how to edit your login page without writing a single line of code to provide users with a better experience and keep your store safe.
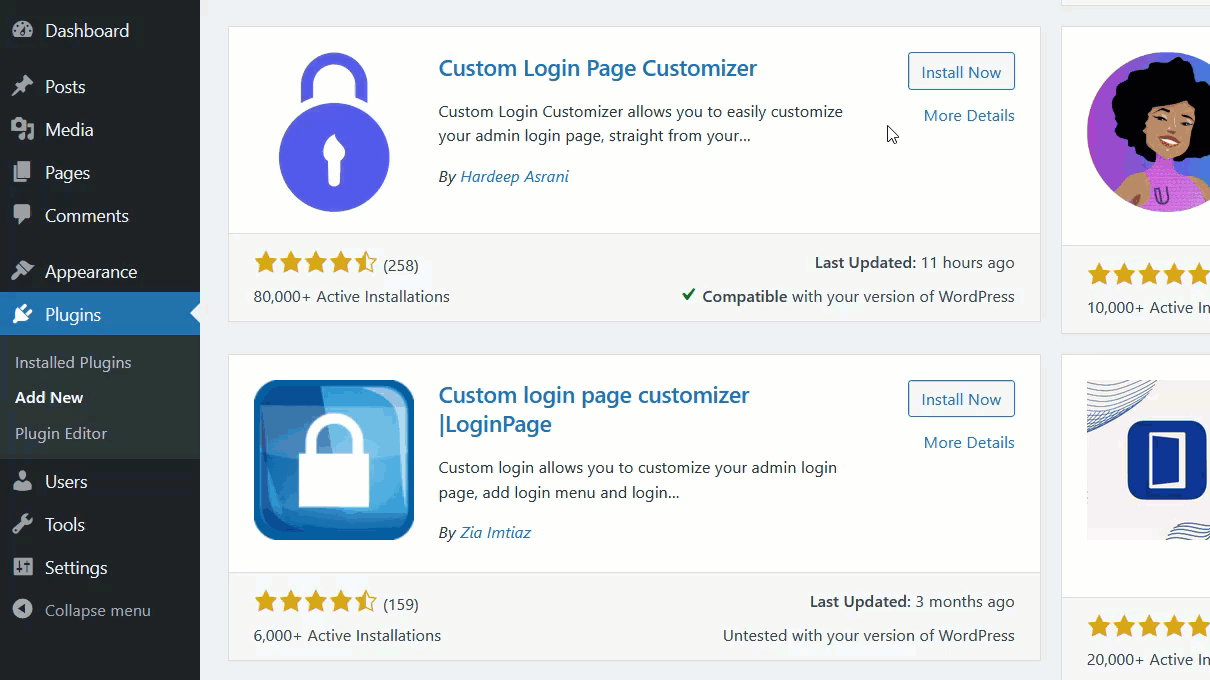
There are many plugins to customize the login page. In this tutorial, we will use Custom Login Page Customizer, a free tool that you can download from the WordPress plugins repository.
The first thing you need to do is install and activate the plugin on your website. Go to Plugins > Add New, look for Custom Login Page Customizer, and install it.
After activation, you will see the Customizer option on the left-hand side under Login Customizer.

Once you access it, you will see the WordPress customizer. The plugin comes with some pre-built templates that you can use to make your life easier and save some time.
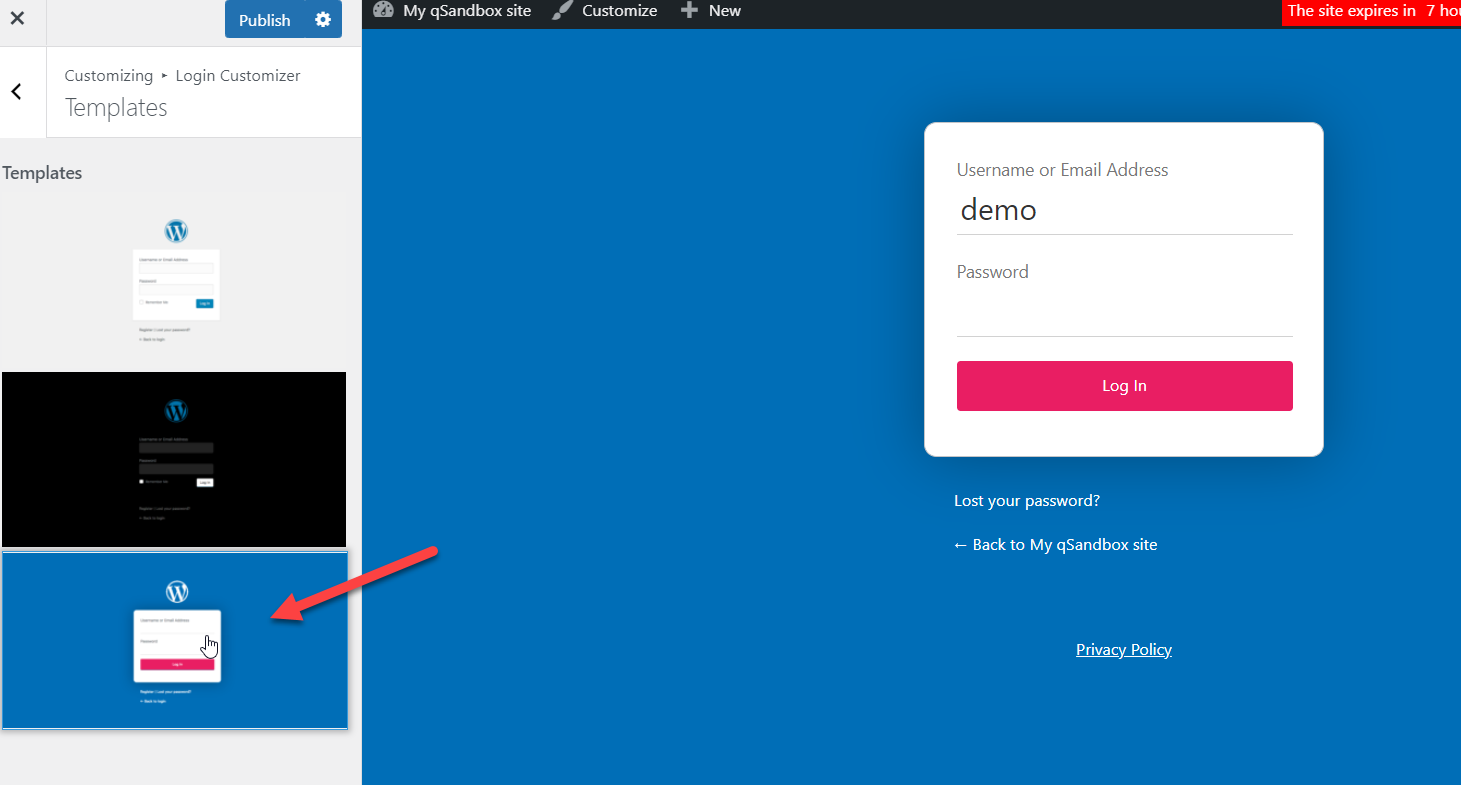
With this plugin, you will be able to customize the background, logo, form, fields, and buttons of your site. Additionally, you can also include custom code scripts from the Custom CSS & JavaScript section.

Once you’re happy with your customization, remember to save the changes. That’s it! Now your website visitors will see the newly designed login page on the front end.
For more information about this, check out our guide on how to customize the login page in WordPress. Additionally, we recommend you also have a look at our tutorial to change the login URL.
Conclusion
All in all, keeping your login page safe is essential. By using CAPTCHA on your login page, you make your site more secure and prevent unauthorized users such as bots from accessing your dashboard.
In this guide, we’ve seen how to add CAPTCHA to the WooCommerce login page using plugins and with a bit of code. Which one should you use? It depends. Both methods will get the job done, so it depends on your skills and needs. If you are looking for an easy solution, you can use a plugin. On the other hand, if you have programming skills and don’t like to install too many plugins, you can add the code snippet provided in this tutorial.
If you are looking for more WooCommerce dedicated tutorials, take a look at these articles:
- How to change the WordPress login page URL
- WordPress login not working? How to fix it
- How to customize the Login Page in WordPress
Have you found this article helpful? If you did, share this article with your friends on social media to help them protect their sites.

The snippet code works for me, I want to add this captcha to my registration form also.
Could you please send me the code for registration form? Thanks in advance