
How to add image to product in WooCommerce
Looking for ways to add images to your products? Whether it’s a featured or image or a gallery, how you present your items will determine how much you sell. That’s why in this guide, we’ll show you how to add an image to a product in WooCommerce.
The importance of images in eCommerce
Images are one of the key elements when it comes to selling a product. A picture tells a thousand words, so a product with an attractive image has more chances of catching customers’ attention and producing a sale.
Store owners tend to put a lot of effort into describing the features of their products. But even though we want to think that we make rational decisions, the truth is that most decisions are emotional. Humans tend to make emotional decisions and justify them rationally. If a product looks good, we’ll be more likely to buy it because it will catch our attention.
Regardless of the type of product you sell, they will have better chances of selling if they look good. If you think about it, that’s logical. If someone is going to use or wear a product whether it’s shoes, clothes, or software, they will want it to look good. That’s why it’s important to add and optimize the images you use to promote your products and ensure that what you sell is looking its best.
Now that we understand its importance, let’s have a look at how you can add an image to a WooCommerce product.
How to add images to a product in WooCommerce
There are 2 main ways to add images to products in WooCommerce:
- Using the WooCommerce dashboard
- Programmatically
Let’s have a look at both methods.
1) Add images from the WooCommerce dashboard
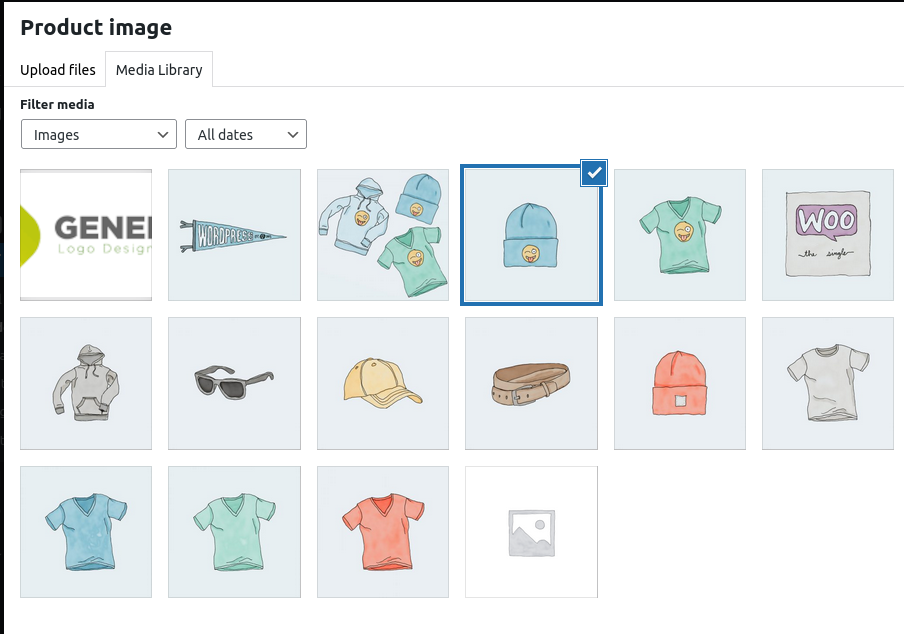
Adding an image to products is a quite simple task on a WooCommerce store. When you create or edit a product, you will find the images meta boxes on the sidebar. There, you’ll be able to set a single featured image and an image gallery with multiple images to showcase your items.
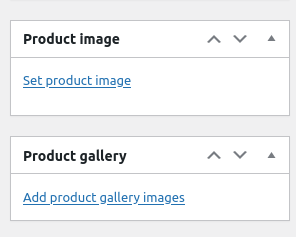
When you click any of these, a modal will open and you will be able to upload new image files or choose one of the existing ones from the WP media library.
If you are adding images to the product gallery, you can press CTRL + left click to select multiple images and add them in a single action.
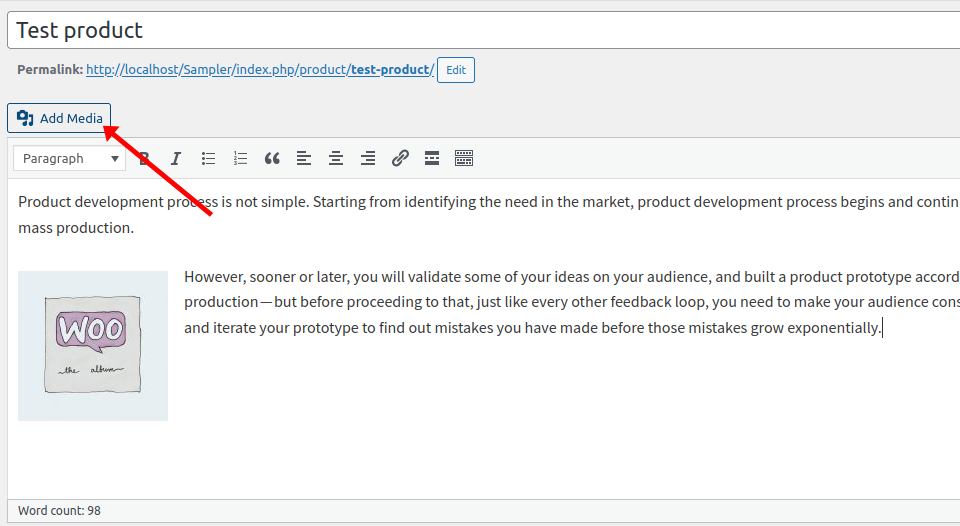
Alternatively, you can add images from the product content description. Simple press the Add Media button and select the images you want to add. If you use this method, keep in mind that this may affect the design of the overall product page, so make sure you select the right size and alignment before adding images in the text editor.
Adding images from the dashboard is straightforward. However, if you have coding skills, you can also add images programmatically which gives you more flexibility. Let’s see how to do it.
2) How to add an image to a WooCommerce product programmatically
In some cases, you might need to add images programmatically. This gives you more flexibility and allows you to include everything from images to single products, features images, galleries, and more.
In this section, we’ll show you sample scripts that will help you add images to specific products. Note that you will need to replace the product and image ID on the first two lines of the function with your product and image ID. Otherwise, if that product and image ID don’t exist, you will get an error.
Also, keep in mind that the scripts will work on a single run. This means that you can delete them after you run them.
Finally, you need to paste the following scripts into the functions.php file of your child theme. You can do that by going to Appearance > Theme Editor. Then, search for the functions.php file on the right column and paste the code as shown below. Alternatively, you can use a plugin like Code Snippets.
NOTE: As we’ll edit some core files, before we start, we recommend you backup your site. Apart from being a best practice, it’s always a good idea to have a recent backup in case something goes wrong. If you’re not familiar with hooks, have a look at our WooCommerce hooks guide where you’ll learn the different types of hooks and how to use them.
2.1) Adding a featured image to a single product
This script will set a featured image for a single product. For that, you need to specify the image ID and product ID as shown below. For example, in this case, we’re setting the image with ID 48 as the featured image of the product with ID 195.
function QuadLayers_add_featured_image() {

    $imageID = 48; // Image ID
    $post_id = 195; //Product ID

    set_post_thumbnail( $post_id, $imageID );

}

add_action('init', 'QuadLayers_add_featured_image');
The init hook will ensure that the function can be run everywhere with each page load. On top of that, we use the set_post_thumbnail() function to set the featured image. This will work both for products and posts.
2.2) Adding a featured image to multiple products
Similarly, you can do the same with multiple products by simply adding their IDs. This script will add the image with ID 53 to products with IDs 32, 33, and 34.
function QuadLayers_multiple_featured_image() {

    $imageID = 53; // Image ID
    $post_id = array(32,33,34); //Product IDs

    for ($ii=0; $ii < count($post_id); $ii++) {

           set_post_thumbnail( $post_id[$ii], $imageID );
    }

}
add_action('init', 'QuadLayers_multiple_featured_image');
As you can see, this is the same script as before, but we put all the product IDs in an array. This way, you can assign the same featured image for several products at the same time. This can be useful for product variations that don’t produce aesthetic changes. For example, you can use the same featured image for variations of the same mobile phone with different memory RAMs.
2.3) Adding images to product gallery
Adding an image to a product gallery in WooCommerce is slightly more complex because you need to use two functions. If you check the following script, you’ll see that the first function (QuadLayers_create_gallery) prepares the information needed to create the gallery. That is the list of images and the product ID where you want to add the gallery.
On the other hand, the update_post_met() is in charge of the gallery creation. To achieve this, we need to use the ID of the product in which we want to add the gallery and a list of images in an array.
function QuadLayers_create_gallery(){
        $imgs_ids=array(48,53,47); //image IDs
        add_img_to_gallery(195,$imgs_ids); // product id
}
function add_img_to_gallery($product_id,$image_id_array){
        update_post_meta($product_id, '_product_image_gallery', implode(',',$image_id_array));

}
add_action('init','QuadLayers_create_gallery');
2.4) Set a default image to products without a featured image
We’ve seen that to set the featured image of a product, in your admin dashboard, you need to go to WooCommerce > Settings > Products.

If you want to set a default image programmatically, use the following snippet.
add_filter('QuadLayers_default_image', 'custom_woocommerce_placeholder_img_src');

function QuadLayers_default_image( $src ) {
	$upload_dir = wp_upload_dir();
	$uploads = untrailingslashit( $upload_dir['baseurl'] );
	// replace with path to your image
	$src = $uploads . '/2021/07/album-1.jpg';

	return $src;
}
This will assign a default image to all the products without a featured image. In this case, we are using the image path instead of an ID, so remember to replace it with the correct path of your image.
To get the path, simply head to the Media library, look for the image you want to use, copy the URL path and paste it in code above keeping the current format.
How to Add Custom Image Sizes
Apart from adding an image to a WooCommerce product, there’s more you can do to customize your items. A good option is to create custom image sizes. By default, WordPress includes 3 image sizes: thumbnail (150 x 150), medium (300 x 300), and large (1024 x 1024). You can easily change these sizes from the dashboard, but what if you want to add custom default sizes instead? Let’s see how to do that.
First, open the functions.php file and paste the following code:
add_theme_support( 'post-thumbnails' );
This will enable the add_image_size function and will allow you to create additional image sizes. Then, update the file. Now let’s add some new image sizes. In the following code, we’ll add four custom sizes with different dimensions. Simply paste the code and adjust the names and dimensions according to your needs.
add_image_size('post-thumbnail size', 800, 240 );add_image_size('homepage-thumb size', 220, 180 );add_image_size('fullpage-thumb size', 590, 790 );
That’s it! Now you will be able more default sizes to choose from on your site. For more information about this, check out our guide on how to add custom image sizes.
Bonus: Remove Default Image Sizes in WordPress
You’ve probably noticed that every time you upload a picture to WordPress, it automatically generates 3 copies of it in the 3 default image sizes that we’ve just seen: thumbnail, medium, and large.
This can be useful and help you save time. However, if you don’t use some of these sizes, the images will only take up space in your server. A quick solution is to remove those image sizes from your site and avoid generating those image copies.
The good news is that you can do that with a simple script. For example, let’s say you want to remove the medium size from your site. Simply copy and paste the following script in the functions.php file of your child theme.
add_filter( 'intermediate_image_sizes_advanced', 'prefix_remove_default_images' );
// This will remove the default medium image size.
function prefix_remove_default_images( $sizes ) {
unset( $sizes['medium']); // 300px
return $sizes;
}
To remove any other sizes, add another line with the size you want to remove. For example, if you also want to remove the large size, the code will be:
add_filter( 'intermediate_image_sizes_advanced', 'prefix_remove_default_images' );
// This will remove the default medium and large image sizes.
function prefix_remove_default_images( $sizes ) {
unset( $sizes['medium']); // 300px
unset( $sizes['large']); // 1024px
return $sizes;
}
That’s it! That’s how you can easily remove image sizes. For more details about this, check out our step-by-step tutorial.
Conclusion
In summary, pictures are essential when it comes to selling your products. An item with an attractive picture has more chances of catching customers’ attention and generating a sale for your store.
In this guide, we’ve seen 2 different methods to add an image to a WooCommerce product:
- From the WooCommerce dashboard
- Programmatically
Now which one is more appropriate for you? Adding an image from the dashboard is quite easy, so it’s a good option. However, if you have coding skills and want more flexibility, you can also add images programmatically. We’ve shown you a few scripts that will help you easily add images, featured images, and galleries to your products.
Finally, we’ve also seen how to add custom size images and remove default image sizes on your site, so you can customize your site and make your products more attractive. For more information on how to make the most of your product pages, have a look at our guide to customize the product page.
Have you added images to your products? Which method did you use? Let us know in the comments section below!
For more tutorials to customize your store, check out the following posts:

Apprrciate this post. Will try it out.