
How to Add Multiple Email Recipients in WooCommerce
Do you want to send emails to different recipients from your store but you’re not sure how? You’ve come to the right place. In this article, we will show you different methods to add multiple email recipients in WooCommerce.
Before we dive into that, let’s better understand in which scenarios sending an email to multiple people can be useful and why you should consider it for your store.
Why should you add multiple email recipients?
In WooCommerce, by default, when a certain action happens the emails are sent to two parties: customer and store owner. However, there are several other situations in which you may want to add multiple recipients to the emails you send from your store.
Most eCommerce businesses, no matter how small or big they are, have different departments or areas. Each of those departments involved in the purchase process needs to keep track of the order details for further processing. For example, the finance department needs order details to manage business accounts. Similarly, a warehouse manager needs order details to fulfill the package request and forward it to shipment. Even if you’re a freelancer you may need to send emails from WooCommerce to more than one person.
Instead of forcing your customers to forward your emails to the corresponding department, you can add multiple email recipients to the WooCommerce mailing list. That way, one email can be sent to all the relevant departments at once instead of having to send them one by one.
Additionally, sending emails to multiple recipients is especially useful in Business-to-Business (B2B) transactions. Instead of having your customers convey details to each relevant department, you can allow them to specify email addresses where they want to receive each notification.
Sometimes individual customers may also request to send the order details to some of their family members. For example, a teenager who buys something from your store with their parents’ card may want to notify them about the purchase. By adding an extra email field during the checkout, you can enable them to receive order confirmation mails at more than one email address.
Now that we better understand why adding multiple recipients can be helpful, let’s see how to do it.
How to Add Multiple Email Recipients to WooCommerce
In this section, we will show you different methods to add multiple email recipients in WooCommerce.
- Using a plugin
- Programmatically
Let’s have a closer look at both, so you can choose the one that best suits your needs.
1) Using a dedicated plugin
The easiest way to include several email recipients is to use a dedicated plugin. There are several tools out there but for this tutorial, we will use WC Multiple Email Recipients. This tool is free and allows you to add up to five additional email addresses to your WooCommerce email notifications list. Additionally, it supports WooCommerce Bookings and Subscriptions making it a great all-rounder.
It’s worth noting that the plugin sends the emails to the addresses you add in BCC (blind carbon copy), so they won’t appear in the email log as individual entries. However, they will still be available in the WooCommerce email header.
With that said, let’s see how to install and set up the plugin on your WordPress website.
Step 1: Install WC Multiple Email Recipients
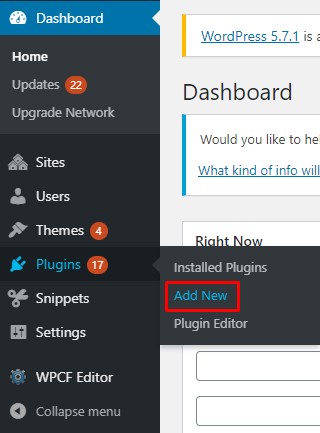
First, in your WordPress Admin Dashboard, navigate to Plugins > Add New.
From there, search for the WC Multiple Email Recipients plugin. Click the Install button and once the installation is complete, press Activate.
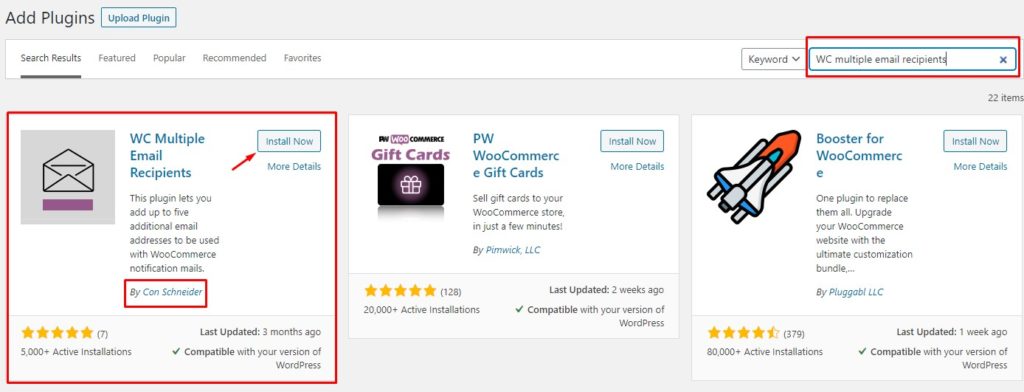
Now the plugin is active on your site and ready to be used.
Step 2: Adding Multiple Email Recipients
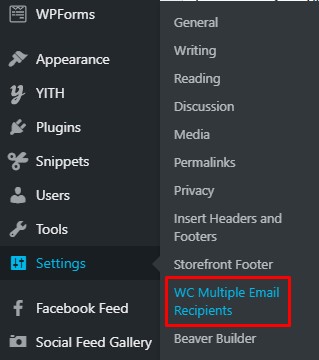
After that, navigate to Settings > WC Multiple Email Recipients and you will find all settings related to this plugin.
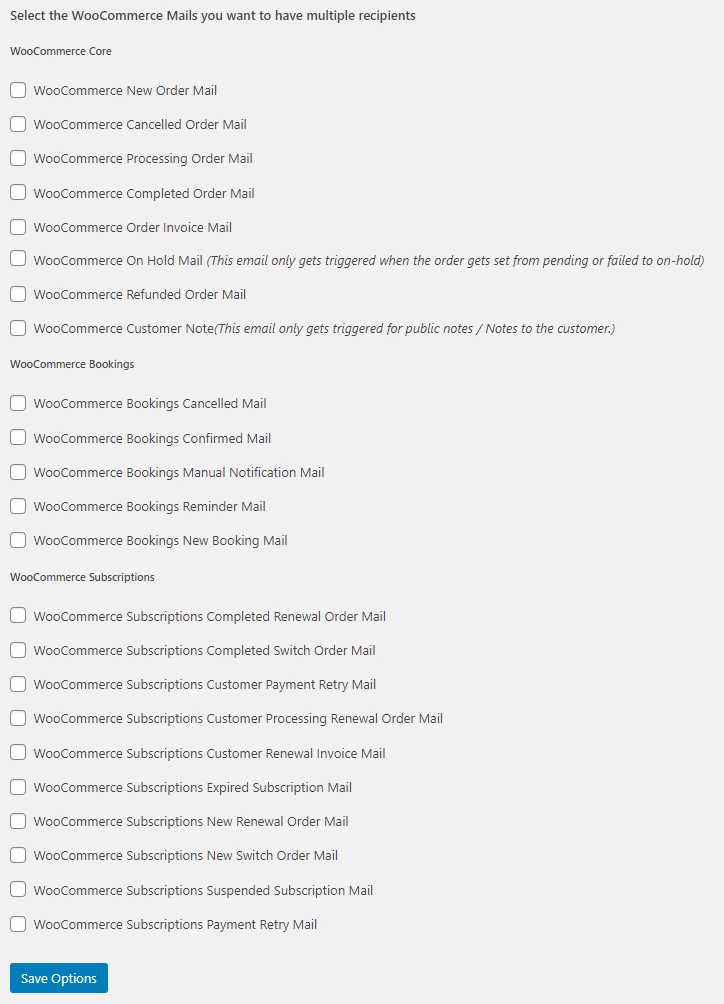
You will come across several empty fields where you can add up to five email addresses, one per field. Each of the email IDs that you include will receive the WooCommerce notifications by default.
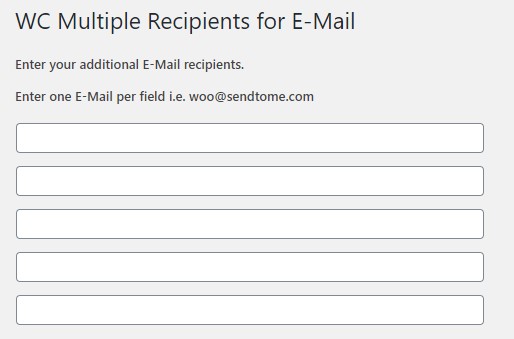
Below the email address fields, you will see the list of notification types you want to have multiple recipients. These include new orders, canceled orders, refunds, and more. Simply tick the notifications you want and press Save Options.
That’s it! From now on, the email notifications you’ve chosen will be forwarded to each of those email addresses.
Other tools allow you to store different email addresses per customer but most of them are paid.
If you have coding skills, there’s much more you can do. Let’s have a look at how to programmatically add multiple email recipients in WooCommerce.
2 Add Multiple Email Addresses to WooCommerce Programmatically
If you know how to code, you can add different recipients with a couple of simple scripts. Before we jump into the code snippets, let’s see how and where to add the code on your WordPress site.
How to Add Code Snippet to WordPress
There are two main methods to add code snippets to your site.
- Editing the functions.php file
- Using Code Snippets plugin
Let’s have a closer look at both.
2.1) Editing the functions.php file
NOTE: As we’ll edit core files, before you start with this method, we recommend you create a full backup of your site and install a child theme if you don’t have one yet. You can either create one or use any of these child theme plugins. After that, you can edit the functions.php file of your child theme.
But why do you need a child theme? The functions.php file contains all the functions your site needs to run. Any mistake here can break your site. On top of that, without a child theme, the changes you make to the functions.php file will be overridden by each update your theme receives. This means that you will need to apply the changes every time after an update. To avoid that, you can apply all your customization to the child theme and always keep your changes.
Once you have your child theme ready, head to your WordPress Admin Dashboard and go to Appearance > Theme Editor. Find the functions.php file on the right column and simply paste your code snippet at the end of it.

The functions.php is one of your site’s most important files and from here you can do a lot of things such as customizing your shop page, editing the product page, and more.
However, if you are not comfortable with the idea of creating a child theme and modifying core content, there’s another method that achieves the same results.
2.2) Using Code Snippets plugin
The second method relies on a third-party plugin called Code Snippets. This tool lets you add code snippets to your WordPress site without having to create a child theme.
First, in your WP-Admin Dashboard navigate to Plugins > Add New and search for Code Snippets. Click Install and then activate the plugin.
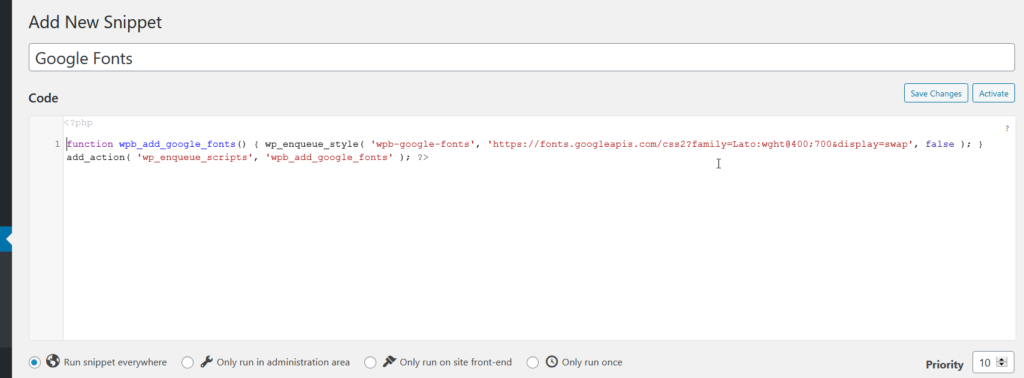
After that, go to Snippets > Add New, paste your code snippet in the Code section and save the changes. We recommend you also give a name or a label to your code snippet, so it’s easy to identify.
It’s worth noting that if you use Code Snippets, you don’t need to create a child theme. However, we always recommend having one.
Now that you are familiar with adding a code snippet to your WordPress site, let’s see how to add multiple email recipients in WooCommerce programmatically.
Add Multiple Recipients to the Complete Order Email
If you want to add multiple email recipients to the complete order email, copy the below snippet and add it to your website using any of the methods we have just mentioned. Remember to replace the email recipient (line 4) with the email address you want to add.
add_filter( 'woocommerce_email_recipient_customer_completed_order', 'quadlayers_add_email_recipient_to', 9999, 3 );
function quadlayers_add_email_recipient_to( $email_recipient, $email_object, $email ) {
   $email_recipient .= ', [email protected]';
   return $email_recipient;
}
If you want to add recipients to other emails, you need to change the email ID. Let’s see how to do it.
Add Multiple Recipients to the Invoice Email
Similarly, to add recipients to the canceled order emails, you can use the same script but change the customer_completed_order to any other email ID. For example, if we want to add recipients to the invoice emails, we’ll use the following script.
add_filter( 'woocommerce_email_recipient_customer_invoice', 'quadlayers_add_email_recipient_to', 9999, 3 );
function quadlayers_add_email_recipient_to( $email_recipient, $email_object, $email ) {
   $email_recipient .= ', [email protected]';
   return $email_recipient;
}
Add Multiple Recipients to the Canceled Order Email
On top of that, you can also include people to receive emails of the canceled orders as follows:
add_filter( 'woocommerce_email_recipient_cancelled_order', 'quadlayers_add_email_recipient_to', 9999, 3 );
function quadlayers_add_email_recipient_to( $email_recipient, $email_object, $email ) {
 $email_recipient .= ', [email protected]';
 return $email_recipient;
}
Once again, remember to change [email protected] with the email you want to add.
Add Multiple Recipients in CC or BCC
There may be cases where you want to add email recipients in CC or BCC. For those cases, you’ll need to adjust the snippet.
For example, to add recipients in CC/BCC for the completed order emails, use the following snippet.
add_filter( 'woocommerce_email_headers', 'quadlayers_add_email_recipient_cc_bcc', 9999, 3 );
function quadlayers_add_email_recipient_cc_bcc( $headers, $email_id, $order ) {
    if ( 'customer_completed_order' == $email_id ) {
        $headers .= "Cc: Name <[email protected]>" . "\r\n"; // remove if not required
        $headers .= "Bcc: Name <[email protected]>" . "\r\n"; // remove if not required
    }
    return $headers;
}
As you can see in the above code, you can set the header to either CC or BCC. Simply remove the line that you don’t need and add the email ID you want. Following the same logic, you can adjust the code and do the same for canceled orders, invoices, refunds, and so on.
Congratulations! You have successfully added multiple email recipients to your WooCommerce mailing list. From now on, any person on the list will receive all the emails you’ve selected.
Conclusion
All in all, if you have an eCommerce store, one of your main priorities should be customer satisfaction. By adding multiple recipients to receive notifications from WooCommerce by email, you are one step closer to a great user experience.
In this guide, we have discussed:
- Reasons to add multiple recipients in your WooCommerce store
- Different ways to add email recipients
- Using a dedicated plugin
- Programmatically
- Two ways to add a code snippet to your WordPress site
- With a child theme
- Using Code Snippets
Have you ever tried to add multiple email recipients in your store? What method did you use? Let us know your experience in the comments section below!
For more information on how to improve your emails, have a look at these guides:

Hi,
Thank you for your post. I followed what you said about adding a new email recipient by installing the plugin. But, even after I added a new one in the plugin, I can’t see the additional email recipient on Woocommerce-> setting -> email recipients list. Is it going to send to multiple email recipients still?
Thanks
Hi Jee! Yes, the email will be forwarded to all the email addresses. The plugin does not add the email addresses to WooCommerce->Settings->Email Recipients. So, no need to worry.
Hi, thanks for this post.
One question. Is it possible to send the billing information from a checkout form to a specific email address, based on a choice? For example: If I select “Los Angeles”, the content should arrive to [email protected]. If I select “Other”, the content should arrive to [email protected], etc.
Thanks for any help you can provide!
Jose