How to Add Quick Buy Button in WooCommerce? With and Without plugins
If you’re running an online business, you might be looking for ways to increase sales, conversions, and revenue. You can capture visitors’ email addresses, enable exit-intent pop-ups, or send newsletters but there’s something much more powerful. In this post, we are going to show you how to add a quick buy button in WooCommerce!
What’s a Quick Buy button?
A quick buy button, also known as a buy now button, lets your shoppers purchase the products they want faster and avoid extra steps of the checkout process. So instead of having to add items to the cart, going to the cart page, and then to the checkout page, they can go from the product page to the checkout page in one click. This way, you reduce drop-offs and cart abandonment.
Most big e-commerce businesses such as Amazon have a quick purchase button on their product page that allows you to buy in one click. So when a shopper clicks on the buy now button, they’re automatically redirected to the checkout page. As you can imagine, this is a great way to increase sales. 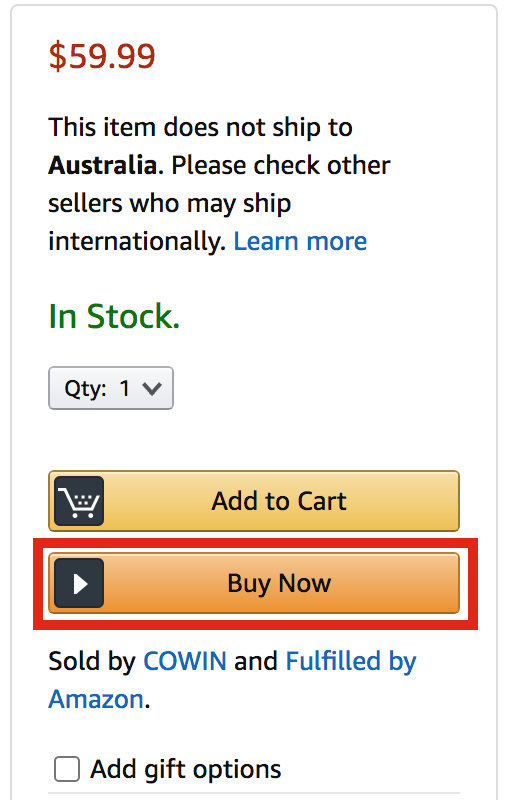
Why should you use a WooCommerce Quick Purchase button?
More than 75% of shoppers leave online shops with products in their carts. One of the main reasons for that is because the purchase process is long and confusing. The longer that process is the more chances users have to drop-off so one of the best solutions is to add a quick buy button to your WooCommerce store. This doesn’t mean you need to get rid of the Add to cart button. Not all your visitors are ready to buy the moment they visit your site.
However, giving those users who are ready to purchase straightway the option to do it in one click, will help you increase your conversions. Additionally, quick buy buttons are a good idea for subscription or membership websites. When a user signs up for a subscription, all you need to do is redirect them to the checkout page instead of taking them to the cart page and then to the checkout.
How To Add a Quick Buy Button In WooCoommerce?
There are three main methods to add a quick buy button in WooCommerce:
- Plugin
- Programmatically (coding)
- Shortcodes
All these methods are 100% beginner-friendly so you can choose the one that best suits you.
1) Plugin
There are many WordPress plugins available for adding a quick buy button to your site. However, we recommend WooCommerce Direct Checkout by QuadLayers, one of the best and lightweight add-ons to simplify the checkout process.
Direct Checkout for WooCommerce is a freemium tool that has a free version and three premium plans that start at 20 USD (one-time payment). The free version has more than 70,000 active installations and has plenty of great features. But if you want more advanced functionalities, the pro version is your best choice.
Plugin Installation and Activation
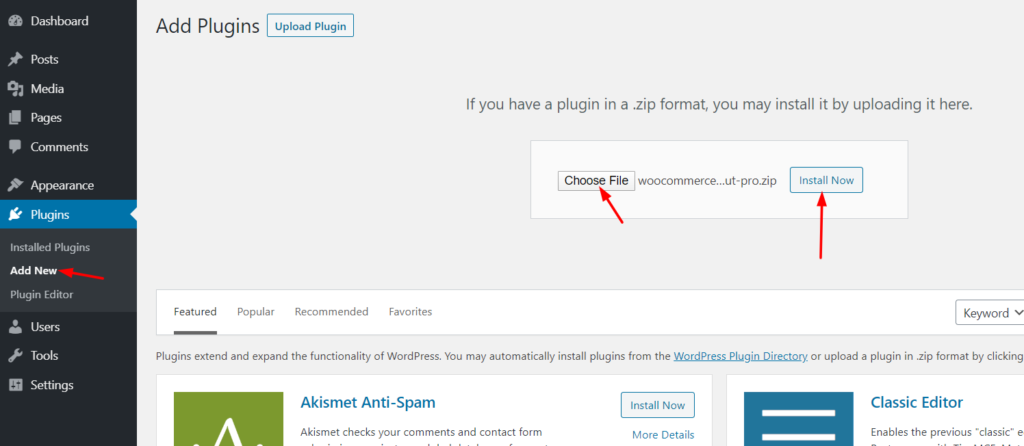
1) Install the plugin on your site. 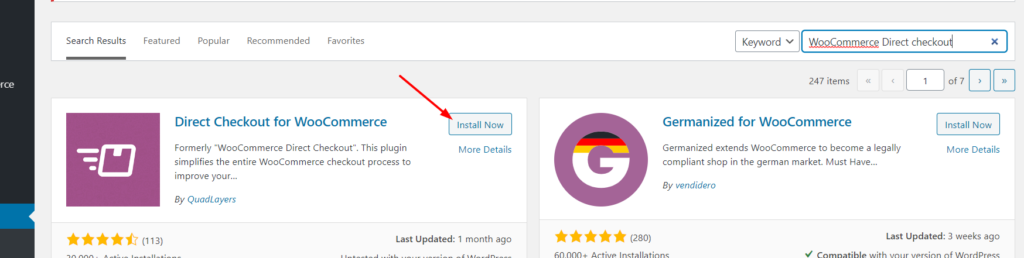
2) Then, activate it. 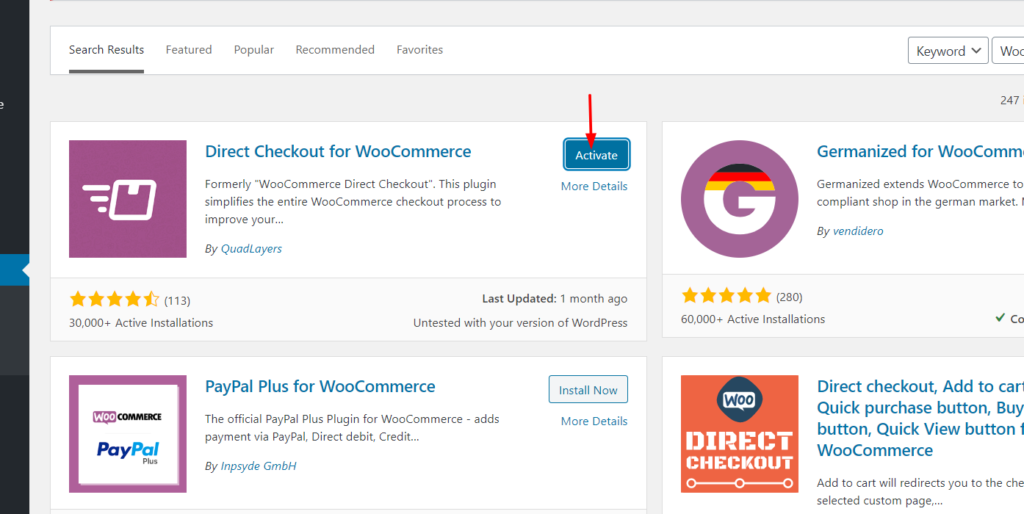
If you’re using some of the premium plans, from the same page, you will be able to upload the downloaded plugin files. Then, click Install Now.
After installation, activate the plugin.
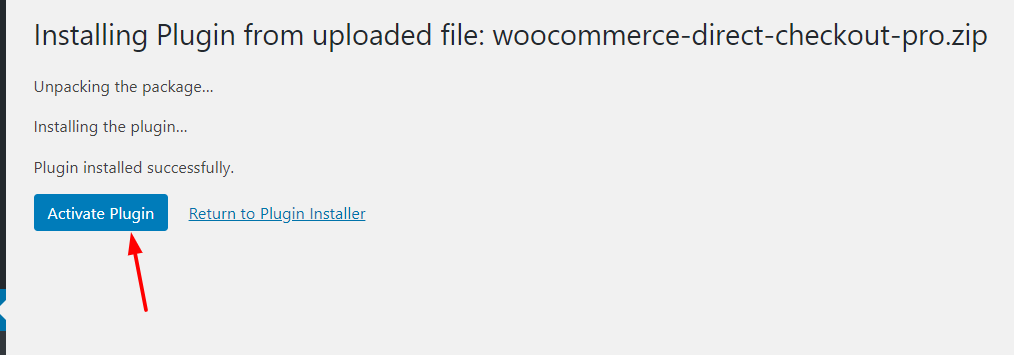 Now that the Direct Checkout for WooCommerce is activated, let’s have a look at the configuration.
Activate the License
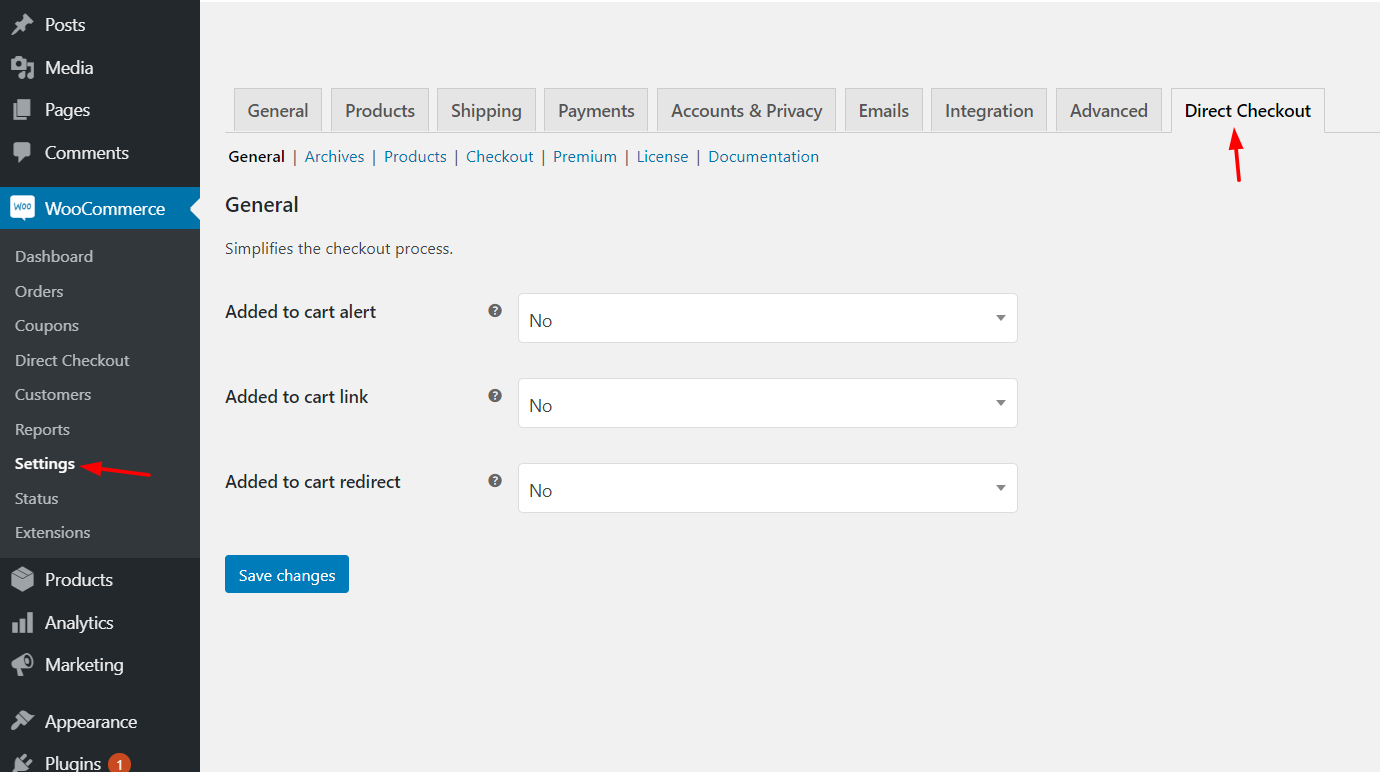
Under WooCommerce > Settings > Direct Checkout, you will be able to see the configuration options to simplify the checkout process.
The next thing you need to do is, activate the premium copy of the plugin with a valid license key.
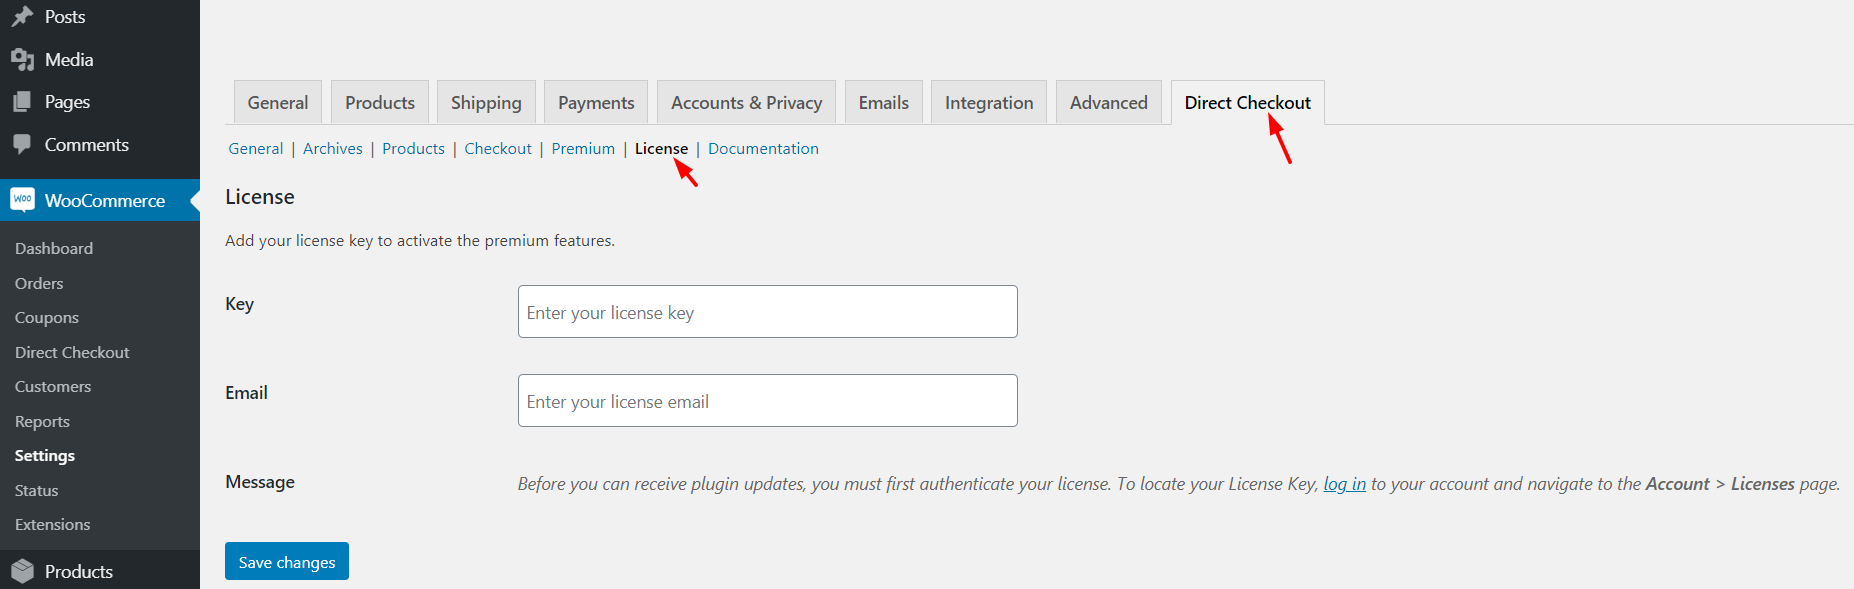
The license key can be found on your QuadLayers account. Simply copy the license key and paste it into your plugins’ settings with the email address associated with it. Verifying your key is important because it will allow you to get automatic updates. Whenever there’s a new version of the plugin, you can update it right from your WordPress dashboard.
Configuration
Before you add a buy now button to WooCommerce, you need to configure and customize your checkout options. First of all, make sure you have some products available in your shop so you can test the customization. In our case, we have one test product, and, as you can see, the product page has just an Add to cart button. 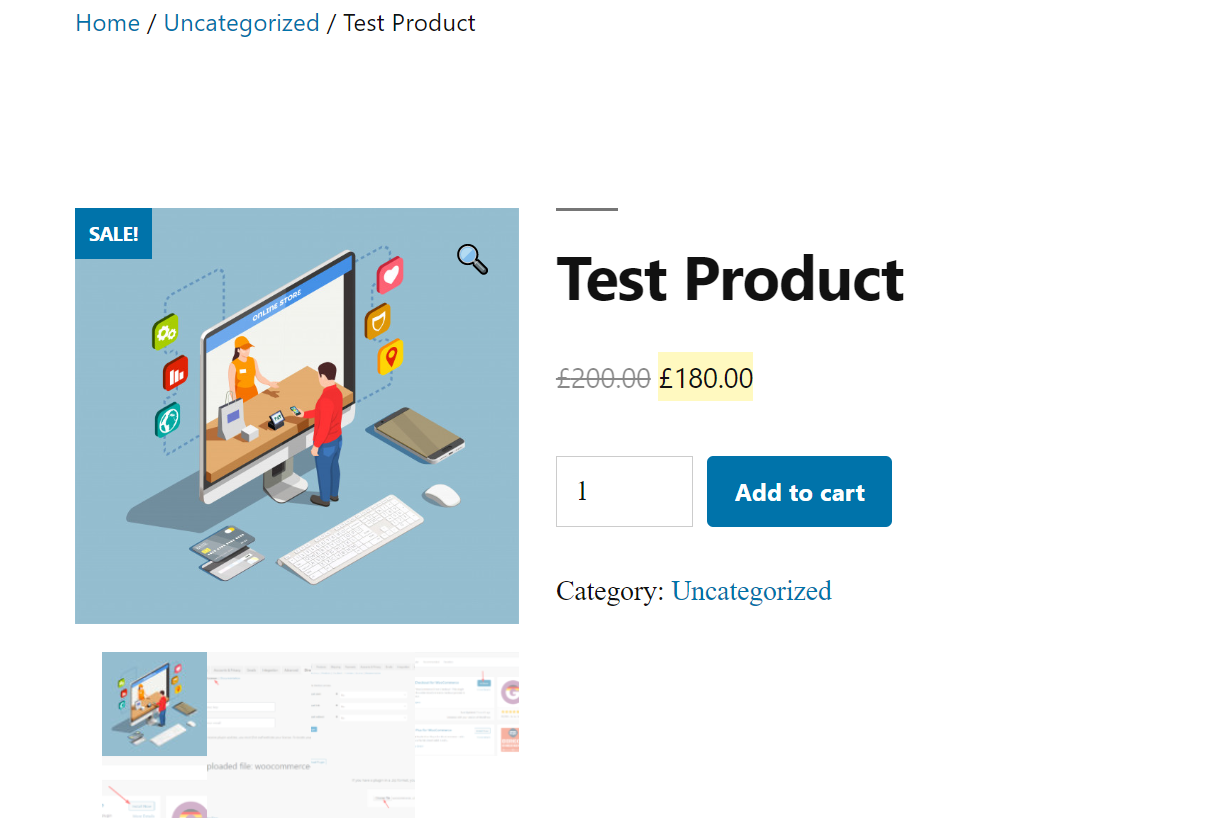
Whenever a visitor clicks that button, the product will be added to their carts. The customer will need to go to the cart page and then the checkout page. So with Direct Checkout, you can direct the shopper from the product page to the checkout page skipping the cart page. This way, you can increase conversions.
Using this plugin is very easy. In the Direct Checkout settings section, you will see the option to disable the cart page. All you need to do is turn on the redirection and add the checkout page as the destination.
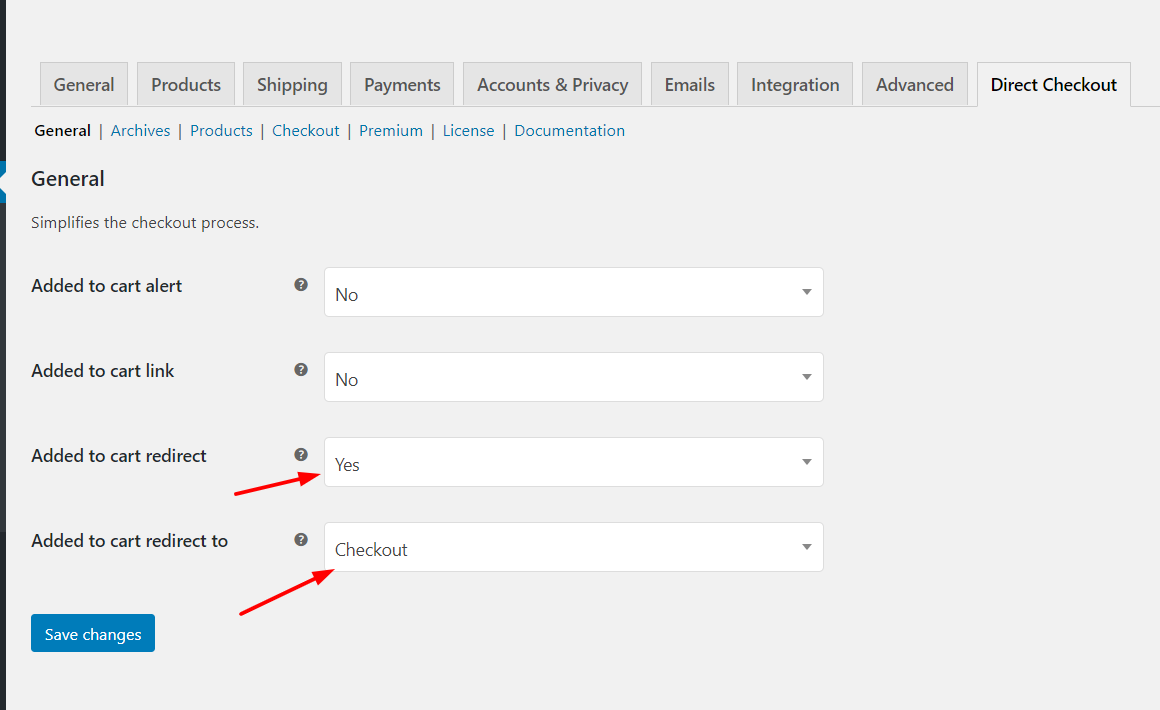
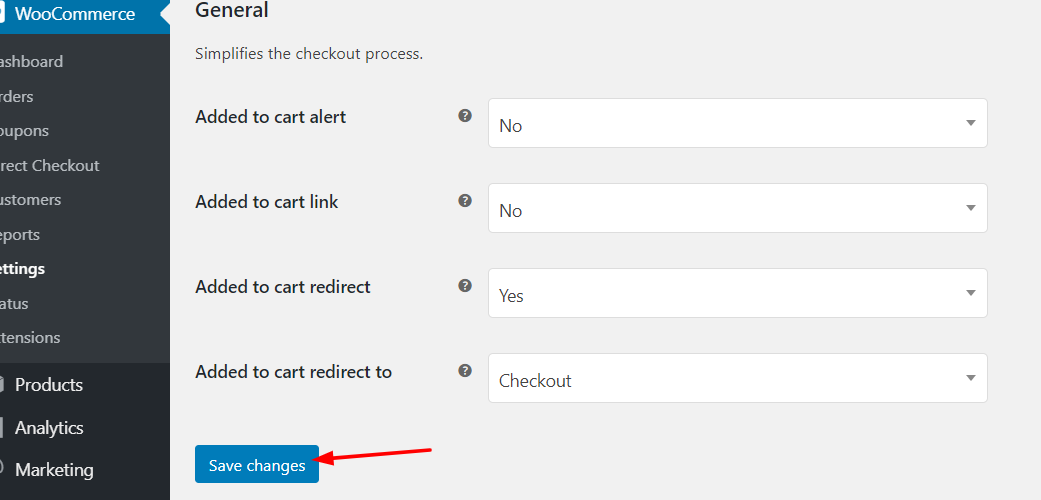
After that, make sure you save the changes.
Now, you are good to go. When shoppers click on the purchase button, they will be automatically redirected to the checkout page. From there, the customer will be able to add billing information, shipping addresses, and make the payment.
WooCommerce Direct Checkout plugin also allows you to remove checkout fields, billing addresses, shipping addresses, and more.
WooCommerce Direct Checkout Pricing
Direct Checkout for WooCommerce has a free version with basic features and three premium plans. 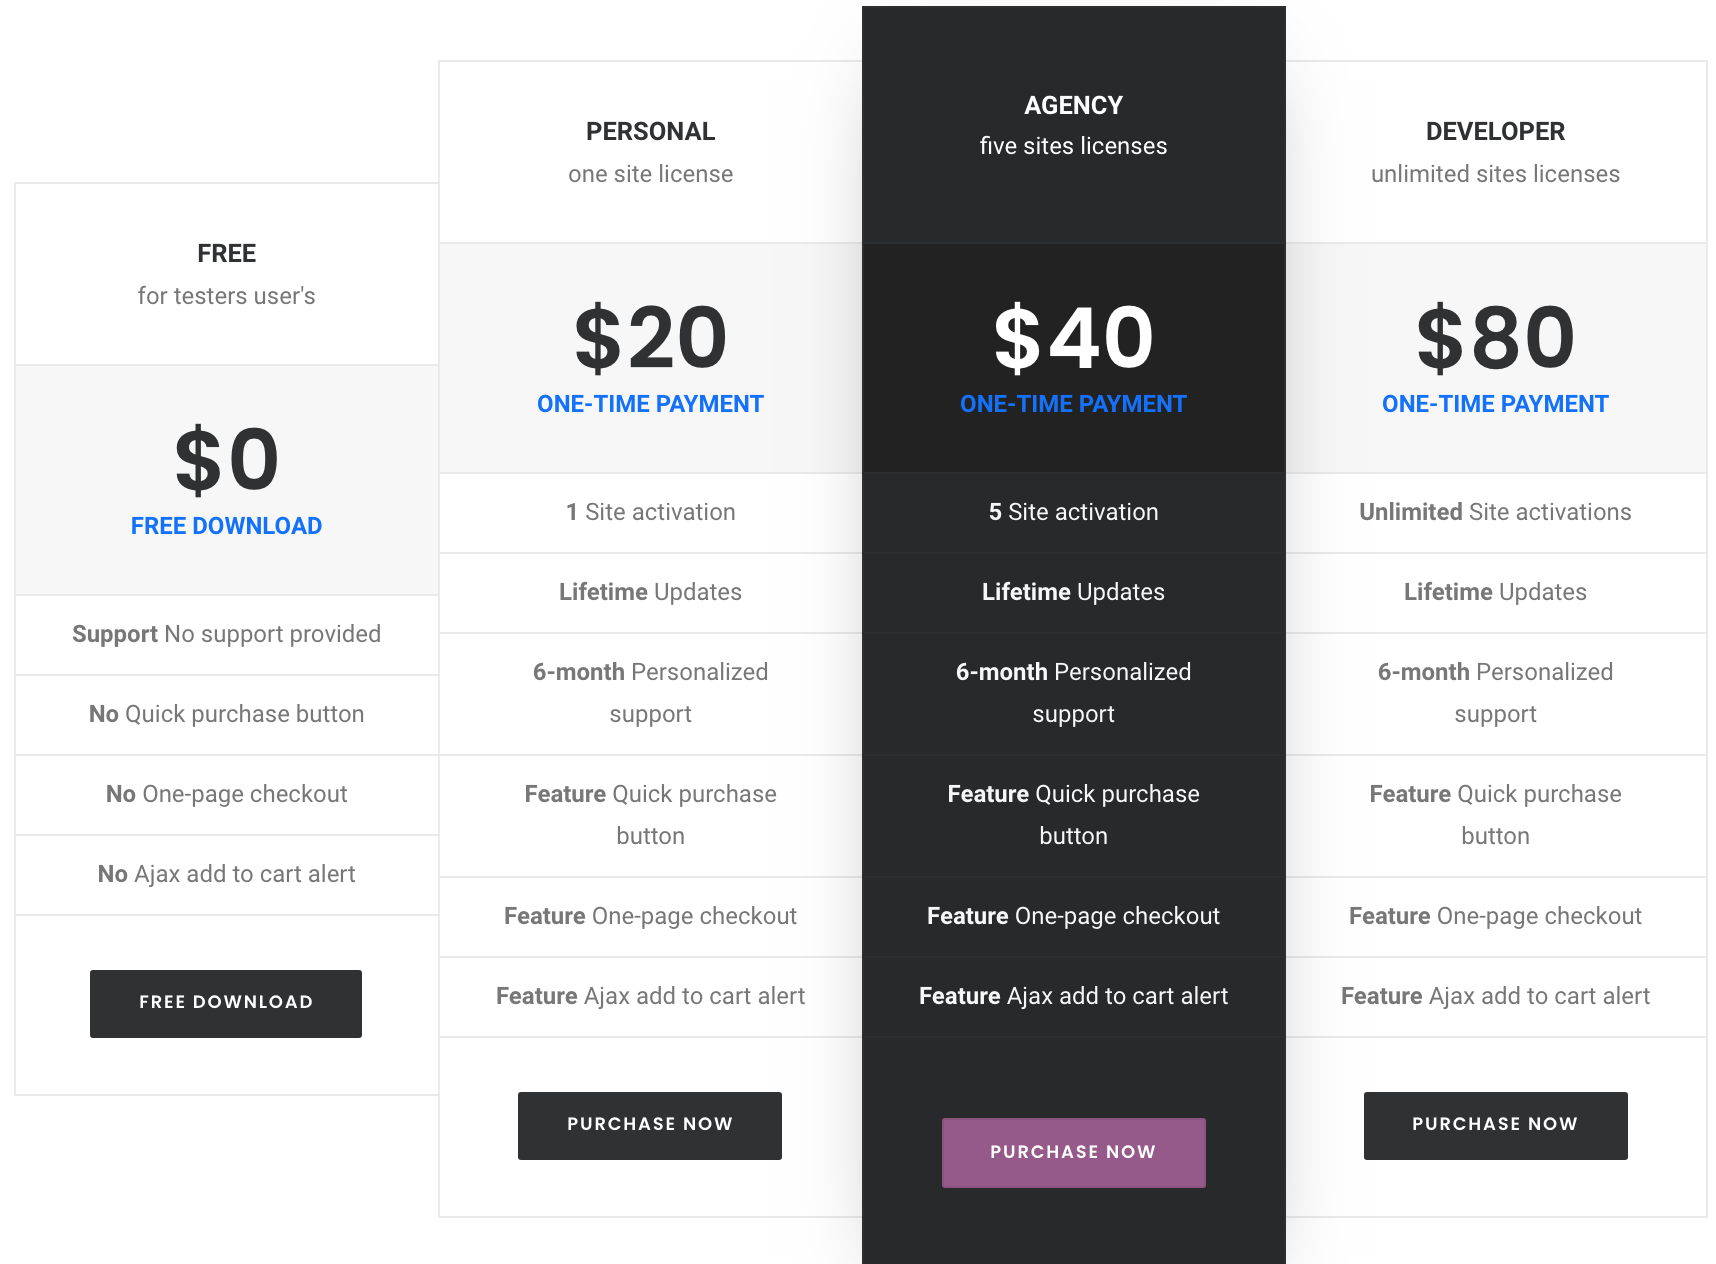
- Personal – 20 USD one-time payment – Single License key
- Agency – 40 USD one-time payment – 5 License keys
- Developer – 80 USD one-time payment – Unlimited License keys
The free version is excellent and has all you need for a start. But if you want more advanced features, we recommend you try the Personal or Agency plan.
Check WooCommerce Direct Checkout
If you want to have a look at other tools, check out our list of the best quick purchase plugins. If, on the other hand, you want to customize your checkout page even more by adding and editing checkout fields, you can have a look at WooCommerce Checkout Manager.
2) Programmatically (coding)
If you don’t want to install any plugins, you can add a quick buy button in WooCommerce programmatically. This method needs some technical knowledge and patience. However, if you follow these steps, you’ll be able to do it even if you’re a beginner. We will show you how to create an add-to-cart button, modify its URL, and how to insert it for simple, variable, and grouped products.
1- Create a checkout URL
First, you need to add the link to the add-to-cart button. You need to replace PRODUCT_ID for the code of the product you want to include in the cart.
https://yourdomain.com/cart/?add-to-cart=PRODUCT_ID
As we want the users to skip the cart page and redirect them to the checkout page, we have to modify the URL as follows:
https://yourdomain.com/checkout/?add-to-cart=PRODUCT_ID
2- Create a product link
After that, you have to modify the URL based on the product type: single, variable, and grouped. A) Single product The URL for single products is:
https://yourdomain.com/checkout/?add-to-cart=PRODUCT_ID
You have to replace PRODUCT_ID with your product ID. For example, for a single product with ID = 10, the link will be:
https://yourdomain.com/checkout/?add-to-cart=10
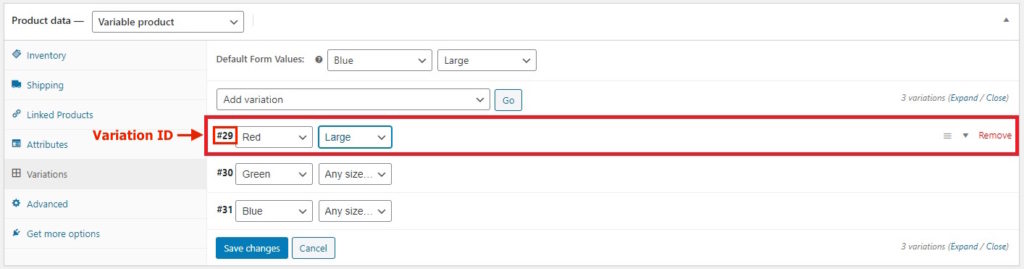
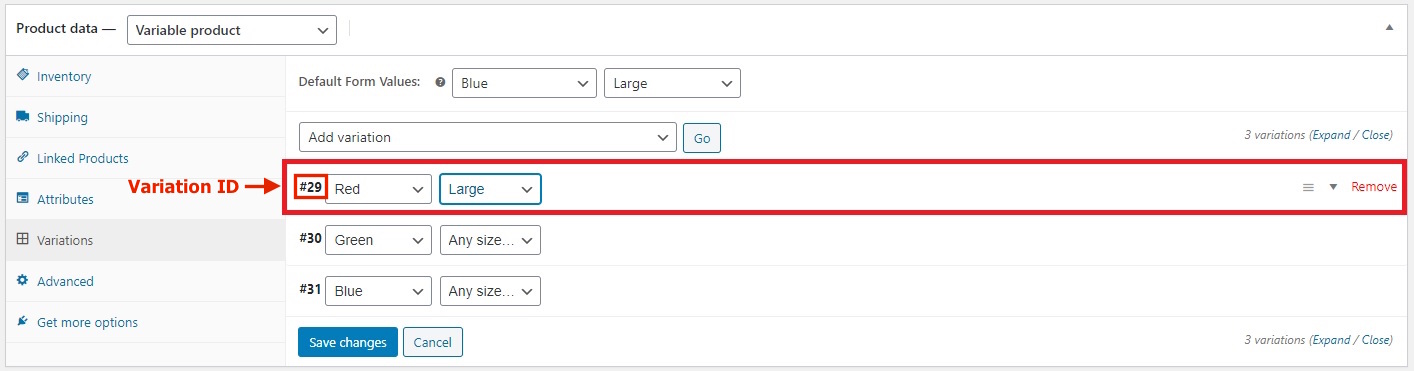
 B) Variable product For variable products, you need to get the variation ID from Products > Variations and use that Variation ID in the URL as follows:
https://yourdomain.com/checkout/?add-to-cart=VARIATION_ID
So if your variation ID = 29, the link will be:
https://yourdomain.com/checkout/?checkout=29
You can also create the link using the Product ID and the Variation ID:
https://yourdomain.com/checkout/?checkout=PRODUCT_ID&variation_id=VARIATION_ID
However, we recommend you use only the variation ID because it’s simpler.
NOTE: This will only work for the variations that have all the attributes generated. For the other variations, you need to add the definition of the attribute that’s missing to the link. For example, let’s say you want to create the URL for the Variation ID = 30. The attribute color is defined (green) but not the size. So if we want to add the size = medium, the URL will be:
https://yourdomain.com/checkout/?checkout=30&pa_size=medium
C) Grouped product For the grouped products, instead of adding the variation ID, you need to add the grouped product ID along with the product ID of the subproducts and the quantities for each of them.
https://yourdomain.com/checkout/?add-to-cart=GROUPED_PRODUCT_ID&quantity[PRODUCT_ID1]=1&quantity[PRODUCT_ID2]=1
For example, here we’ll include the grouped product ID = 1900, and the sub-product ID = 10 and 15.
https://yourdomain.com/checkout/?add-to-cart=1900&quantity[10]=1&quantity[15]=1
3- Define the quantity
Additionally, you can also define the number of products you want to include. For that, you have to use the parameter quantity. If you don’t specify the number of products, by default it will be 1.
So now, let’s have a look at how to include the parameter quantity in single, variable, and grouped products.
A) Single product You add the parameter quantity after the product_id:
https://yourdomain.com/checkout/?add-to-cart=PRODUCT_ID&quantity=1
So if you want to add the product ID = 10 x2, the link will be:
https://yourdomain.com/checkout/?add-to-cart=10&quantity=2
B) Variable product For variable products, the logic is the same:
https://yourdomain.com/checkout/?add-to-cart=VARIATION_ID&quantity=1
For variation ID = 29, and quantity = 3 the link will be:
https://yourdomain.com/checkout/?add-to-cart=29&quantity=3
C) Grouped products Finally, for grouped products, the standard URL is:
https://yourdomain.com/checkout/?add-to-cart=GROUPED_PRODUCT_ID&quantity[PRODUCT_ID1]=1&quantity[PRODUCT_ID2]=1
So for the grouped product ID = 1900, the link with product ID = 10 x3 and product ID = 15 x2 will be:
https://yourdomain.com/checkout/?add-to-cart=1900&quantity[10]=3&quantity[15]=2
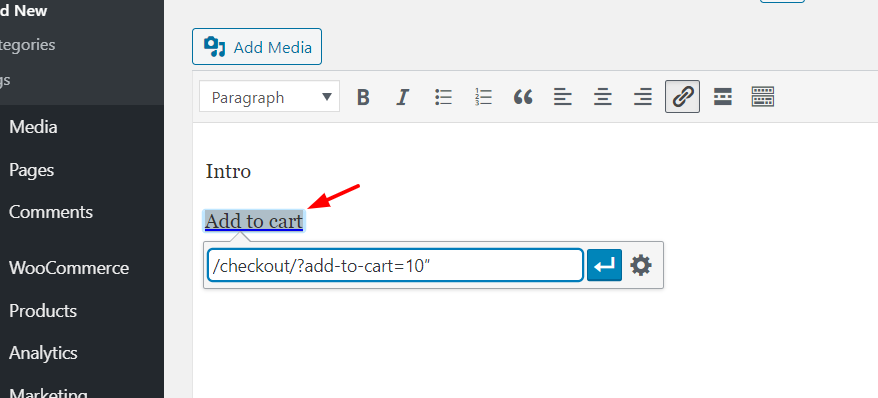
Once you finish customizing the URL, if you check the page from the frontend, you will be able to see an Add to cart URL that will redirect users directly to the checkout page. 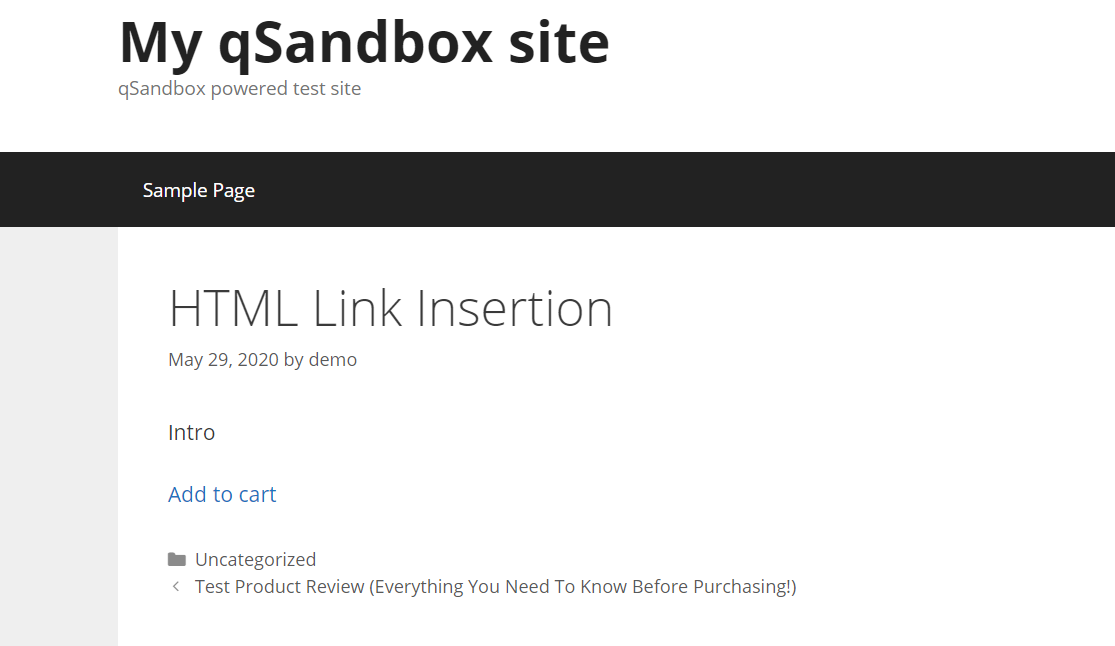 This works functionally but doesn’t look great. Now you need to transform that link into a nice button, adding some styling with a bit of CSS.
4- Define button style
After modifying all the URLs, you have to create the buy now button. As we’ll direct customers directly to the checkout, we’ll call the button Purchase Now instead of Add to cart.
In WooCommerce, there are two button styles:
1. Default button style
<a class="button" href="#">Purchase Now</a>
2. Alternative button style
<a class="button alt" href="#">Purchase Now</a>
Additionally, you can create your custom button style:
<a class="button my-button" href="#">Purchase Now</a>
The following code will display a red button with white letters and a thin blue border.
.my-button {
color: white;
background-color: red;
border: 1px solid blue;
border-radius: 3px;
box-shadow: 0px 0px 22px 0px rgba(0,0,0,0.75);
}
Simply copy and paste the code in WordPress dashboard > Appearance > Customize > Custom CSS. 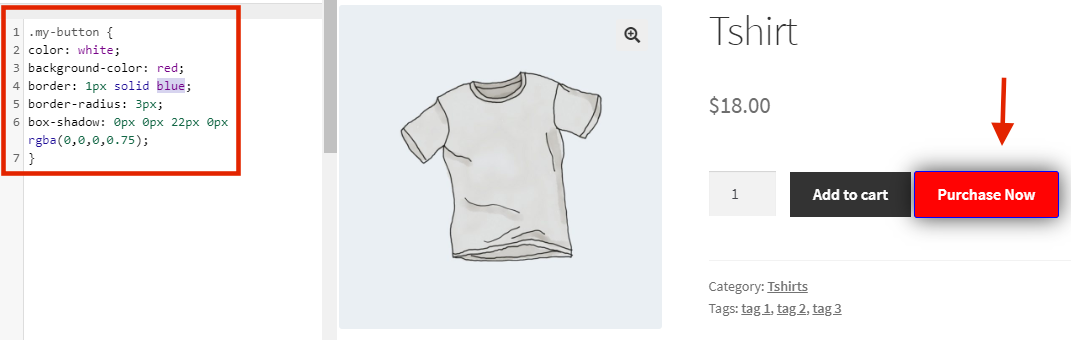
Then, customize it to give it the look and feel of your site changing the colors, borders, size, and so on. If you want to customize your store with a bit of coding, we recommend you check out some of the following guides:
- How to customize the Add to Cart button
- How to edit the shop page
- Customize the checkout page step-by-step
3) Shortcodes
The last method we’ll see to add a buy now button is with shortcodes. Even though there isn’t a shortcode for a quick buy button in WooCommerce, there are workarounds to do something similar. This method is useful if, for example, you want to promote one of your products on a blog post, you can add a quick purchase option article without having to link it to the product.
WooCommerce comes with a lot of shortcodes that you can use anywhere on your site. The great thing about using shortcodes is that you don’t need to modify the core files or anything. Simply copy and paste the shortcode wherever you want to display it and that’s it.
Add to cart shortcode
As there’s not a shortcode for a quick buy button, we’ll add an Add to cart button and then change the URL to redirect the user to the checkout. First, log in to your WordPress site and go to the content editor where you want to display the add to cart button. Here, you will add the button to one of your product review posts for example.
The Gutenberg editor comes with the shortcode block so add the block to your content area. 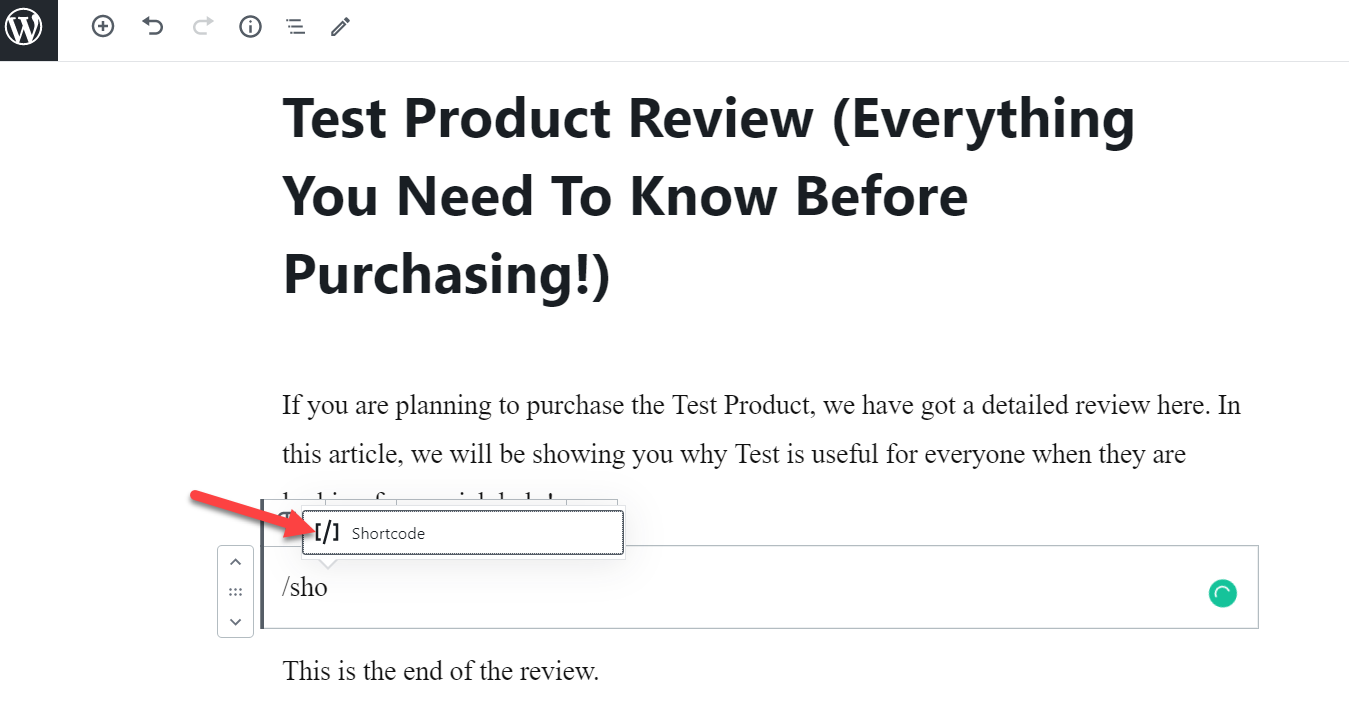 The shortcode we will use for the button is:
[add_to_cart id= "ID"]
You need to replace the ID with your product ID. You can fetch your unique product ID from the WooCommerce Products section.
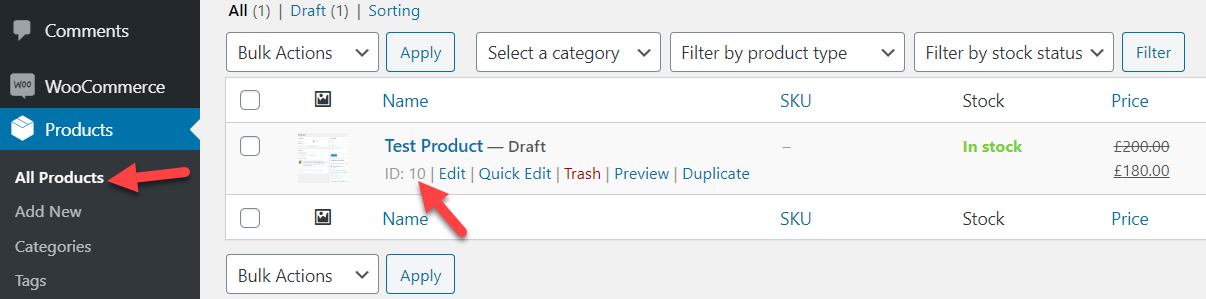
In our case, the product ID is 10 so we will modify the shortcode as follows:
[add_to_cart id= "10"]
Following this example, paste the shortcode to your content area, and publish or update the post. 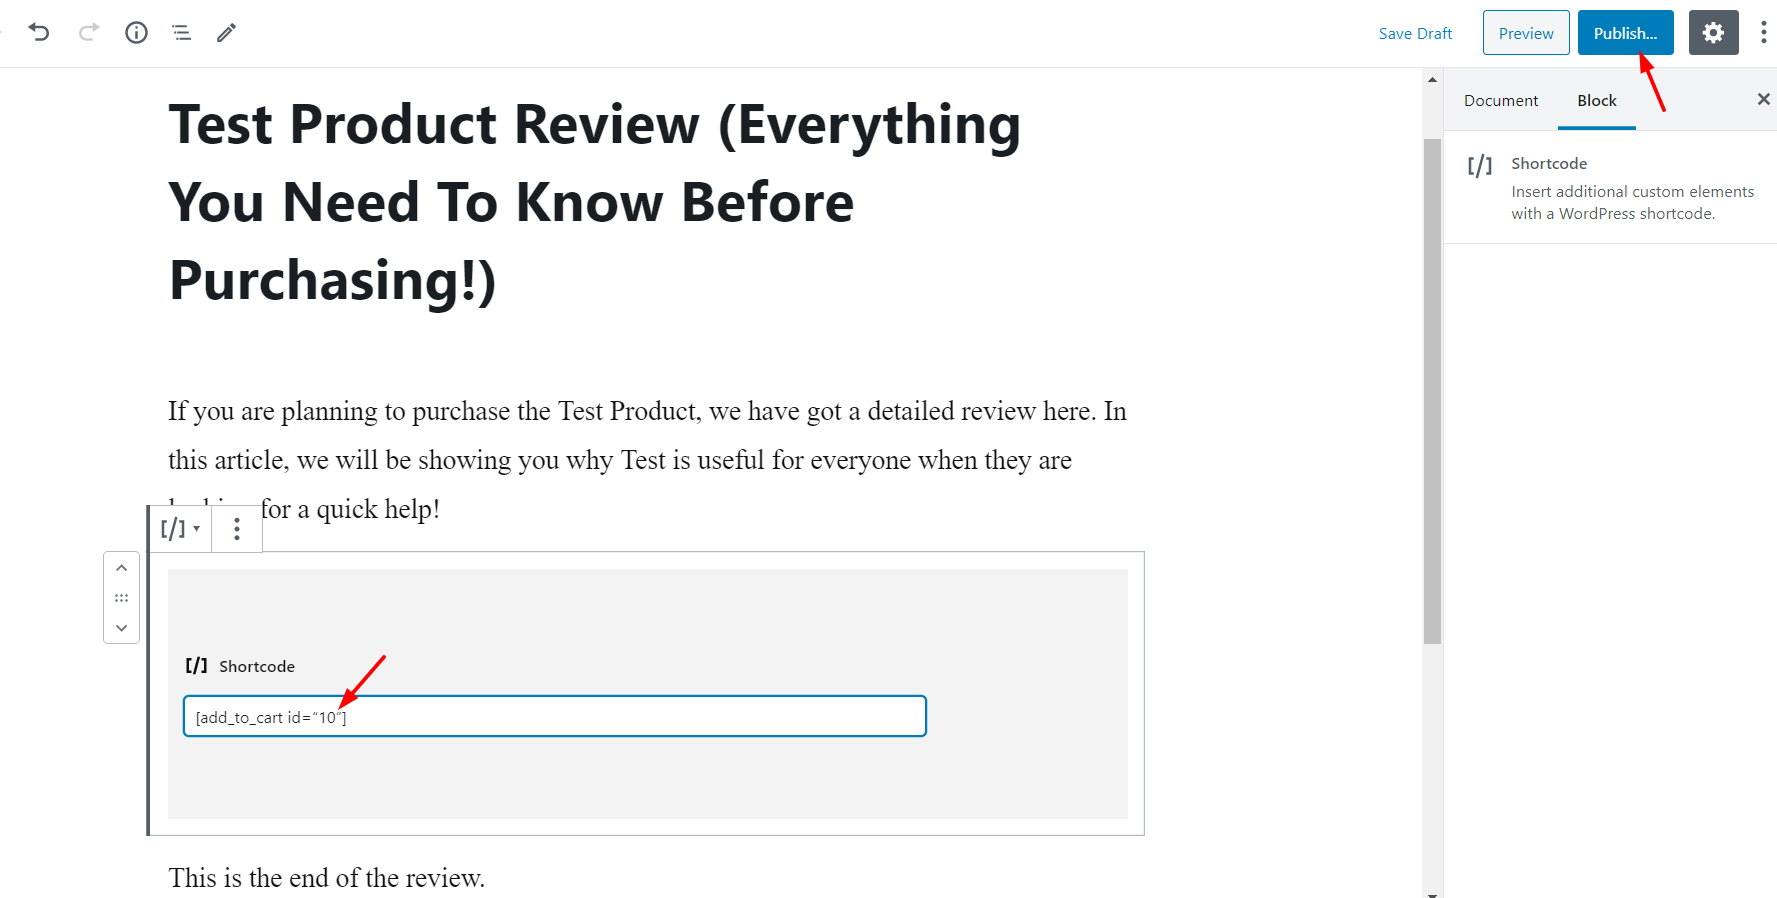
So when you check your article from the frontend, you will see a stylish button that will allow your customers to add the product with ID=10 to their cart. 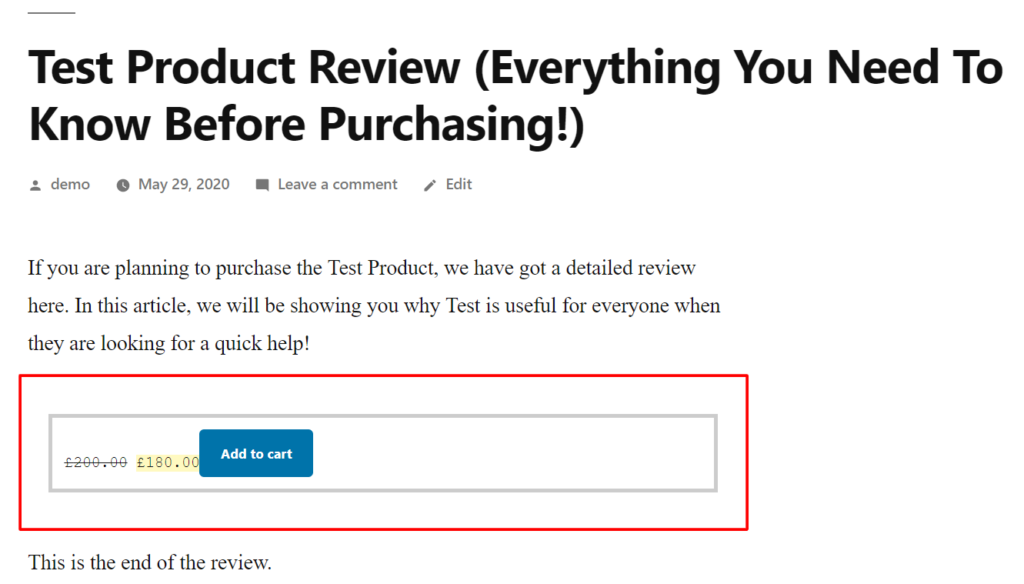
You can also customize the shortcode with some attributes. Along with the ID, the shortcode supports other attributes like class, quantity, SKU, style, and show the price. For example, you can modify the add to cart button with a shortcode like this:
[add_to_cart id=”XXXX” class=”alt” quantity=”2” sku=”XXXX” style=”border:4px solid #ccc; padding: 12px;” show_price=”true”]
Simply write the correct values for your product in each attribute. Additionally, you can customize the styling of the button. One advantage of this method is that you can also insert an add-to-cart button in one of the widget areas. 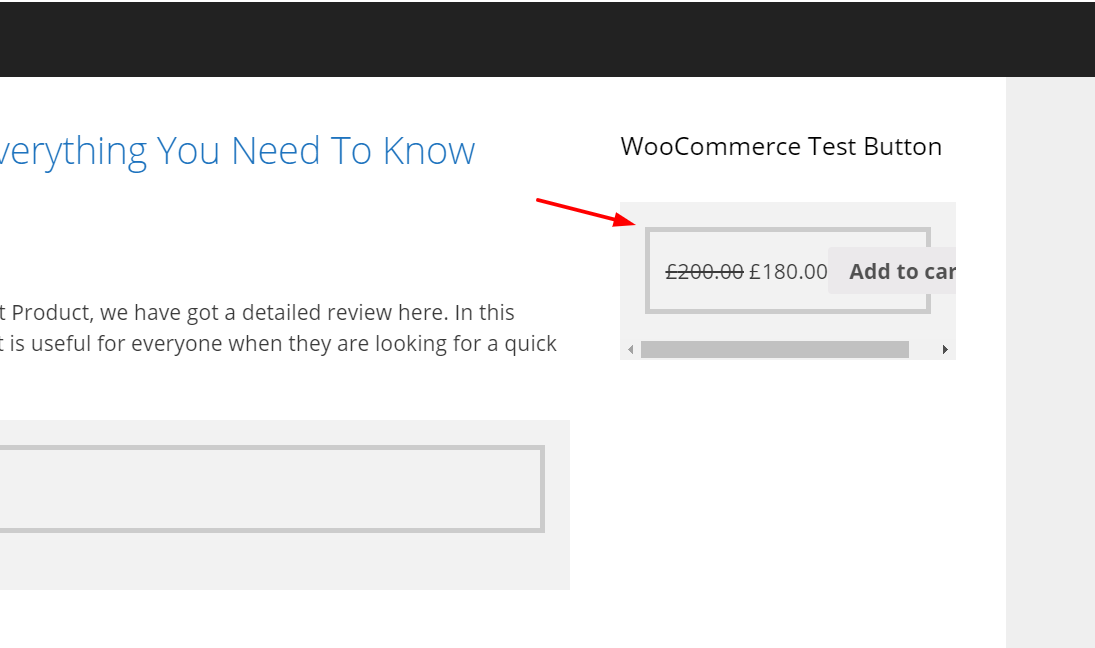
Change the URL to direct users to the checkout
Once you place the shortcode, remember to change the URL of the cart to direct the user to the checkout.
href=”http://yourdomain.com/checkout/?add-to-cart=10″
To do this there are two options:
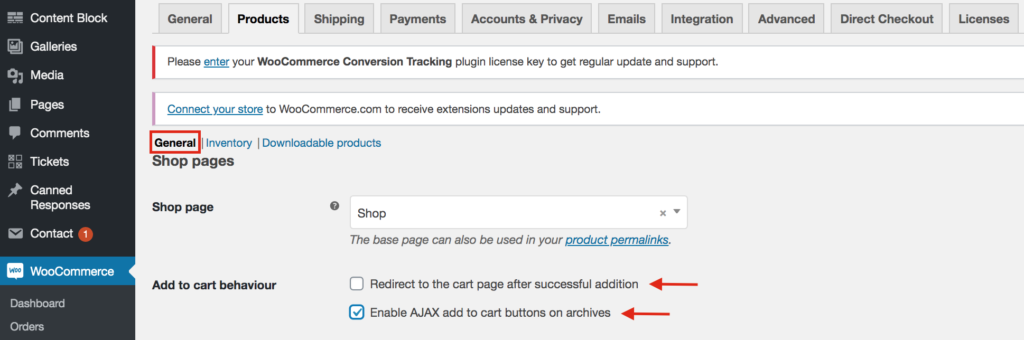
- In your WP dashboard, go to WooCommerce > Settings > Products > General. Here, tick the “Enable AJAX add to cart buttons on archives” option and disable “Redirect to the cart page after successful addition”.
- Install Direct Checkout for WooCommerce to skip the cart page and redirect the shoppers from the product page to the checkout page.

Troubleshooting
If you have modified the CSS button and the change is not reflecting in your frontend, it probably is an issue regarding the cache. So to fix it, simply clear your browser cache and WordPress cache. If the button still doesn’t appear, double-check the code.
Conclusion
All in all, adding a quick buy button to your WooCommerce store can help you increase conversions. You’ve learned 3 different ways to achieve this:
- With a plugin
- Programmatically (coding)
- With shortcodes
The most straightforward way is by using the Direct Checkout plugin. With a few clicks, you will be able to direct your users from the product page to the checkout page. If you don’t want to use any plugins, the coding method is an excellent choice but requires some technical skills.
finally, another interesting option to shorten the checkout process and boost conversion is to create direct checkout links on your store. For more information about this, you can check out our step-by-step guide.
We hope you found this guide helpful and learned how to add a quick purchase button in WooCommerce. If you did, please consider sharing this post on social media.
Which method are you going to try on your site? What other things do you do in your store to increase conversion rates? Let us know in the comments below!

how its possible to create a button in HTML and create link manually i have 118 products with 4 variations so i have 118*4 = 472 product id so its not possible to create links manually please provide us a programming way to do this stuff also and thanks for this article also
well thanks it’s really help me
You’re welcome.