
How to Add Schema Markup to WordPress
Schema markups (structured data) can be helpful for SEO. If you need to rank your content in search engine results, you should be using structured data. To help you, we have got this article to show you how to add schema markup to WordPress.
What Is Schema Markup?
Schema markup, also known as structured data, is a code that you can add to your website, blog posts, pages, and custom post types to make them more SEO-friendly.
There are different types of structured data available:
- Microdata
- JSON-LD
These are the latest and most widely used schema markup types and are not outdated compared to other structured data. By implementing the schema markup properly, you can quickly improve the overall website’s SEO. The JSON-LD code can be executed on the website’s header file and will be implemented site-wide.
On the other hand, if you need to add schema data to individual posts or pages, you need to use Microdata.
Why Add Schema Markup (Structured Data) to a WordPress Site?
Once you have started a WordPress site, your main goal would be to attract maximum website visitors, make money from it and increase the conversion rate. But as you know the competition is pretty tough these days. So you can rank higher only if you have good content and SEO practices.
Therefore, to increase the CTR (Click Through Rate), you need to add schema markup to your WordPress installation. You can rank higher for the keyword using the structured data.
Adding schema markup to your articles will also give you a professional look at the search engine result pages. As a result, more people will prefer your content over competitors and get more website visitors. More website visitors means more conversion and revenue.
What Is the Difference Between Schema Markup and Rich Snippets?
In simple words, schema markups are code you insert into your website’s back end, whereas rich snippets are the after-effect of the inserted code.
For example, if you need to add product schema or recipe schema to your blog posts, you generate a random code with all the required information inserted into your article. This process ultimately happens in the backend of the site.
Only the administrator or people with administrator-level access can see the actual code. The website visitors won’t see the added code in the front end. Once you have added the schema markup code inside the article and indexed the site, the visitors will see rich snippets in the SERP.
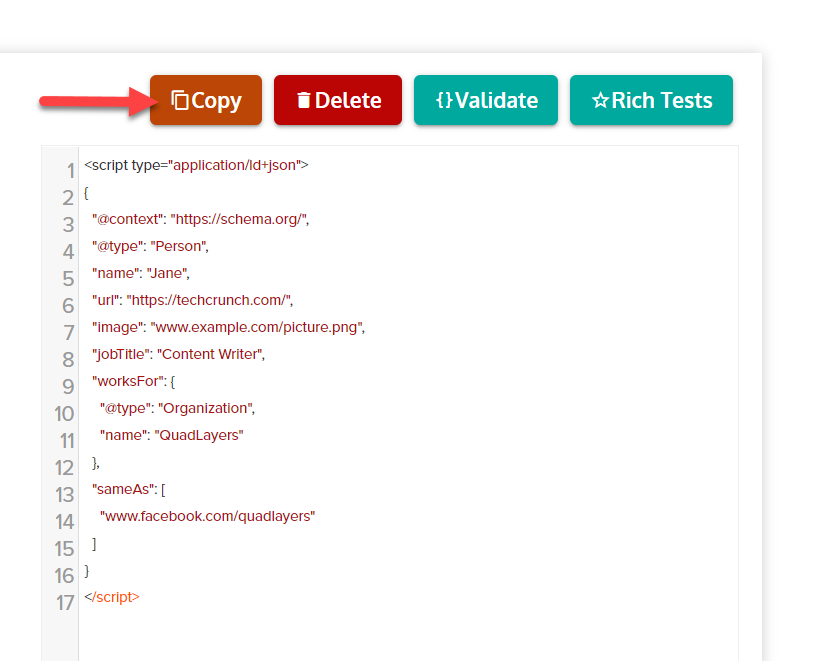
For example, here’s a schema markup code:
And here’s the rich snippet:

Search engine crawlers will take some time to analyze the page and index and will show the results to the visitors accordingly.
How to Add Schema Markup to WordPress
There are several methods to add schema to a WordPress website. In this article, we will cover the following approaches:
- Through the WordPress dashboard
- WordPress themes
- Plugin Method
We will show you the step-by-step guide to complete all these processes, so you can choose your preferred method.
1) Through the WordPress Dashboard
Using the WordPress dashboard is the easiest way to add schema markup to WordPress. You can add it to your website even if you use the classic editor as well as the Gutenberg editor. Let’s see how to do it properly using both editors.
But first, you have to generate structured data code using an external resource. For this tutorial, we will be using Simplified Search for creating the snippet. However, you can use any other similar sites to generate the code if you want.
As soon as you open the website, you’ll need to select a markup that you’d like to create. They include an article, breadcrumb, event, FAQ page, job posting, local business, and so on. Select the option that is most suitable for your website.
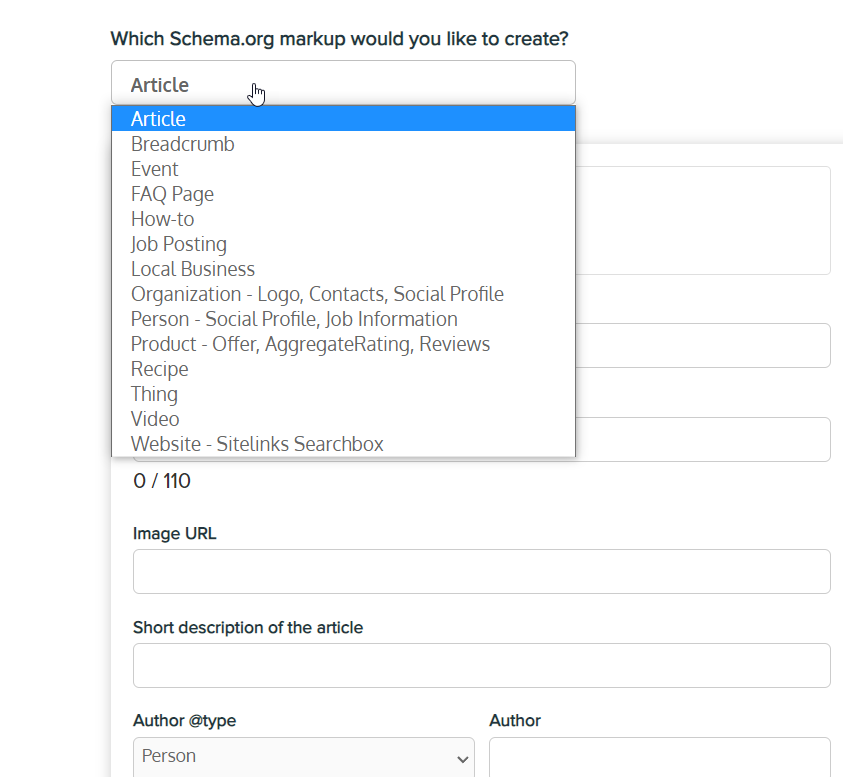
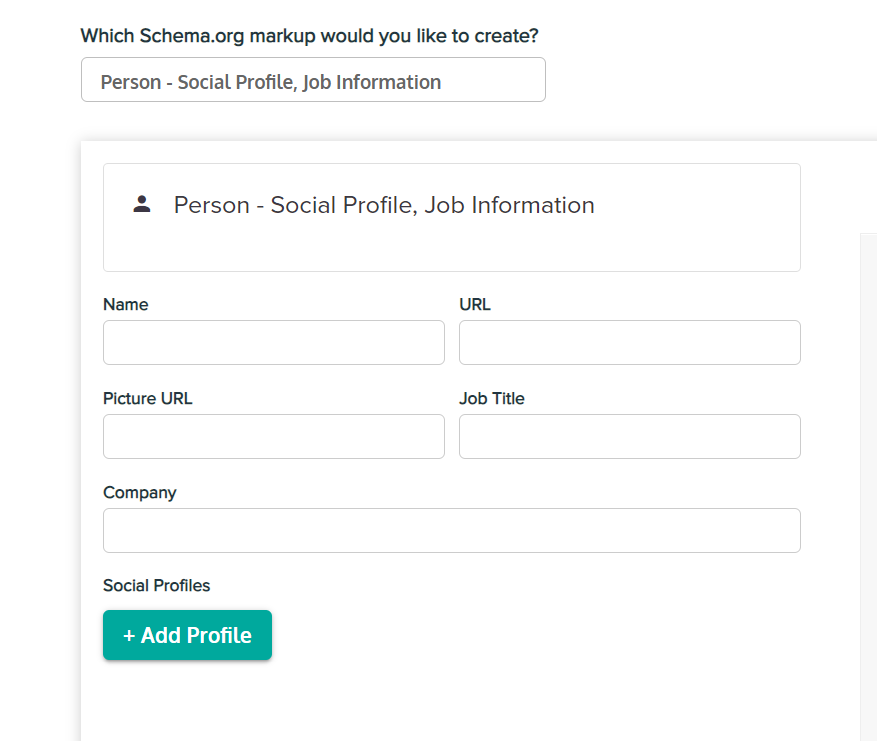
Here, we will choose the Person markup. So, choose the required item from the dropdown. After that, the tool will show you all the required fields that you need to enter. They include:
- Name
- URL
- Picture URL
- Job title
- Company
- Social profiles
Once you have filled in all these details, you will see the structured data code on the right-hand side of your screen.
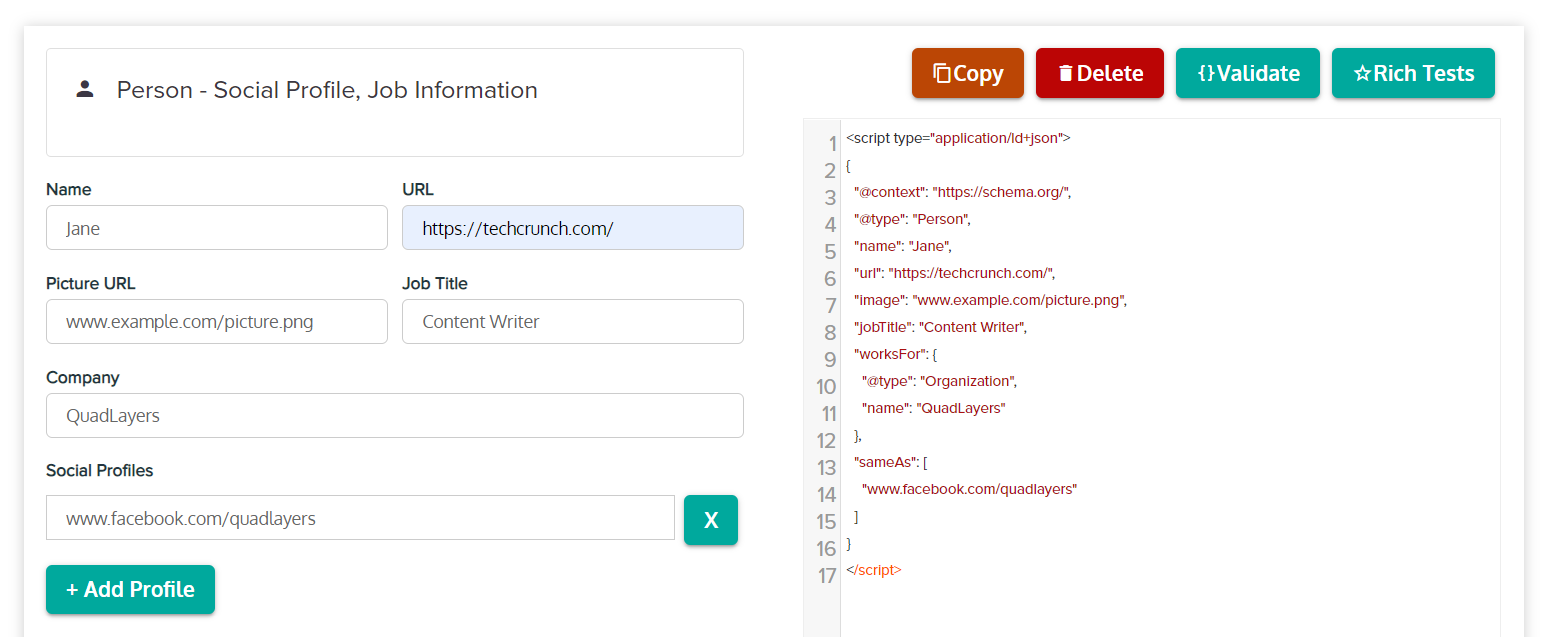
That’s the final output. You need to copy the code from there.
Now, you’ll need to paste this code into your website. You can add it through the classic editor as well as the Gutenberg editor.
1.1) Classic Editor
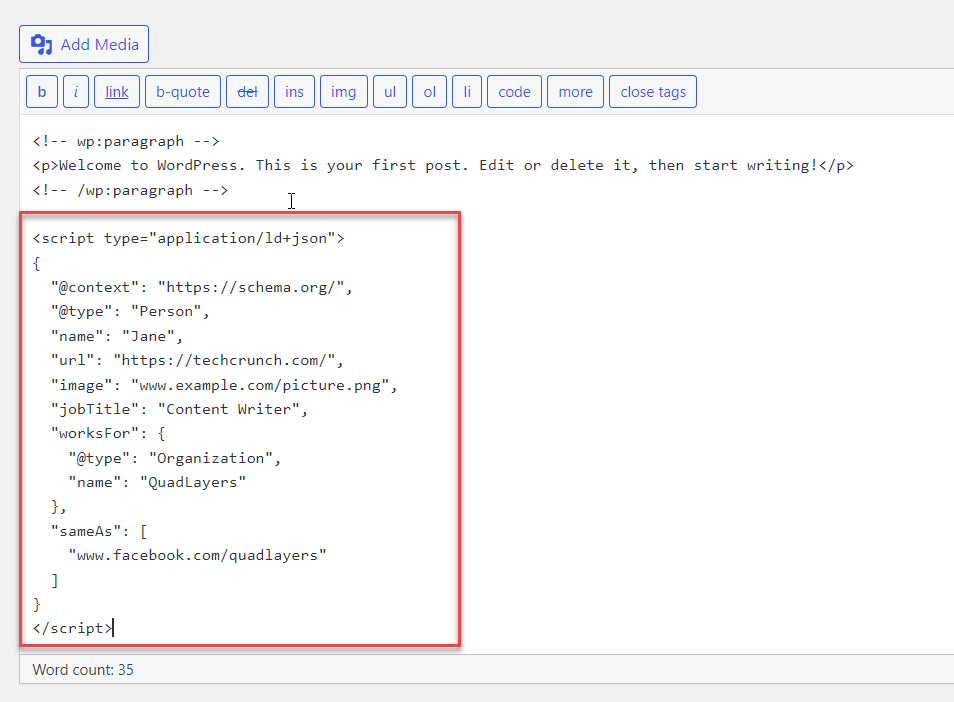
If you use the classic editor, open the post editor of the post where you need to add the schema. After opening it, you have to switch to the Text editor. This will bring the HTML editor of the post.

On a new line, add the HTML code for your schema markup that you generated earlier.
Finally, Publish or Update the post.

That’s how you can add schema markup to WordPress through the Classic Editor plugin.
1.2) Gutenberg Editor
You can also add the generated schema code to your website if you are using the latest builder, a.k.a. Gutenberg. The blocks can be used to add it to the Gutenberg editor.
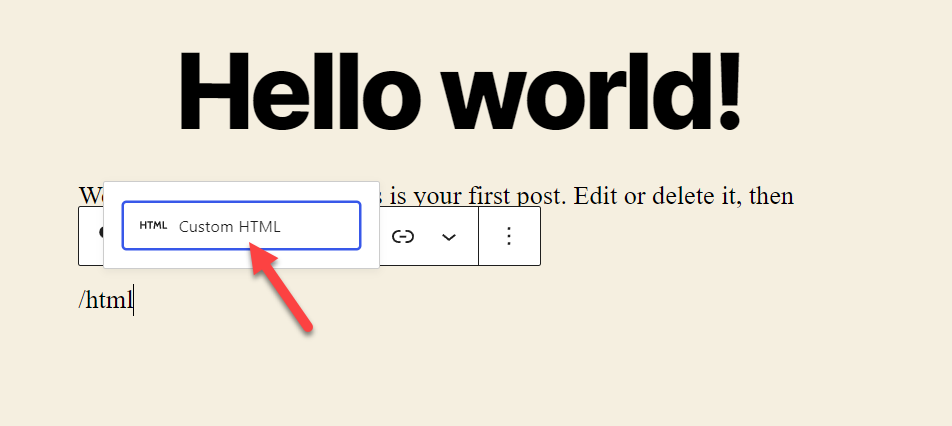
To be precise, you can use the HTML block to add the structured data. So, open the block editor of the post that you want to add the schema. Here, search for the /HTML block and add it to your post.
Inside the custom HTML block, add the schema code that you generated earlier. It should look similar to the screenshot below.
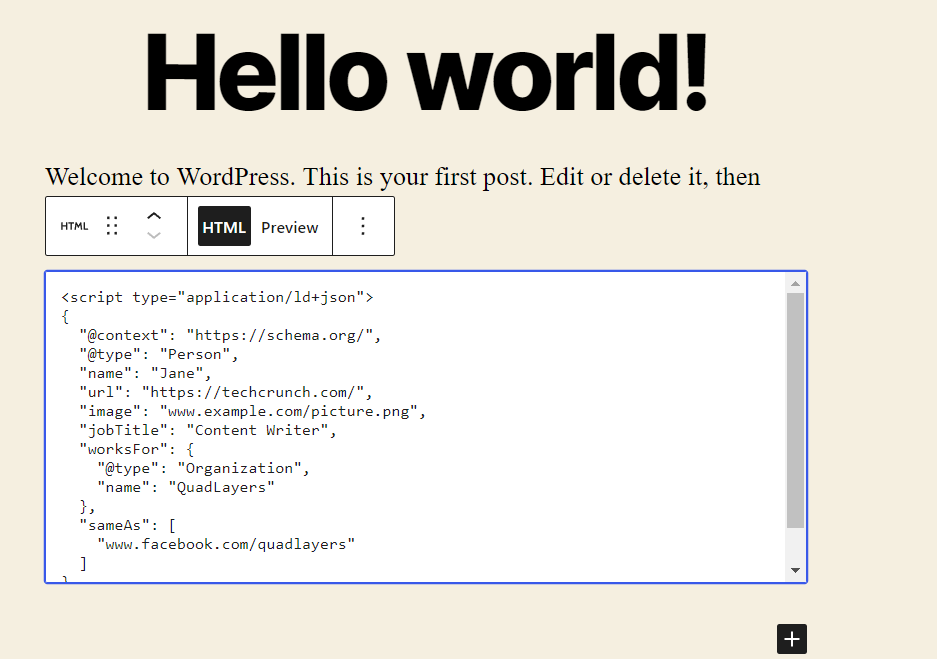
After pasting the code, Update the article.
And that’s how you add schema markup to WordPress using the Gutenberg editor. Even though you can add them through the WordPress dashboard itself, it may get a bit tedious. You’ll have to modify all the posts and pages individually to add schema for the whole website.
Fortunately, some alternative methods can save you a lot of time to do so due to the flexibility of WordPress. Let’s go through them as well.
2) WordPress Theme
Some WordPress themes come with inbuilt schema options.
If you use any of those themes, you can use the Shema feature to add snippets.
For example, the Schema by MyThemeShop comes with the inbuilt structured data options. So, when you create blog posts, you can assign a schema type to them and publish the article. Hence, you don’t need to add any codes manually or use a dedicated WordPress plugin using this approach.

All you have to do is install the WordPress theme and use it as your active theme. Then, you can use the theme options to add schema markup to your WordPress website.
3) With Plugins
If you are looking for the most efficient method to add schema markup to WordPress, using a plugin is the most acceptable option.
3.1) Dedicated Plugins
There are several dedicated schema plugins available with unique features and integrations.
Some of the popular schema plugins are:
- All In One Schema Rich Snippets (Free)
- WP Review (Free and premium)
- Schema.press (Free and premium)
- Schema Pro (Premium)
- Review Schema (Free and premium)
- Ultimate Blocks (Free)
- WPRichSnippets (Premium)
3.1.1) Install and Activate the Plugin
We will use the All In One Schema Rich Snippets plugin for this demonstration. It is an accessible schema plugin with a good amount of active installations. But to start using it, you first have to install and activate the plugin on your WordPress installation first.
So go to Plugins > Add New from your WordPress dashboard and search for the plugin. Then, click on Install Now to install the plugin and Activate it after the installation is complete.

If the plugin is not in the official WordPress repository, you will have to install the plugin manually.
3.1.2) Configure the Schema Settings
The plugin supports multiple schema options such as:
- Review
- Event
- Services
- Person
- Product
- Video
- Articles
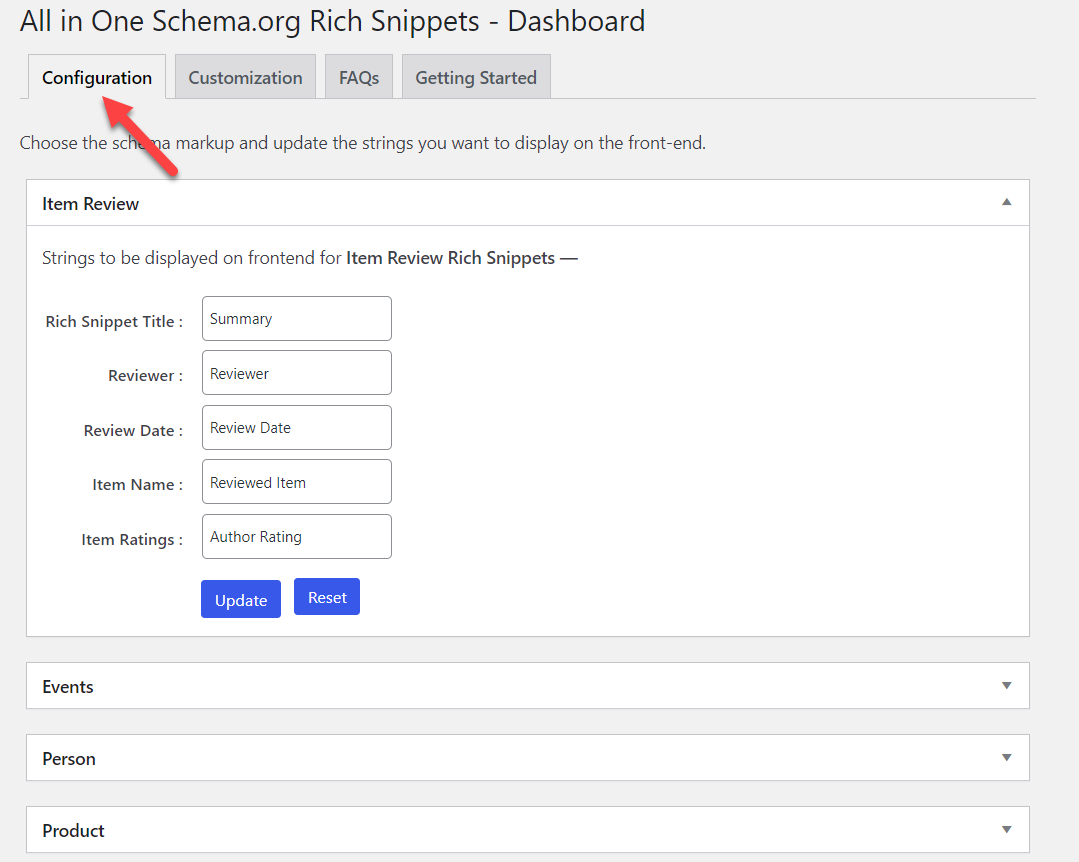
You can open the All in One Schema dashboard and further modify them from the Configuration tab. As soon as you open a schema option, you’ll need to add the necessary strings for it.
Similarly, the Customization tab will allow you to modify the styling of the schema box. It has multiple color options for the backgrounds, borders, titles, and snippet text.

Once you have updated the settings, you can save the changes.
3.1.3) Add Schema Markup to your Post
To add schema markup to your article, go to the Classic Editor/Gutenberg Editor of the post and scroll down. You will see the plugin settings there.

From the dropdown, you can choose a schema type. For this demo, we are going to select Review schema.
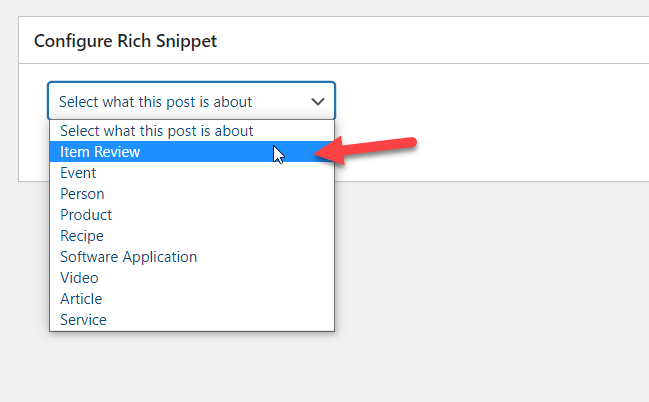
After choosing a snippet type, the plugin will show you additional fields.
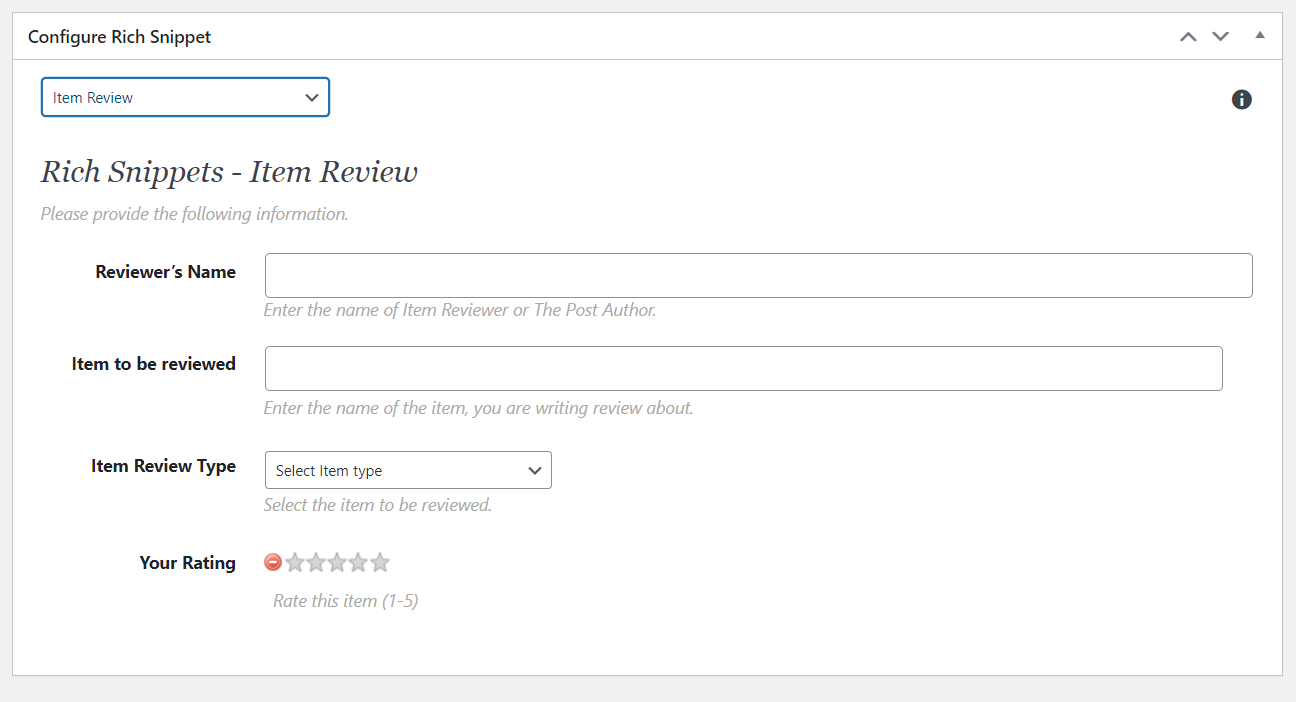
In our case, we have fields like
- Reviewer’s name
- Item to be reviewed
- Item review type
- Rating
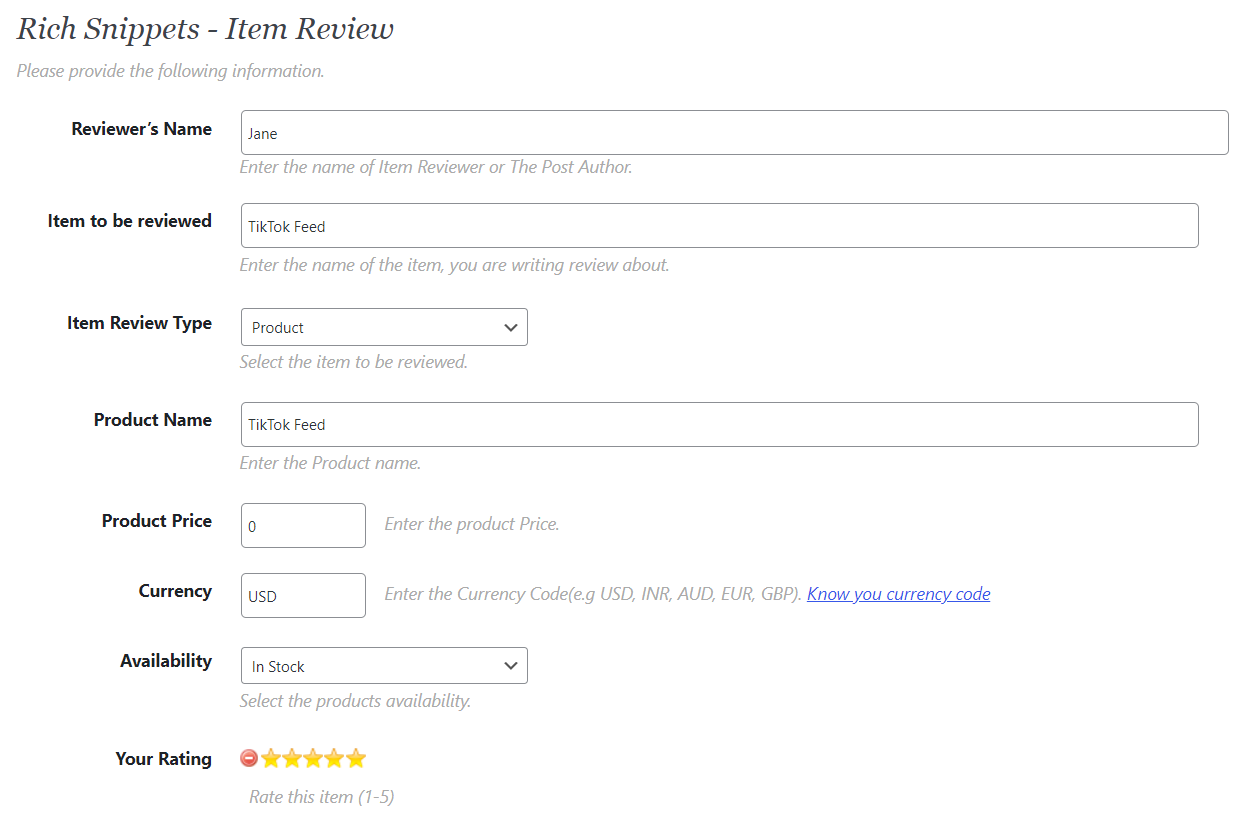
Here, we have added the item review for the TikTok Feed plugin.
Once you have filled the fields with the required information, update/publish the article.
That’s it. You can add schema to your WordPress posts, pages, or custom post types using a dedicated plugin.
3.2) SEO Plugins
If you don’t want to use a dedicated schema plugin, you can rely on an SEO plugin too. Some of the best SEO plugins that you can use are:
- Rank Math
- Yoast SEO
- All In One SEO Pack
We are going to use Rank Math SEO for this tutorial. So, the first thing you have to do is install and activate the plugin on your site. Of course, you can skip this step if you are already using Rank Math on your site.
![]()
You have to complete the basic setup if you are a first-time user. We have a detailed guide on how to set up Rank Math SEO if you need help with it.
3.2.1) Configure the Schema Settings
Once you are done with it, you can enable schema from the dashboard. Just enable the toggle switch in the Schema (Structured Data) option from your Rank Math dashboard.
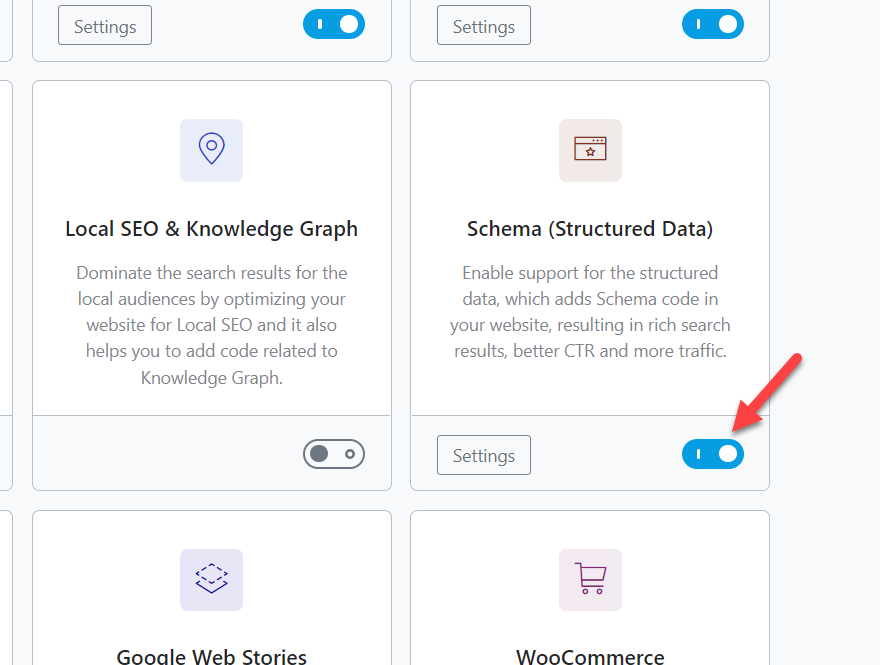
By default, Rank Math will automatically enable Structured Data. But if you click on the settings, you will be redirected to the schema settings section.
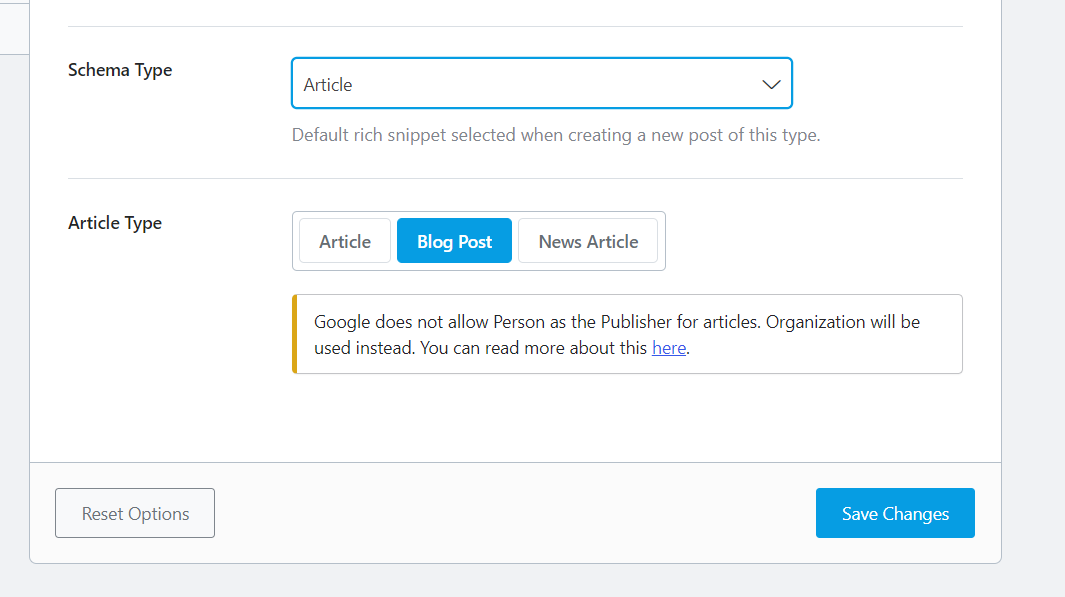
In the dropdown option of the Schema Type, you can select from multiple schema types. This schema type will act as your global structured data type.

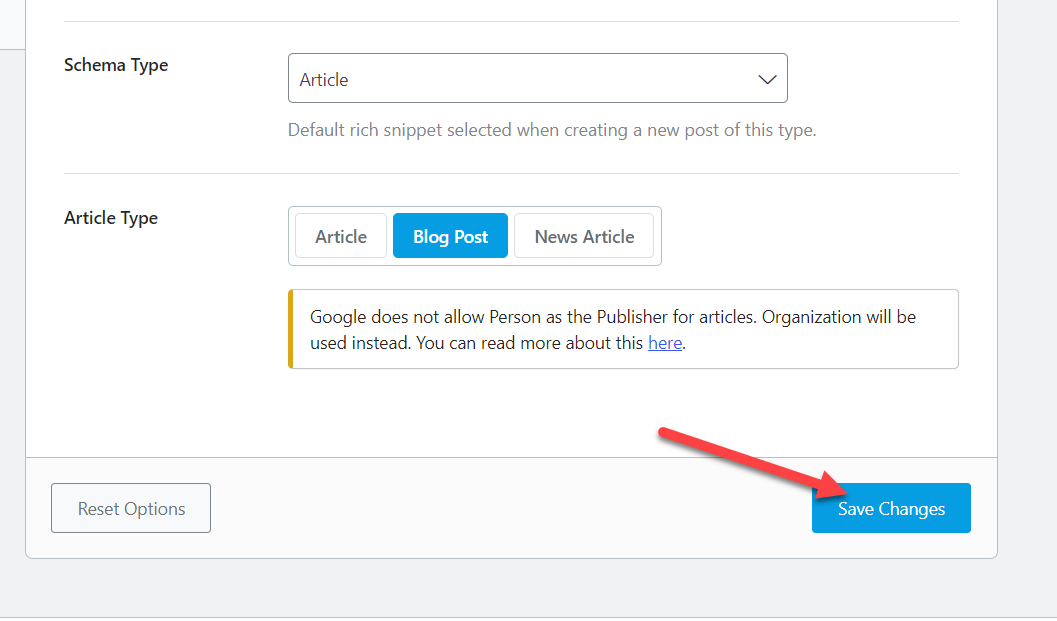
We have selected “Article” as our schema type. And as you can see, the plugin even provides some more options for the particular schema type. Once you have selected all the necessary options, save the changes.
3.2.2) Adjust Schema Options for Posts
Now, open any existing blog posts or create a new one. Under the Rank Math settings, you can see the schema settings.
When you enter the post title and meta description, the plugin will automatically take care of the structured data. But if you need to modify it, you can choose the edit option.
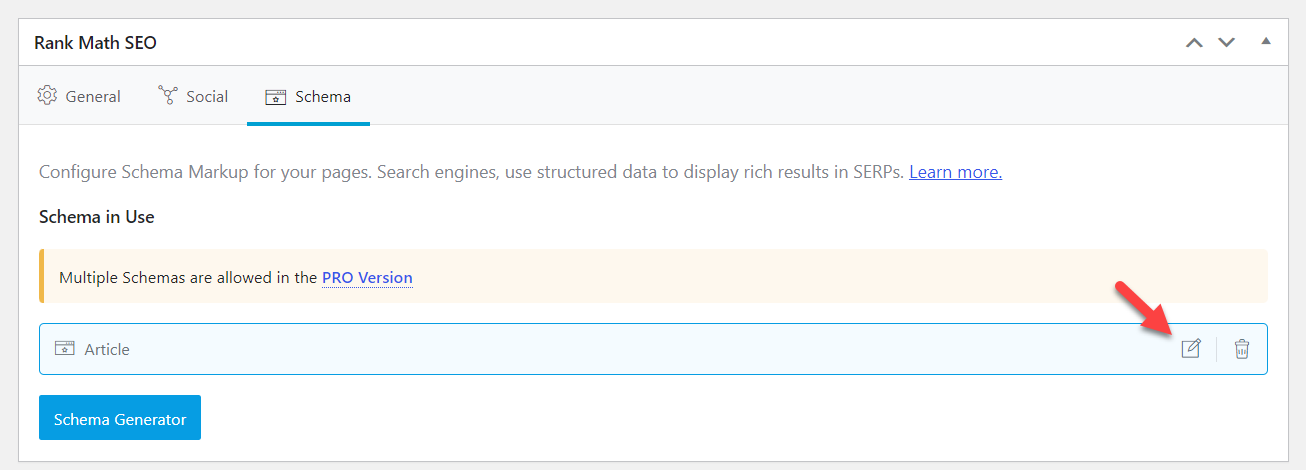
Then, you will be redirected to the schema builder.
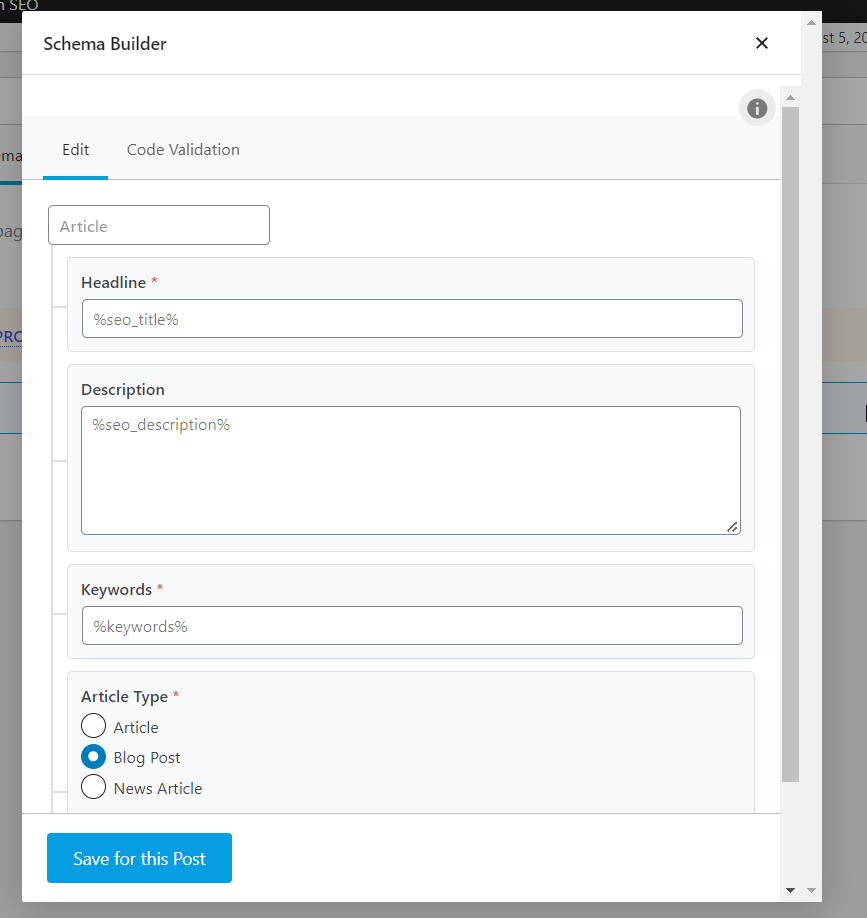
From here, you can further modify the schema according to the post. Adjust all the options that best suits your post.
This way, you can use an SEO plugin to manage the Schema implementation. On top of that, if you need to add multiple schemas to this post or page, you have to upgrade to Rank Math premium. The premium version will unlock more useful features and integrations and can help you a lot to improve the SEO of your WordPress website.
How to Test the Schema Markup
Once you have inserted the schema code into your WordPress posts or pages, the next thing you need to do is test it. We will be using the Rich Results tool to test the schema markup. It can analyze URLs or snippets and find potential errors associated with the schema code.
The first thing you need to do is go to the Rich Results testing tool.

There, you will see two options for testing the markup.
- URL
- Code
If you are going to inspect a web page, choose the URL option, paste the permalink and click on Test URL.

The tool will take a couple of minutes to analyze the submitted web page. After that, you will see the results on the next page.
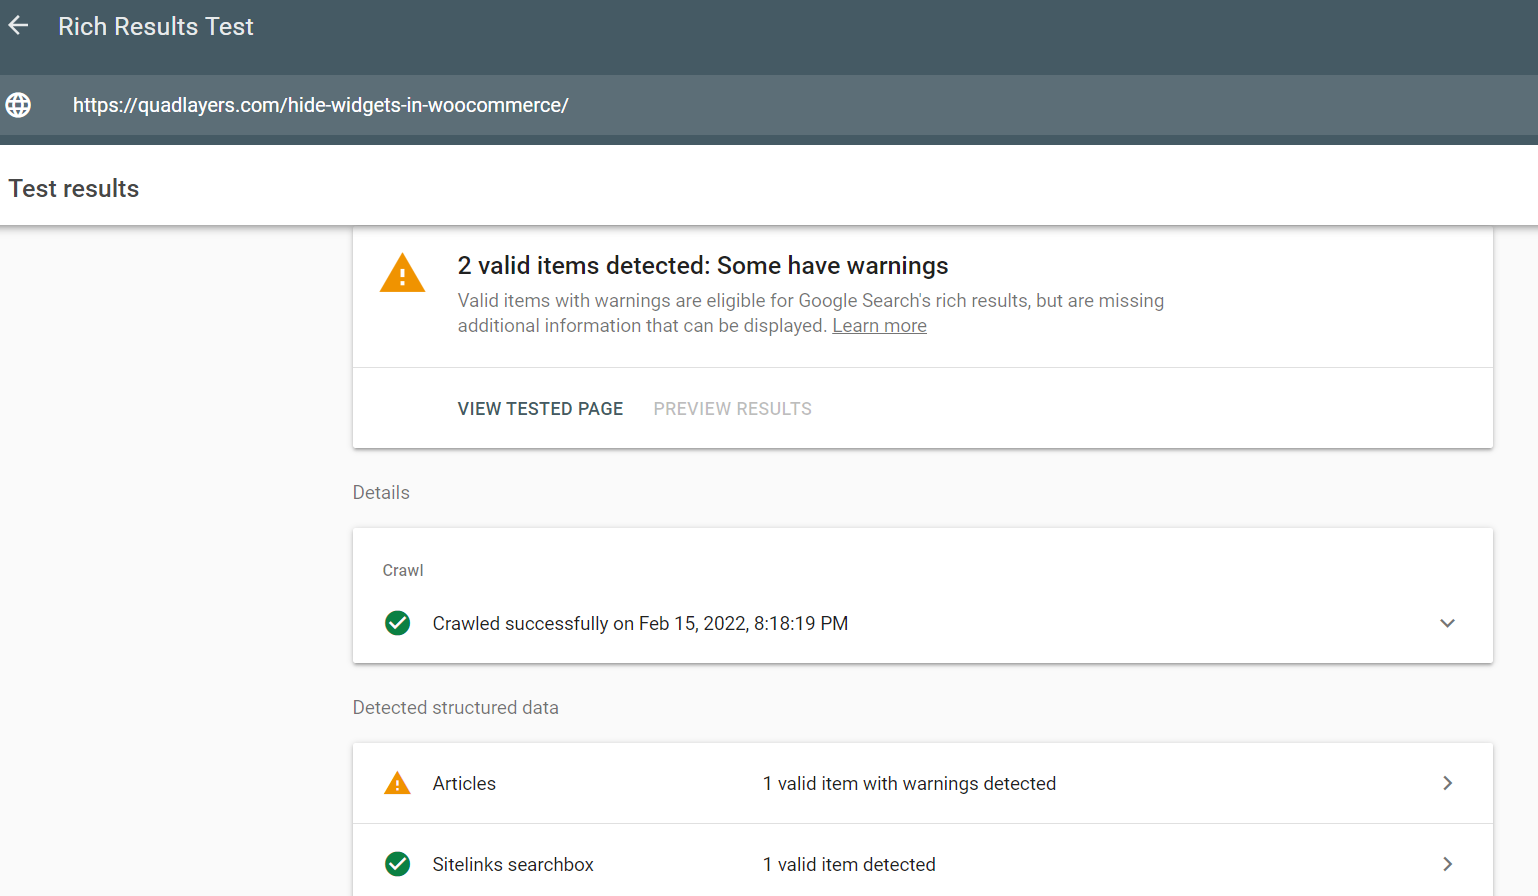
There, you will see the valid markups and the errors. By inspecting them, you can find a solution and improve your schema.
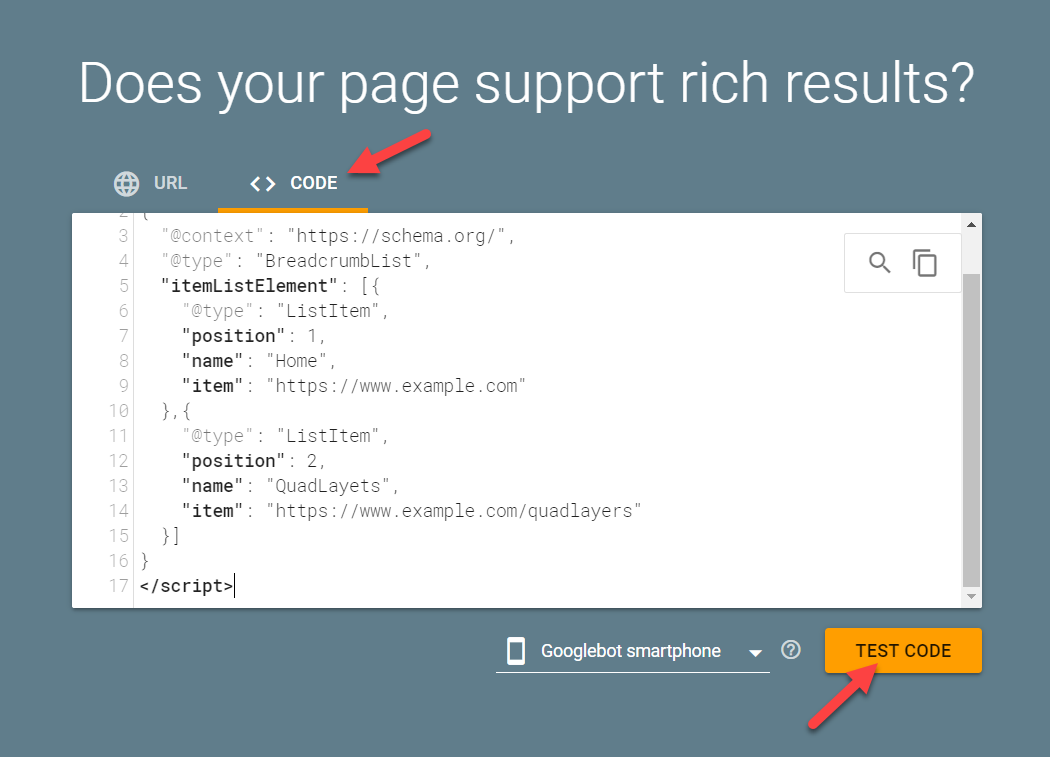
If you have a code, choose the Code option, paste the code and start the test.
On the next page, you can see the result.
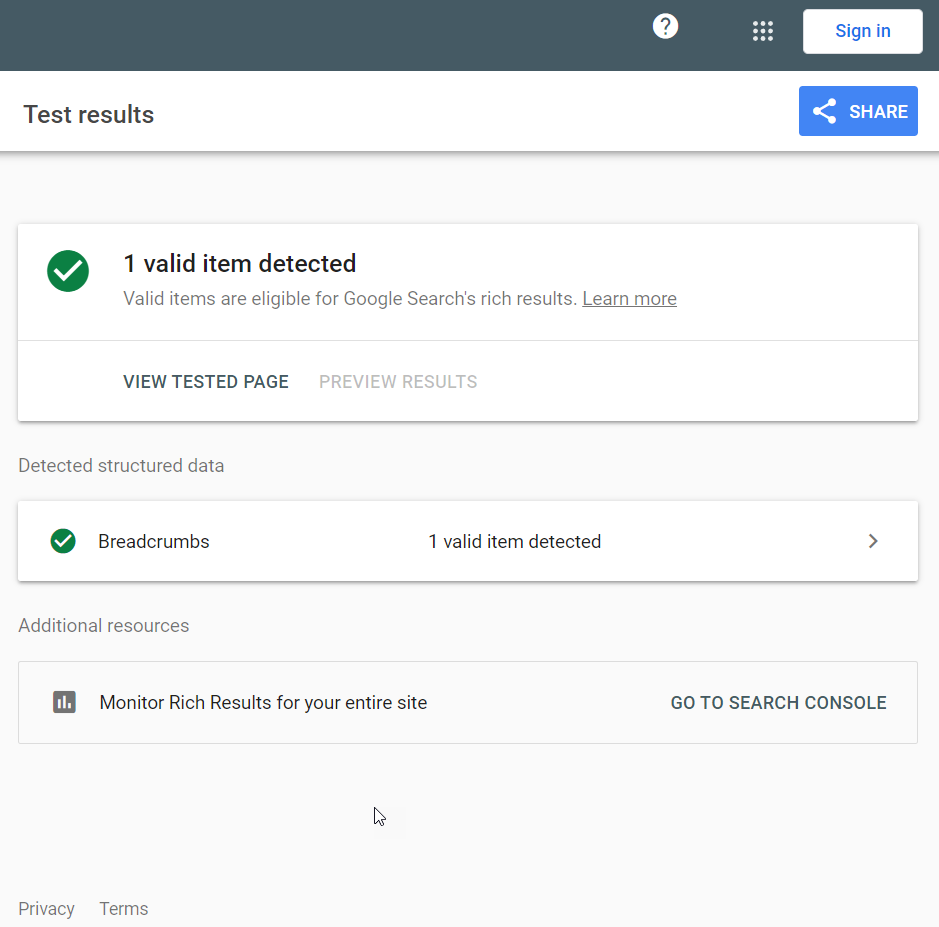
As you can see, the code is valid, and everything is working well.
That’s it.
This way, you can test the schema markup.
Conclusion
Adding structured data to your WordPress website can give you many SEO benefits and help you improve your rankings.
The main ways to add schema markup to WordPress are:
- Via the WP Dashboard
- Classic Editor
- Gutenberg Editor
- WordPress themes
- Plugins
- Dedicated plugins
- SEO plugins
If you do not need to use additional plugins in your WordPress installation, you can try the manual method. The manual process is pretty simple, but you have to do everything yourself. On top of that, you probably need to update all the articles individually to modify the existing snippets.
But your WordPress theme might also come with inbuilt schema options that you can use. The only drawback is that all the added schema codes can be lost when switching the theme to another one.
On the other hand, the plugin methods can be feasible if you need a simple solution with minimum effort. For example, dedicated schema plugins will give you more features. Or, if your SEO plugin comes with structured data options, you can use that too.
Have you found this article helpful? We hope that you can add schema markup to your website.
Please let us know about your experience in the comments and share this post with your friends on social media if it was helpful. That would mean a lot to us.

Hi Jane,
I’m using rank math plugin on a parenting woocommerce store. In the search console I’m getting “Either “offers”, “review”, or “aggregateRating” should be specified” error. I tried finding solution on google but till date this issue isn’t resolved. What should I do?