Regardless of whether you are running a business or a personal site, you need to make sure that users can share your content on social media. That’s why in this post, we’ll show you how to add social media icons to your WordPress menu.
Why Add Social Media Icons to the WordPress Menu?
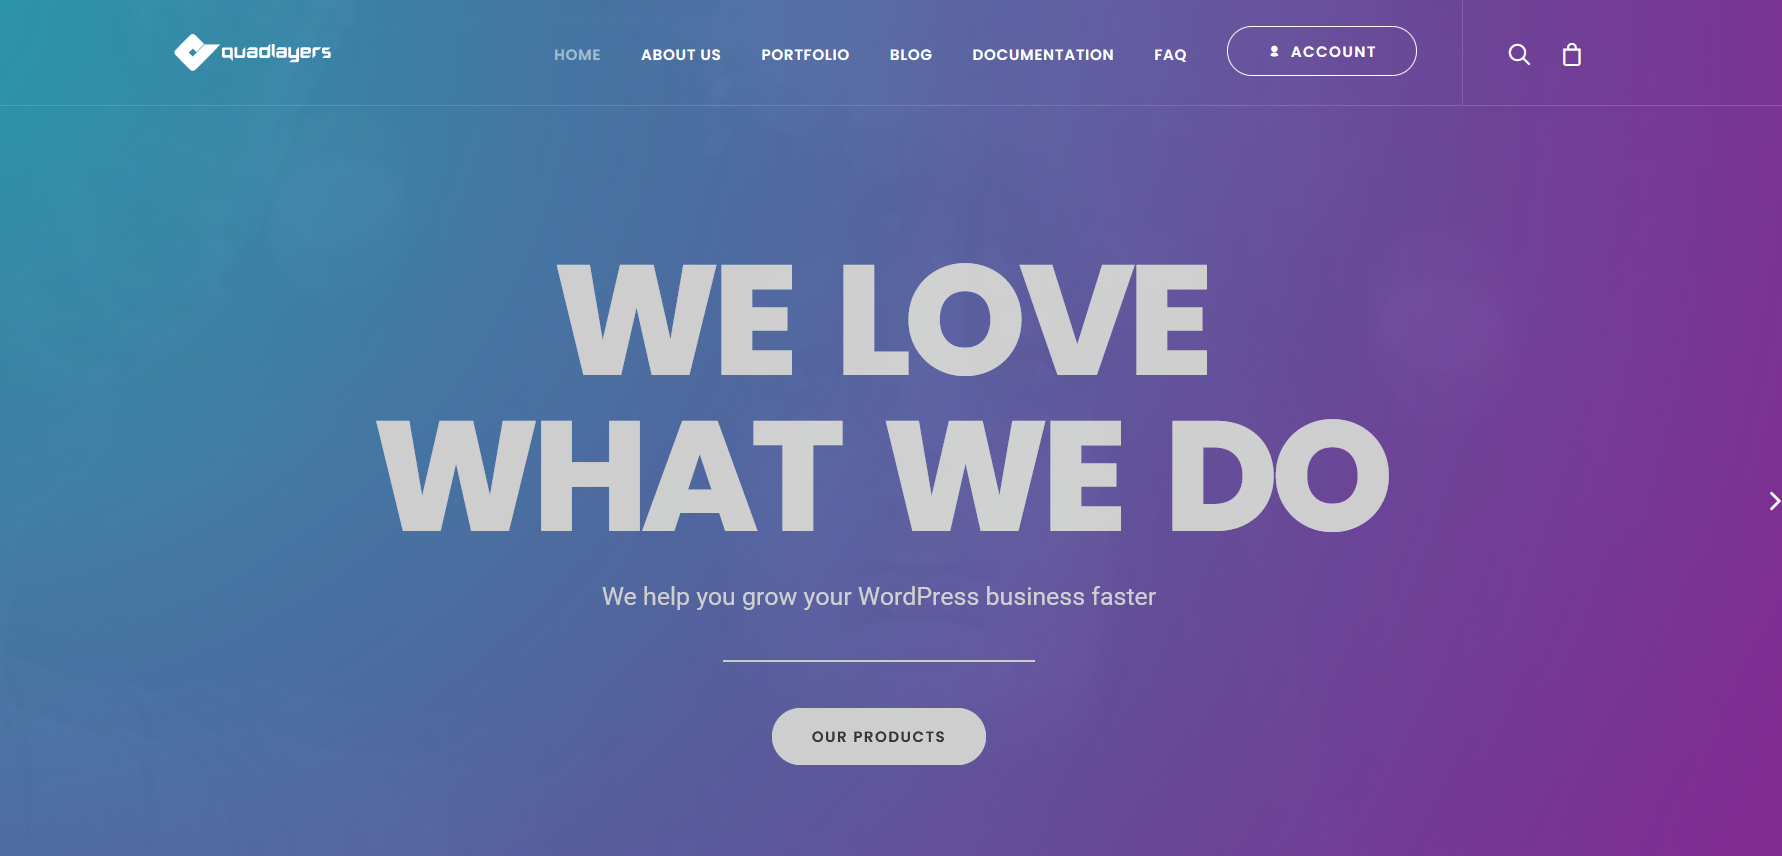
According to recent studies, nearly 50% of the global population uses at least one social network. Connecting your site with Facebook or adding Instagram feeds to your website are good options but there’s something else you can do to grow your social media presence. The menu is one of the most prominent elements on your site. Additionally, it’s one of the first things that users see when they visit your site. For example, have a look at our website’s primary menu.
 So to customize your site and make the most of your social media channels, you can add social media icons to your WordPress menu. On top of that, you can display icons on other areas of your site that support widgets such as your footer, sidebar, and so on.
Even though some themes like Divi include some options to add social media icons to the menu, most themes don’t come with this feature. And WordPress doesn’t include a native feature to include icons in the menu either.
So in this post, we’ll show you three methods to easily add social media icons to your WordPress menu.
How to Add Social Media Icons to your WordPress Menu
There are three main ways to add social media icons to your WordPress menu:
- With plugins
- QuadMenu
- WP Social Icons
- From the theme customizer
- Manually using FontAwesome icons
In this guide, we will describe each method step-by-step so you can choose the one you like best.
1) Plugins
Using plugins is the easiest way to include social media icons on your menu. There are several options out there so, to make your life easier, we have listed two of the best plugins you can use.
1.1) QuadMenu
QuadMenu is the best tool to easily customize and take your WordPress menus to the next level. This is a freemium plugin. There’s a free version with basic features and three premium plans that come with more advanced features and priority support.

To add social media icons to your menu, you need the premium version. So, let’s see how to install it and activate the plugin on your site.
Installation and Activation
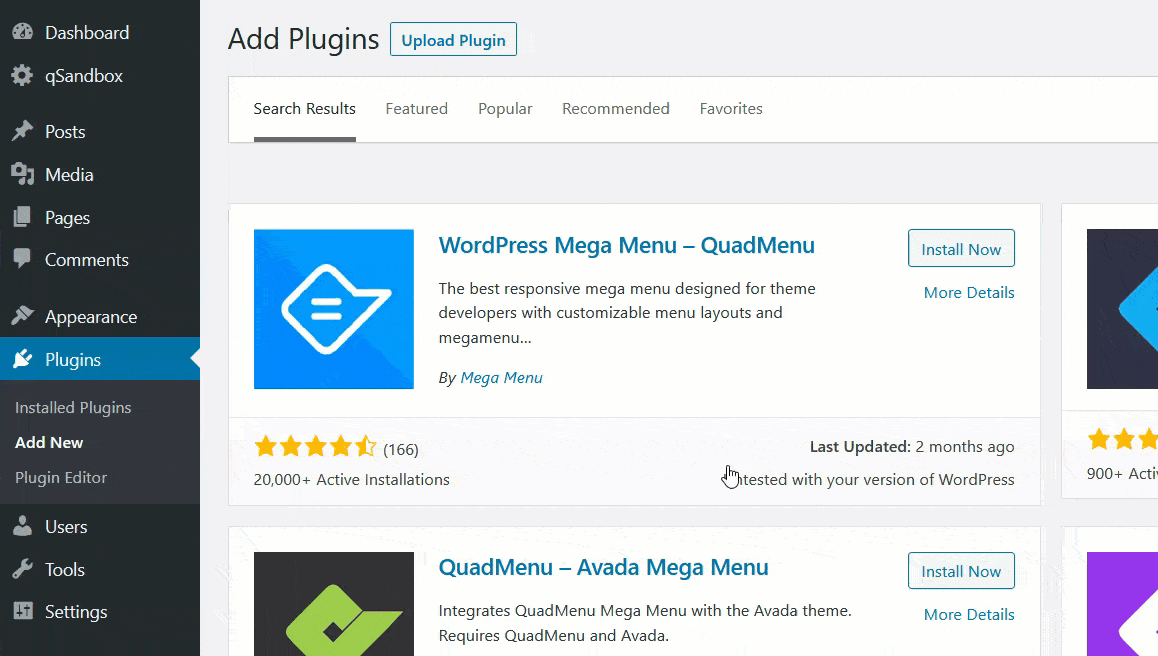
First, you need to purchase the plugin and download the files to your desktop. Then, before installing it, you need to install the free version on your site. To do that, go to your WP dashboard > Plugins > Add New. Then, use the search bar and look for QuadMenu. After that, press Install and then Activate.
After activation, use the files of the premium version you downloaded before and install them on your site.
 Once you have activated the plugin, you will need to verify your license key. From your QuadMenu account’s dashboard, you will see the licenses option.
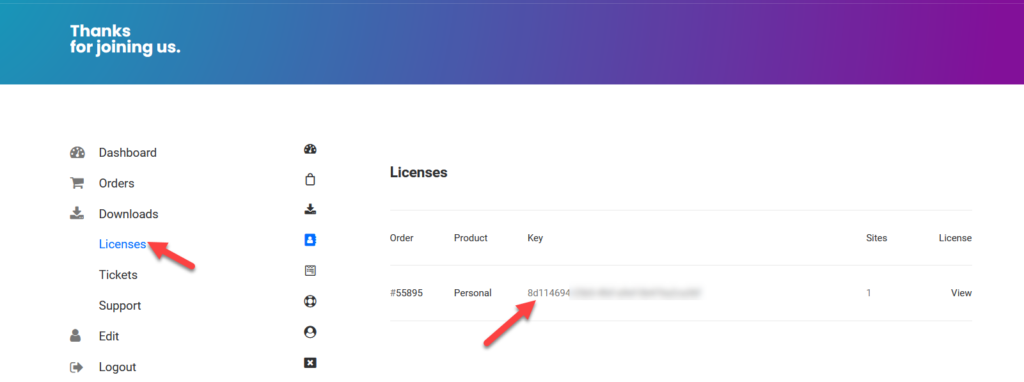
Copy the key from there and paste it in the licenses field with your registered email address to verify your key.
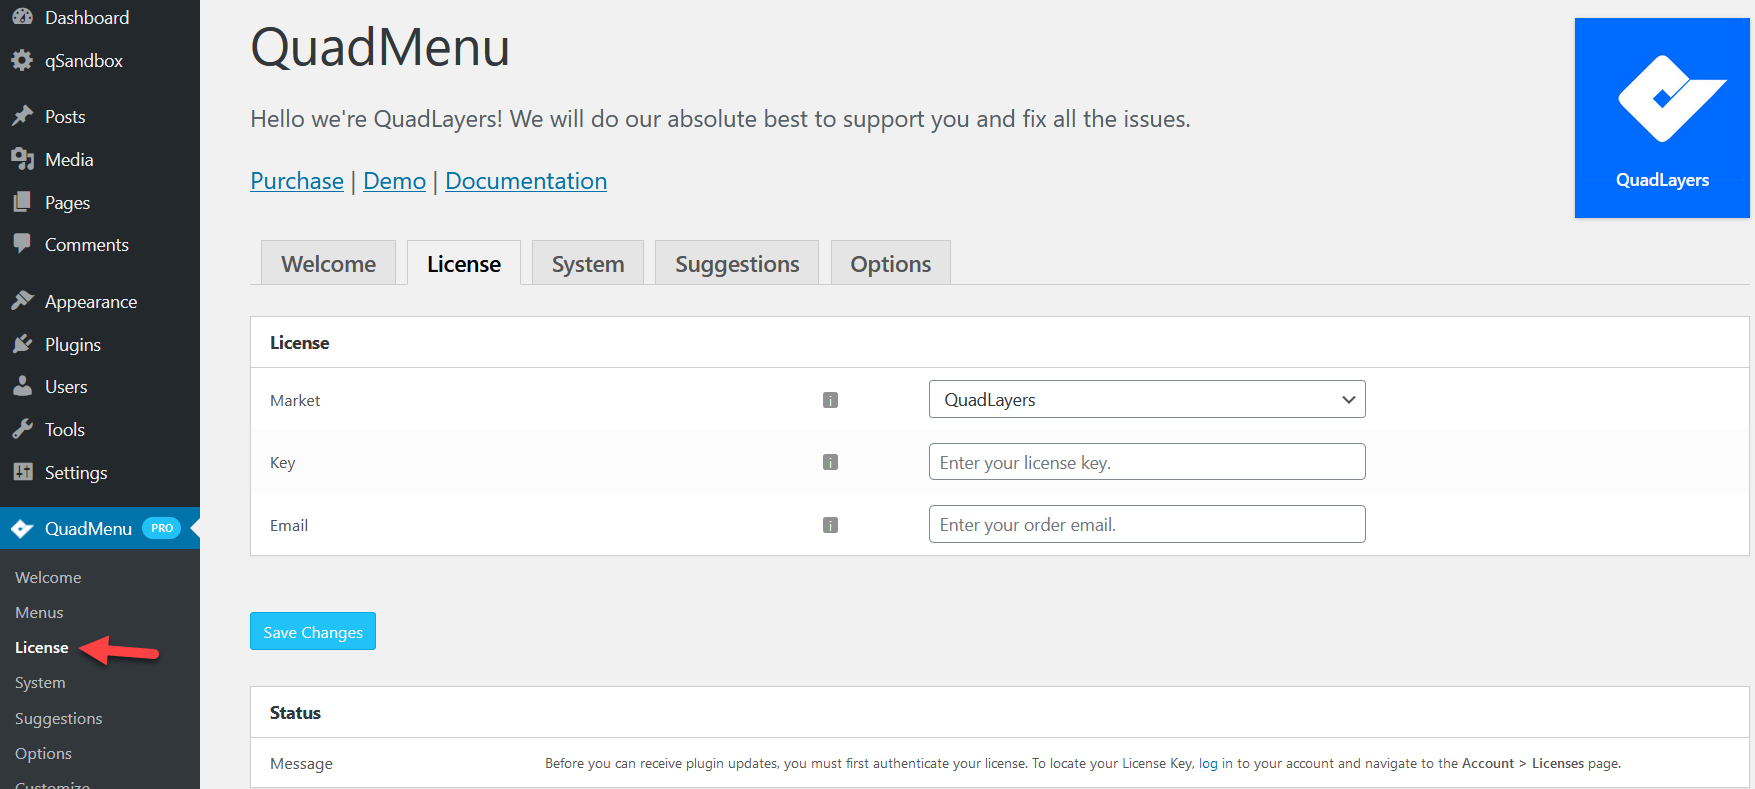
The plugin is available in our store, Envato, and Elegant marketplace, so use the dropdown menu to select the appropriate option for your purchase. After verifying it, you are good to go.
Add social media icons to your WordPress menu with QuadMenu
QuadMenu works with any free or premium theme. For this demo, we are going to use GeneratePress but the process is similar to any other theme. First, let’s go to the plugin’s settings by going to QuadMenu > Options.
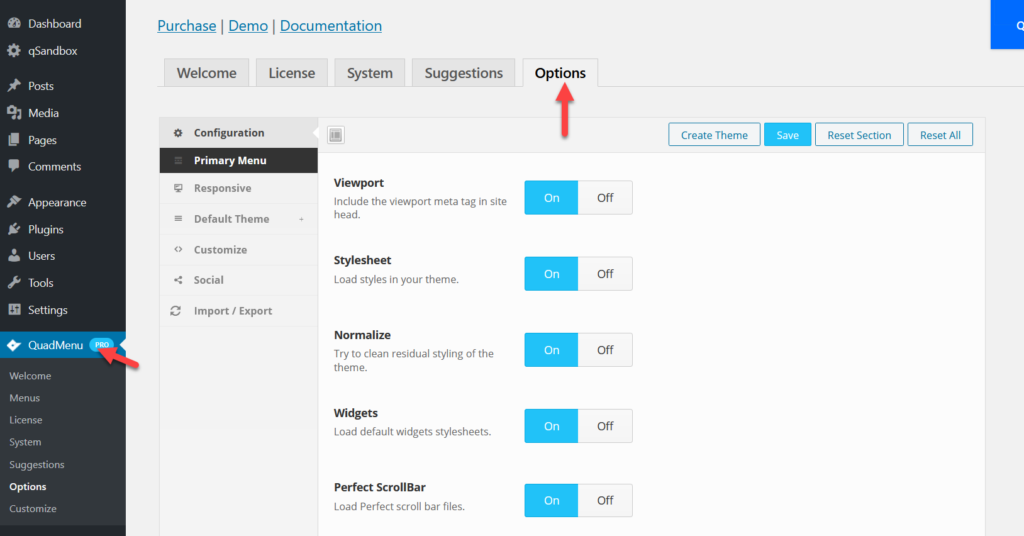 There, you will see several customization options such as:
- Primary menu
- Responsive
- Default theme
- Customize
- Social
- Import/ Export
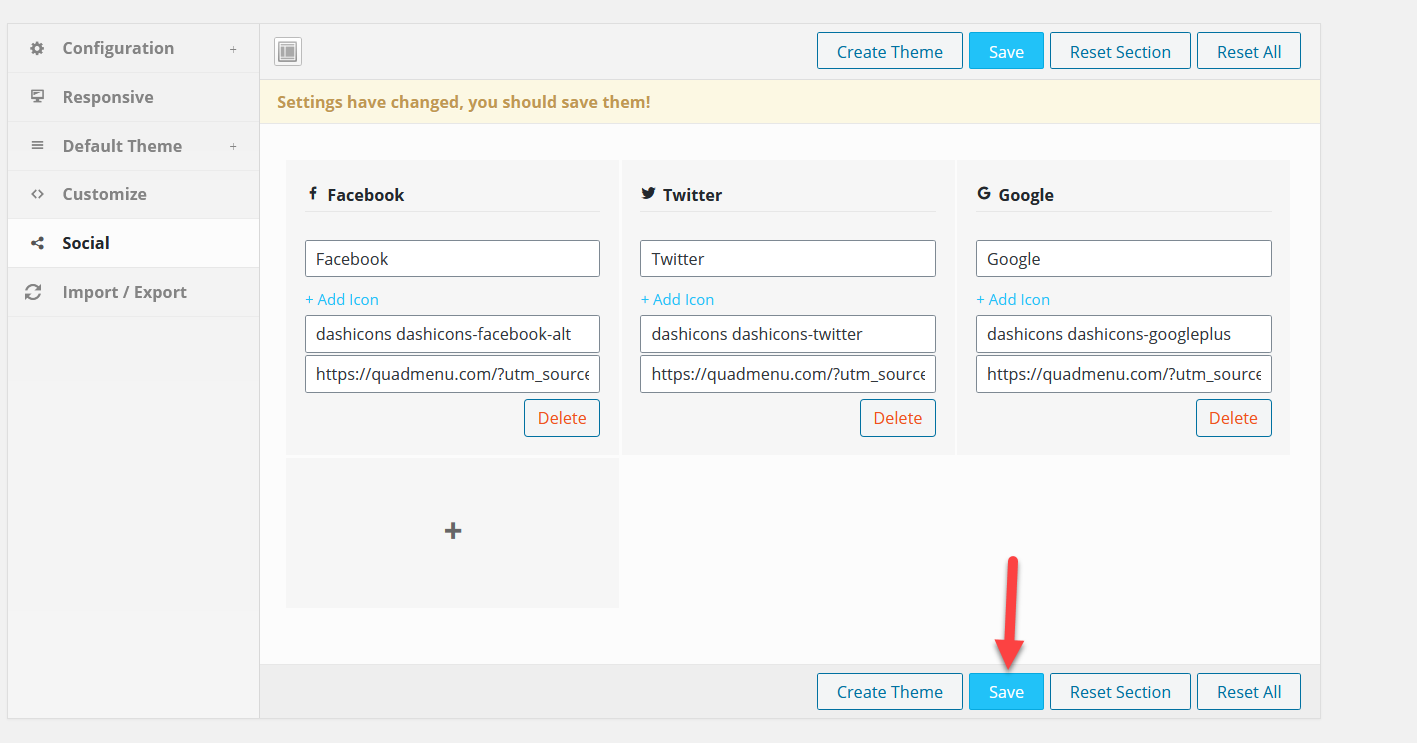
Configure social options
In our case, we need to add social media icons to our primary menu. So, we’ll select the Social option.
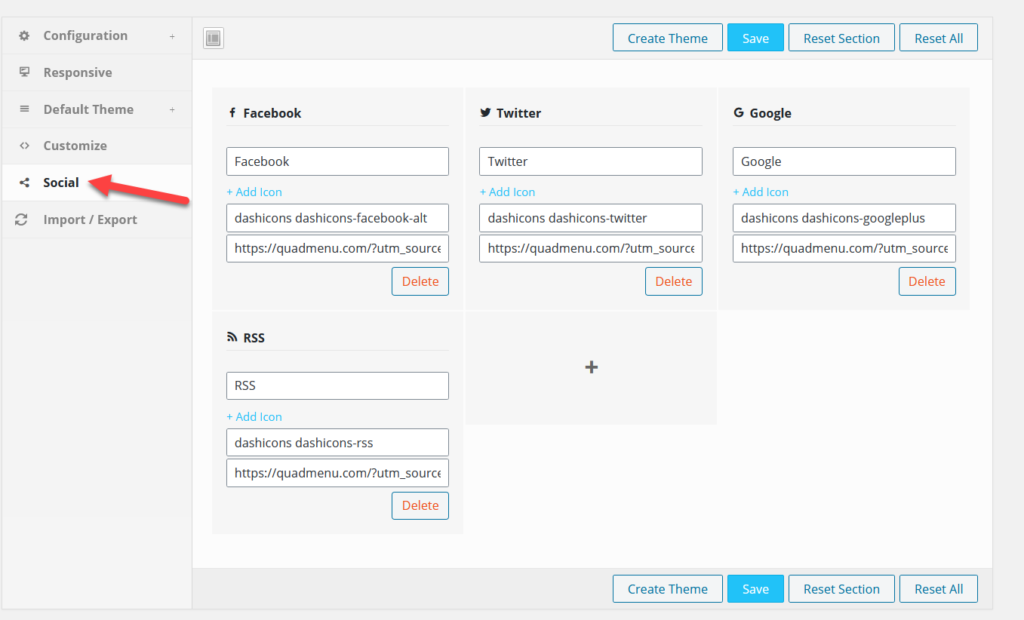
You will see several default options that you can edit or delete depending on the channels you have. They already have assigned icons with social media profiles.
However, you can also customize them by clicking on the + Add Icon button. Additionally, you can add new social media channels by pressing the + button. 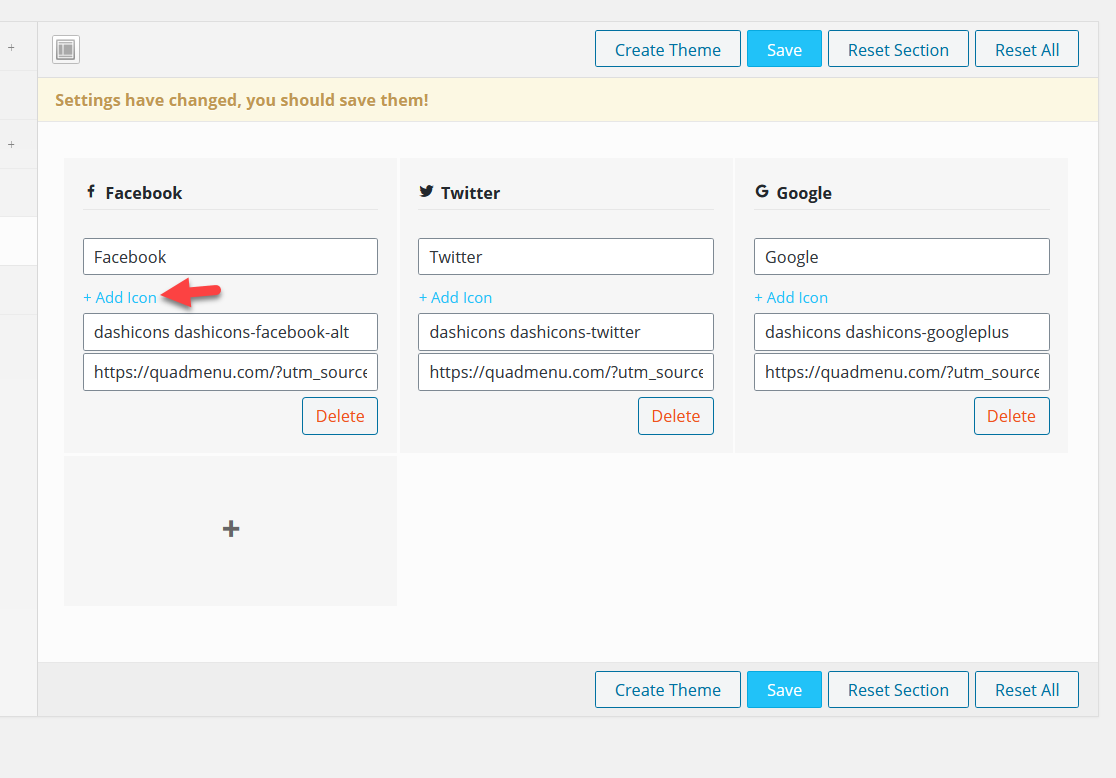
Let’s say you want to change the Facebook icon. Press + Add icon and you will see a pop-up with plenty of icons that you can choose from.
![]()
There are many icons so we recommend you use the search feature to filter the results.
![]() As you can see, we have searched for Facebook icons. It will show you all the available icons related to your search query so select the one you like and save it. You can also change the titles and URLs. Once you’ve made all the changes you want in QuadMenu, save the settings.
As you can see, we have searched for Facebook icons. It will show you all the available icons related to your search query so select the one you like and save it. You can also change the titles and URLs. Once you’ve made all the changes you want in QuadMenu, save the settings.
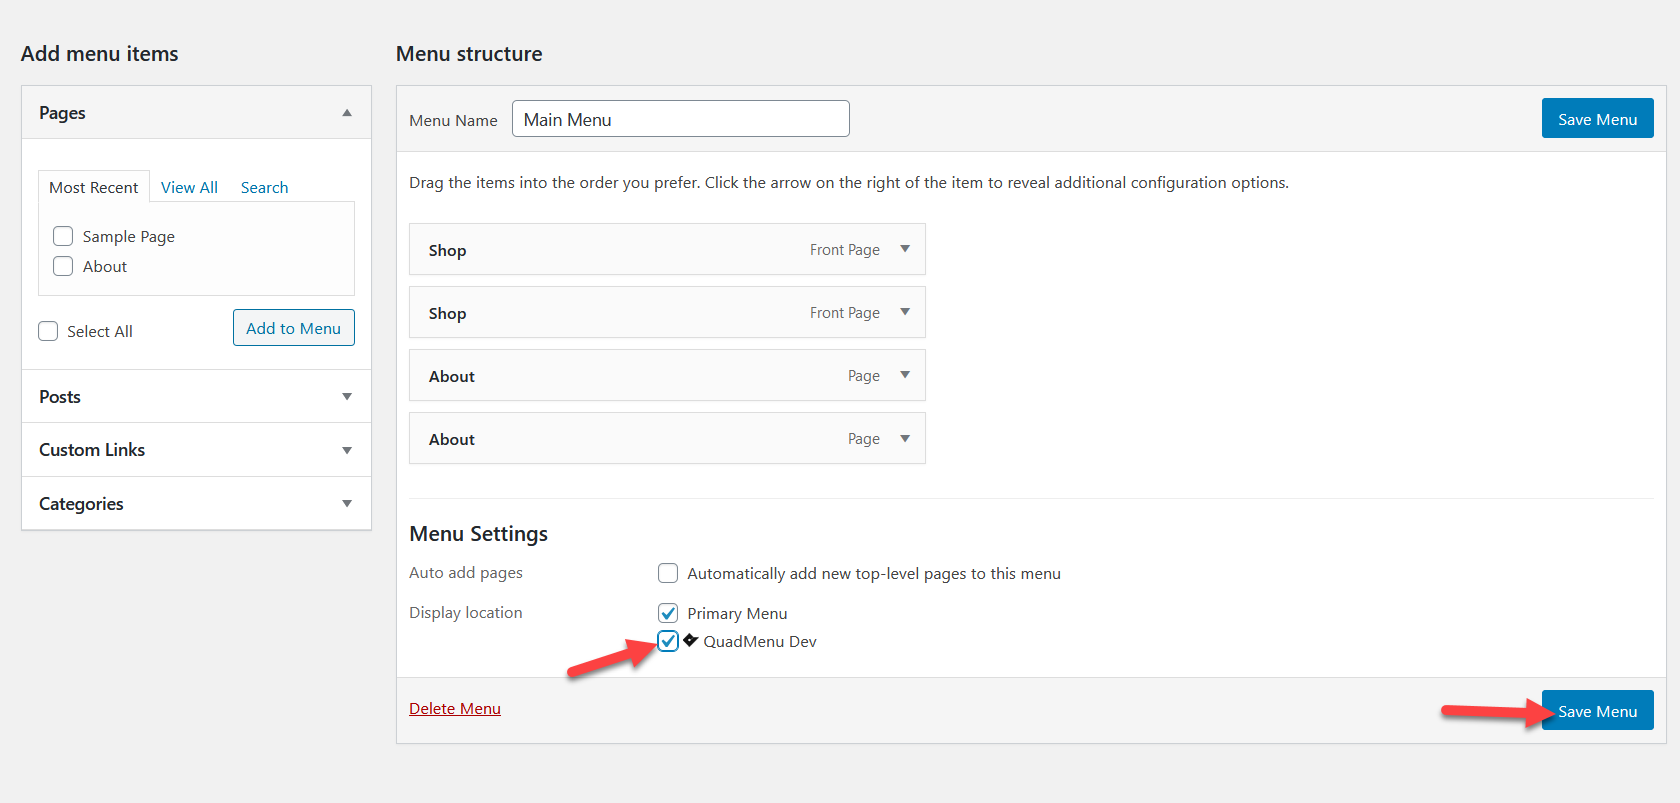
After that, go to the WordPress menus. You will see all the available menus there. To use the QuadMenu options on your menu, you need to mark it as QuadMenu Dev under the Menu settings. After that, save the menu.
On the next page load, you will see the QuadMenu options. 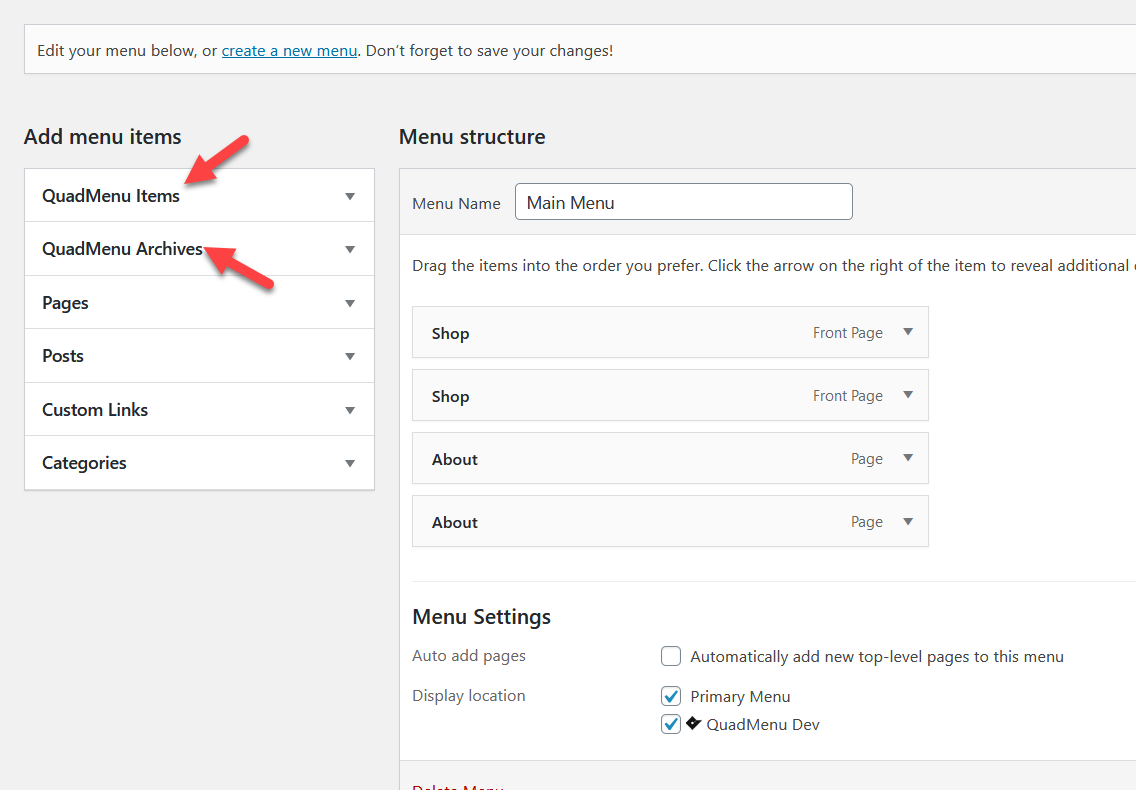
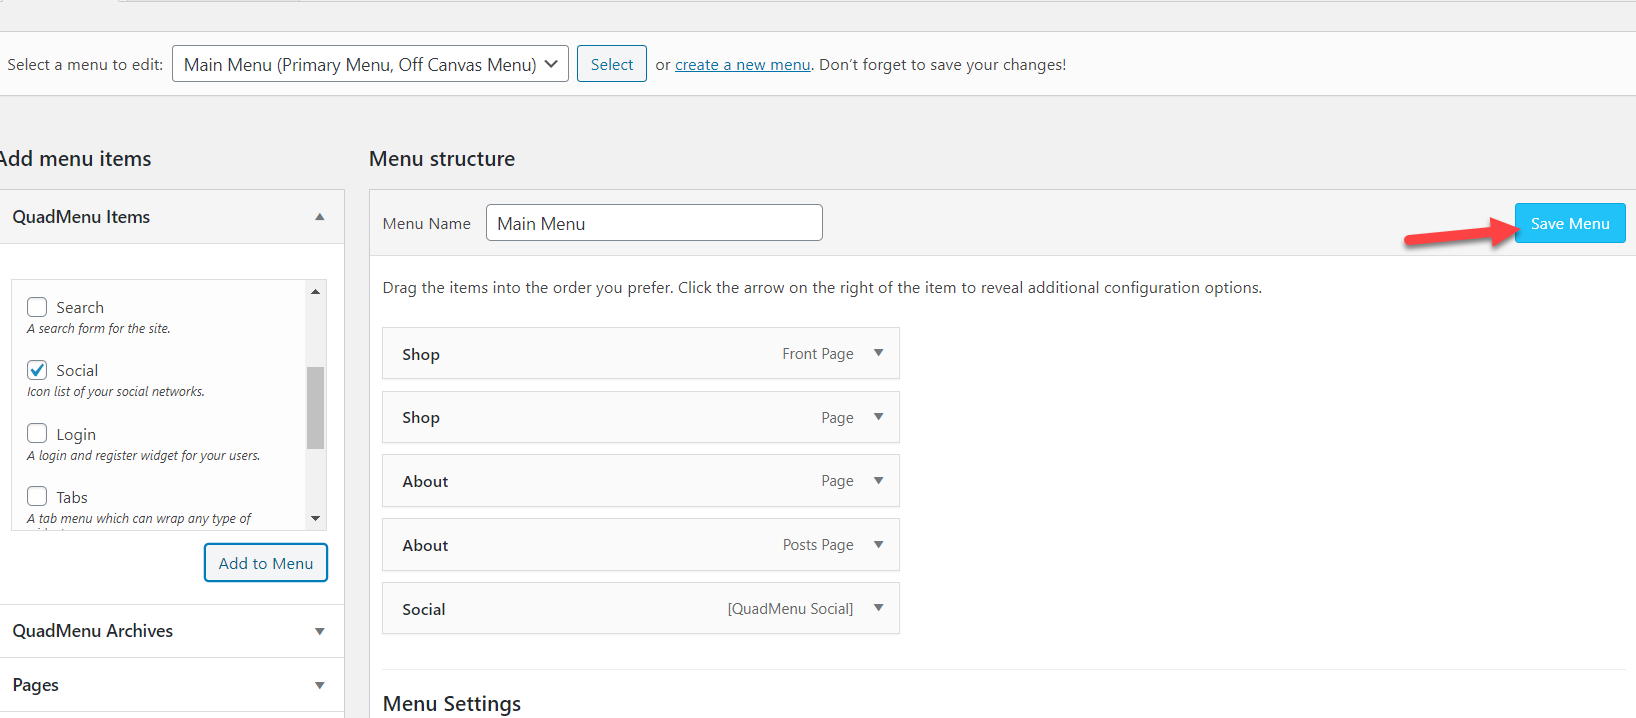
Under the QuadMenu items, you will see the Social icons list. Select them and press Add to Menu.
![]()
After that, you will see the Social section under the Main Menu options. Hover your mouse over and you will see the QuadMenu customization options.
![]()
If you need additional customization, select that option. Otherwise, press the Save Menu button and you are good to go.
Icons on the menu (Frontend)
Now, it’s time to check the results. So, go to your website’s homepage and you will see the social icons. And when you hover over them, the icons will be rendered.

That’s it! You have successfully added social media icons to your WordPress menus with QuadMenu.
1.2) WP Menu Icons
If you can’t afford any premium plugins, don’t worry. We have got a free solution for you. In this section, we are going to show you how to add social media icons to your WordPress with a free plugin called WP Menu Icons. ![]()
Installation and Activation
First, install and activate WP Menu Icons on your site.
![]() This tool is very easy to use and doesn’t require any additional customization.
This tool is very easy to use and doesn’t require any additional customization.
Customizing Menu Icons
If you don’t have a menu on your site, you can create one from the configuration section. 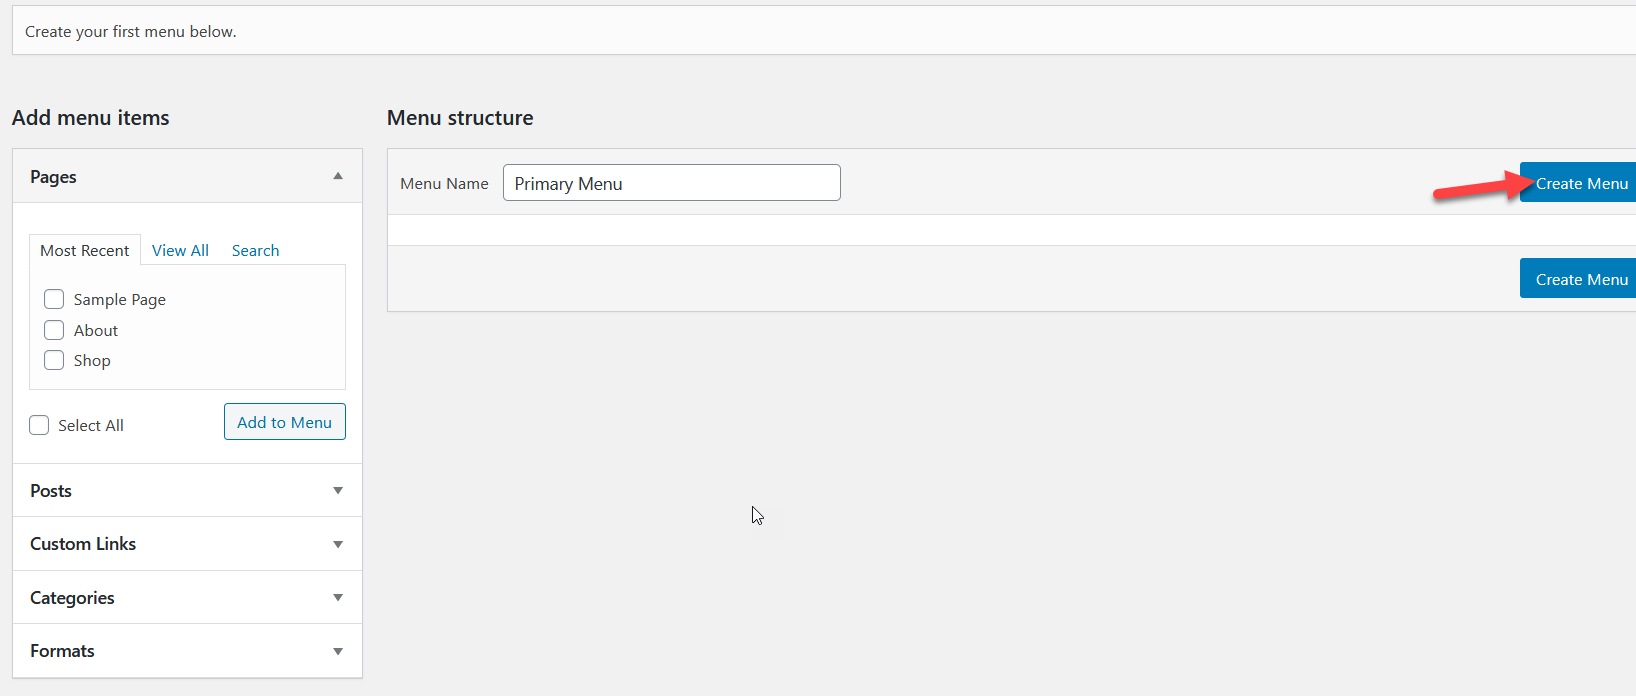
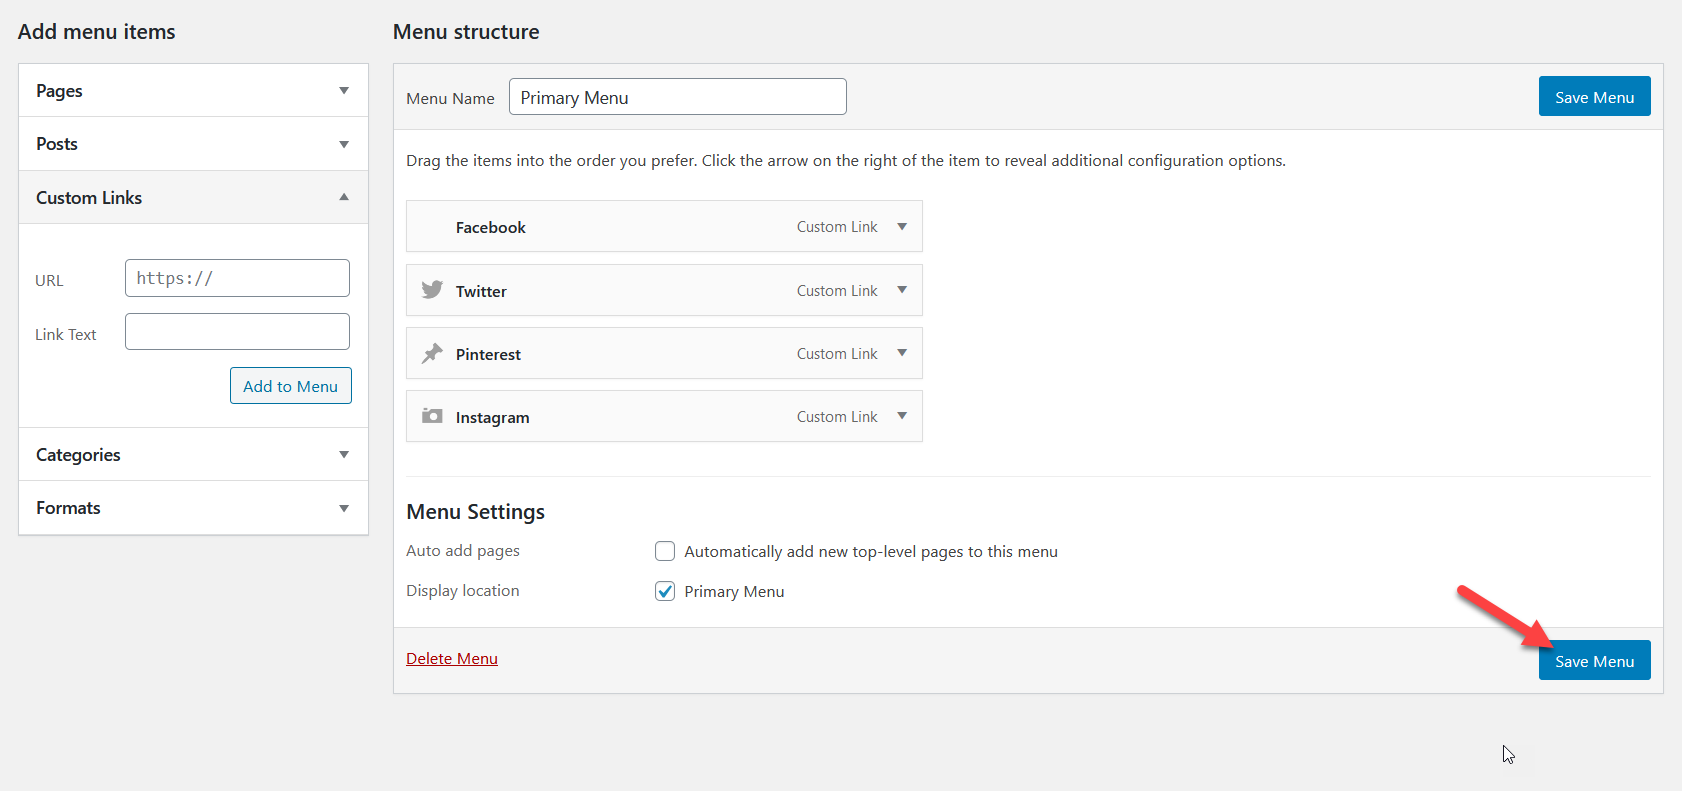
Assign a location to your menu and then you are ready to add items to it. To add your social media profiles to the menu, choose the Custom Links item. You will need to enter the URL to the page you want to link and a label. Then, press Add to Menu.
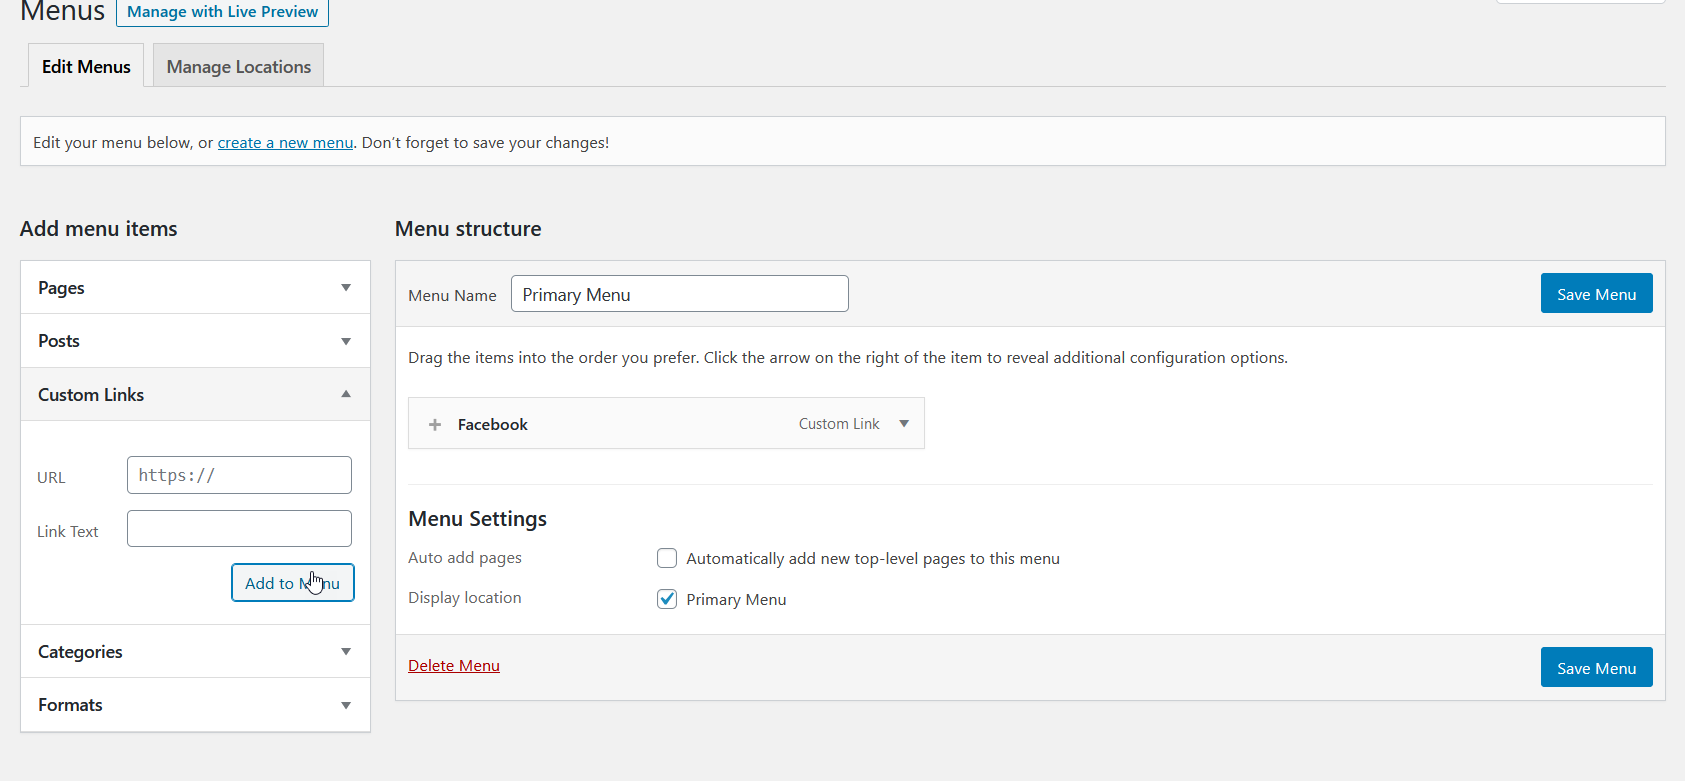
 After you add the icon to the menu, the configuration page will look like this.
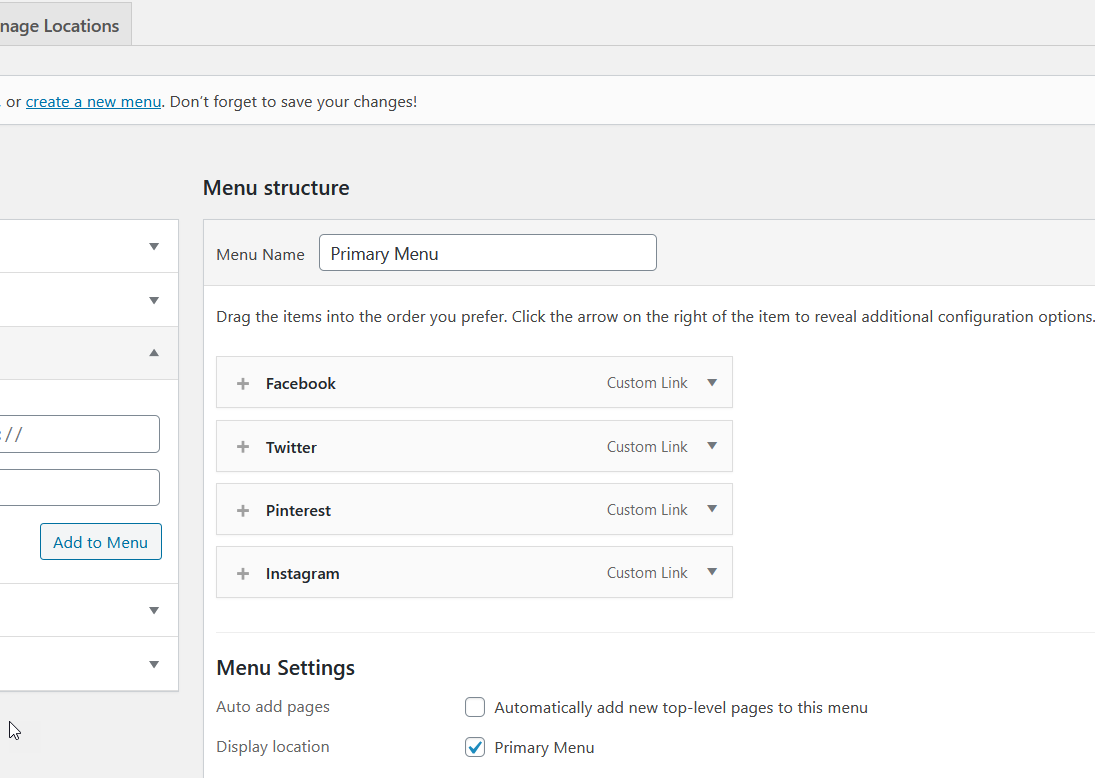
 Similarly, you can add other social media icons. In this case, we’ve added Twitter, Pinterest, and Instagram icons to our menu.
 On the menu items, there’s a + button. That’s the setting you need to use to add icons to the menu items, so click it.
![]() Then, you will see a large selection of items to choose from.
Then, you will see a large selection of items to choose from.
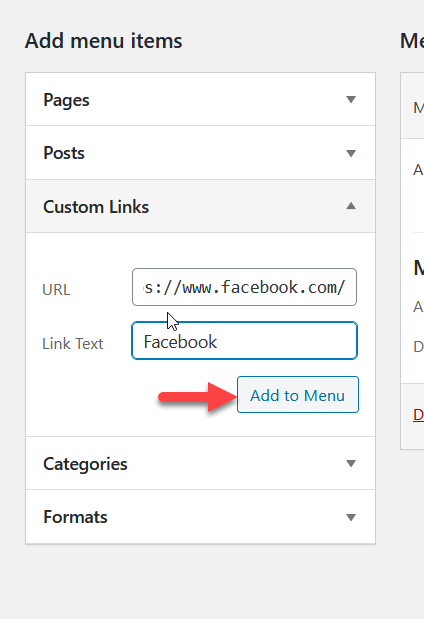
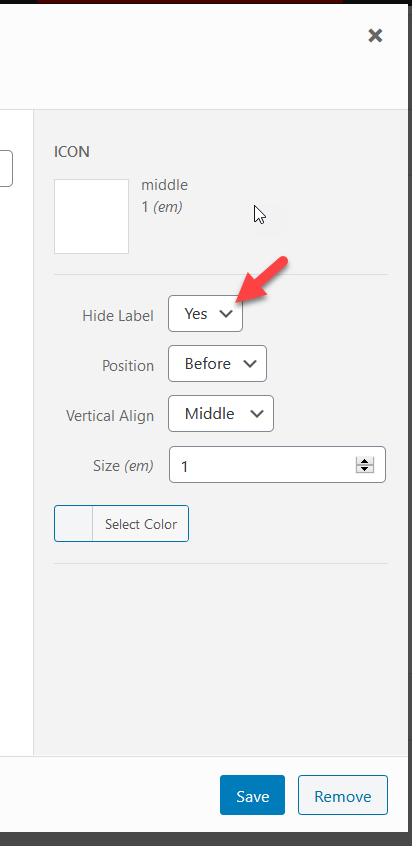
![]() There are dozens of icons so use the search feature to filter the results you want. In this case, we have selected the Facebook menu item, so we’ll search for the Facebook icon.
There are dozens of icons so use the search feature to filter the results you want. In this case, we have selected the Facebook menu item, so we’ll search for the Facebook icon. ![]() After selecting the one you like, you will see the icon settings in the right column. Here you can display or hide the label, customize the position, size, and alignment. In this case, we’re going to hide the label. After you’re done with the customization, click Save.
After selecting the one you like, you will see the icon settings in the right column. Here you can display or hide the label, customize the position, size, and alignment. In this case, we’re going to hide the label. After you’re done with the customization, click Save.
 You can customize the Pinterest, Twitter, and Instagram icons in the same way. After adding the required icons, save the menu.
 Now it’s time to check the result. Go to your website’s frontend and you will see the new icons.
![]()
That’s how you can add social media icons to your header menus in WordPress with WP Menu Icons. Finally, you can also style your icons from the WP Menu Icons settings page.
2) Add Social Media Icons with the Theme Customizer
If you don’t want to install any plugins, you can include social media icons in your menus using your theme customizer. Some premium themes such as Divi, Newspaper, or Avada come with integrated theme panels that allow you to customize the theme and add social media icons.
If you’re not sure if your theme comes with the option to add social media icons, in your WordPress dashboard go to Appearance > Customize > Menus > View Locations and check if there’s a social menu or social icon option.
For our demonstration, we are going to use the Divi theme by Elegant Themes. First, go to your WP dashboard > Appearance > Customize.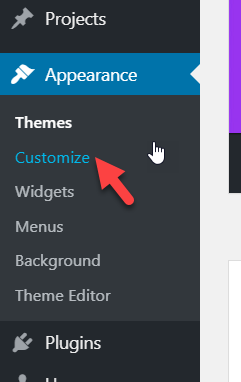
Then, go to the header customization and header elements. There, you will see an option to enable header social icons.
![]()
Enable that option and then you will see it on your website’s header. ![]()
Additionally, you can customize them by going to Divi > Theme Options.
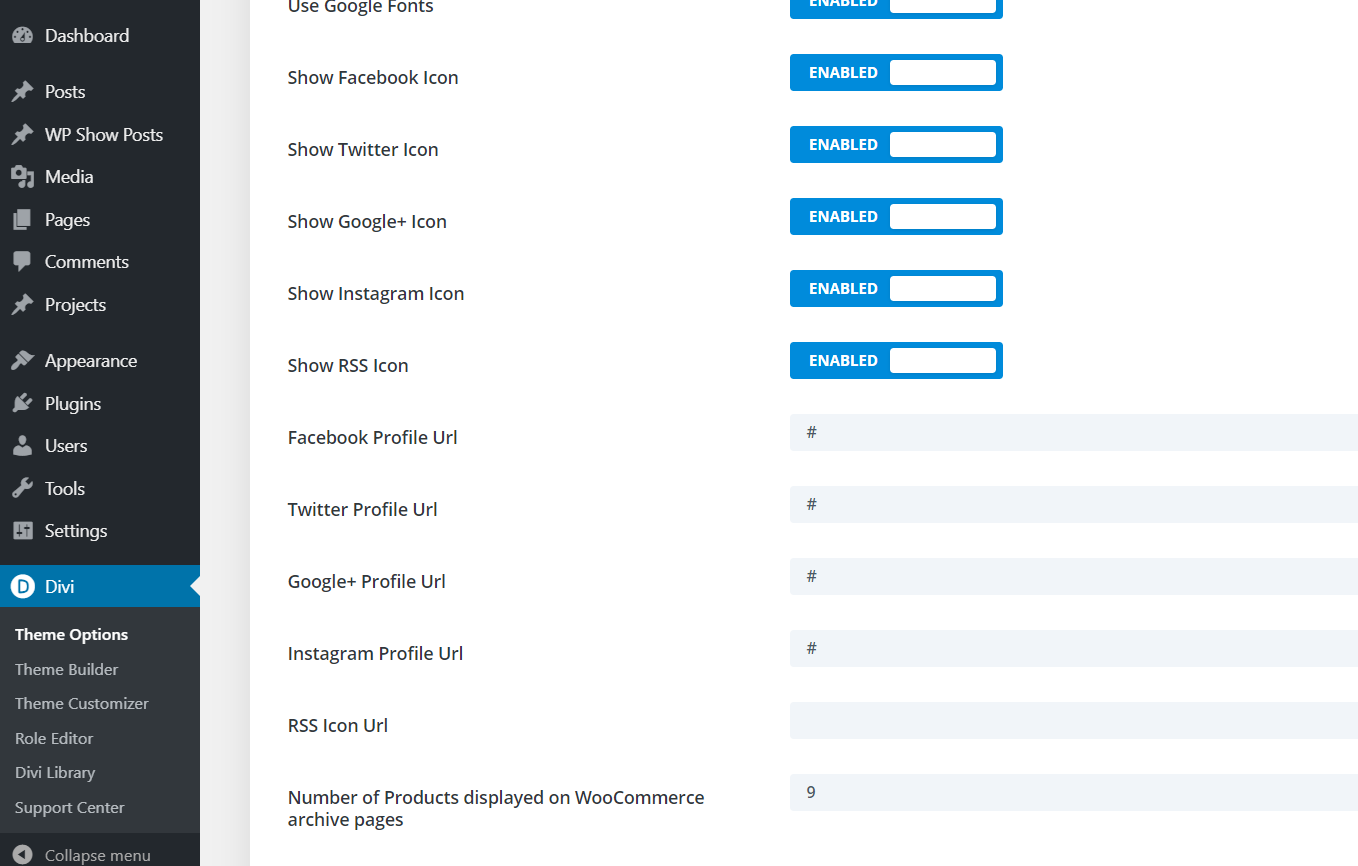
There, you can enable the icons you want and enter the URL of your social media profiles. The social media icons will appear in both the header and footer of your site by default.
![]()
However, you can choose to hide them through the customizer settings.
![]() Other themes like Newspaper and Newsmag have their own customization options, so you can enable/disable icons and display them right through the dedicated theme panel. If you can’t find the social media icons section in the theme customizer or panel, feel free to leave a comment below and we’ll try to help you.
Other themes like Newspaper and Newsmag have their own customization options, so you can enable/disable icons and display them right through the dedicated theme panel. If you can’t find the social media icons section in the theme customizer or panel, feel free to leave a comment below and we’ll try to help you.
3) Using FontAwesome
Finally, you can add social media icons to your menus in WordPress manually. Even if you’re not a developer or don’t have coding skills, you can display social media icons with a bit of HTML coding. To do that, we’ll use FontAwesome’s icons.
So, the first thing you need to do is go to the FontAwesome website.
Use the search feature to find the icons you need. For this demo, we are going to search for Twitter icons.
![]()
On the next page, the website will show you the search results. Choose the one you like best.
![]()
On the next page, you will see the details of the icon you selected so simply copy the HTML code of the icon. 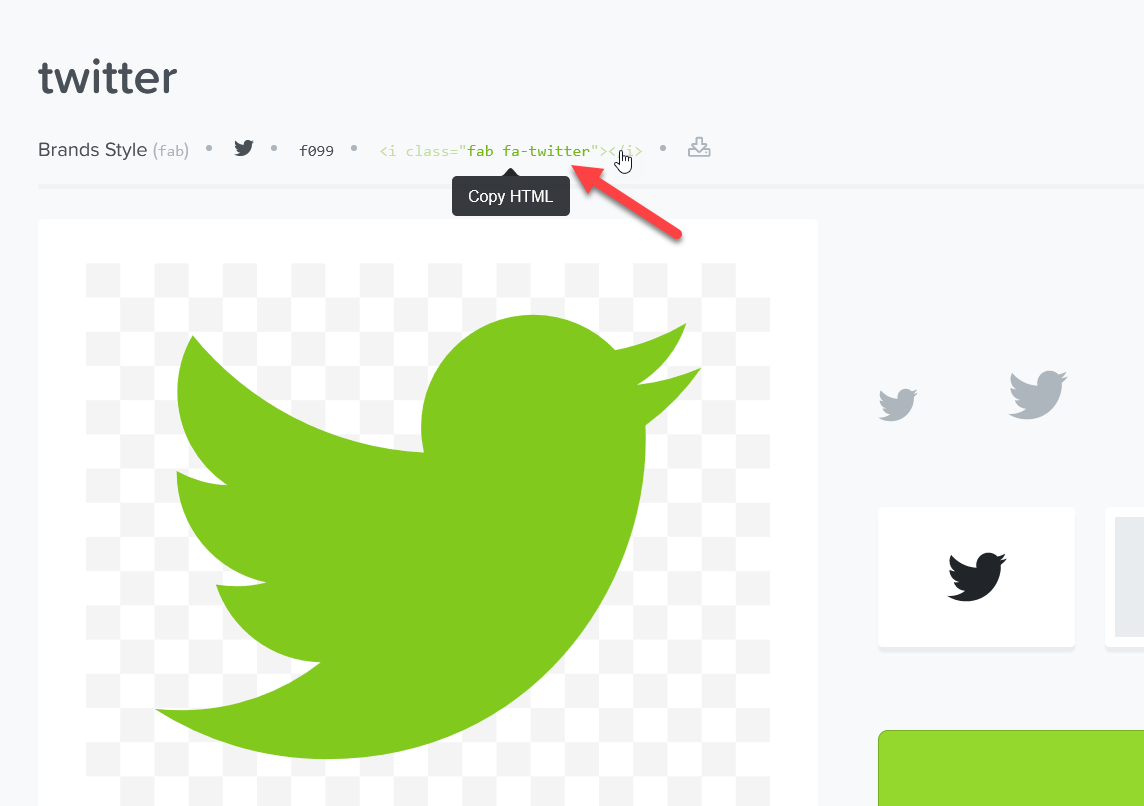
Adding Font Awesome Icons To WordPress
Then, go to the menus section on your WordPress site. On the left side, you will see the custom links section. You will need to enter the URL to your Twitter profile and paste the HTML code you have just copied in the Link Text field. Once you do that, press Add to Menu. 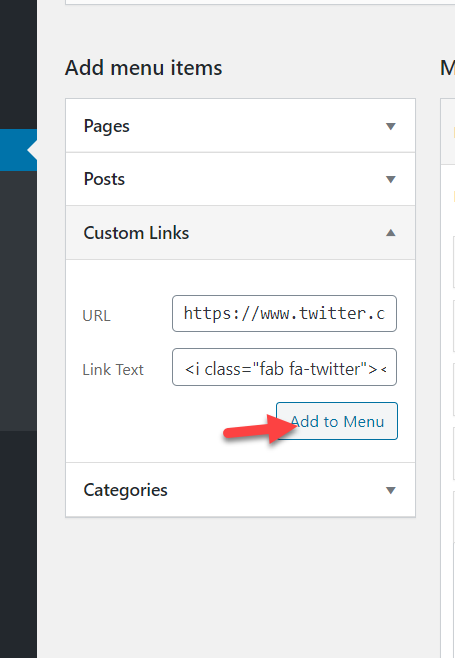
After that, save the changes. Then, go to your site’s frontend and you’ll see the icon.
![]()
This way, you will be able to add any social media icon to your menu.
HTML code doesn’t work
If you’ve followed every step of this tutorial but the HTML doesn’t work, try this. If the fab code doesn’t work, try changing the HTML code by removing the b from the fab.
So, for example, in our case, the final HTML code will look like this <i class=”fa fa-twitter”></i> instead of <i class=”fab fa-twitter”></i>. Example: 
Add social media icons to the WordPress header
The header is one of the most popular places where you may want to add social media icons so let’s quickly see how to do it using the Theme Customizer.
Note that you’ll need a theme that gives you the option to add social media icons to the menu. Also, keep in mind that the steps may be slightly different depending on your theme but you should be able to follow the steps without any issues in most themes.
Let’s have a look at two options: creating a new menu and editing an existing one.
Adding social media icons to the header in a new menu
- In your WordPress dashboard, go to Appearance > Menus
- Press the create a new menu link next to the Select button and give it a name
- Now you can add the icons to it. Select the new menu and enter the social media and URLs you want to include (Instagram, Facebook, YouTube, and so on) and press Add to Menu
- Save the changes
- After that, place the menu you’ve just created in the header section
- Save the changes and that’s it! That’s how you add social media icons to the WordPress header!
Adding social media icons to the header in an existing menu
- In your WordPress dashboard, go to Appearance > Customize > Menus
- Go to the Header section and press the Add items button
- Then select the icon of the social media platform you want to add, enter the URL, and press Add to Menu. You need to do the same for each social media you want to add
- Select the menu location where you want to display the icons. The options you have will depend on your theme.
- Save the changes. That’s it!
Alternatively, if you want to add the icons to the footer, for example, follow the same process but select the Footer as the location for the icons.
Bonus: Open social media icons in a new tab
Adding social media icons to your WordPress menu will help you grow your social media presence. However, the issue is that when a user clicks on the icon on your menu, the page of the social media will load in the same window and the user will leave your site. The solution is to make the social media icon load the page on a new tab. Let’s see how to do it.
In your WordPress dashboard, go to Appearance > Menus, open the Screen Options on the top right, and enable the Link Target option. Then, go to each menu element and tick the Open link in a new tab checkbox. Alternatively, you can set each target to _blank.
Finally, save the changes and you’re done!
How to add social feeds to your site
Apart from adding social media icons to your menu, you can also add social feeds to your site to increase engagement with your users. In the section, we’ll show you how to connect Instagram and TikTok to your website.
Add an Instagram feed to WordPress
The easiest way to connect Instagram with your site is to use the Social Feed Gallery plugin. It’s a freemium tool that allows you to display your Instagram feed in a few clicks.
First, install and activate the plugin from this link. Then, go to Social Feed Gallery and log in to your Instagram account.
After that, go to Social Feed Gallery > Accounts, and you’ll have the option to log in to your personal or business account (keep in mind that the business account has more options). Then, add an account, log in, and give the app the necessary permissions to connect your account to WordPress.
Once that’s done, go to the Feeds tab, press +Feed, and add the feed you want to display. Finally, customize your feed and once you finish, you’ll see that the plugin provides you with a shortcode that you can paste on any page or post to display your feed.
For more information, check out our guide on how to integrate Instagram with WordPress.
Add a TikTok feed to WordPress
Similarly, you can also connect your site with TikTok. To display TikTok feeds, we’ll use a dedicated plugin called WP TikTok Feed. This is the most popular TikTok plugin for WordPress and it has a free version and a few premium plans.
After installing and activating the plugin, in your WordPress dashboard, you need to link your TikTok account and then go to Tiktok Feed > Feeds. There, press +Feed and add the feed you want to display. Additionally, you’ll see several options to customize how you display the feed on your site.
For more information about this, check out our tutorial on how to embed TikTok videos in WordPress.
Conclusion
All in all, adding social media icons to your WordPress menus is an excellent way to boost your social media presence. In this guide, we’ve seen 3 different ways to do it:
- With plugins
- From the theme customizer
- Manually
If your theme allows you to add icons by default, you don’t need to use any extra plugins or HTML code. If you prefer a plugin, we recommend you use QuadMenu. It will allow you to gain full control of your whole WordPress menu customization and it also comes with plenty of powerful features.
However, if you prefer a free solution, have a look at WP Menu Icons. It’s a simple tool that will help you include social icons in no time.
On the other hand, if you don’t want to install any plugin, you can add social media icons using a bit of HTML and FontAwesome icons. This option also allows you to customize the icons with a bit of CSS or you can avoid the styling part and use the default icons.
Have you found this article helpful? If you did, leave us a comment below and share this post on social media. For more related tutorials, check out the following guides:

Amazing article, Jane. learned a lot from it. thanks for sharing this with us.
Thanks, Priya for sharing your feedback!
You rightly said plugins make work very easy. Thanks for this step-by-step guide for installing plugins to add social media icons. Can you suggest to me which one is better WP Menu Icons or Quad Menu?
Hi, Mason.
QuadMenu and WP Manu Icons are the best WordPress plugins for adding social media icons to a menu. But if you need a complete solution, you need to go with QuadMenu. It is a mega menu plugin, and you can do more than adding social media icons. The premium version plugin will give you more unique features.
Thanks for your reply. I really appreciate it.
Its a Great Important post.Thank You so Much Sharing your post.