
How to Add WooCommerce AJAX Product Filters
Do you want to create AJAX product filters for your site? You have come to the right place. In this article, we will show you how to add WooCommerce product filters to improve the shopping experience in your store.
Before we have a look at the process of creating and adding product filters, let’s better understand what AJAX product filters are and why you need them.
What are AJAX Product Filters?
Product filters help the user find their desired product quickly by establishing requirements and filtering out all the unwanted results. For example, if a customer wants a blue T-shirt, they will select a T-shirt as the type of product and the blue color filter to discard all the other products and colors. Similarly, there can be filters for size, weight, price, average rating, and so on.
The term AJAX refers to a technique of web development that allows the page to be updated asynchronously for small amounts of data. This lets the site apply minor changes to a web page while staying on the same page, meaning that no refresh is required. Conversely, with older techniques, the entire web page had to be reloaded every time there was any minor change affecting the user experience and consuming more server resources.
Why Should You Use Product Filters?
Now the question that arises here is why you should use product filters in your store? Simply put, you need product filters to improve your customers’ shopping experience and help them find what they’re looking for. Nearly every online store with a large number or variety of products makes use of product filters. Amazon, eBay, and Zara are good examples of this.
By using filters, shoppers can easily discard all the unwanted results and get a selection of only the products they are interested in. This results in better customer satisfaction which leads to more conversions and sales.
On the other hand, without AJAX product filters, customers may have a hard time finding out the products they want. Shopping online should be quick and easy, so if the process takes too long, customers will leave your store and go to a different site that offers a better experience.
As you probably don’t want to lose your customers, product filters should be an important part of your online business strategy.
So, now you know their importance, let’s see how you can enable product filters in your WooCommerce store.
How to Add WooCommerce Product Filters
In this tutorial, we will show you two different ways to add product filters to your store.
- Default WooCommerce product filters
- Using a third-party plugin
Let’s have a look at both methods.
1. Default WooCommerce Product Filters
By default, WooCommerce offers a few basic product filters. If you have a relatively small store without a wide variety of products, you may find that the default filters are enough for your needs.
To add these filters to your store, just go to the WP Admin Dashboard and navigate to Appearance > Widgets. There you will find a list of all the available widgets for your site.
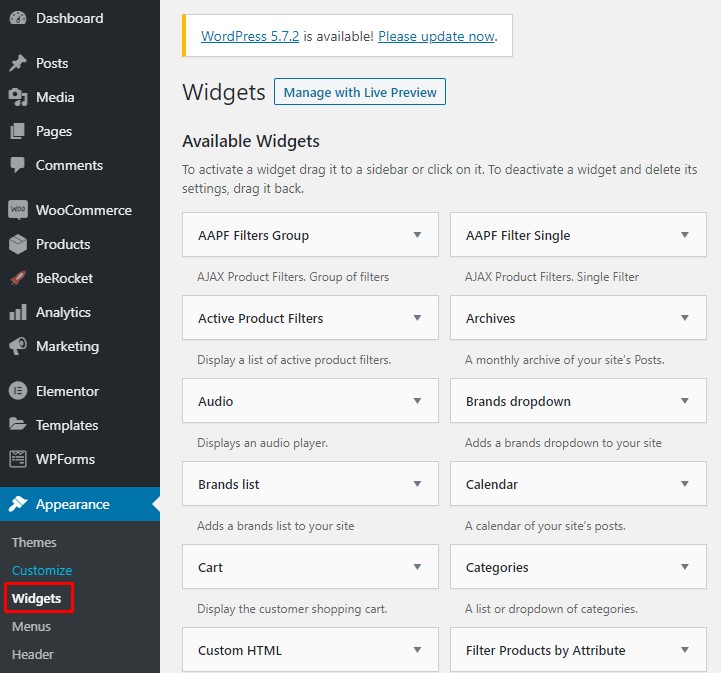
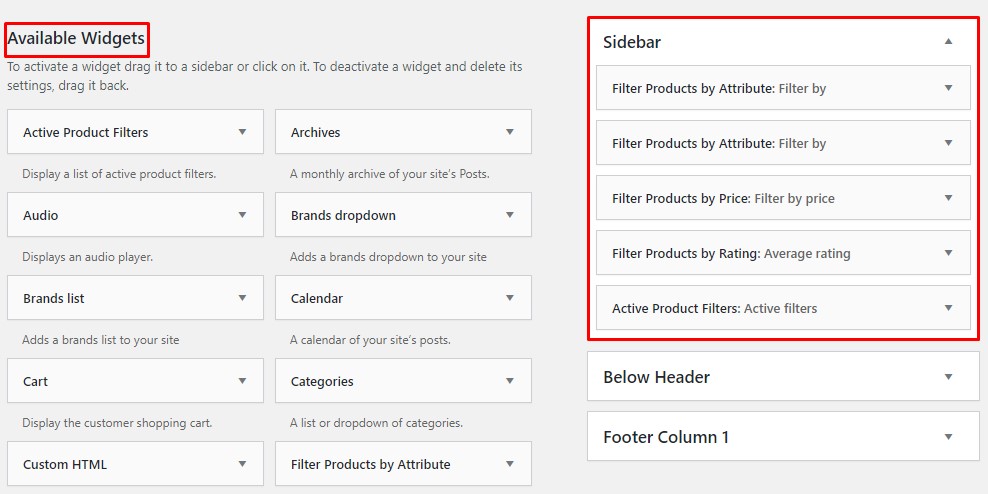
If you have WooCommerce enabled, you will find the default product filters in the widgets list. Just click and drag your desired filter widget to any of the widget areas supported by your theme. In our case, we will add the product filters to the sidebar.
That is literally all you need to do to add the default WooCommerce product filters to your store.
Default product filters
By default, there are three kinds of product filters: price, attribute, and average rating.
- Filter by Price: Adds a slider that you can use to filter products based on the price range
- Filter by Attributes: It allows you to filter items based on their attributes such as size, weight, color, and more. Note that you will have to add a separate widget for each attribute
- Filter by Average Rating: As the name suggests, you can filter products based on their average rating
Since the WooCommerce default product filters come pre-configured, you don’t need to set them up. Just drag them to a widget area, and that’s it. However, their options are quite basic, so they don’t offer many customization options to edit fonts, shapes, or sliders.
Even though the default WooCommerce product filters will do the job for most users out there, there is a catch. Each time a customer selects a filter, the entire page needs to reload for the change to be applied. As you can imagine, this is annoying for the users and affects their shopping experience. That’s why you should add AJAX product filters.
Unfortunately, WooCommerce doesn’t support AJAX filters by default, so you have to rely on third-party plugins.
2. Using a Third-party Plugin
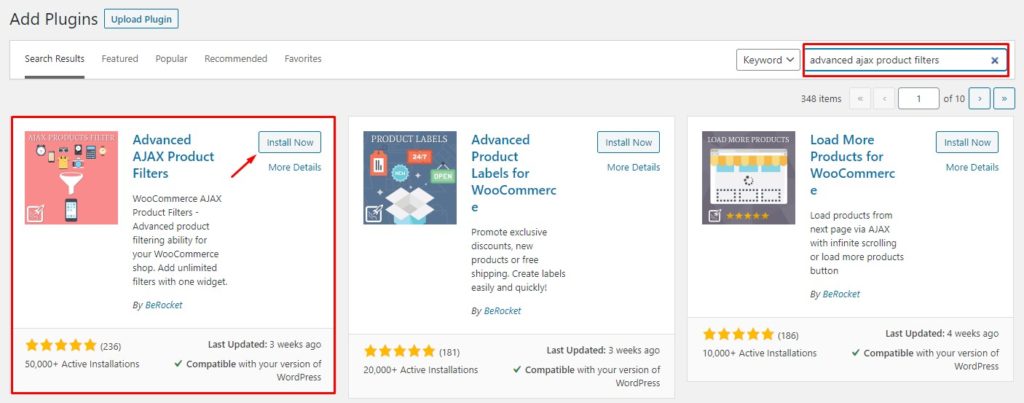
There are several tools you can use to add WooCommerce product filters. For this tutorial, we will use Advanced AJAX Product Filters developed by BeRocket. This is a freemium feature-rich tool that ensures a smooth user experience.
The plugin specializes in AJAX product filters and offers a wide variety of filters with custom styling to match the look and feel of your store. It also allows individual and group filters, and you can set your general preferences that will be valid for both filter types.
Now let’s see how you can add this plugin to your WooCommerce store.
Step 1: Install the Plugin
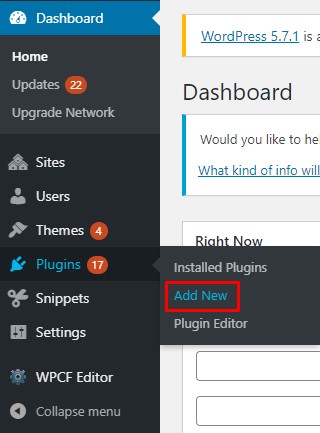
First, you need to install the plugin. For that, go to the WP Admin Dashboard and navigate to Plugins > Add new.
Search for the Advanced AJAX Product Filters by BeRocket. Click on the Install button to install the plugin and then activate it.
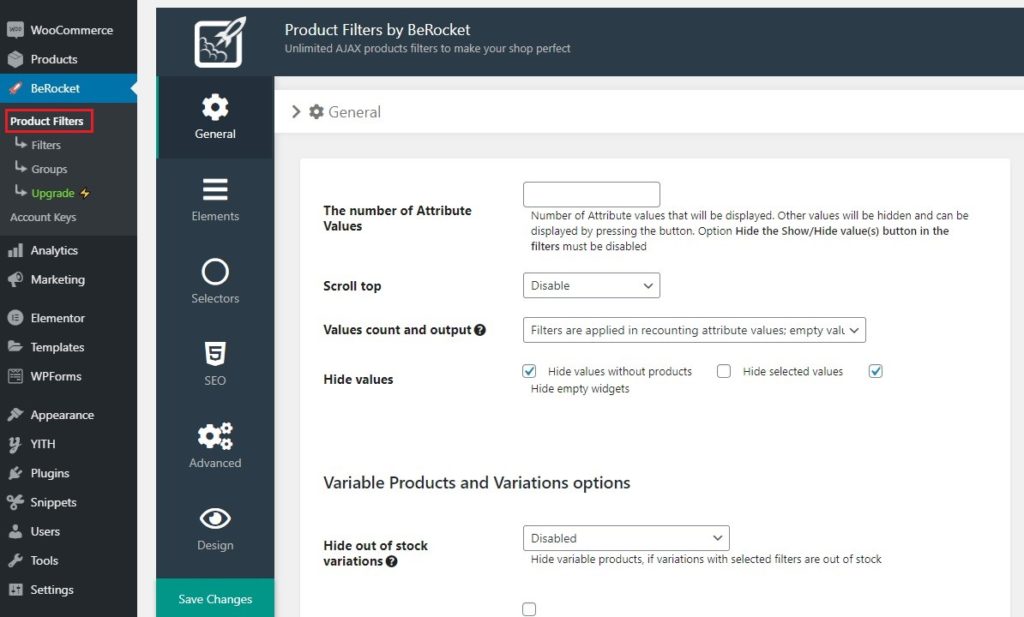
After that, go to BeRocket > Product Filters where you will be able to set your preferences for the filters. These aren’t technical settings but rather general preferences and customization options that you can configure as you like. You can select the number of attribute values, hide values, and more.
Now that you have installed and configured the plugin, let’s create your first filter.
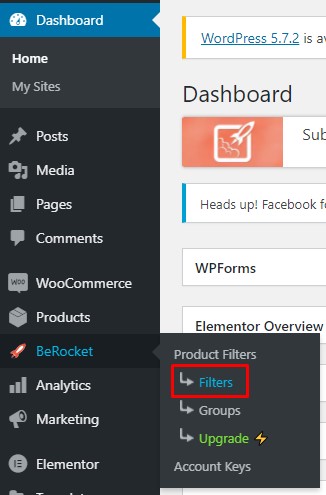
Step 2: Create a New Product Filter
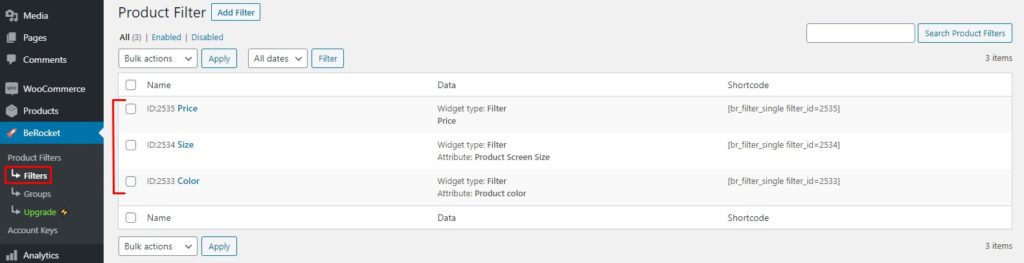
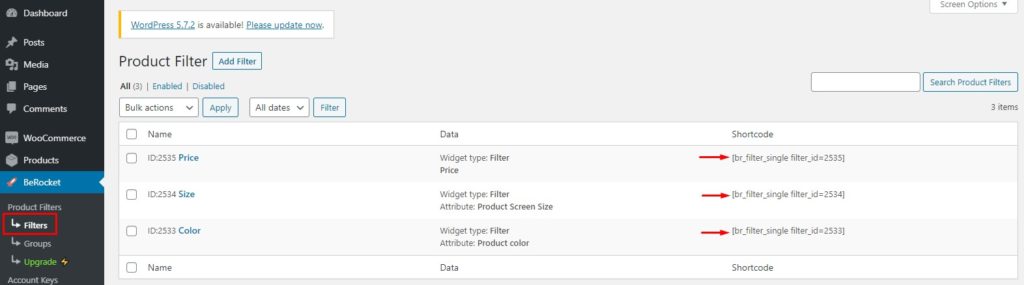
To create a product filter, head to the WP Admin Dashboard and go to BeRocket > Filters.
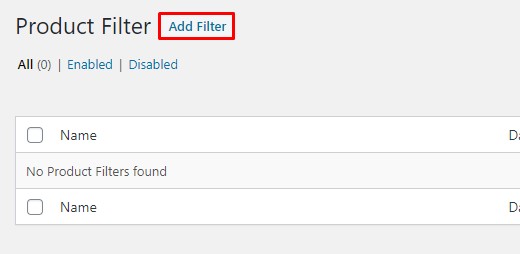
On the settings page, press the Add Filter button.
A new settings page will appear and you will have to fill in all the details to create a filter. There are multiple sections that you need to fill, so let’s have a look at them one by one.
- Title: Give a meaningful title to your filter, so it’s easy to understand, e.g., size, color, rating, and so on
- Conditions: You can set conditions to display the filter on certain pages, products, or categories. You can add multiple conditions and even add nested conditions as well. You can also hide the filter on certain types of devices such as mobile, tab, or desktop
- Widget Type: Here you need to select the kind of filter you want to create. There are four types to choose from: Filter, Update Products Button, Reset Products Button, and Selected Filters Area
- Attributes and Values: Specify the attribute for the current filter
- Style: Style and customize the filter. You will get multiple layouts to choose from such as checkbox, drop-down menu, color box, slider, and more
- Required Options: Provide all the available options under this filter. For example, provide all the colors available for the color filter
- Additional: This section only contains preferences. There are several options that you can set as per your requirements
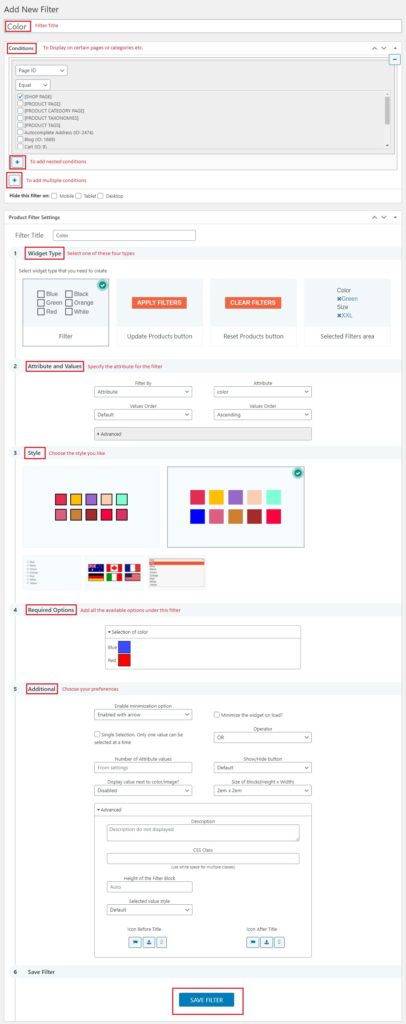
Once you have filled out the form, click on the Save Filter button to create the filter.
Manage your filters
Then you can navigate to BeRocket > Filters to find all your created filters in one place. From this page, you can edit, enable, disable and even remove any filter you want.
Congratulations! You have now created your first WooCommerce product filter using a plugin. Similarly, you can create as many filters as you need to improve your customers’ experience.
But that’s not it! You have created an individual filter for now, but you can take it a step further and create filter groups. With this plugin, you can merge filters with similar attributes into one group. For example, size, weight, and color can be combined to create one filter group called Physical attributes. Filter groups are easy to manage and keep your sidebar organized in case you have too many filters.
Now let’s see how to add product filter groups in WooCommerce using Advanced AJAX Product Filters.
Step 3: Create a Filter Group
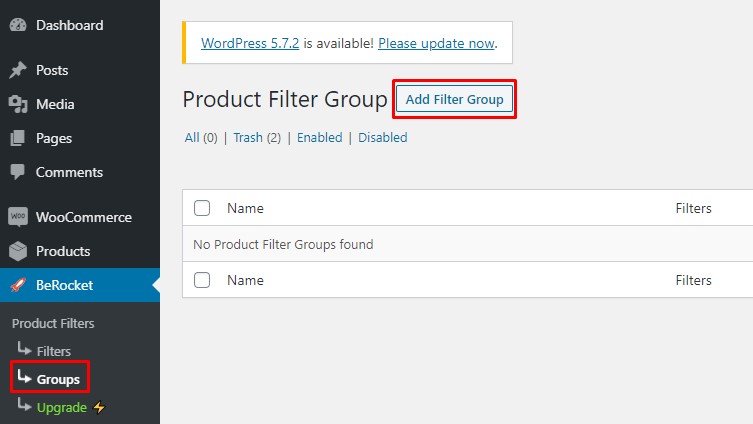
In your WordPress dashboard, navigate to BeRocket > Groups and click on the Add Filter Group button to create a filter group.
On the settings page, fill out the Add New Filter Group form just like you did before for the individual filters. This one is slightly different, so let’s have a look at the options:
- Title: No secrets here, just give your filter group a clear and meaningful title
- Conditions: Set the conditions if you want to display the filter on specific pages or categories. You can add multiple conditions as well as nested conditions. You can also choose to hide the filter from a particular device
- Group Settings: You can choose which individual filters you want to add to this group. Select the desired filter from the drop-down menu and press Add Filter to add it to the group. Similarly, you can add as many filters as you want
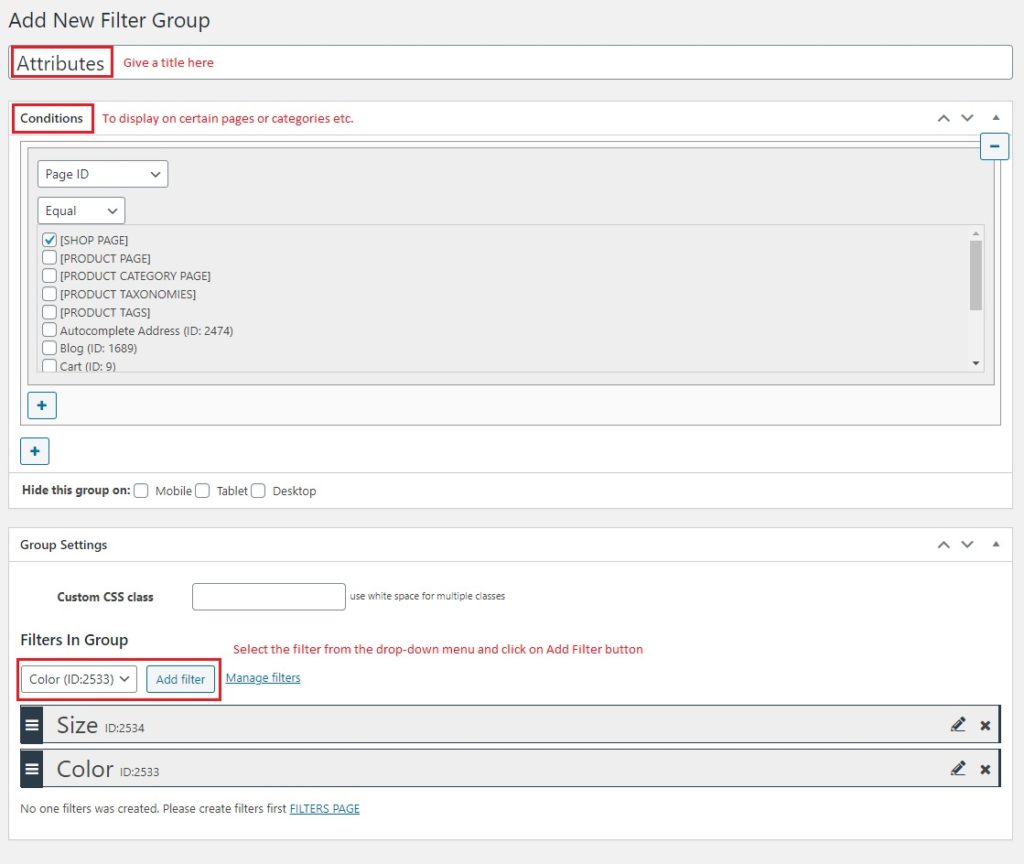
Once you’re done, click on the Save button on the top-right corner to save the filter group.
Now you can navigate to BeRocket > Groups and have a look at all your filter groups in one place. You can also manage, edit or remove groups from this page.

Now that we have created them, it’s time to display these filters on the shop front-end.
Step 4: Display the Filters
In your WP Admin Dashboard, head to Appearance > Widgets.

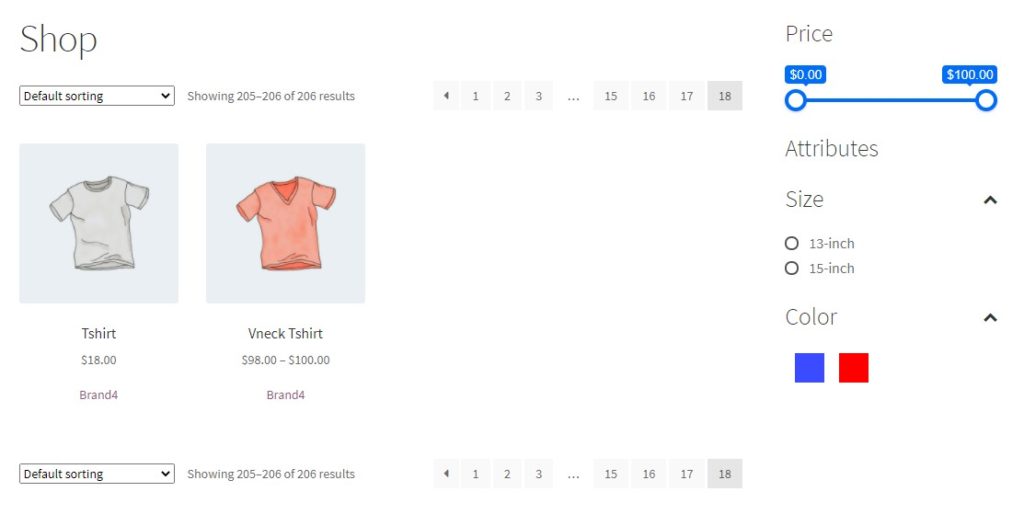
Locate the AAPF Filters Single and AAPF Filters Group widgets and drag and drop them to your desired widget area. Note that you will have to add the widget for each filter separately. Select the filter you want to add to this widget and click Save.

Bravo! You did it. The filters are now displayed on your store’s front-end in the corresponding widget area.
However, there’s something else. this is not the only way to add product filters to your WooCommerce store. If you want to display the filters in some other area apart from the widgets areas, you can use shortcodes.
Step 5: Display the Filters Outside the Widgets Area Using Shortcodes
Each filter has a shortcode that you can use to display it anywhere on your site. Go BeRocket > Filters and you will find the shortcodes for each filter. Just copy the shortcode for the filter you want to display.
After that, go to the page/post where you want to display the filters, click on the + icon on the top-left and search for the shortcode block. Then select the shortcode widget icon to add a shortcode area to your page/post.
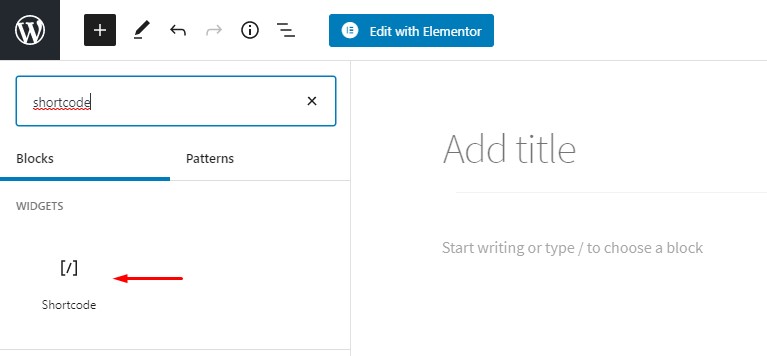
Now paste the filter shortcode you just copied in the shortcode area and press Update/Publish on the top-right corner to make the changes live.
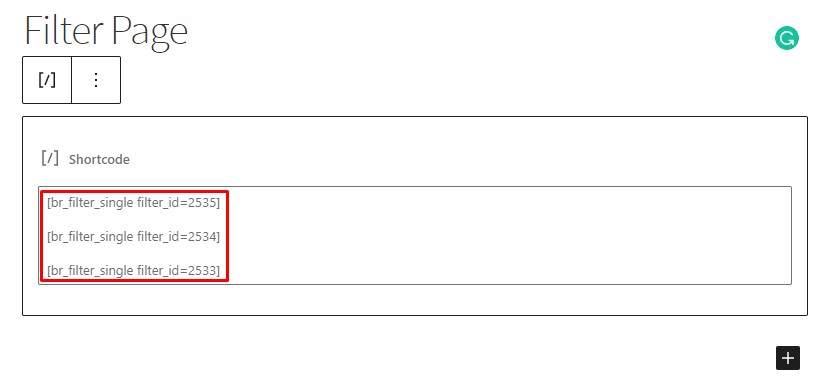
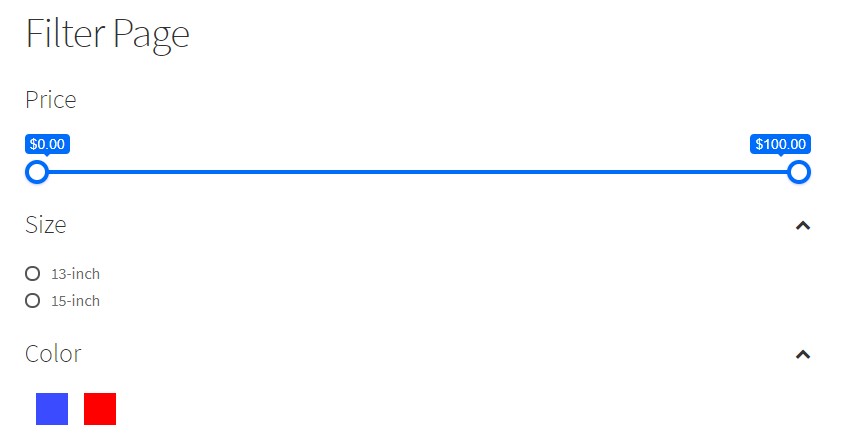
That’s it! The filters will now be displayed at your desired location. You can navigate to the front-end to see the changes.
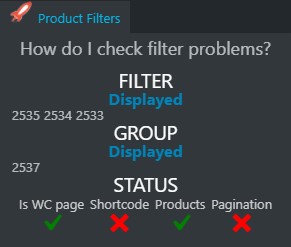
Step 6: Identify Problems with the Filters
Just hang on a little more! There is another nifty little feature of this plugin that we’d love to mention. This WooCommerce products filter plugin provides you with a handy tool to let you know about the status of your active filters. Moreover, it tells you if there are any issues with a particular filter and the reason behind it, so you can fix it and get it working in no time.
To use the active filters status tool, log in to your WP Admin and navigate to the front-end where the filters are displayed. On the top black bar, you will see the Product Filters tab with a rocket icon. Click this tab, and it will display all the useful information.
All Done! Congratulations! You can now successfully create, update, and display product filters on your WooCommerce store and also beware of any possible issues with the filters.
Conclusion
All in all, WooCommerce product filters are a must if you have a large number of products or a diverse range of products. They are very convenient for the customers as they help them find the products they’re looking for quicker and improve their shopping experience.
As a store owner, customer satisfaction is of utmost importance and it can help you boost your sales. On the other hand, if your shoppers can’t quickly find what they want, they will probably leave and don’t come back.
In this tutorial, we’ve seen how you can add product filters to your WooCommerce store and make sure users find what they want.
In summary, we have learned:
- What are AJAX product filters?
- Benefits of WooCommerce product filters
- How to Add WooCommerce product filters
- Default WC product filters
- Using a third-party plugin
Have you tried adding product filters to your store? Which method did you use and how was your experience? Let us know in the comment section below.
