
How to Add WooCommerce Flat Rate Shipping : Beginner Friendly Guide
Setting up easy-to-understand shipping fees and managing them based on your shipping expenses can be tricky, especially if you run a large business with different product sizes, weights, and dimensions. For that reason, we at QuadLayers have brought you our guide on how to add WooCommerce flat rate shipping.
This guide will cover how you can add clear and transparent shipping rates for your store while ensuring that you don’t take a negative hit to your profits off your shipping expenses. But first, let’s talk about flat rate shipping and why you should consider using it.
What is Flat Rate Shipping?
Flat rate shipping is when you apply fixed pricing for your shipping charges. That means that the shipping costs remain the same regardless of the item’s weight, volume, or dimensions. In WooCommerce, you can go the extra length to provide a specific shipping cost to all customers from a shipping zone.
For example, all your customers from North America might have to pay $20 for shipping, while you can set your shipping rate to $30 for European customers. This allows customers to pay a specific price for their entire order instead of paying separately for each item based on different values or percentages.
Why add Flat Rate Shipping in WooCommerce?
Setting up multiple methods and more accessible shipping rates is important to help you convert more sales. Flat rate shipping is one of the three methods you can set for shipping rates in WooCommerce. With flat rate shipping, you can change shipping rates based on your customer’s location allowing less shipping charges for more accessible and closer locations.
Additionally, the shipping costs to run a store may differ based on your requirements. Some stores need to ship more often daily, while others ship less but might be charged more. Thus it is crucial to set up specific flat rate shipping for certain items and different rates based on your business.
This is why we’ve brought you our guide on how to add flat rate shipping in WooCommerce. Our guide today will cover how you can set up flat rate shipping methods, set up shipping classes and zones, and even use a plugin to provide much more adaptive and flexible shipping rates. So let’s get right into it.
How to add WooCommerce Flat Rate Shipping
You can add flat rate shipping in WooCommerce using two major methods.
- Default WooCommerce Dashboard
- Using a Plugin
We’ll go through each of these methods in this article. But you can select the process that you find the most convenient.
Add Flat Rate Shipping from WooCommerce Dashboard
As we just mentioned, flat rate shipping is one of the three methods WooCommerce lets you set up. Before you set up your flat rate shipping method, you need to set up specific Shipping zones. Then, you can specify which regions you’d like to ship to and what rates to apply to these regions. So let’s quickly set up your WooCommerce shipping zones.
1. Create a WooCommerce Shipping Zone
To create a shipping zone, you need to open your Shipping zones setting by clicking on WooCommerce > Setting > Shipping in your WP Admin Dashboard.
If you have any shipping zones already made, these will be listed here. If not, let’s start by clicking on Add Shipping Zone.
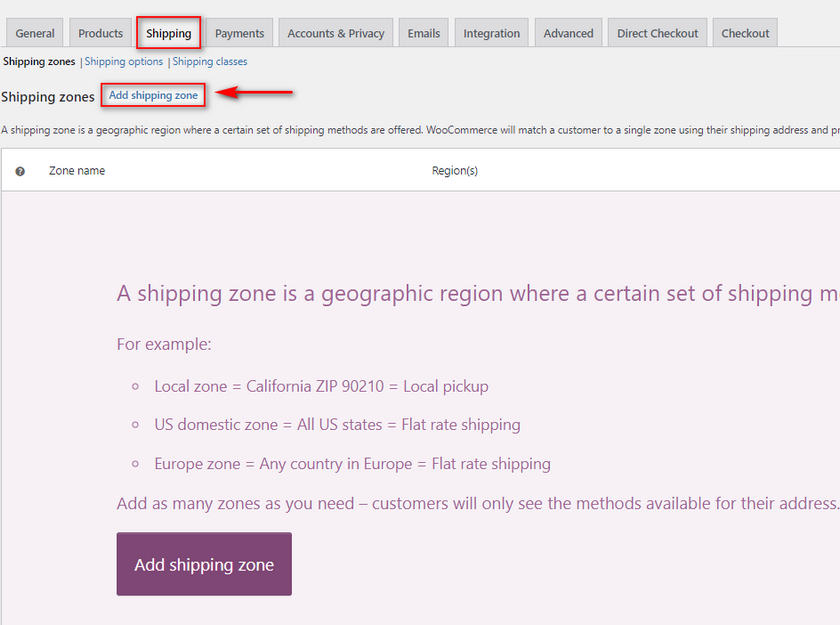
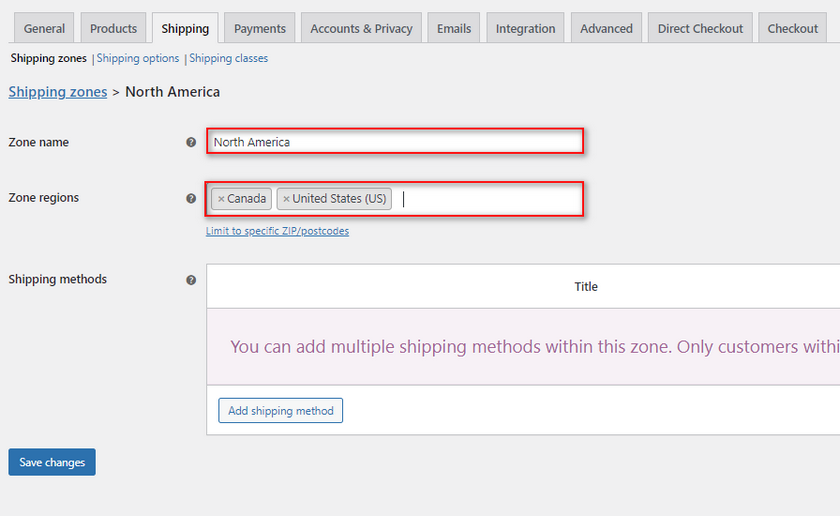
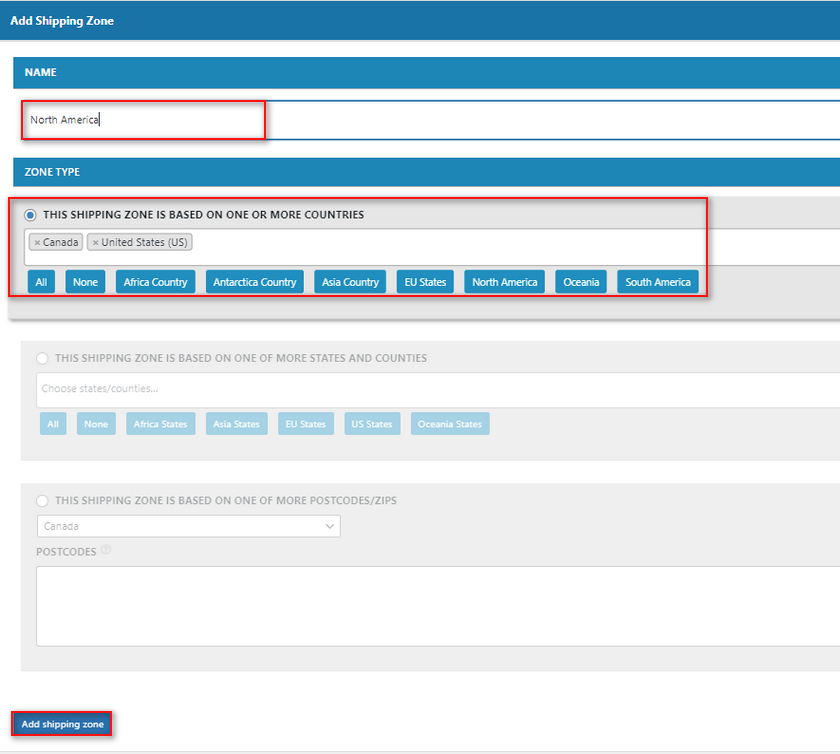
In the next window, you’ll be required to set up your shipping zone by giving it a name, which regions it operates under, and the available shipping methods.
First, let’s add a Shipping zone name such as ‘North America.’ Then, we can add the United States and Canada in the Zone regions field.
2. Add WooCommerce Flat Rate Shipping
Now, with the shipping methods, you can choose between flat rate, free shipping, and local pickup. Obviously, we will select the Flat rate option here. Now, we can add and manually configure our flat rate shipping method.
Click on Add Shipping Method and choose Flat Rate and click on Add Shipping Method. But you’re not done just yet; you need to specify the charges for flat rate shipping.
2.1. Set Shipping Cost rules
Once you add your flat rate shipping method, click on Edit to open your Flat rate settings. Here you can change the name of your flat rate shipping as well as specify your shipping costs. You can also specify whether or not this shipping charge is taxable.
Go ahead and rename your flat rate shipping method if you’d like, Then change your Tax status according to your preference.
With the Cost field, you can set a specific flat cost for your products. For example, we can set this at 20, and if your customers are from Canada or the US, they’ll be charged a flat price of $20.
After you’re done, click on Save Changes.

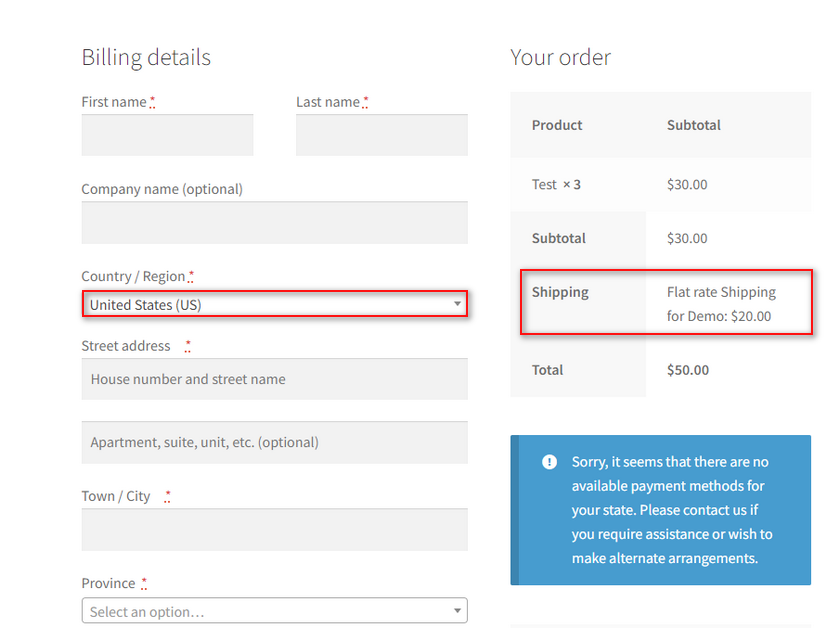
Now, if you open your store and checkout with a United States shipping location, for example, you should see this:
And that is the simplest way to add WooCommerce flat rate shipping. However, there are more than a few ways to make this a lot more flexible, even directly from WooCommerce shipping options.
3. Advanced WooCommerce Options for Flat rate shipping:
If you want to enable more advanced WooCommerce options and even per-item shipping, you can do so straight from the flat rate shipping options window.
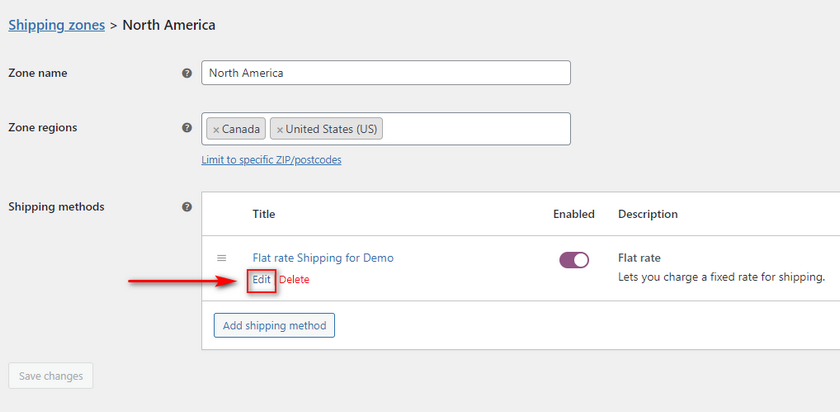
For this, open your Shipping zone and click on Edit under your Flat rate shipping.
Next, we’ll be configuring the cost field using specific variables that WooCommerce lets us use.
These variables’ placeholders are:
- [qty]: It lets you change shipping costs based on the quantity of the products so you can enable per item shipping rates.
- [fee]: It lets you add an additional shipping charge based on the total value of the cart. With the [fee] placeholder, you also have the option to set a percentage-based shipping charge, a minimum fee, and a maximum fee for the shipping charge to be applied. These attributes are percent, min_fee, and max_fee.
3.1. Enable per item-based shipping price:
Let’s start by enabling per item shipping using [qty]:
For this, you can enter a shipping charge in the cost field such as 10+ (5*[qty]). This will change the shipping cost, so you charge a $10 flat price and 5 times the quantity of the items.
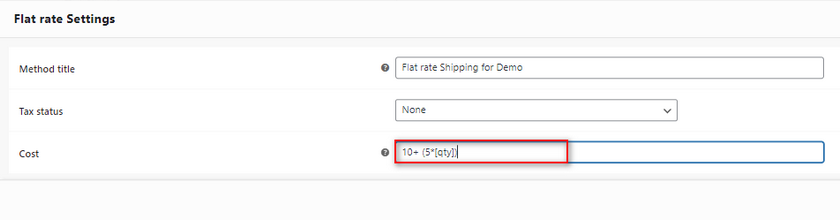
So, if you have 3 items as we do in our cart, you’ll be charged 10 + (5 x 3) = 25 like so:
Of course, you can configure the value in any way you want as long as you’re using the [qty] variable placeholder.
3.2. Enable percentage-based shipping
Next, let’s look at percentage-based shipping charges.
Using the [fee] placeholder, you can set a specific percentage of the total order value to be used for calculating the shipping rates. For this, you can also use a min_fee so the percentage charge can be applied only if the cart is above a certain total order cost.
Let’s see an example. We can use the value as : 20 + [fee percent=”15″ min_fee=”5″]
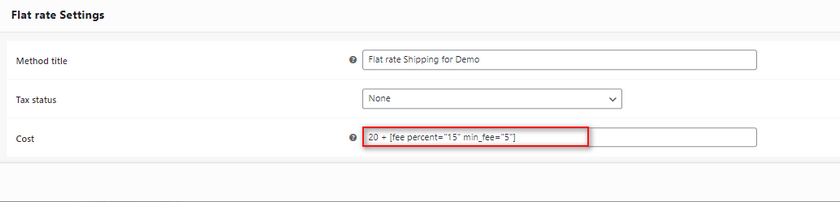
Now, your shipping rate will be applied as $20 + 15% of the total order only if the minimum total order cost is more than $5.
We can add this to our cost field as shown in the screenshot below:
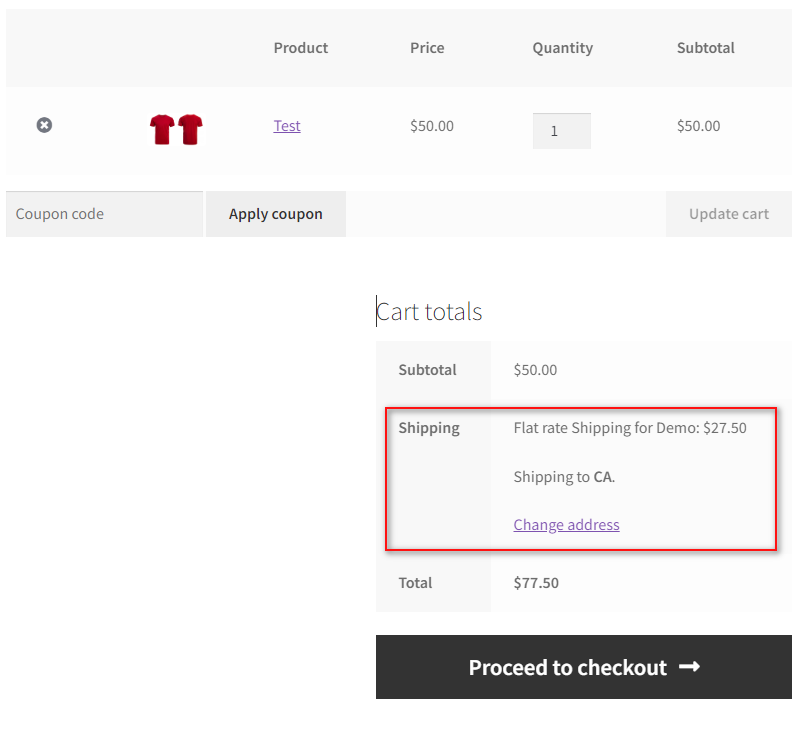
Here you can see our order cost is $50. So the applied cost is $20 + 15% of 50 = $27.5.
Now, you can configure the values or even set a max_fee so that your shipping cost doesn’t exceed a certain amount.
4. Extend Flat Rate Shipping using Shipping Classes
WooCommerce also lets you designate shipping classes and add specific products to them. Then, you can apply shipping rules and flat rate shipping to this class that is applied to all the products under the shipping class. This is exceptionally useful if you have different products with different product dimensions.
For example, if you’re selling kitchen items, you can set a different shipping cost for appliances and a different shipping rate for kitchen tools and knives. This obviously applies in different ways for different WooCommerce stores, but you get the basic idea.
4.1. Create Shipping Classes
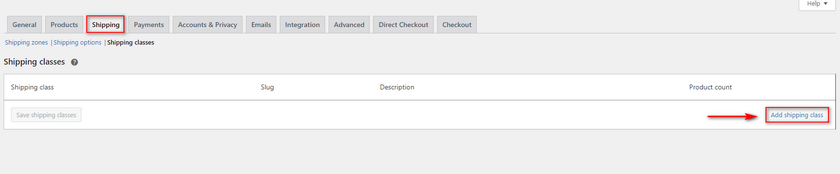
So, let’s start by creating two shipping classes for our products. Open your WooCommerce shipping class options from WooCommerce > Settings > Shipping > Shipping Classes on your WordPress dashboard.
Then, click on Add Shipping class and add a name, slug, and description for your shipping classes. Once you add them, click on Save shipping classes and you are done!
Now, enter the necessary details for your new shipping class on the respective fields. After that, all you have to do is Save the shipping classes.

As soon as you’ve added your shipping classes, go back to the Shipping zones page and click on Edit on your shipping zone. Then, edit your flat rate shipping method, and you should see new shipping class options added to this menu.
Here, you can define the flat rate shipping cost for each class and a shipping cost for items with no shipping class. Of course, you can also use the variable placeholders like [qty] and [fee] as we mentioned above if you’d like.
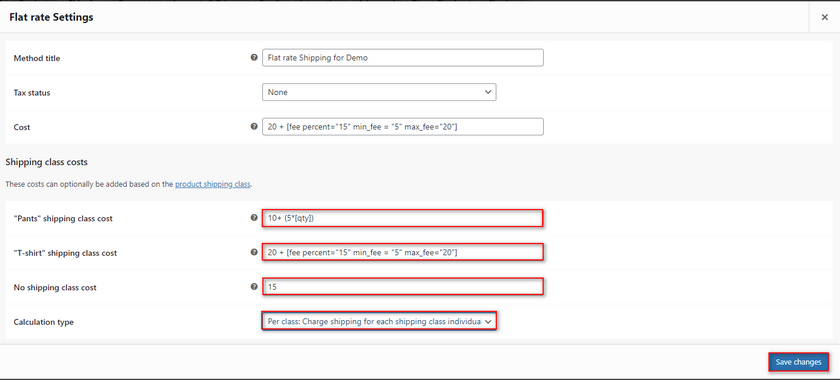
Similarly, you can also use the Calculation type option to calculate your shipping costs based on each product’s shipping class or the basis of the most expensive shipping class.
Once you set your options the way you like, don’t forget to click on Save Changes.
4.2. Add Shipping Classes to products
After you create the shipping class, you just need to add your products to it. To do this, open your Products page by clicking on Products on your Wp Admin Dashboard.
Click on Edit on any of your products, scroll down to Product data, and click on the Shipping tab.
Use the Shipping class field to add your product to a shipping class. Then, just Update your product, and save your changes.
That’s it! Your products should now have different shipping rates based on their shipping classes when you preview it on your website.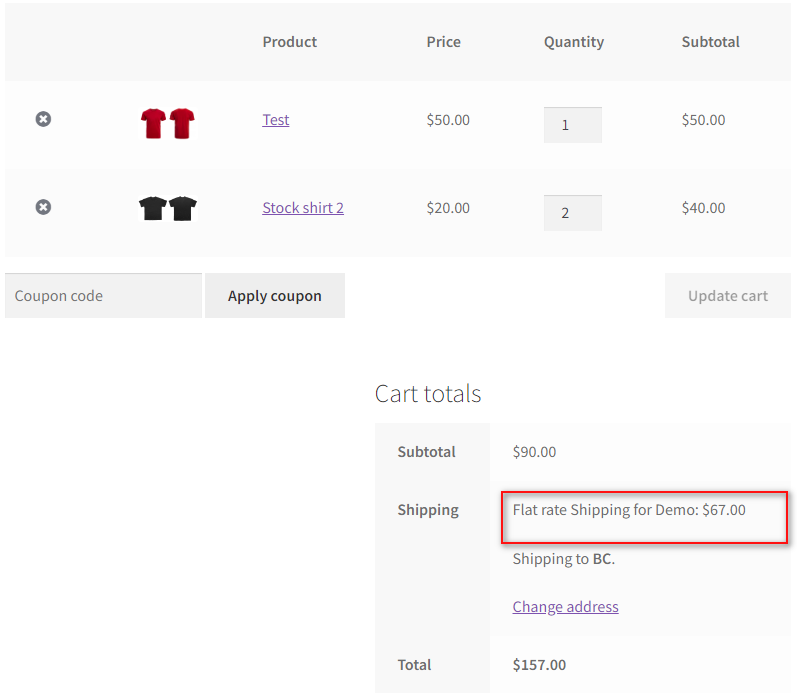
Add WooCommerce Flat Rate Shipping using a Plugin
The above processes can be done all using default WooCommerce options. But it might be difficult for users to set them up entirely on their own. Do remember that these steps are only for a specific region, and you might have to add the same or different settings for different shipping regions as well.
If you want, you can make this process a lot easier and streamlined by using a dedicated Flat rate shipping plugin.
With a flat rate shipping plugin, you can define multiple different flat rate shipping methods for different regions in a much shorter process. Additionally, you can also add flexible free shipping options as well as change flat rate shipping based on products, category, quantity, cart total, product tags, user roles, and so on.
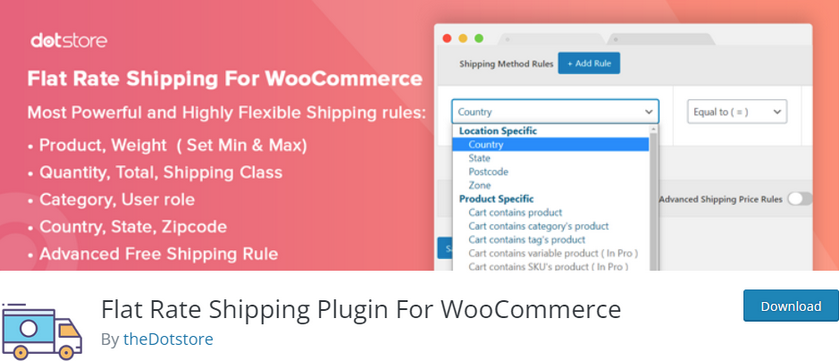
So let’s take a look at how you can add WooCommerce flat rate shipping using a WordPress plugin. For this demo, we’ll be using the Flat Rate Shipping Plugin For WooCommerce plugin.
If you choose to use a different plugin, the steps themselves should be quite similar. A quick look at the plugin’s documentation and a reference from our guide should be enough to help you cover the differences.
If not, you can always ask us for our help in the comments section. You can also refer to our list here to find a perfect WooCommerce shipping plugin if you’re in need of one. So, let’s get started by installing and activating the plugin first.
1. Install and Activate the plugin
Start by opening your WP Admin Dashboard and clicking on Plugins > Add New.
Then, use the search bar on the top right to search for Flat Rate Shipping Plugin for WooCommerce. Click on the Install button on the plugin’s tab. Then you can click on Activate to finish the activation process.
You can also activate the plugin by opening the Plugins page on your WP Admin dashboard and clicking on Activate under Flat Rate Shipping for WooCommerce.
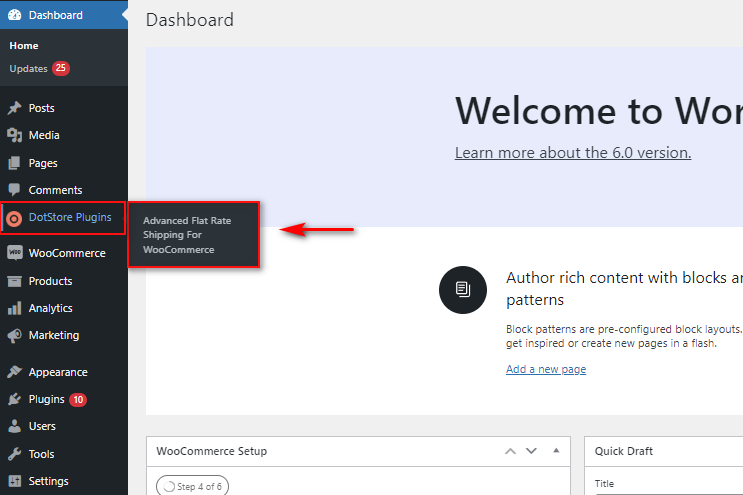
After the plugin is activated, you’ll be asked to set up the plugin as well. To start the setup process, click on DotStore Plugins > Advanced Flat Rate Shipping for WooCommerce on your WP Admin Dashboard.
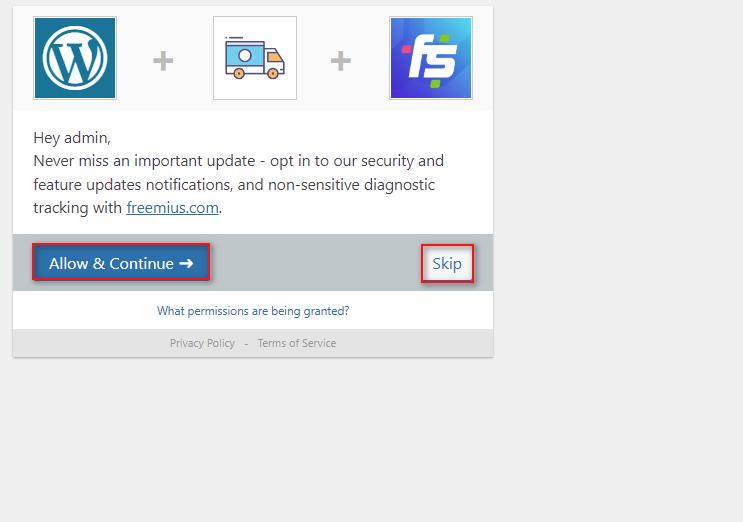
Next, you’ll be asked permission to provide you with notifications and collect nonintrusive data tracking. You can click Allow and Continue or Skip it. Either way, it will take you to the next step in setting up the plugin.
2. Configure the plugin
The basic setup of the plugin requires you to do the same as above, where we set up shipping zones and individual shipping methods. However, the entire process is much more streamlined.
2.1. Create a Shipping Zone using the plugin
Let’s start by creating a Shipping zone. Select the Manage Shipping Zones tab in the plugin’s interface. Then, click on Add Shipping Zone.
Thankfully, the process of adding a shipping zone is similar to the above for WooCommerce. Just start by giving your shipping zone a name and then choose which countries or regions fall underneath it. Once you’re done, click on Add Shipping Zone.
Alternatively, you can also use the Zone type options to choose if you want to enable zones based on specific states, counties, or even postal/zip codes. This way, you can enable shipping for specific states, say the United States or China, or just specific zip codes in your own state if you’d like.
Once you click on Add Shipping zone, you should see your newly made shipping zone on the Manage Shipping Zones window. Now that we have our shipping zones defined let’s add a shipping method to be applied for this zone.
3. Add a Flat rate shipping using the Plugin
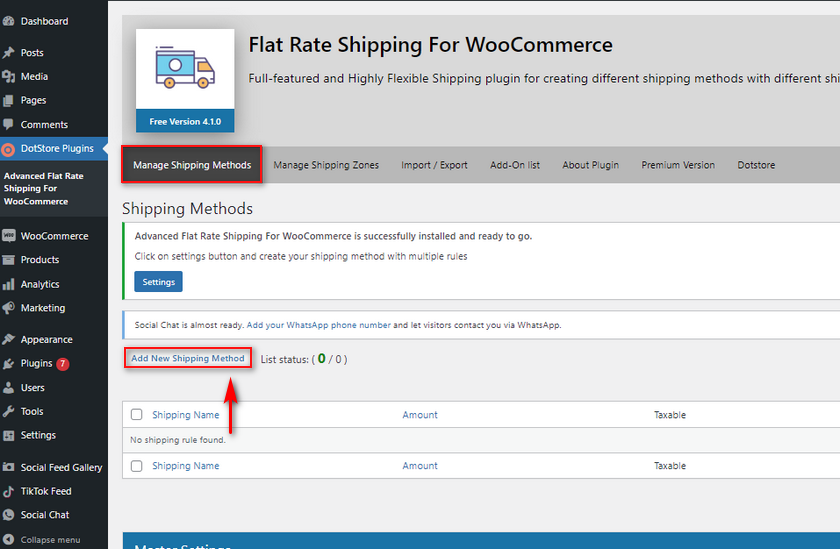
Now that you have completely configured the plugin based on your WooCommerce store, the only thing left to do is add the flat rate shipping. To do so, click on Manage Shipping Zones once again and then click on Add New Shipping Method to start.
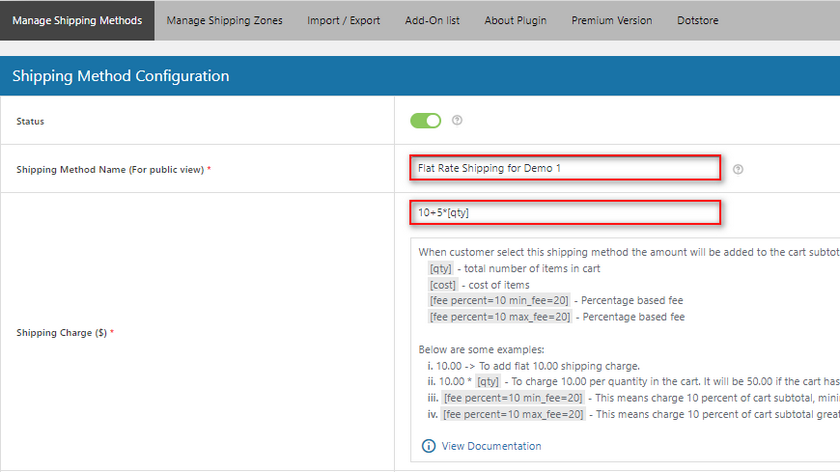
The process of adding your flat rate shipping method is also quite similar to the above but with a few more added options. First, go ahead and name your custom flat rate shipping method and set a shipping price. Similar to WooCommerce’s native settings, you can also define this price using [qty] and [fee] variables. These also work the same way as above, so let’s add our price as 10+ (5*[qty]).
3.1. Enable optional Free shipping for your flat rate shipping:
Next up, you can even choose to add optional Free shipping to your flat rate shipping if your customer’s order exceeds a certain amount or if they apply a coupon. Let’s just enable the option for now and set the free shipping based on the field to the Minimum order amount. Then, use Free Shipping Order – Amount to set a value.

Once your customer’s total order exceeds this value, the plugin will provide free shipping to your customers as an option.
The plugin also comes with additional options such as :
- Tooltips: So you can add tooltips and tooltip descriptions to your shipping method. This gives your customers more clarity on how your shipping charges are calculated and additional details regarding free shipping.
- Show only for logged-in users: If this option is enabled, only your logged-in users will be able to see this specific shipping method.
- Default Selected Shipping: If set to yes, the current shipping will be selected automatically in your cart.
- Is Amount Taxable: This option lets you specify if the shipping amount is to have tax applied or not.
And these are the basic options for adding your flat rate shipping. You can also apply specific shipping charges for each shipping class item directly from this page. All the shipping classes you have already created for WooCommerce will be shown here, along with their respective shipping prices.
You can also set your calculation type, so it calculates prices based on individual items and their classes or chooses the item class with the highest current pricing.
3.2. Add and customize Shipping Rules
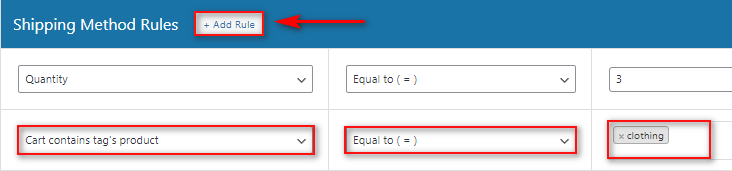
The plugin also has options to let you add multiple shipping methods and shipping price rules if you’d like from the same menu. So, for example, if you want the current shipping method only shown when the total quantity of cart items is more than 1, you can set the shipping condition to Quantity. Then, use the parameter field in the middle to Greater than and set the value field as 1. The rule will apply to the shipping method only when the quantity of products exceeds 1.

Moreover, we can also add more than a single rule if we want. Now, if we want, we can add another rule to make the shipping method only if there are products with the “clothing” product tag.
Simply click on the +Add rule button and then set the parameters as ‘Cart contains product’s tag,’ ‘equal to,’ and set your appropriate product tag.
Now, the plugin will check for both conditions when your customers add a shipping address that falls under your shipping zone. Finish up by clicking on Save Changes, and you should be done.
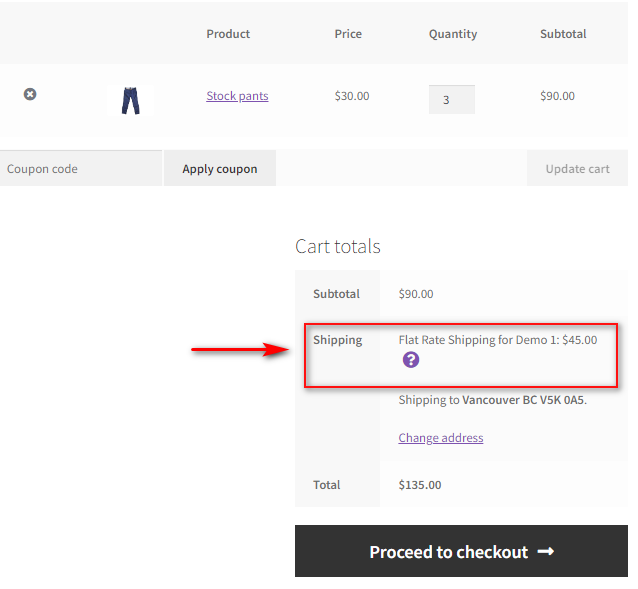
As long as your cart fills in the right shipping conditions, you should see your new flat rate shipping method available for you in your cart or checkout.
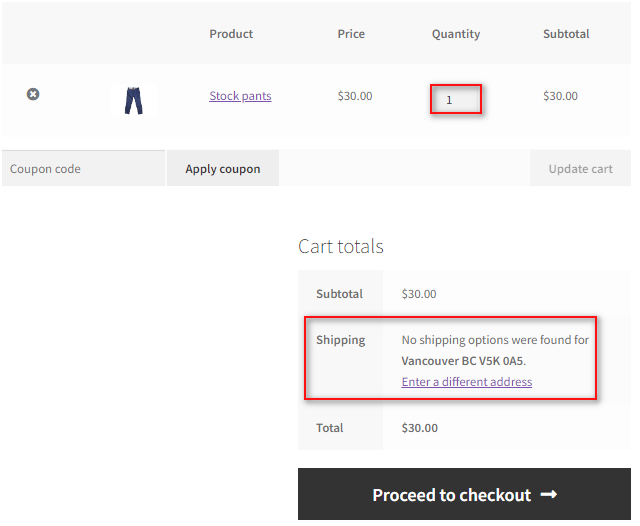
For example, if we change the quantity to 1 or add a product that isn’t in the cart, you shouldn’t be able to see the shipping method:
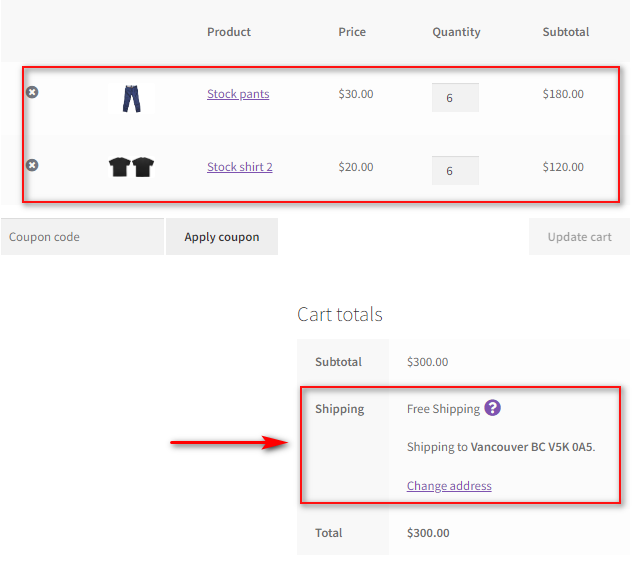
And of course, if we exceed the total order value of 200, we should see free shipping as an option as well
Bonus: How to add multiple Shipping methods using the plugin
Using the same plugin, you can also add multiple different flat rate shipping methods for your customers as well. This can help you to provide the option for a more expensive or cheaper option too. For example, you can add a priority shipping payment to deliver in a shorter time or a cheaper shipping option to deliver over additional days.
Additionally, you can simply add another shipping method by clicking on Add New Shipping Method in your plugin’s interface.

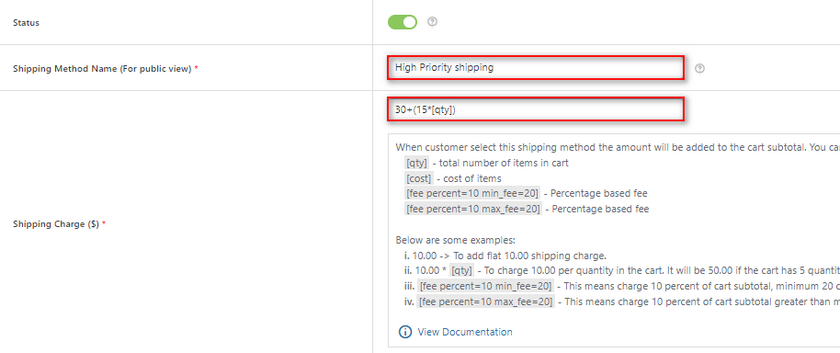
For this method, we’ll be naming it High priority shipping and adding a higher cost to it as 30+(15*[qty]).
Set your shipping class prices and click on Save Changes.
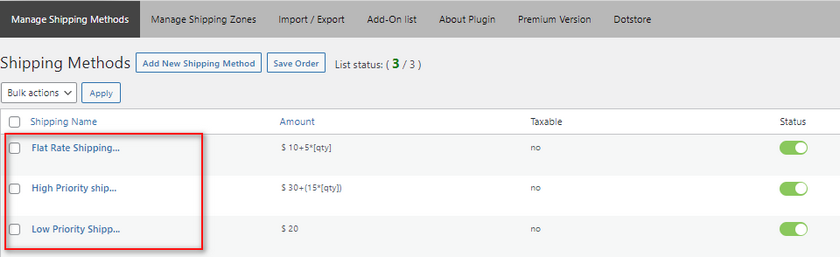
Now, under Manage Shipping methods, you should see two different shipping methods listed.
You can enable or disable them anytime you want. Additionally, we’ll add more options for our multiple shipping options.
Right under your list of shipping methods, you should see the Master Settings fields. These fields let you customize how these shipping methods appear to your customers. Using these fields, you can:
- Choose whether your shipping methods appear as radio buttons or a dropdown field.
- Force your customers to choose a shipping method.
- Show the number of methods on the Advanced Flat Rate shipping methods page.
For our demo, we’ll be changing the Shipping display mode to display shipping with radio buttons and enabling the force customers to select a shipping method option.
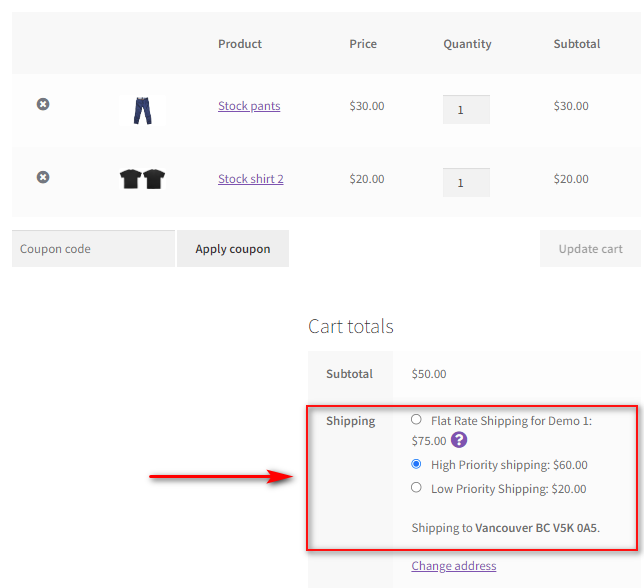
Now, you should have multiple shipping methods displayed to your customers.
Conclusion
And that ends our guide on How to Add WooCommerce Flat Rate Shipping. It can be really helpful for you if you wish to add multiple shipping methods to your website. Let’s quickly summarize all the points we discussed today:
- Add shipping zones and flat rate shipping using WooCommerce Options.
- Use advanced WooCommerce shipping options for flat rate shipping.
- Add WooCommerce flat rate shipping using a dedicated plugin.
- Enable multiple flat rate options using a plugin.
As for our recommendation, unless you prefer using the WooCommerce Dashboard, we highly recommend using a plugin instead. Plugins tend to have a much easier process of adding flat rate shipping methods. There are more options available, too, like flexible free shipping, weight-based shipping, and multiple shipping options. These options are more beginner-friendly and you are given the plugin and all its features in a single place instead of multiple different tabs and pages.
Therefore, if you’re more of a WooCommerce beginner, we highly recommend sticking with a plugin such as Advanced Flat Rate shipping or any other excellent shipping plugin that you can find.
Similarly, here are some more beginner-friendly guides on customizing your WooCommerce checkout and shipping experience. So why not check out some of them:
