
How to Add WooCommerce Product Countdown
Do you want an easy way to add a WooCommerce product countdown for your store? A countdown timer can help you can increase the sales of your product. It’s a great way to inform your customers about discounts, new product launches, offers, upcoming events, and many more.
In this post, we’ll show you how to easily add a WooCommerce product countdown for your online store. Before that, we’ll cover why it is important to add a countdown timer for WooCommerce sites.
Why add a product countdown in WooCommerce?
The main purpose of adding a countdown in WooCommerce is to announce sales, deals, and discounts on products. The countdown timer displays the remaining time and remaining products in the inventory which creates a sense of urgency amongst the customer.
According to the research, people take action in case of urgency because of FOMO (fear of missing out). This is also a marketing technique implemented by many online business owners. Because of the fear of missing out on the good deals, it encourages the visitors to purchase the product/service before the time runs out.
This technique is used by even the biggest eCommerce sites like Amazon, Aliexpress, and many other websites especially on festive seasons like Christmas, New Year’s day, and Black Friday.
Therefore, adding a countdown timer to WooCommerce is one of the best strategies to increase sales and boost conversion. For that, you can use a product countdown to display clearer information about your sales campaigns.
With that said, let’s jump straight into how to do so.
How to add WooCommerce product countdown?
The easiest way to add a WooCommerce product countdown is using a dedicated countdown plugin. These plugins are easy to configure and can be inserted into posts and widgets using shortcodes.
So let’s take a look at some of the popular plugins and how we can use them for your WooCommerce products first.
Sales Countdown Timer
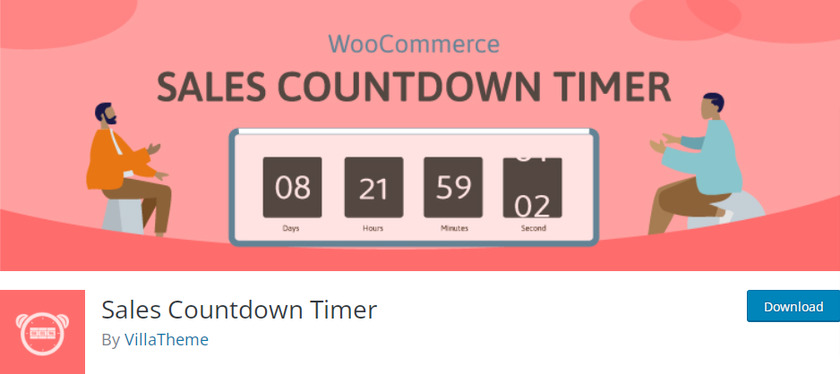
Sales Countdown Timer is a WordPress plugin that lets you create a countdown timer for your website. The plugin is very easy to configure and integrate into any project with advanced options.
It allows you to display a customizable countdown timer that can be included in a sidebar widget, post, or page via shortcodes. They can be created for a single product as well as a bulk countdown timer for variable products.
Key Features:
- Generate shortcodes
- Simple and clean Interface
- Easy font and color change from plugin options
- Auto Countdown Reset Option
Price:
Sales Countdown Timer is a free plugin. It is available on the official WordPress plugin repository.
YITH WooCommerce Product Countdown
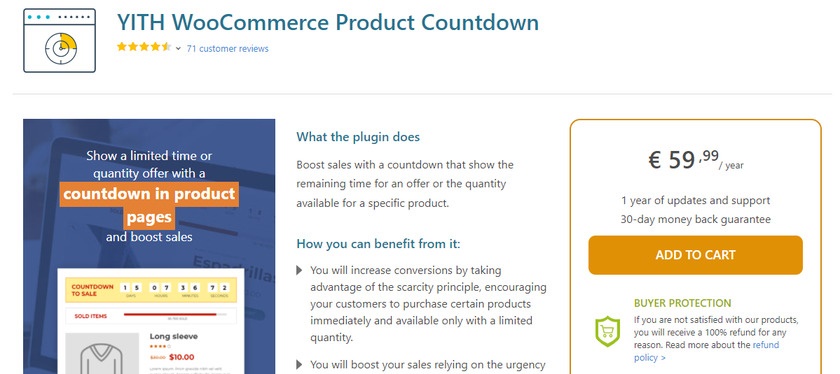
YITH WooCommerce Product Countdown is another plugin to help you boost sales on your website. It’s a perfect tool to create attention-grabbing countdown timers in posts and pages for eCommerce websites.
The is developed in HTML5 and is fully customizable. Additionally, it works perfectly with the new Gutenberg editor and you can also display the number of available or sold-out items.
Key Features:
- Create a Progress Bar
- Compatible with mobile devices
- Customizable texts and color
- Change the timer type
Price:
YITH WooCommerce Product Timer is a premium plugin that starts at a 65 USD annual fee. It includes 1 year of updates and support and a 30-day money-back guarantee.
How to use a plugin to add WooCommerce product countdown:
If you’re looking for a free option to add a product countdown for your WooCommerce website, we recommend Sales Countdown Timer as a starter. We will be using it for this demonstration too.
But before we begin, please make sure you set up WooCommerce properly using one of the compatible WooCommerce themes to avoid any theme or plugin conflicts. For now, let’s start by installing and activating the plugin.
1. Install the Sales Countdown Timer plugin
The first thing you need to do is visit the Plugins > Add New page in your WordPress admin area. Then, search for Sales Countdown Timer in the search bar.
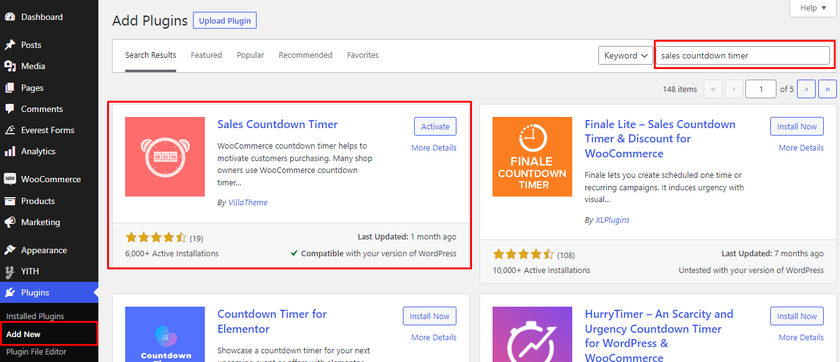
This should give you the plugin from the WordPress plugin directory on the search results. Click on the Install Now button next to the plugin. Once the installation process is completed, Activate it.
If you want to use the premium version of this plugin, you have to upload and install it manually. For more information, take a look at our detailed guide on how to install a WordPress plugin manually.
2. Configure the Plugin Settings
After the plugin is activated, you need to set up the plugin. You can find a new option “Countdown Timer“added in the WordPress Dashboard menu. As soon as you open it, you can see a toggle button that allows you to enable or disable the or even remove the countdown timer from your WooCommerce website.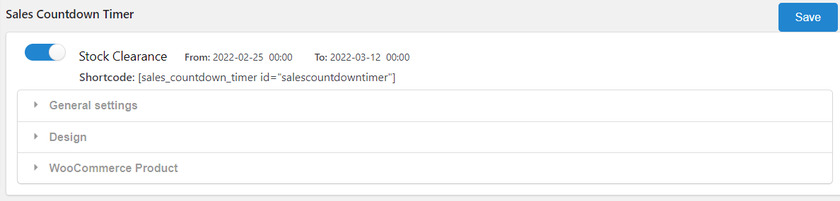
After that, there are 3 major settings to configure and set up the plugin. They include general settings, design, and WooCommerce products. Let’s see how we can configure the plugin settings.
2.1) General Settings
In the General settings, you can set a name for the countdown timer so that you can find the sales countdown profile whenever you want to add the countdown timer on the single product page. 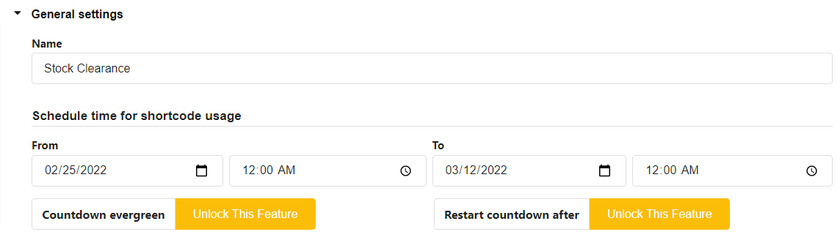
Next, you will have to set the date and time to schedule the product countdown timer.
There are some more features in the general settings like the “Countdown evergreen” and “Restart countdown after”. They are available only in the premium version of the plugin
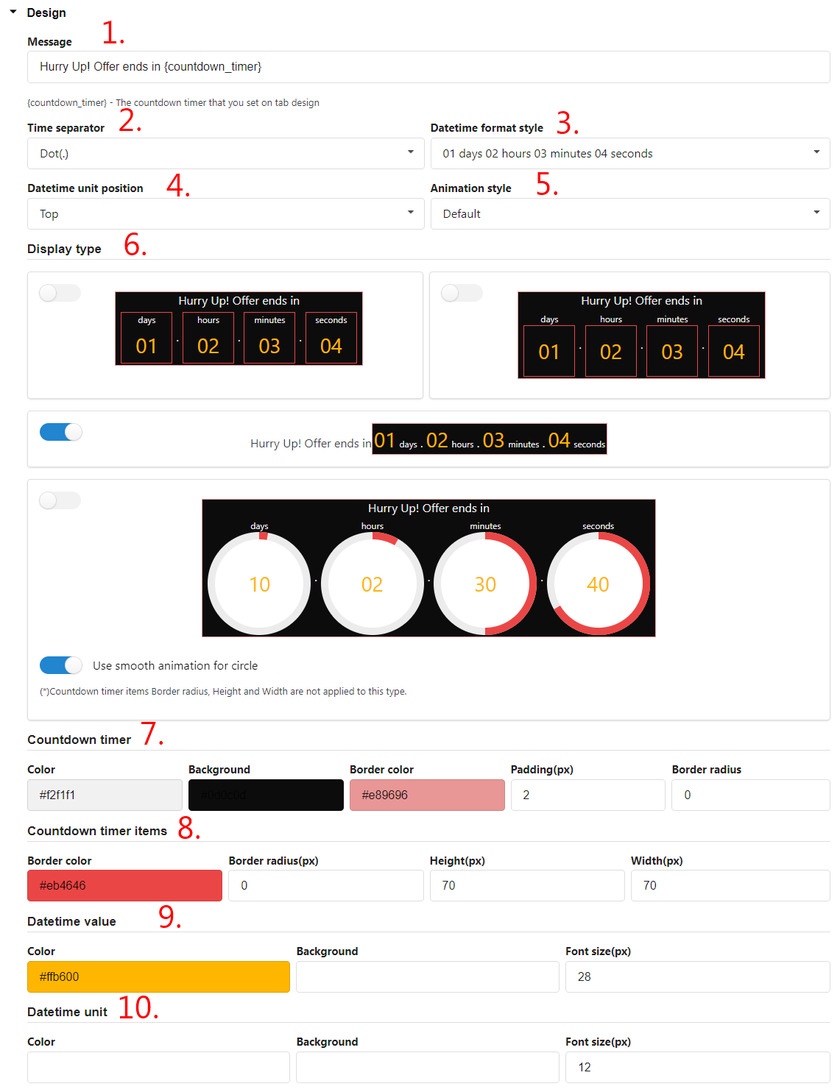
2.2) Design Settings
You can customize the overall appearance of the countdown timer in Design settings. There are altogether 10 options that you can configure to match the countdown timer to your website. They are:
- Message: Add text message which appears in the front end
- Time separator: Choose the separator like colon(:), comma(,), dot(.). between time unit
- Datetime format style: Select various format styles for time
- Datetime Unit Position: Choose top or bottom position to display time unit.
- Animation style: Choose the default or slide animation style for the Countdown timer
- Display Type: Choose various layouts for Countdown Timer
- Countdown timer: Choose a color for the background, border, padding, and border radius of the countdown timer
- Counter Timer Items: Allows to set color for counter timer items
- Datetime Value: Customize background color and font size for datetime value
- Datetime Unit: Customize background color and font size for datetime units.
2.3) WooCommerce Product Settings
Finally, the WooCommerce Product setting allows you to configure how you want the countdown products to be displayed.
You can enable a sticky timer for the products, and adjust its position on a single product or archive pages.
Similarly, if you want to display the countdown timer on the shop or the category pages, you can do so as well. The size of the timer can even be adjusted for these pages on mobile devices. 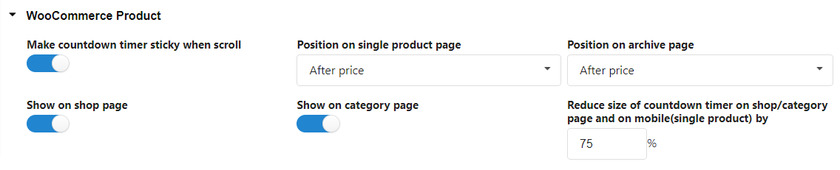
Furthermore, you can also enable a countdown timer for your upcoming sale. All you have to do is add a customized message for it to your website. 
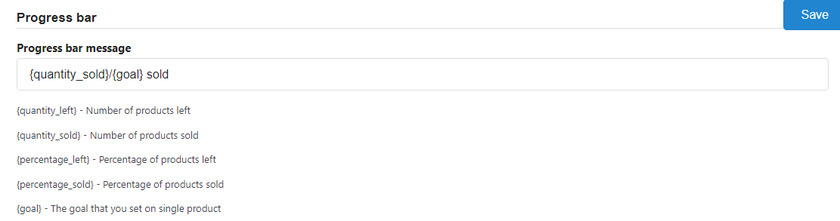
Lastly, you also get progress bar options for your countdown timer. You can configure these settings to see the availability of the product along with the order status of the products. Not only that, but you can also customize the design of the progress bar.
The first thing we can see in the progress bar is a section with a progress bar message. Here you can configure the message with the help of shortcodes like {quantity_sold}/{goal} sold
Next, we can see how many of your products have been sold by selecting a progress bar type. There are two options which are increase and decrease. If you select the increase option, your product bar is filled with every purchase of the product.
Besides the progress bar type, you can also see the “Order status” option. This option lets you select an order status first and only the selected order status will be counted in the progress bar.
You can also select the position of the sale progress bar. There are two positions where you can display the progress bar which is above and below the countdown clock. 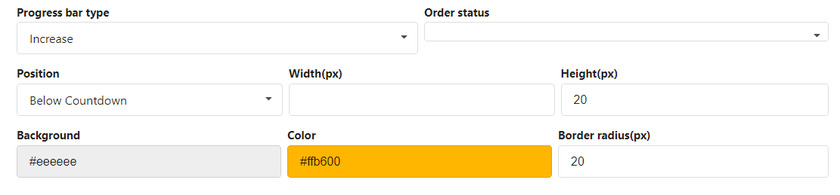
For the last configuration, you can change the text, background, and border-radius color of the progress bar.
3. Add WooCommerce Product Countdown Timer to Single Products
After the configuration, you can now easily add a countdown timer to your WooCommerce products directly from the edit order page. Just go to Products > All Products from your WordPress dashboard. Here you can see all of your products. You can either click on Edit or select the product in which you want to set the countdown timer 
This leads to the product edit page. Then, scroll down where you can see Product data with several options in the dropdown. Since we are adding a countdown timer to a single product, you should select ‘Simple product‘ from the dropdown. 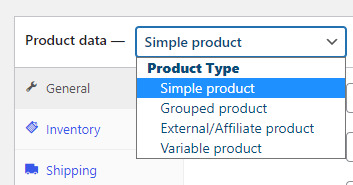
In the General settings, you can set the regular price along with the sale price. Below that, click on the Schedule option after the Sales Price option. We can see additional countdown timer settings where you can set a date and time for the countdown. 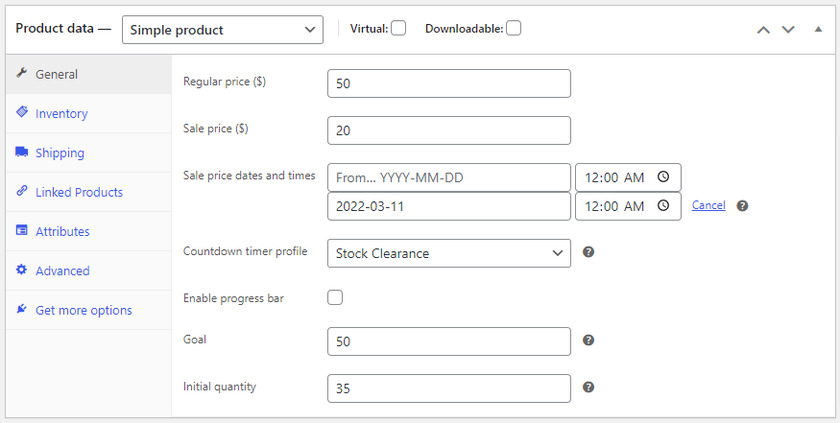
Moreover, you can also select the countdown timer profile that we created while configuring. In our case, it’s “Stock Clearance”. You can name the profile name according to your sales campaign.
The progress bar can also be enabled from here by checking the box.
Then, all you have to do is set a goal and initial quantity which lets your customers know how much of the product has been sold or is available. Once you are done, click on the Update button. As a result, you can see that the counter timer is displayed on the product page. 
3.1) Add WooCommerce Product Countdown Timer to Single Page with Shortcodes
If you want to add WooCommerce product countdown to other WooCommerce pages instead of products, you can simply use shortcodes. They are provided on the CountDown Timer settings page. Just copy the shortcode. 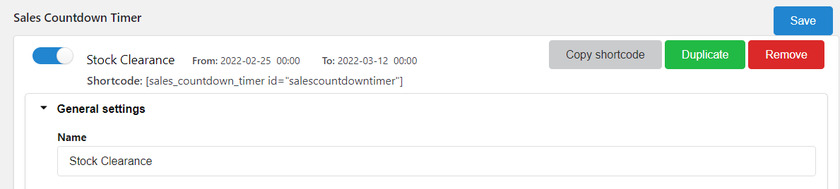
Now all you need to do is edit the page where you want the product countdown to be displayed. Then, paste the shortcode here.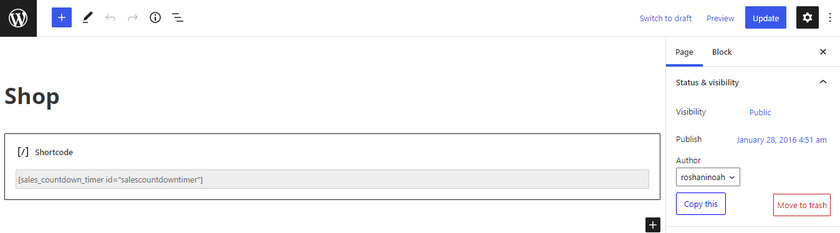
Finally, click on Update. If you preview the page you can find the countdown timer on the front-end of the page. 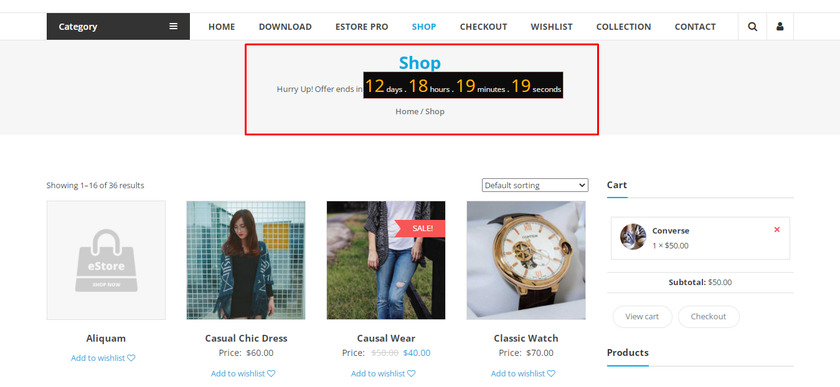
4. Add bulk sales countdown timer for variable products
We saw how we can add a WooCommerce product countdown timer for a single product. Now let’s see how we can add bulk sales to a product with variations or variable products.
Earlier on the product edit page, we set the single product as a ‘Simple product’, but now we need to change the product type to ‘Variable product’ from the dropdown menu of Product data. 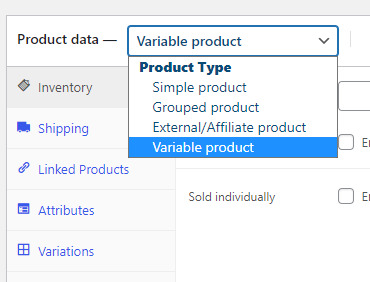
You might notice that these settings are different from the Simple Product. But the process to set the countdown is the same as single products for Variable products too.
Select Variations from the options and again set the date and time for the countdown timer along with the goal and initial quantity of the product. You can also enable or disable the progress bar by checking the box. 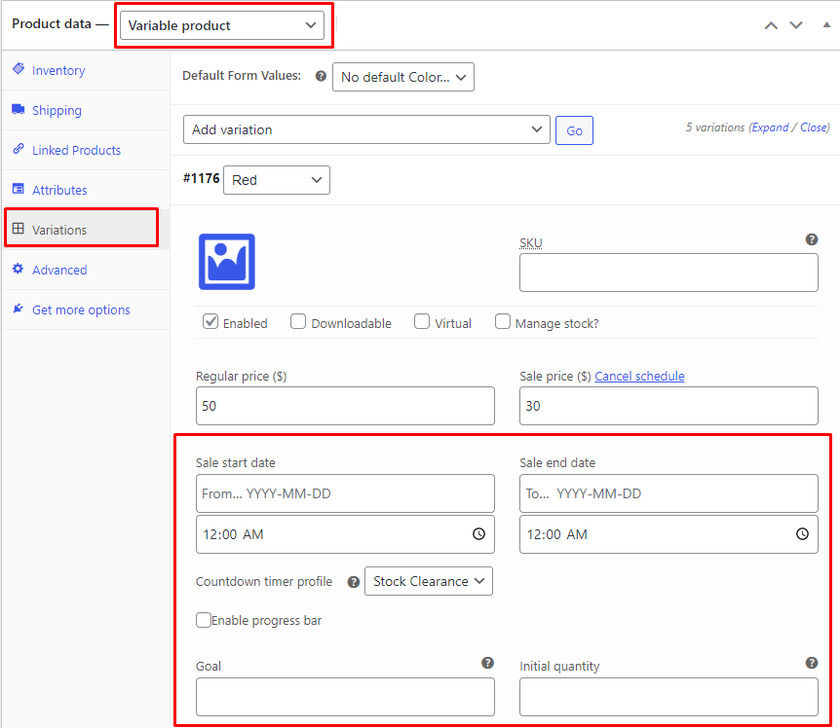
Thereafter, you should go to the Product > All Products. To add a bulk sales countdown timer we have to filter the product type, select Variable product from the dropdown menu, and click on the Filter button. 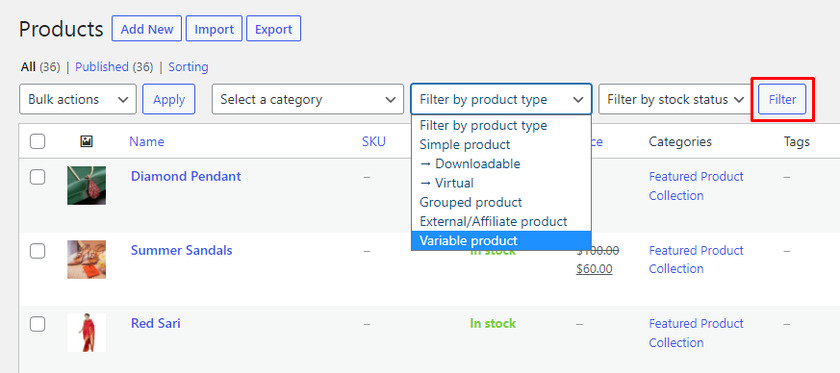
Now you can only see the list of variable products in the products list.
Select the variable products and select Edit from the Bulk Action field and click on Apply button right next to it. 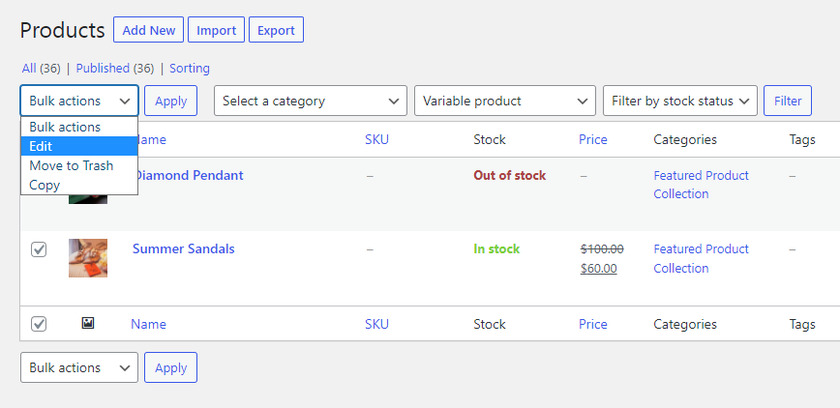
If you scroll further in the edit page you can find a bulk sales countdown timer for variable products. 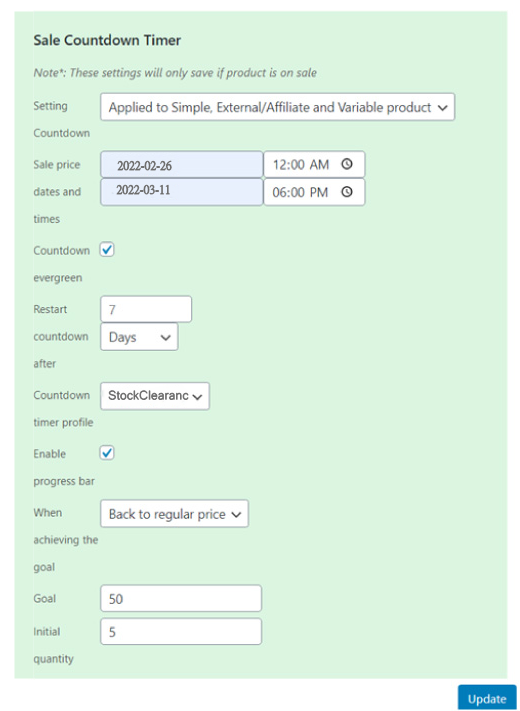
After editing the bulk sales countdown timer according to your preference click on the Update.
Bonus: Autocomplete WooCommerce Orders
We have already presented you with one of the easiest ways to add a WooCommerce product countdown. They are very useful to inform your customers about the offers. But as a bonus, we’ll also provide this guide to offer a quick response to customers’ orders by autocompleting them.
The easiest and the quickest way to autocomplete WooCommerce orders is by using a dedicated plugin.
We’ll be using Autocomplete WooCommerce Orders plugin for this guide. So let’s go ahead and install the plugin. For that, go to your WordPress Dashboard > Plugins > Add New and search for Autocomplete WooCommerce Orders in the search bar.
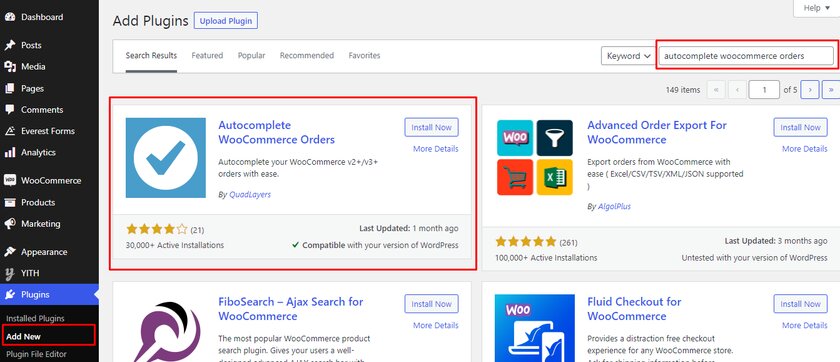
Once the result is displayed, click on the Install Now button and Activate it.
Before we move further, we need a PayPal token in order to set up the AutoComplete WooCommerce plugin. You can easily find the token from your PayPal account. So let’s get the token first.
Set up PayPal Data Token
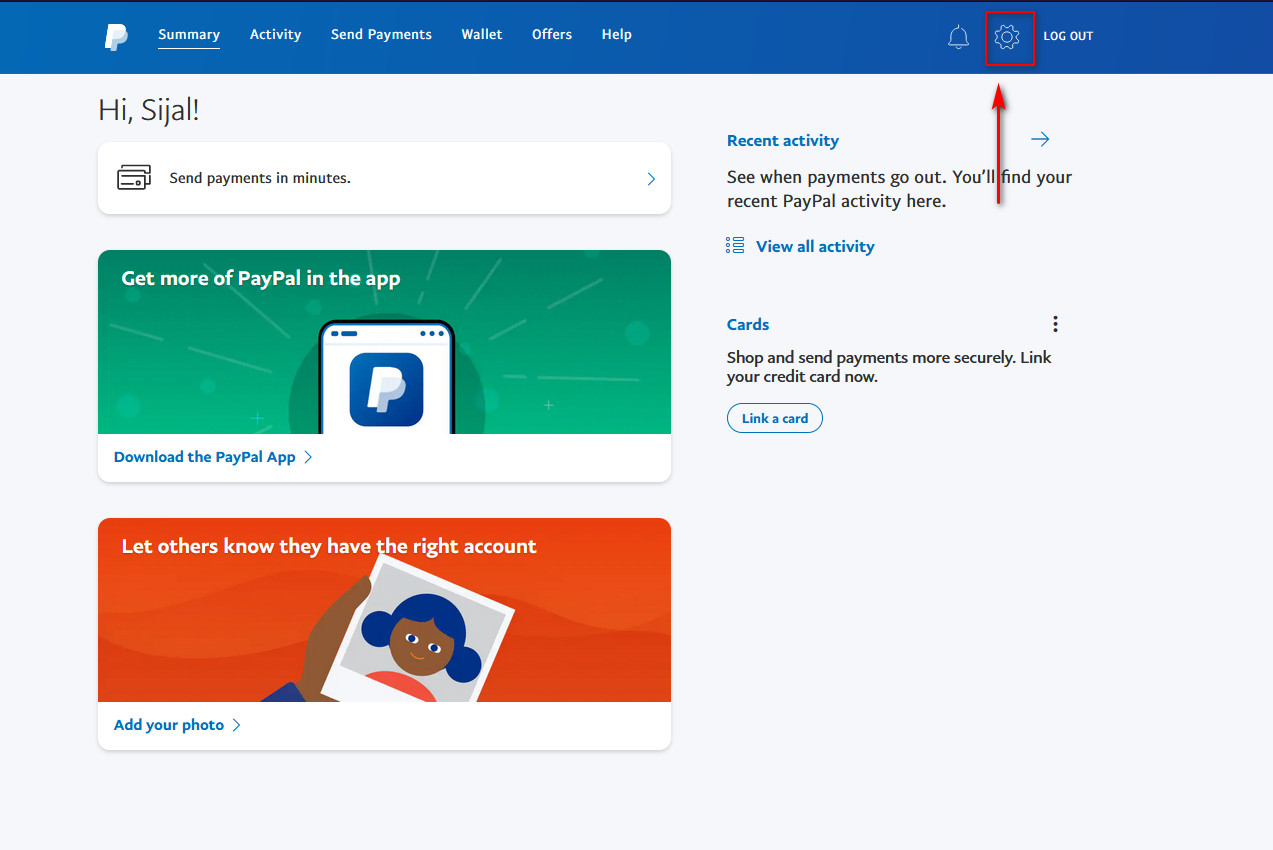
The first step is to log in to your PayPal account. Now, go you’re your PayPal account settings by clicking on the Settings button from the Navigation bar.
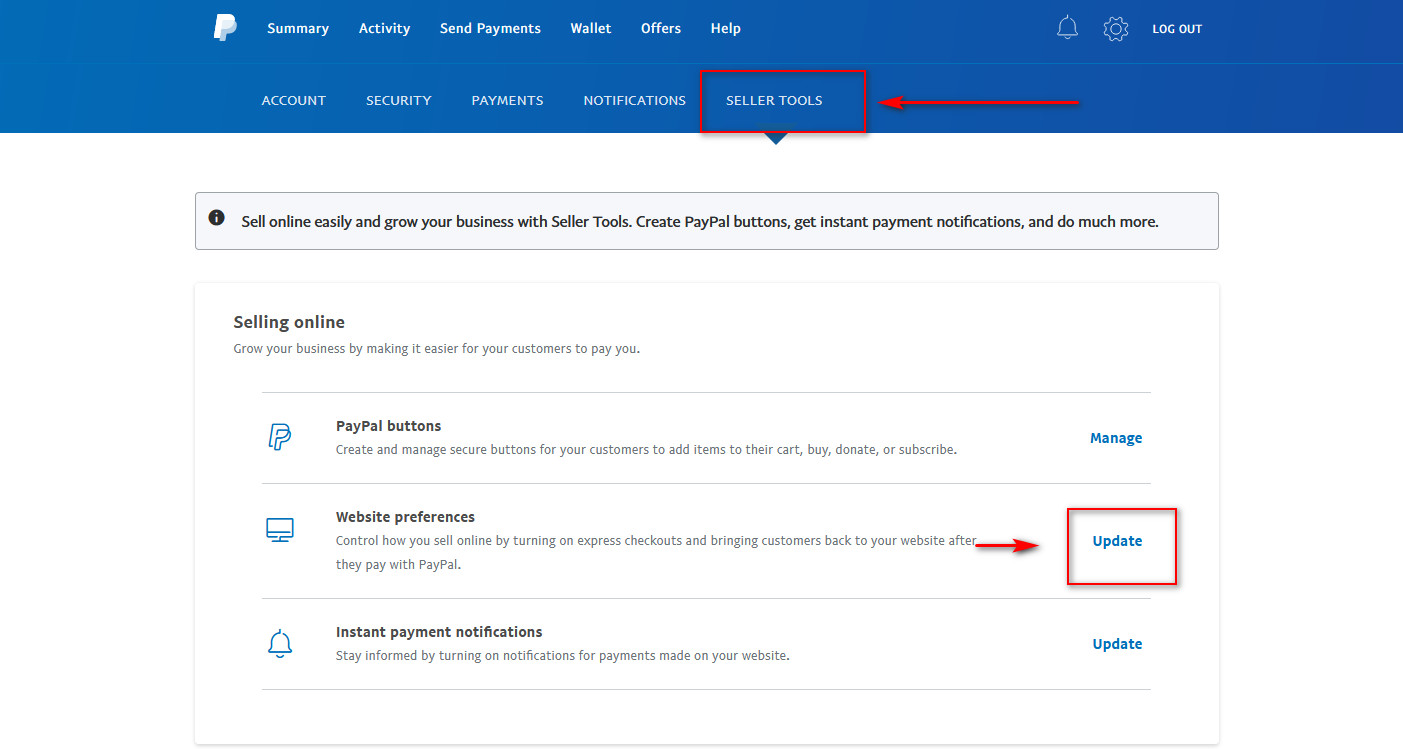
You’ll find various options but you should click on Sellers Tools Tab. Make sure to click on Update of Website preferences.
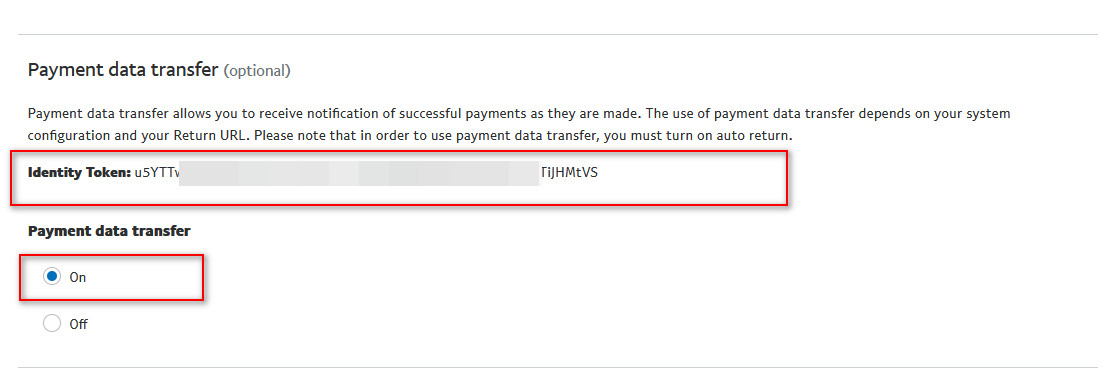
Then, scroll down to Auto Return and enable the Auto Return Option. Upon doing so, you can add a field to your Return URL page. Remember that whenever your users check out the pages, they’ll be redirected to the page you choose.
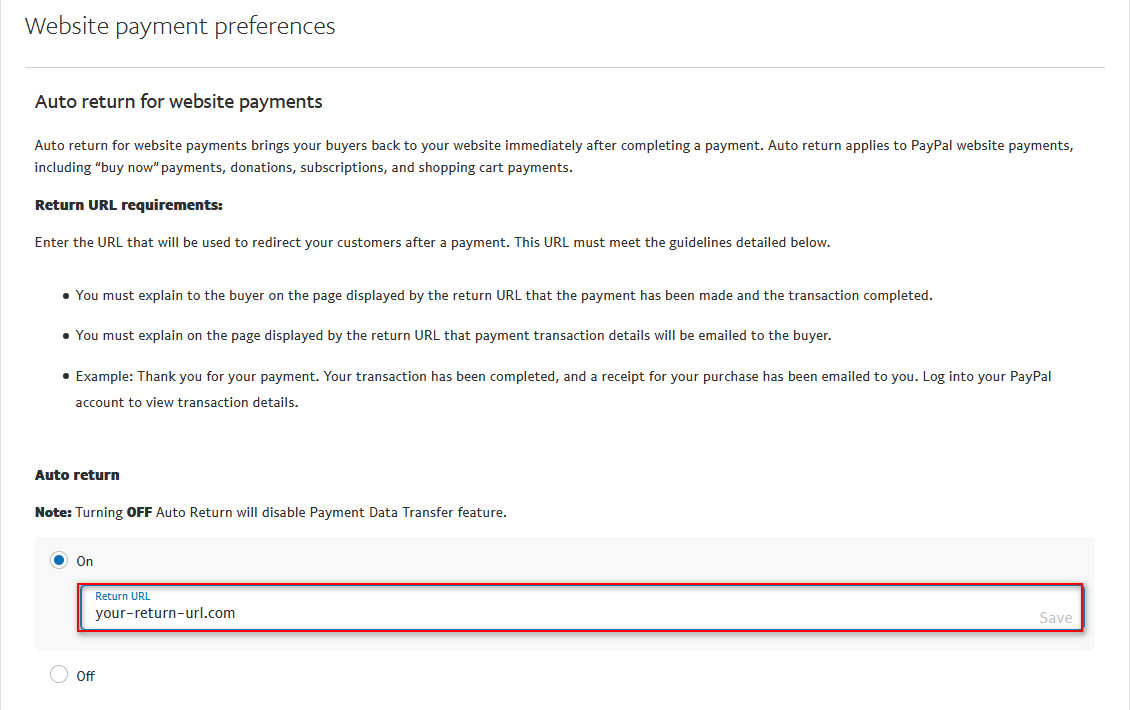
After selecting the Return URL, save the settings. If you scroll further, you can access your Paypal Data token. Copy the identity token and also Enable the Payment Data Transfer option.
Configure Autocomplete Order Plugin
To configure the settings of the plugin, go to WooCommerce > Settings and open the Autocomplete Orders tab.
You can find 3 different modes.
- Paid Orders of Virtual Products only
- All paid orders of any product
- Any order (paid or unpaid)

Choose the mode that you want on your website. Also, remember that your orders will be automatically processed according to the mode that you choose. For example, if you choose All paid orders of any product option, the plugin will auto process orders for all kinds of products on the basis of verified payments.
Setting up your PayPal Data Transfer Token
After you have set up both plugin and PayPal Data Token click on the WooCommerce> Settings and open the Payments tab.
You will be able to see all the payment gateways of the website here. Just click on Manage to open the settings for PayPal in WooCommerce.

You can find PayPal identity token field if you scroll further. Now paste the Identity Token that we saved earlier.
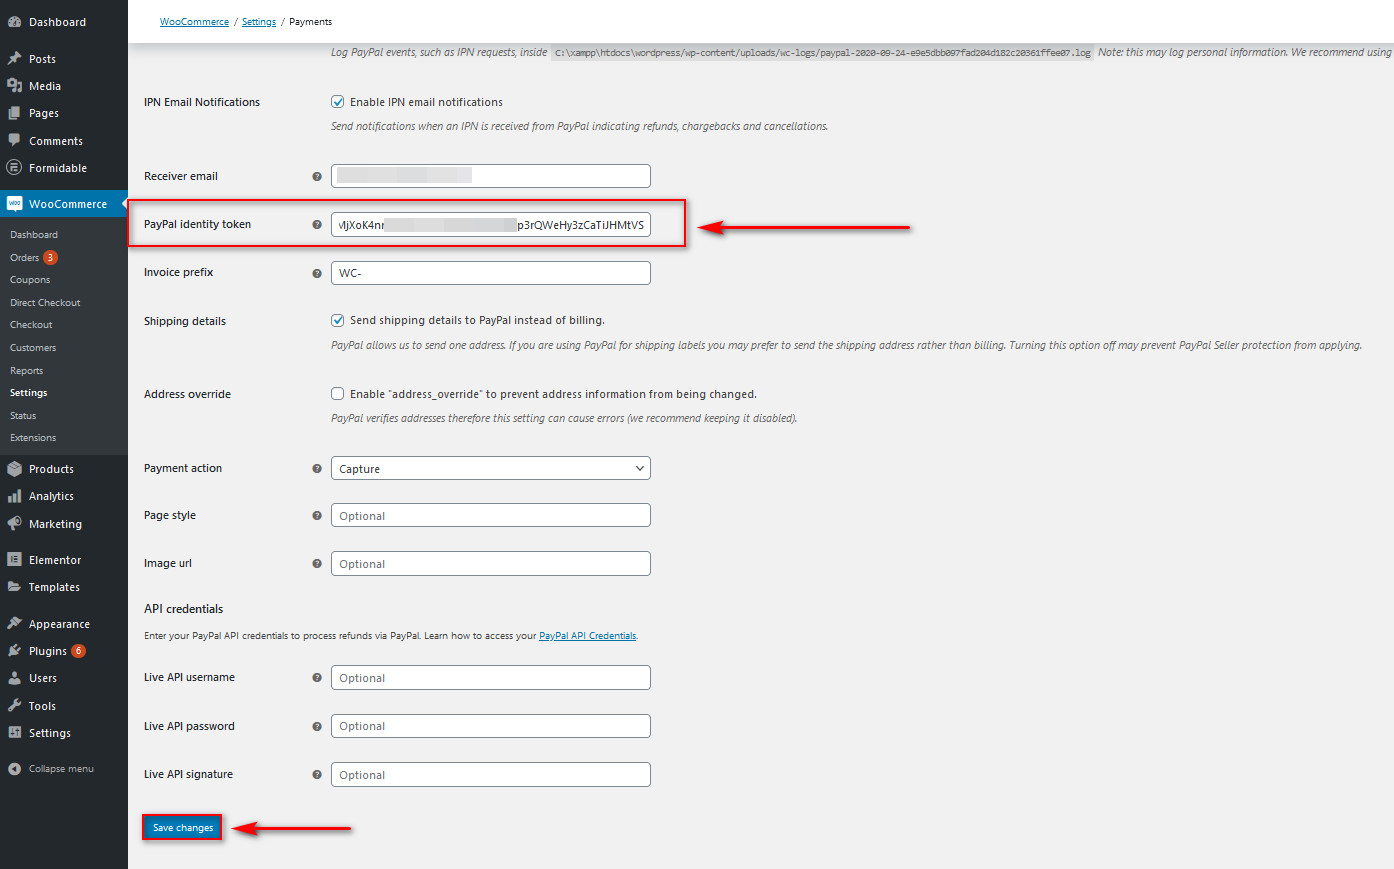
At last, you can set up the remaining settings to provide a nice checkout experience for your customers with PayPal. If you want to learn how to do it, check out this article. Once you are done setting up everything, click on Save changes.
Now your customers will be able to autocomplete WooCommerce orders on your website.
Similarly. you can also enable autocomplete orders with the help of code. If you’d like to learn how to do so, we recommend you check out the article here.
Conclusion
In conclusion, adding a countdown for WooCommerce helps you to increase sales, boost conversions and also provide a better customer experience.
Today in this tutorial, we saw an easy way to add a product countdown to any WooCommerce website. This is perfect for those who are beginners. Sales Countdown Timer is an excellent freemium plugin that is very easy to configure and comes with added features if you want to upgrade to the premium version.
We have also provided you with some basic steps to autocomplete WooCommerce orders where your can customers can purchase your virtual products or services without manually approving them at every order. But if you want to learn about WooCommerce orders, we have some more guides to export or delete orders, and even repeat or test orders.
Have you added a countdown for your products? What do you think about this plugin? Please let us know about your experience in the comment section.
Furthermore, if you want to improve the user experience on your WooCommerce site, these articles might be helpful to you:
