
AI Power Review: How Powerful Is This Plugin & How to Use It?
Are you interested in integrating AI into your WordPress or WooCommerce website? If you need help with content generation, this AI Power Review will help you. In this article, we will talk about what AI power plugin offers, how it will help you, how to use it, and so on.
But first, let’s see how AI Power can help you with your online business.
How AI Power Can Be Helpful
AI Power can help you with all things. For example, it can help you with
- Content writing
- Bulk content writing
- WooCommerce product writing
- AI assistance
- Image generation
And so on.
Let’s take a deep look at it. Hiring a content writer for your blog will cost you some money based on the salary package of the writer. If your business is making revenue and things are going well, hiring a content writer for your team would be a good idea.
On the other hand, if you are starting with a low budget, using AI Power to generate content would be a great idea. The plugin is simple to use and can help you write content on demand. The plugin also helps you with image generation, which will help you in multiple cases.
AI Power uses DALL·E 2 to generate images. This makes sure you are getting the best results without any hassle.
AI Power Review
In this review, we will be talking about
- Features
- Support
- Documentation
- Pricing
And also how to use AI Power to generate content for your business. Since AI is improving daily, many developers will create similar tools. This AI Power review will help you if you are interested in the tool and need to know everything about it before completing the purchase.
Let’s start with the complete AI Power review without any further ado.
AI Power Features
In a nutshell, the popular features of AI power are:
- Form Creation
- Image Generator
- Content Creation
- Role Manager
- Chat WIdget
- WooCommerce Integration
Below, we will explain individual features so you will understand them better.
1) Form Generator
Once you have completed the OpenAI API authentication, you have access to the form generator. By default, you can use any free or premium WordPress form builder plugins to create forms.
But it won’t be a suitable option if you are a beginner and need to create complex forms. Hence, getting help from AI Power would be the feasible option.
AI Power has a lot of pre-made form templates.
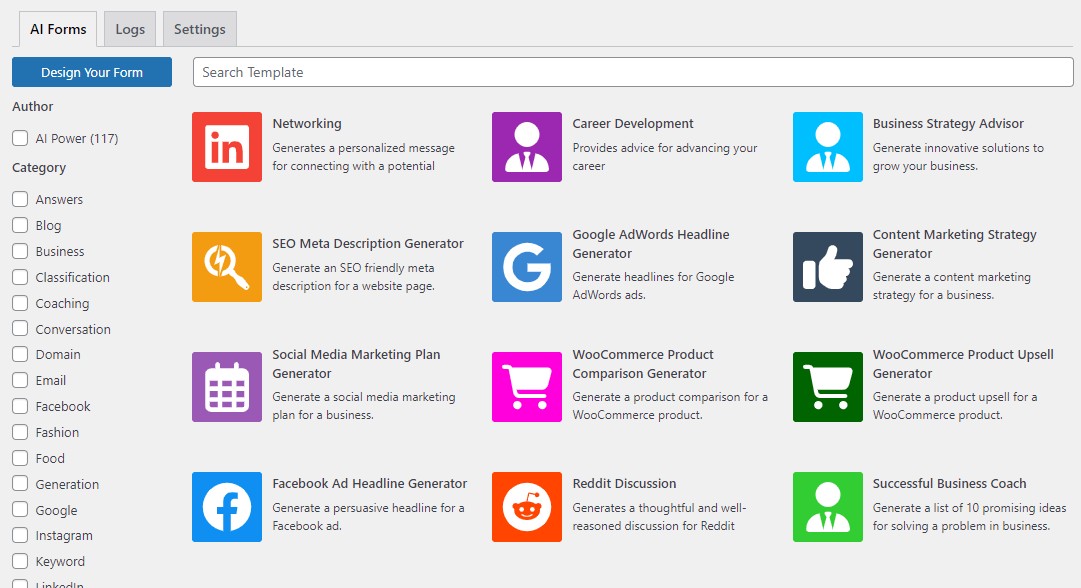
Some of the popular templates available are:
- Networking
- Social Media Marketing Plan
- Facebook Ad Headline
- Business Strategy Advisor
- WooCommerce Product Upsell
- LinkedIn Post
You can choose any pre-made templates or create a new one from scratch. The tool uses GPT 3.5, 4, and DaVinci for form generation. All the forms you create using AI Power will be 100% customizable. You can edit the fields, labels, and everything as you like and match it with your branding. Use the preview option to check the form before publishing.
Once you are good with the design, you can publish the form.
2) Image Generator
Finding images (non-copyrighted) can take a lot of time. If you need to stand out from the crowd, you should start developing your own. But hiring a graphics designer can be costly. If you need to save money and still need to generate images, use the image generator powered by AI Power.
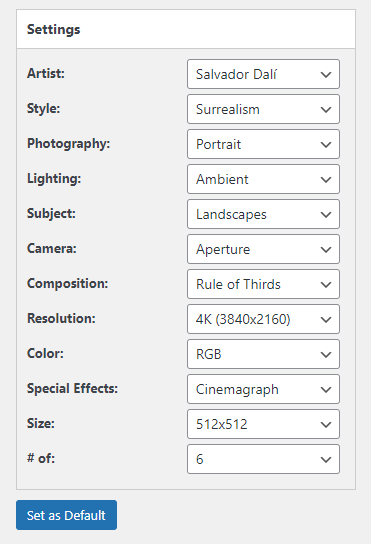
With DALL-E and Stable Diffusion, you can generate images.
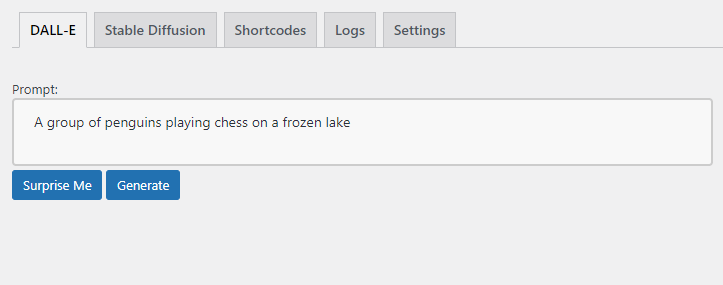
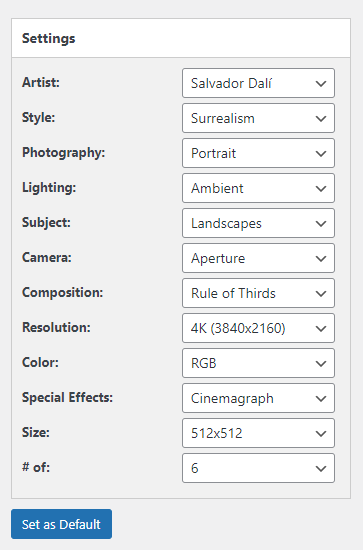
All you need to do is describe the image. Apart from the description, you can also configure the image generation further.
If you are not happy with the result, generate one again! There won’t be any limits.
3) Content Creation
If you need to publish content daily on your blog and need help with the tool, use the content writing feature. AI Power comes with a content-writing tool that helps you generate unlimited content on demand.
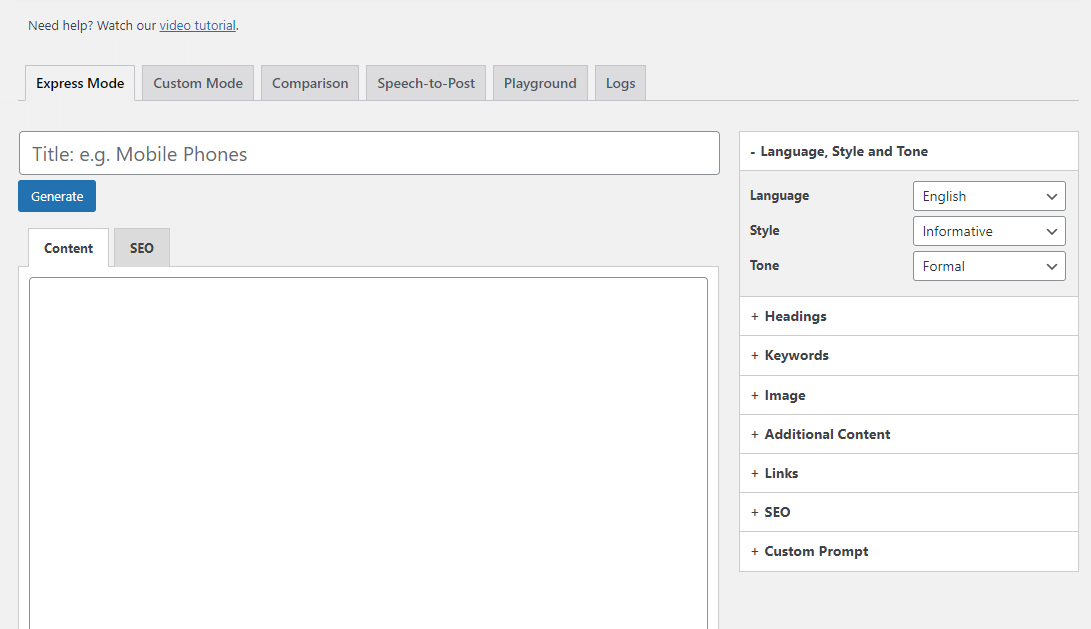
Once you have rented the content topic, the tool will handle the content writing. With the further configuration available, like headings, keywords, links, and SEO, you can generate the perfect articles.
You will have the option to edit the content after the generation. This way, you can ensure the posts will meet your standards.
4) Role Manager
As the website administrator, you can control the role permissions. AI Power comes with dedicated Role Manager settings.

From there, you can control the permission of
- Editor
- Author
- Contributor
- Subscriber
You do not need to give full permission to subscribers and contributors. With this feature, you can control what they can access and what to limit.
5) Chat Widget
Would you like to add a chat widget to your WordPress website? If you look at the market, you will see several options. But the point is most of the WordPress live chat plugins available in the market have limited features.
With AI Power’s chat widget, you can do more stuff.
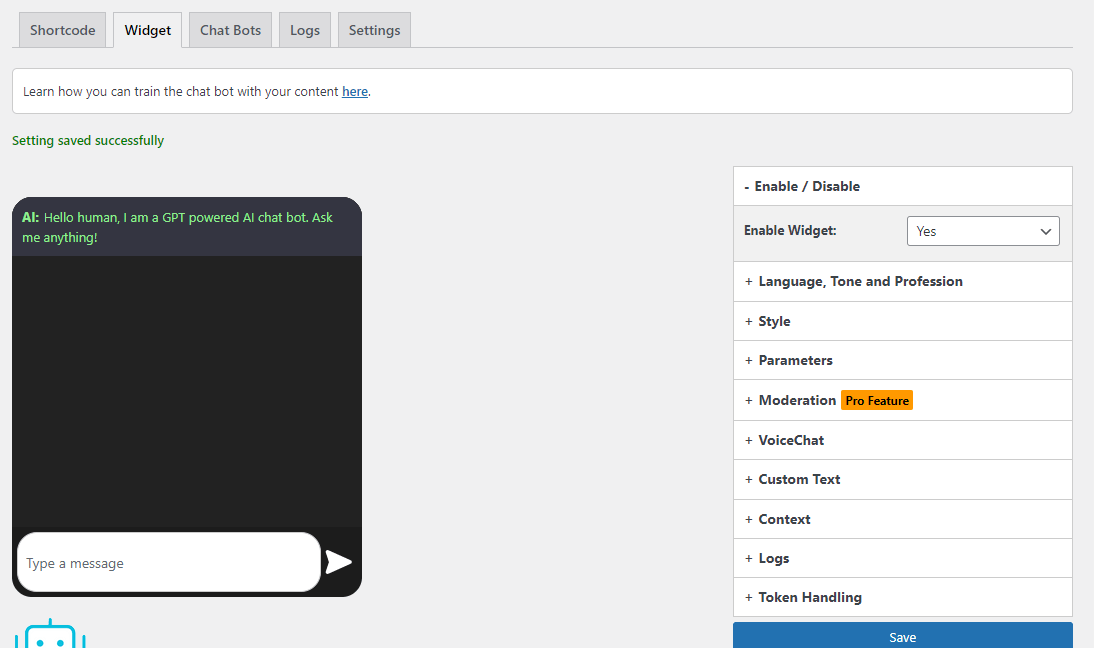
Once you have enabled the feature, you can add a chatbot to your website’s front that uses GPT 3.5 and 4 to interact. The widget comes with a lot of features. Some of the configurations you can do are:
- Language
- Tone
- Profession
- Style
- Parameters
- Context
- Logs
And so on.
You can tweak the chat widget the way you like. After modifying the widget, you can display it on your website’s front end using shortcodes.
6) WooCommerce Integration
When running a WooCommerce store, bringing in more sales and conversions would be challenging. You need to develop SEO-optimized product descriptions and recommendations to boost your sales. With the AI Power WooCommerce integration, you can quickly increase your sales.
With the feature, you can write:
- Product Title
- Meta Description
- Product Description
- Product Tags
- Short Product Description
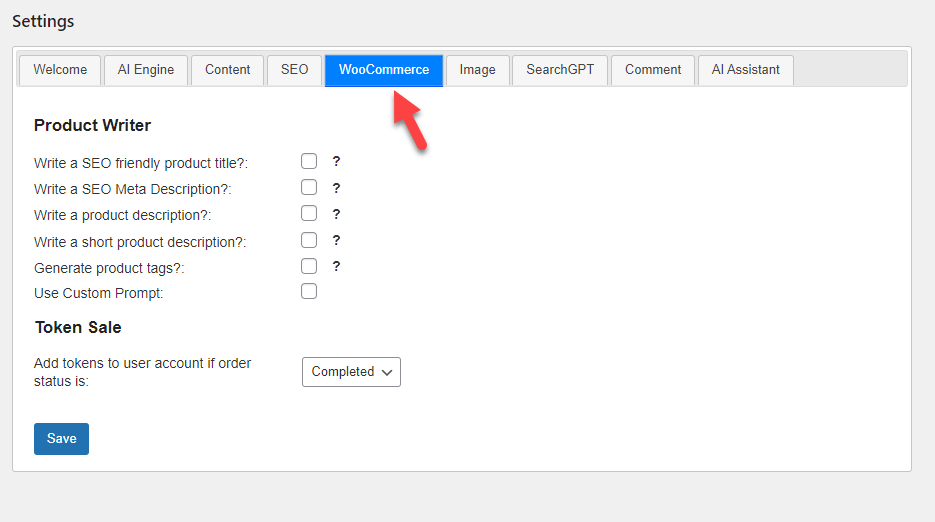
On top of that, you can also use AI to give recommendations to your customers based on their behavior and preferences. It can help you optimize your WooCommerce store and sell more products.
Support
If you need help with the plugin, the first place you can try is the support forum.
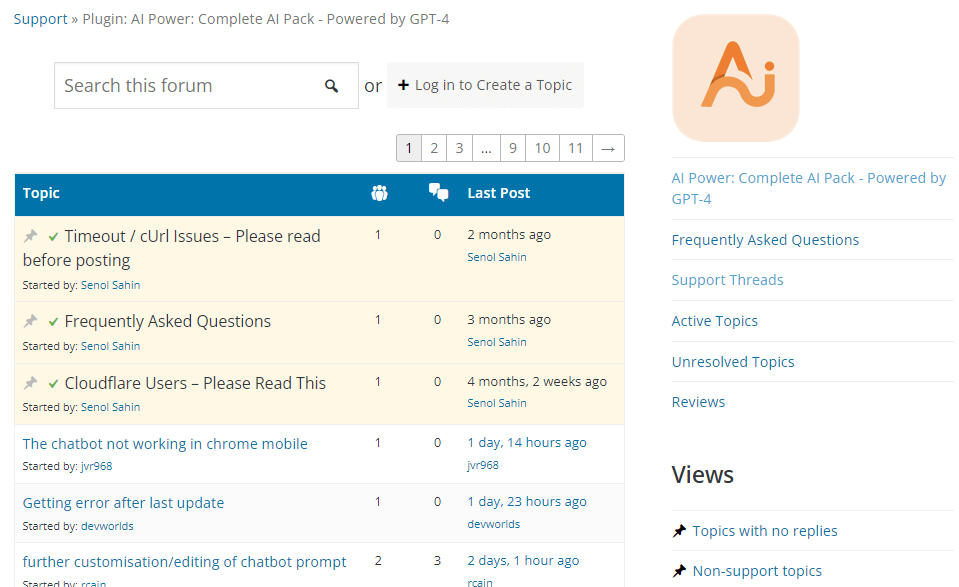
This will be the best place if you use the free version of AI Power. When you have a premium subscription, you can access priority support. Through this page, you can raise a support ticket. If you prefer chatting with a live chatbot, use this page.
They have an excellent support team and will get back to you within a business day.
Documentation
Check out their documentation section if you prefer reading written guides regarding configuring or using the plugin.
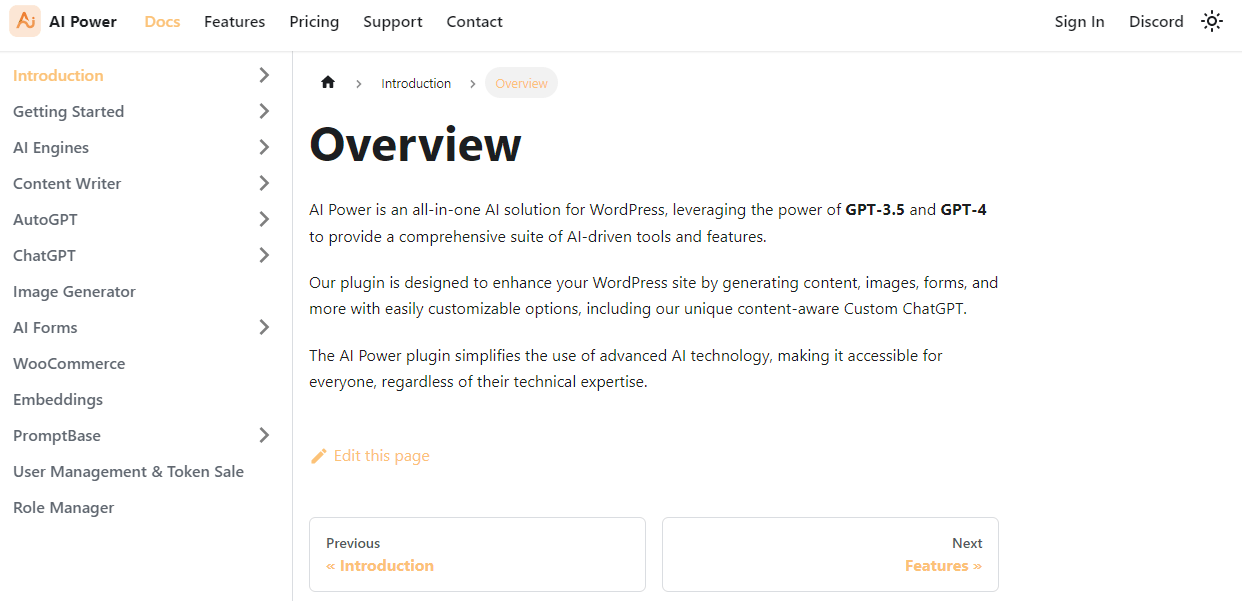
They have categorized the documentation section like:
- Introduction
- Getting Started
- AI Engines
- Content Writer
- AutoGPT
- ChatGPT
- Image Generator
- AI Forms
- WooCommerce
- Embeddings
- PromptBase
- User Management
- Role Manager
You can check the archives to find the proper tutorial. As always, if you can’t find a guide that’s available in the docs archive, get in touch with the support team. They will help you to solve every issue.
Pricing
AI Power is a freemium tool. The free version tool will give you access to the basic features. On the other hand, if you are looking for unique features, you should check out the premium version.
They have three pricing models:
- Monthly billing
- Yearly billing
- Lifetime billing
Let’s take a closer look at each option.
Monthly Billing
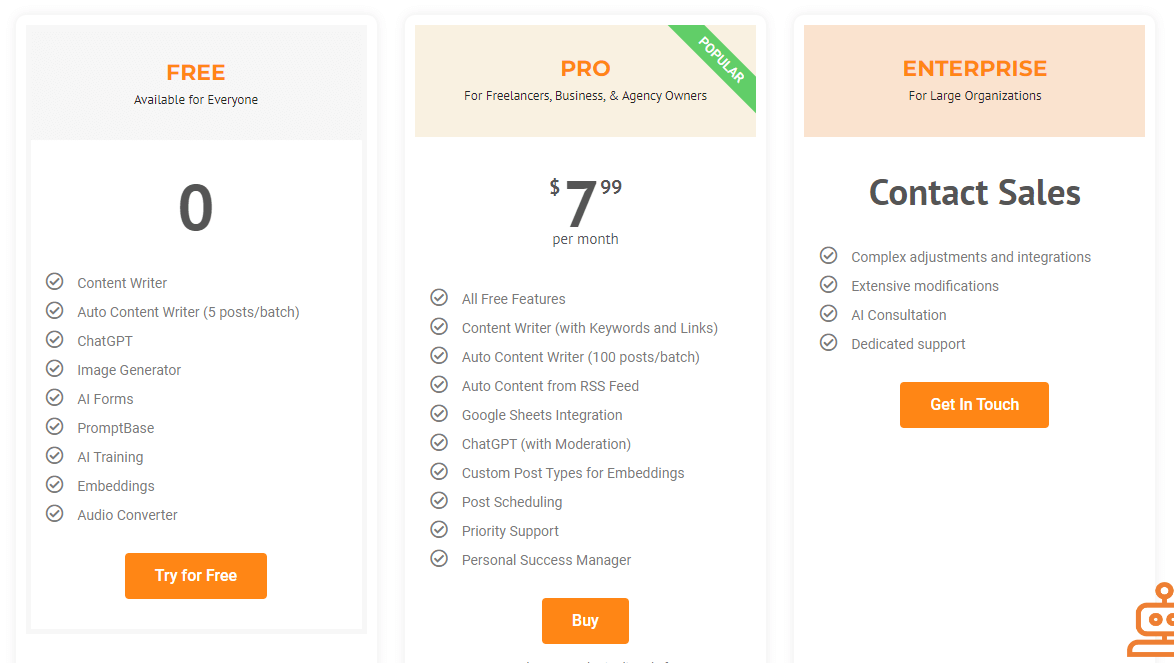
- Pro – $7.99 a month
Yearly Billing
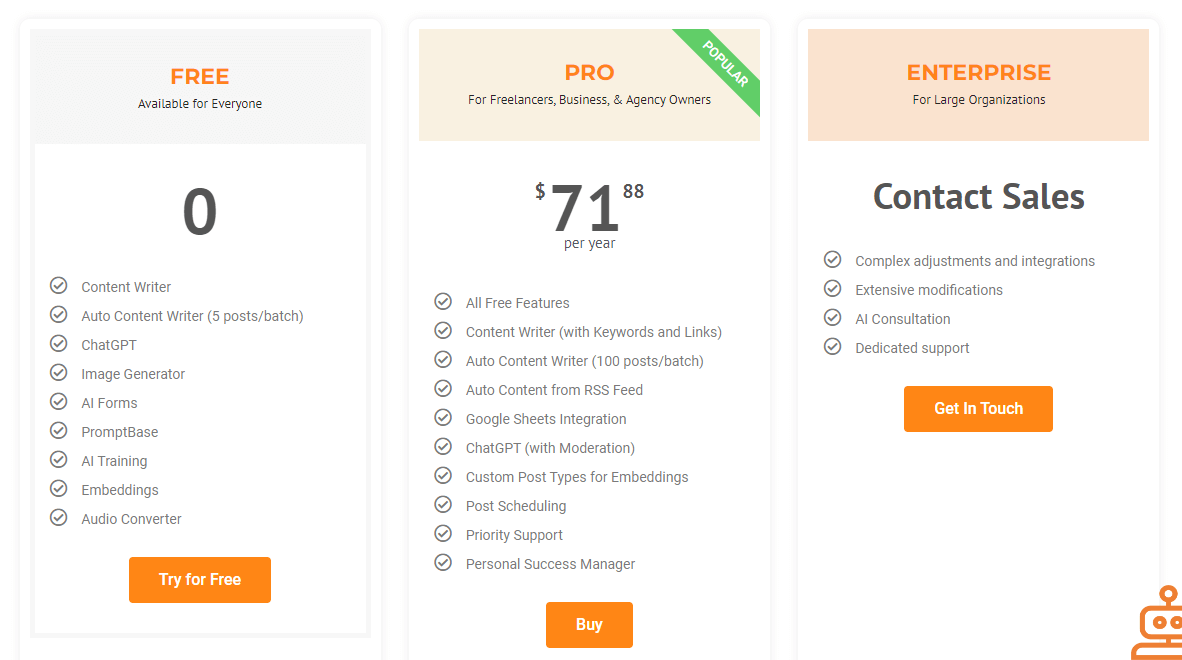
- Pro – $71.88 a year
Lifetime Billing
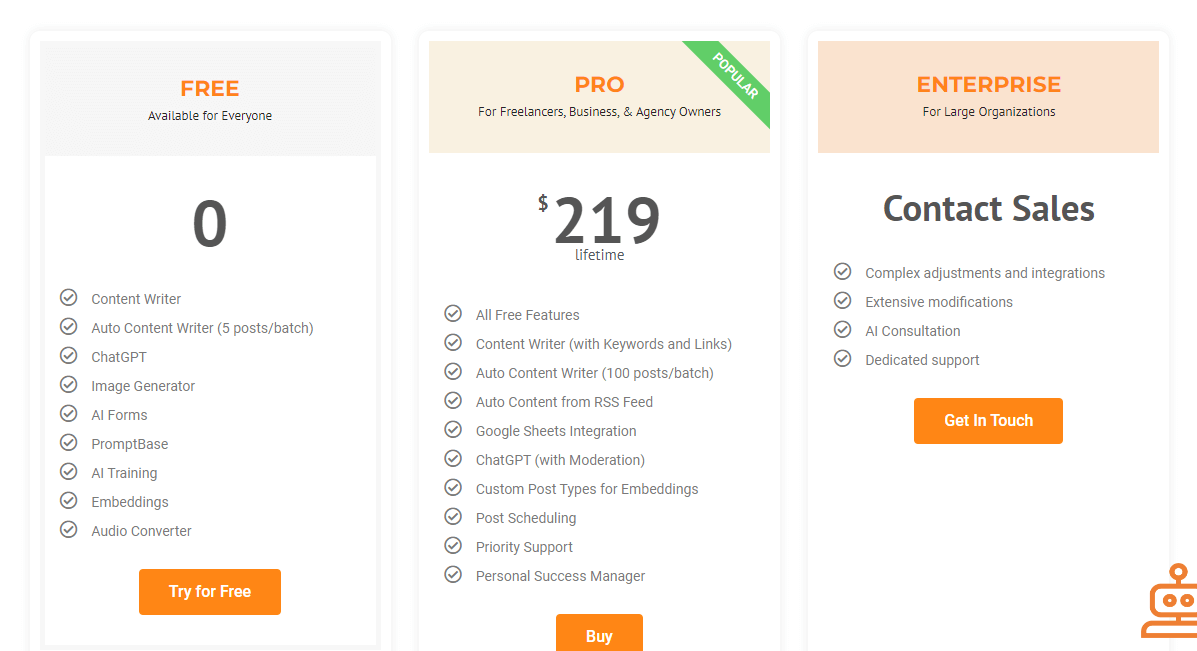
- Pro – $219 (one-time fee)
You can choose a subscription according to your usage. For example, if you are a blogger or a WooCommerce store owner, a monthly or yearly subscription would be the best option. On the other hand, if you represent an agency that works with multiple clients, a lifetime subscription would be more helpful.
So according to your preferences, pick a plan.
Get Started with AI Power
If you are interested in the plugin, check out this link. From there, you can access the plugin and learn more about it. If you are interested in the premium version tool, use this link.
How to Use AI Power in WordPress
in this section, we will show you how to properly use AI Power on your WordPress website. Since the plugin is available in the WordPress plugin repository, you can directly install it from there.
1) Installation and Activation
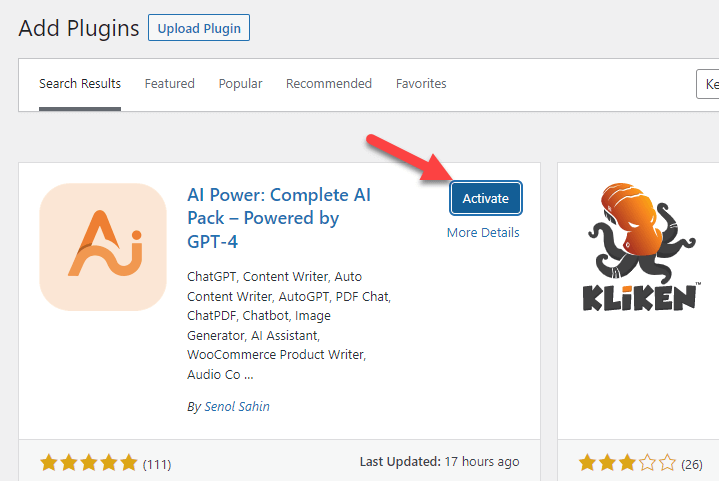
The first thing you need to do is log in to your WordPress site, go to Plugins > Add New plugins and search for AI Power. Once you have found the plugin, install it.
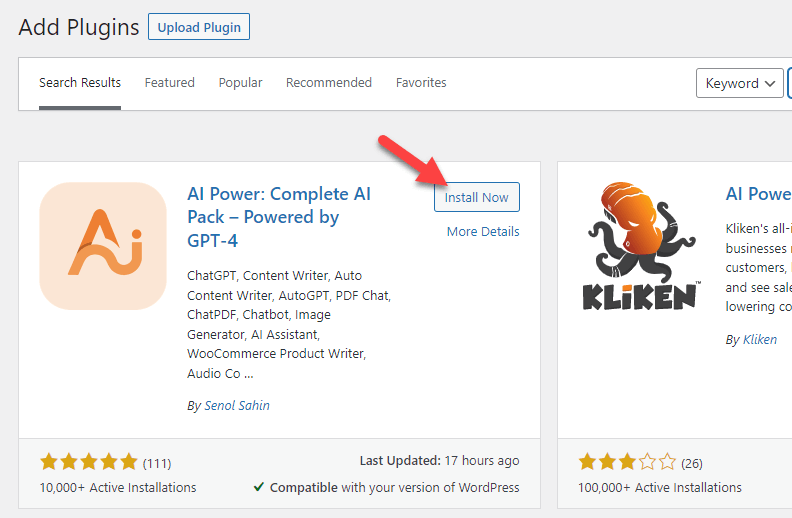
After completing the installation, activate the tool.
You can see the plugin’s settings on the left-hand side of your WordPress site.

The first thing you need to do is set up an OpenAI API key. Since the plugin uses OpenAI to generate content and write product descriptions, this is mandatory.
2) API Configuration
You can go to this page and create your API key.
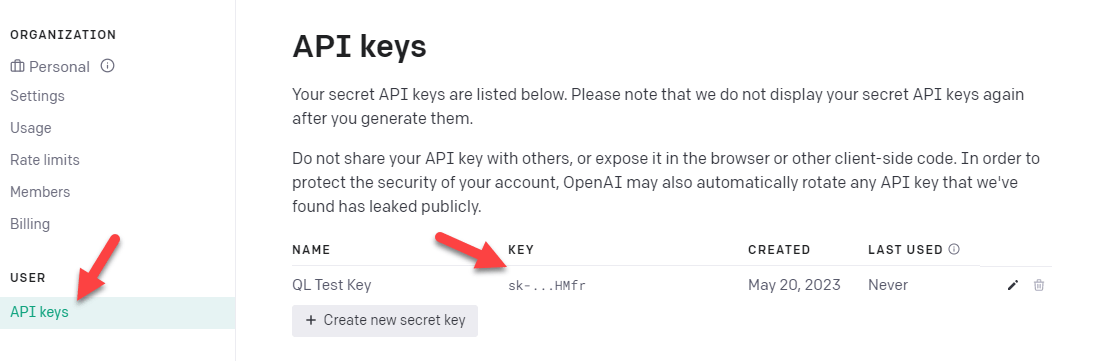
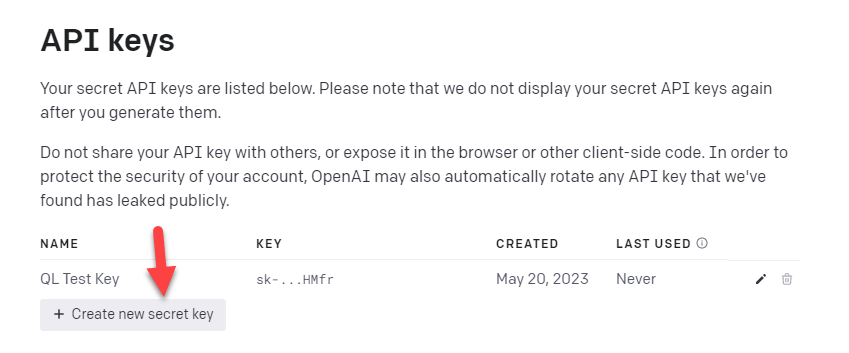
If you do not have a key generated, click on the button that says Create new secret key.
After entering a label for your key, create it.
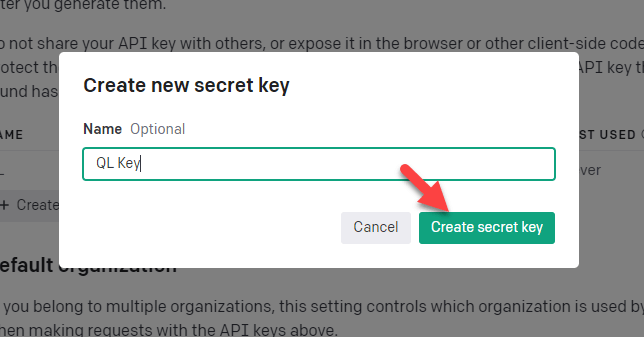
On the next page, you can see the key.
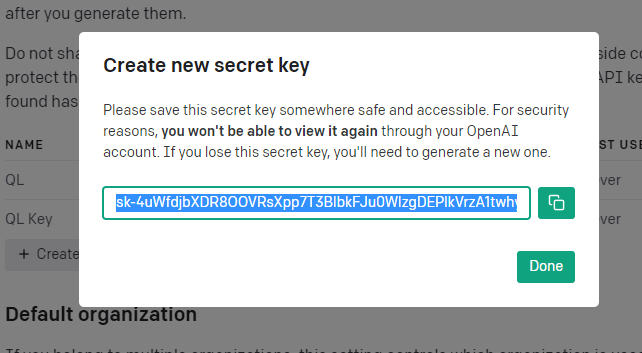
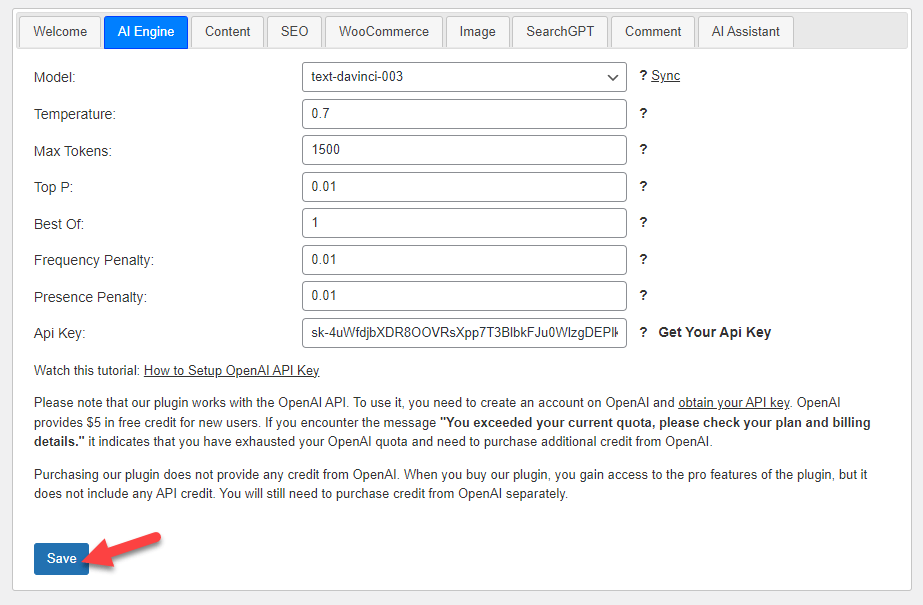
You need to copy it from there and paste it inside the AI Engine settings. After pasting the key, save the settings.
That’s it!
3) AI Power Tools
Once you are done with the API configuration, you can move forward and use every option they offer.
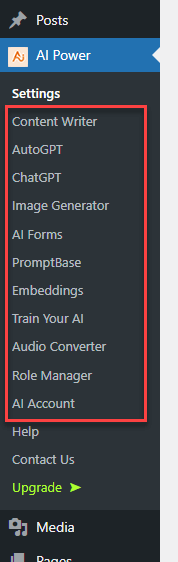
As you can see in the screenshot, they have multiple tools like:
- Content Writer
- AutoGPT
- ChatGPT
- Image Generator
- AI Forms
- PromptBase
- Embeddings
- AI Training
- Audio Converter
- Role Manager
- AI Account
For example, let’s try the content writing feature.
4) Testing Writing Feature
Open the option, enter your heading, and generate the content. You can tweak the content on the right-hand side according to your preferences.

The tool will take a few seconds to minutes to generate the content. Once the tool has shared the document, you can tweak it from there and start with the publishing schedule.
5) Testing Image Generation
Similarly, you can use the image generation feature.
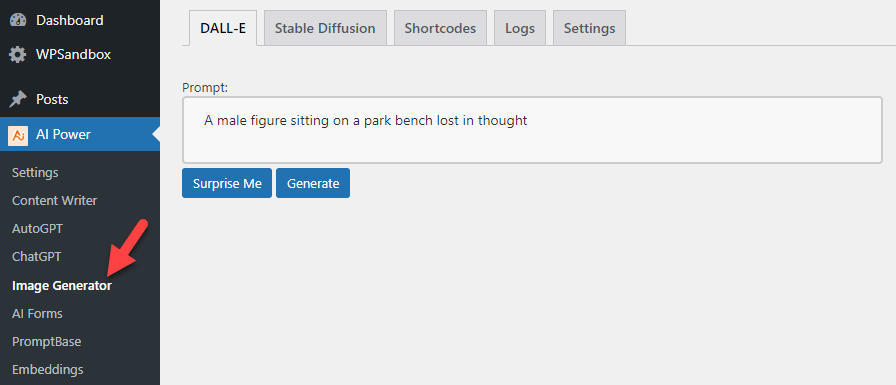
You can enter the brief idea of the image and click on generate.
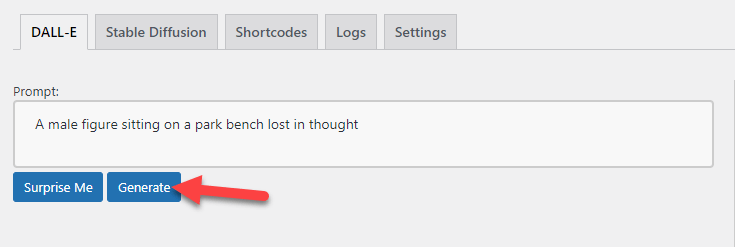
As usual, you will have the image configuration options on the right-hand side.
This is how you can use AI Power on your WordPress website and generate content. As you can see above, the process is straightforward and doesn’t need any technical knowledge.
With a few mouse click, you can generate content based on your requirement. Since OpenAI is constantly evolving, you could get more and more features on the go.
NOTE: To use this plugin correctly, you should buy OpenAI credits. Otherwise, you won’t be able to generate content/make use of the plugin as you expected.
Conclusion
Artificial Intelligence is a common thing most people discuss these days. After OpenAI released ChatGPT (for free), most people got access to it, and they learned more about the technology. As a business owner or content writer, you must use AI to improve your business or skills.
You can improve your website or blog with a powerful plugin like AI Power. As you can see in the article, the tool has many unique features. Some of the most common features that will be helpful to you are content writing, image generation, WooCommerce product generation, etc.
There is no technical stuff involved in using AI Power. Once you have generated an OpenAI API key, you are good to move forward. All you need to have is enough API credits.
We hope you have found this AI Power review helpful and enjoyed reading it. If you did, please share this article with your friends or fellow bloggers. It will help someone generate content and improve their blog archive.
Similar articles you might like:
