
How to apply CSS on specific page/post
Do you know that you can apply CSS on a specific page or a post in WordPress? Yes, due to the CSS-friendly nature of WordPress, this is possible. And in this guide, we will show you the various ways through which you can add CSS to a specific page or a post.
All the WordPress themes usually apply different styles to each type of content. Posts, pages, taxonomies, profiles, and any other piece of content have different stylesheets in each of them. And the same goes for the plugins and all the other aspects of WordPress too.
However, due to the flexibility of WordPress, you can also use different stylesheets for a specific page and post types. But let’s look at why you might need to add CSS to them before we go through the process.
Why apply CSS to Specific Page or Post
Adding CSS to specific pages and posts is very useful if you are building a website or designing your website. CSS is generally used to customize the visual appearance of the website. So, using CSS on your website overall can be very helpful to present your web pages exactly how you want for your website visitors.
There might be a particular page or a post type that needs a unique design compared to other pages or posts on your website. In this case, one of your best options is to apply CSS on the specific page or the post. These pages or posts are usually added to the menus of your website. But they can also include other unique pages and posts like the shop page, product page, or even the home page.
For example, even we at QuadLayers have used CSS on specific pages like Portfolio and About to make them different from other pages or post types. Now, without further ado, let’s move on with the process.
How to apply CSS on Specific Page or Post
There are various ways with which you can add apply CSS on a specific page or a post. But, here are the 3 most common ones:
- Using the HTML id or class
- Adding a PHP function
- Including CSS file on specific page or post
All these approaches can be used to apply CSS for multiple purposes. We will be going through all these approaches in this article with a proper step-by-step tutorial.
1. Using the HTML id or class
This is one of the most common and widely accepted approaches if you want to apply CSS on a specific page or post. All we need to do is grab a unique identifier that a page or post will have. Then, this HTML class or id allows us to target all our CSS scripts to the desired page or post.
1.1. Find the HTML class or id of the page
First, you must find out the id or class to be used for the CSS script. This can be easily found with the help of the browser inspect tool.
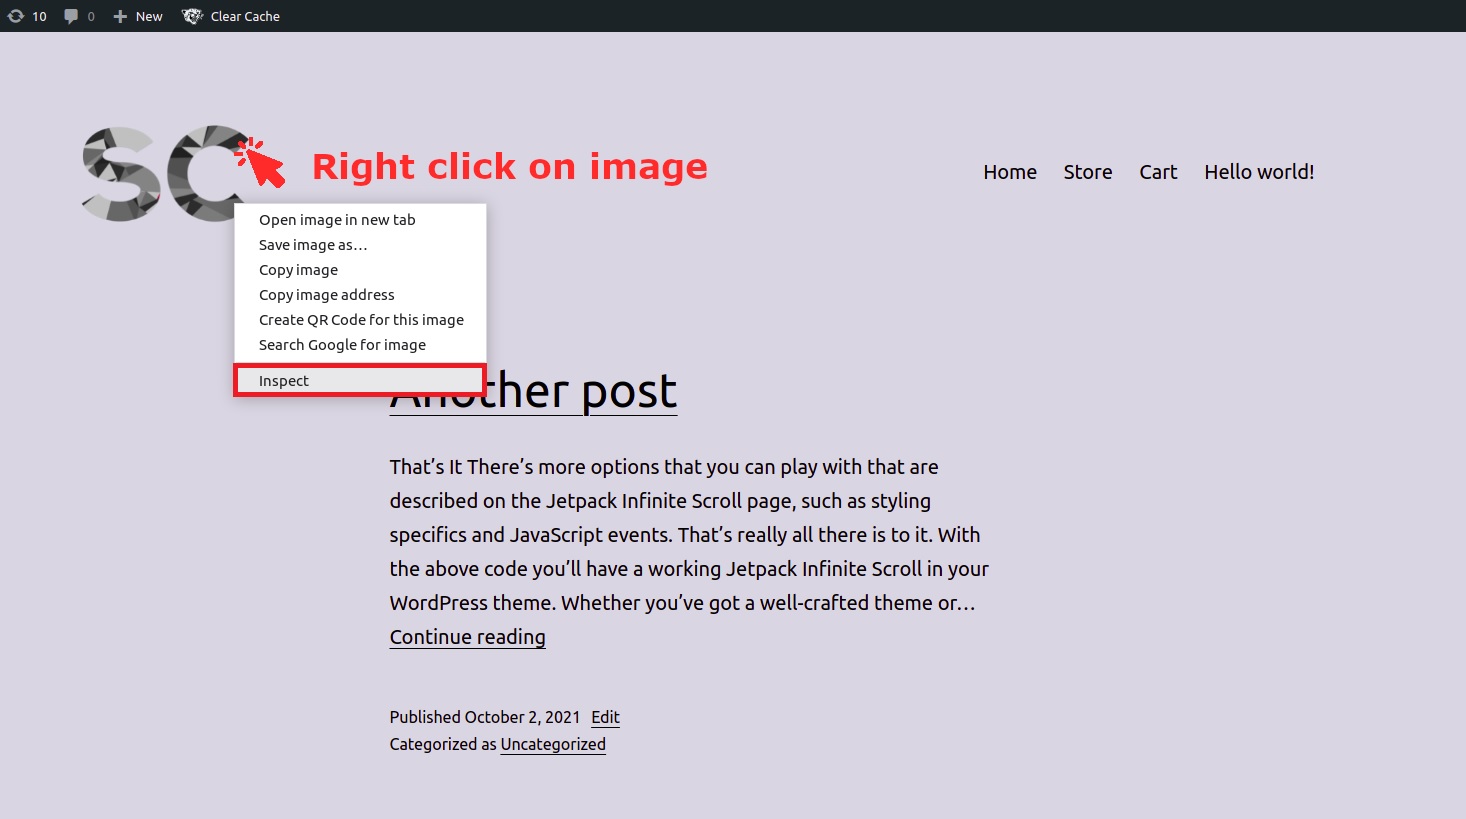
Just open the page where you want to apply CSS and right-click on the element that you want to edit. Then click on Inspect.
Here, check the body HTML tag. This will vary depending on the theme that you are using.
We have used the Twenty Twenty theme in all of the following examples. So, this is what you will see when you inspect the home page of a website using the Twenty Twenty theme:
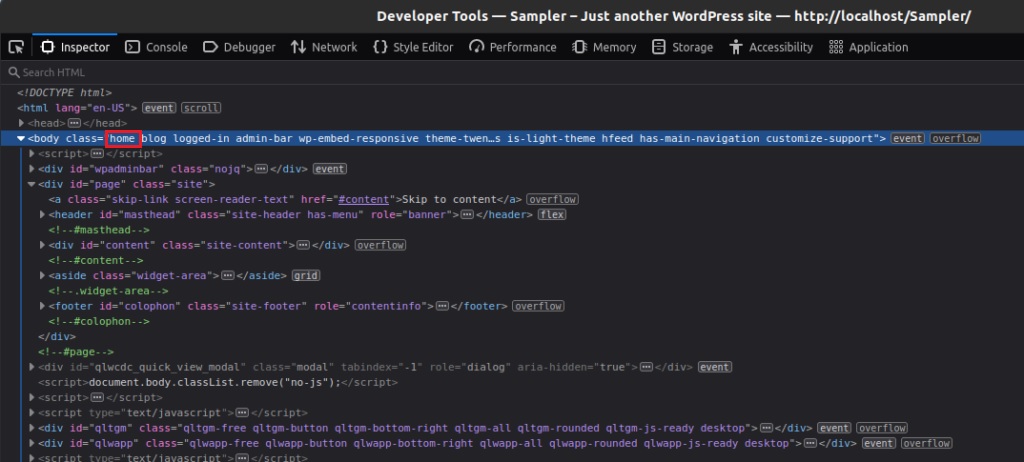
From the above screenshot, the unique identifier that the home page has is the “home” class. Therefore, if you want to apply some CSS rules only to the home page, you need to use this class in your selectors.
For example, let’s say we want to apply some style to the logo only on the home page. Then, besides the home class, we also need the logo image selector. Again, this can be obtained from the browser inspect tool.
![]()
In this case, we’ll use the “custom logo” class to apply our style to the logo. Now, let’s put them together with the class grabbed on the previous step. Finally, we can apply our script only on the home page using the following CSS selector:
.home .custom-logo{ /*your CSS here */}Note: You don’t need to follow all the in-between HTML tags and include them in your selector. You can skip them all even if the element you want to style is far away from the unique page selector.
Of course, if you need a more specific selector, you can use the full CSS path selector. But this is quite overwhelming and won’t be necessary in most cases.
As an example, this is a much specific selector for styling the same logo element we’ve seen before:
html body.home div#page.site header#masthead div.site-branding div.site-logo span.custom-logo-link img.custom-logo{ /*your CSS here */}1.2. Find the HTML class or id of the post
Similar to the pages, there should be a unique HTML class for each post too. Again, just inspect the element on the post you want to apply CSS with the help of the browser developer tool. Then, you will be able to see the unique identifier as with the postid attribute.
For the following post with the Twenty Twenty theme, the class that identifies this post is postid-557.

Similarly, you can do the same with any other page of a website. Using the unique class that identifies a page. If you look at the following screenshot, you can see that the class that identifies the page is page-id-357.

Finally, create your own CSS selector that suits the need of your website just like the custom logo example. Then, you can apply the CSS on the specific page or post by adding it in Appearance > Customize > Additional CSS. If you need more help with it, you can have a look at our guide on how to apply CSS to WordPress or apply CSS using the browser developer tool.
2. Adding a PHP function
The previous method is adequate for applying our custom CSS to specific posts or pages. It will be enough for most of the customization you might require. But in some cases, there can be limitations:
- Your theme does not have any unique HTML class or id for the content you need to style.
- You have a large list of CSS rules and need to save them in separate files.
- You want to apply some other condition besides the current page.
If you have similar problems when you want to apply CSS to a specific page or a post, using a PHP function would be better.
But before we start, make sure that you backup your WordPress website or create a child theme for this approach. We will be editing some delicate files on your website. So, any unnecessary changes might lead to further issues with your website.
If you need help you can even use one of the best child theme plugins for WordPress to create a child theme.
2.1. Find the page/post id
The first step is to check the id of the page or the post where we want to apply our styles. You might notice that the id values are the same as that of the previous step. However, this is not the same HTML id that we used before.
The id that we are referring to now is a PHP variable that identifies posts and pages. Whereas, the id in the previous approach identifies an HTML class.
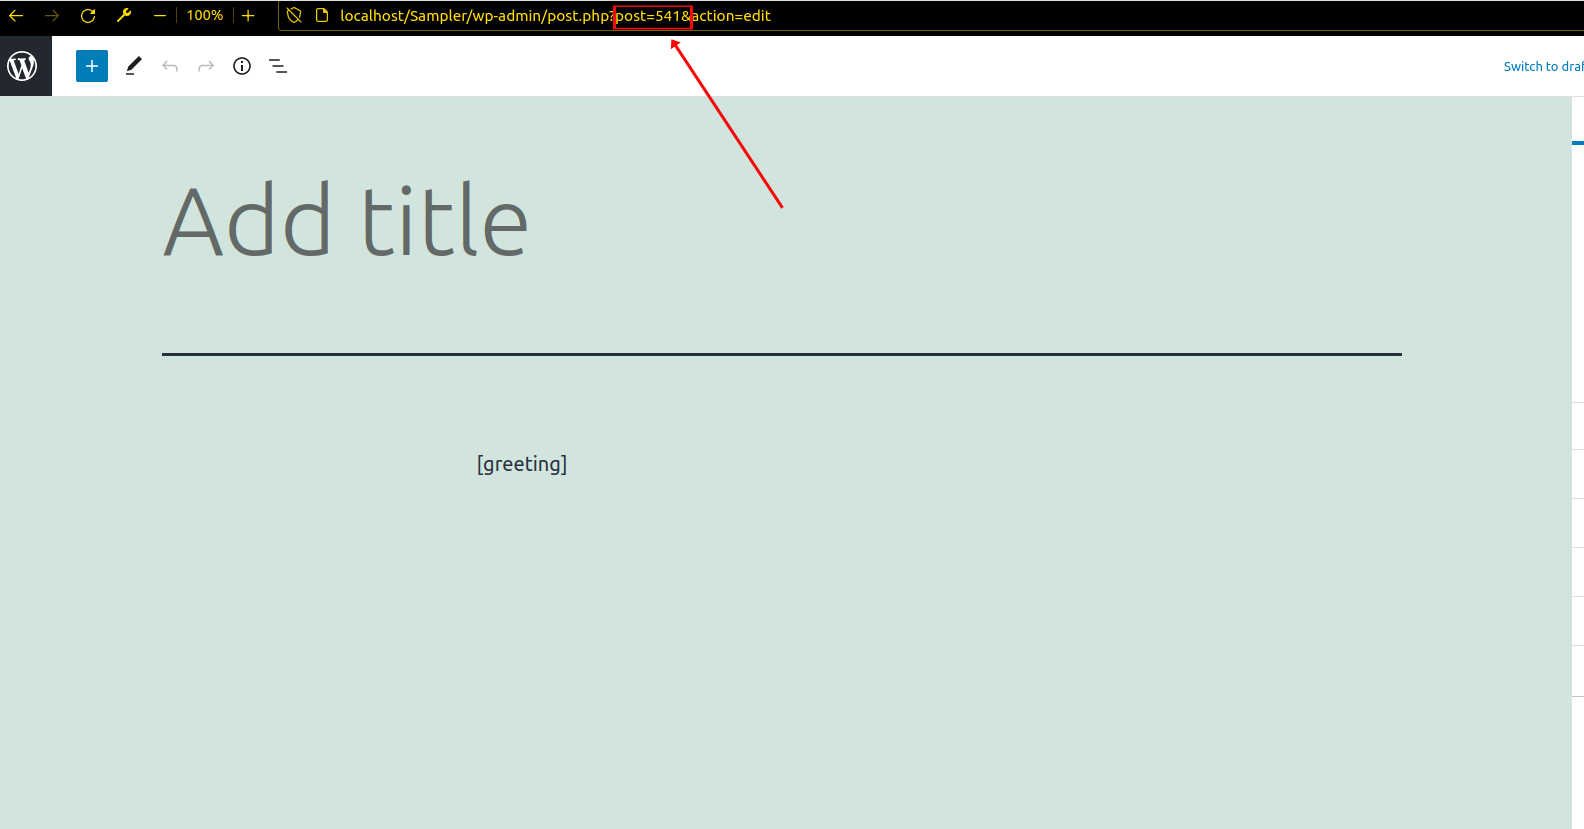
Thankfully, it’s very easy to find the page and post id on your website. You can see the id of pages and posts on the backend admin dashboard when you open the editor. The post or page id is mentioned on the URL of your browser.
Another way to get the id of a page or post is using the following script on the functions.php file of the child theme. Just go to Appearance > Theme Editor and open the functions.php file.
Then, paste the following snippet in the editor and Update the file. It will print the page id on the front end.
add_action('wp_head',function(){
    $page_id = get_queried_object_id();
    echo $page_id;
});
After you know the PHP identifier for the post or page you need to apply CSS to, you can simply print the CSS on the head. You can use the same hook we’ve used before, i.e., wp_head().
Just paste the following snippet on the functions.php file once again.
add_action('wp_head','my_head_css');
function my_head_css(){
$page_id = get_queried_object_id();
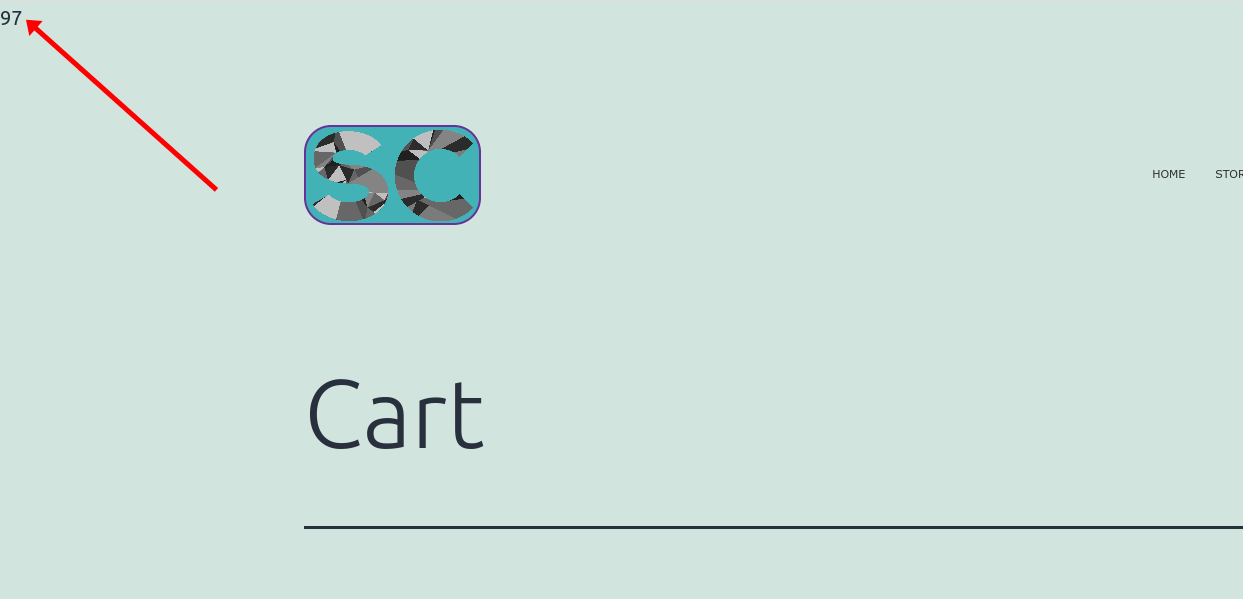
if($page_id==97){
echo "<style> /* your CSS here */ </style>";
}
}
Make sure that you add your CSS on the “your CSS here” section and Update the file.
3. Including CSS file on Specific Page or Post
The previous methods are fine for adding small pieces of CSS for basic customization that a specific post or page requires. But for larger CSS scripts, you must follow the good practices and upload a separated CSS file. where all your custom CSS should be gathered.
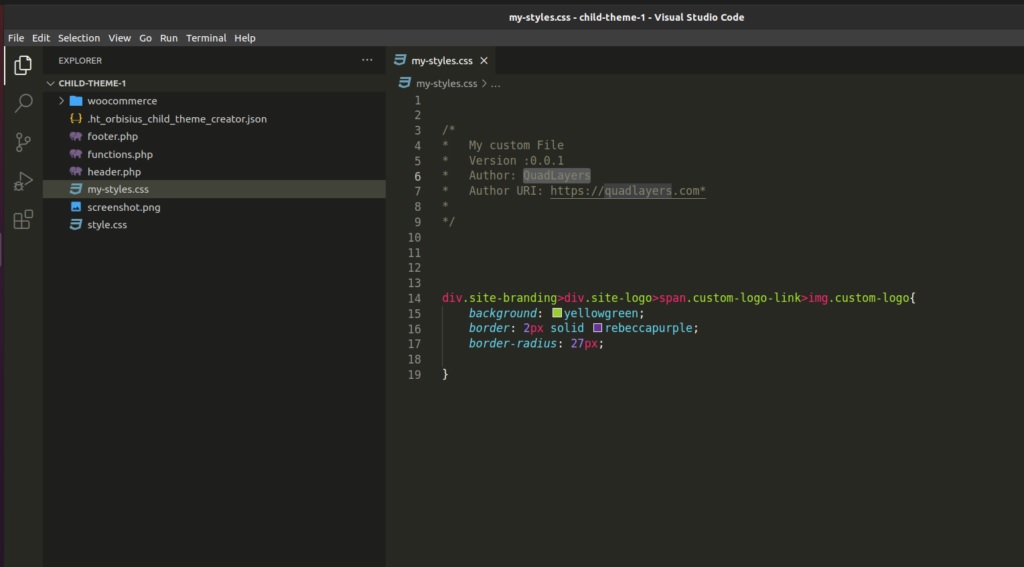
3.1. Create CSS file using Code Editor
First, you need to create the separated CSS file with all the necessary CSS scripts using a code editor. Editors like Visual Studio Code, Sublime text, or any other that supports CSS files can be used.
Then, create a new file with the CSS extension and paste your code here. We have named the file my-style.css for this tutorial.
3.2. Upload the CSS File to Child Theme Folder
Now, the CSS file that you created must be uploaded to the child theme directory. For this, you can use an FTP client like FileZilla to upload the file. You can even upload it in the main child theme directory itself.
![]()
3.2. Enqueue your Custom CSS File
Now, you can enqueue your custom CSS file to your WordPress website by adding a code snippet on your functions.php file.
In the following script, we will be using the wp_enqueue_script() hook, which is the correct way to apply CSS files to a WP website. Inside the function, we register and enqueue our CSS file (my-styles.css) only if the condition is met. This is the same usage as the previous example.
Then, the get_queried_object_id() function will retrieve the id of the current page or post. All you have to do is add the following script to the functions.php file once again and Update it.
add_action( 'wp_enqueue_scripts', 'my_theme_styles' );

function my_theme_styles() {
    if(get_queried_object_id()==97){
        wp_register_style( 'my-styles', get_stylesheet_directory_uri() . '/my-styles.css');
        wp_enqueue_style( 'my-styles', get_stylesheet_directory_uri() . '/my-styles.css');
    }
}
Note: In the above sample script, we refer to the same ID reference that we used in previous examples, which is 97.
If you want further information about adding a CSS file, please have a look at our detailed guide to apply CSS to WordPress.
Conclusion
These are all the various methods through which you can apply CSS to a specific page or a post. It can help you a lot to create unique designs for particular pages and posts for your website. To summarize, there are 3 most common ways to add CSS to specific pages and posts:
- Using the HTML id or class
- Adding a PHP function
- Including the CSS file on a specific page or post
The most straightforward approach out of them is using the HTML id or class for the CSS selectors. However, if your theme has any limitations for it, your next best option is to add a PHP function to apply CSS. Finally, if you have to apply large CSS scripts for the specific page or the post, including them in a CSS file is the most suitable approach for you.
If you want to use more CSS on your website, we also have tutorials to customize the Divi menu with CSS or edit the WooCommerce shop programmatically. Similarly, you can also customize your pages and posts even more with the help of our guides to create posts and pages programmatically, turn a post into a page, create custom post type, or even add posts to a page in WordPress.
So, can you apply CSS to specific pages or posts now? Was this tutorial helpful? Please let us know in the comments. In the meantime, here are some more articles that you might want to visit:

Thanks so much! I didn’t realize I could apply css on my blog posts page using .blog I was trying the .pageid but it just wasn’t working.