
How to apply CSS using browser developer tool
Looking for ways to style your site with a bit of CSS? There are different ways to do that. In this guide, we’ll show you how to apply CSS using the browser developer tool along with a few examples of things you can do.
When developing an application or website, developers use a wide variety of tools that help them do their jobs. One of the most popular ones is the browser developer tool. Without it, working on a website would be much more complicated.
Most browsers provide their own inbuilt developer tool. Most of them are similar but have a few different options. Considering that nearly 66% of users use Chrome, in this guide, we will focus on the ![]() Chrome developer tool. It is one of the most complete ones and it stands out from the browsers because of its performance and variety of features.
Chrome developer tool. It is one of the most complete ones and it stands out from the browsers because of its performance and variety of features.
Before jumping into how to apply CSS using the browser developer tool, first, let’s get familiar with the Chrome developer tool and what you can do with it.
NOTE: We’ll explain some concepts here, but to follow this guide, we recommend you have a basic understanding of CSS and how it works.
The Chrome developer tool
First, you need to open the tool in Chrome. For that, there are 3 options:
- Press F12 on your keyword
- Right-click anywhere on the screen and select Inspect
- Press the three-dot icon on the top right next to your user avatar and go to More Tools > Developer Tool
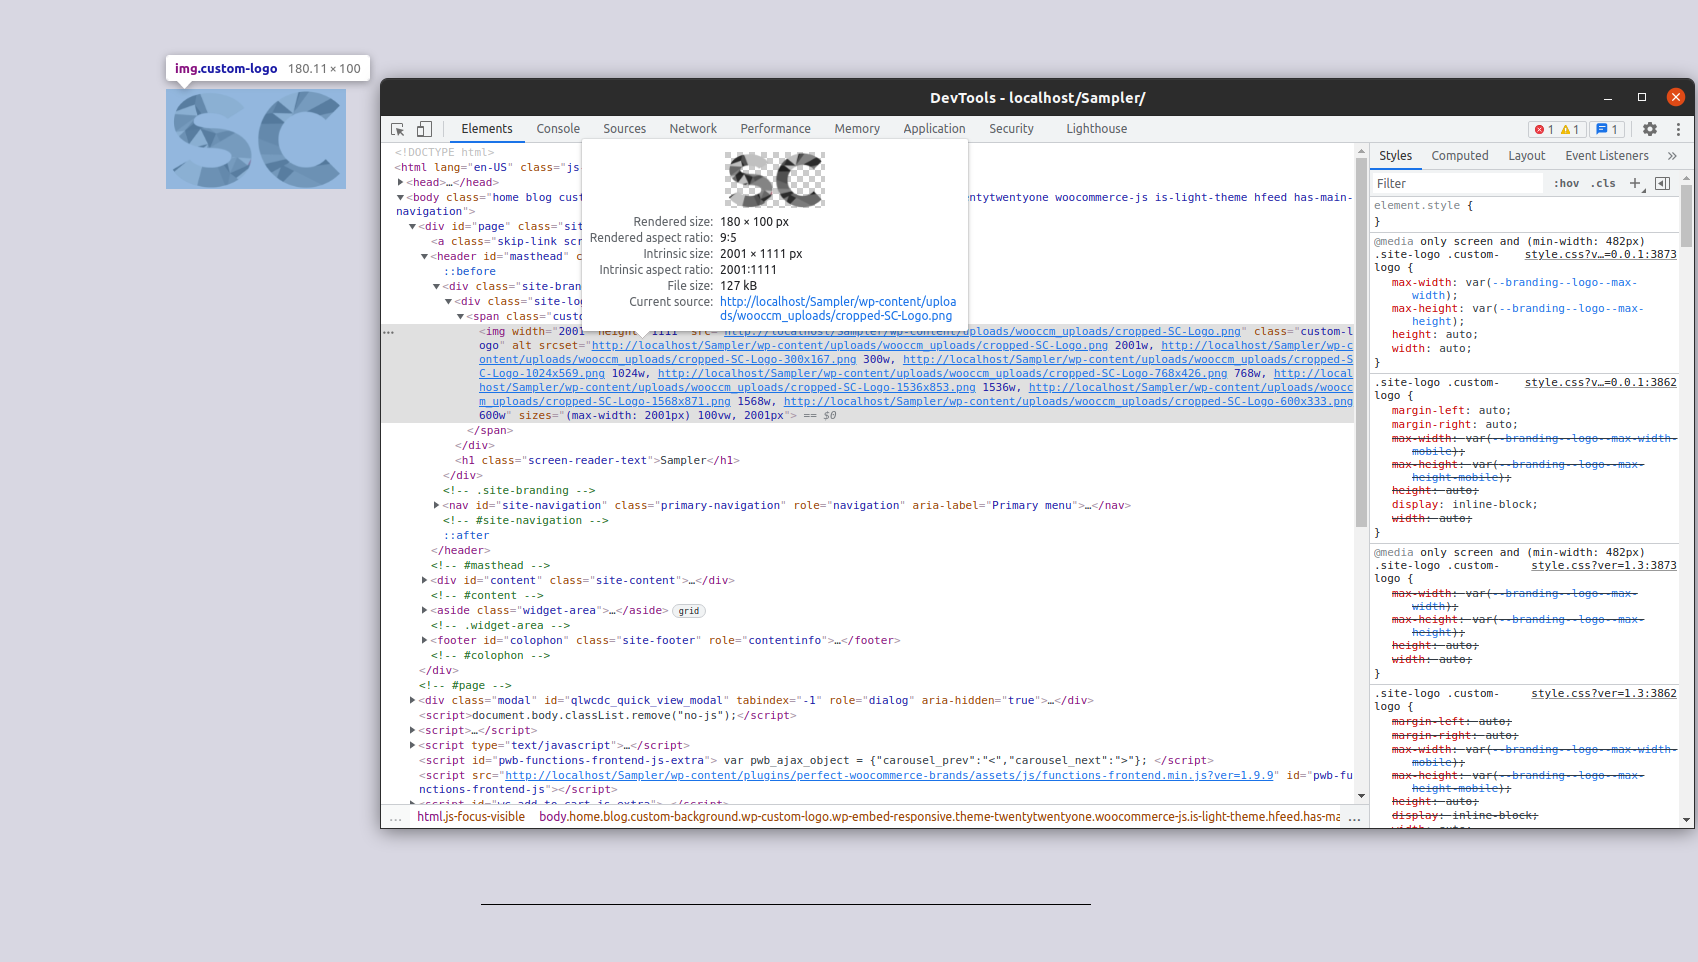
Any of those three options will open the DevTools that should look like this. Your developer tool may look slightly different but the elements will be the same.

As you see, there are several tabs, make sure you’re on the Elements tab that shows you the HTML output of the website. Note that the tool will take all the information regarding the current window, that is the active tab on the browser when you opened the DevTools.
You can have multiple developer tool windows opened at the same time, each one displaying the information of a different tab on the browser.
How to find an HTML element on the browser developer tool
If you have a closer look at the elements in the tool, you’ll see that you can open most of the elements by clicking on them. On top of that, the elements nested inside other elements are highlighted on the frontend when you hover over them.
By looking at the different elements, you can see the HTML parent elements. You can dive into the HTML structure by opening each element with a click. In most sites, the HTML code is quite long, so it can be tedious if you need to find a specific element. Even more so if the element you’re looking for is deeply nested within a large list of HTML parent elements.
However, there’s a much easier way to find a specific element.
Finding specific elements
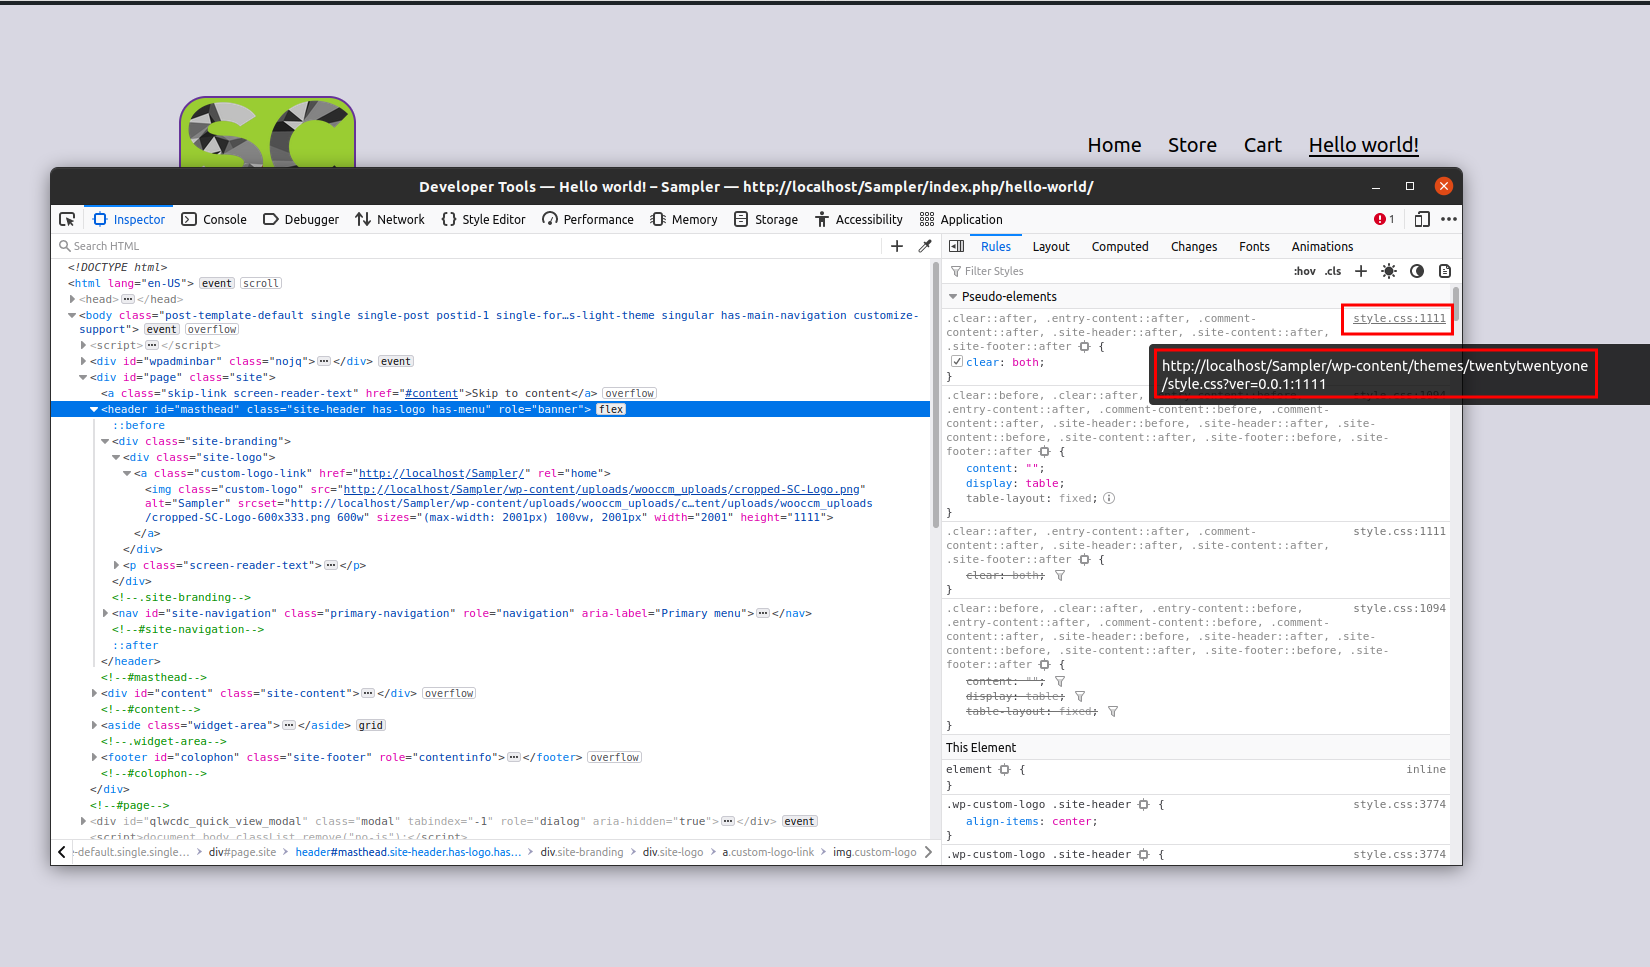
Simply right-click on the element you want to analyze and select Inspect.
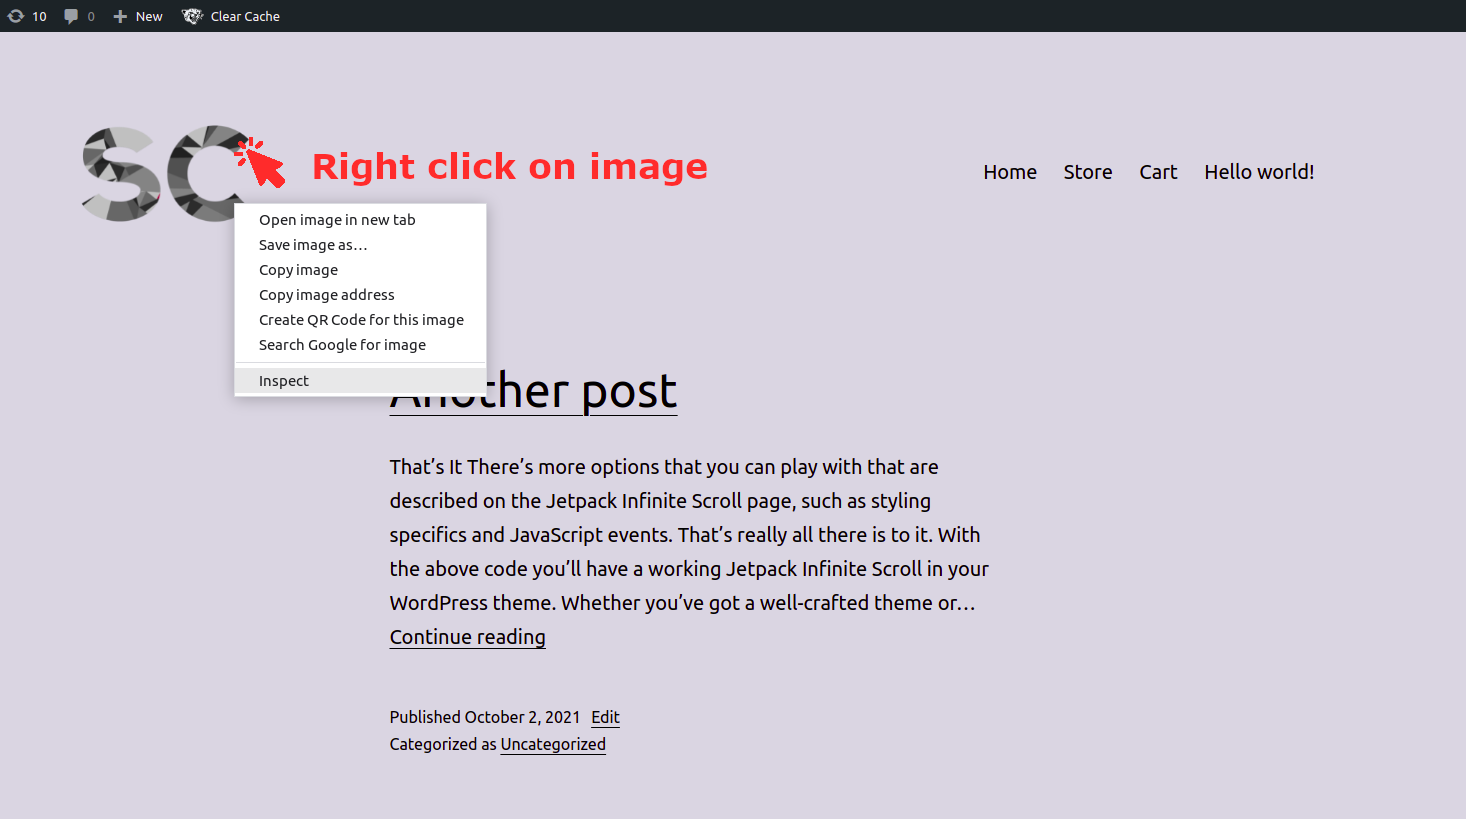
When the inspector opens, that element will be selected and appear highlighted in the DevTools.
As you can see in the screenshots above, we’ve clicked on a logo, so when we inspect the element in the developer tool, the image of the logo is already selected and highlighted. This helps us understand the deepness of the element within the full HTML source code of the website.
Now that you know how to select specific elements using the developer tool, let’s go a step further and add a bit of custom CSS.
Editing the CSS script live
If you have a look at the right side of the dev tool window, you will see all the CSS rules that are applied to the element you selected sorted by inheritance.
Inheritance is one of the main CSS concepts that describe CSS functionality. Don’t worry if you don’t fully understand what it is, we’ll explain it in the next section.
To apply your own CSS rules on the dev tool, you need to type or paste it there, right after the element-style declaration:

In this case, following our example, we’ve changed the width, background color, and border of the logo we have previously selected.
You can also insert your scripts on any of the CSS rules on the sidebar instead of doing it on the element.style wrapper.
CSS inheritance on the browser developer tool
You might be wondering what’s the point of having all those CSS rules there if you can apply your CSS code on any of them and it makes no difference.
As mentioned before, those are all the CSS rules applied to the selected element sorted by inheritance.
The inheritance concept describes how CSS is applied to an HTML document. Basically, it controls what happens when no value is specified for a property of a given element.
If you have a closer look at the screenshot below, you will see that all the CSS selectors on the sidebar target the same element: the element you selected in the main section.
If you apply two or more rules to the same element, the one that will be applied is the more specific one. This would disable the inheritance behavior, which applies to properties without a definition.
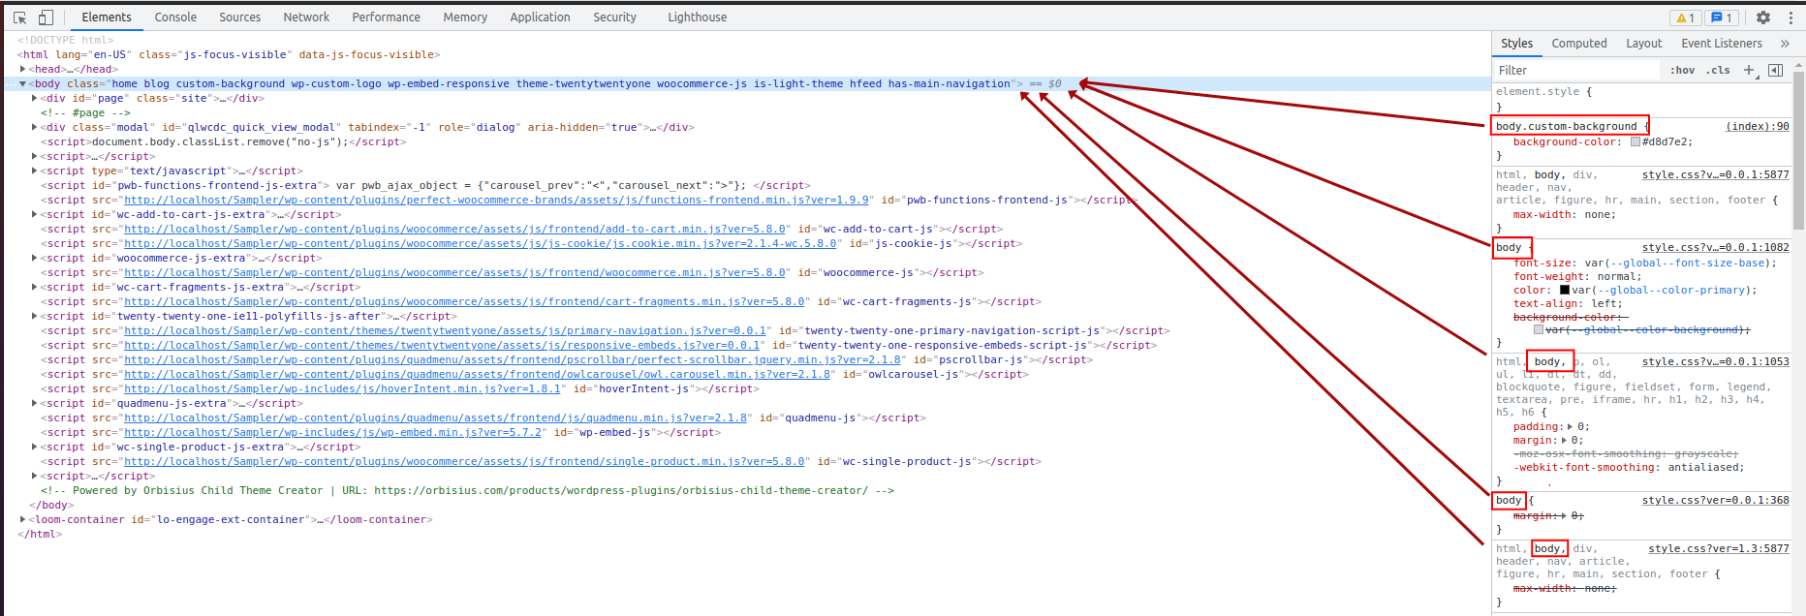
In the above screenshot, the background-color property of the <body> element is given by the following rule:
body.custom-background {
background-color: #d8d7e2;
}
This overwrites all the other rules that apply to <body> because it has a more specific selector that includes the .custom-background class.
If you want to learn more about CSS inheritance, you can have a look at this documentation.
Now that you have a better understanding of its elements, let’s see how you can apply CSS using the browser developer tool.
How to apply a CSS script using the browser developer tool
After working with the dev tool and once you’ve written your CSS script, you need to copy the CSS code from the developer tool and add it to the CSS files of your website. In this section, we’ll show you how to do that step-by-step.
1) Get the CSS selector
First, you have to grab the selector. Open the developer tool and click on the HTML element you want to edit so it highlights. Then, right-click on the highlighted element and go to Copy > CSS selector.

2) Refine the selector
In the above screenshot, the CSS selector we copied to the clipboard is:
.site-branding > div:nth-child(1) > span:nth-child(1) > img
In some cases, this selector might not work, so you need to refine it to make it more specific. For example, you can use the following selector that is much more specific and will overwrite the previous one:
div.site-branding > div.site-logo > span.custom-logo-link > img.custom-logo
3) Copy the CSS rule
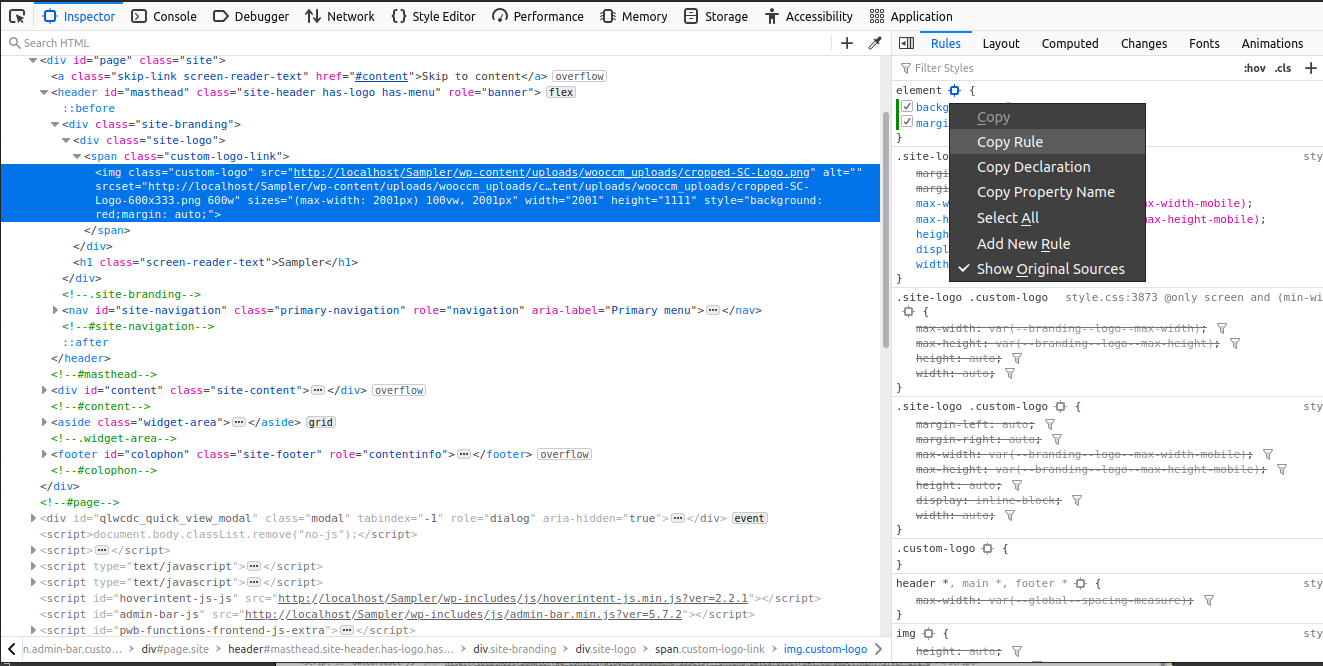
Once you’ve customized the selector and confirmed that it works, copy the declarations you need from the right sidebar of the dev tool.
To do that, right-click on the CSS rule you’ve added to the dev tool, and select Copy rule.
4) Add your CSS code to your website
The final step is to add the custom CSS code you’ve just created using the browser dev tool to your website style files putting together the selector and the declaration.
There might be several ways to include your custom CSS in your site depending on your setup. Many plugins and themes provide their own CSS editor box, and you can also add the scripts right into the CSS files of the theme. Let’s have a look at a few different options.
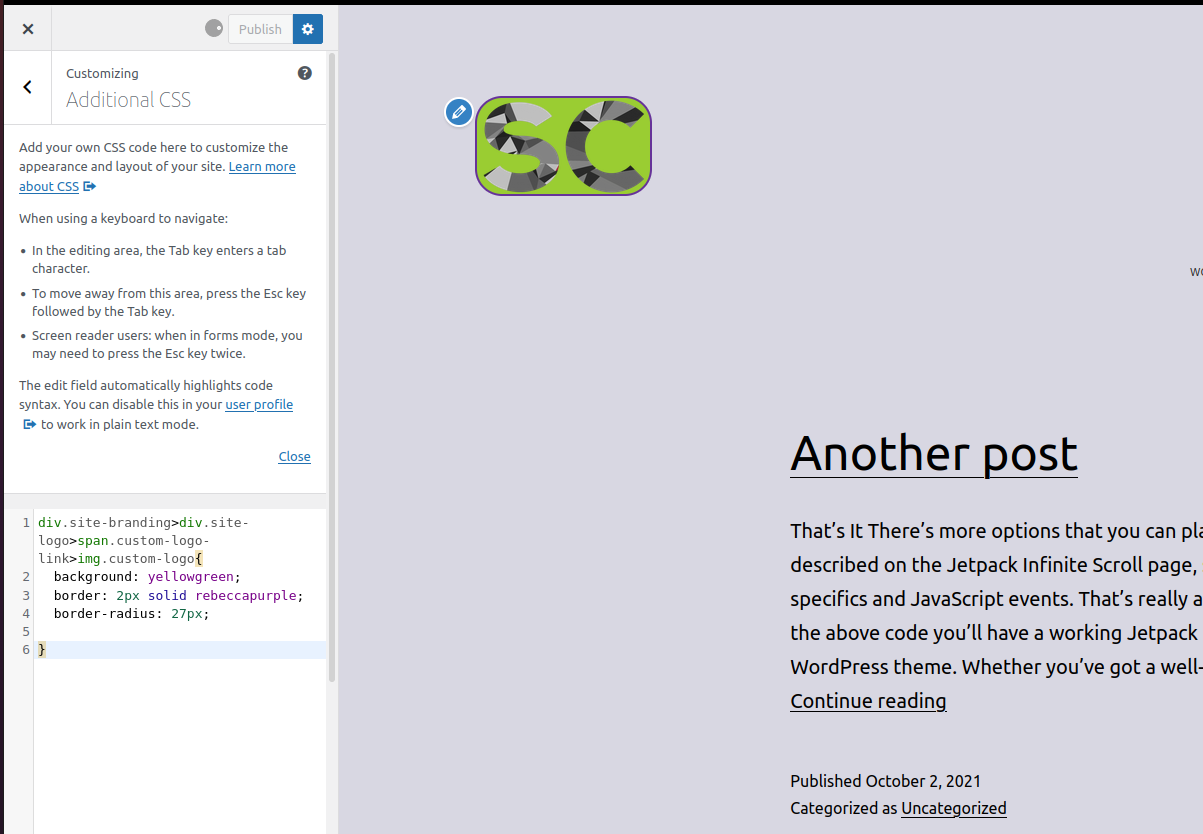
4.1) Additional CSS editor of theme customizer
A straightforward method to apply CSS using the Additional CSS editor of the theme customizer. This is an option that WordPress provides you with by default to add custom CSS and it’s present on all websites.
To add your CSS code to your site, on your dashboard, head to Appearance > Customize > Additional CSS. Paste your CSS rules into the editor and hit Publish.
The advantage of this method is that you don’t need any extra tools and you can see a live preview of the code before it goes live.
4.2) CSS file of the child theme
If you are using a child theme, you can add the custom scripts to the style.css file. This is a good option if you have a lot of CSS code.
To do this, open the style.css file of the child theme and paste your CSS rules there. Depending on your child theme, the file may have a different name or there may be some other files. In any case, make sure that the file has a .css extension and that you are editing the correct file.
Another alternative to editing the WordPress files of your child theme is to use the theme editor under the Appearance tab of the WordPress dashboard.

The CSS scripts that you add here will work the same way as adding them to the theme customizer, but they might have a slightly better performance.
Check CSS files on the browser developer tool
In the previous section, we’ve explained how to add CSS scripts to your WordPress site. As you can imagine, all the CSS rules you see on the developer tool come from a CSS file. These files might be created by the website dynamically, loaded from the server, or from a cached file of the client browser.
If you have a closer look, you’ll see that the name of the file that contains a CSS rule is displayed right after the rule, on the CSS sidebar of the dev tool.
If you click on the file name (style.css) you’ll go to the style editor screen of the dev tool where you will see all the active CSS files and their content.
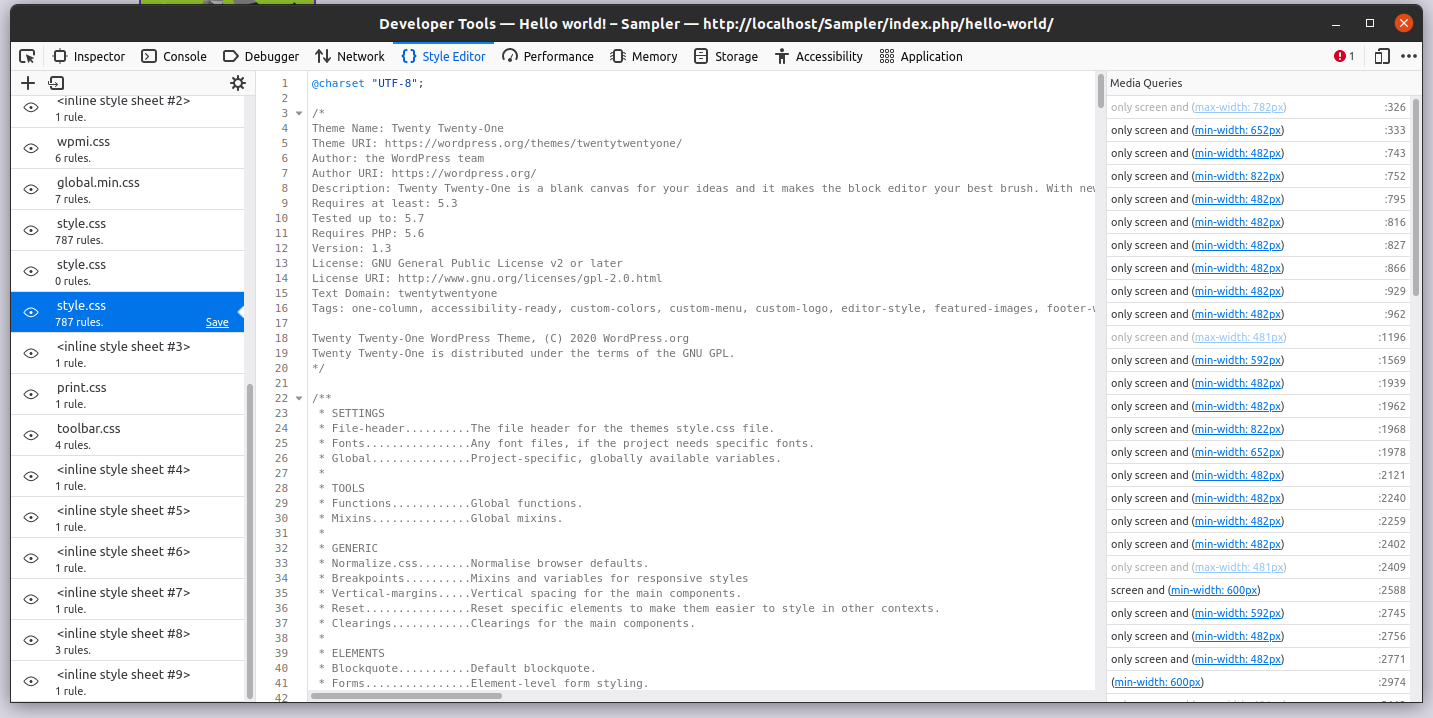
This can be useful to have a better understanding of all the CSS files present on your website.
Conclusion
All in all, most browsers include very powerful developer tools that developers use daily. In this guide, we’ve shown you one of the main features of the browser developer tool. We’ve seen how to find specific HTML elements on the dev tool and how to edit CSS live. Additionally, we’ve explained the CSS inheritance and why it’s important.
Finally, we’ve shown you how to apply a CSS script using the browser developer tool step-by-step and different ways to add it to your site.
If you found this tutorial interesting, share it with your friends on social media. For more useful guides to improve your site, have a look at the following articles:
