
How to Change WooCommerce Checkout Error Messages
Are you looking for ways to update the error notices at checkout? We’ve got you covered. In this guide, we’ll show you different methods to change the WooCommerce checkout error messages.
When running an online store, at some point you will face conflicts and errors. We’ve previously seen how to fix general problems on the checkout, what to do when the Add to Cart button doesn’t work, and some solutions when the Shop Page is empty. In this tutorial, we’ll show different ways to change the WooCommerce checkout error messages and create custom ones.
Before we have a look at the different ways to do so, let’s better understand the benefits of customizing the error messages on the checkout page.
Why Change the Checkout Error Messages?
By default, WooCommerce comes with basic and quite generic checkout error messages. Most store owners leave them as they are, so by changing those messages, you can easily stand out from the crowd.
Leaving the checkout notices unchanged is a great missed opportunity. The checkout is the most important moment as it defines whether you close the sale or not. If there’s an error during the checkout, shoppers might back down and you might end up losing the sale. By customizing these error messages at checkout, you can make the most of them and explain what happened to provide security to the customers.
By default, WooCommerce displays error messages when there are required fields that are missing or when the payment method the customer introduced isn’t valid. These are the typical error messages you see at checkout:

As you can see, they are clear but there’s a lot more you can do with them. For example, you can add elements that reflect your brand, add more text, and so on.
Now that you know why you should change the checkout error messages in WooCommerce, let’s see how you can complete the task.
How to Change the WooCommerce Checkout Error Messages
There are two ways to edit the WooCommerce checkout error messages:
- With plugins
- Programmatically
Let’s have a look at both methods, so you can pick the right one according to your skills and needs.
1) Customize the checkout error messages with plugins
If you don’t have coding skills or prefer to use plugins to edit WooCommerce error messages, you can use the Say What plugin. This tool helps you modify your website strings without writing a single line of code or editing template files.
The free version comes with basic features, while the premium version starts at 39 USD per year and unlocks more advanced customization opportunities.
Once you have installed and activated the plugin, you will see the configuration options on the left-hand side. From there, you can select the string you need to replace and enter the target content. Once you have done that, hit Save, and that’s it.
If you need help with the plugin, you can raise a support ticket or email the support team using the contact form.
2) Edit checkout error messages programmatically
If you don’t want to use a plugin and have programming skills, you can edit the error messages with a bit of code. In this section, we will show you how to use PHP to change the error messages in WooCommerce.
There’s a lot you can do here. For this demonstration, we’ll focus on displaying one error message instead of the default multiple warnings on the checkout page.
To do this, we’ll modify the theme’s functions.php file, so before starting we recommend you backup your site and create a child theme if you don’t have one yet.
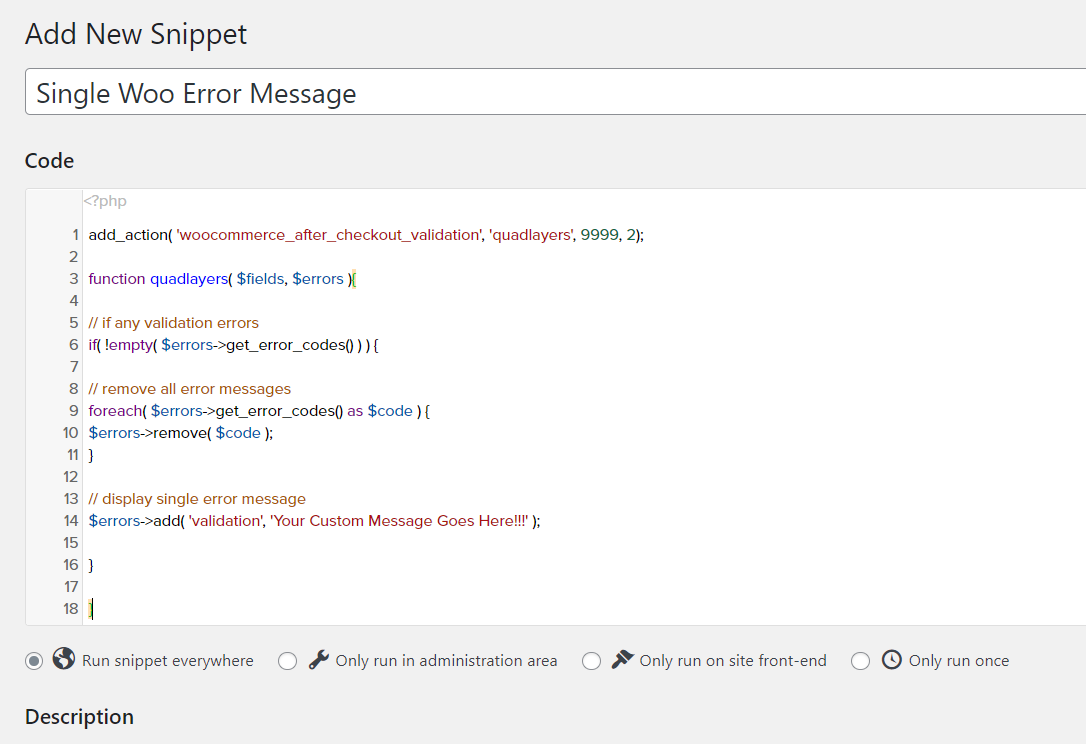
After that, you can add the below code to the funtions.php file of your child theme. As mentioned before, it will display a single error message on the checkout page instead of several notices.
add_action( 'woocommerce_after_checkout_validation', 'quadlayers', 9999, 2);
function quadlayers( $fields, $errors ){
// in case any validation errors
if( !empty( $errors->get_error_codes() ) ) {

// omit all existing error messages
foreach( $errors->get_error_codes() as $code ) {
$errors->remove( $code );
}
// display custom single error message
$errors->add( 'validation', 'Your Custom Message Goes Here!!!' );
}
}
If you have a closer look at the code, you’ll see that we have set quadlayers as the function, and Your Custom Message Goes Here!!! as the single message. Feel free to take this snippet as a base and adjust it according to your requirements.
For this demonstration, we’re using a site-specific plugin to paste the code as you can see below.
Now check the front end, add any product to the cart, and go to the checkout page. If you try to complete the purchase without filling any required fields, you will see an error like this:
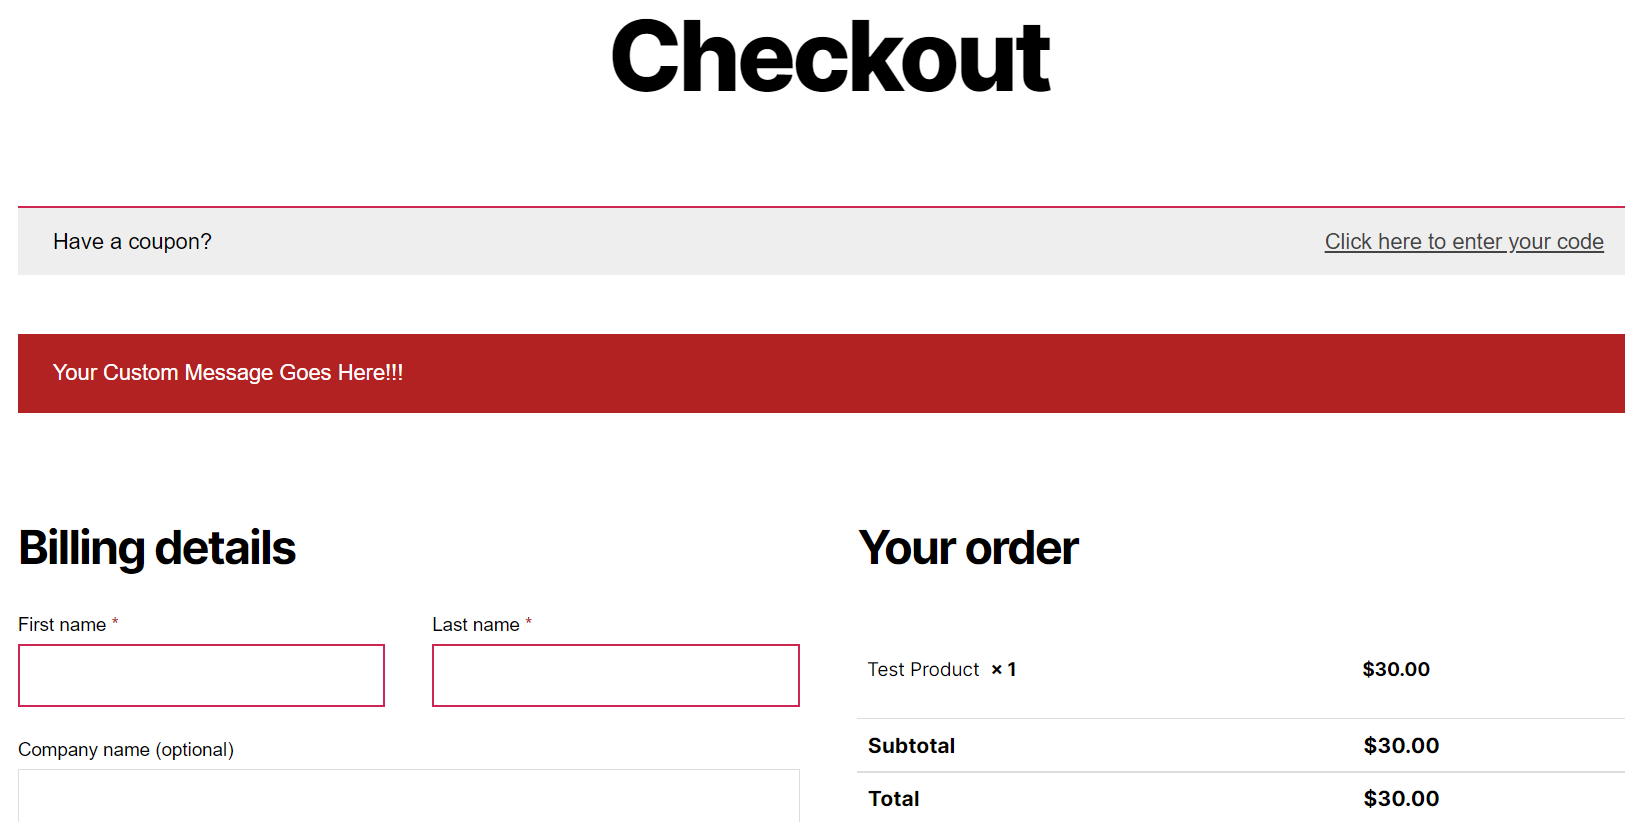
This way, you can change the WooCommerce checkout error messages with a bit of code.
As you can see, this is a simple example. We recommend you combine this approach with conditional to improve your customers’ shopping experience. To learn more about that, have a look at our guide on how to add conditional fields to the WooCommerce checkout.
So far, we’ve seen a few ways to customize the error messages at checkout. But there’s more you can do to improve your online store. Let’s see how you can add custom messages.
How to Add a Custom Checkout Message
In this section, you’ll learn to display a custom message on your checkout page. First, in your dashboard, go to Pages > Checkout.

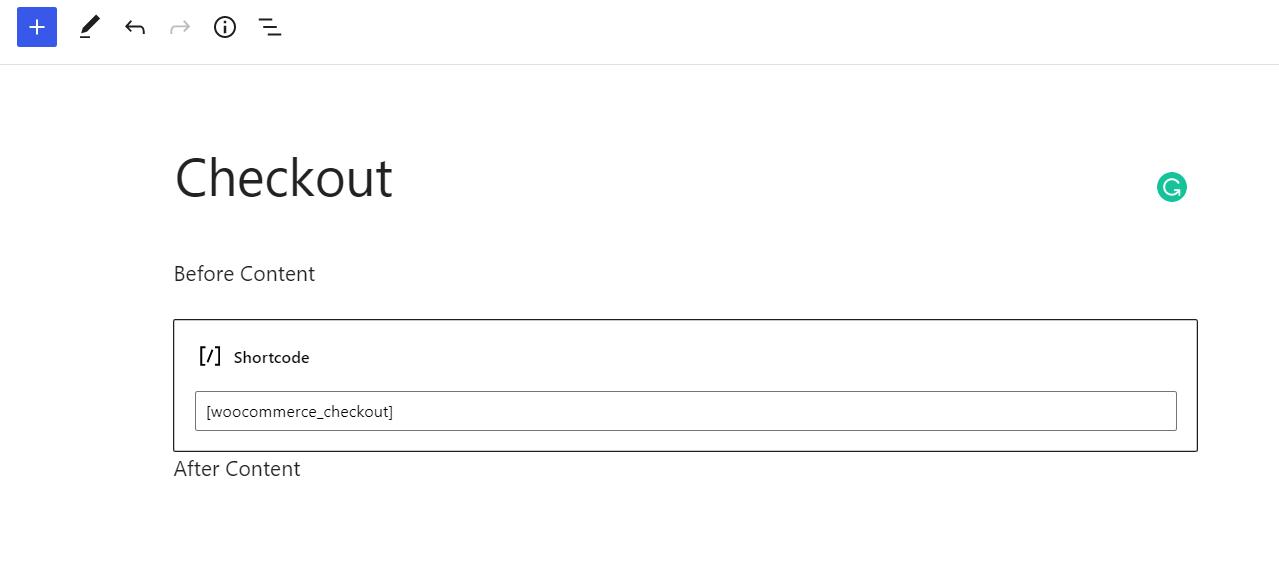
Here, you can modify the page content and display custom messages, add media, and much more. By default, the checkout page contains the WooCommerce checkout shortcode.

If you want to display a custom message before and after the checkout fields, you can use the paragraph block. For this demonstration, we will add one paragraph block before and another one after the checkout shortcode. We’ll simply call them “Before Content” and “After Content”.
After updating the page, have a look at the checkout page from the front end and you will see the custom messages that we have just added.
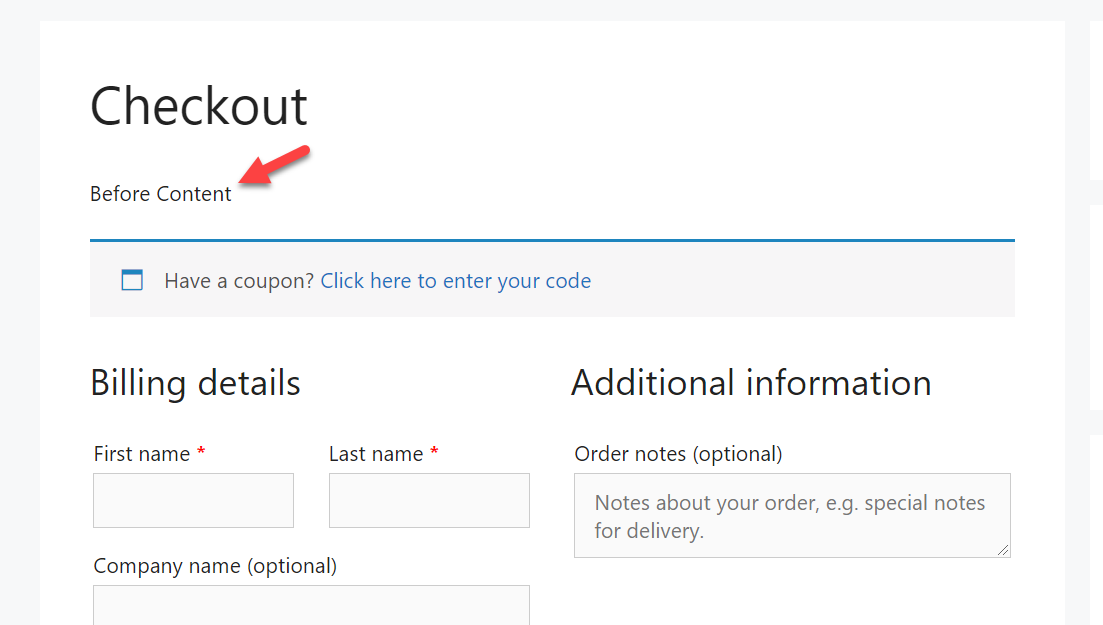

Similarly, you can add any type of content such as images, custom messages, coupon codes, and more to the checkout page.
How to Change the Error Message Position
By default, WooCommerce displays the error messages on the left-hand side. The good news is that you can change that with a bit of CSS. In this section, we will show you how you can change the error message position with a CSS snippet.
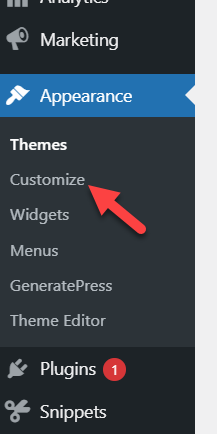
First, log in to your WordPress admin dashboard and go to Appearance > Customize.
Open the Customizer and go to the Additional CSS section.
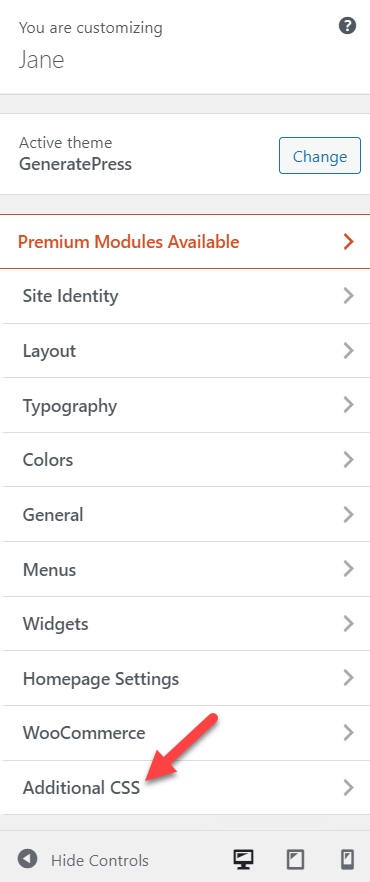
This is where you can add your CSS snippets. The WordPress customizer will display the changes in the live-preview section, so you can see every update in real-time.
Simply copy this snippet and paste it into the wizard.
form.checkout {
-ms-flex-wrap: wrap;
flex-wrap: wrap;
}

.woocommerce-NoticeGroup-checkout {
-webkit-box-flex: 1;
-ms-flex: 1 1 100%;
flex: 1 1 100%;
max-width: 100%;
width: 100%;
margin-bottom: 40px;
margin-top:20px;
}

.woocommerce-NoticeGroup-checkout ul.woocommerce-error {
position: relative;
top:auto;
bottom: auto;
left:auto;
right:auto;
padding-right: 30px;
z-index: auto;
cursor: default;
-ms-transform: none;
transform: none;
-webkit-transform: none;
animation: none;
-webkit-animation: none;
}

.woocommerce-NoticeGroup-checkout ul.woocommerce-error:after {
content: none;
}

.woocommerce-NoticeGroup-checkout ul.woocommerce-error.hidden-notice {
animation: none;
-webkit-animation: none;
}
In this case, we’re giving the message a margin of 40 pixels on the bottom, 20 pixels at the top, 30 pixels of padding on the right, and 100% of width. Adjust these values according to your preferences and remember to save the changes.

Bonus: How to Hide WooCommerce Errors
Before we finish this guide, let’s have a look at a different alternative. What if instead of changing the WooCommerce checkout error messages you want to hide the error messages? If that’s your case, this section is for you. We will show you how to remove errors with a bit of code.
As we’ll edit some core files, make sure to create a full backup of your site and use a child theme if you don’t have one already.
To hide errors, we customize the wp-config.php file. First, we recommend downloading a copy of the wp-config.php file to your local computer to have a backup that you can restore if needed.
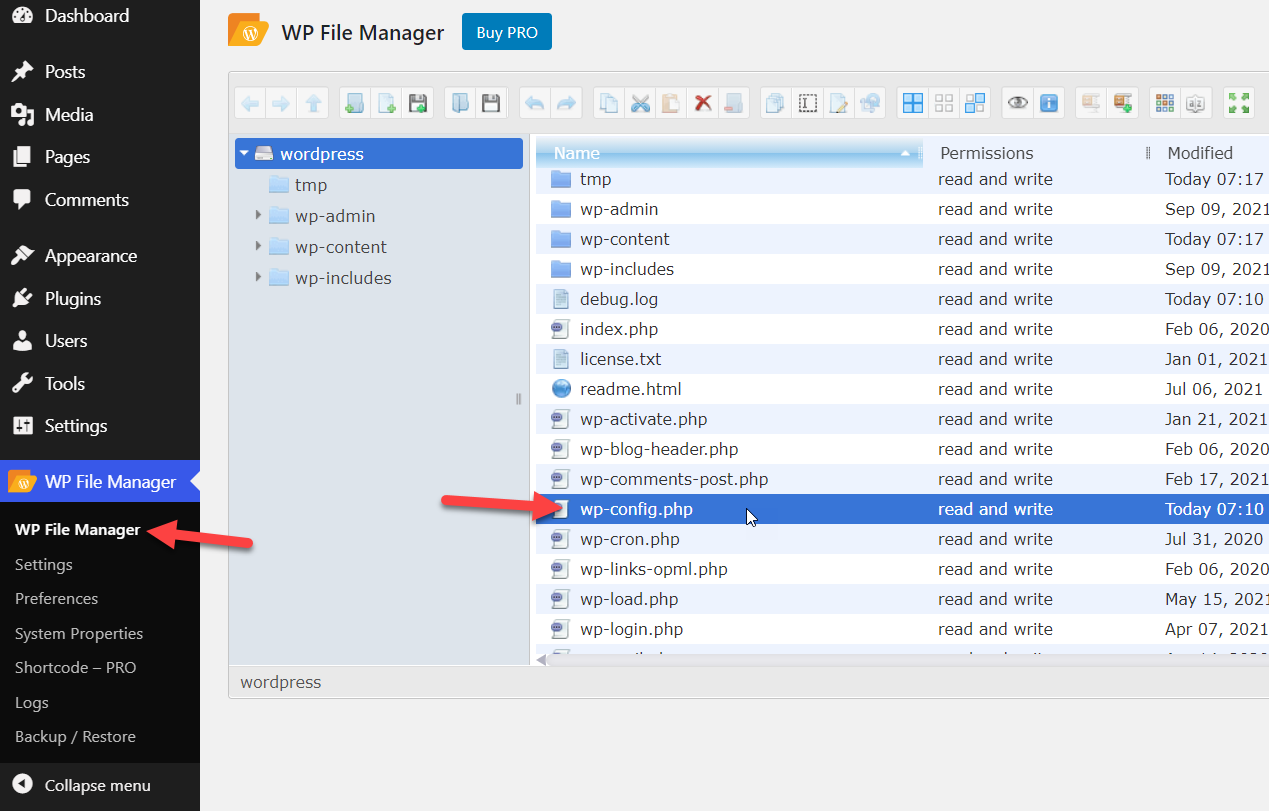
There are several ways to access WordPress core files. For this demo, we’ll use a dedicated plugin called File Manager. First, in your dashboard, go to Plugins > Add New and search for File Manager. Once you have found the plugin, install it and activate it on your website.
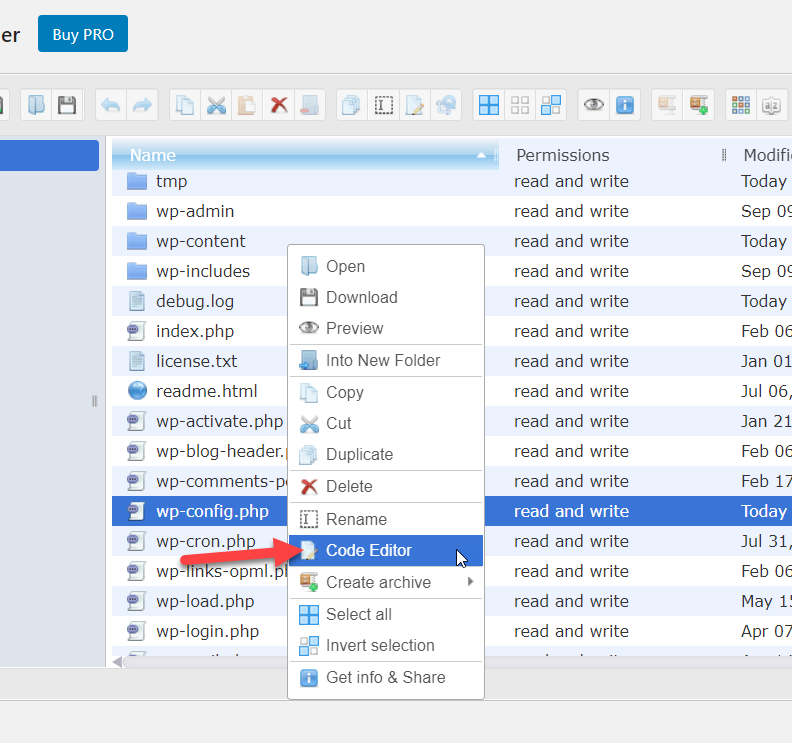
After activation, you will see the plugin’s configuration on the left-hand side. Look for the wp-config.php file.
Right-click on the file and select the Code Editor option.
In the middle of the file, you will see one of the following lines:
define('WP_DEBUG', true);
or
define('WP_DEBUG', false);

Once you find it, replace that line with the following code and save the file:
ini_set('display_errors','Off');
ini_set('error_reporting', E_ALL );
define('WP_DEBUG', false);
define('WP_DEBUG_DISPLAY', false);
The code will turn off all the error messages.

That’s it! From now on, your store won’t display any error messages.
More ways to customize the checkout
Finally, let’s see other ways to further customize your WooCommerce checkout.
Add custom fields to checkout
In this section, we’ll show you how you can add custom fields to the checkout page.
As you can imagine, you can add many different types of fields. For this demonstration, we will add a custom checkbox at the end of the checkout page to give shoppers the option to subscribe to your newsletter and build your email list.
Simply paste the following script in the functions.php file of your child theme:
// checkbox field
add_action( 'woocommerce_after_order_notes', 'quadlayers_subscribe_checkout' );

function quadlayers_subscribe_checkout( $checkout ) {
woocommerce_form_field( 'subscriber', array(
'type' => 'checkbox',
//'required' => true,
'class' => array('custom-field form-row-wide'),
'label' => ' Subscribe to our newsletter.'
), $checkout->get_value( 'subscriber' ) );
}
As you can see, we’ve added the label “Subscribe to our newsletter” next to the checkbox. You can take this as a base and adapt it to your store.
Make fields optional
Another interesting option is to make mandatory fields optional. This way, you make shoppers fill in only the fields that are necessary for the transaction. This way you make the checkout process faster and improve customers’ experience.
If you sell virtual products, for example, you can make the Address field in the Billing section optional pasting the following code into the functions.php file of your child theme.
add_filter( 'woocommerce_billing_fields', 'wc_address_field_optional');
function wc_address_field_optional( $fields ) {
$fields['billing']['billing_address_1']['required'] = false;
return $fields;
}
For more information about this, check out our guide to customize the WooCommerce checkout.
Conclusion
In summary, by editing the checkout notices, you can add another customization layer to your checkout and stand out from your competitors.
In this guide, we’ve seen two main ways to change WooCommerce checkout error messages: using a dedicated plugin and programmatically with a bit of code. Using a plugin is a good alternative for those who don’t have coding skills or prefer to customize their stores in a few clicks.
On the other hand, if you have programming knowledge and don’t want to install more plugins, you can code your own solution. This gives you much more flexibility and allows you to do anything you want. Make sure that you paste the snippet into your child theme, so you don’t lose your customization after updating your parent theme.
We hope you have found this article helpful and learned how to change WooCommerce checkout error messages. If you did, please share this post with your friends on social media.
For more interesting articles, have a look at these posts:

Hi, I need help regarding my website checkout page. In this, my checkout page error message is not showing on the online payment option (I am using ccavenue) its working fine on COD Option
I need your help on this, please