How to Change WooCommerce Language: 4 Methods
Translating your store can be a good idea to help you reach a global audience. If that’s your case, we’ve got something for you. In this post, we will show you how to change the WooCommerce language and improve your store’s visibility.
Why Change the Language of Your Store?
WooCommerce’s default language is English. Even though for many people English is the “international” language, the truth is that many people don’t speak English. If most of your users aren’t fluent in English, it may be a good idea to change the language of your store.
The main benefit of changing the language is that you can tailor your site to your audience so they have a better experience.
If you only sell products to English-speaking countries such as the United States, UK, or Australia, it makes sense that you set up your store in English. On the other hand, if you target non-English countries or a global audience, you might want to consider making your store multilingual. For example, if you sell to Latin America and Spain, you should change the language of your WooCommerce store to Spanish.
By simply adjusting the language, you can provide users with a better experience, which will help you boost your sales and revenue. Finally, if you sell products all over the world, having an option that lets users switch the language is a big plus.

Now that we better understand the benefits, let’s see what you can do to change the language of your store.
How to Change the WooCommerce Language
There are four main ways to change the language of your WooCommerce store:
- Change the language of the dashboard
- Install a language manually
- Change the language of the store
- Create a multilingual store
Each method has certain pros and cons. Let’s have a closer look at each of them so you can choose the most appropriate one for you.
1) Change the Language of the WooCommerce Dashboard
In this section, you’ll learn how to show English as your store’s primary language but use another language in the backend. This is helpful is people who don’t speak English have to manage the back end. For example, you can show your store in English in the front end but use German for the back end.
First, log in to your WordPress dashboard and go to the Settings > General.
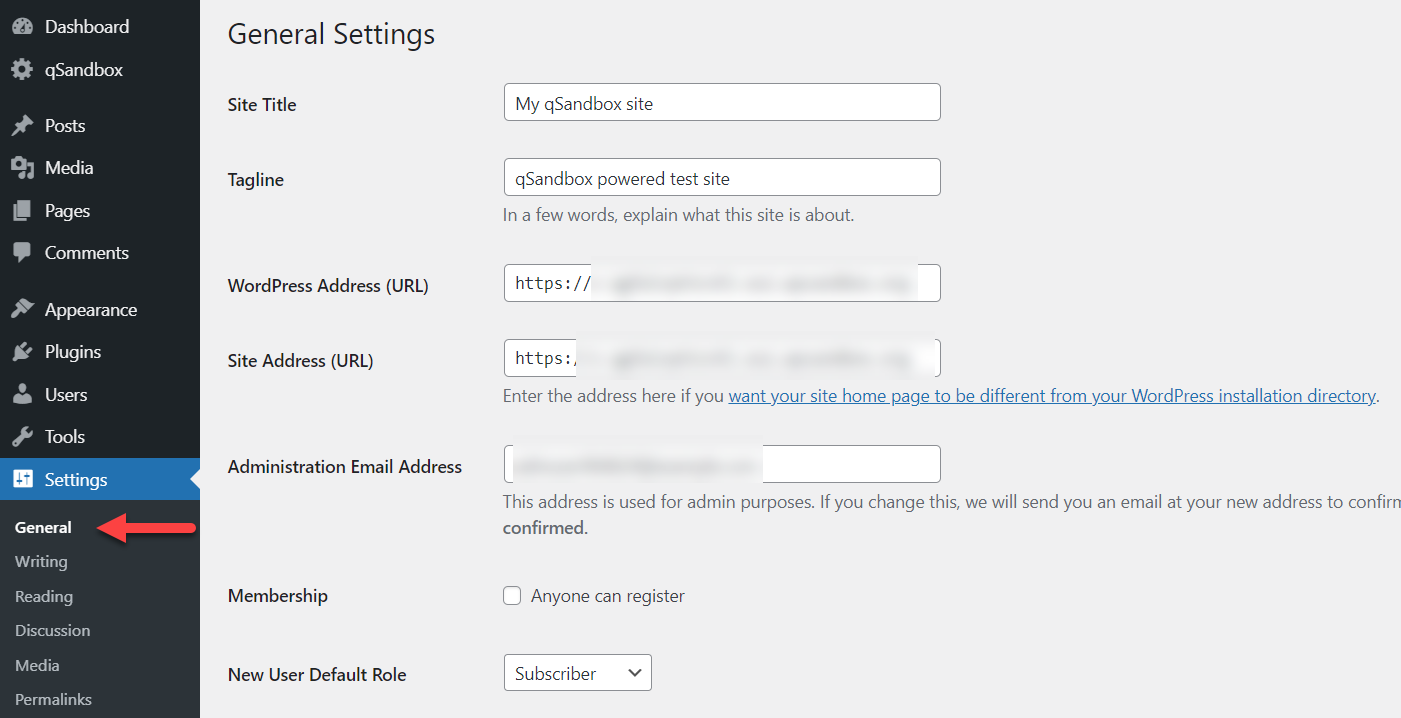
Scroll to the bottom and you will see the Site Language section.
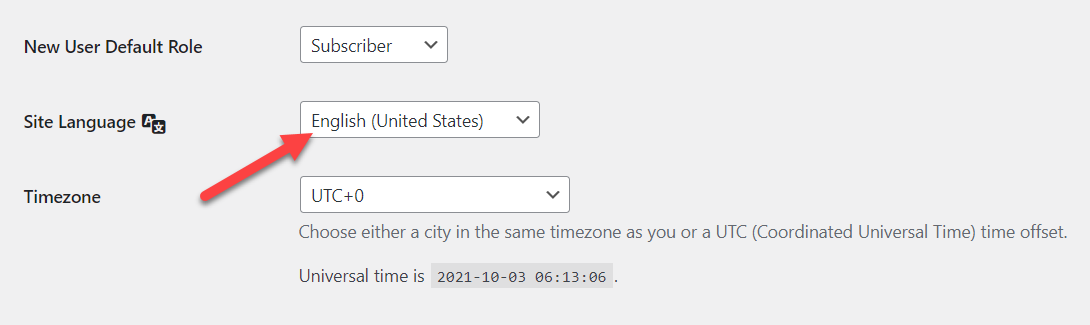
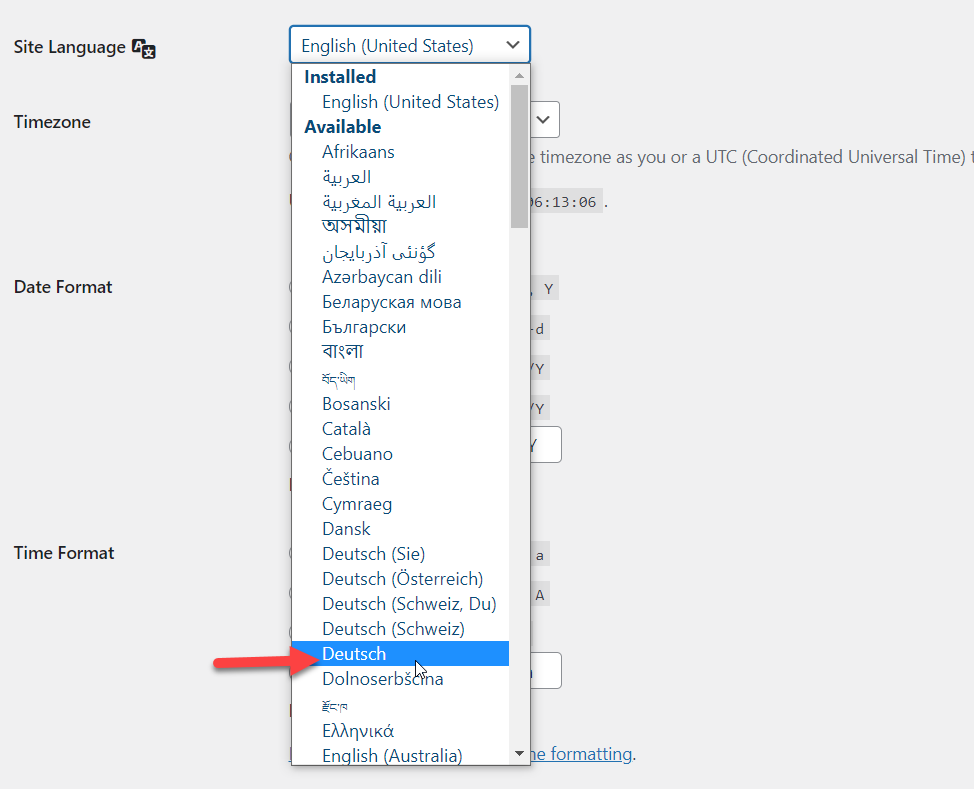
Changing the language there will modify your entire website’s language. From here, you can also install additional languages on your site. For this demonstration, we’ll set up the website selecting Deutsch (German) as the WordPress backend language. Simply look for the language in the list, select it and install it on your site.
If everything goes well, WordPress will change your default backend language to Deutsch (German) as you can see below.

The current configuration will change both the back-end and front-end language. However, we want to keep the front-end in English. To do that, you need to do something else.
Go to Dashboard > Updates > Translations and press Upload Translations. After that, go back to Settings > General and use select the language you want to display on the front end from the drop-down.
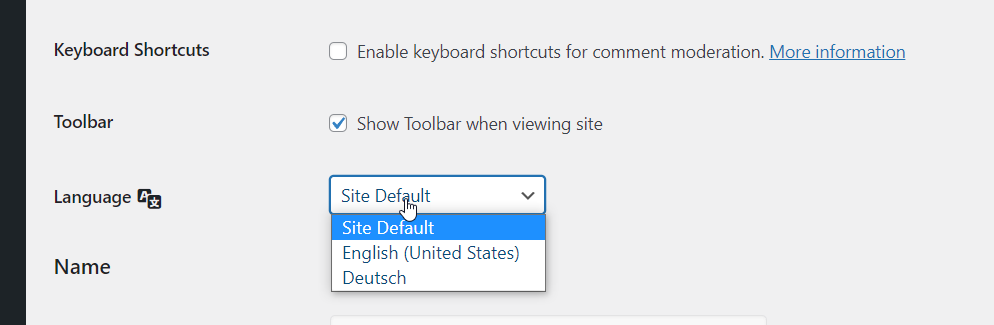
Then, go to Users > Profile and you will see an option to change the user language there. By default, the user will be configured with the site’s language, but you can change it.
Simply click on it and you will see all the installed languages in the dropdown. Select the language you want to use in the back-end and save the settings.
Keep in mind that this will only apply to your WordPress account. If other members of your team have access to your dashboard, they’ll have to select the language they want from their profile settings.
That’s it! From now on, your website visitors will see the default language in the front end, and the other language you chose on the back end.
2) How to Install a Language Manually
WordPress is the most popular CMS, so it has translations in many languages. However, sometimes you may want to use a language that’s not available in WordPress. In that case, you need to install the language manually. To complete this task, you need to download the language files, access your website files through cPanel/an FTP client or a dedicated file manager plugin and complete the manual upload.
Let’s have a look at this process step-by-step.
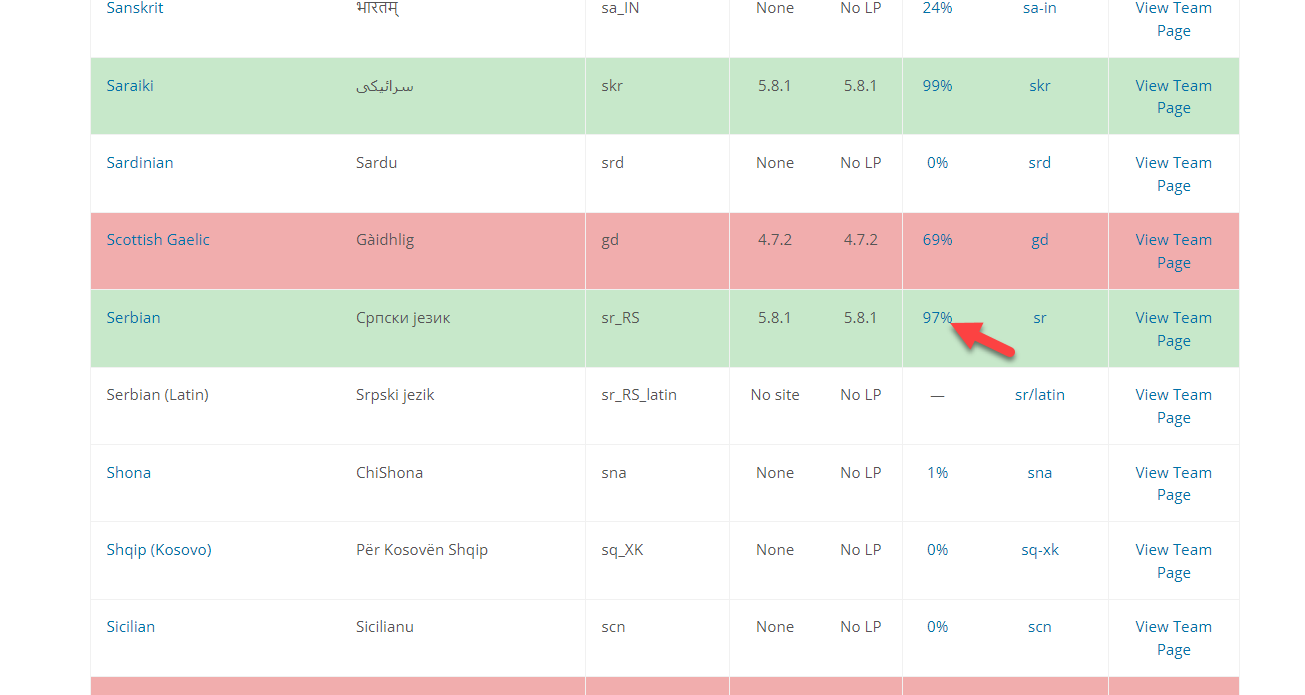
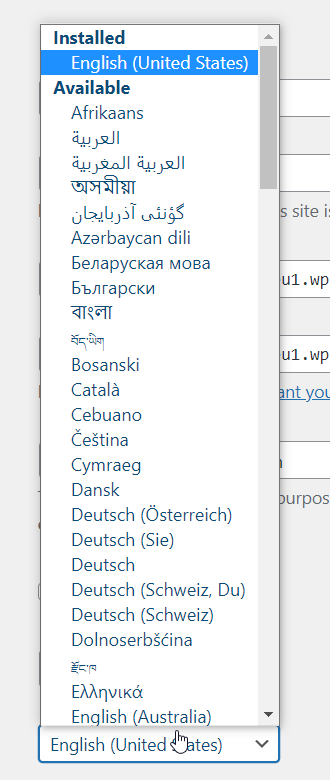
The first thing you need to do is open the WordPress translate section and scroll to the bottom. There, you will see all the available languages you can install on the website. From the archive, find your preferred language and click on the percentage link. For example, let’s say we want to translate our site to Serbian.
Inside the individual language page, you will see five columns:
- Set/Sub Project: Different sections of the plugin
- Translated: Strings that are translated
- Fuzzy: Strings that need adjustments
- Untranslated: Parts of the plugin that aren’t translated
- Waiting: Strings that need approval from someone from the WordPress translation team

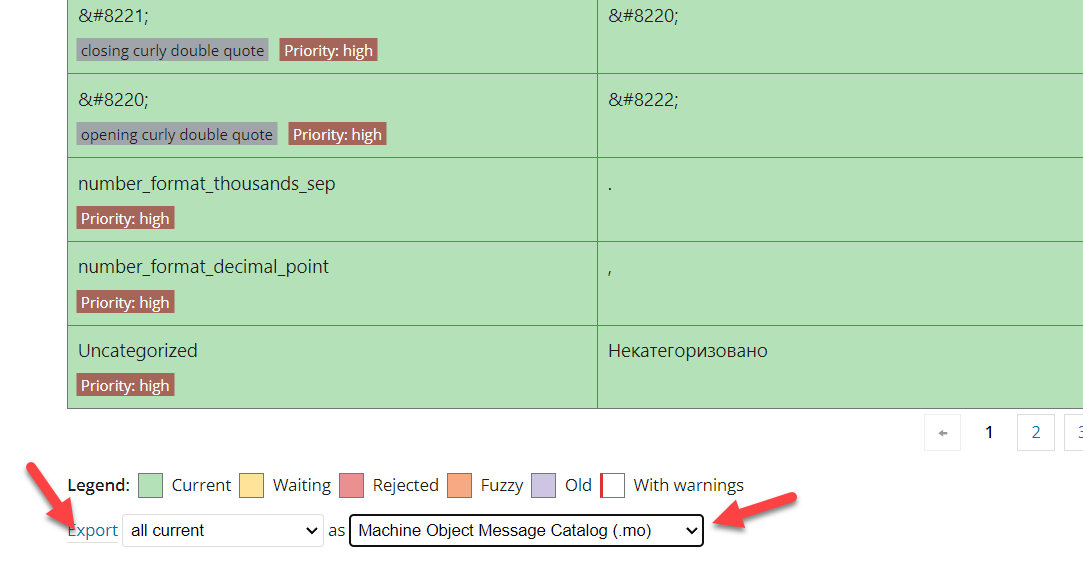
Download the Development project from there. Then, scroll to the bottom until you see the export options. From there, select .mo (Machine Object message Catalog) as the file type and complete the export.
A .mo file will be downloaded to your local storage. That is the language file you need to install on your site. To begin the installation, you need an FTP client such as FileZilla or cPanel access. Alternatively, you can use a file manager plugin.
Install a language manually with File Manager
For this demo purpose, we will use File Manager, so, first, we have to install and activate the plugin on our website.
After that, open the plugin’s settings and go to the wp-content folder.
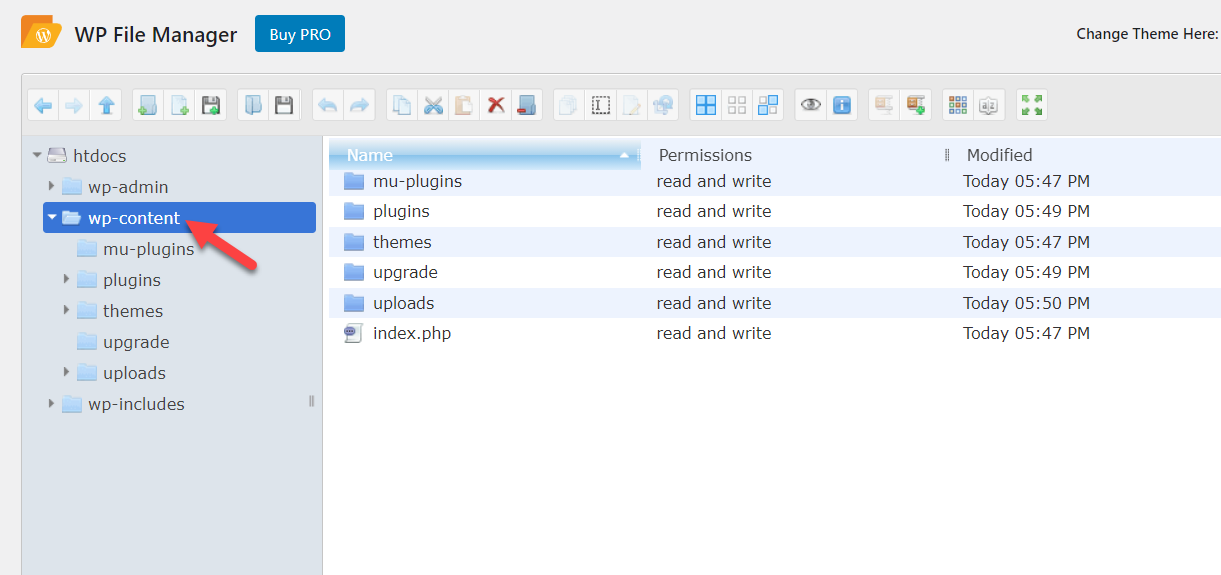
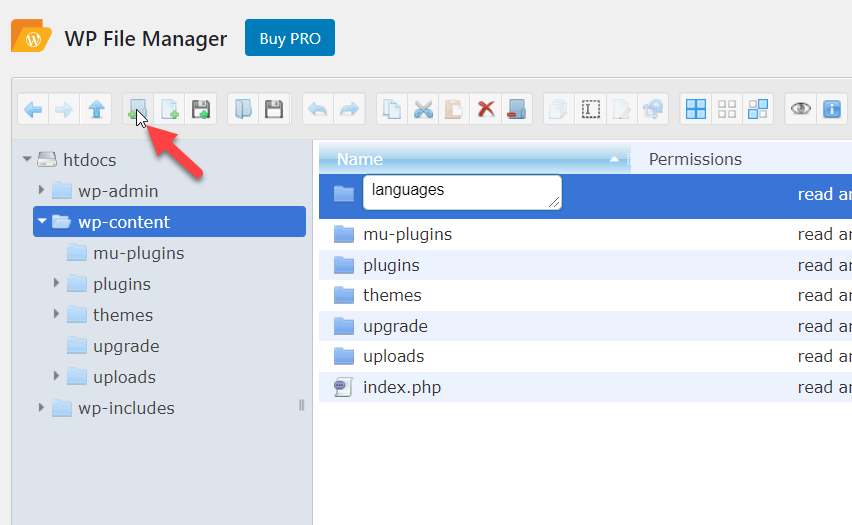
In some cases, there will be a folder called languages. If your installation comes with that folder, you can skip this step. But if your site doesn’t have the languages folder, you have to create one manually.
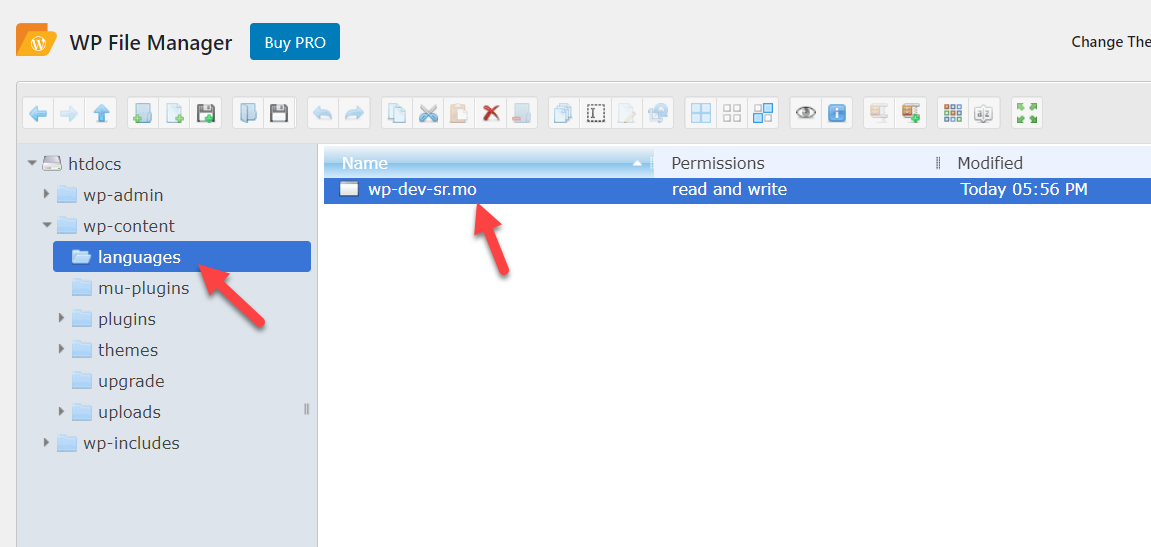
Open the folder and upload the language .mo file you downloaded in the previous step.
After completing the upload, go back to your WordPress dashboard and head to Settings > General. From the languages settings, you will see the newly installed language.

Simply select it from the dropdown and update the settings to apply it to your site. This way, you can install as many languages as you want.
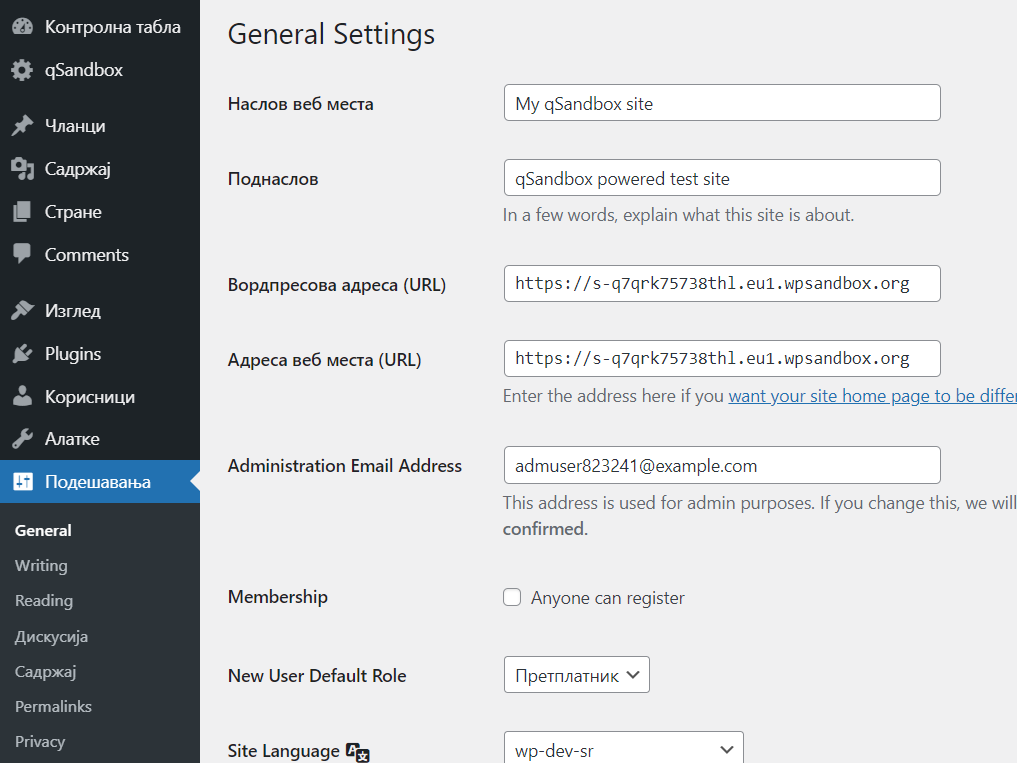
As you can see in the above screenshot, we have successfully updated the language of the WordPress installation to Serbian.
This is how you can change the WooCommerce language by manually installing it.
3) Change Language of the Store
If you want to use a single language on your WooCommerce store, this section is for you. Using a single language is the simplest option and it’s appropriate when the backend and frontend of your site don’t need different languages.
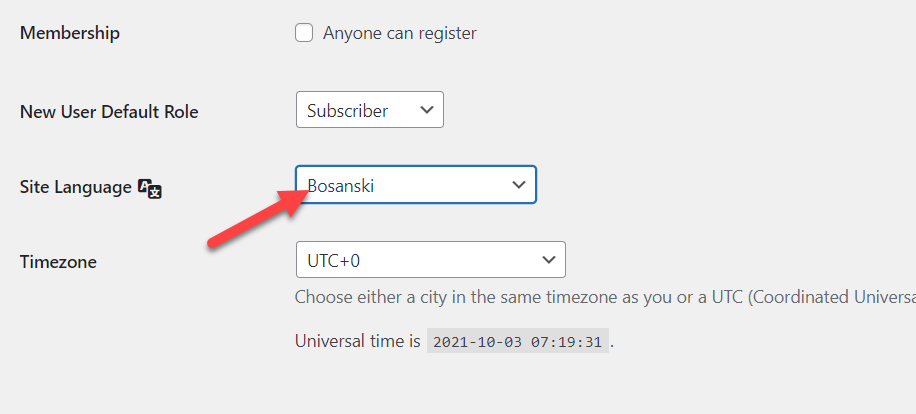
The good news is that changing the language of your site is quite simple. From your WordPress dashboard, go to General > Settings and look for the Site Language option.
When you click the dropdown, you will see the available languages you can install on your site.
Select the language you want to use in your store and save the settings. This will change both the backend and frontend language of your site.
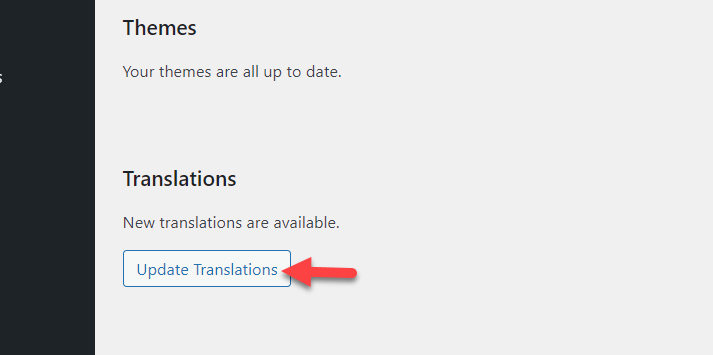
Make sure you update the translations regularly to keep your store updated using the Update Translations button.
This is how you can easily modify the language of your store.
4) Create a Multilanguage Store
The last option to change the language of your WooCommerce store is to create a multilingual store. This is an interesting option for those businesses that sell products or services worldwide. With a multilingual store, you can translate your store into different languages and display the frontend in the appropriate language for each user. This way, you can provide visitors with a better experience which will help you increase your sales.
To create a multilingual store, you need to correctly set up WooCommerce and a translation plugin. For this tutorial, we will use Loco Translate, one of the best free translation plugins.
Install and activate Loco Translate
First, install and activate Loco Translate on your WooCommerce store.
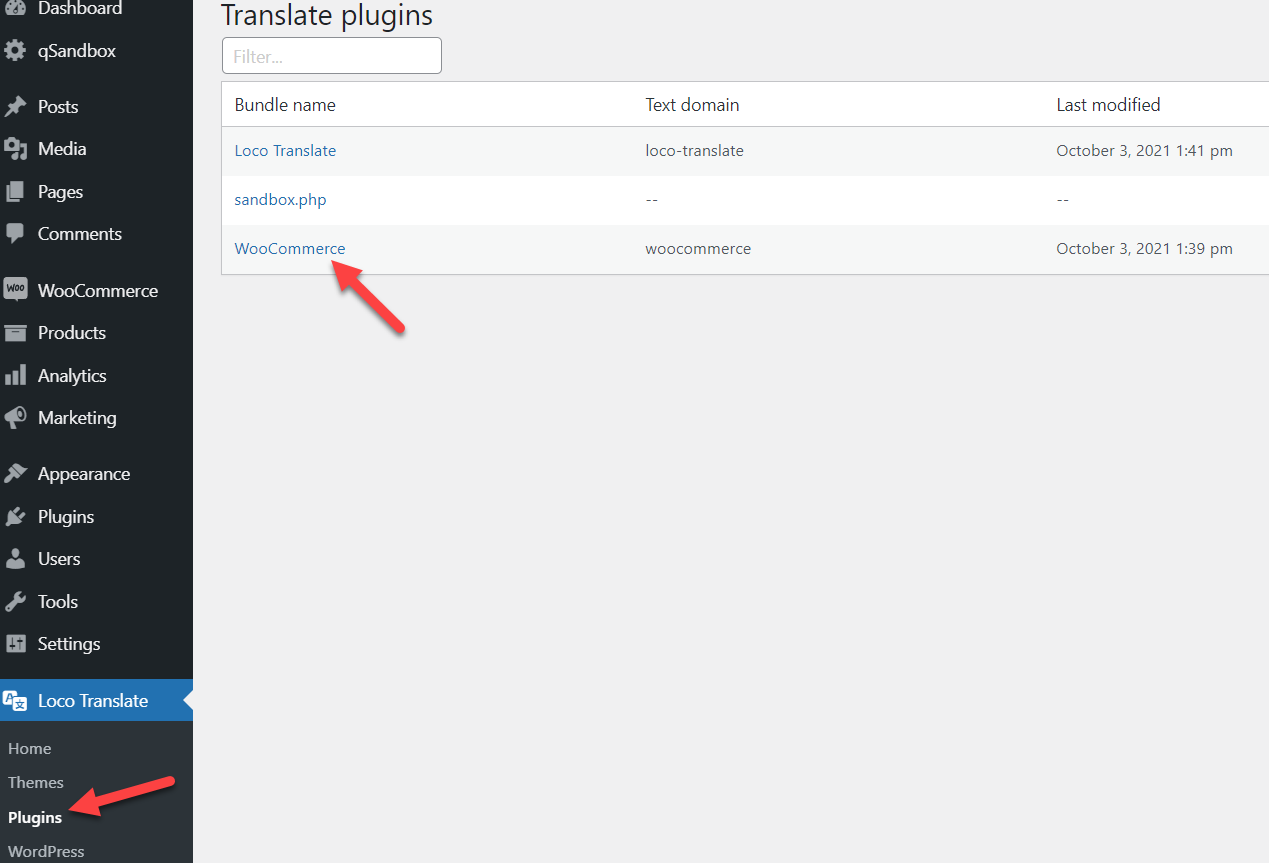
After activating the plugin, you will see the settings on the left-hand side. Since we are going to translate the WooCommerce plugin, go to the Plugins under Loco Translate. There, you will see all your installed plugins and you have to select WooCommerce.
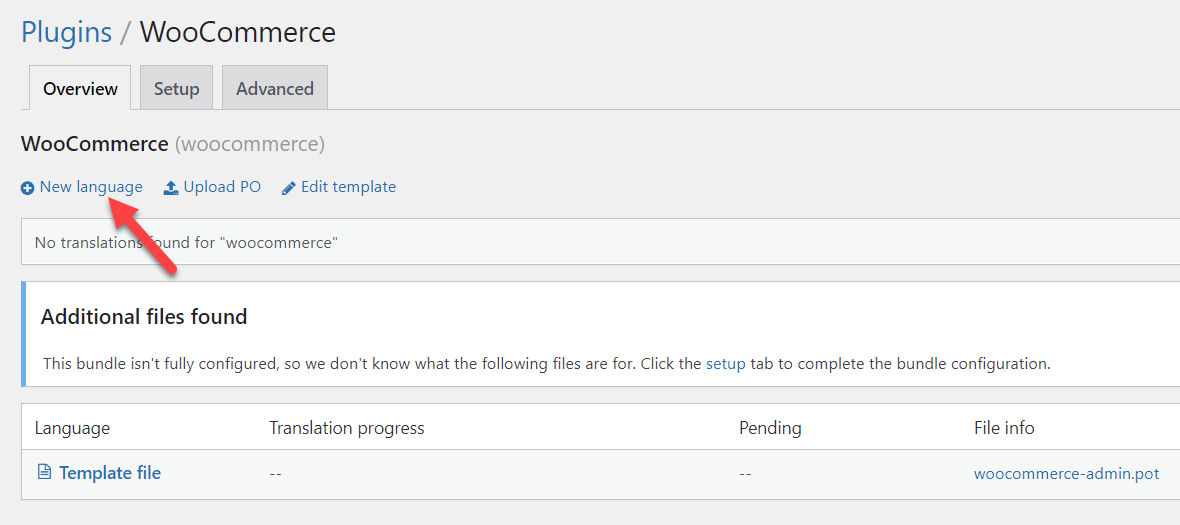
There will be no languages by default, so you need to create a new language.
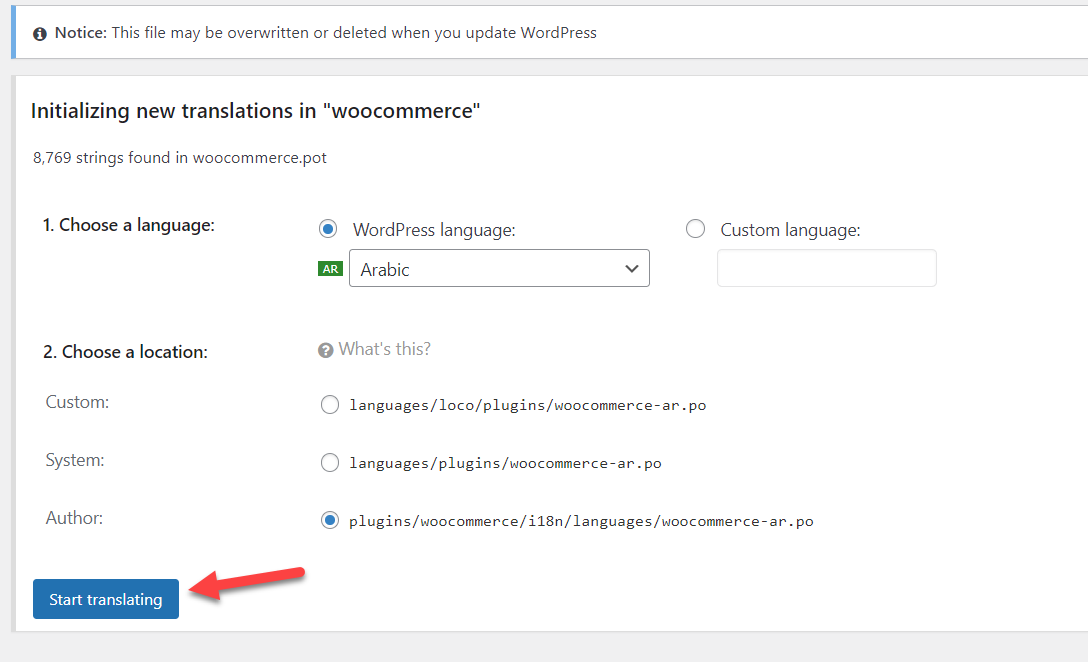
You will see a configuration wizard and you have to select a language and choose a location for storing the file. For example, let’s say you have a lot of customers from the Middle East so you want to translate your store into Arabic. Select Arabic from the dropdown, the storage location, and then click Start translating
The system will start translating the content. Depending on the size of your site, this may take a few minutes, so you may have to wait a little bit.
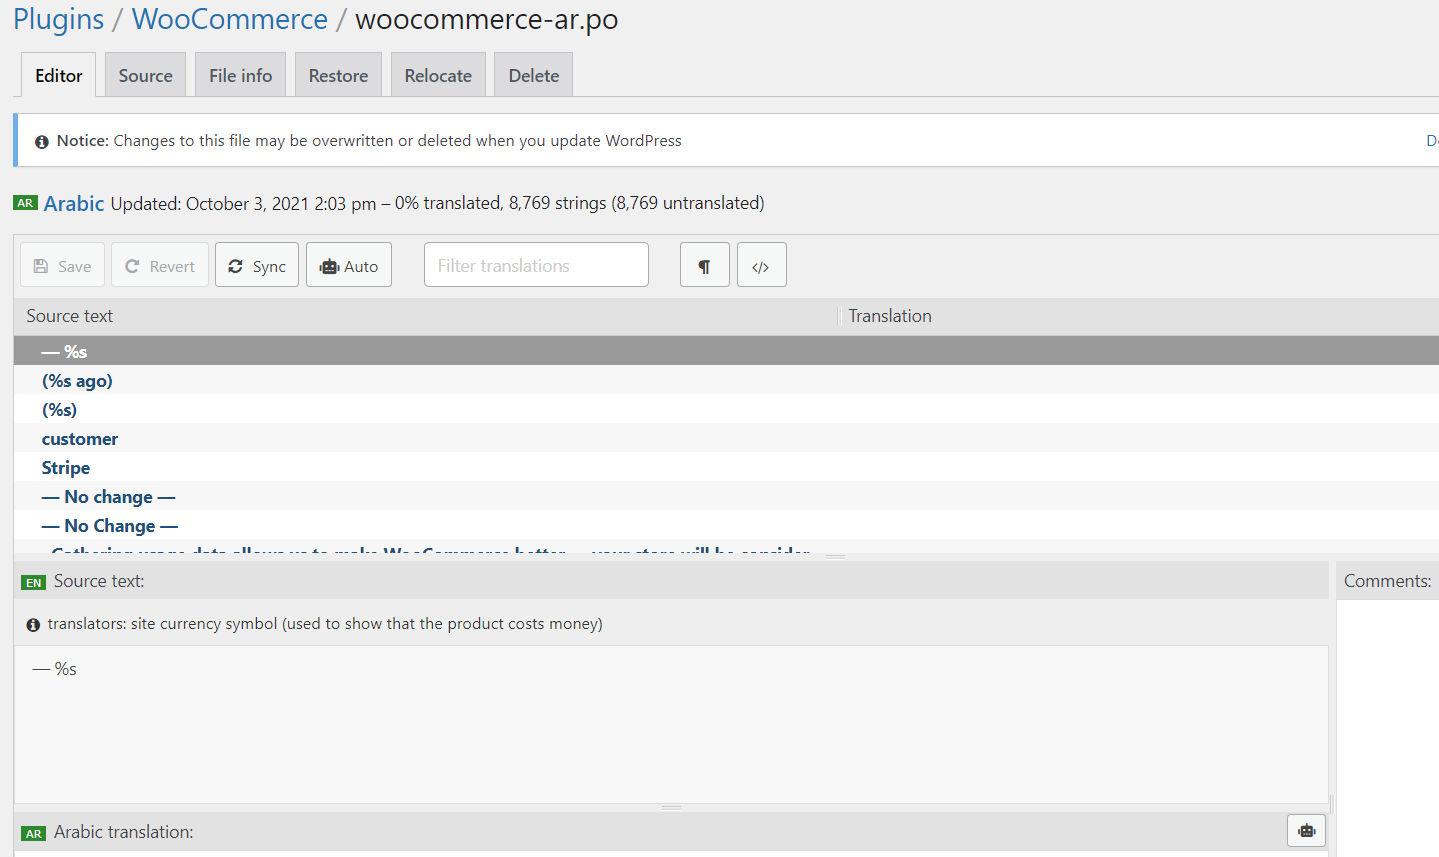
After the translation finishes, save the settings and that’s it! You have created a multilingual store and changed the language of your WooCommerce site.
To translate your store into more languages, follow the same process selecting the languages you want.
NOTE: Keep an eye on the updates, so whenever the WooCommerce plugin releases a new version, you update the translated files too to make sure everything is translated.
Best WordPress Translation Plugins
If you want to translate your WooCommerce store manually, you have two options:
- Hire an expert
- Use a dedicated translation plugin
Hiring an expert tends to be more expensive and the quality isn’t always great. If you’re going to get someone to translate your plugin, we recommend looking for a native speaker with good experience translating software.
On the other hand, if you are on a tight budget and want to save some cash on translations, you can use a dedicated plugin. There are many translation tools out there and some of them are free.
If you are looking for the best WordPress translation plugins, some of the ones we can recommend are:
- WPML
- Polylang
- Weglot
- Loco Translate
- TranslatePress
- MultilingualPress
All these plugins are easy to use and come with cutting-edge features. Have a look and them and choose the one that best suits your needs and budget.
Conclusion
All in all, translating your site can help you offer a better customer experience and increase your sales. In this guide, we’ve seen four ways to change the language in WooCommerce:
- Change the language of the dashboard
- Install a language manually
- Change the language of the whole store
- Create a multilingual store
The easiest way is to change the language of the whole store which will modify both the frontend and backend. Alternatively, if you want to have a language for the frontend and a different one in the backend, you can simply change the language of the dashboard. If you want to translate your store into a language that’s not available in WordPress, you’ll need to install it manually.
Finally, if you sell to several markets all over the world, creating a multilingual store is your best choice. And the best part is that you can use free plugins to do so.
Have you translated your site? Which method did you use? Let us know in the comments below!
If you found this article interesting, please share it on social media and help your friends translate their site.

Is there a way to have a non-English language as the default, then English as the second language. I’ve tried to follow the above, however on the customer login/ registration pages these still are in English. Site is using Elementor Pro + WooCommerce
Whats the difference between step 1 and 3??
The first option will help you display different languages in the front end and back end. The third option will help you choose a global language. However, if you are into translating your WordPress/WooCommerce store, we highly recommend using any WordPress translation plugin.