Do you want to improve your site’s security and avoid brute force and DDoS attacks? In this guide, we’ll show you different ways to change the WordPress login page URL to protect your site.
Every day, thousands of websites are hacked because of poor security features or vulnerabilities. To give you an idea of how bad this issue is, there is currently 1 cyberattack every 3 seconds! That’s why you should take some measures and protect your site.
Why Change the WordPress Login Page URL?
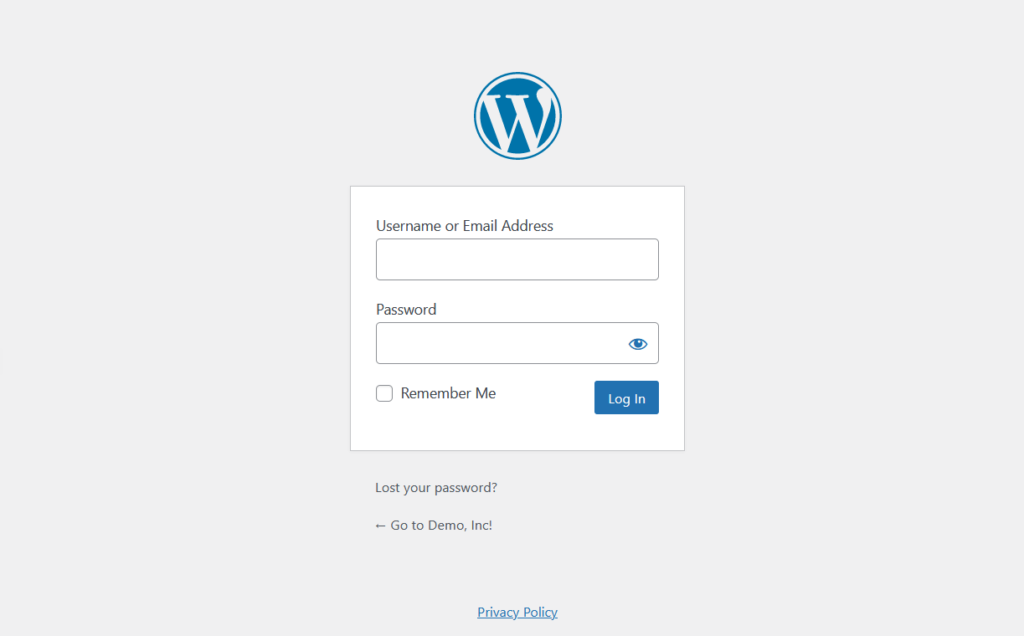
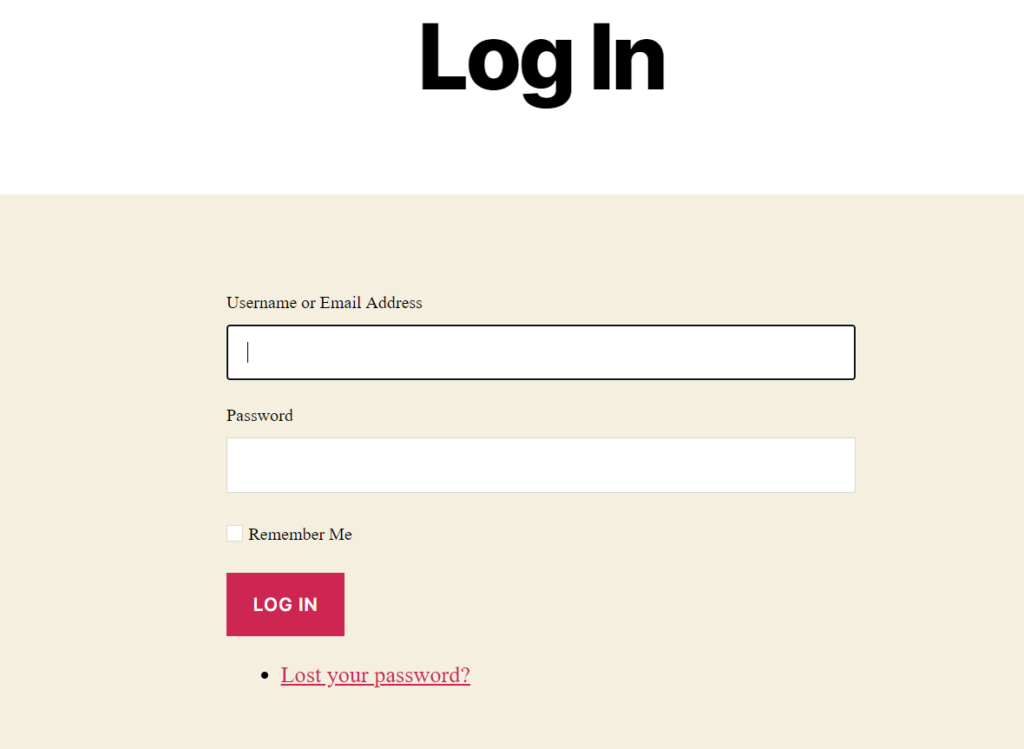
The WordPress login page URL (also known as the admin URL or /wp-admin) is the page that provides access to your website’s backend. By default, all WordPress websites have the same login page URL structure: www.yourdomain.com/wp-admin or www.yourdomain.com/wp-login.php. As you can imagine, this isn’t the best in terms of safety because any hacker can get to that page and try to access your site with combinations of username and password.
Apart from customizing the login page, it’s also a good idea to change its URL to make your website safer. Hackers will have a harder time finding the admin URL and you’ll also reduce the traffic coming from bots who try to access your site.
Before we have a look at the different methods to change the login page URL in WordPress, let’s understand why you shouldn’t simply change the URL manually.
Can I Change the Login Page URL Manually?
Yes, but it is not a recommended practice if you are serious about your business.
You probably know the importance of child themes when it comes to customizing your site. By applying changes to the child theme, those modifications won’t be overridden when you update the parent theme. The child theme keeps all the editions safe from those changes. The same happens here.
Manually changing the login page URL on the parent theme can be tricky. Every time WordPress receives an update, you will have to change the URL manually. As you can imagine, this can be both annoying and frustrating, so better to use a different solution.
How to Find the WordPress Login Page URL
Before learning how to change the login page URL, let’s see how to find it first.
As mentioned above, by default, you can find the login page by adding /wp-admin/ at the end of your domain. In most cases, the /wp-admin/ path will work if the site administrator hasn’t modified the default path. If that doesn’t work, try adding /wp-login.php/, /login/, /admin/ at the end of your domain name.
NOTE: Some managed hosting companies like Kinsta, WP Engine, or GreenGeeks provide you with one-click admin access without entering a username or password. This means you can log in to your site without entering any credentials.
How to Change WordPress Login Page URL
There are two main ways to change the WordPress login page URL:
- With a plugin
- Programmatically
In the following section, we will show you both methods step-by-step so you can choose the most appropriate one for you.
1) Change the Login Page URL with a plugin
The easiest way to modify the WordPress login page URL is by using a plugin. For this, there are several tools you can use:
For this demonstration, we will use WPS Hide Login. It’s a free and efficient plugin that will help you to modify the login URL of any WordPress installation in a few clicks.
Installation and Activation
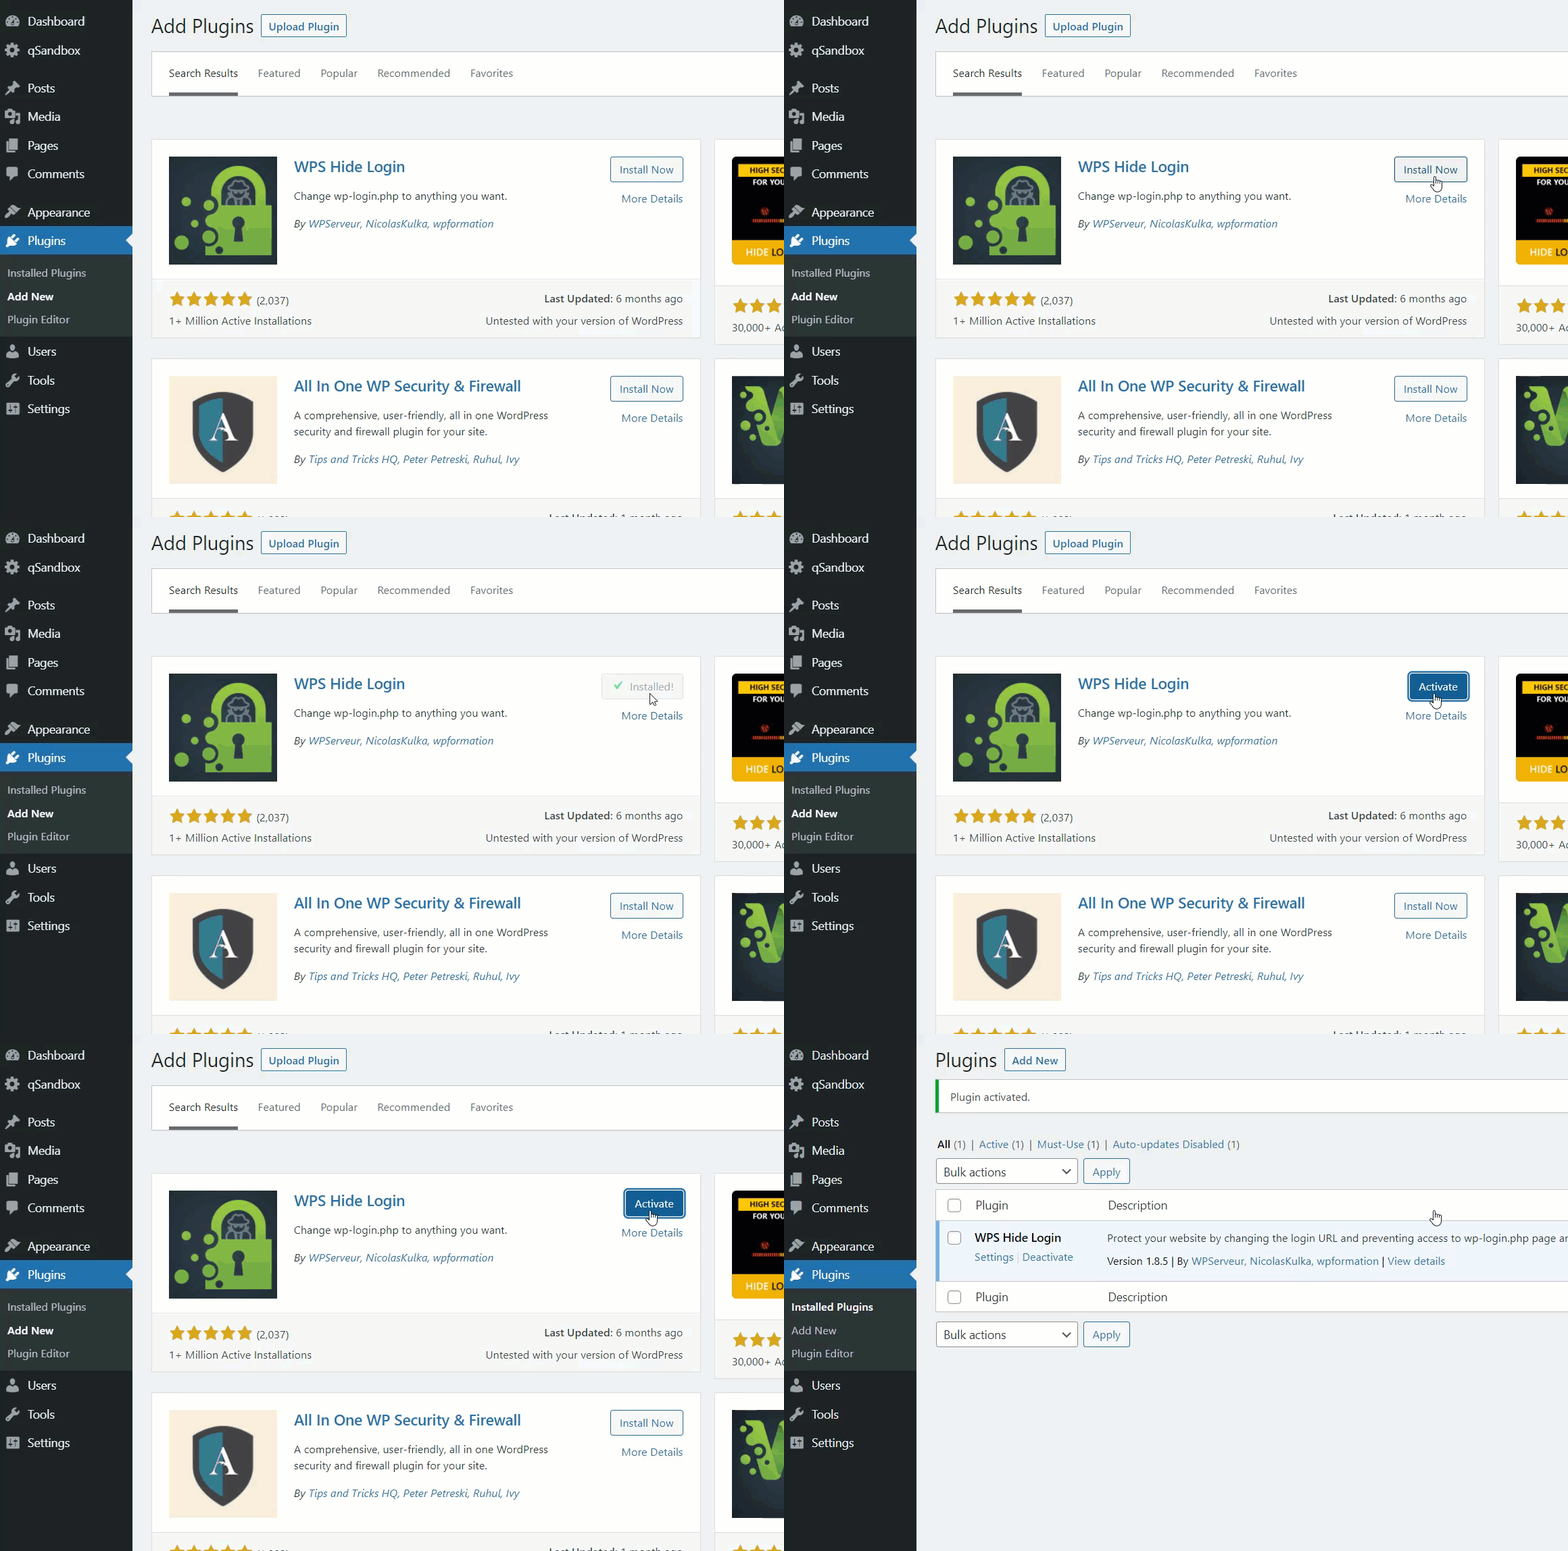
First, you need to install and activate the WPS Hide Login plugin. To do this, in your WordPress dashboard, go to Plugins > Add New and search for WPS Hide Login. Once you have found the tool, install it and activate it.
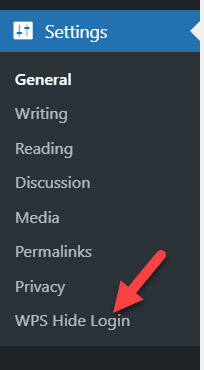
After successful activation, you will see the plugin’s configuration options under the Settings section.
Customization
Now it’s time to customize the login page URL. Open WPS Hide Login’s settings and you will see two options.
- Login URL
- Redirection URL
On the login URL field, enter the new path you want for your login page. For example, you can add something like “newlogin” so your new login URL will be www.yourdomain.com/newlogin/. Keep in mind that since you make the change, you will have to use that URL to access the WordPress admin dashboard.
Once you change the login page URL, the /wp-admin/ path (or any other login URL that you were using) won’t work anymore so you’ll have to redirect users from the old login URL to the new one. And that’s where the Redirection URL comes into play. When someone enters the old www.yourdomain.com/wp-admin/ in their browser, they will be redirected to the redirection URL.
After modifying the URLs, click Save Changes.
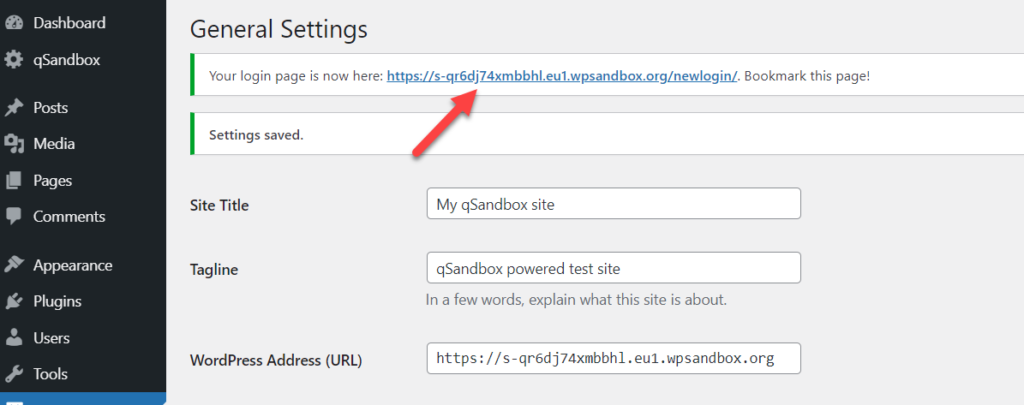
Once you have updated the new settings, WordPress will show you a warning at the top of the page saying that the new login page has changed. We recommend you bookmark this page to make sure that you remember it.
This is how you can change the WordPress login page URL using a plugin.
What if I forget the new login page URL?
If you forget the new login URL, there’s a quick solution. As you won’t have access to the admin section, you’ll have to log in to your site using an FTP client such as FileZilla.
Then, open the plugins folder and delete the whole folder of WPS Hide Login from there. After that, the default login page will be the default one, /wp-admin/ in most cases.
2) Change the WordPress Login Page URL Programmatically
If you have coding skills and don’t want to install third-party plugins, you can also change the login page URL programmatically. In this section, we’ll show you a few snippets that you can use to make your site more secure.
The wp-login.php file provides access to the admin dashboard, so by editing it, you can modify the default login path. For this, you will need a text editor such as Sublime Text, Atom, or any other that you like. Once you’ve installed one, you’re ready to continue with the process.
Additionally, you’ll need a file manager tool. For this tutorial, we’ll use File Manager but feel free to use a different one.
NOTE: As you will edit WordPress core files, make sure that before you start, you generate a complete backup of your site. This way, if anything goes wrong, you can restore it without any issues.
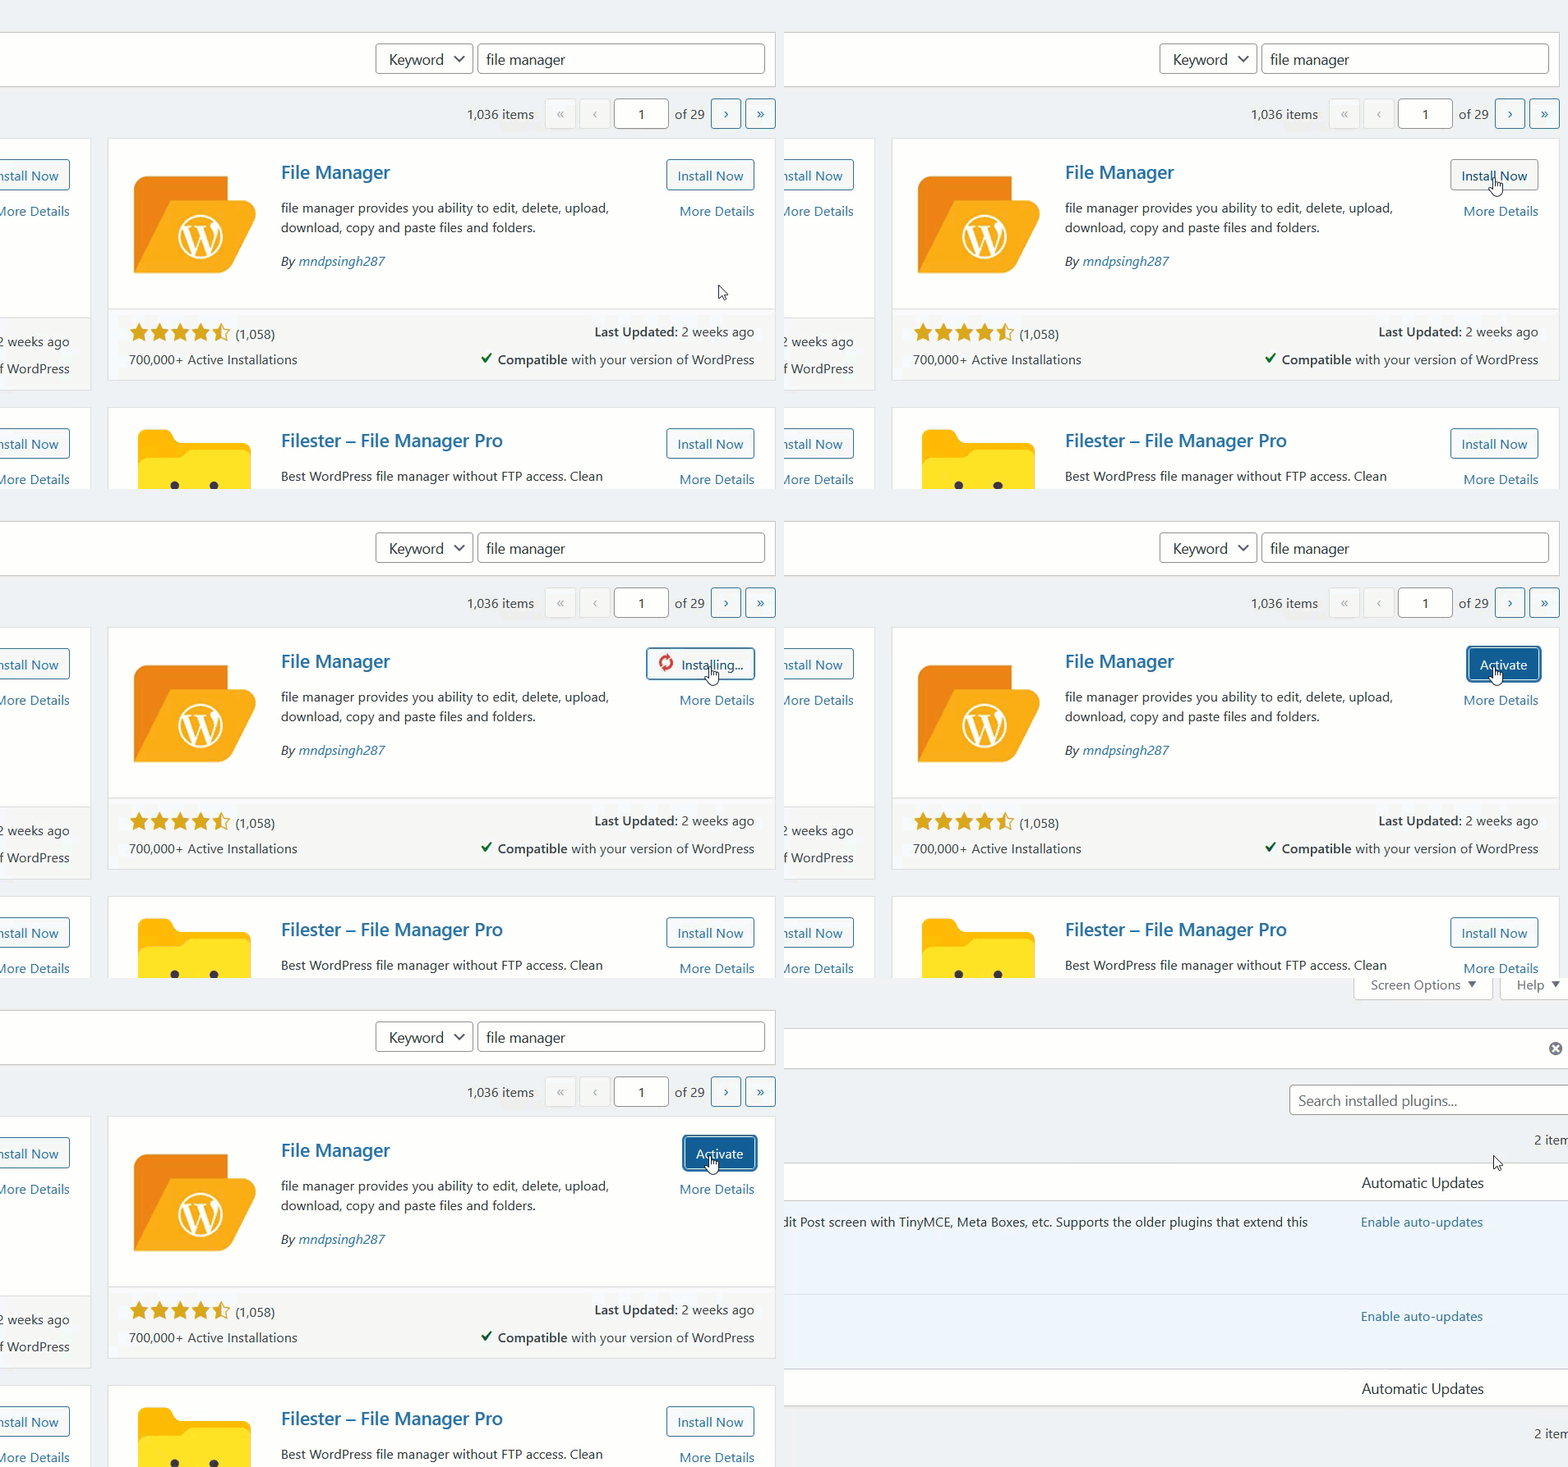
Now let’s start with the process. In your WordPress dashboard, go to Plugins > Add New, and install and activate the File Manager.
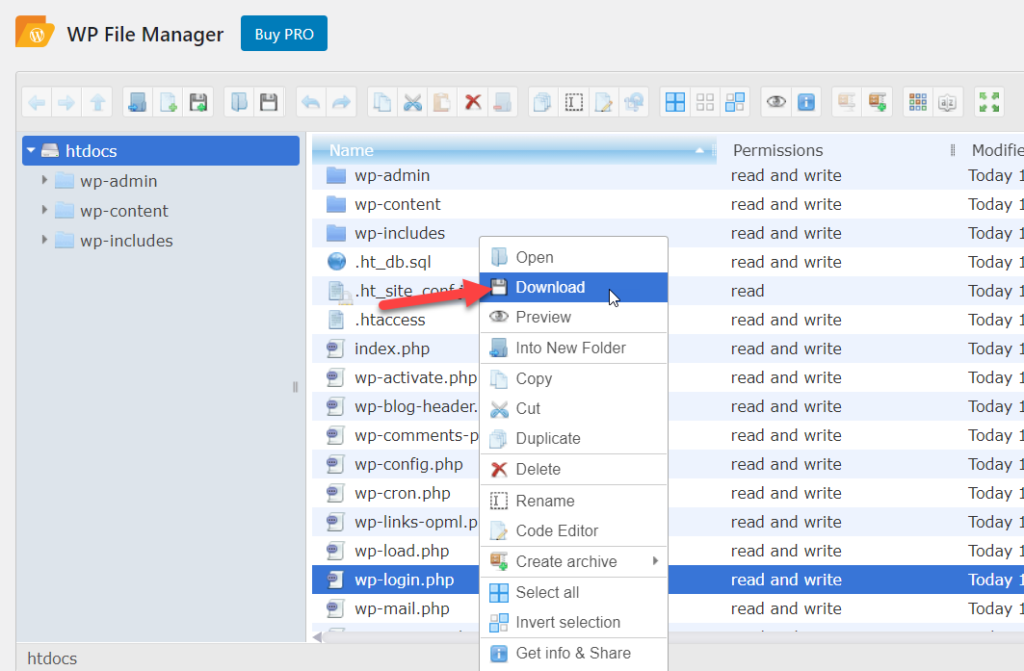
After activating the plugin, open it and you will see all the directories and files. As we’ll edit the wp-login.php file, locate it and download it to your local computer by right-clicking on it and selecting Download.
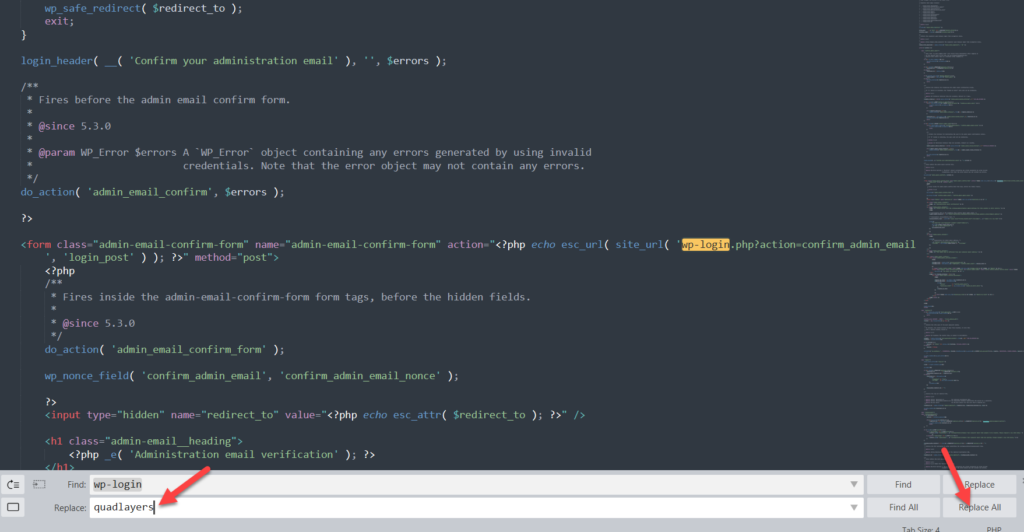
Then, open the file using a text editor of your choice. You need to search for wp-login and replace it with a custom instance. Keep in mind that this instance will be the new login page URL. For example, we are going to replace it with quadlayers. You need to replace every wp-login from the whole file, so enter your new instance in the Replace field and press Replace All.
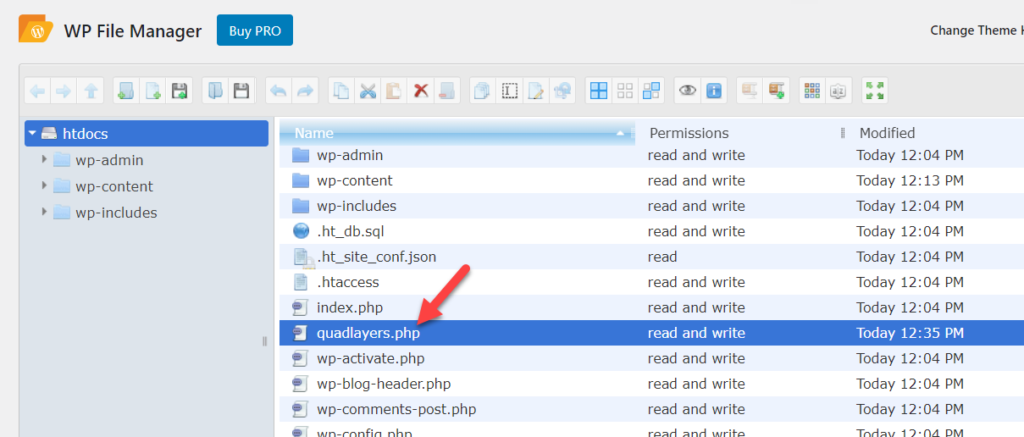
After that save the changes. Now you need to rename the file. In this example, we’ve changed the name of the wp-login.php file to quadlayers.php. After that, upload the file to your website and remove the wp-login.php from your site.
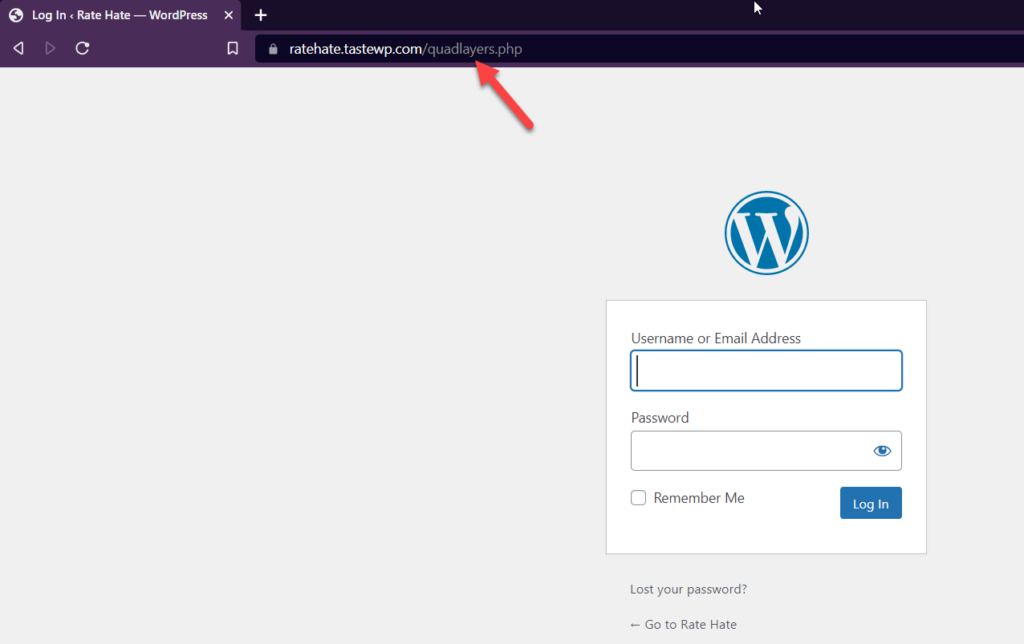
Once you have done that, it’s time to access the new URL path. Following the same example, your new WordPress login page URL will be www.yourdomain.com/quadlayers.php.
This way, you can change the login URL without using any plugins.
Create a Custom Login URL
The easiest way to create a custom login URL is to use the Theme My Login plugin. It’s a lightweight tool that allows you to embed a login form into any page on your site. For example, instead of your wp-admin page, you can redirect your team members or registered customers to a dedicated page where you will show them the login form.
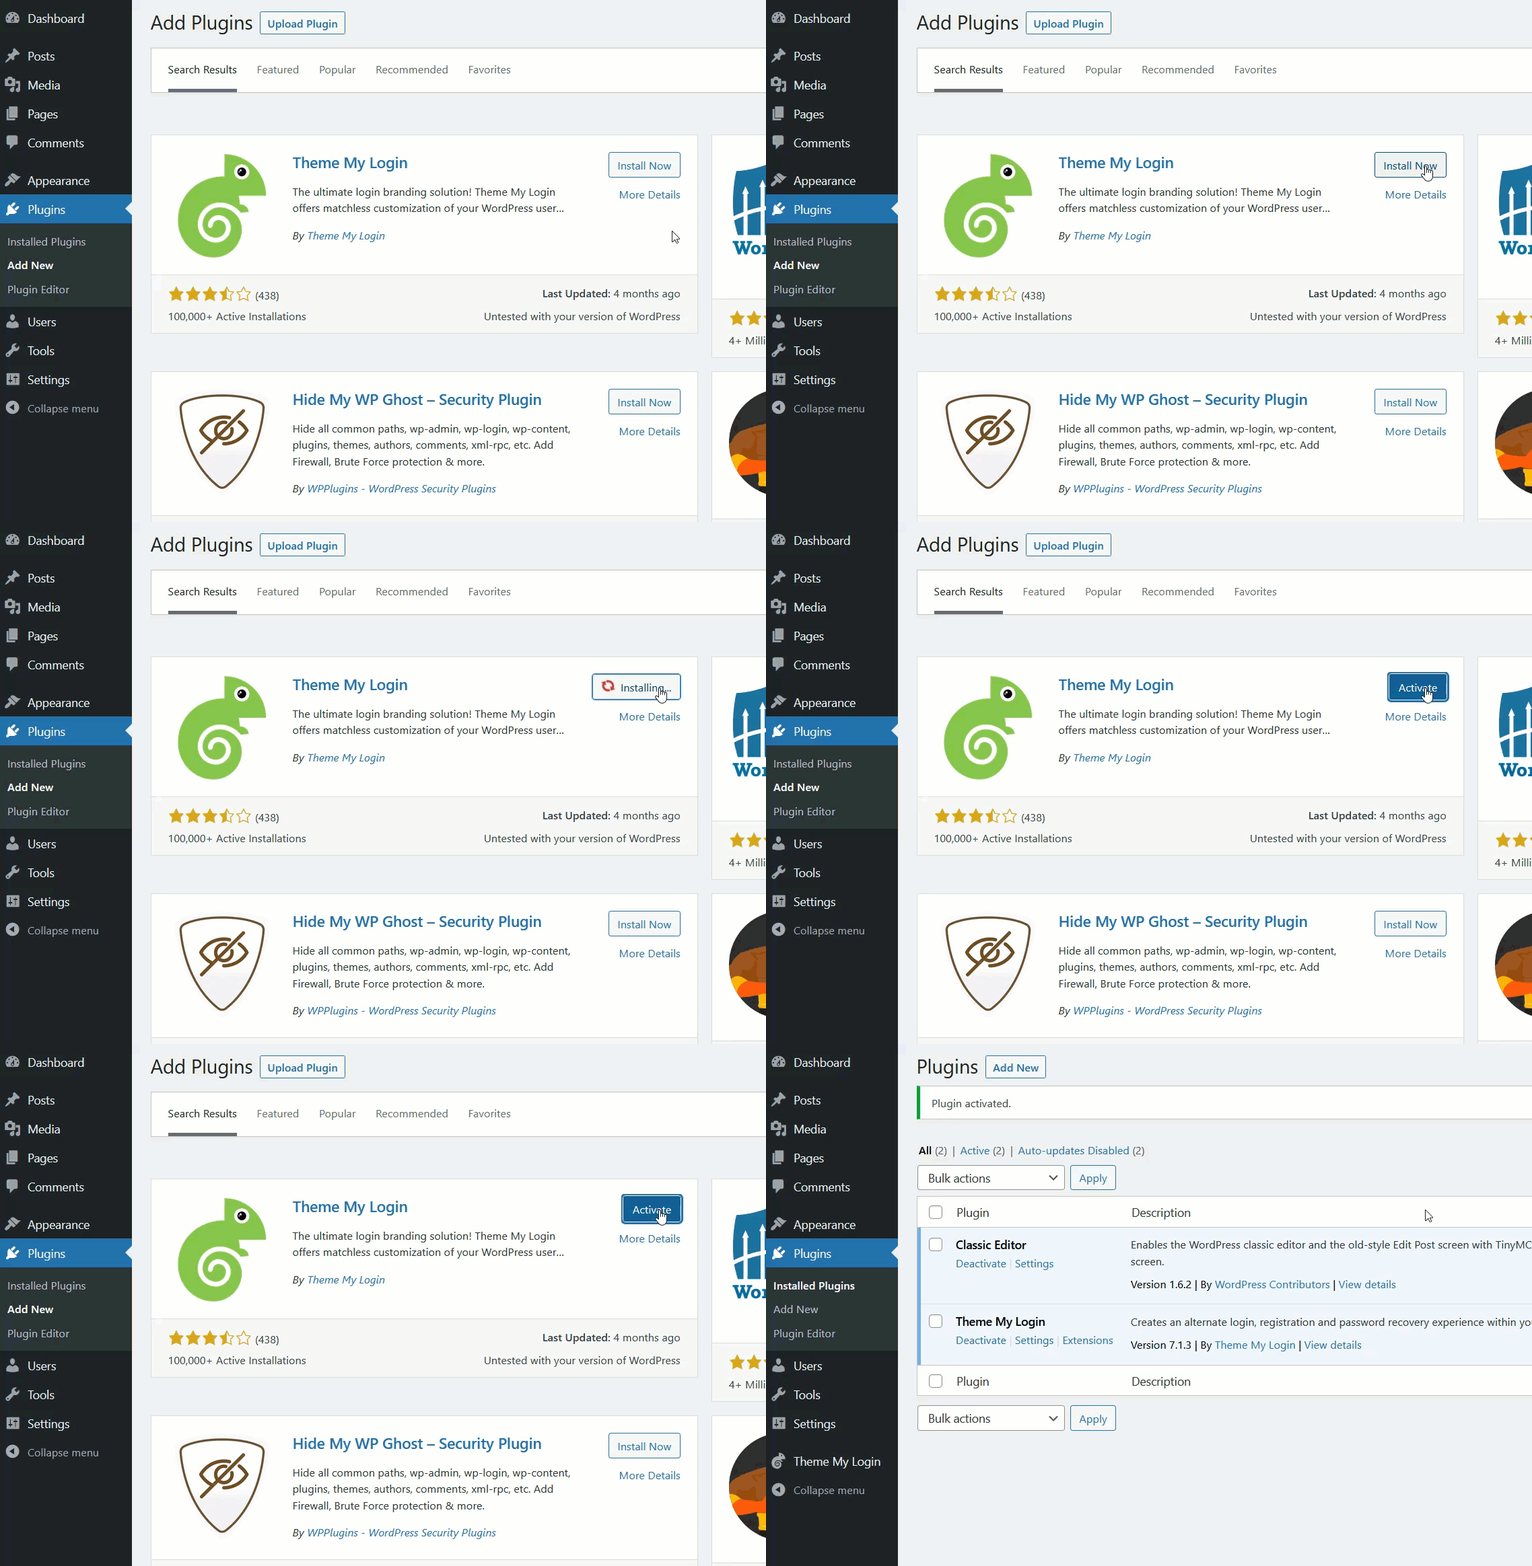
Let’s see how to create a custom login URL on your site. First, install and activate Theme My Login. In your WordPress dashboard, go to Plugins > Add New, and install and activate the plugin as shown below.
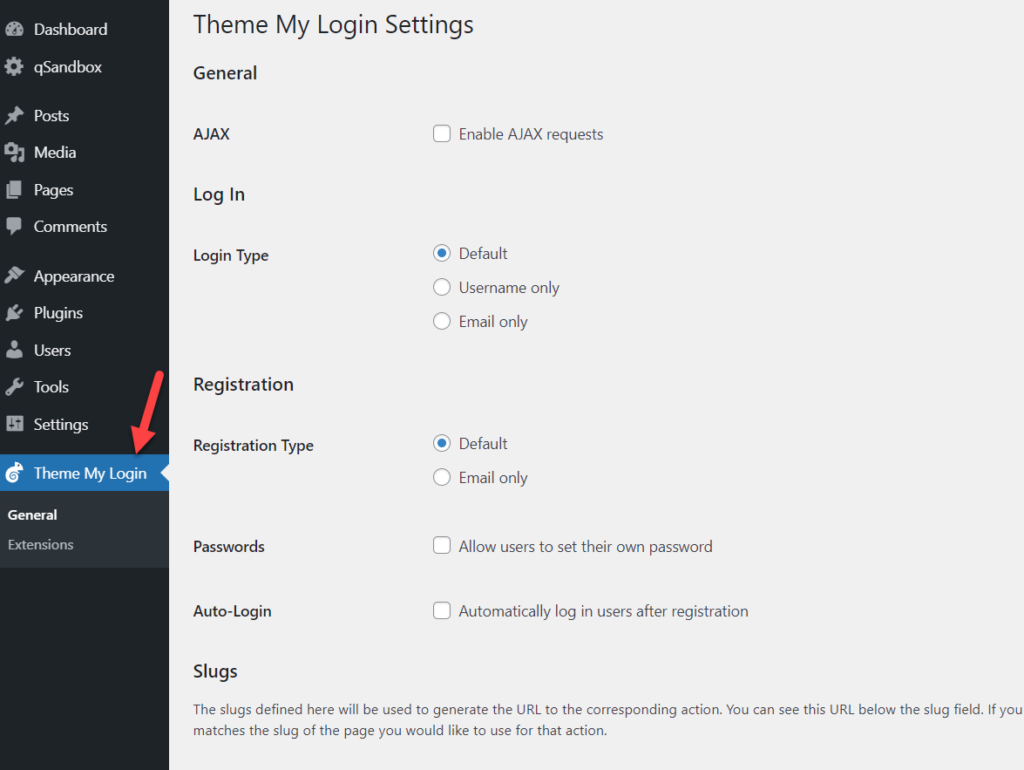
After that, you will see the plugin’s configuration on the left-hand side.
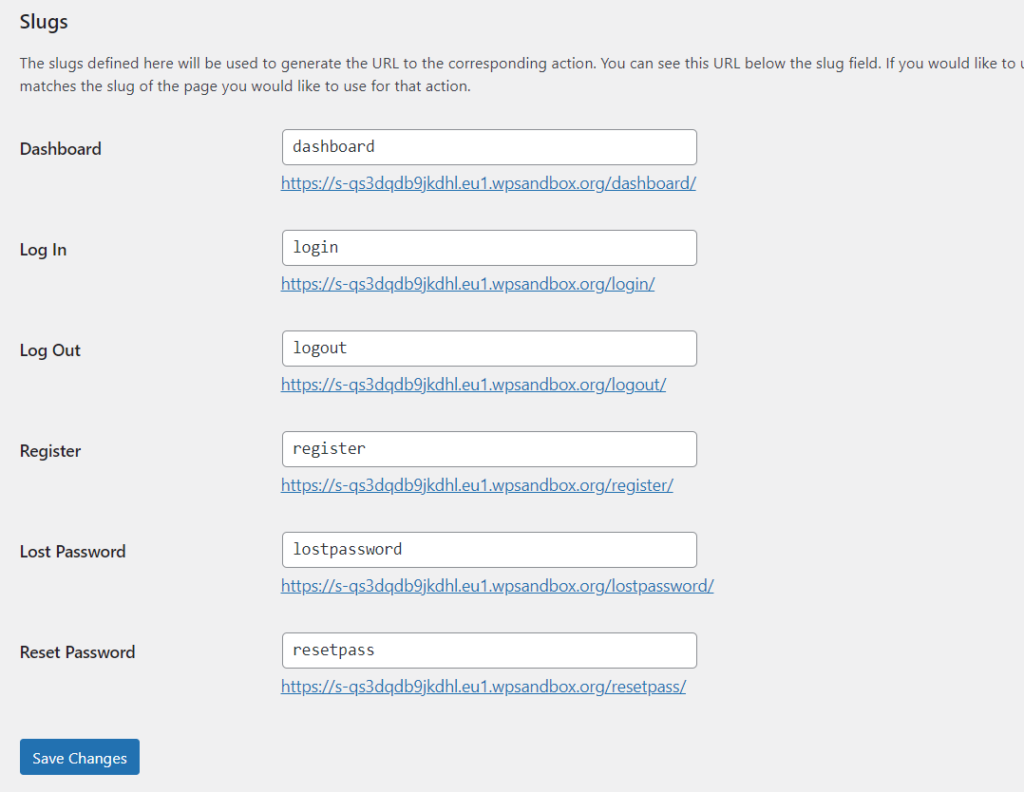
Scroll to the slugs section where you will see all the permalinks you can change.
- Dashboard
- Login
- Logout
- Register
- Lost password
- Reset password
By default, the plugin will assign a login page slug to each page but you can customize them. Once you have updated the settings, save the changes and check the custom permalink from the front end.
This way, you can easily create a custom login URL in no time.
How to Password Protect Your Login Page
If you use shared hosting providers, you can protect your login page with a strong username and password combination. However, if you run a big website or an eCommerce, simply changing the login URL isn’t enough. Apart from changing the WordPress login page URL, you should also add a password to add an extra layer of security to your site.
In this section, we will show you how to add a password to protect your login page.
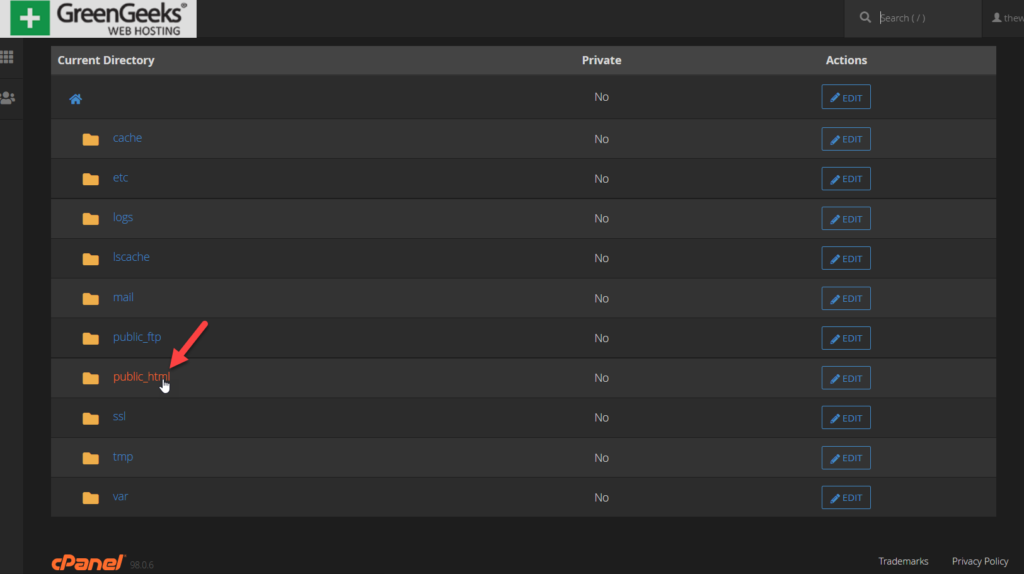
For this demo, we will use the GreenGeeks web hosting service. First, log in to your web hosting account and cPanel section and open the Directory Privacy option.
After that, you will see all the available directories there. Open the public_html folder.
Then, enable the password protection option and save it.
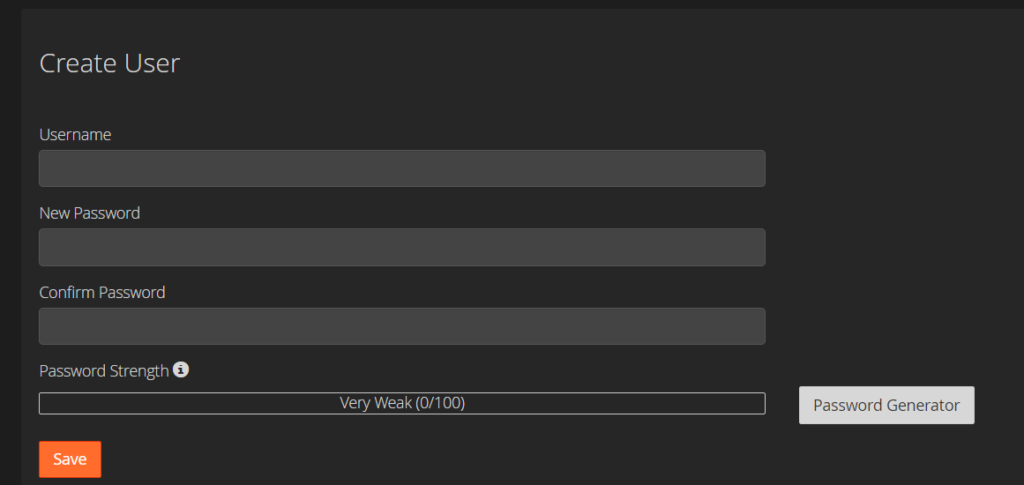
Scroll down and you will see a section to set up a username and password.
Enter a username, password or generate them and save the settings again. That’s it!
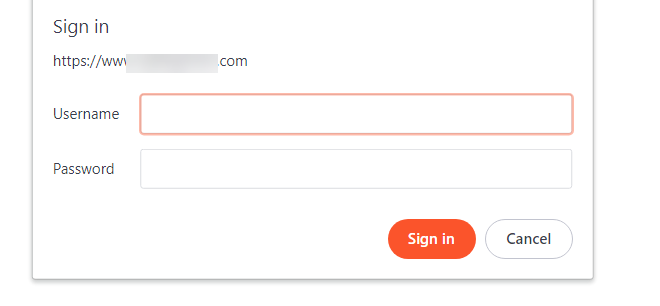
From now on, when someone accesses the wp-admin page, they will see an authentication box where they will have to enter the right credentials to access the WordPress admin page.
NOTE: If you can’t find this feature inside the cPanel or website hosting account dashboard, you need to contact hosting support. Some managed WordPress hosting companies such as Kinsta come with a dedicated page for the wp-admin password protection feature.
Bonus: How to Limit the Login Attempts
Another excellent measure to protect your site is to limit the number of login attempts that each user has. This is a good practice to reduce brute force attacks and keep your website safe.
For this, we will use a plugin called Limit Login Attempts Reloaded. It’s a free tool that allows you to limit the login attempts in a few clicks.
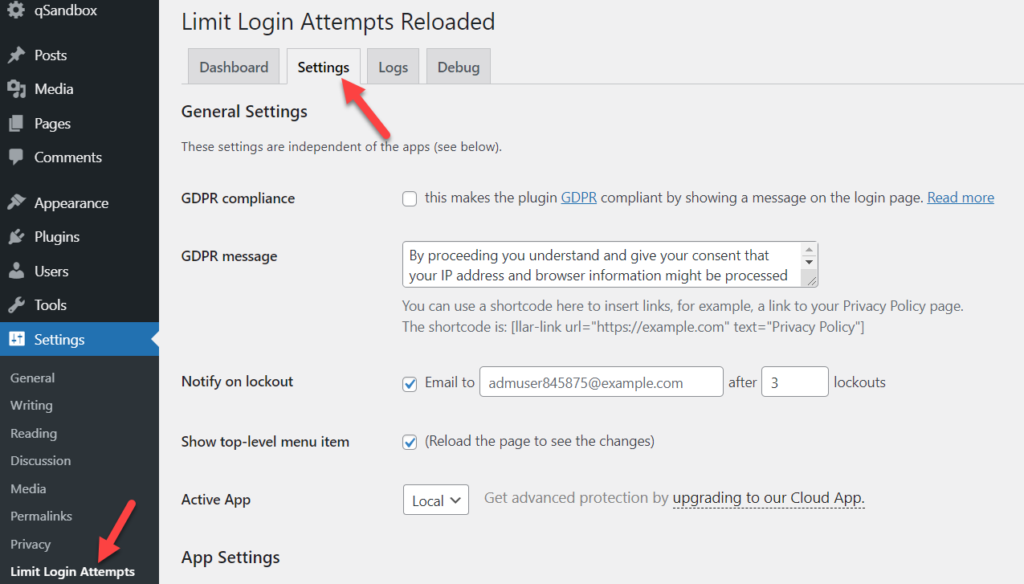
First, go to Plugins > Add New and install the plugin. After activating it, you’ll see the plugin’s settings on the left column under Settings. Open it and go to the Settings tab.
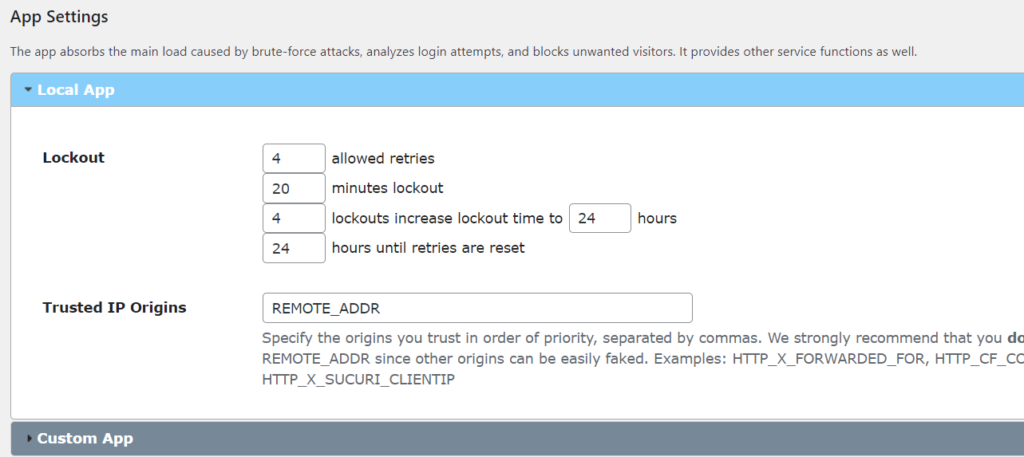
Scroll down, and you will see the App Settings section. There, you will be able to customize the login attempts as well as the time you want to lock that user out. That means that their IP will be blocked and they won’t be able to access the login page.
Once you change the values, save the changes and that’s it! You’ve just limited the login attempts and will receive notifications when someone enters the wrong account credentials.
For a more detailed explanation about this, check out our guide to customize the WordPress Login Page.
Conclusion
In summary, considering the number of cyberattacks happening every day, website security is no more optional. Whether you’re running a membership site, an eCommerce store, or a blog, you need to spend enough time and make your website more secure.
In this guide, we’ve shown you different ways to change your WordPress login page URL to improve your site’s security. By doing this, hackers will have a hard time finding your admin page and you’ll avoid many attacks. Which method is best for you?
If you don’t have coding skills and want something fast, WPS Hide Login is a great solution. It lets you easily manage your login URL and change the URL in a few clicks. On the other hand, if you have coding skills, you can use edit the wp-login.php file and change the login URL without any plugins.
Additionally, if you want to display the login form on a friendly URL, you can use the Theme My Login plugin. It’s another free tool that you can use to customize the login page.
Finally, we also recommend you have a look at our guide to customize the login page in WordPress to make the most of it and protect your site. If you’re having issues with the login, check our tutorial to learn how to fix the most common login problems.
Are you ready to change your login page? Which method have you used? Let us know in the comments section below.





What about this system:
add_filter( ‘login_url’, ‘my_login_page’, 10, 3 );
function my_login_page( $login_url, $redirect, $force_reauth ) {
return home_url( ‘/my-login-page/?redirect_to=’ . $redirect );
}
Will this not change the WP Admin URL?
AND that code is from WordPress Codex.
We will be updating the guide.