
How to Connect Eventbrite with WordPress? 4 Easy Ways!
Would you like to connect Eventbrite with WordPress? In this guide, we will show you 4 easy methods to integrate your Eventbrite events with your site.
What’s Eventbrite?
Eventbrite is a global ticketing platform where customers can find upcoming events and organizers can create, share, and promote their events. The best thing about Eventbrite is that it allows you to create any kind of event from music festivals to conferences, fundraisers, competitions, and contests. These events can be both free or paid.
Now, let’s see why you should add it to your site.
Why Connect Eventbrite with WordPress?
Eventbrite allows you to set up pages that describe the event and contain all the information users need before signing up or purchasing tickets. This platform also lets customers process payments and create lists of events.
Even if you could replicate all this on your site with several plugins, it’s much easier to connect Eventbrite with your site. Why waste all that time, effort, and money when you have a much easier solution? Eventbrite is a dedicated platform to create events. So, it provides you with everything you need for hosting events. In 2019, it powered nearly 5 million events and served roughly 1 million event creators.
So, by adding Eventbrite to WordPress, you can use their platform to manage all the events and payments whilst still using WordPress to create specific landing pages or posts to provide more information about the events. That way customers can find out more about your business and you can develop a bond with them.
How to Connect Eventbrite with WordPress?
Now that we better understand the benefits of this platform, let’s see how to connect Eventbrite with WordPress.
There are different ways to do that. Here we will show you the easiest and most effective ones:
- Add Eventbrite checkout to WordPress
- Eventbrite checkout as a button
- Full checkout
- Embed Eventbrite events in Widgets with plugins
- Display Eventbrite Events
- WP Event Aggregator
Let’s have a closer look at what each of these methods has to offer.
1. Add Eventbrite checkout to WordPress
This method is very useful if you only want to add a few events to your site.
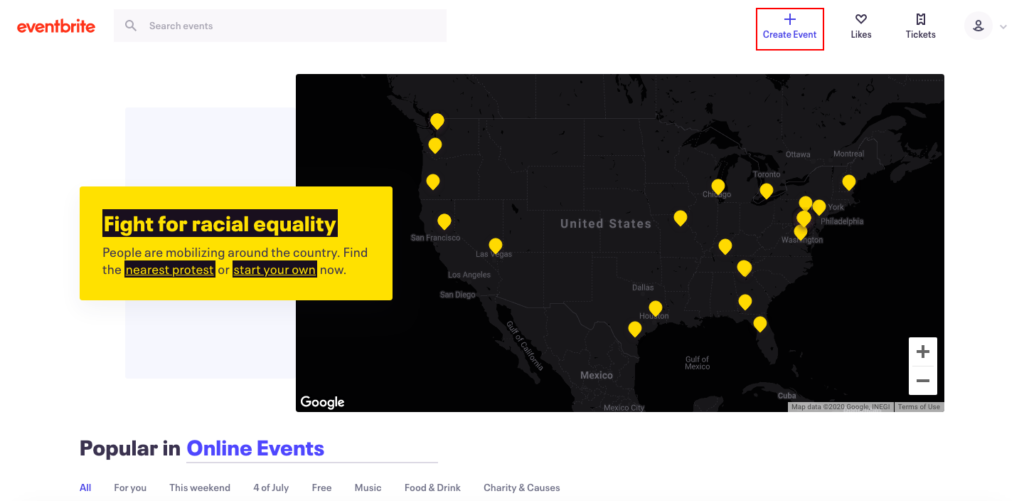
To make the explanation easier to follow, we have set up a sample event on Eventbrite. Due to time constraints, I won’t go into detail on how to create events. But don’t worry, it’s super easy and won’t take you long. All you have to do is go to Eventbrite and press the Create Event button on the top right as shown below.
Then, follow the steps and you will have an event in no time.

The principle here is to add the event’s checkout to your WordPress website so you can take advantage of its smooth and well-built process.
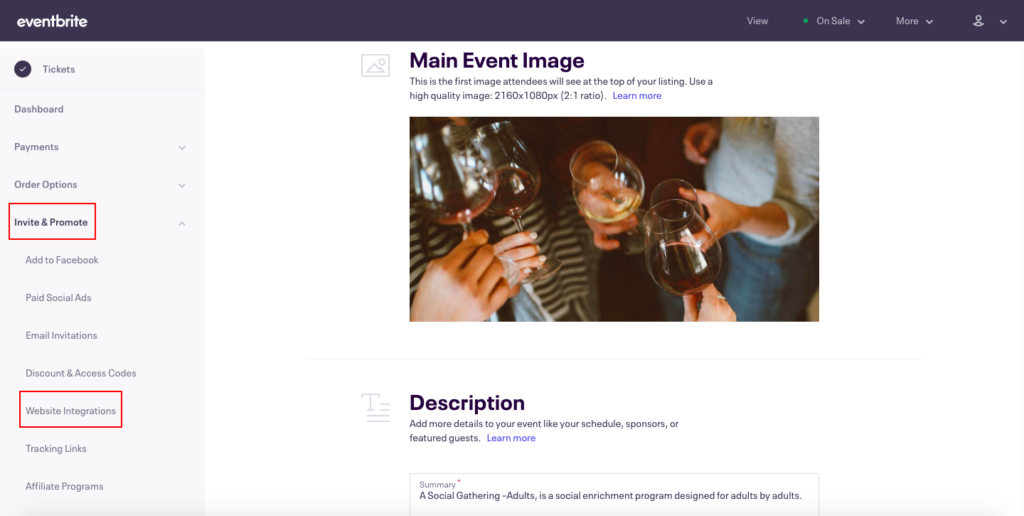
So, go to the Eventbrite management dashboard and click the Invite & Promote tab on the left. Then, go to Website Integrations and you will see two options to integrate Eventbrite with WordPress:
- A button that displays the checkout modal on your content.
- Embed the checkout on the page with your content.
For each option, you can switch to the Preview tab to check out how it will look.
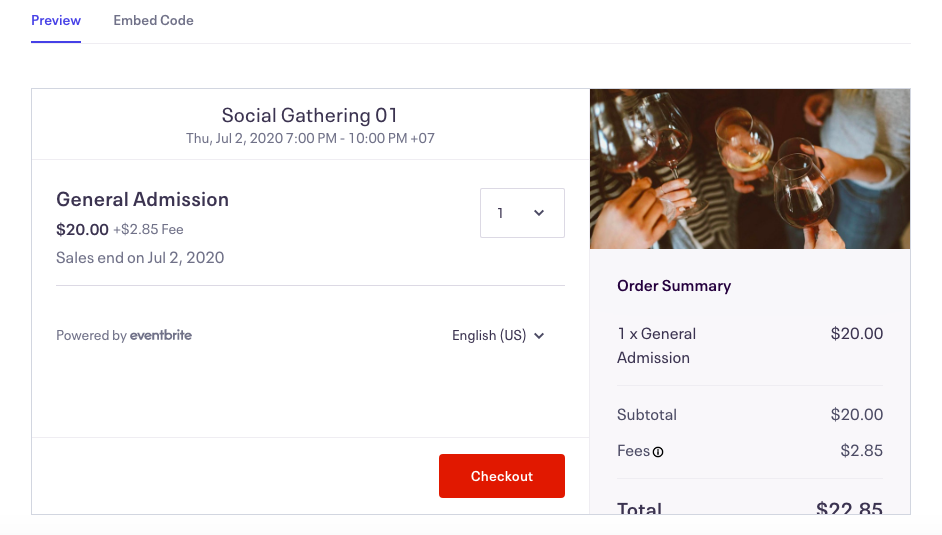
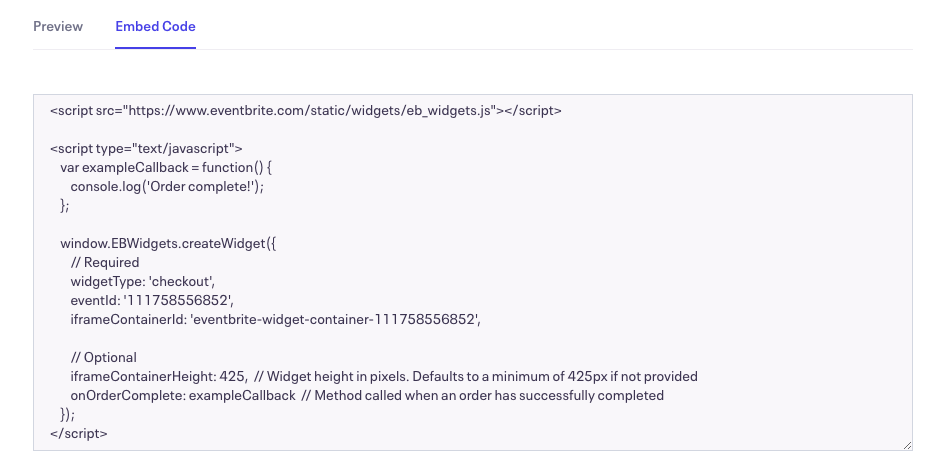
Then, select the option you want. Go to the Embed Code tab and copy the whole code.
After that, go to your WordPress dashboard.
1.1. Display Eventbrite checkout as a button
As we mentioned before, there are two options to connect Eventbrite with WordPress. If you want to display the Eventbrite checkout on your site as a button, the best choice is to insert it into the Custom HTML widget. Here we’ll show you how to do it.
In your WordPress dashboard, go to Appearance > Widgets.
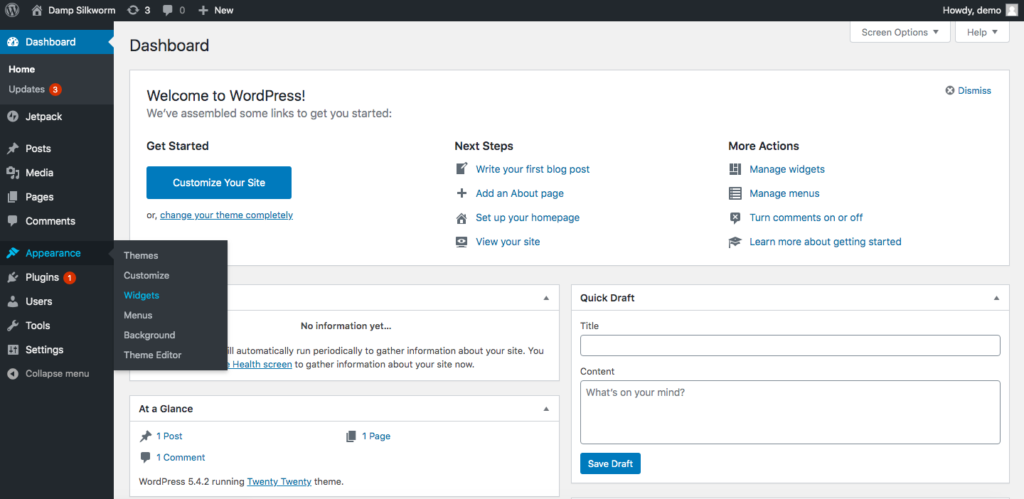
There, select the Custom HTML widget and paste the code you previously copied into the box:
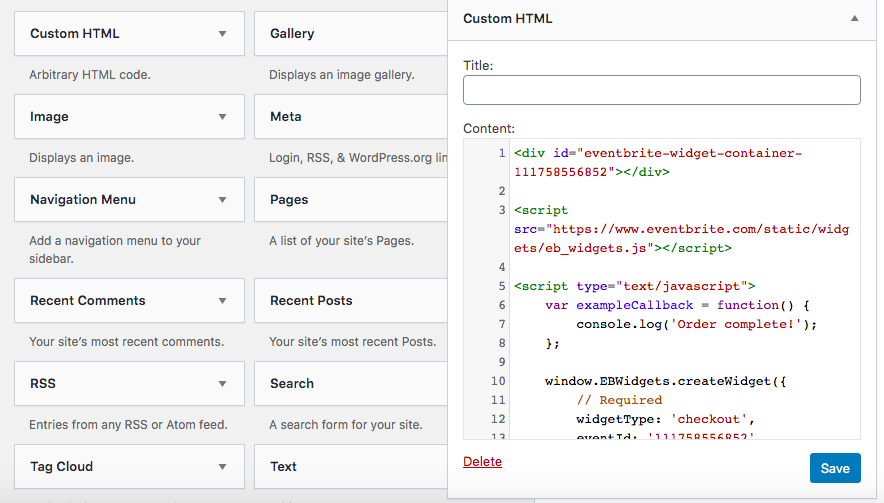
Then press Save and that’s it! You’ve added Eventbrite to your site as a button. Here’s what we got when placing the Eventbrite button in the Footer 2:

NOTE: Some users get the following error when trying to save the code after pasting it in the Custom HTML box.
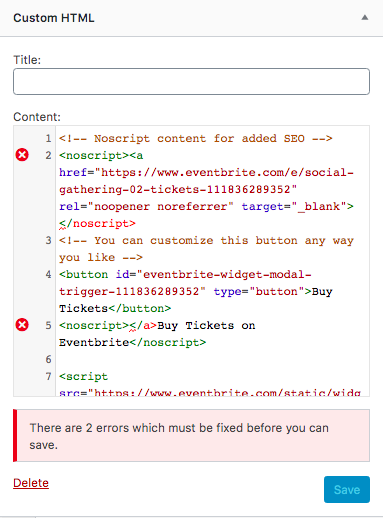
If this is your case, you just need to make a small adjustment to the code. You need to move </a> from line 5 to line 2 and place it before </noscript>. Once you do that, you’ll be able to save the code and display the Eventbrite button on your site.
1.2. Display Eventbrite full checkout process
Another option is to display Eventbrite’s full checkout process. In this case, it’s better to show it on a page. Here, we’ll show you how you can do it using the block editor.
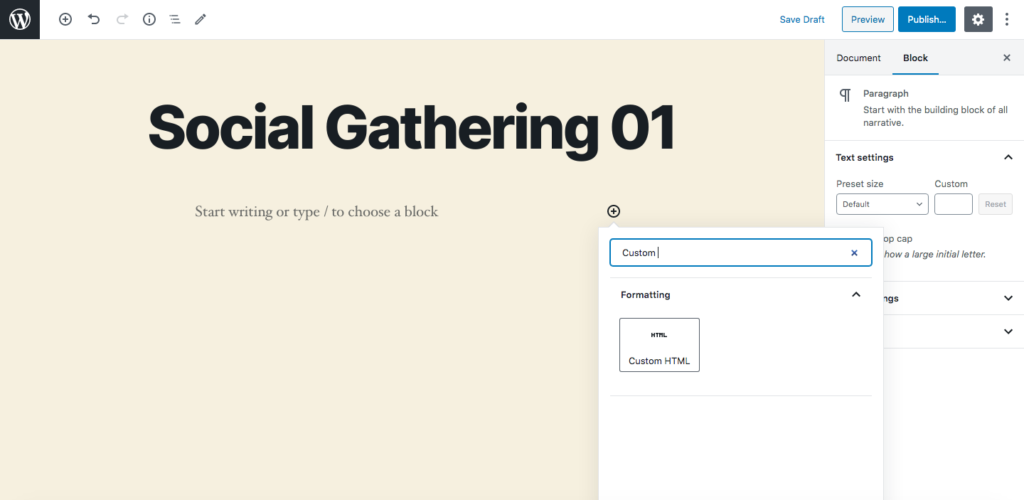
In the WordPress dashboard, go to Pages > Add New, and you will see the block editor interface. Depending on what page builder you are using, your interface might look different.
Then, add a Custom HTML block.
Paste the code you previously copied into the box.
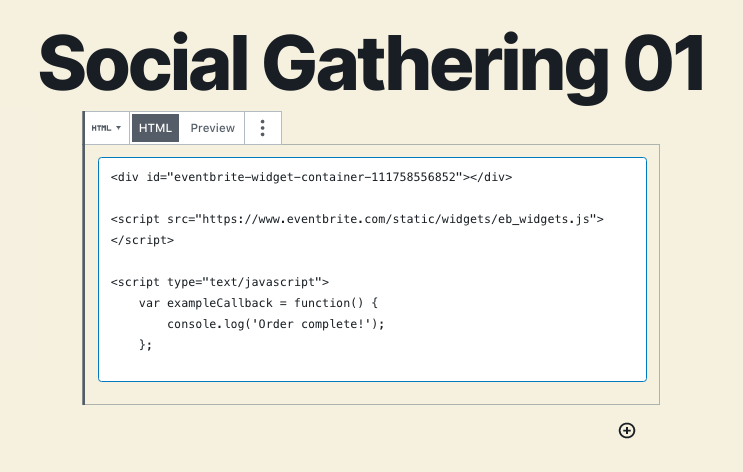
Finally, publish the page and you will get something like this:
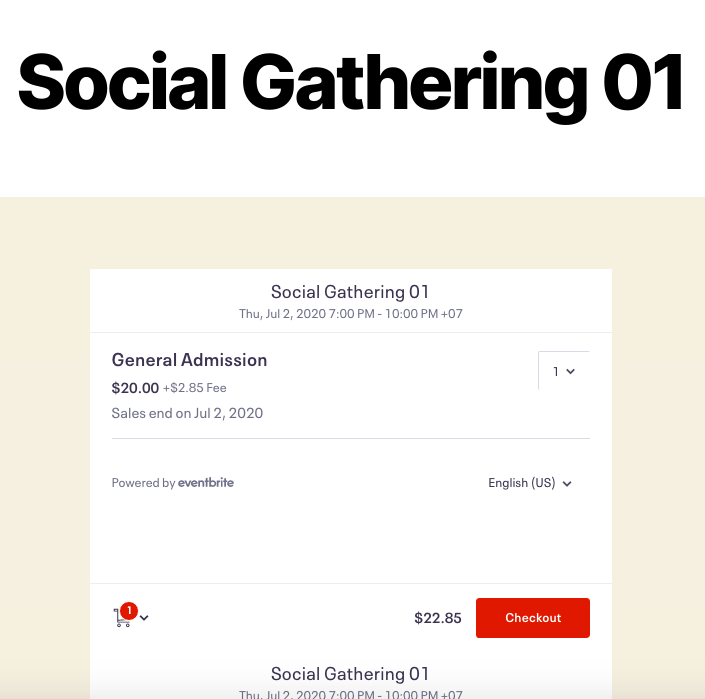
Easy peasy! That’s all you need to do to add the checkout process of Eventbrite to WordPress. However, there are some little notes I want to give you:
- If you want customers to be able to buy the tickets on your site only, not on Eventbrite, change the event on Eventbrite to private.
- Before embedding the checkout, you need to enable HTTPS/TLS.
We recommend this method because it’s easy and straightforward. But, if you don’t want to work with widgets and the block editor, you can follow this alternative way.
2. Embed Eventbrite event in Widgets
The first method is suitable if you only want to integrate one or a few events. However, if you want to connect Eventbrite to WordPress with more events, you’ll need widgets. With this type of display, customers can check out all your events in one place, choose the ones they’re interested in, and buy tickets.
Let’s see how to add Eventbrite events to your site with two different plugins.
2.1. Display Eventbrite Events in WordPress (Widget)
Developed by Fullworks, Display Eventbrite Events in WordPress is a powerful tool to connect Eventbrite to WordPress and display the events in a widget. It creates a widget using the Eventbrite API to read data directly from the Eventbrite servers. So, instead of importing events into WordPress and managing them from your dashboard, this plugin takes advantage of Eventbrite management systems and makes it easier for you. Even better, it is a free plugin.
Now, let’s have a look at how to use Display Eventbrite Events step-by-step.
Step 1: Install and Activate the Plugin
In your WP dashboard, go to Plugins > Add New and search for Display Eventbrite Events in WordPress.
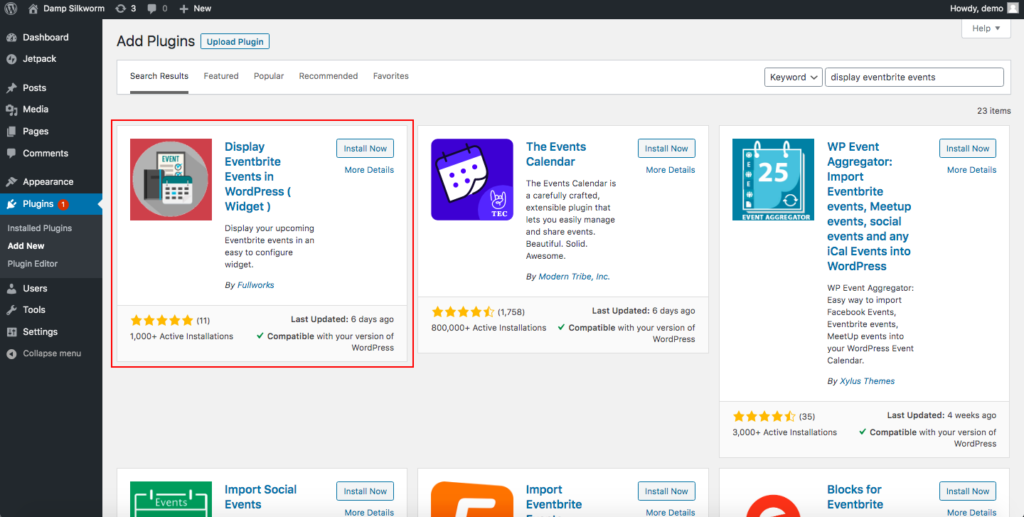
After installing and activating the plugin, you will see a welcome page where you will click Allow and Continue to get to the next step.
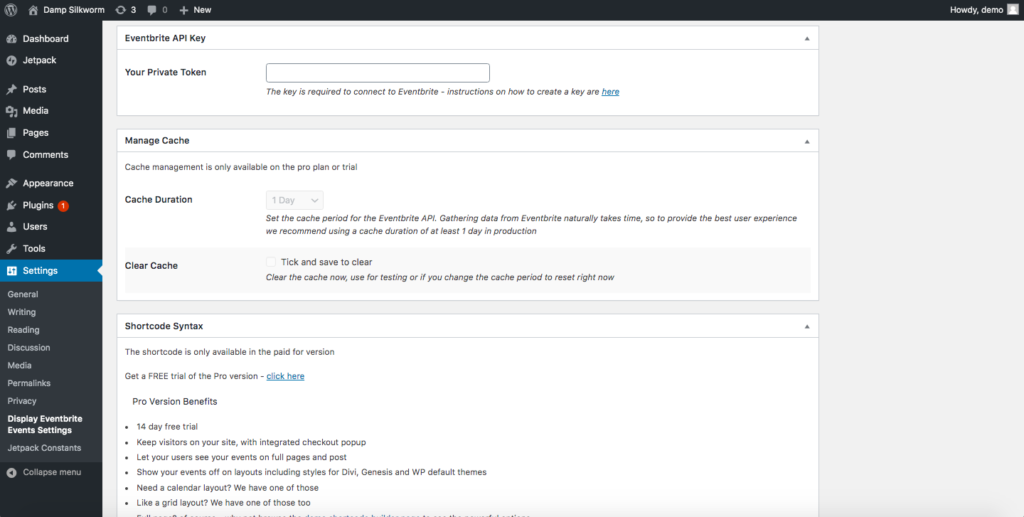
Step 2: Get the API Key and Save it
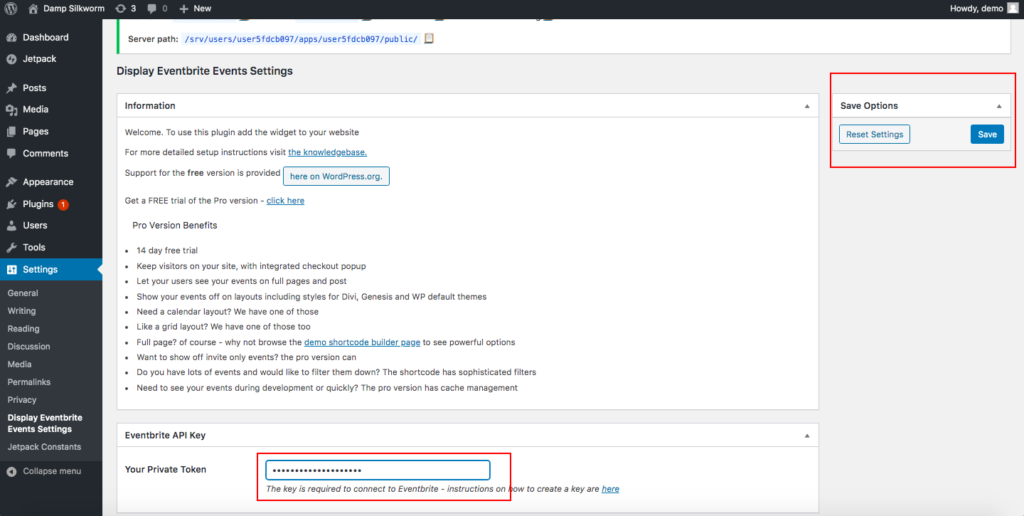
On the settings page, you will need to introduce your Eventbrite API key.
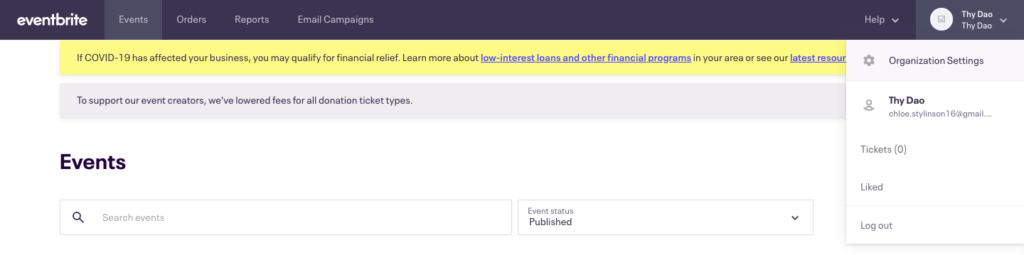
So, go back to your Eventbrite account and click Organization Settings on the top of your profile dropdown.
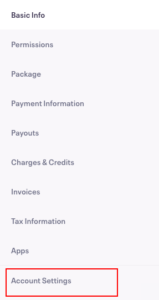
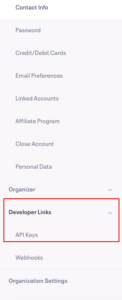
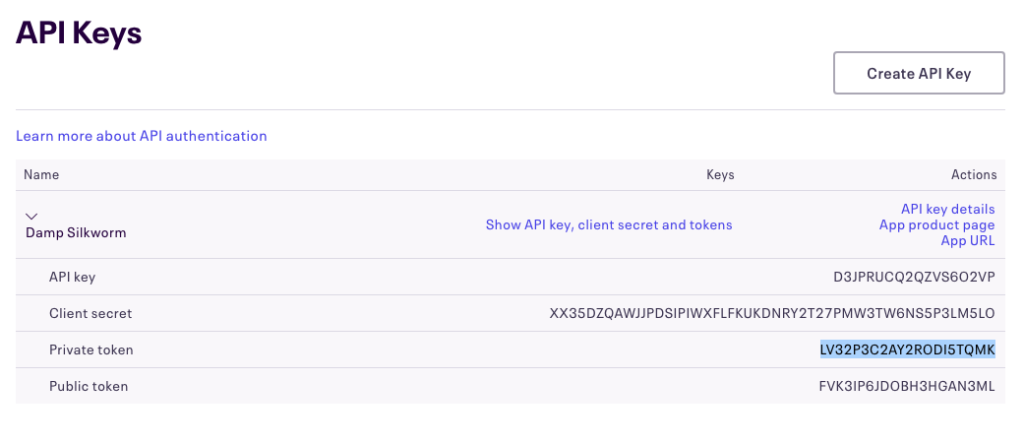
You will see the Account Settings on the left of your screen. Click on it and go to Developer Links > API Keys.
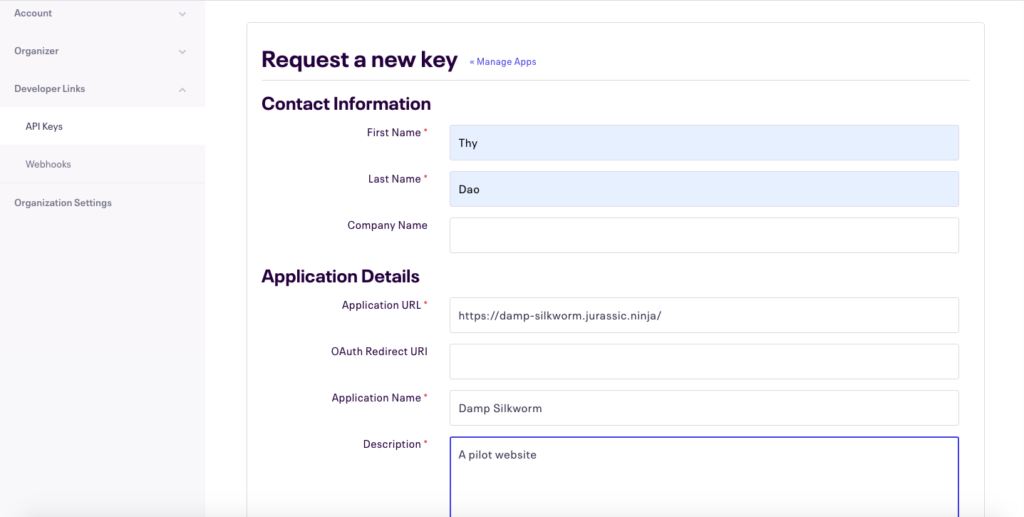
If you are new to Eventbrite, you will see that there aren’t any keys yet. So, you will have to create one. Click Create API key on the main screen, and fill in the form with your information. Even though it makes no difference to your API key, we suggest you fill in the form with information that helps you remember which API key is for which purpose.
Once you finish, click Create.
Congratulations! You’ve just created your first API key. Now, click to see its details and copy your private token. Please note that you need to copy the Private Token, not API Key.
Then, go back to the plugin’s Settings page in WordPress. Paste the token into the API Key box and click Save on the right.
Step 3: Display the Events
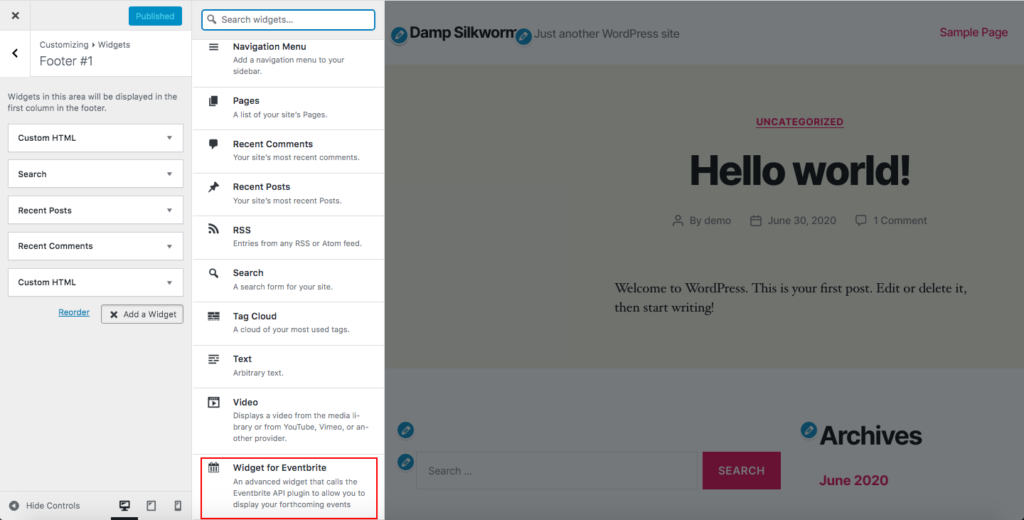
After that, go to your site’s Customizer > Widgets. Keep in mind that for each of them, the widget area may vary. For example, in the default theme I use, you can display the widgets in Footer #1 or #2. But, some page builders and plugins let you set up widgets on pages.
So, in our case, we click Footer #1 > Add a Widget, and scroll down to find the Widget for Eventbrite.
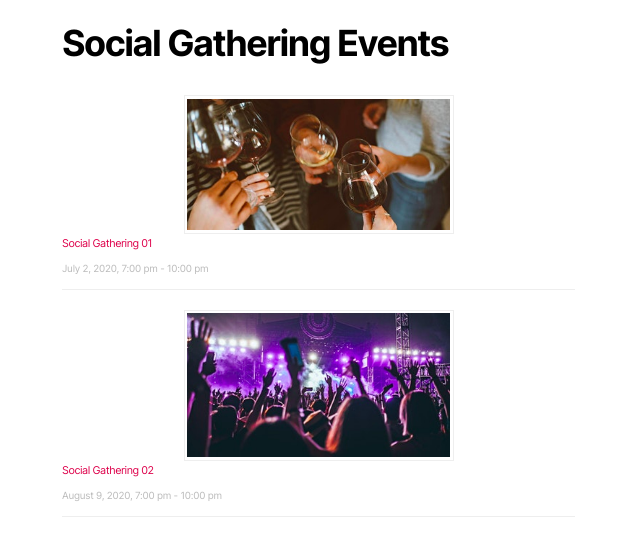
After that, you will see a pop-up with different customization options to display Eventbrite events. Use these options to personalize the event. For example, I will change the Title from the default to Social Gathering Events. Besides, we only have two events so we will put 2 in the Number of posts to show.
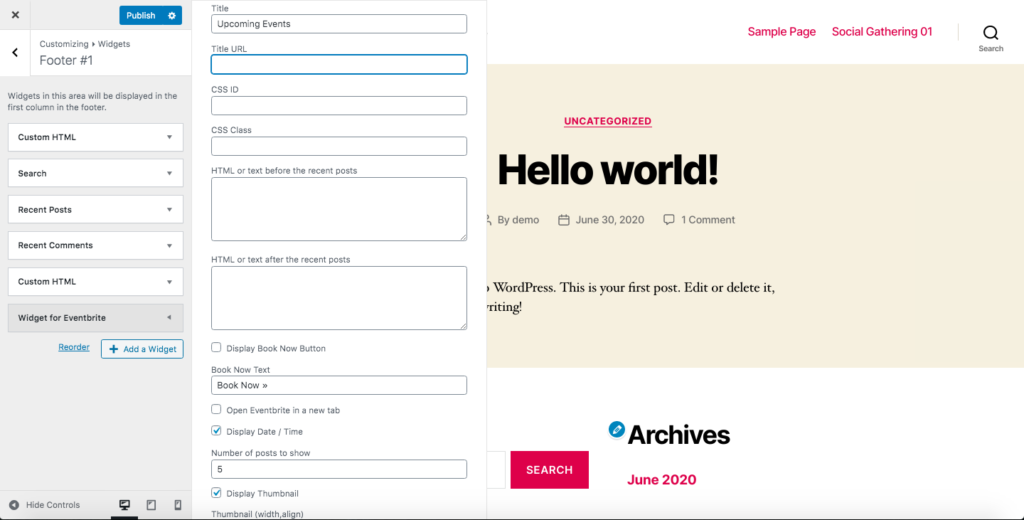
That’s it! You have connected Eventbrite with WordPress by displaying widgets!
Depending on where you add the widget, you will get a beautiful result on the front end. We placed the widget in the Footer 1 and this is what we got:
NOTE: It’s important to note that to pull off this method, you need to change all your events on Eventbrite to public rather than private before creating an API key. Otherwise, you won’t be able to display your events on your site.
2.2. WP Event Aggregator
Launched by Xylus Themes, WP Event Aggregator is an excellent event importer to connect Eventbrite with WordPress. Besides, it allows you to import events from Facebook, Google Calendar, Apple Calendar, Meetup, Outlook Calendar, iCalendar, and more.
The main difference with Display Eventbrite Events is that WP Event Aggregator manages the events from the WordPress admin dashboard instead of displaying widgets. This way you have more control without having to switch from WordPress to Eventbrite. However, there is also a downside. With multiple events, your site will be heavier and might be a bit slower to load.
Now, let’s see how to make the most of the WP Event Aggregator plugin to integrate Eventbrite with your WordPress site.
Step 1: Get Private Token in the API key
After installing and activating the plugin, you’ll be able to get the private token. To do that:
- Go to your Eventbrite account and click Organization Settings.
- Go to Account Settings and then to Developer Links > API Keys.
- If you don’t see your key, you will have to create one.
- Click the Create API key button and fill in the form. Once you finish, press Create.
- After creating the API key, copy your Private Token.
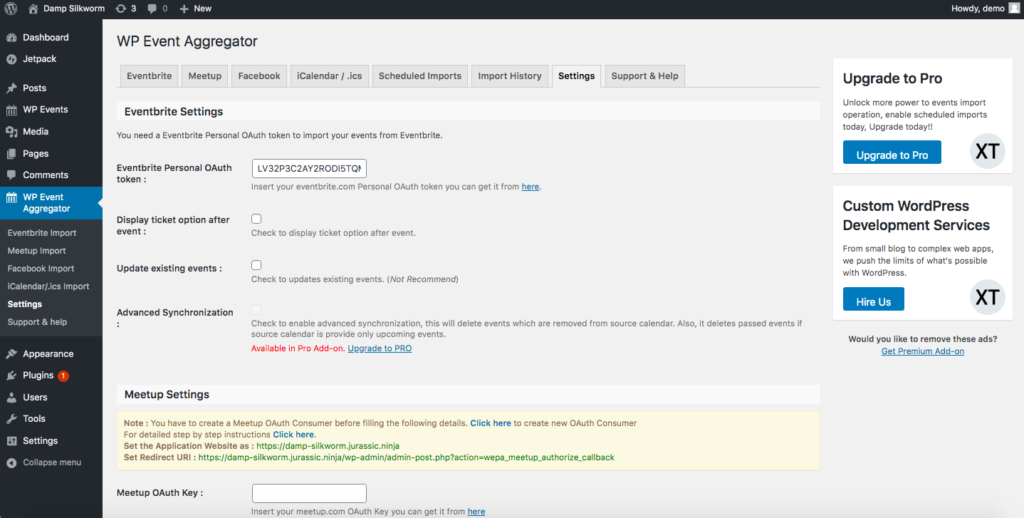
- Once you have your API key, go back to the WordPress dashboard > WP Event Aggregator > Settings.
- Paste the API key in the Eventbrite Personal OAuth Token field and then click Save Settings.
Step 2: Import Eventbrite Events
Once we’ve connected Eventbrite, it’s time to import some events. To do that, go to the Eventbrite tab in WP Event Aggregator. In the New Import tab, you can choose to import events by Event ID or Organizer ID. Here we’ll show you how to do it with the Event ID.
So, select Event ID from the dropdown event ID and then fill in the Eventbrite event ID.
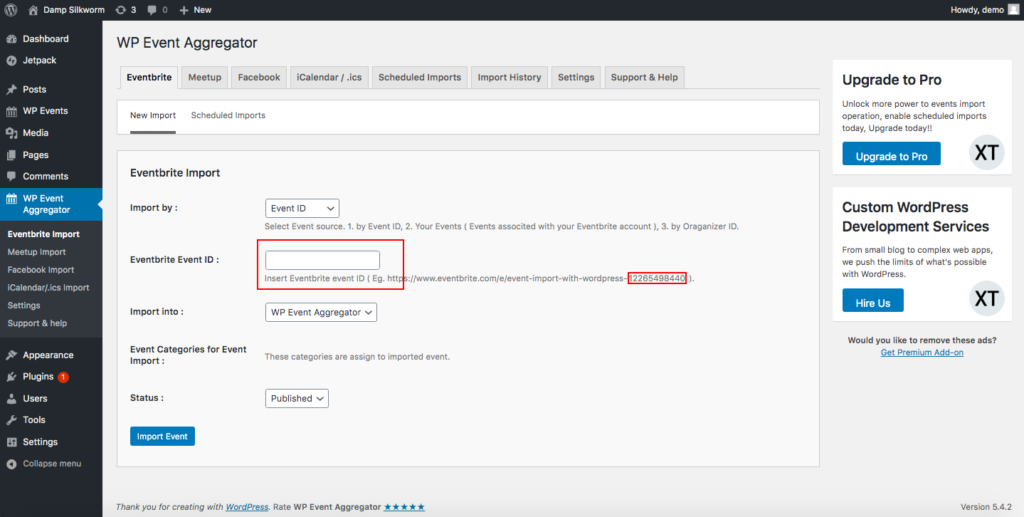
To get the Event ID, go to your event on Eventbrite, preferably the event management dashboard, and look at the URL link. The Event ID is the string of numbers at the end of the URL.

Copy it, go back to the WordPress dashboard, and paste it in the box Eventbrite Event ID. Then, click Import Event.
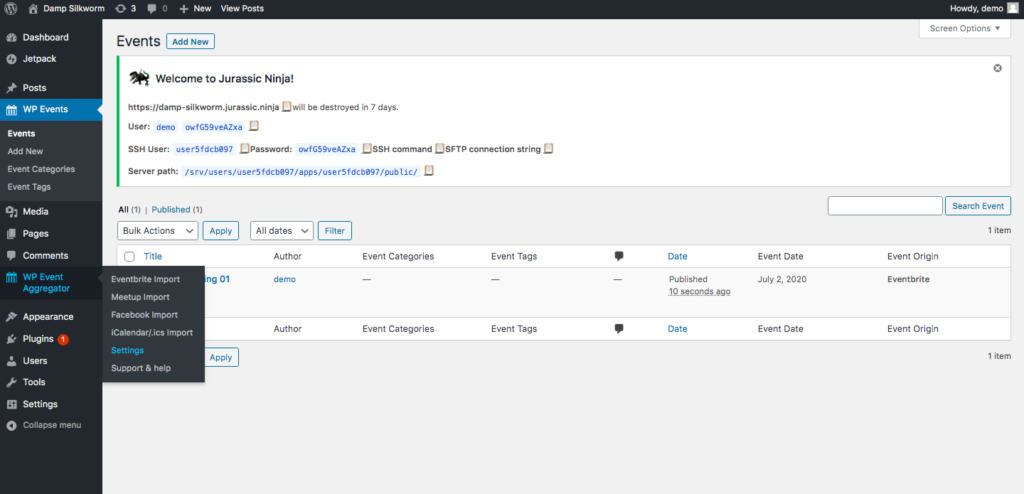
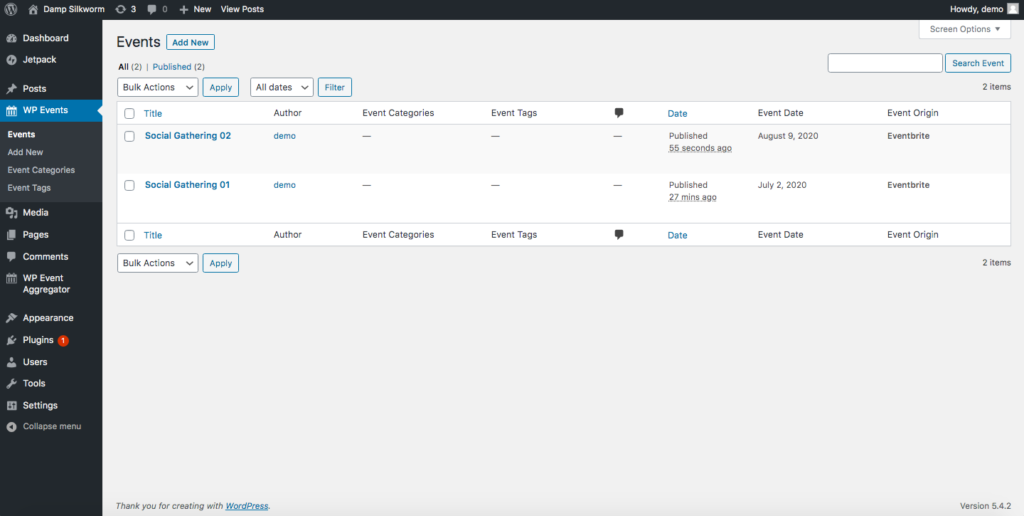
In the WP Events tab, you can check all the events you have imported. For example, we have imported two events so it looks like this:
Step 3: Display Events
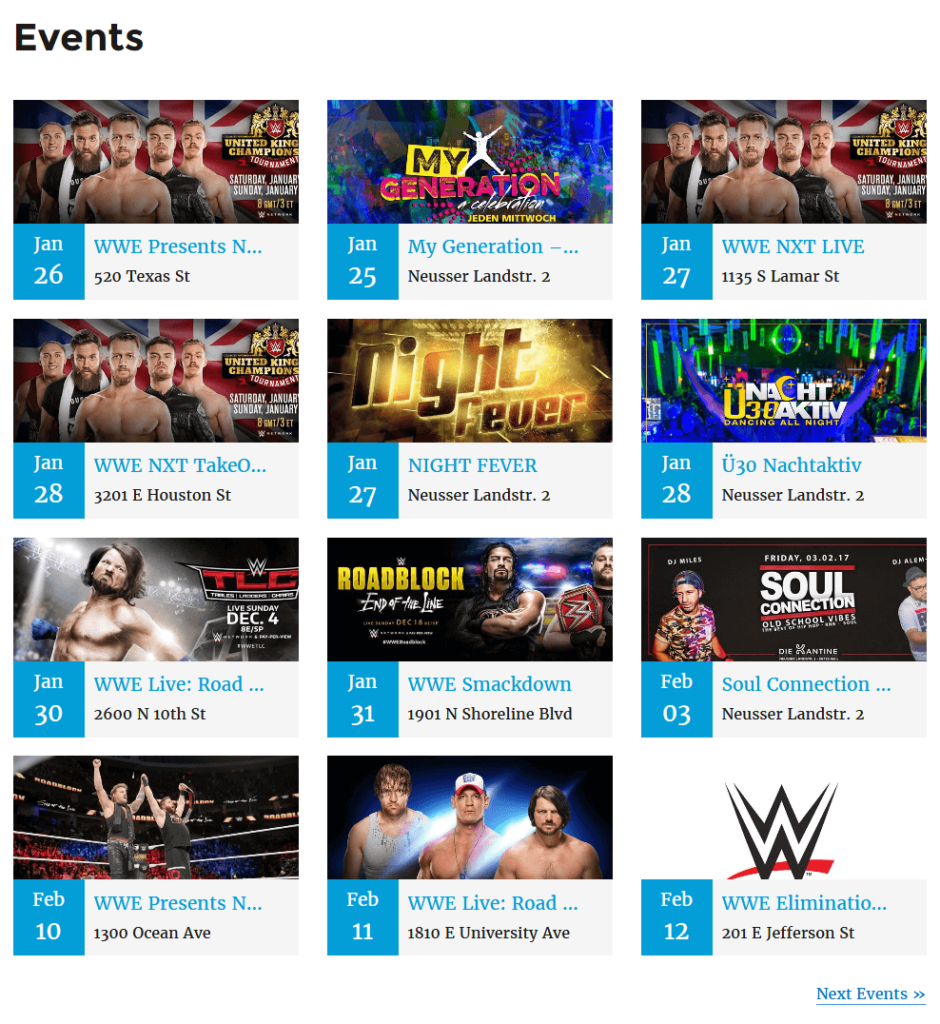
Finally, you need to display the Eventbrite events on your site. So, copy and paste this shortcode on the page you want to display the events:
[wp_events col=”2″ posts_per_page=”6″ category=”cat1,cat2″ past_events=”yes” order=”desc” orderby=”post_title” start_date=”2017-12-25″ end_date=”2018-12-25″ ]
You can customize this shortcode and change the number of posts, columns, and more. To know more about this, check out the WP Event Aggregator’s documentation.
As we only have 2 events, we get the following result.

Conclusion
In conclusion, now you know four different ways to integrate Eventbrite with WordPress. So, which option is better for you? The short answer is it depends. The long answer is that before choosing one method, you need to understand the difference between embedding their checkout and displaying widgets. While the former allows your customers to buy tickets on your site, the latter redirects them to Eventbrite.
So, if you only have a few events and you want to keep them available solely on your site, embedding the checkout is your best choice. Alternatively, if you have various events, displaying them as widgets with some plugins is the way to go.
If you want to add events to your site, you can also check out our guide on how to add Google Calendar to WordPress.
Have you tried any of these methods? Are you happy with the result? Let us know in the comment section below!
