How to Create Bookable Products in WooCommerce
Do you want to rent your products through your online business? If yes then we have the right guide for you. Today we’ll show you an easy way to create bookable products in WooCommerce.
Before that let’s take a look at why adding bookings or bookable products to WooCommerce is beneficial for your online business.
Why add bookings and bookable products to WooCommerce?
The number of active Internet users is constantly growing, and in parallel, the level of online shopping is also growing. We can buy and rent almost everything online.
Renting your product is one of the best ways for extra income. It is also convenient for the customers who want a certain product for a short period of time. This way it’s going to be a lot cheaper than purchasing the products.
There are lots of platforms where you can sell or rent your products. But the catch is you have to pay rental fees for the products. So one of the best solutions to avoid this situation is to add your bookable products to WooCommerce.
WooCommerce is the best platform to sell or rent your products because it doesn’t require a huge investment. Most importantly, it is beginner-friendly and you can create a fully functional rental marketplace within a short period of time.
Even though WooCommerce doesn’t have the features to create a bookable product you can always opt for a plugin that contains all of the essential features without touching a code. Not only that, you can manage and control the availability of your bookable products in WooCommerce. You can track the records and get the information of the booked products easily whenever you want it.
Now let’s have a look at how to create bookable products in WooCommerce.
How to create bookable products in WooCommerce
One of the best ways to create bookable products in WooCommerce is by using a plugin. The plugin adds those features that WooCommerce does not include by default. Similarly, there is a number of plugins that can help you turn your WooCommerce site into a product rental and booking platform. Let’s take a look at the most popular ones:
WooCommerce Easy Booking
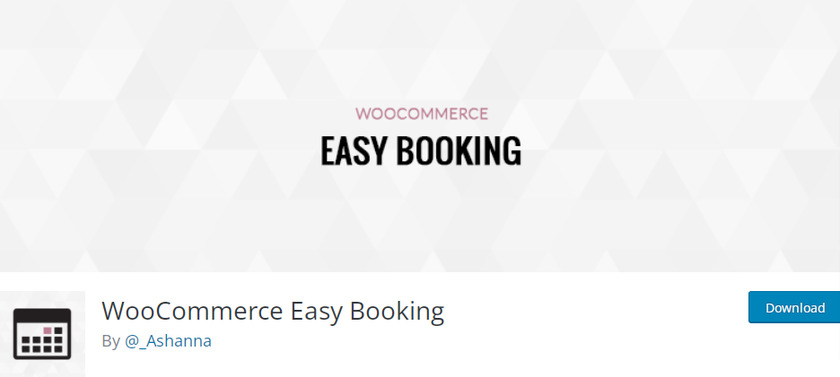
WooCommerce Easy Booking is an excellent plugin that comes with a set of impressive features. This plugin is perfect for beginners, including you and your customers. Even if you have no experience with WooCommerce, creating and managing bookable products is easy with a newbie-friendly backend.
The plugin has a simple configuration setting. You can display the availability of the products or services through a booking calendar. Along with that, this plugin supports Google Calendar synchronization. You’ll find all of the necessary features in the free version of this plugin along with tracking your booking orders.
Key Features
- Compatible with various product types (Variable, Grouped, Simple, and Bundle)
- Responsive and mobile-friendly date pickers
- Track the booking directly from the WordPress dashboard
- Translation-ready available in more than 40+ languages
Price
This is a freemium plugin. The premium version starts at 49 Euros per year with 1 year of updates and support.
WooCommerce Bookings
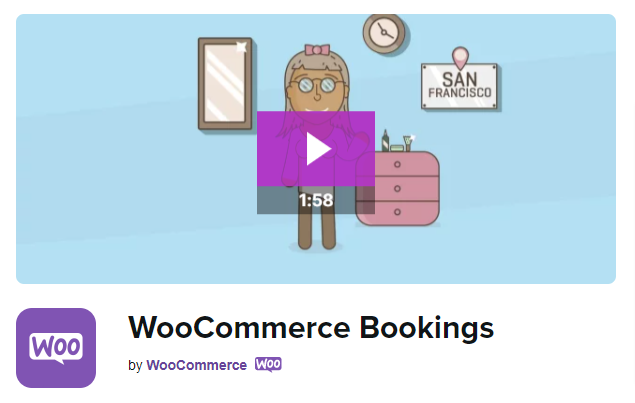
WooCommerce Bookings is a premium plugin that lets you create an online booking system for your WooCommerce site. The plugin comes with a lot of customizable options, custom fields, and an internal control panel with a calendar to manage booking dates. This plugin works by adding a new product type to your WooCommerce site.
You can find a good-looking design along with a simplistic backend offering an easier process for customers who can book your products with just a few clicks. Even though the plugin is on a little bit pricier side, it’s totally worth it considering its fully automated online booking system.
Key Features
- Custom email notification for customers
- Update booking availability from the WordPress dashboard
- Multiple bookings from different customers at the same time
- Integrated with Product Addons extension
Price
WooCommerce Booking is a premium plugin that starts at 249 USD per year and offers 1 year of free support along with extension updates and a 30-day money-back guarantee.
These are some of the plugins with which you can easily create bookable products in WooCommerce. Now, let’s see step by step how to do so.
For this tutorial, we will be using the WooCommerce Easy Booking plugin since it is lightweight and easy to configure. To use it, firstly we have to install and activate the plugin.
But before we begin, we highly suggest you set up WooCommerce correctly using one of the WooCommerce compatible themes to ensure no conflicts with the theme and other plugins.
1. Install and Activate the plugin
First, go to Plugins > Add New from your WordPress dashboard and search for the keyword ‘WooCommerce Easy Booking’ in the search bar on the right side of your screen. Then, click on Install Now button to install the plugin.
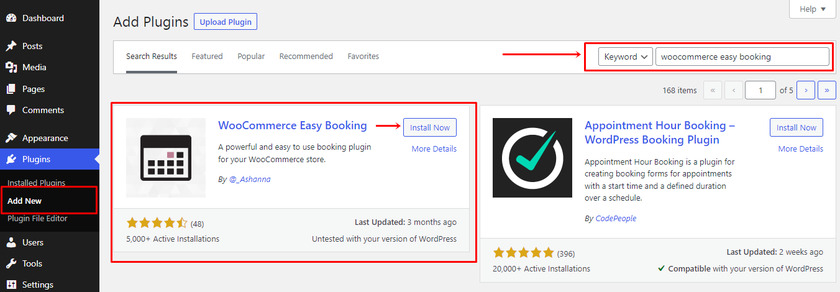
After the installation is done, click on Activate button right away.
In case you want to use the premium version of this plugin, you’ll need to install and activate the plugin manually. For more information about it, you can go through a detailed guide on how to install a WordPress plugin manually.
2. Configure Plugin Settings
Before creating bookable products with this plugin, we have to configure the plugin settings then only we can activate the reservation option in a product.
Once we have installed and activated the plugin, a new section called “Easy Booking” will appear in the side menu of our administration panel.

It consists of a general plugin settings configuration panel with 3 sections of which we are only going to use two of them: Settings and Reports.
2.1 General Settings
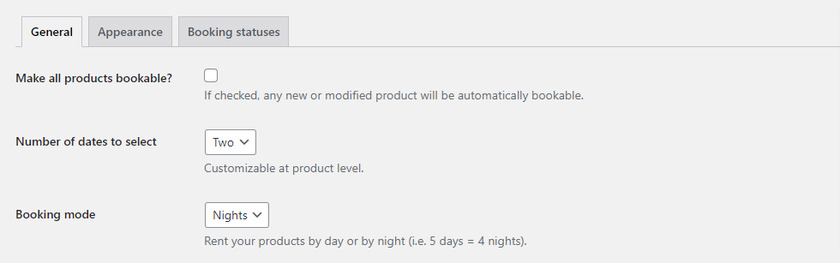
Within that section, we click on “Settings” to access the plugin’s general settings panel and be able to configure all the fields. First of all, you can see a checkbox to make all your products bookable. You can check it if you want to do so.
Then, you can find a dropdown menu where you can set a number of days which allows customers to select starting date and ending date.
After that, you can select booking mode from the dropdown. This mode lets your customers rent your products by the day or by night which is mainly used by businesses that offer accommodation services. But remember if you count nights, one day will be always be counted less (3 days = 2 nights).
Next, you’ll see a field where you can set the booking duration by adding a number of consecutive days or nights. You can set the duration only if you have set the number of days as two in the previous field.
The Minimum and Maximum duration fields can be set with the minimum and the maximum number of days respectively. Minimum duration refers to the minimum number of days that the product must be reserved. Make sure to at least configure it for a day.
On the other hand, maximum duration indicates if you want to limit reservations to a maximum of days per client. If you don’t want to put limits, you can leave it blank or put a zero.

After that, the next field indicates from what day a booking is available in relation to today. For example, let’s assume that the product you offer to reserve requires prior preparation that takes at least a day’s work. In that case, the client who wants to reserve it has to notify you at least one day in advance, and therefore, you should put a 1 in this field.
But if your product can be reserved on the same day, then you can leave this field blank or enter a zero. And for the Last Available date, the maximum number of days that you can set is 3650 days(10 years).
2.2 Appearance
In the appearance section, it’s all about customizing the colors of the date calendar to match your theme. You can choose between two calendar themes and customize the background, main color, and text color.
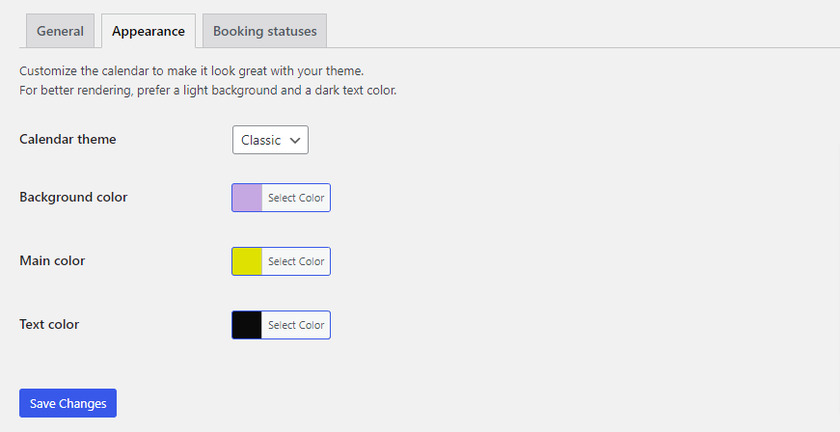
After you have customized the appearance of the calendar, click on Save Changes.
2.3 Booking Status
We have learned about various order statuses in our previous articles. However, this setting is not related to the particular WooCommerce order status page.
All you need to do is configure the settings over here so that you can easily keep track of the booking records. You can find the booking status on the ‘Reports’ page.
Here you can find four types of booking status which are Start, Processing, End, and Completed. You also need to set a number of days for the Start and End status. Let’s see how each of the statuses works and how to configure these settings.
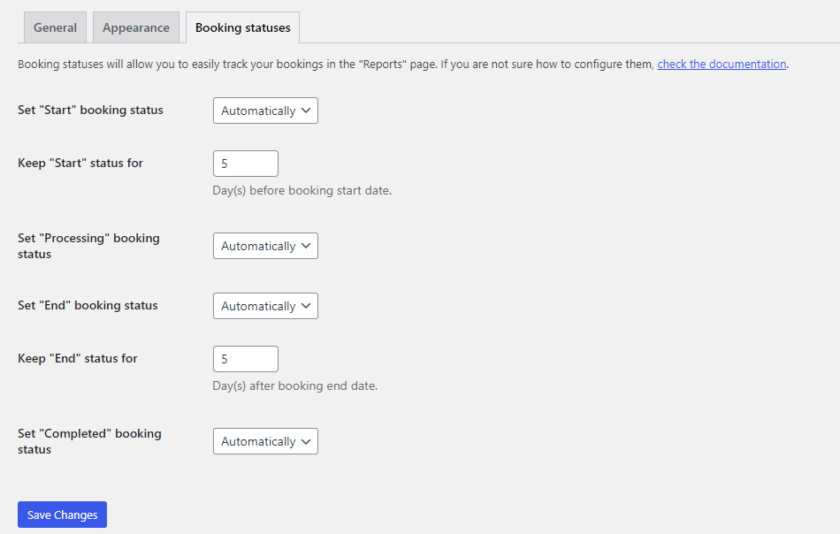
Start: Whenever a booking is made for the products. Set the status a few days ahead before the actual booking date if it requires time for you to prepare and deliver the product.
Processing: Booking is done and the product is delivered. Requires no further action.
End: The booking date has ended. Set the days a few days after the actual booking days if it requires time to prepare the items for another booking.
Completed: This status means that the booking is over and the product is available to book again.
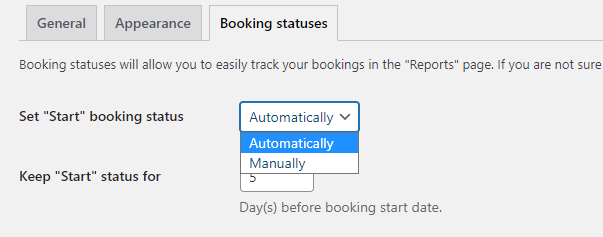
You can change the booking status automatically or manually. Simply click on the dropdown menu from each of the statuses and choose your preferred option.
Also, you can set the number of days for “Start” and “End” status if you need time to prepare the products.
For example, if you need 5 days to prepare the products, you can set 5 in the “Keep “Start” status for the” field. The Start status won’t be changed for 5 days until the booking start date.
2.4 Reports
You can find all of your booking statuses in the Reports. We have already configured the settings to change the booking status manually or automatically.
To change the booking status manually, select the order page where you can edit the item.

After that, if you’ll scroll further down you can find a dropdown menu from where you can choose the status, once you have selected the current status of the bookable product, click on the Save button.

3. Create Bookable Products in WooCommerce
After the configuration, you can now easily create bookable products in WooCommerce. A new option is added to each product file that allows us to configure the WooCommerce as a bookable product. You can either create new bookable products or change your regular WooCommerce products to bookable products.
For that go to the Products > All Products from your WordPress admin area. Now, you can either click on Add New button or click on Edit by selecting the product from the product page.

Upon clicking any of the options, a product edit page will be opened. For this tutorial, we’ll create a new bookable product. Here you can enter all the details which include the title, description, images, categories, etc of the product.
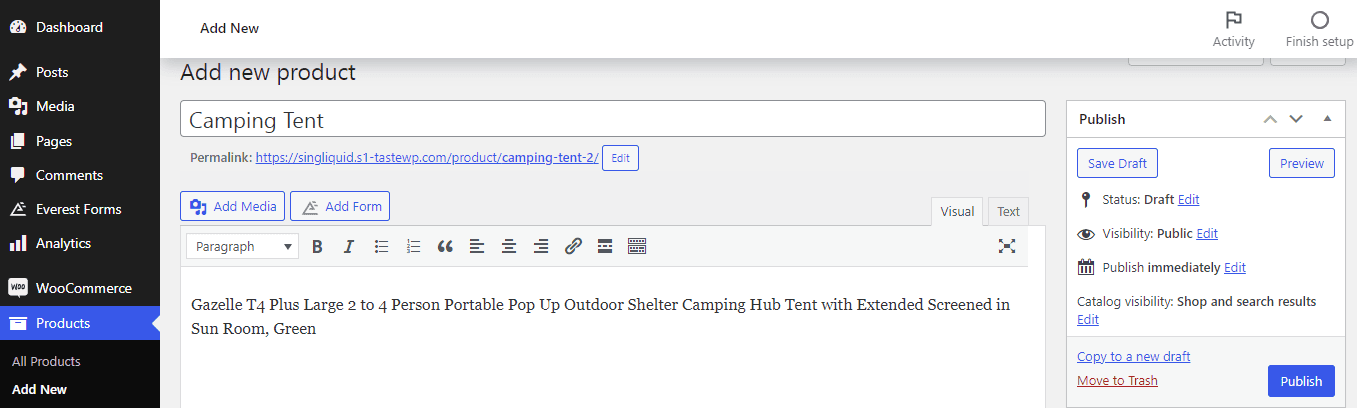
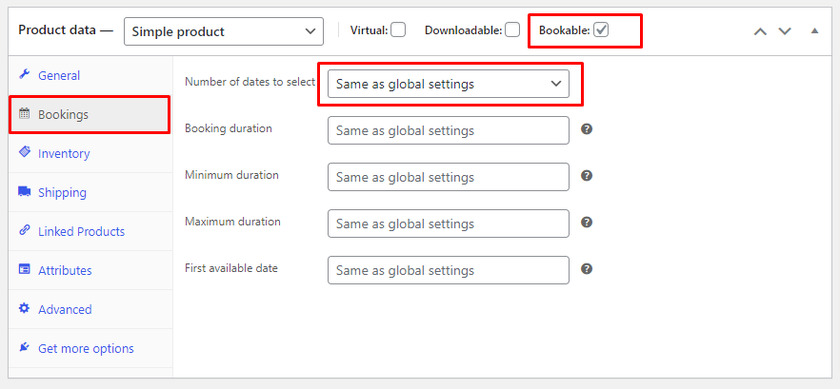
Then, scroll further down and you can see 3 different options in the Product Information section. We need to mark the “Bookable” option.
By marking the product as bookable, a new tab called “Bookings” will be displayed on the left-hand side below the General tab. We can configure the settings or leave it as it is without making any changes because we have already configured the plugin settings earlier and those are the global/default settings for all of the bookable products.
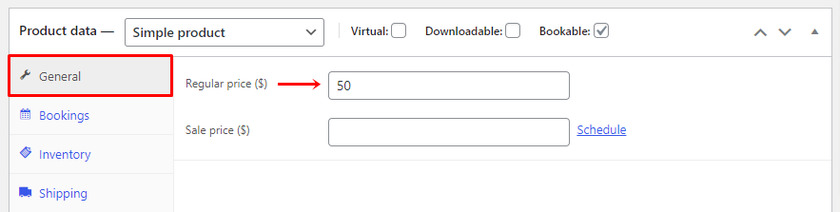
The next step is to define the price you want to charge per day of the booking. You must enter the price in the ‘Normal Price’ field in the General tab. You can even add additional fees for the product if needed.
To finish, you just have to click on “Update” to save the configuration and your product can be booked from your WooCommerce site.
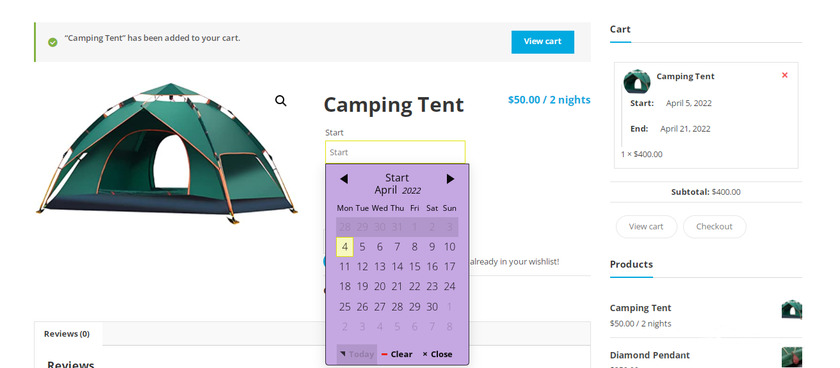
Now when a customer accesses the page of the product, the fields for the start date and the end date of the booking will be displayed. So whenever the customer clicks on them, a calendar will be displayed where they have to simply select the date. You can find the total amount of the booked product in the cart.
That’s it! With these easy configurations, you can create bookable products on your WooCommerce website in no time.
Bonus: Embed Google Calendar with WordPress
As we saw how easily customers can select dates and book their desired product. Even though the plugin provides all of the needed features and functionality to book a product you do not have lots of options when it comes to the design and managing the calendar.
That’s why as a bonus, we’ll provide this guide to embed Google Calendar to any posts or pages on your WordPress website. Google calendar makes it easier to organize the bookings of the products.
The easiest and quickest way to embed Google Calendar with WordPress is by using the custom HTML block. Even though we will be using HTML for this method, we’ll assure you that you don’t have to code anything and the steps are really simple and easy.
First sign in to your Google Calendar account. Once logged in, you can find a gear icon on the top of your calendar dashboard. Click on the Settings.
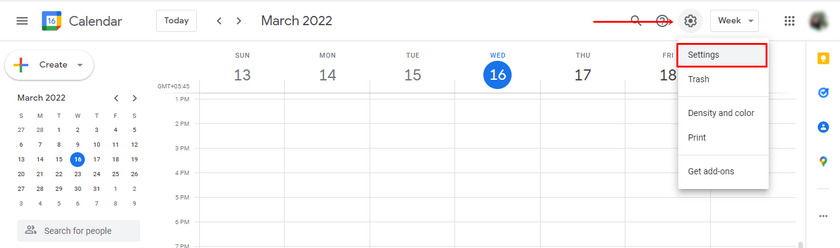
Then you can find the ‘Add Calendar’ option on the left sidebar. Upon clicking that more options will be displayed, select Create New Calendar from the dropdown.
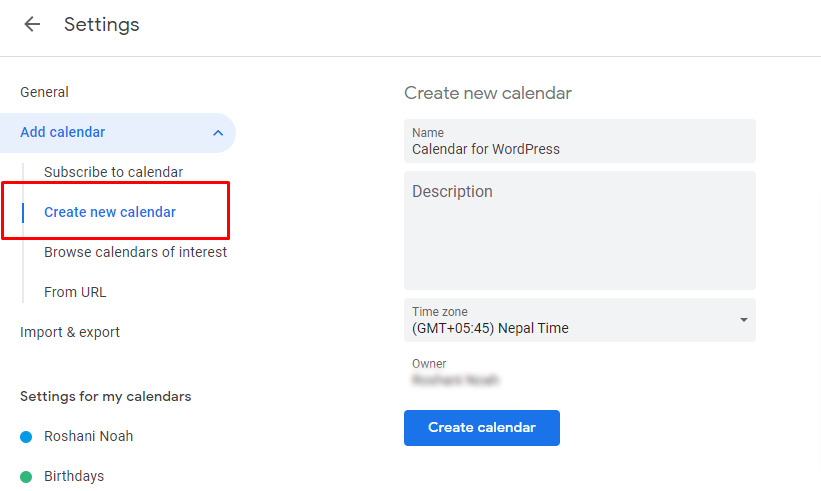
Now you can see fields where you can add details about your calendar. Fill the fields with the details and click on the ‘Create Calendar’ button.
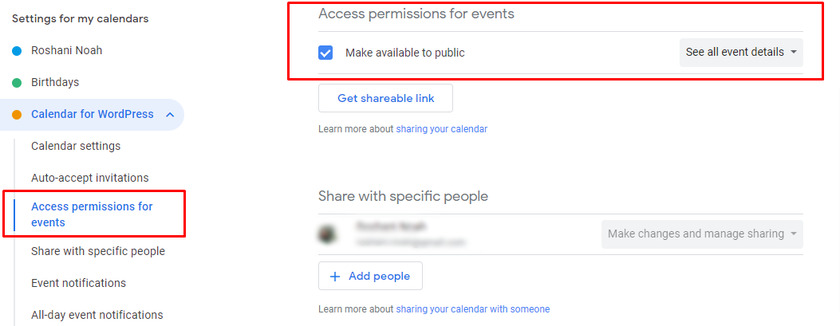
Once the calendar is created, we have to change the settings to grant access permissions for the calendar to make it visible to everyone.
For that click on the newly added calendar and once again lots of options are opened in the dropdown menu.
You can find the ‘Access Permissions for Events’ option. Here you can see a checkbox to make the calendar available to the public. Tick the checkbox and your settings are saved automatically.
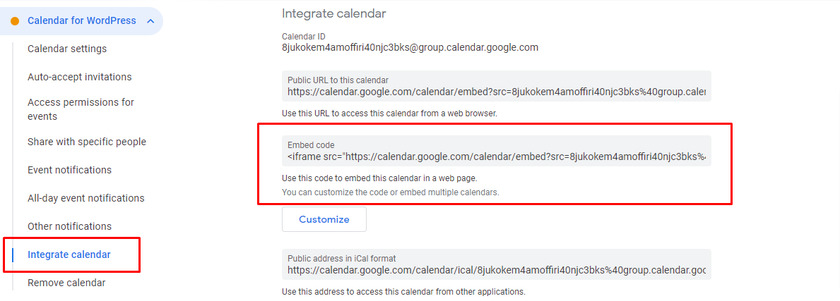
Now, a code is required to embed the Google Calendar in WordPress. It is available in the same settings under the option ‘Integrate Calendar’.
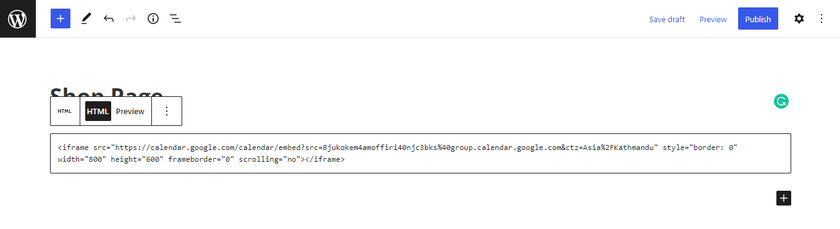
Then copy the Embed code and go to your WordPress.
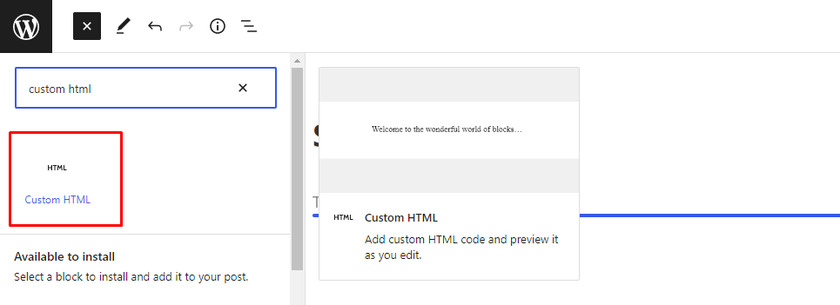
Now go to any page or post where you want to embed the Google Calendar. Here you need to add a new block to paste the code that we copied earlier. You can search for a custom HTML block and insert it into the posts.
Then, paste the embed code.
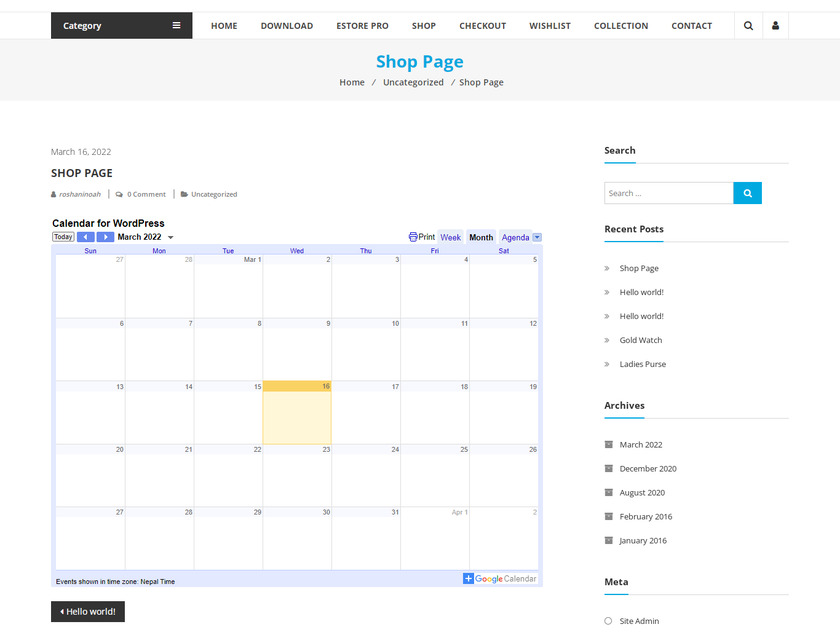
After pasting the code into a custom HTML block, you can preview the calendar by clicking on Publish button. This is how the Google Calendar will display on your WordPress site.
Conclusion
So this is how you can create a bookable product in WooCommerce. Having bookable products helps your business for recurring income through the same product. Along with that, it helps your customer to cater items for the short-term.
To summarize, the easiest way to create a bookable product in WooCommerce is by using a plugin. While there are many options when it comes to choosing a plugin, WooCommerce Easy Booking is one of the best plugins with awesome features. Booking the product is easy for the customers and the purchase process is the same as that of other regular WooCommerce products.
Similarly, you can use the default calendar provided by the plugin to manage the bookings or you can embed the Google Calendar to any of your posts or page. Google Calendar helps to manage and keep track of your bookings in a comprehensive way along with a high level of customization.
So can you create a bookable product in WooCommerce now? Did you try any other plugins? Please let us know about your experience in the comments below.
In the meantime, you can go through some more of our detailed posts to elevate your WooCommerce store:
