
How to Create Temporary WordPress Login: 3 Methods
Do you want to create a temporary login on your site but aren’t sure what to do? This post is for you. In this guide, we will have a look at different methods to create a temporary WordPress login.
Before we jump into the different ways to do that, let’s better understand the benefit of creating temporary logins.
Why Create a Temporary Login for WordPress?
The main benefits of temporary logins are that they expire after a certain number of hours or days. Additionally, these temporary accounts don’t need a username and password combination to access the backend. You can simply give users a unique URL that will take them directly to the backend.
Creating a temporary login can be useful for troubleshooting purposes, helping developers fix conflicts, and testing new features. For example, you may want to give admin access to some of your developers for a period of time while they make adjustments to your site or fix an issue.
Instead of giving them your admin credentials or creating new users to then delete them, you can create temporary logins. This way, you don’t need to create any permanent accounts making it easier for you to manage the different roles and accounts.
Now that we better understand its benefits, let’s have a look at the different methods to create temporary logins in WordPress.
How to Create a Temporary WordPress Login
There are two main ways to create a temporary WordPress login:
- From the WordPress dashboard
- Programmatically
- Using a dedicated plugin
In the following section, we will show you both methods so you can pick the most appropriate according to your requirements.
1) From the WordPress Dashboard
This is the simplest method to create a WordPress user and doesn’t require any third-party plugin or code.
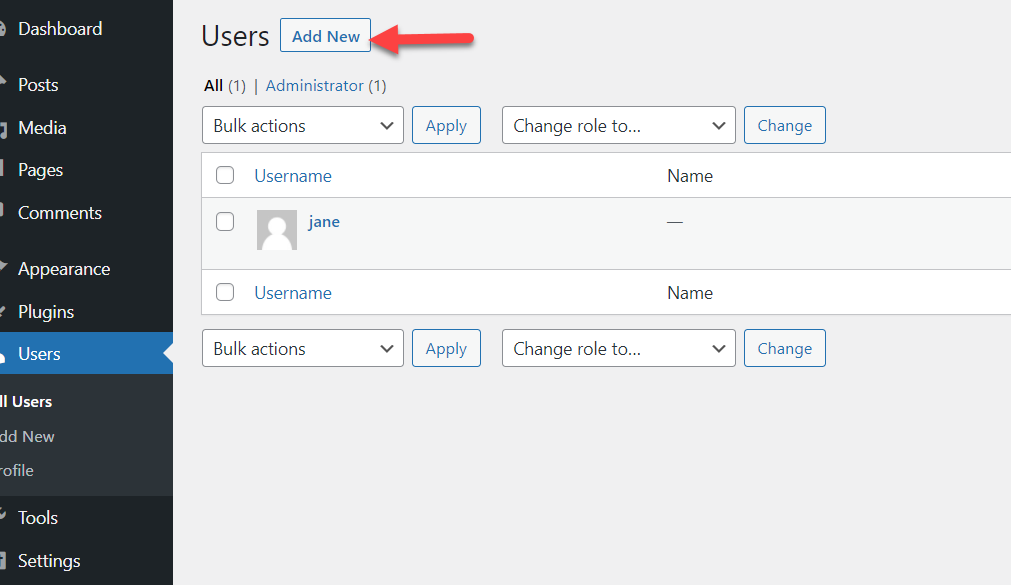
First, open your admin dashboard and go to Users > All Users. There, you will see all the users with their username, name, email address.
To create a new user, click on the Add New button.
Then, you will have to fill in a username, email, first and last name, website, password, and role.
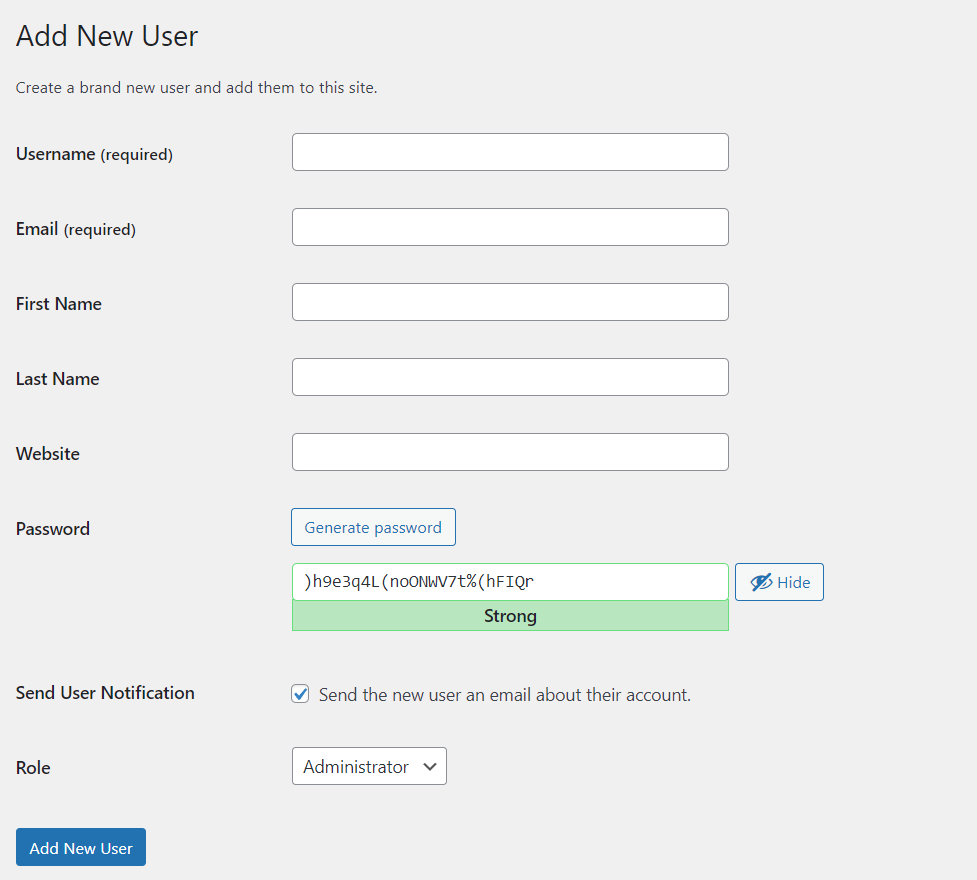
Username, email address, password, and role are mandatory options. You can also select the option to send the user a notification.
Make sure you choose the proper roles depending on your situation. Once you have filled the form with the required details, press Add New User. This will tell WordPress to create a new user.
This way, you can create a new user through the WordPress dashboard. However, this won’t be a temporary user. Once you don’t need this account anymore, you need to manually delete it for security purposes.
2) Create a temporary WordPress login programmatically
There’s another way to create users in WordPress. Instead of using the admin dashboard, you can use a bit of code.
NOTE: As we will edit the theme’s functions.php file, before moving forward you should generate a complete website backup. Additionally, we recommend you edit the child theme, so if you don’t have one, follow this guide to create a child theme or use one of these plugins.
Once you’ve done that, let’s see how to create users programmatically.
The code we are going to use is:
wp_create_user( 'johndoe', 'passwordgoeshere', '[email protected]' );
As you can see, we are using johndoe as the username, passwordgoeshere as the password, and [email protected] as the email address. Make sure you edit the code to give the user the right, username, email, and password.
You can directly paste that code snippet into the functions.php file or use a site-specific plugin like Code Snippets. For this demonstration, we will use Code Snippets.
We install the plugin, go to Snippets > Add New Snippet, and paste the code there.

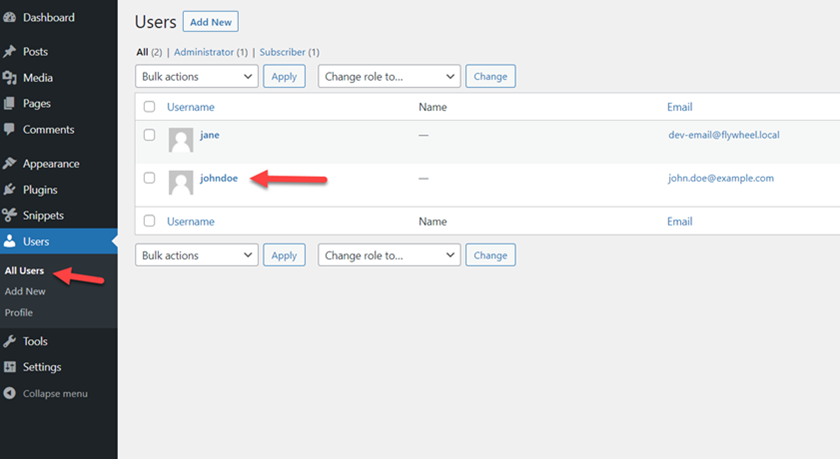
After saving the snippet, check the user section and you will see the new user.
To improve the above code, you can use a hook, so the new snippet will look like this:
add_action('admin_init','QuadLayers_create_user');
function QuadLayers_create_user(){
  wp_create_user( 'johndoe', 'passwordffgoeshere', '[email protected]' );
}
That’s it. This way, you can create WordPress users with a bit of code. Then, once you want to remove the user from the website, you can either delete the snippet or deactivate it. If you want more details about this process, check out our guide to create users programmatically.
As you can see, the above options aren’t ideal because they rely on you remembering to remove or change the user’s role. For a better solution that automatically removes certain users after a specific period, you’ll need to use a plugin.
3) Create a temporary WordPress login with plugins
The best solution to create a temporary login is to use a dedicated plugin. There are several tools out there, but for this demonstration, we’ll use Temporary Login Without Password. This free plugin comes with many unique features and allows you to create unlimited temporary logins in a few clicks.
In this section, we will show you how to use this plugin to create a temporary login in WordPress.
3.1) Installation and Activation
First, you need to install and activate the plugin. Go to Plugins > Add New, look for the Temporary Login Without Password plugin, and install it.
Once you have activated the plugin, it will automatically redirect you to the settings page. If it doesn’t, you will see the plugin’s settings under the Users section.
3.2) Plugin Configuration
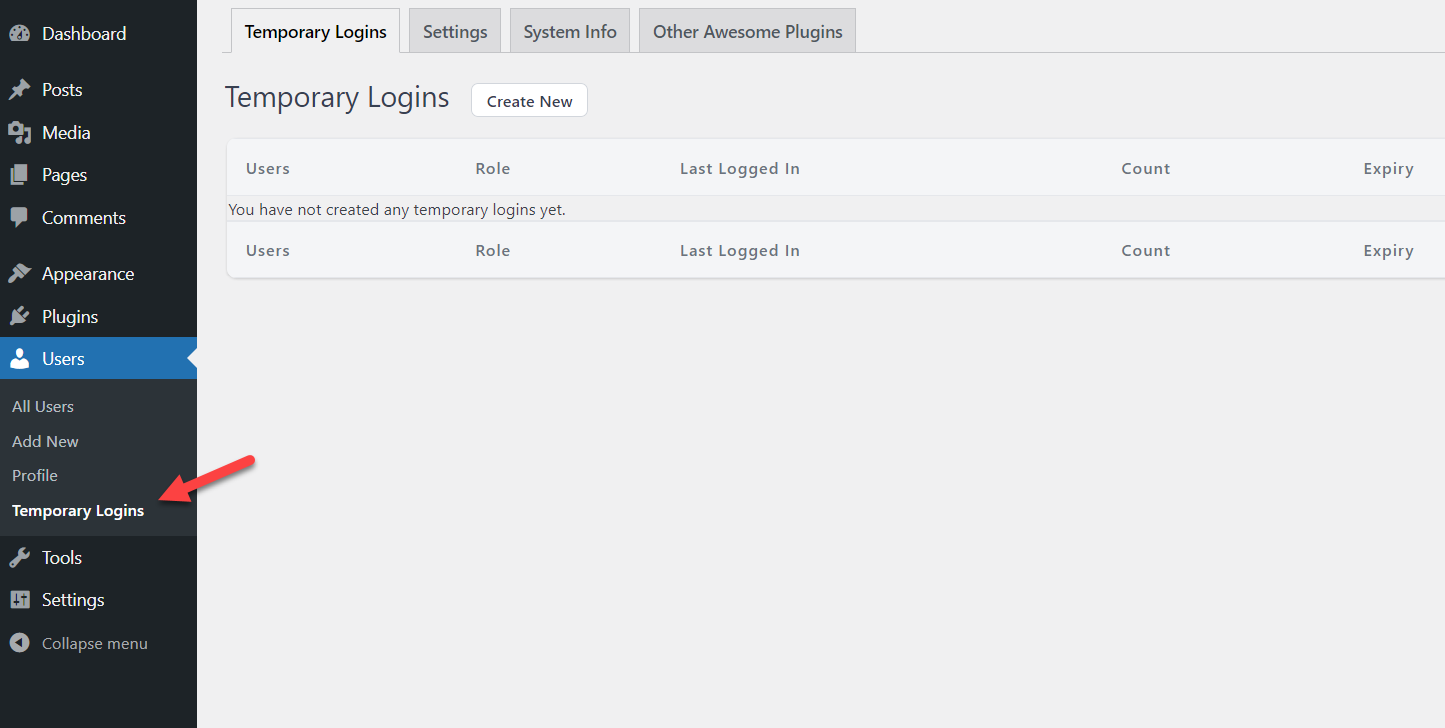
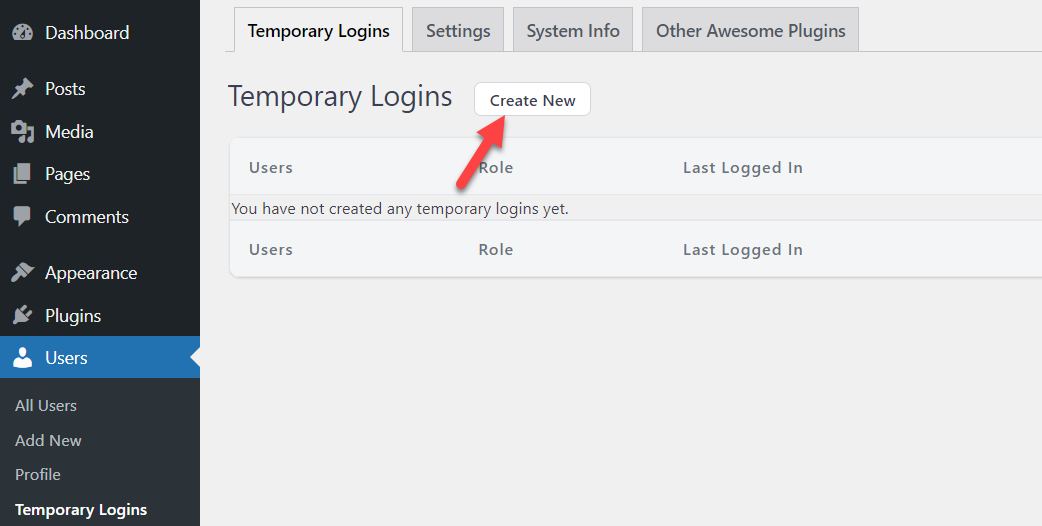
By default, you won’t see a login. To create a temporary account, press Create New.
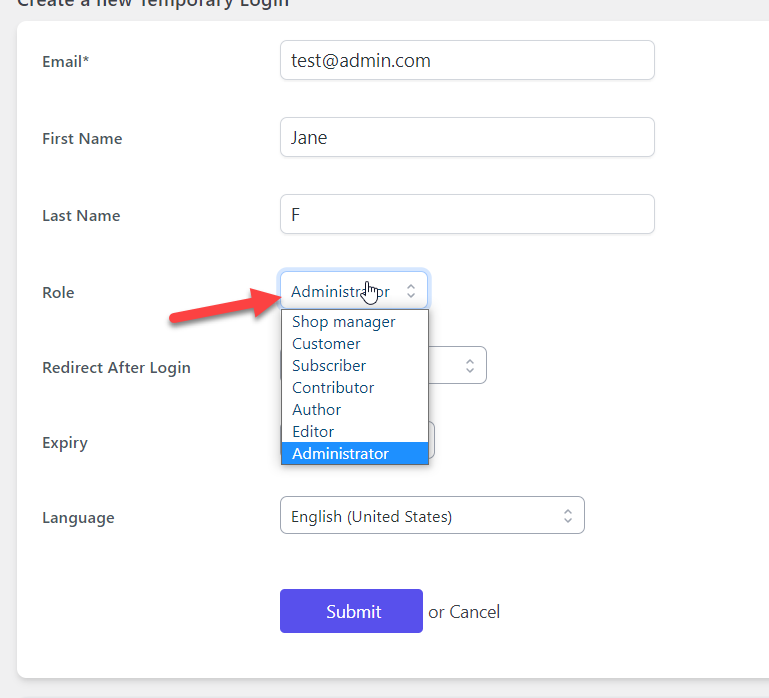
The account creation process is straightforward and comes with minimal settings. You simply need to enter the following details:
- Email address
- First name
- Last name
- Role
- Redirect after login
- Expiry
- Language

In the email field, you need to enter the recipient’s email address. WordPress will verify this email address when someone uses this login. The first and last names are fields to help you identify each person, while the role is crucial as it will define the permissions you give to that user.
If you press the Role dropdown, you will see the list of all the available roles on your website. For this demo, we will select Administrator, but choose the role that makes sense for your case.
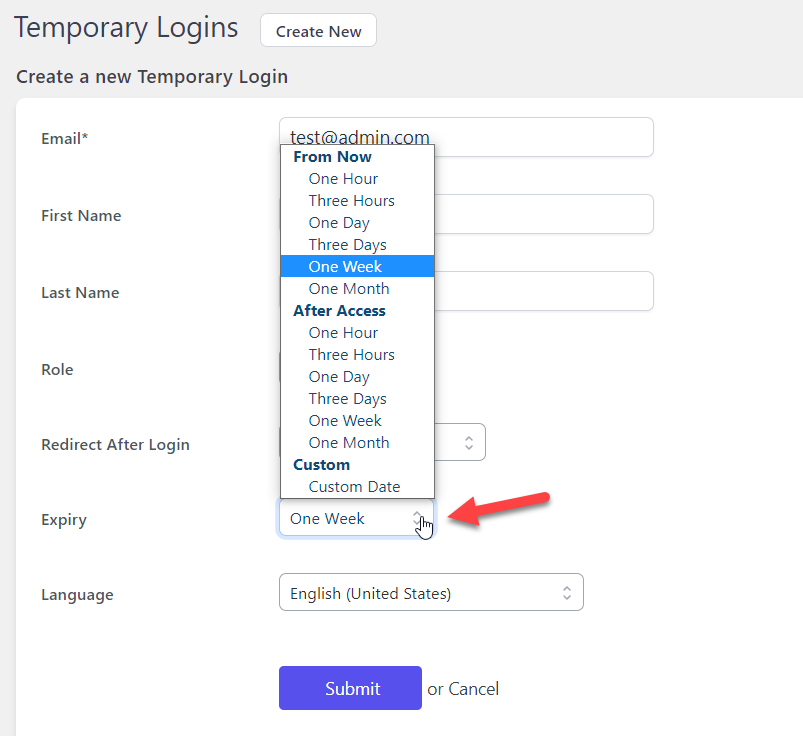
Setting up the expiry time is another critical setting. Press the dropdown and select the option that makes sense for your situation. For example, if you’re giving access to someone to fix a small issue on your site, 3 hours or a day may be enough, whereas if they need to do a more complex task, a week or a month may be a better option.
Finally, you will see an option to choose the language for the user. By default, the plugin will pick the language used in the WordPress settings, but you can change it from here. If you have an online store and want to change the language, have a look at our tutorial to change the WooCommerce language.
Once you have filled in all the fields, click Submit to create a new temporary user.
The plugin will display a unique link on the screen:
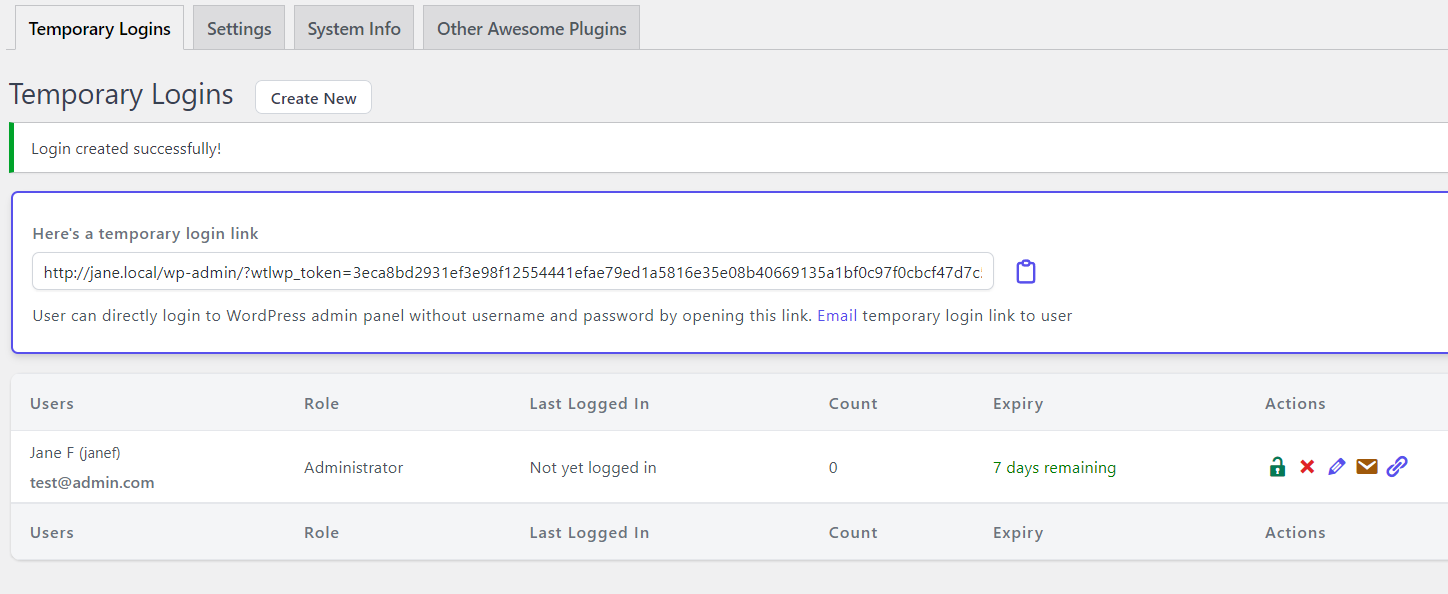
3.3) Send the link to temporary users
Send that link to the temporary users so they can access your site’s backend without a username or password. Once the temporary users click the link, the plugin will automatically redirect them to the configured destination without any authentication.
This way, you can create as many logins as you want without any restrictions.
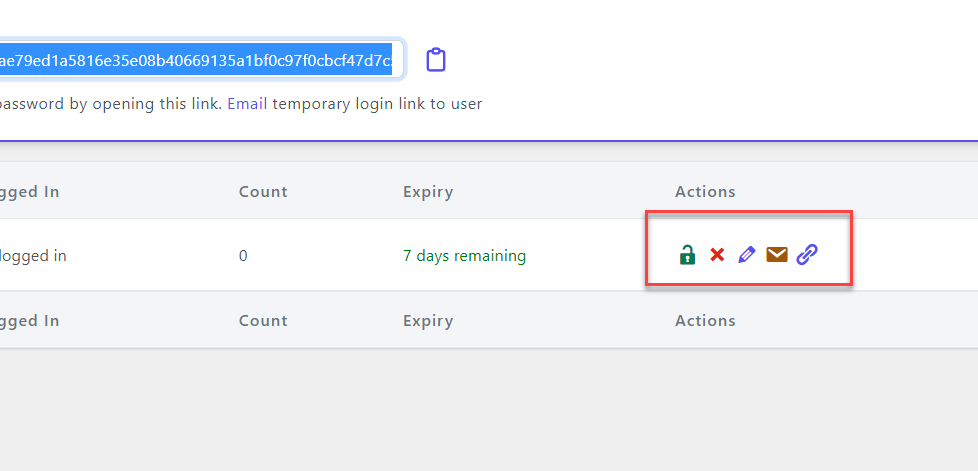
You can also manage the existing temporary logins with the following options:
- Disabling the login
- Deleting the login
- Editing the login
- Emailing the direct login link
- Copying the direct login link
The plugin will provide temporary users access for the specified time and then automatically delete them.
That’s it! That’s how you create a WordPress temporary login with a plugin.
What if you’ve given some users temporary admin access and you want to make sure that they aren’t doing anything they aren’t supposed to? The good news is that you can monitor the user’s activity.
How to Monitor User’s Activity
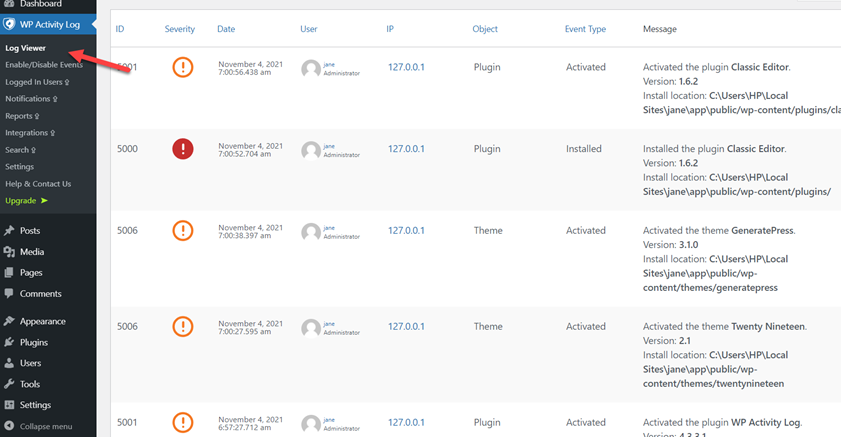
The easiest way to monitor users’ activity on your site is to use dedicated plugins. There are a lot of tools for that, but for this tutorial, we will use WP Activity Log.
First, you need to do is install and activate the plugin by going to Plugins > Add New.

After activation, you will see the plugin’s settings on the left-hand side. From the log viewer, you can view all the activities that each user performs to make sure that they aren’t using the permissions you’ve given them for malicious activities.
Conclusion
In summary, creating temporary logins can be useful when someone needs to access your site for a specific task or a specific period.
In this guide, we’ve seen two different ways to create a temporary login in WordPress:
- Create an account using the WordPress dashboard and then delete it
- Create users programmatically and then remove them
- Use a temporary login plugin that removes the temporary user automatically after a certain period that you define
Creating an account using the WordPress dashboard is the simplest method. However, it won’t be a temporary account, so you’ll have to manually delete it once you don’t need that user anymore. On the other hand, the plugin method is more convenient because it allows you to create an account for a certain period. After that, the plugin automatically deletes the account making it easier to manage. Additionally, we also recommend using an activity log plugin to track users’ activities.
Finally, you can also create users programmatically with a bit of code. Similar to the admin dashboard method, you’ll need to manually remove the temporary user once you don’t need it anymore.
Have you created temporary users? Which method did you use? Let us know in the comments below!
If you’ve enjoyed this post, you may also be interested in the following guides:
