How to Create a WooCommerce Mobile App
Do you want to create a mobile Android and iOS app for your online store? In this post, we are going to show you how to easily create a WooCommerce mobile app without writing a single line of code.
Why Create a WooCommerce Mobile App with an app builder?
Currently, more than 50% of the traffic on the internet is mobile. That’s why optimizing your store for mobile devices is a must. Using responsive design is a good start, but if you want to stand out from your competitors you need an app.
Some years ago, developing an app was something that only big companies could afford. It was expensive and it took a long time to develop. However, things have changed. App builders are tools that help you create an app in a few days without writing a single line of code or hiring expensive developers.
App builders allow you to build both Android and iOS apps and improve your users’ mobile shopping experience. The best part is that they are very easy to use and let you create and customize your app even if you have no experience developing apps. If you’re interested in creating a mobile app for your online store, you can check out our list of the best app builders for WooCommerce.
Apart from offering another channel to monetize your store, mobile apps can help you reduce cart abandonment. You can customize offers for them and send them relevant deals through push notifications.
Now, let’s see how to create a WooCommerce mobile app step-by-step.
How to create a WooCommerce Mobile App
Let’s see how you can make your first WooCommerce app using Appmaker.
Step 1: Account Creation
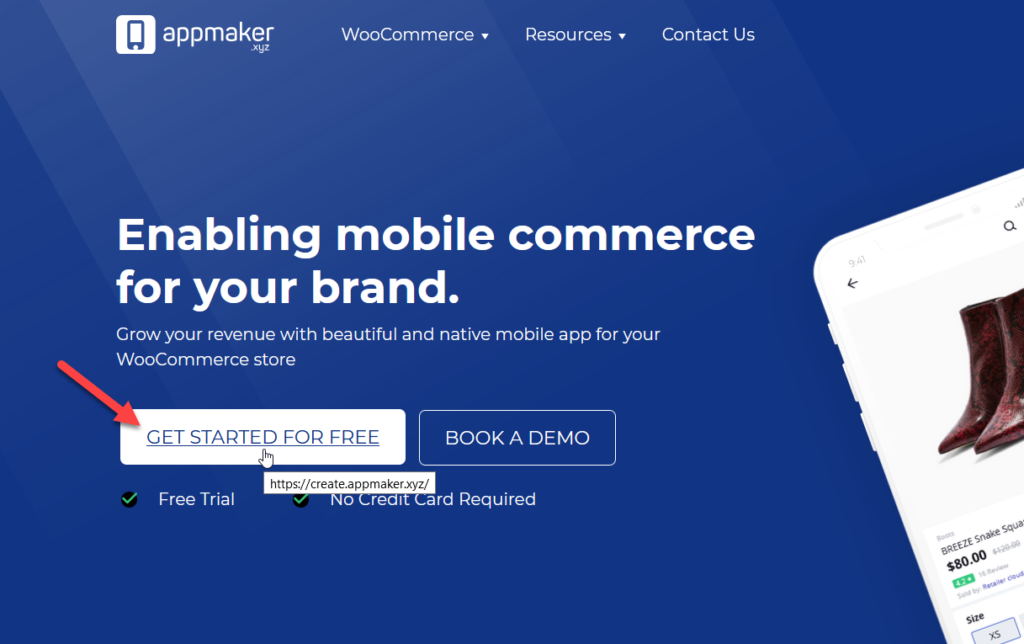
First, go to Appmaker.xyz and click on the Get Started For Free button.
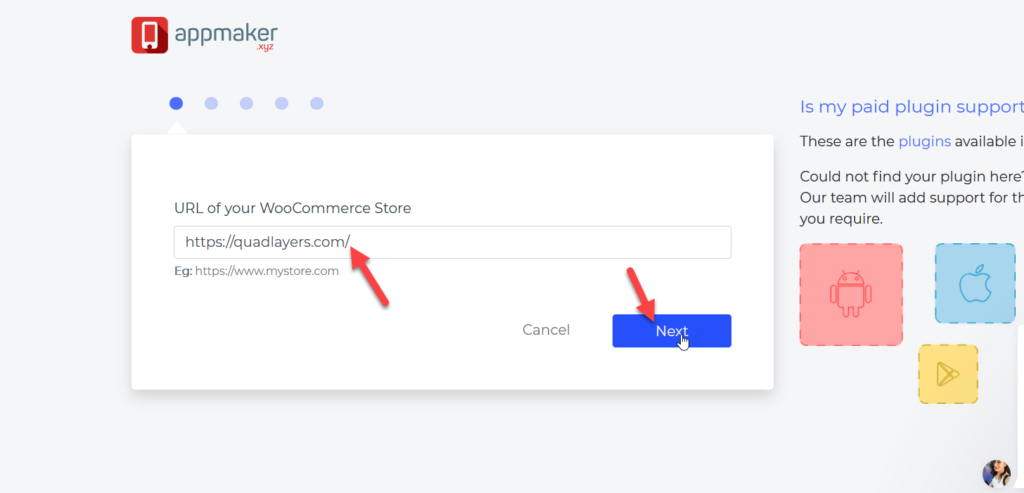
Then, enter the URL of your WooCommerce store.
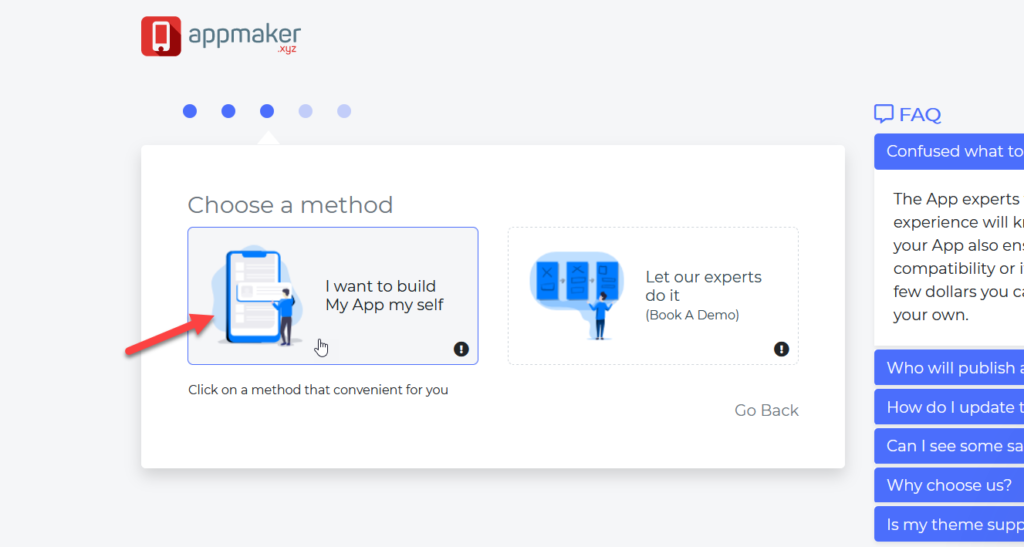
On the next page, you will see two options.
- Create the app yourself
- Hire experts
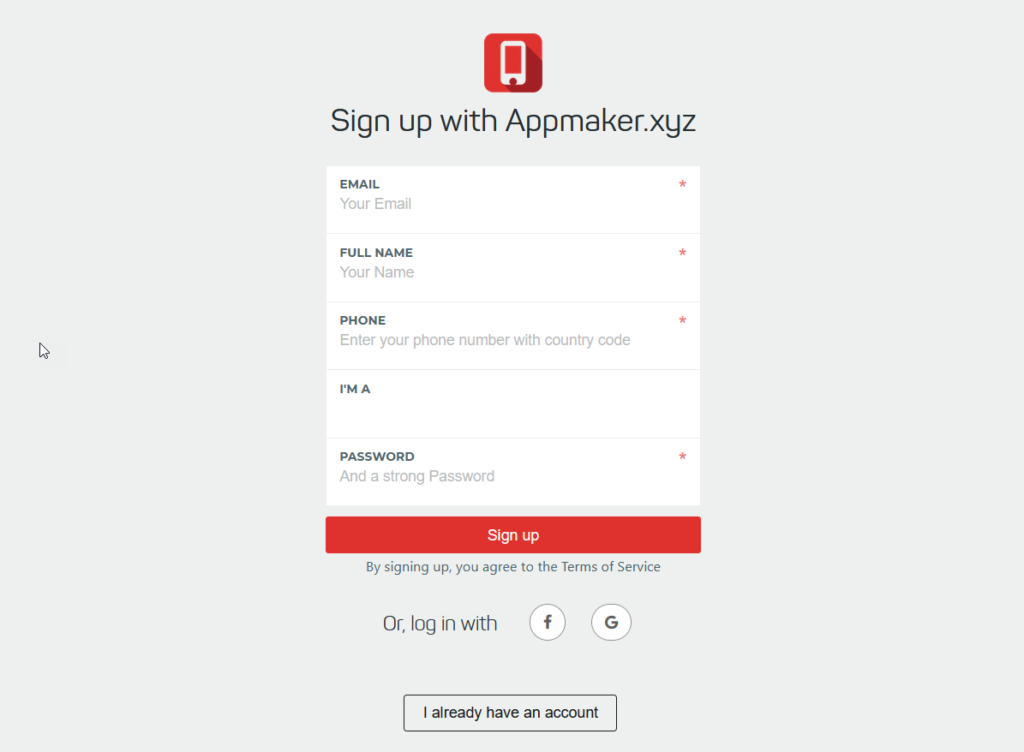
In this guide, we’ll show you how to create a mobile app from scratch without hiring any developers, so we’ll choose the first option. On the next page, you will need to create an account or log in to your account if you already have one.
After entering the required details, sign up. Then, you will be redirected to the website’s dashboard where you’ll have to name your app. Simply submit the app name and you are good to move forward.
Step 2: WooCommerce Store Authentication
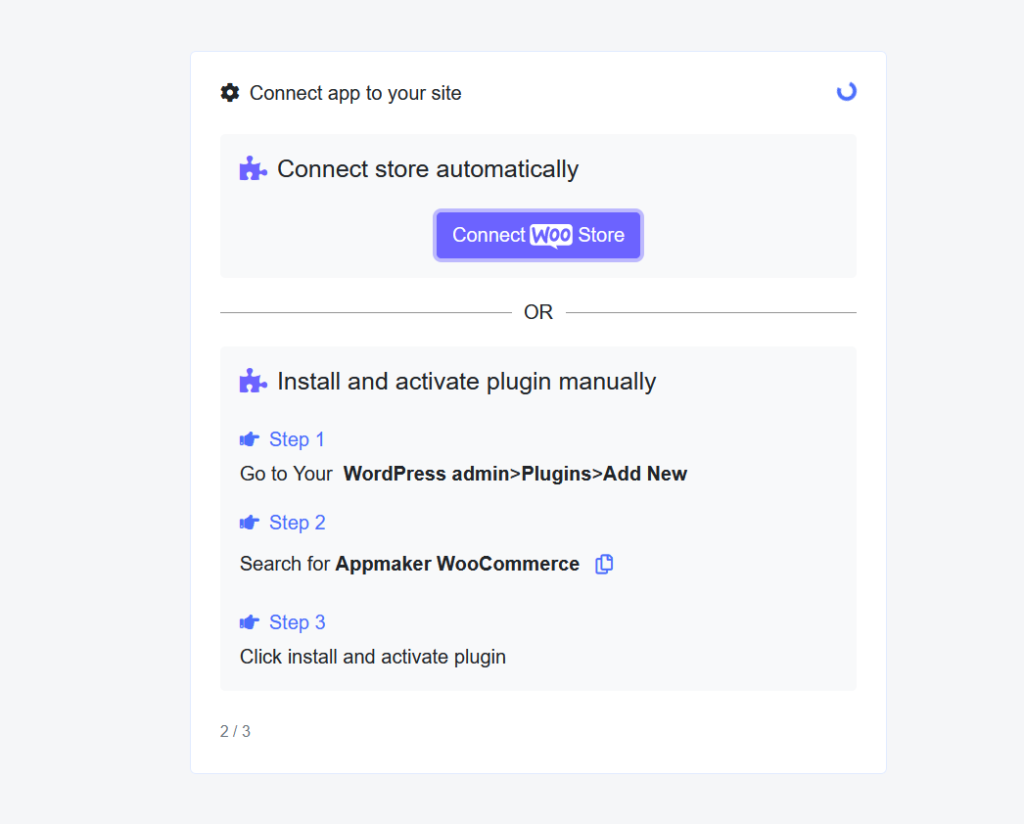
Once you have an Appmaker account, you need to connect it with your WooCommerce store. You can do it automatically or manually by installing the plugin. In our case, we’ll use the plugin.
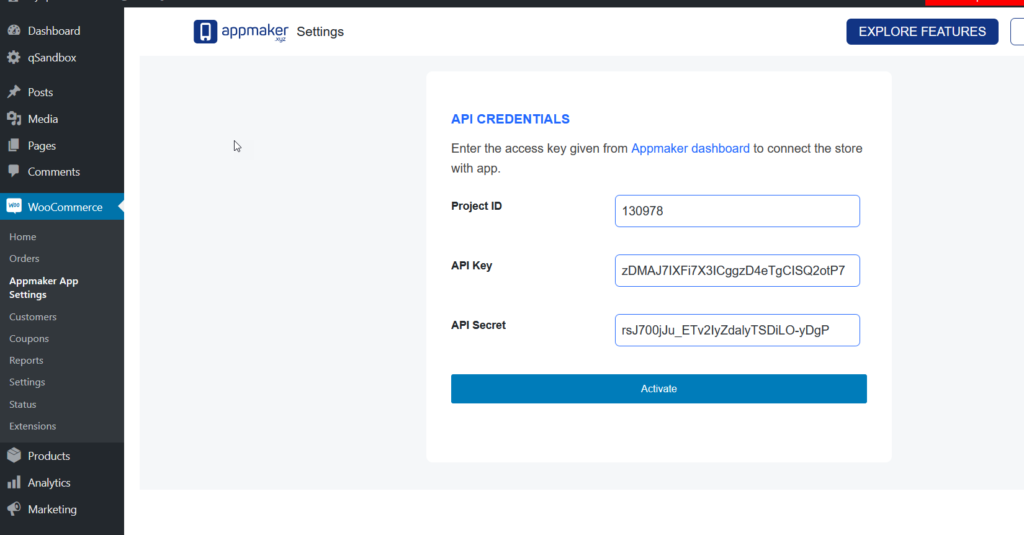
Once you have installed and activated the plugin, your Appmaker screen will show your unique project ID, API Key, and API secret. Copy them and place them somewhere handy because you’ll need them in the next steps.
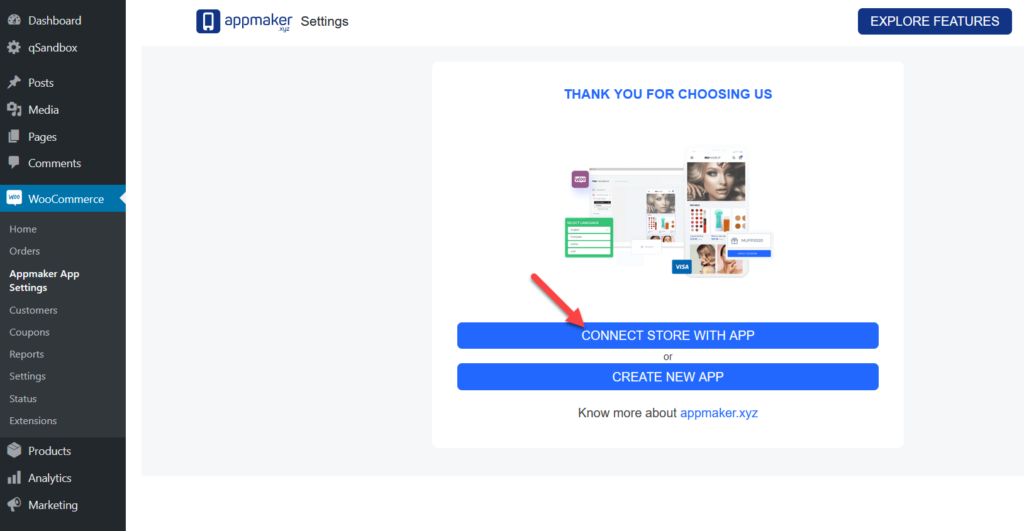
Now go to your WordPress dashboard > WooCommerce > Appmaker App Settings and select the app authentication option.
Enter the API credentials you have just copied from the Appmaker website and activate the plugin.
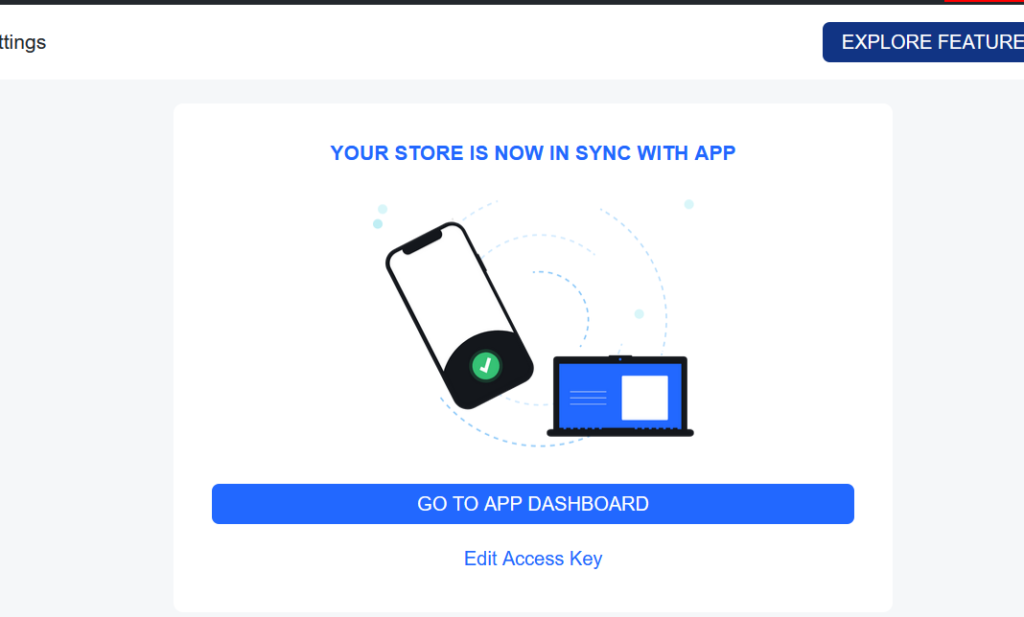
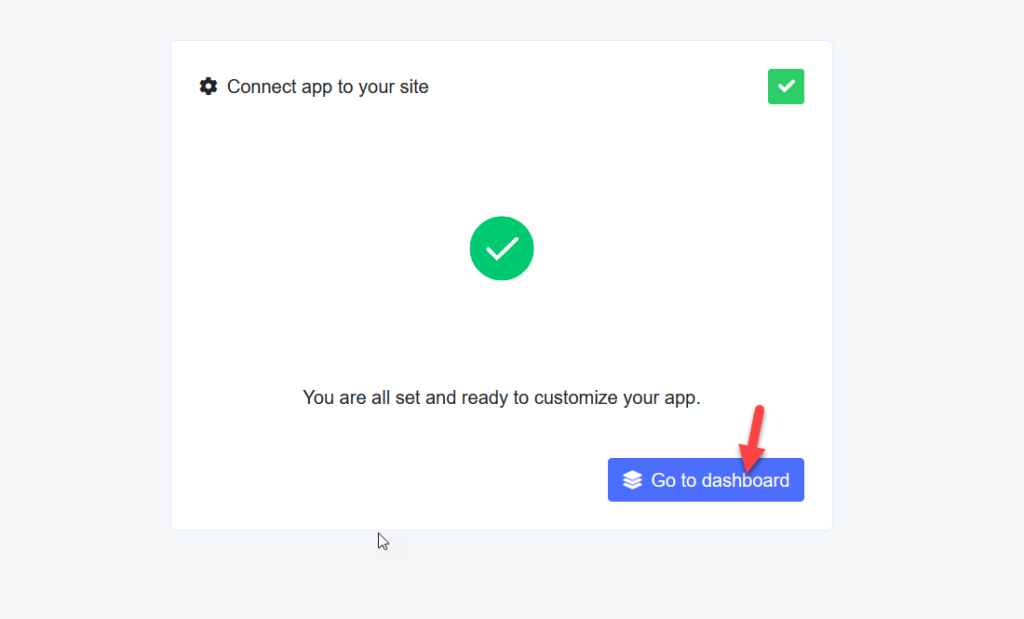
As you can see below, our store is now integrated with the Appmaker app.
Now it’s time to customize the app, so let’s go to the app dashboard.
Step 3: App Modification
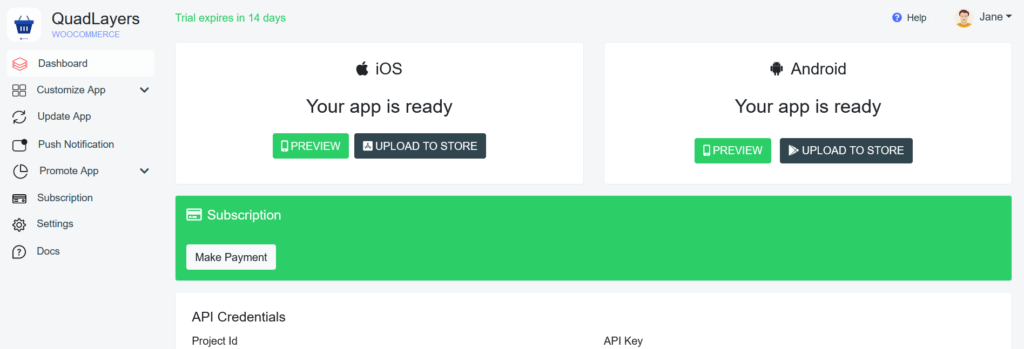
To create your WooCommerce mobile app, you can download a copy of an Android or iOS app from the account dashboard and test it in Appmaker’s testing environment.
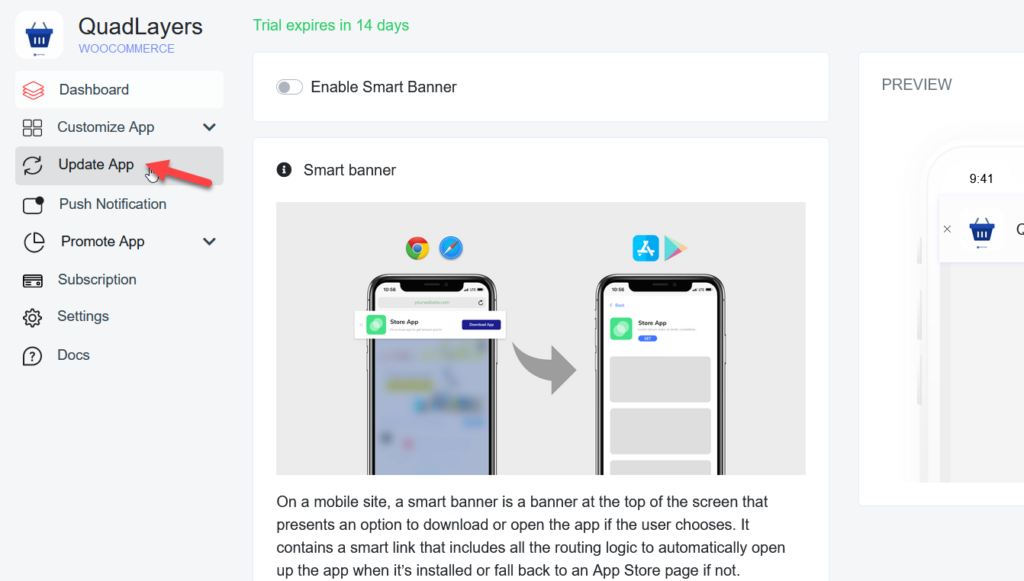
To personalize your app, go to Update App, where you’ll find the basic configurations.
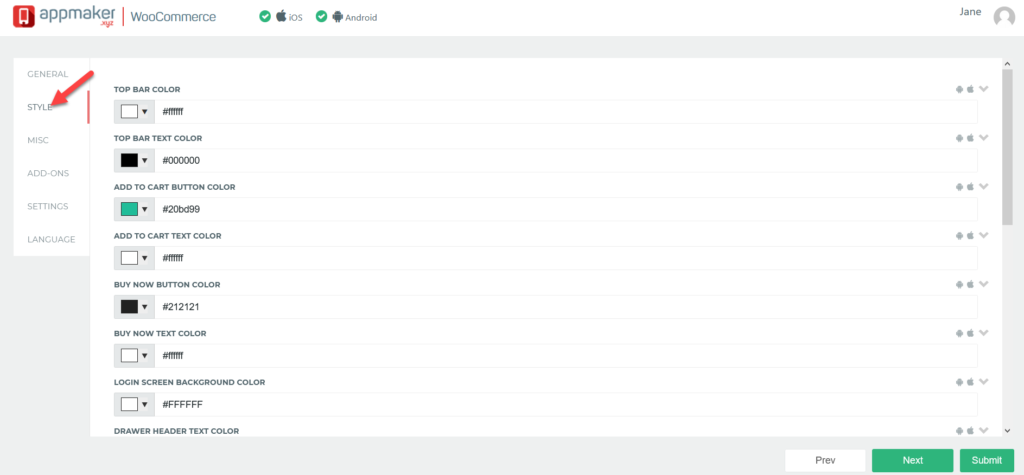
In this section, there are 6 different subsections:
- General
- Style
- Misc
- Add-ons
- Settings
- Language
Each of these options allows you to customize different elements of the app. For example, to change the styling and design of your app, simply go to the Style section. You’ll be able to customize the header, text, background, buttons, and much more.
After making the changes you want, save them. Even though the changes won’t apply instantly to your app, they have a short delay of only 5 minutes. After updating the app, you can test this on your phone.
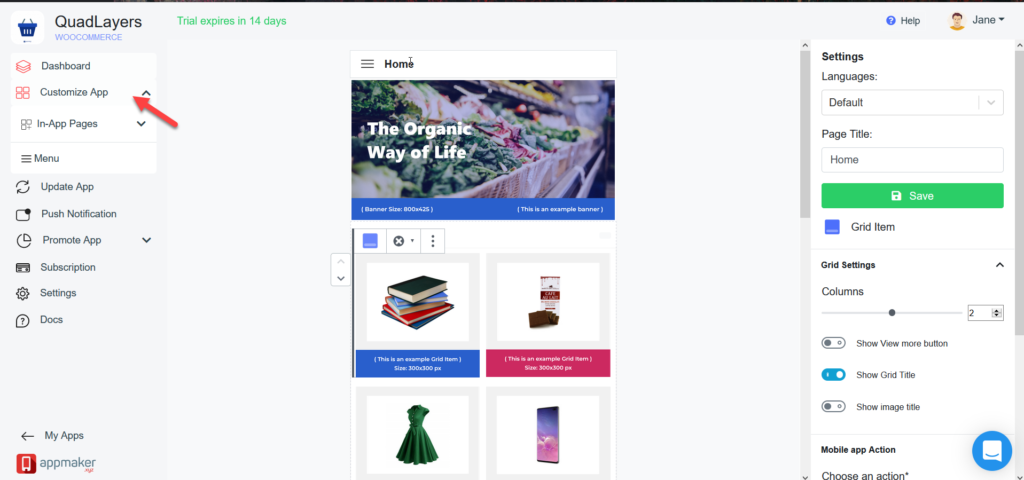
That’s just the first step. Now, let’s customize the app even more. From the Customize App section, you can edit colors, grid, title, and many other things.
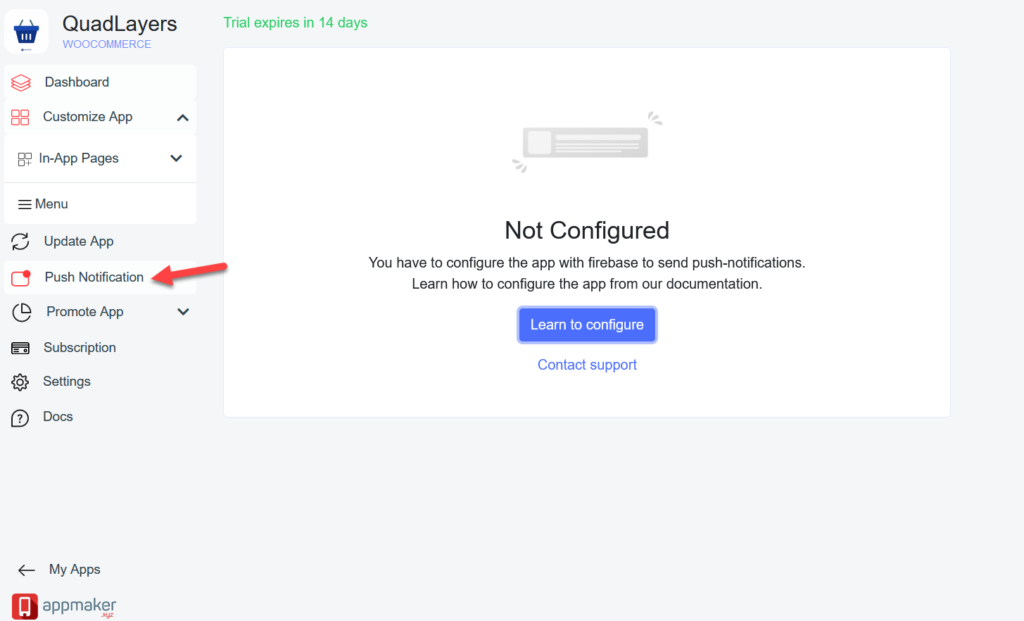
Apart from customizing your app’s design, you can activate push notifications from the Push Notification section. Appmaker uses Google’s Firebase free service to send out push notifications.
As you can see, you can create a WooCommerce mobile app for your store quite easily and without any developing skills.
Step 5: Testing the Android/ iOS app
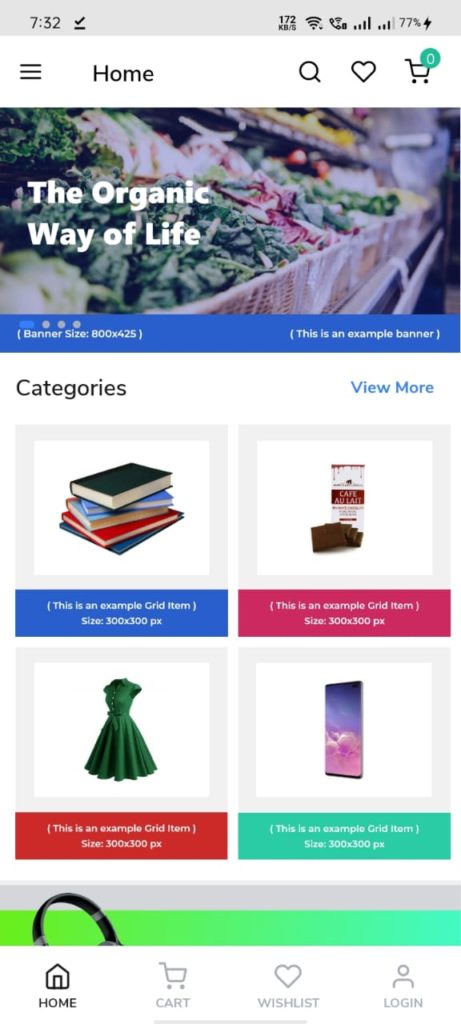
After customizing the app, you can test it on Appmaker’s staging environment or your own device. First, download the app and install it on your mobile phone. After that, open it and you will see the homepage.
In this case, we haven’t modified the homepage yet, so it displays default images.
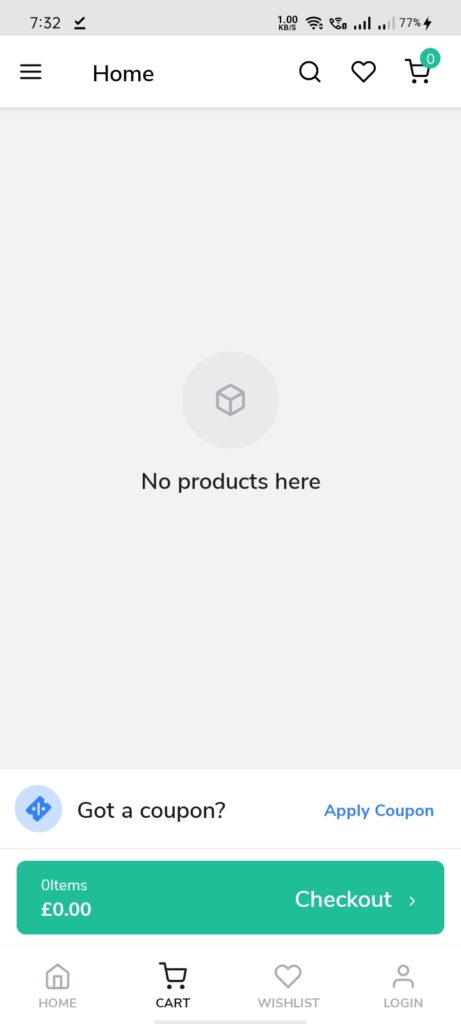
The app also has a cart page where users can apply discount codes and proceed to checkout.
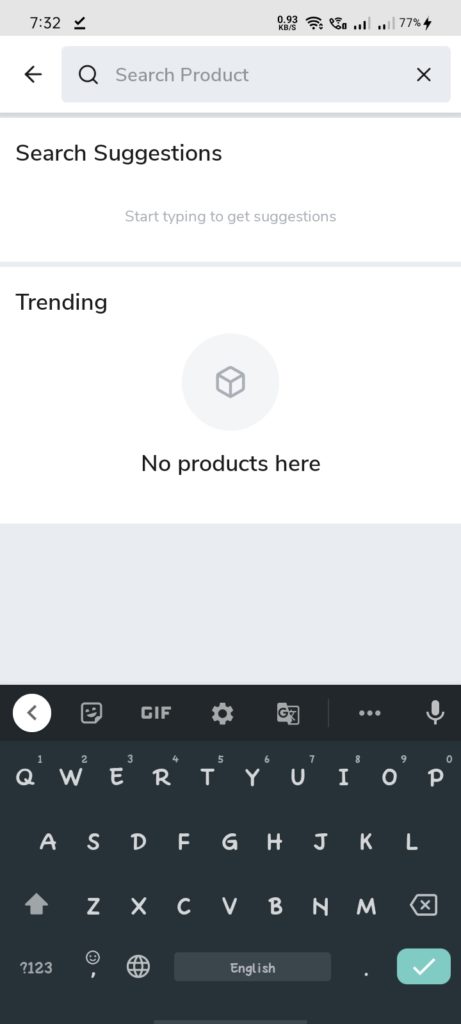
On top of that, there’s an inbuilt search feature in the app. Apart from helping users find what they’re looking for, the search bar will also display recommendations of trending products.
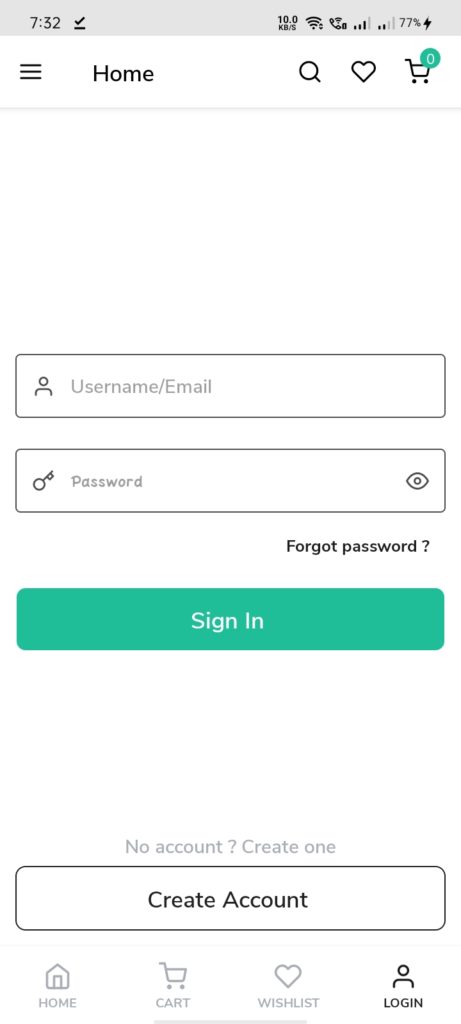
Additionally, you can require users to create an account before completing the purchase.
All these fields are 100% customizable. From the Appmaker.xyz account dashboard, you will be able to edit every single field and give your app the look and feel of your brand.
NOTE: Keep in mind that after you make changes to your app, you’ll need to install the new version.
Publish app in the stores
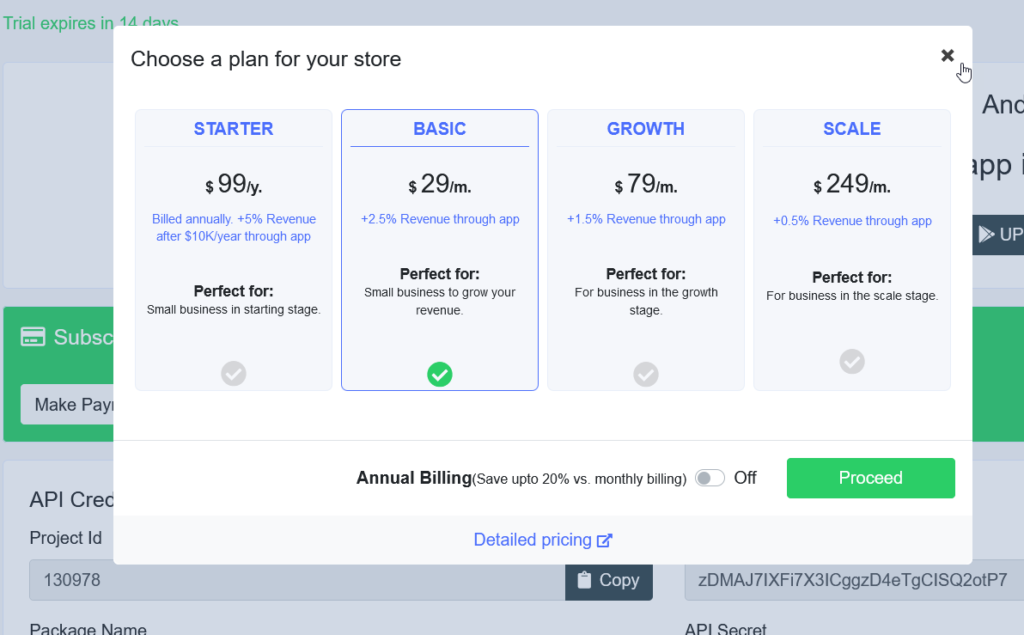
Appmaker has a 14-day free trial and 4 premium plans for different types of businesses. If apart from developing your app you want to submit it to the Google Play Store and App store, you’ll need to buy a premium plan.
Recommendations when creating a mobile app
Now you know how you can create a WooCommerce app without writing any code. To make your life easier, have a look at these recommendations.
Test The App Before Publishing it
If you are planning to publish the app on Google Play Store or App store, you need to test the app multiple times. Make sure that there aren’t any major bugs and security holes. The process tends to be easier for Google than for iOS so be prepared to fix or adjust different things in case your app gets rejected.
Testing the app is extremely important so we recommend you have at least one quality tester or look for beta testers online.
Track the App Performance Regularly
Once you have submitted the app, you need to see how it performs. Pay close attention to feedback and make sure you track the most important events to see what users do in the app. This will help you understand what is working and what’s not to improve the app.
Use of Push Notifications
Push notifications are an extremely effective tool to bring people back to your app. For example, you can let your customers know about the latest deals or new arrivals in your store.
OneSignal is a popular push notification service for both mobile and desktop sites. This is a freemium service so you can start with the free plan and see if it makes sense to then upgrade to one of the paid plans that come with more advanced features and tracking options.
Don’t Use Too Many Ads
A good way to monetize your app is by including ads. However, make sure you don’t overuse them. Your app should provide a great user experience and make the shopping experience enjoyable. Displaying too many ads will have the opposite effect and may annoy your customers.
Conclusion
Creating an app for your store can help you provide users with a great shopping experience and increase your sales. The best part is that developing an Android and iOS app is quite simple and doesn’t require expensive developers. By using app builders like Appmaker, you can create an app in a few days without writing a single line of code.
You can also customize the design and even activate push notifications to reduce cart abandonment and let your customers know about new arrivals, special deals, details about their orders, and more.
We hope you have found this article. If you have any questions, let us know in the comments section below!

