How to customize the 404 page in WordPress
Are you looking for ways to edit the 404 error page on your site? We’ve got you covered. In this guide, we’ll show you different ways to customize the 404 page in WordPress.
If you use the Internet regularly, you have probably come across the 404 error page at least once. It appears when the requested page isn’t available. Most website owners leave the default 404 page without realizing that there’s a lot you can do to make the most of that page. The good news is that if you use WordPress, you can easily customize it.
Before we see how to edit this error page, let’s better understand what the 404 page is and some of the benefits of customizing it.
What is the 404 Page?
A 404 error page is a page in a website that is displayed when a user enters a broken or invalid link in the web browser. This means that the page the visitor is trying to access isn’t accessible. As you can imagine, this isn’t a good thing for your site.

Not only do broken links create a poor experience but it can also affect your SEO rankings. As a general rule, you should try to avoid sending visitors to the 404 page because they won’t find what they’re looking for there.
However, your visitors will land on 404 pages at least once no matter how well maintained your website is. It might happen if the server is down, a moved page isn’t redirected properly, or the page itself never existed. On top of that, users might also end up on a 404 page because they entered an incorrect URL in the browser. So there is no way to prevent visits to 404 pages completely.
Why Customize the 404 Page?
Since you can’t fully avoid visitors landing on a 404 error page, you should make the most of it and turn that bad experience into an opportunity.
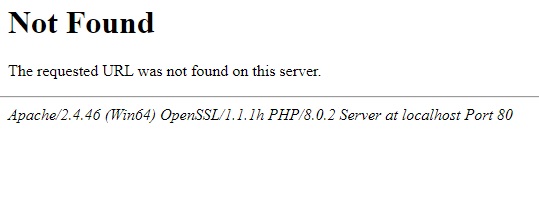
The default 404 pages of most websites aren’t great. They usually display a “Not Found” error with some technical details of the issue and they tend to look very similar. As you can imagine, that’s not the best for the user. The only thing the user can do is go back to the previous page.
The good news is that, as most sites have the default 404 page, you can stand out from your competitors by editing it. In WordPress, you can easily customize the 404 page, provide additional information to the users, and encourage them to take some action.
There are numerous possibilities with how you can change the 404 page of your site. For example, you can improve the page’s design by changing the background and adding some options. Similarly, you can let the user know why they might have landed on the 404 page and add some tips to get the information they want. Alternatively, you can add some links to other useful posts or pages of your website.
These customizations can also make an impression on your visitors which is always good for your website.
Without further ado, let’s see how to edit your 404 pages.
How to Customize the 404 Page in WordPress
There are 2 main ways to easily customize the 404 page in WordPress:
- Programmatically
- With a plugin
Let’s have a look at each method so you can choose the most appropriate one for you.
Before you start with the process, make sure that you create a full backup of your site. We will edit sensitive information on your website, so it’s always a good idea to have a backup in case something goes wrong.
1) Customize the WordPress 404 Page Programmatically
This method is very useful for those who have some coding skills and gives you plenty of flexibility to change the 404 page. Even if you aren’t an advanced user, you can easily customize various components of the 404 page by adding a few snippets.
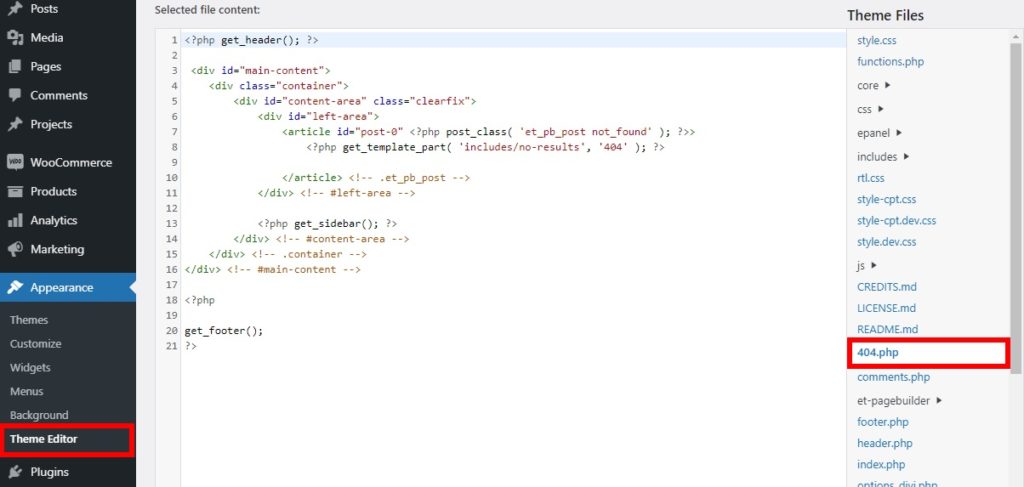
All you need to do is go to Appearance > Theme Editor in your WordPress dashboard and open the 404.php file from the right side of your screen. Here is where you will have to add the code snippets we’ll see below.
Keep in mind that the code on these files varies depending on the theme you use. We’re using the Divi theme, but the code might look different if you use another theme. If you want to use Divi too, have a look at our full review.
If you use a different theme, use some of the following snippets as a base and adjust them to customize your 404 pages in WordPress.
Text and Title customization of 404 Page
You can easily customize the text and title of the 404 page by editing the default code in the 404.php file.
The default code of your 404 error page might look something like this.
<?php get_header(); ?>
<div id="main-content">
<div class="container">
<div id="content-area" class="clearfix">
<div id="left-area">
<article id="post-0" <?php post_class( 'et_pb_post not_found' ); ?>>
<?php get_template_part( 'includes/no-results', '404' ); ?>
</article> <!-- .et_pb_post -->
</div> <!-- #left-area -->

<?php get_sidebar(); ?>
</div> <!-- #content-area -->
</div> <!-- .container -->
</div> <!-- #main-content -->

<?php

get_footer();
All you need to do is replace the entire <article> tag with a set of heading tags and add the text and titles that you want to display on the 404 page as follows.
<?php get_header(); ?>
<div id="main-content">
<div class="container">
<div id="content-area" class="clearfix">
<div id="left-area">
<h2> Page Not Found - 404 Error </h2>
It might be a server issue.
</div> <!-- #left-area -->

<?php get_sidebar(); ?>
</div> <!-- #content-area -->
</div> <!-- .container -->
</div> <!-- #main-content -->

<?php

get_footer();
Quick Tip: If you want to preview the 404 page, you can just enter your website URL in a new tab of your web browser and add the 404 path.
For example, if your site URL is “www.sitename.com“, then you can just add the 404 at the end of it (“www.sitename.com/404“) to preview the 404 page.
Make sure that there’s no page with that exact path on your site. If it already exists, then you can add some random characters to the path such as “www.sitename.com/404-preview-404″.
Display Most Recent Posts in the 404 Page
If you want to display the most recent posts on the 404 page of your website, simply add the following code snippet to the 404.php file.
<?php wp_get_archives( array( 'type' => 'postbypost', 'limit' => 10, 'format' => 'custom', 'before' => '', 'after' => '<br />' ) ); ?>
In this case, we’re displaying the last 10 posts, but you can change the limit attribute with the number of recent posts you want to show.
Show Random Posts in the 404 Page
Similarly, you can also show random posts on the 404 page. For that, add this code snippet to the 404.php file.
<ul>
<?php
$posts = get_posts('orderby=rand&numberposts=5');
   foreach($posts as $post) { ?>
        <li><a href="<?php the_permalink(); ?>" title="<?php the_title(); ?>"><?php the_title(); ?></a>
        </li>
   <?php } ?>
</ul>
You can also adjust the number of random posts you want to display by editing the code snippet.
If you aren’t comfortable editing files with code, you can also change the 404 page with plugins.
2) Customize 404 Page in WordPress with a Plugin
This method can be useful if you don’t have coding skills or prefer not to edit files with snippets. Using a plugin can be one of the fastest and easiest ways to customize the 404 page in your WordPress website. All you need to do is install the plugin and make a few changes.
There are multiple plugins you can use to edit the 404 pages. Some of the best ones are:
2.1) 404page by Peter Raschendorfer
404page is one of the most popular WordPress plugins to customize the 404 page. It lets you use the default WordPress page editor to help you create your own custom error pages.
The plugin is very easy to use, so you can edit your 404 page in just a few minutes. It works well with most popular WordPress themes and plugins, so you won’t have any compatibility issues.
Key Features
- Uses the default WordPress page editor to edit the 404 page
- Compatible with major WordPress themes and plugins
- Very straightforward and easy to use
- Well documented and comes with a plugin manual
Price
404page is a free plugin.
2.2) Colorlib 404 Customizer
Colorlib 404 Customizer is an excellent plugin to customize 404 pages. It provides you with the option to edit the 404 pages with the theme customizer which is very convenient as you can see all the changes you make in the live preview.
It also allows you to edit the background images of the 404 page along with multiple 404-page templates. Similarly, you can also add custom CSS to the page to further customize it if required.
Key Features
- Enables you to use the Theme Customizer to edit the 404 page
- Additional options to edit the text and background of the 404 page
- Option to add Custom CSS to the 404 pages if needed
- Multiple 404-page templates
Price
This plugin is 100% free and you can download it from the WordPress repository.
Customizing the 404 page with Colorlib 404
Now let’s see how to edit the 404 page with a plugin. For this tutorial, we will use Colorlib 404 Customizer. Apart from letting you see the changes you make in real-time with the live preview, you have access to 20 different page templates for your website. Then, all you have to do is make some changes with the customizer and update the 404 pages.
Let’s have a look at the process step-by-step.
Install and Activate the Plugin
To install the plugin, in your WordPress dashboard go to Plugins > Add New and search for the plugin on the search bar as shown in the screenshot below. Once you find Colorlib 404 Customizer, click Install Now to install the plugin and then activate it.

You can also download and install the plugin manually. If you’re not sure how to do that, check out our guide on how to install a WordPress plugin manually.
Customize your 404 Page
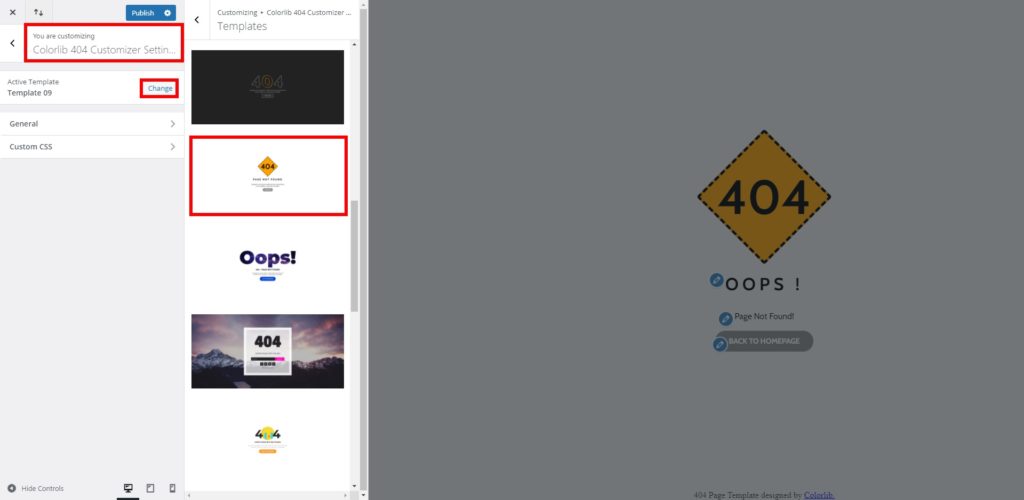
After the plugin is activated, go to Appearance > Customize to open the theme customizer. Go to the Colorlib 404 Customizer Settings tab and you will see three options: Active Template, General options, and Custom CSS. Depending on the template you choose, you might see more options.
The preview of the customizer will change to your new custom 404 page accordingly. First, select the template that you want for your 404 page by clicking on the Change button for the Active Template. You can choose from 20 different templates.
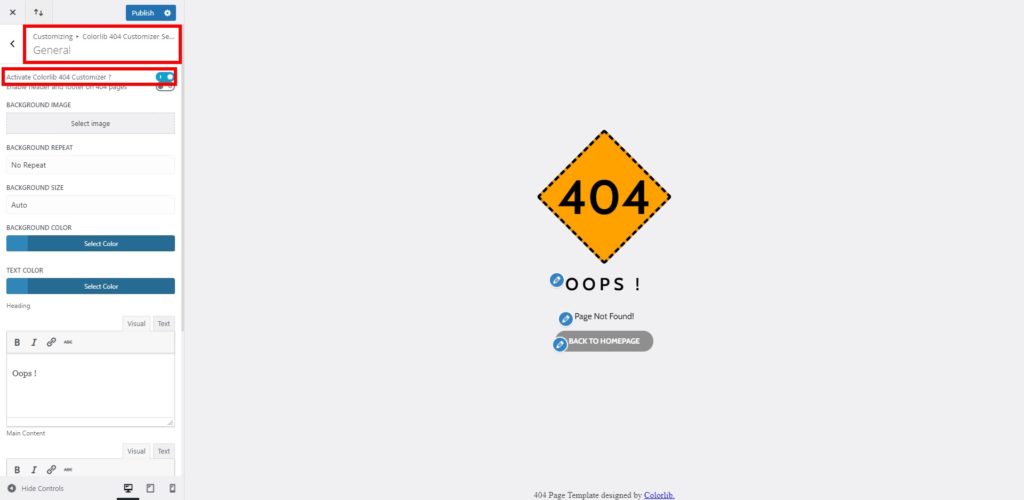
Then, select the General options. Here, you need to Activate the Colorlib 404 Customizer to display the custom 404 page. After that, you can add or change the background image and text for the main content of the page. Additionally, you can adjust the background-repeat, size, and color of the page.
You can also add text and links if you want to redirect your visitors elsewhere from the 404 pages. This is very useful to take users to relevant pages and make sure they stay on your site.
The plugin includes a default button to take your audience to the homepage that you can customize as well.
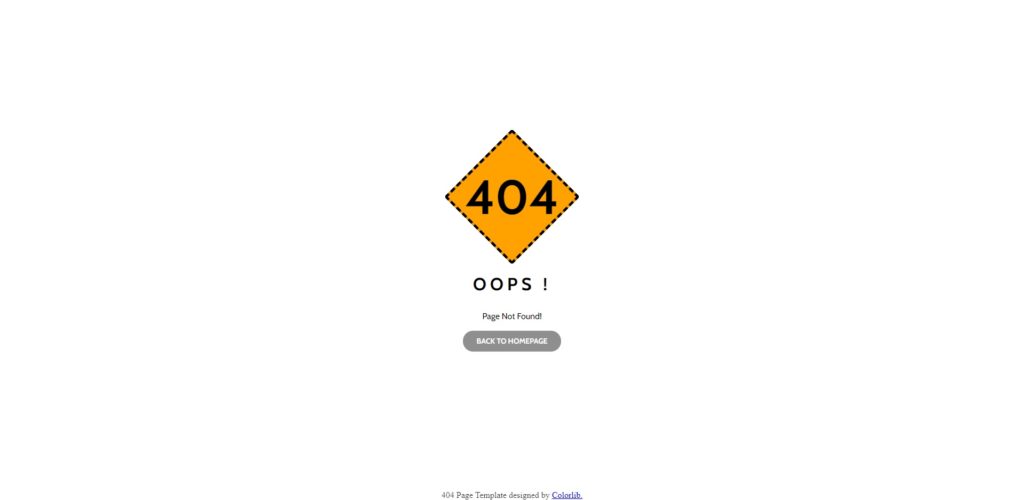
If you go back and open the Custom CSS options, you can edit the page using custom CSS. This can be useful to change the page design and match it with the look and feel of your site.
As mentioned before, you can view all the changes you make in real-time with the live preview of the customizer. After you are happy with all changes on your 404 page, press Publish to update the page.
Conclusion
In summary, no matter how well you maintain your site, visitors will eventually come across the 404 page. Most website admins leave the default page but you can edit it and make the most of it. By changing the 404 page, you can stand out from your competitors by improving the visitor experience and avoid losing a user.
In this guide, we’ve seen different ways to customize the 404 page:
- Programmatically
- With a dedicated plugin
If you have coding skills, you can use code snippets to edit the 404 page. You can change the text of the website, add useful links and buttons, display recent posts, and more. However, if you are a beginner and don’t want to edit files, you can use a plugin to change the 404 pages. In a few clicks, you will be able to customize the background images and text of the page.
We hope that you can now customize the 404 page without any problems with the help of this tutorial. To make the most of your site, we recommend you have a look at some other guides to help you edit various other pages:
- How to edit the WordPress homepage
- Learn how to edit the product page programmatically
- How to customize the WooCommerce shop page
- Customize the WooCommerce category page
- How to edit the checkout page in WooCommerce
- Learn to customize the My Account page in WooCommerce
- How to Customize WooCommerce Product Page
Have you customized the 404 page on your site? Which method did you use? Let us know in the comments below!

Does anyone know if the code works as well for multisite installations?
If so, does the 404 page bounce to the subdomain / subfolder / subsite or the main or root domain / folder / site?
seems to have errors
Hi there,
Can you please elaborate on which section you’re getting the error?