
How to Customize WooCommerce Product Search
Do you want to customize WooCommerce product search and enhance it? When running a WooCommerce store, you need to ensure that the shop is very well optimized for sales and performance. Adding and customizing a product search can help you a lot with it.
But before we go through the process, let’s have a look at why you may need to customize the product search on your WooCommerce store first.
Why Customize Product Search in WooCommerce?
WooComemrce is an easy-to-use tool to create an online shop within minutes without writing a single line of code. It comes with every functionality a typical online store needs. But some features are limited.
For example, the default WooCommerce product search feature is minimal. If your store has more than 1000 products, customers will have difficulty finding the right product they need through the default product search. This can affect your business very badly. By providing accurate search results, you can reduce your store’s cart abandonment rate and bounce rate.
You can easily modify your desired things when using WordPress as the CMS. Similarly, in this case, you can give a seamless product search experience on the front end by customizing the WooCommerce product search feature as well. So, your shop visitors and customers can easily find the right product that they need
And thus, it will also increase your overall revenue. Alternativelty, it can also boost the user experience of your WooCommerce website.
How to Customize WooCommerce Product Search
To customize the WooCommerce product search, we have got 3 major methods.
- Default search widget
- Using a plugin
- Programmatically
We will show you all three methods below. So, you can pick your preferred one from there.
1. Add the Default Search Widget
It is well known that WordPress has a lot of default customizable options to offer for your website. Therefore, you can just use the default search widget to add it to your website.
If you need to add it to any of your available widget areas, you can just follow these steps. But there are further two different ways with which you can add and customize your product search widget in WooCommerce.
1.1. Add Product Search from the Widget Menu
If you check Appearance > Widgets from your WordPress dashboard, you will see all the available widget areas.

The widget areas may be different depending on the WordPress theme you are using. Some WordPress themes come with many widget areas, while others have limited areas. However, to add a search widget, you must expand the widget area you need to use.
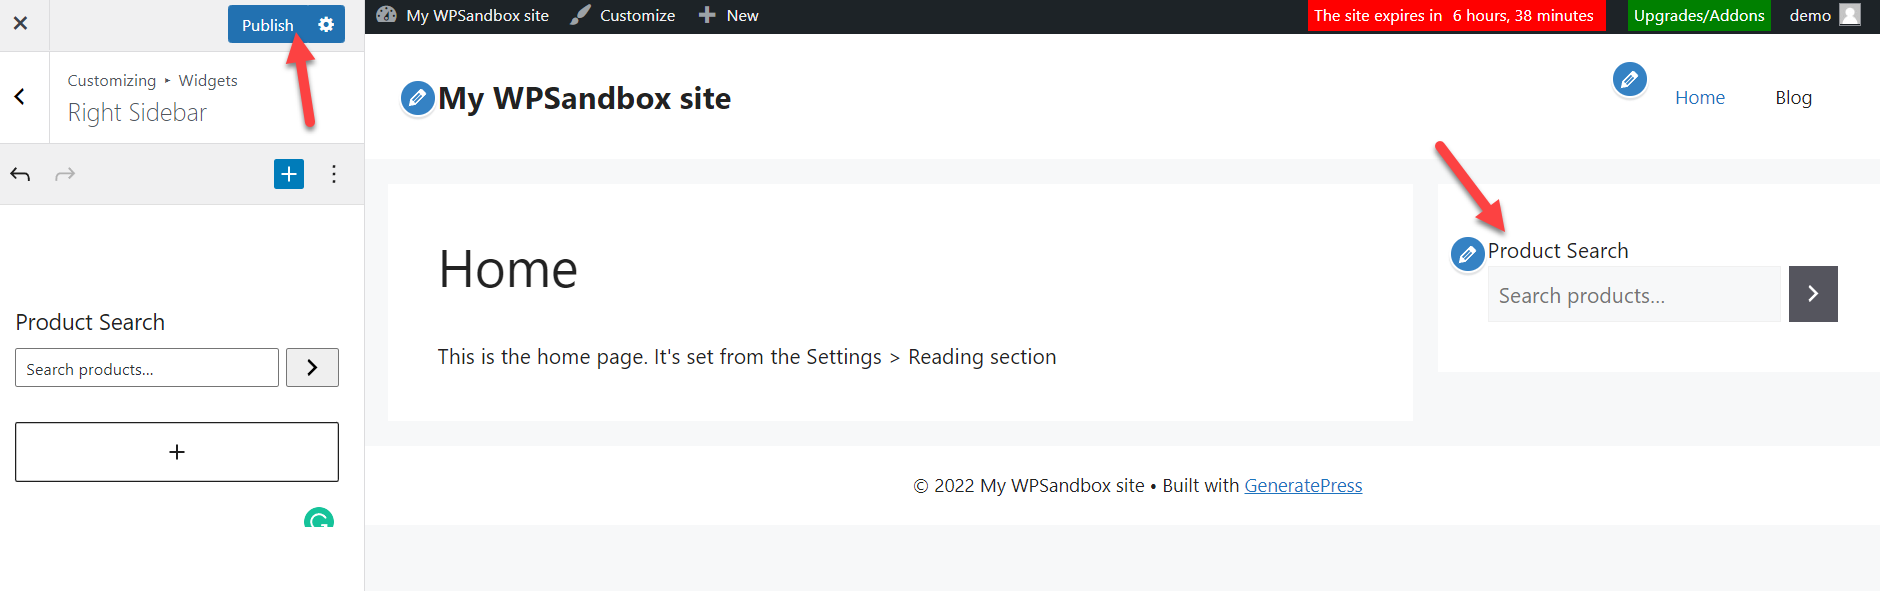
Here, we will be using the Right sidebar widget area. So, you need to click on the + button to add more widgets to that area.

Then, search for the Product Search widget on the widget area. Once you find it, click on it to add it to the designated area.
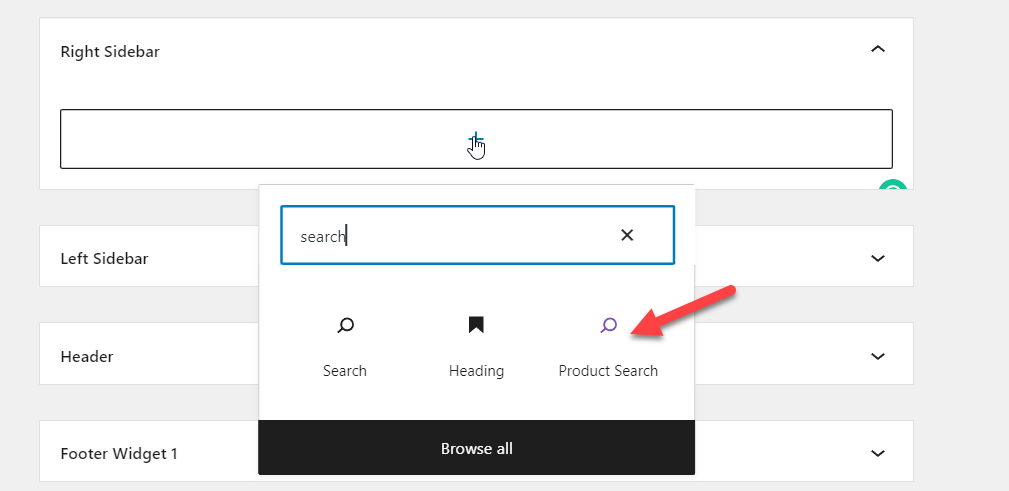
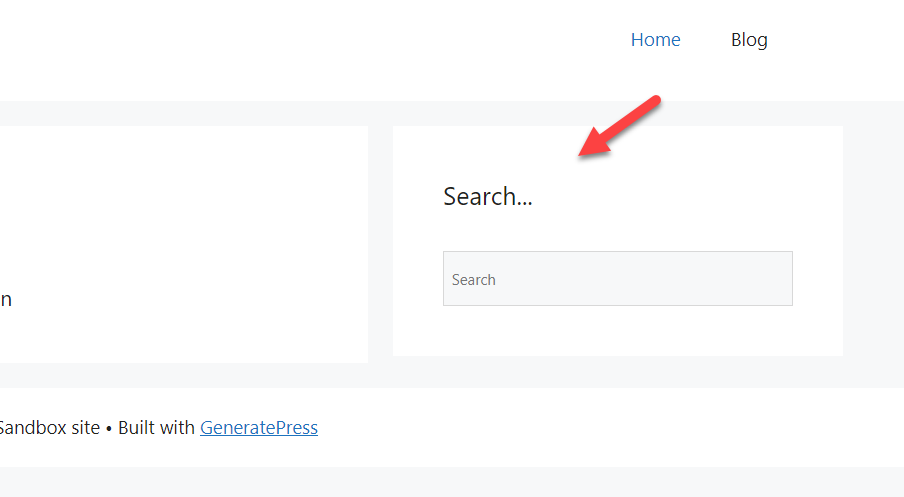
Now, all you have to do is Update the page once you have modified it. And if you check the website from the front end, you will see a product search widget on the right sidebar of your website.

1.2. Add product Search Widget from Customizer
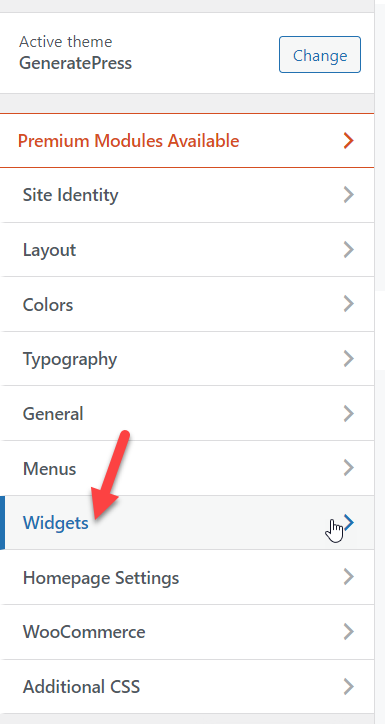
You can also add the search widget through the WordPress Customizer. First, open the customizer from Appearance > Customize in your WordPress dashboard and select the Widgets option.
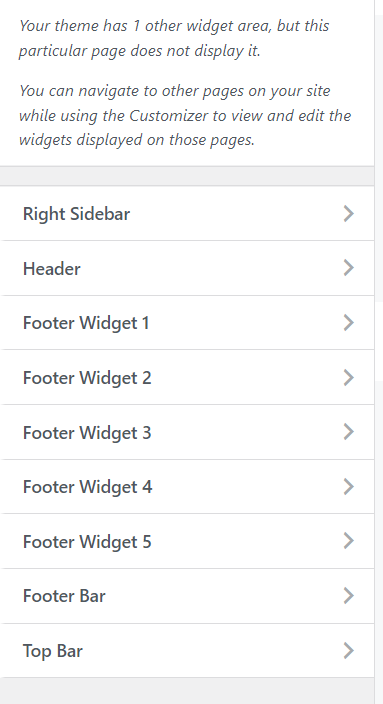
On the next screen, you will see all the available widget areas. Again, just like the previous approach, they all depend on the theme that you use for your website. Just select the widget area where you want to add the product search.
Now, click on the + button and add the Product Search widget there.
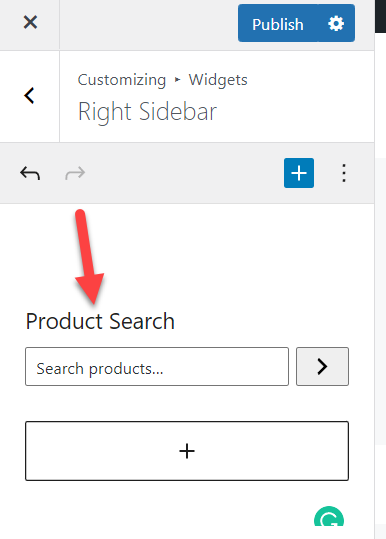
Inside the live preview tab, you will see how it looks. If you are okay with the customization, Publish the page.
That’s it! This is how you can add a default product search widget to your WooCommerce store using the widget option or the theme customizer. But as mentioned before, the default options have very limited customization options. So if you want to make more changes to it, you will either have to use a plugin or do so programmatically.
2. Customize WooCommerce Product Search using a Plugin
The WordPress plugin repository also contains thousands of plugins that can help you customize your WooCommerce website as well. You can use some of them to customize your product search too.
Out of them, Advanced Woo Search is a great plugin to add and modify your WooCommerce product search. You can easily allow your customers to search for the products according to their title, categories, SKU, ID, and so on.
But to start using the plugin, you need to do install and activate the plugin first.
2.1. Install and Activate the Plugin
Open Plugins > Add New from your WordPress dashboard and search for the keywords of the plugin. After you find the plugin, click on Install Now to install it. As soon as the installation is complete, Activate the plugin.

2.2. Configure the Plugin Settings
Once you have activated the plugin, you will see its settings on the left-hand side of the WordPress dashboard under Adv. Woo Search > Settings.
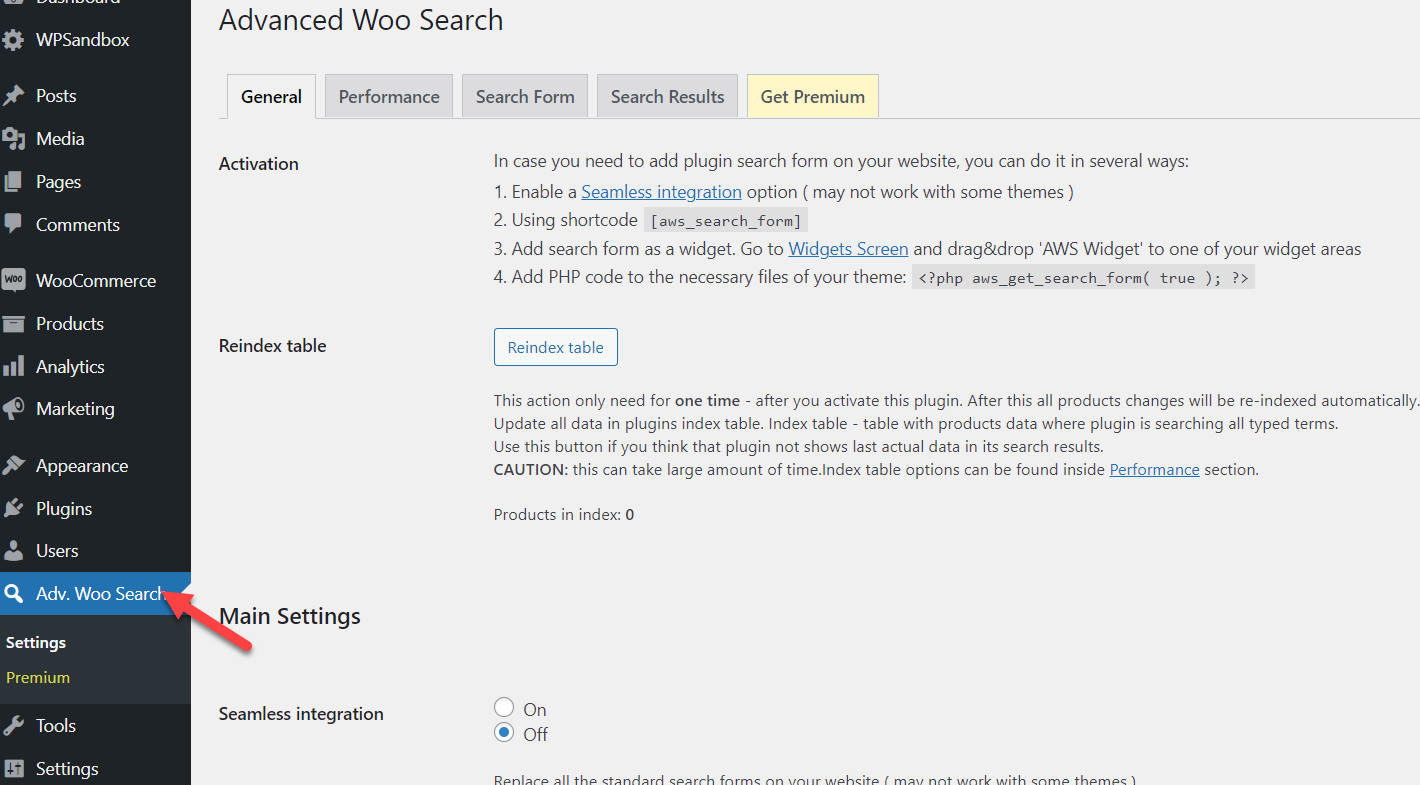
From there, you can configure the general options along with settings for performance, search form, and search results of the plugin.
You have multiple ways to embed the search option inside your WooCommerce installation. For example, the shortcode or widget if you are looking for a beginner-friendly method. On the other hand, if you need a more advanced technique, feel free to use the PHP snippet mentioned on the page.

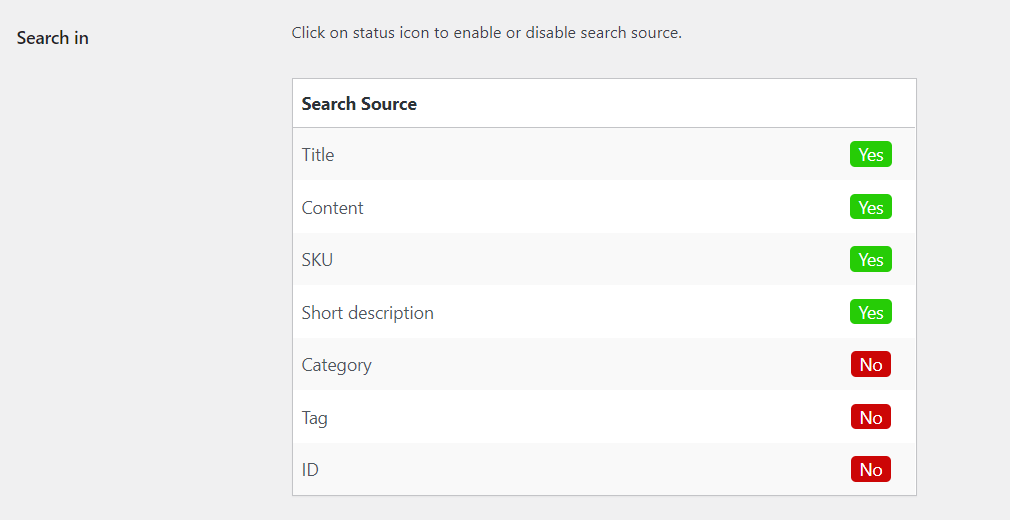
From the same page, you can customize your search icon and output. For example, when a customer enters a search keyword, you can specify the sources that are preferred to look in.
Similarly, you can customize the search form and search results from the same page. Once you have done modifying the options, save the updates.
2.3. Add the Search Widget to your Store
After you have configured all the necessary settings, the very next you need to do is add the search widget to the site. As mentioned above, you can choose the shortcode, widget, or coding method to complete this task.
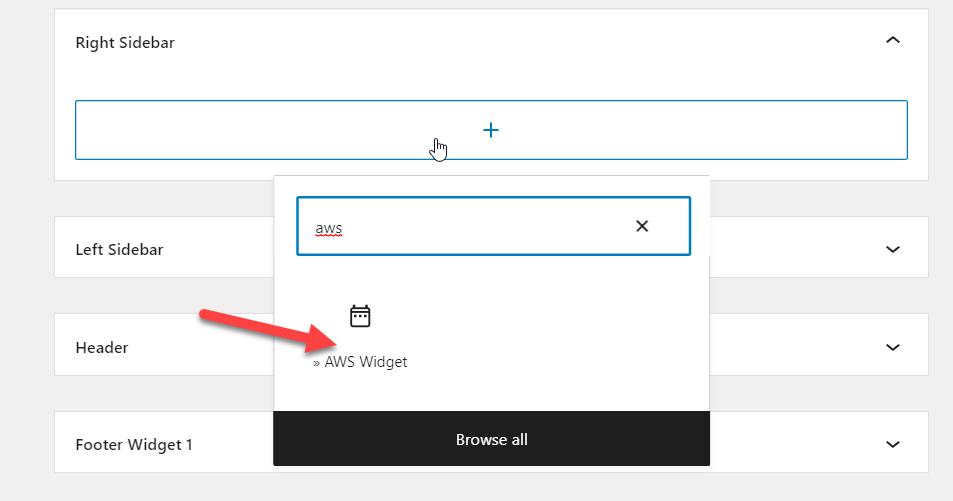
In this case, we will add the search option using the widget. All you have to do is search for AWS Widget and add it to the widget area.
You can also configure the search label from the same screen.
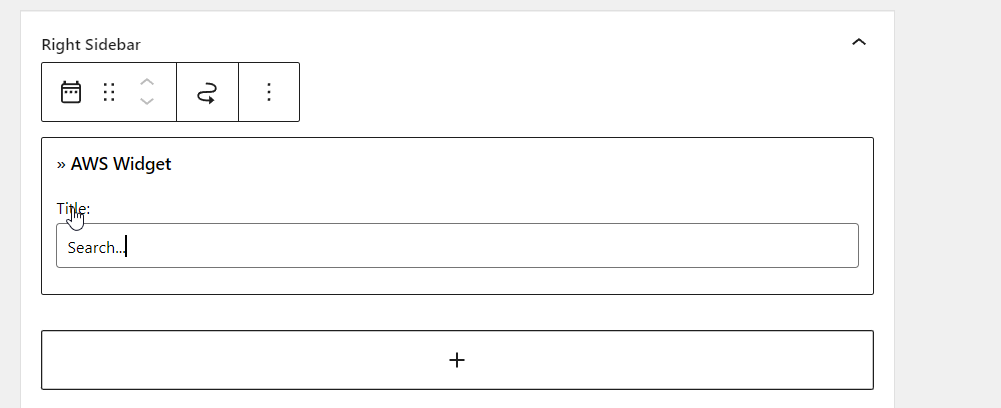
After adding the widget, Update the page. Once you have done that, you need to check it from the front end. You will see the search form there.
If you want to try any other WooCommerce product search plugins, feel free to have a look at this article.
3. Edit Product Search in WooCommerce Programmatically
If you are okay with editing codes and modifying the core files, you can customize the WooCommerce product search with some snippets too. We’ll show you this approach step by step as well.
But before making changes to your live WooCommerce store, ensure you have created a complete site backup. This way, you can ensure nothing will go wrong in case of a plugin/ code conflict. Also, we will not be pasting the snippet directly to the parent theme’s functions.php file. Instead, you must create a child theme or use a site-specific plugin. Of course, you can always use a child theme plugin to make it.
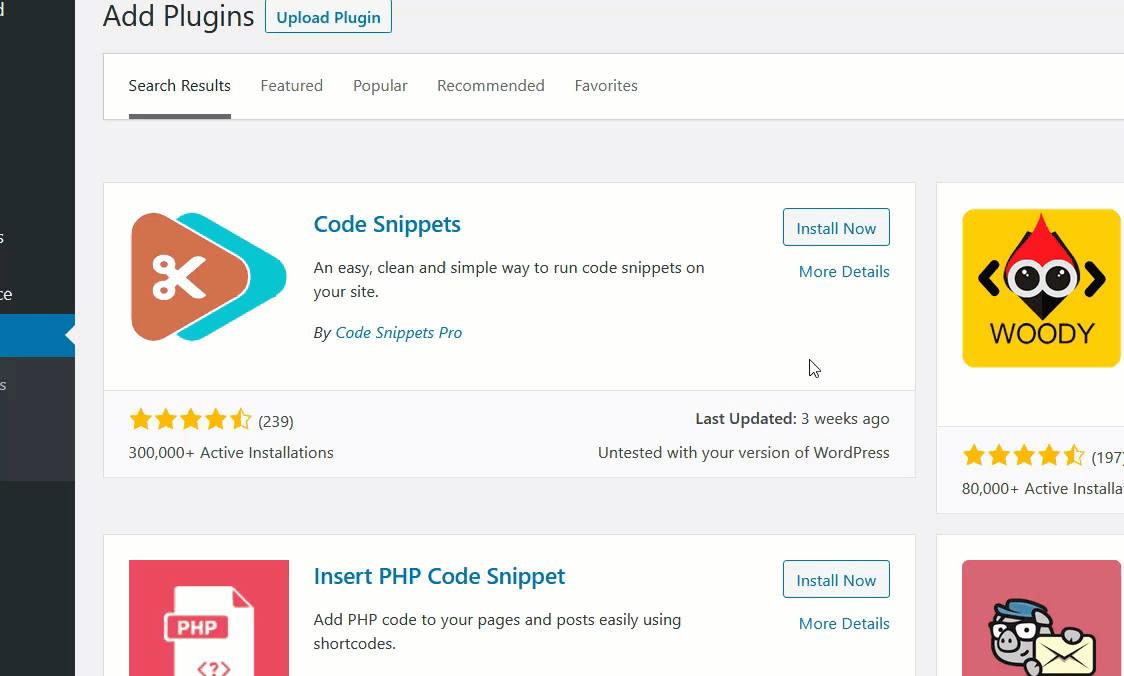
For this tutorial, we will be using Code Snippets. Code Snippets is a free and easy-to-use WordPress site-specific plugin that will help users add custom codes and CSS to the WordPress installation. If you plan to use the same, install and activate Code Snippets on your installation.
Once you have installed the plugin, you will see its configuration on the left-hand side. Just add a new snippet to your website.
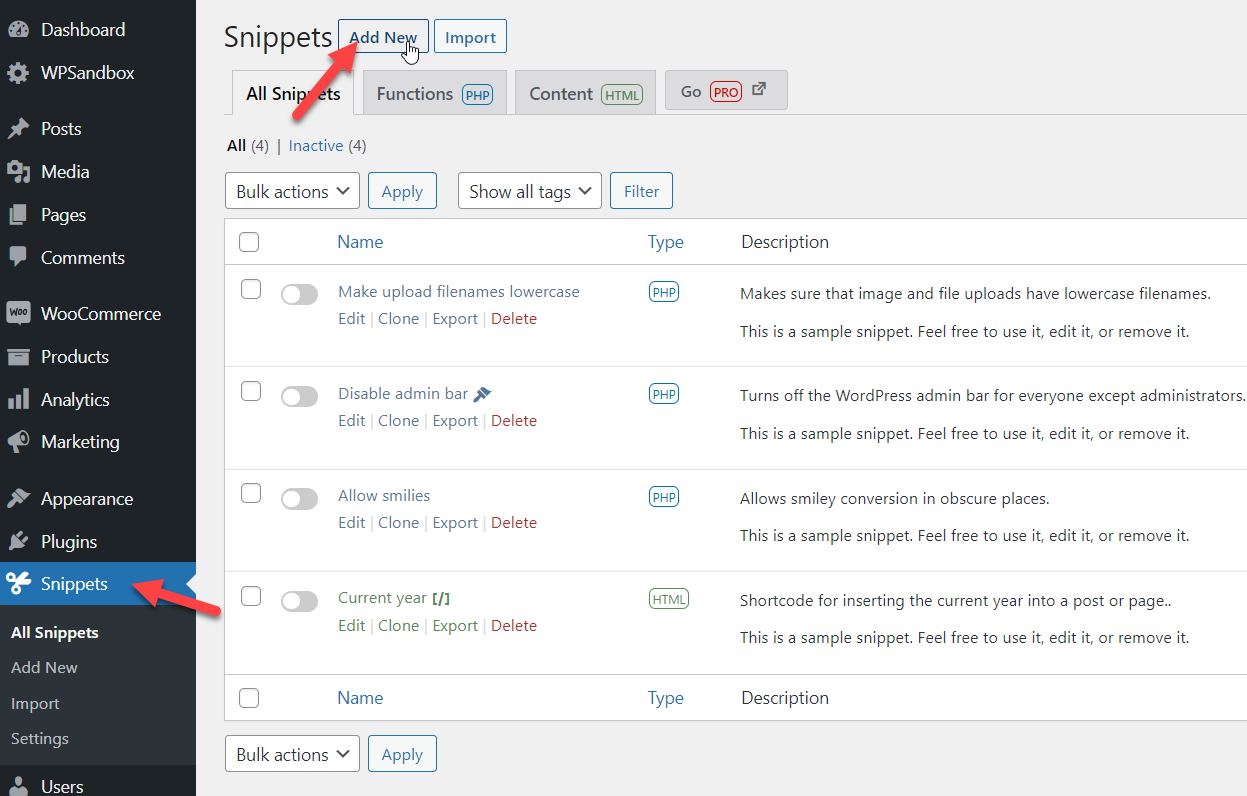
You can copy the following code.
/**
 * This code snippet will replace the default product search from in the search widget.
 */add_filter( 'get_product_search_form', 'quadlayers_custom_product_search_form' );function quadlayers_custom_product_search_form( $form ) {
    ob_start();
    ?>
    <style>
    /*Include your styles rules here*/
    </style>
    <form role="search" method="get" id="searchform" action="<?php echo esc_url( home_url( '/' ) ); ?>">
        <div>
            <label class="screen-reader-text" for="s"><?php echo __( 'Search for:', 'woocommerce' ); ?></label>
            <input type="text" value="<?php echo get_search_query(); ?>" name="s" id="s" placeholder="<?php echo __( 'My Search form', 'woocommerce' ); ?>" />
            <input type="submit" id="searchsubmit" value="<?php echo esc_attr__( 'Search', 'woocommerce' ); ?>" />
            <input type="hidden" name="post_type" value="product" />
        </div>
    </form>
    <?php
    return ob_get_clean()
;}
And paste it inside the snippet.
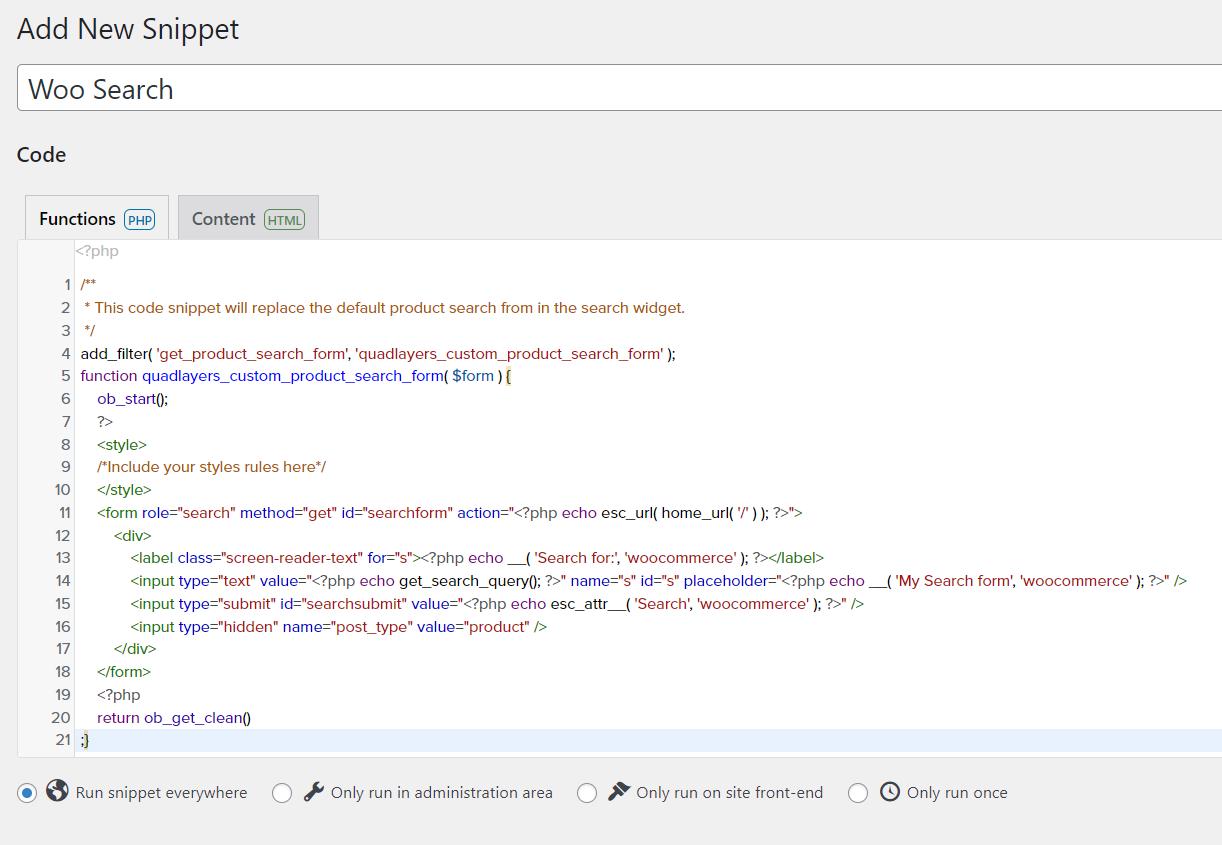
Before saving it, let’s have a closer look at the code. Here, we are using quadlayers_custom_product_search_form as the function. So, if you are planning to add custom CSS right through the PHP code, use this field:
<style>
/*Include your styles rules here*/
</style>
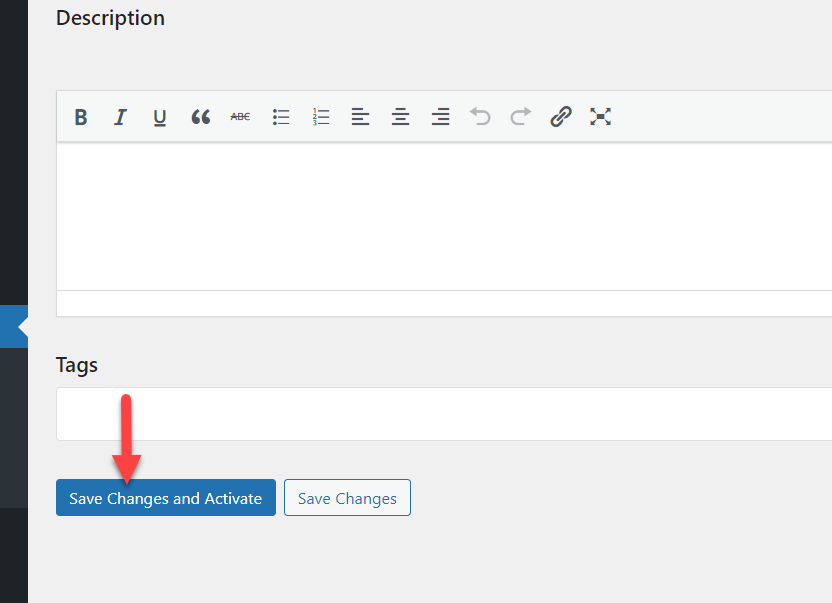
After modifying the CSS section (if you need it) according to your preferences, save the snippet.
That’s it.
This is how you can modify the WooCommerce product search programmatically.
Bonus: Add WooCommerec AJAX Product Filters
Adding AJAX to your WooCommerce installation is a great idea. It will help the store customers find the exact product they need without the hassle. This section will show you how to enable your online store’s AJAX product filtering system.
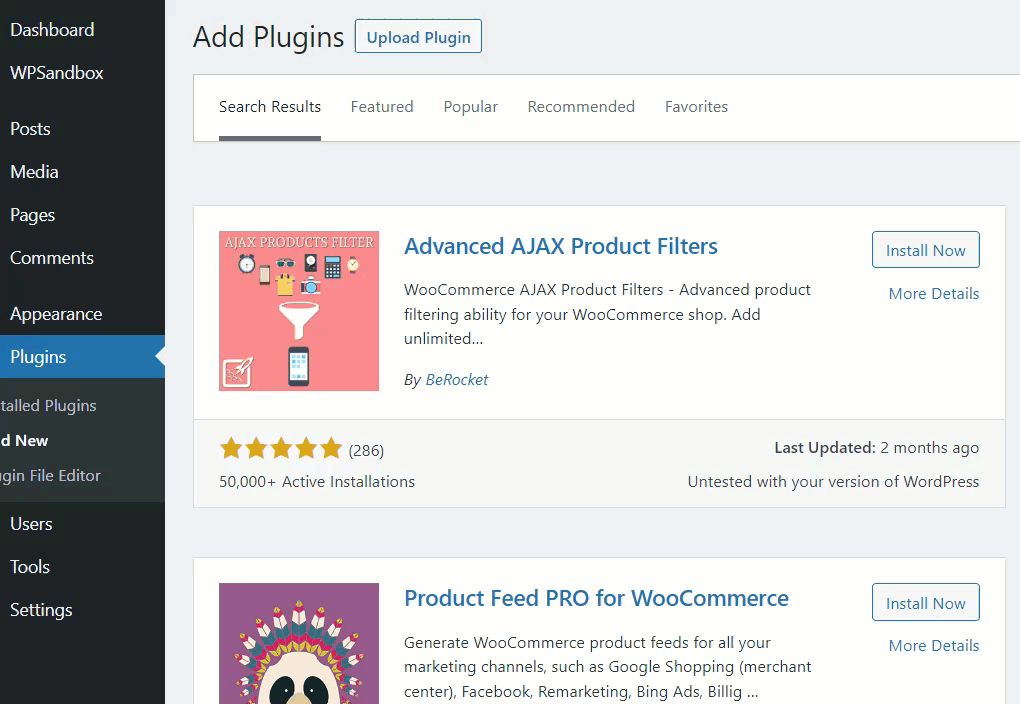
By default, WooCommerce’s default filtering system is minimal. You have to use a third-party WordPress plugin to unlock the full potential of the AJAX filtering system. And for this tutorial, we will be using Advanced AJAX Product Filters.
So, you need to install and activate the plugin on your WordPress installation.
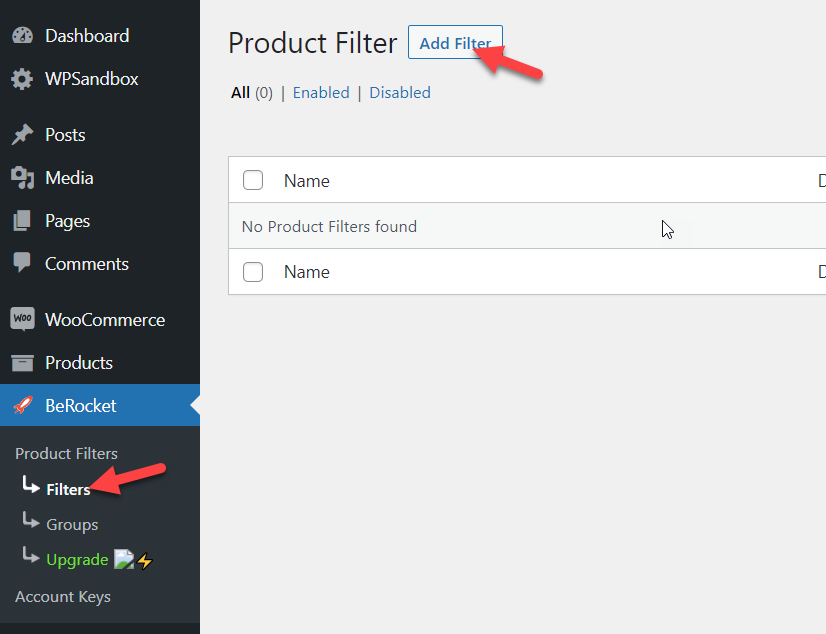
After activating the plugin, you will see the BeRocket menu on your WordPress dashboard. From there, go to the Product Filters option.
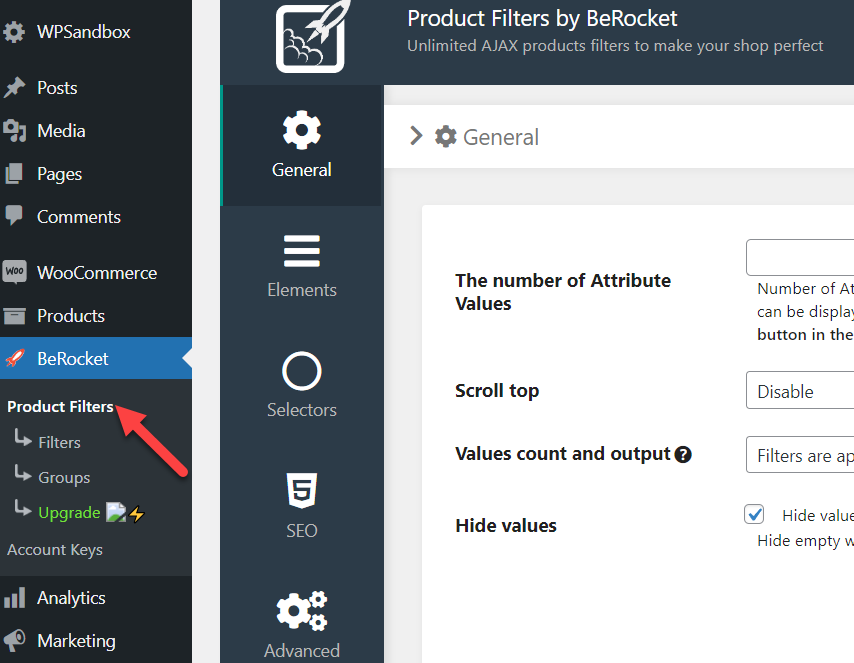
These are the global configuration options, and you can modify them according to your preferences. When you are ready to move forward, click on the Filters option. From there, you can create custom product filters.
Finally, click the Add Filter button to add a new filtering option.
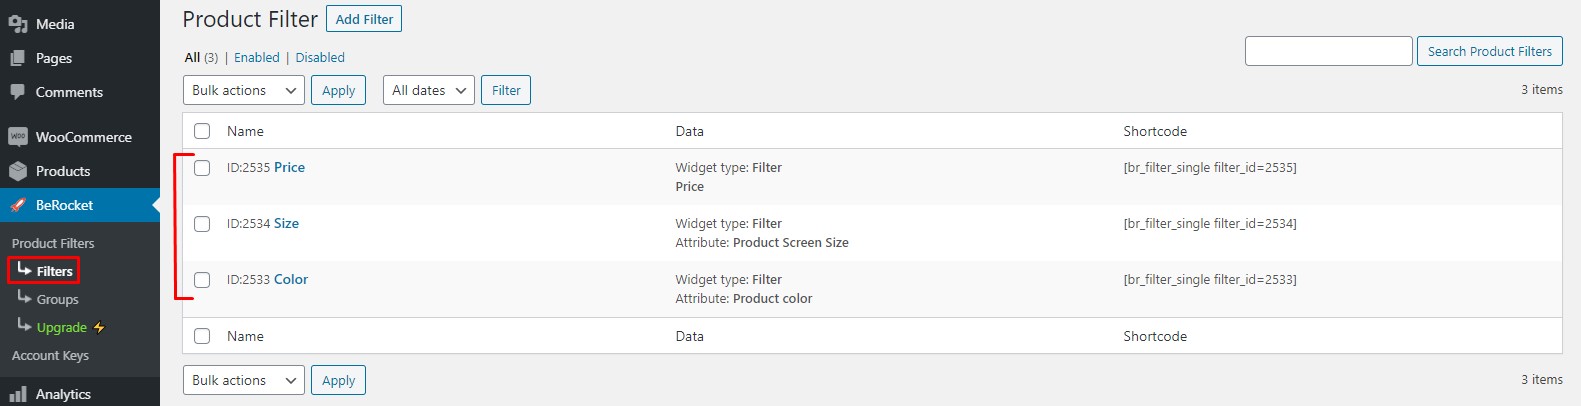
On the next page, you will see a dedicated page for customizing your filters.

You can add as many filters as you want. After publishing filters, they all will be displayed under the plugin’s Filters menu from where they can be managed.
If you want, you can also create a filter group from the groups’ section. You can access it from the Groups menu.

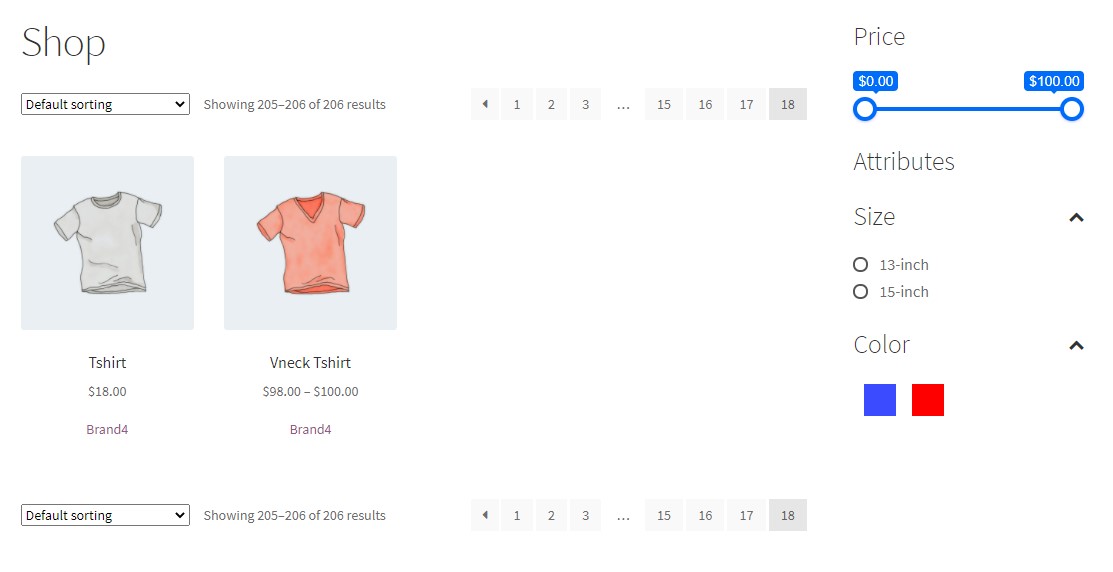
Once you have modified the filters according to your requirements, you can add the AAPF filter widgets to your WooCommerce store. You can add it to a widget area through Appearance > Widgets from your WordPress dashboard.

Once you update the widget, you can preview it on the website from the front end.
This is an easy way to add WooCommerce AJAX product filters to your inline store. But if you need more information on it, please check out this link.
Conclusion
So this is how you can customize WooCommerce product search results. The three methods we recommend are:
- WooCommerce search widget
- Plugin
- Coding
If you need to add the search option to any available widget areas to make it more accessible, you can use the first method we mentioned above. On the other hand, if you need another easy-to-use solution that will enhance the search feature, you should consider using a plugin. Finally, if you need a more advanced method and can handle codes, you should choose the third option.
All these methods are beginner-friendly and will deliver the desired result.
We hope you have found this article helpful and enjoyed the read. Please consider sharing this post with your friends and fellow bloggers on social media if you did. Also, for more related articles, you need to check out our blog archive. However, here are some more of our articles that you might find interesting:
