
Having problems with your theme or plugins compatibility? Downgrading WordPress to an older version might be a quick solution. In this article, we will show you several methods to downgrade the WordPress core to a previous version.
Why Downgrade WordPress?
The recent WordPress 5.5 update broke thousands of websites. There were several issues but one of the most common ones was the compatibility of the new WordPress version with plugins and themes. This means that every theme, plugin, or custom code that isn’t compatible with the new WordPress core, shows error messages and crashes the websites due to these conflicts.
We’ve already seen different methods to fix the WordPress 5.5 problems and one of the best ones is to downgrade WordPress to a previous, stable version. Even though this doesn’t solve the compatibility problem with the new version, it allows you to have your site online until the incompatible themes and plugins receive an update.
So, in this guide, you’ll learn different ways to downgrade the WordPress core.
You can also test the compatibility in a staging environment to make sure that everything works correctly before trying it on your website.
How to Downgrade WordPress to an Earlier Version?
There are three main methods to downgrade WordPress to an older version.
- Manually
- Using a plugin
- By restoring a backup
They all get the job done so choose the one that best suits your skills and needs. Now, let’s have a look at each of them step-by-step.
1) Downgrade WordPress Manually
Out of the 3 methods, having to downgrade the WordPress core manually is probably the hardest for beginners. However, it’s very useful, especially if you’re locked out of your WordPress admin area.
In this process, you will have to download the previous WordPress files from its official website, create an FTP account, use FileZilla to upload those files and make some changes to the files. Let’s see how to do it step-by-step.
Download CMS Core
The first thing you need to do is download the previous stable version of WordPress. For this guide, we are going to roll back to 5.4.2. To do that, go to the WordPress releases page and download the files.
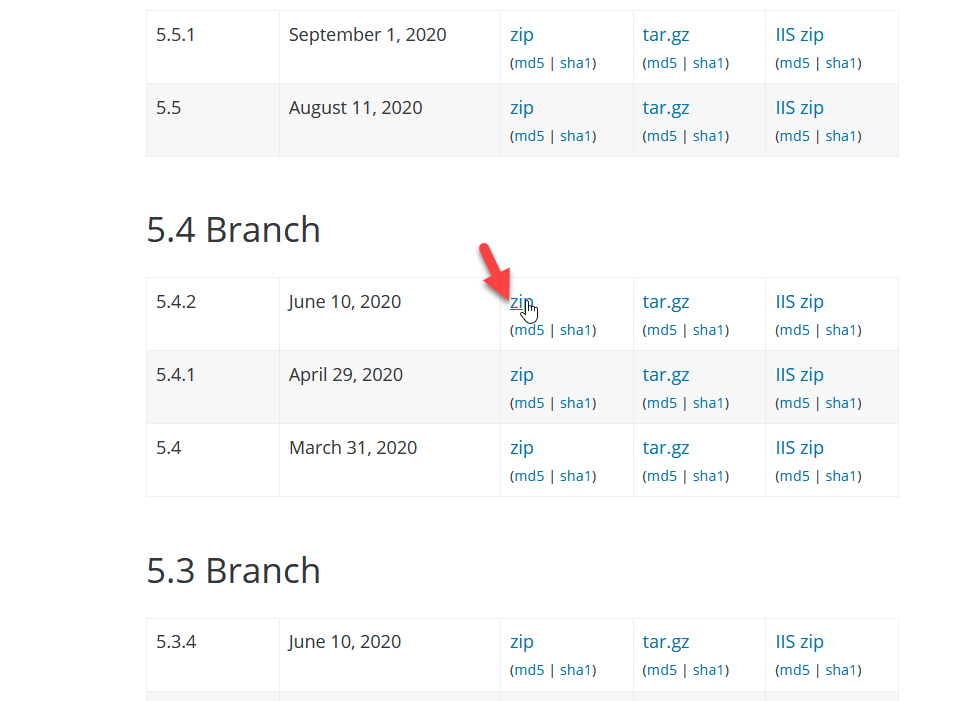
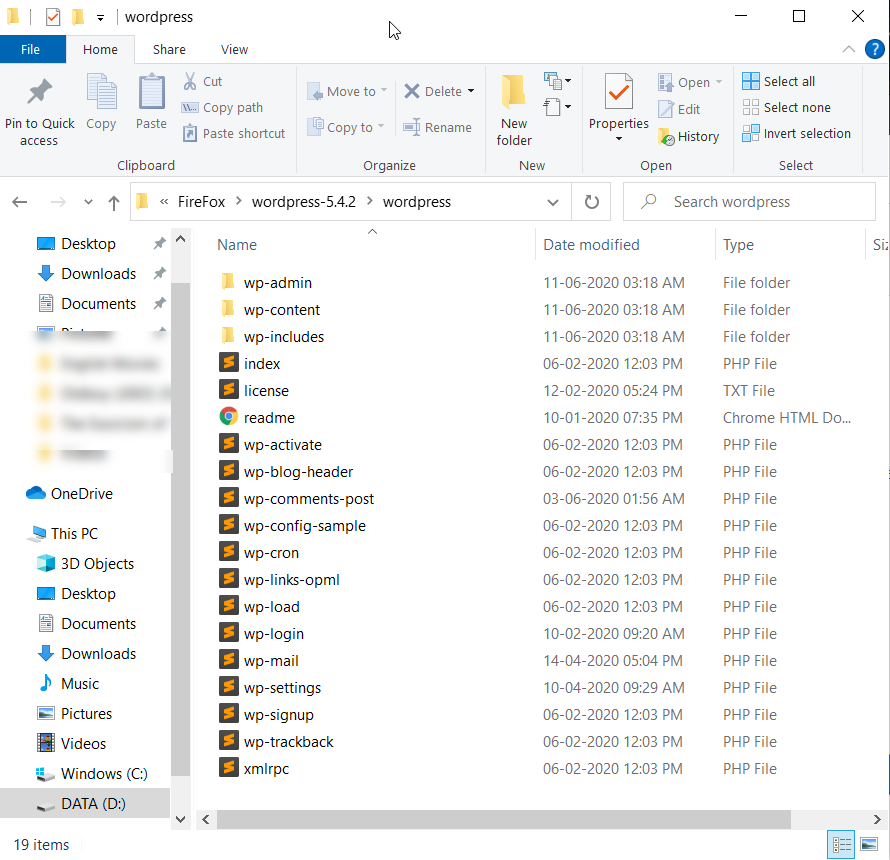
You can download the Zip file/tar.gz or IIS Zip file. After you download it to your local computer, extract the file. You will see three folders and some PHP files inside it.
After that, you need to create an FTP account.
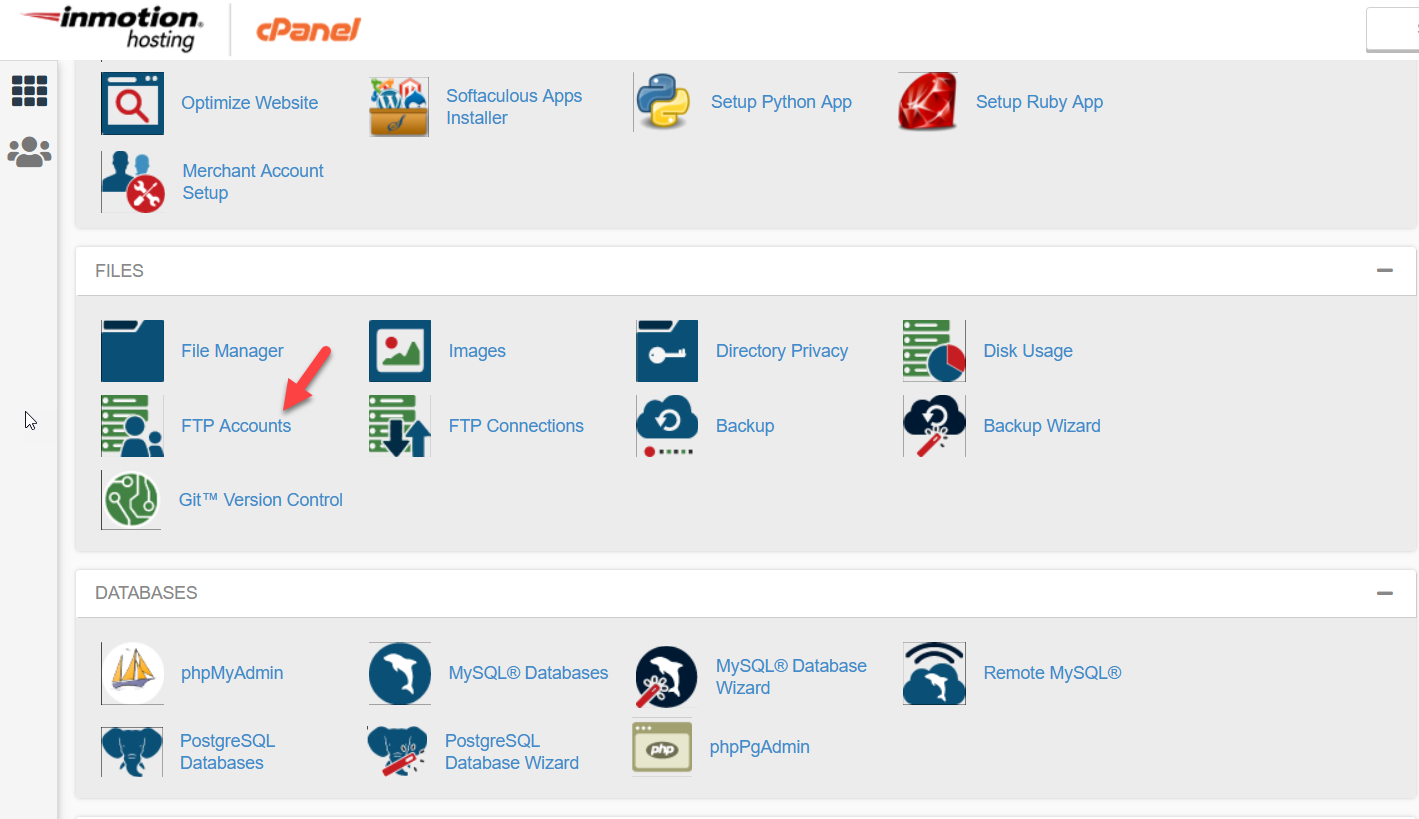
Create FTP Account
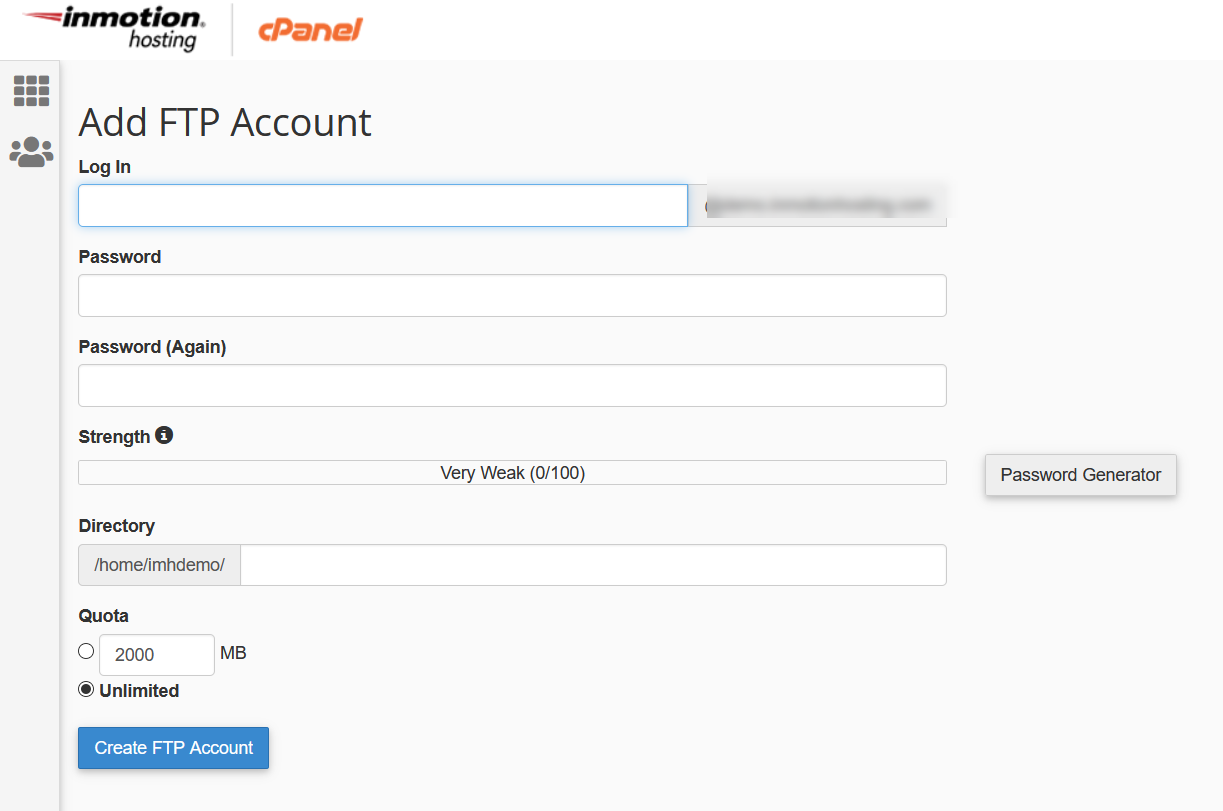
Now, it’s time to create an FTP account to access your WordPress site’s file manager. If you are on shared hosting, the FTP account settings will be in your control panel.
Managed WordPress hosting companies like Kinsta and WP Engine have a dedicated section for the FTP account in the user dashboard. Simply create your username and password and create an FTP account.
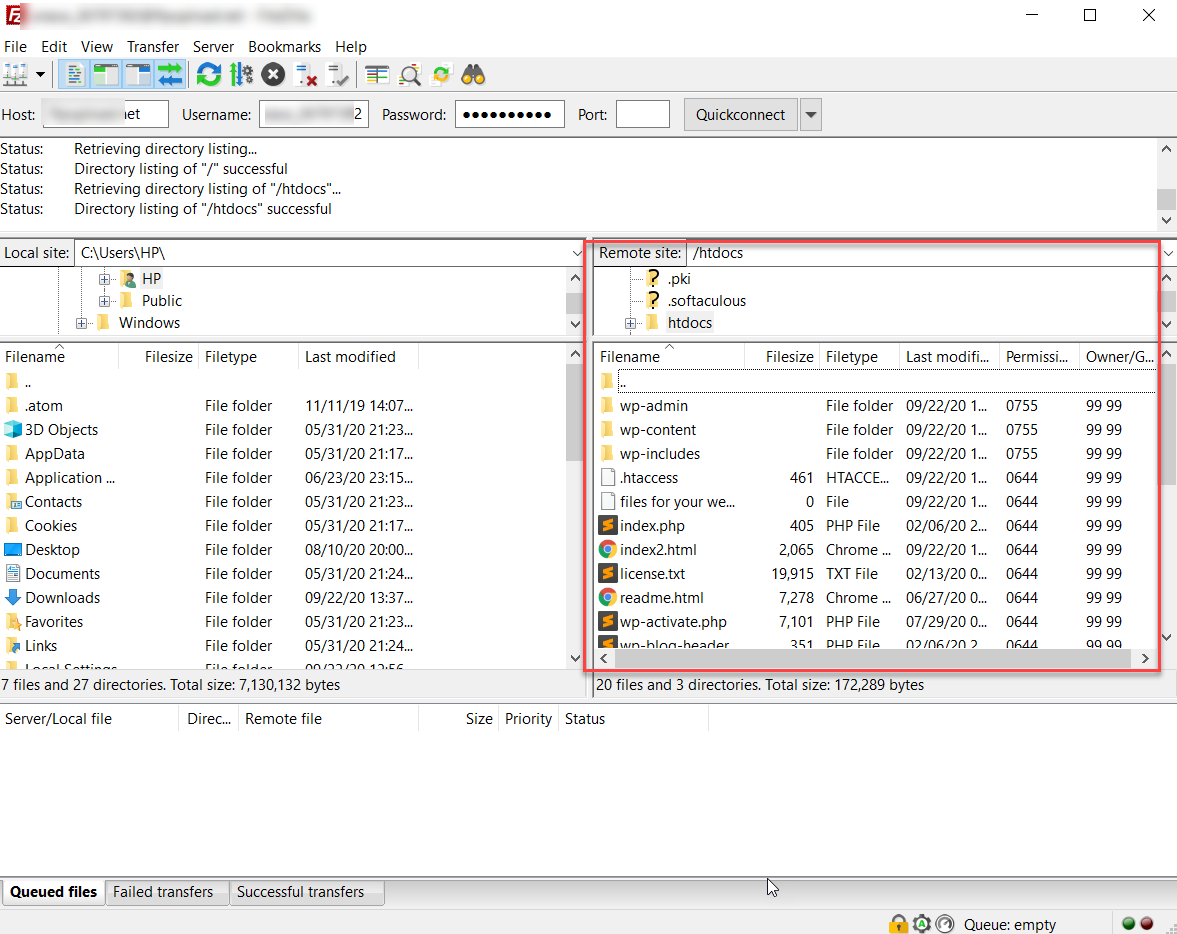
After that, log in to your file manager using any FTP client such as FileZilla. In our case, we are going to choose the FileZilla FTP client.
Modifying Files and Directories
After creating your FTP account, log in to your file manager. You’ll have to make some changes to the files.
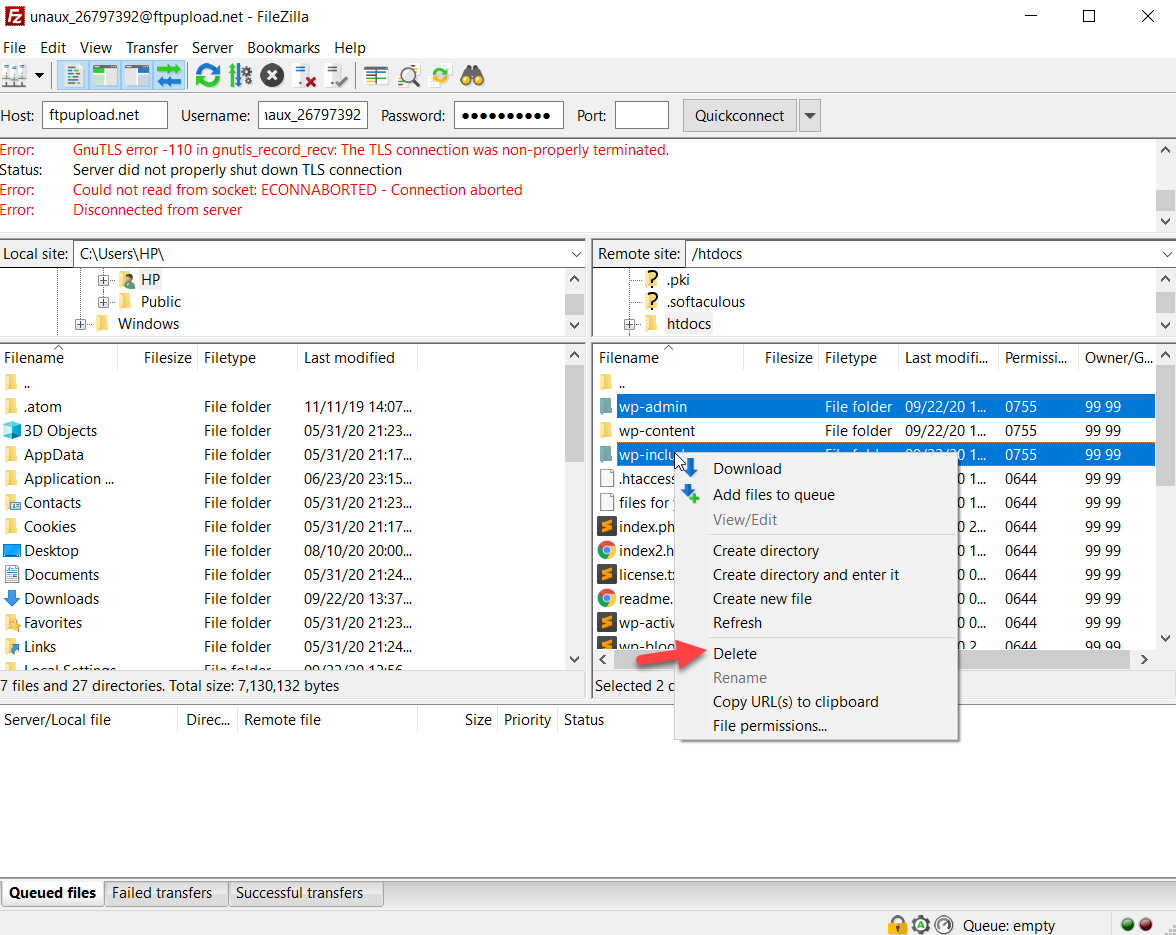
Now, you need to delete the wp-admin and wp-includes folders. Both directories contain a lot of subfolders and files, so this process may take some time.
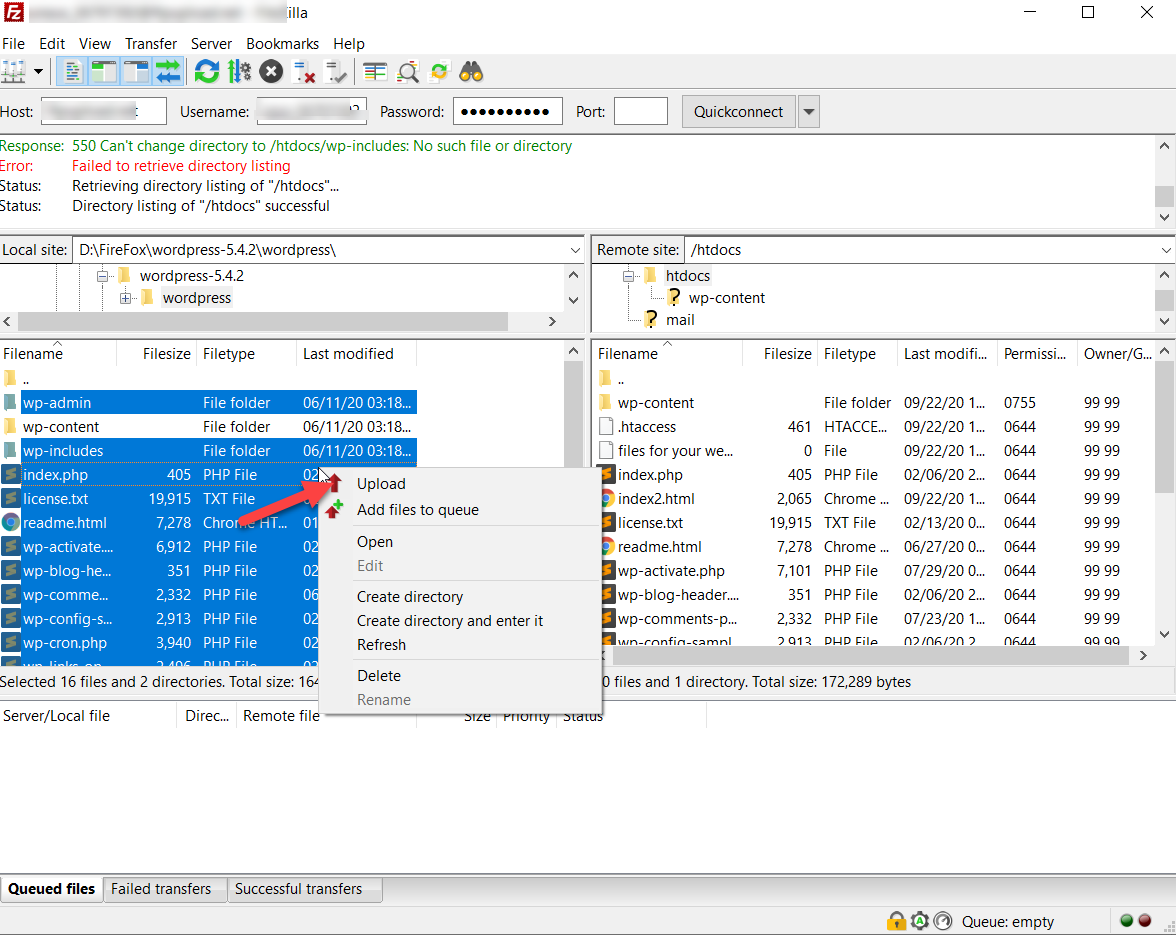
After deleting both directories, you need to upload the WordPress files of the version you’ve previously downloaded to the server. So simply select the files, right-click, and press Upload.
Keep in mind that you don’t need to upload the wp-content folder because it contains your uploaded media and related files.
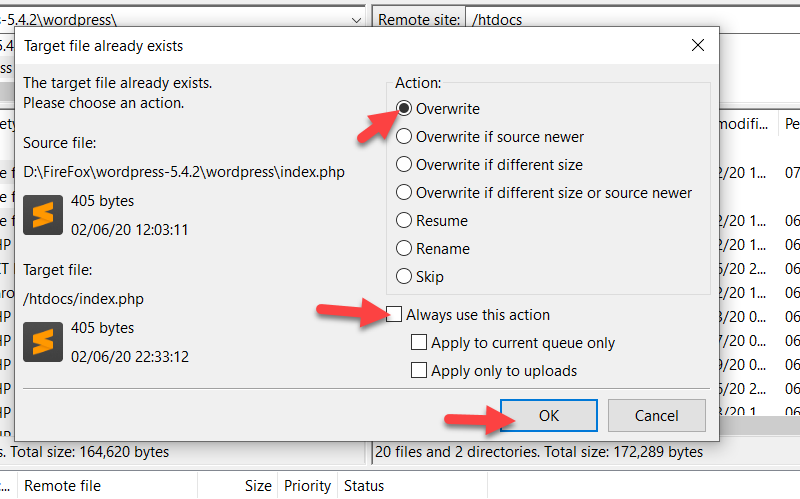
When you do this, you will see a dialogue box on the screen. Select the Overwrite option and click Ok.
After uploading the new files, go to your WordPress admin section and press Update WordPress Database.
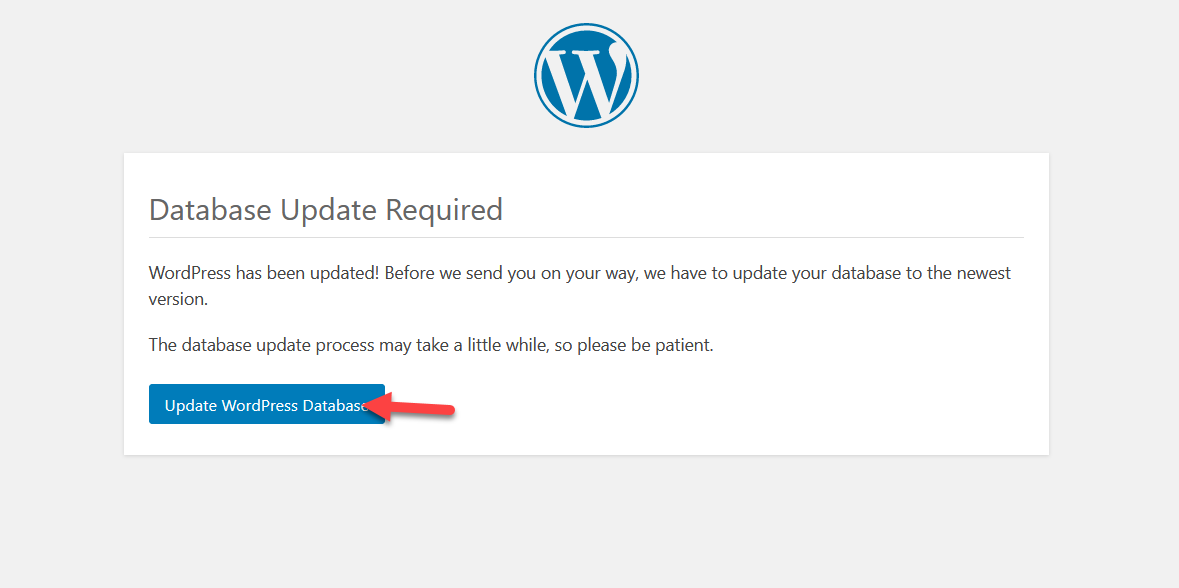
Your server will now update the database. This may take some time if your database is big so be patient.
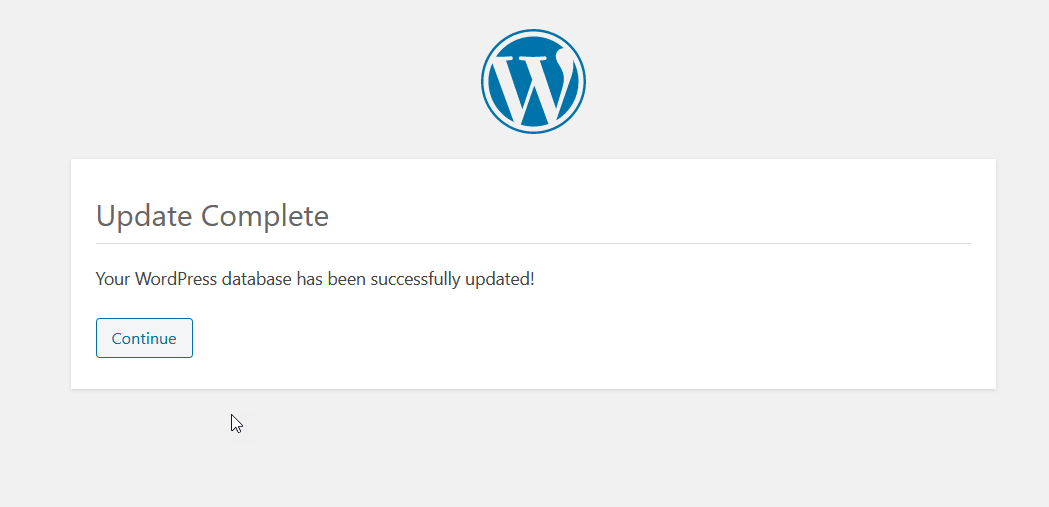
Then, log in to your WordPress dashboard using your username and password and you will see that the installed core version is now 5.4.2.
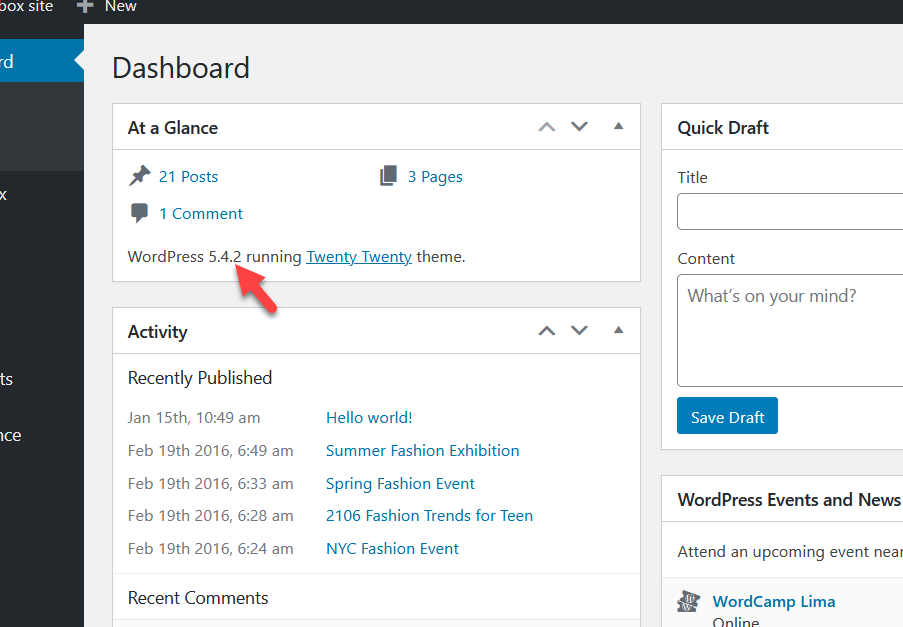
You’ve just downgraded WordPress manually! The process involves several steps but if you follow them in order, you shouldn’t have any issues.
2) Downgrade WordPress with a Plugin
A more beginner-friendly option to downgrade your WordPress install is by using a plugin. There are several tools that you can use but we recommend using WP Downgrade. This is a free plugin that allows you to change the WordPress versions and choose an old one in a few clicks.
Installation and Activation
First, you need to install the plugin on your site. So, in your WordPress dashboard, go to Plugins > Add new. Search for WP Downgrade on the search bar and then install and activate the tool on your site.
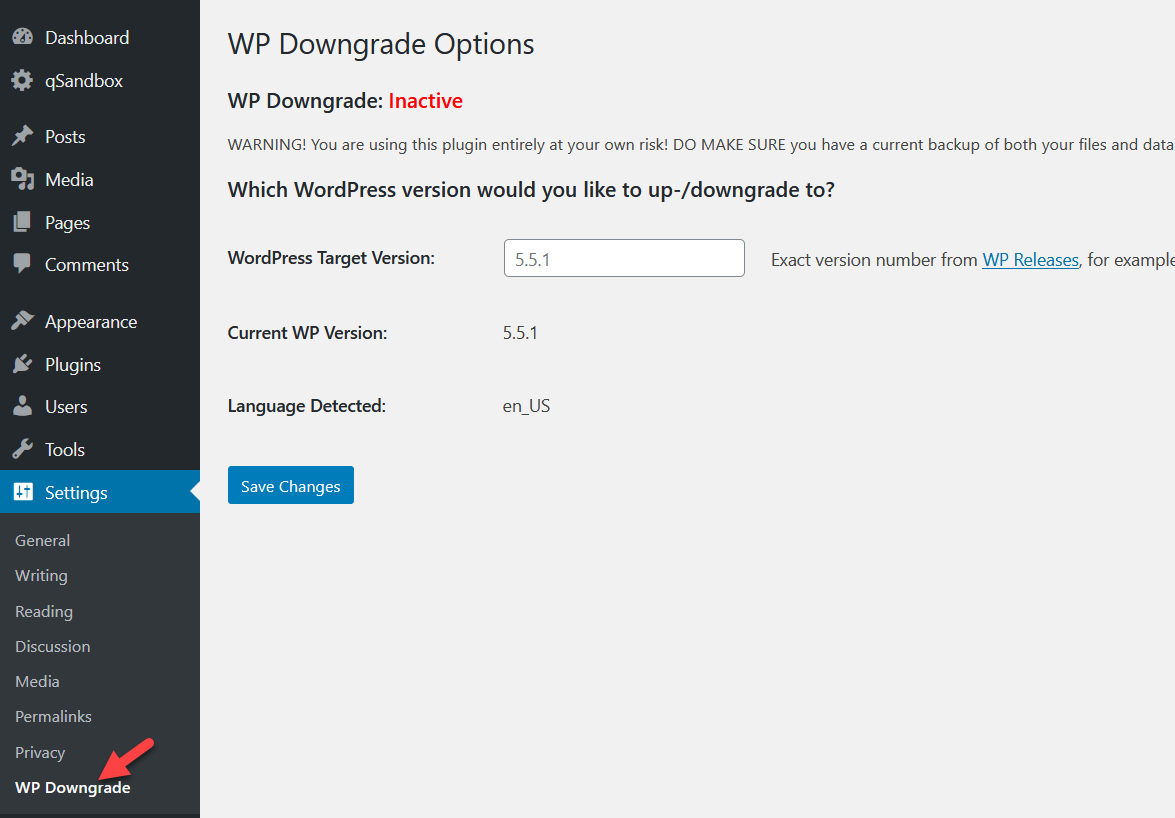
Then, go to Settings > WP Downgrade. There you will see your current WordPress version and you’ll have to specify the version you want to downgrade to (or Target Version). You need to enter the exact version number so you can check out WordPress’s official releases page.
In our case, we’re running WordPress in 5.5.1.
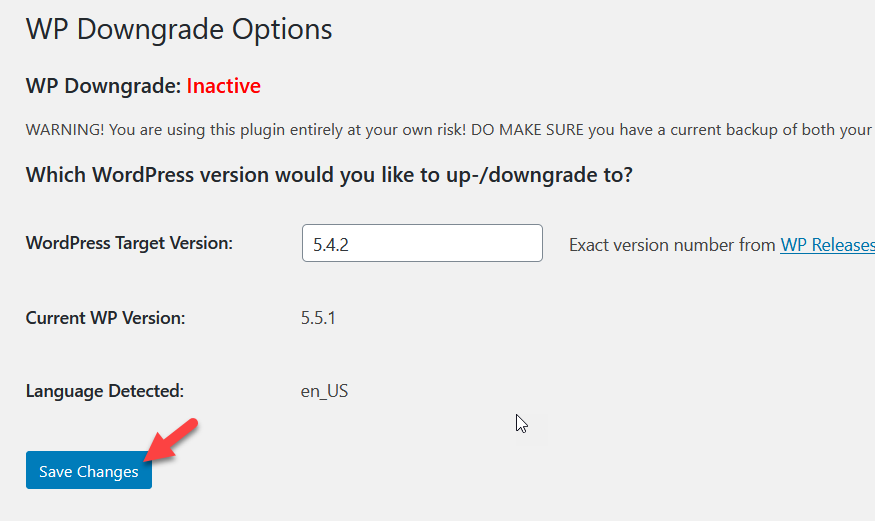
Let’s say you want to downgrade your core to WordPress 5.4.2. So, in the WordPress Target Version box, simply type 5.4.2. Remember that you need to specify the exact version number. After that, press the Save Changes button.
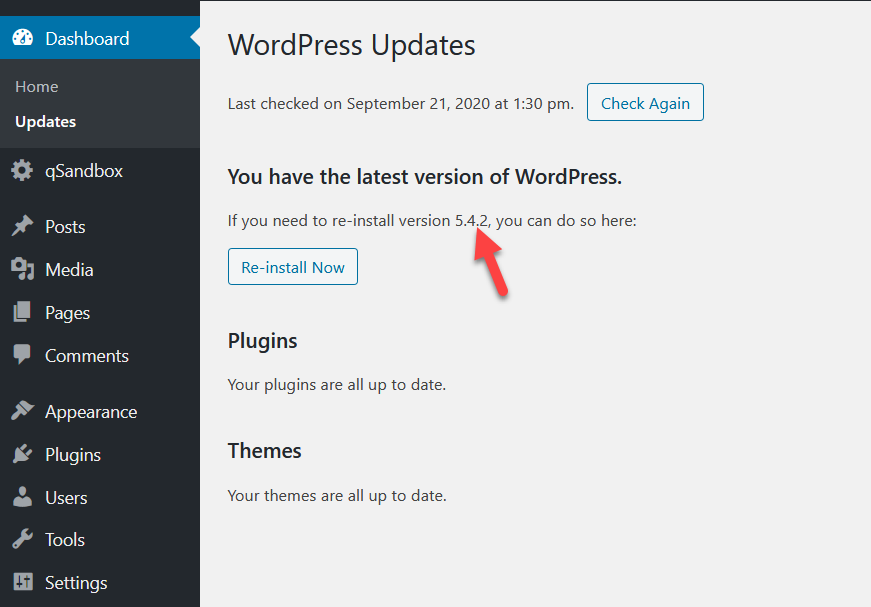
In the next page load, you will see that WordPress has been downgraded to the specified core version.

You can see the same on the WordPress updates page.
This method is very effective and only takes a couple of clicks. So if you want to change your WordPress version without using any third-party tools like FileZilla, this is an excellent option for you.
3) Restore a Previous Backup
The third method to downgrade WordPress to an older version is to restore a previous backup. This will only work if you have a backup of your site. If you’re not sure how to do that, you can have a look at our guide on how to generate a full backup.
Before downgrading WordPress, you need to create a backup of your website. This way, you will be able to restore this backup file when you need it. For this demo, we have created several demo backup files using the UpdraftPlus plugin.
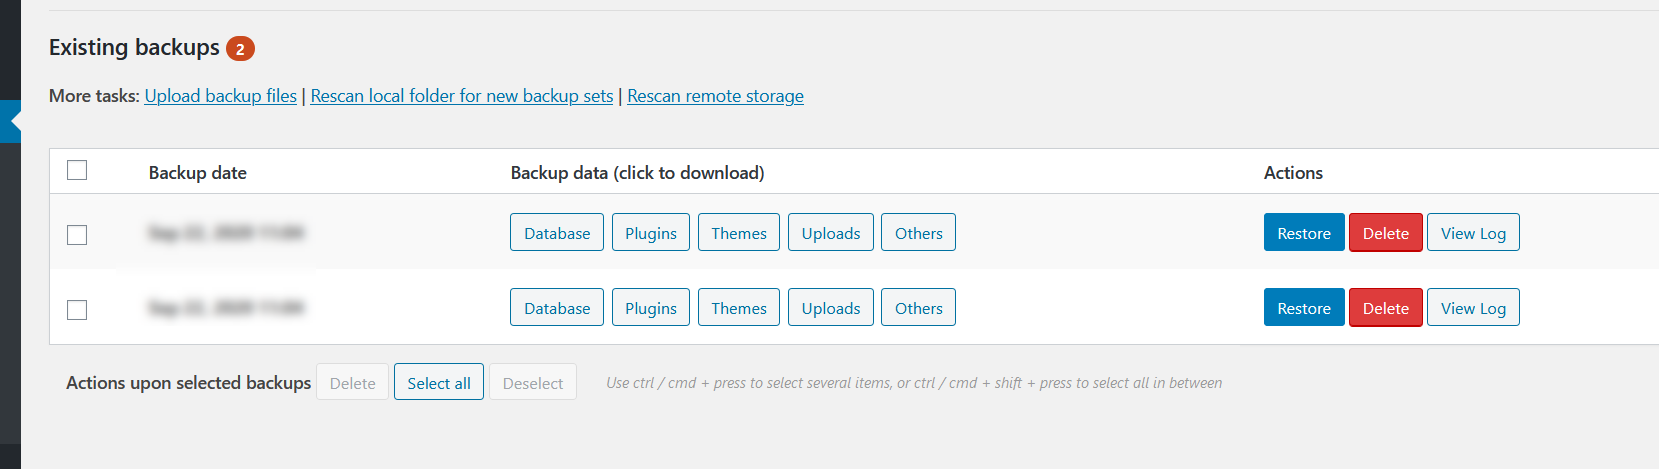
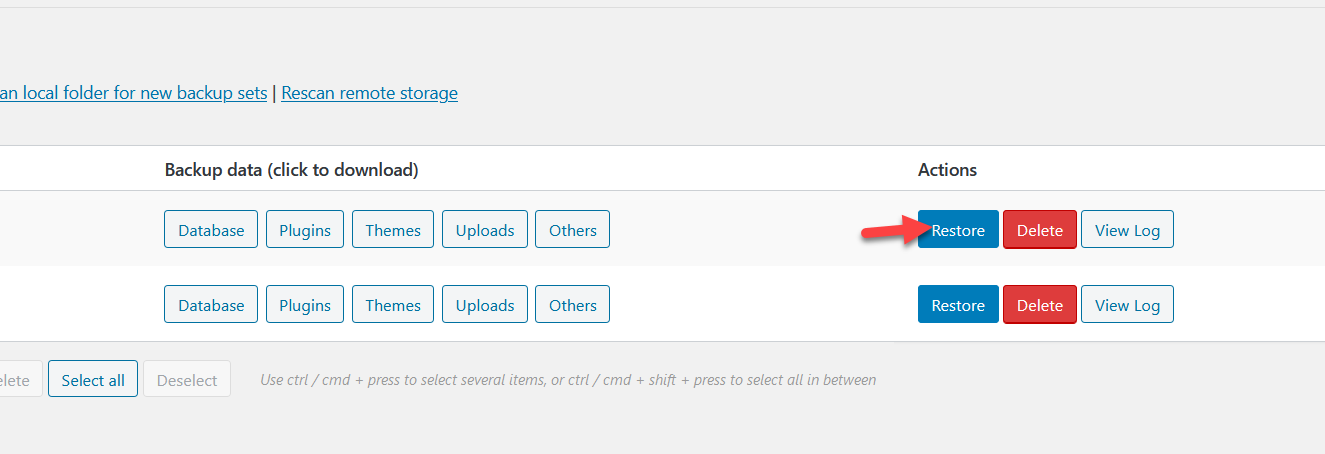
When you want to restore a backup, all you need to do is go to the plugin settings in the WordPress admin and click Restore on your target version.
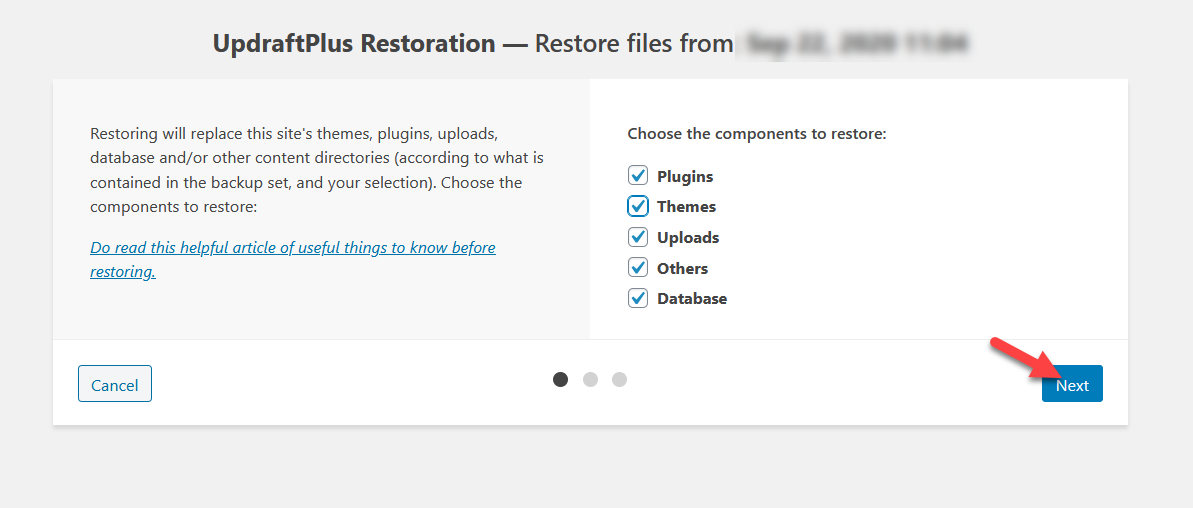
On the next page, you can select the components you want to restore such as plugins, themes, uploads, and more.
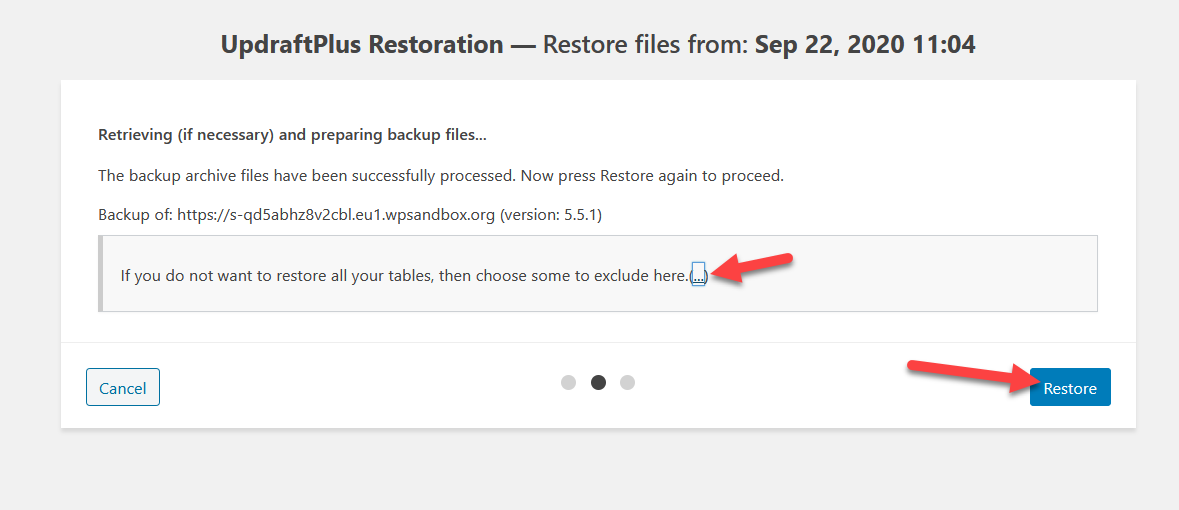
The plugin will import all your database tables by default but you can also exclude the tables you don’t want to restore. After that, click Restore.
The restoration process may take some minutes if your backup is big. When it finishes, you’ll see a success screen.

And that’s how you downgrade WordPress to a previous version by restoring a backup.
NOTE: It’s worth noting that managed hosting solutions such as Kinsta, WP Engine, or Flywheel generate daily backups of your website. So, if you are using any of those, you don’t need to rely on additional plugins to create backups.
Tips to Downgrade WordPress
WordPress is the most popular CMS in the world so WordPress sites and plugins receive constant attacks from hackers. That’s why, to keep your website and your files safe, we recommend you generate regular backups of your site. This way, if anything bad happens, you can restore it and keep your business up and running. If you’re not familiar with the process of creating a backup, check out our tutorial to generate a complete backup.
Additionally, we recommend keeping the backup files in a secure location. So, instead of keeping them on the same server, you can download them to your local storage or upload them to any other secure cloud storage services like Google Drive or Dropbox.
Some backup plugins like BackupBuddy allow you to automatically transfer the backup files to any third-party cloud storage or even an FTP server. Consider this when you use a backup plugin.
Finally, before updating WordPress to the latest version, it’s a good idea to create a staging environment. This way, you’ll be able to test the changes before applying them to your site. So if there’s an issue, you can solve it without breaking your website.
Conclusion
All in all, downgrading WordPress to an older version can be a good option when you’re having problems with the latest WordPress update, when you’re experiencing compatibility issues with plugins or themes, or when you simply want to run a previous version of WordPress.
In this guide, we’ve seen different methods to do it:
- Manually
- With a plugin
- Restoring a previous backup
If you’ve been locked out of your WordPress site, the manual method is the best for you. It requires several steps and it’s not as easy as the other methods, but if you’re familiar with FTP and file uploading, you won’t have any issues.
On the other hand, the plugin method is the simplest way to downgrade WordPress. If you have access to your WordPress dashboard, simply install the WP Downgrade plugin and roll back to a more stable WordPress version.
Another easy way to get your site back online is to restore a previous backup. This process is quite simple but it will work only if you have a complete backup of your WordPress core.
Finally, if instead of downgrading WordPress you want to roll back to a previous version of your plugins and themes, we recommend you have a look at this guide that explains the process step-by-step.
Do you know any other methods to downgrade WordPress? Which one do you use? Let us know in the comments section below!
