
How to Edit robots.txt in WordPress (with and without Plugins)
Are you looking for the most effective ways to edit robots.txt in WordPress? They are crucial if you want to let search engine crawlers know the pages and sections of your website that they should crawl and index.
Even though WordPress generates a robots.txt file for your website by default, you may still need to change it to manage what search engines can view. If you aren’t familiar with robots.txt, don’t worry. We’ll explain what robots.txt is and why it’s essential to edit it, along with the various ways to edit it on your WordPress website with this tutorial.
So let’s dive in to understand what robots.txt is.
What is Robots.txt?
Robots.txt is a plain text file in your website’s root directory that contains instructions for web robots or bots on which pages or areas of your site they should crawl and index. The file tells the search engines whether the pages or sections should be indexed or not based on the website’s specific regulations.
For example, web crawlers such as Google web crawlers check websites regularly to update their index of pages. These web crawlers from Google, also known as Googlebot, follow the instructions stated in the robots.txt file to check the website.
The primary purpose of the robots.txt file is to assist webmasters in controlling what information search engines may access on their sites. You can use the file to prevent bots from accessing specific sites or directories. But keep in mind that some bots apart from Googlebot and other renowned web crawlers may not follow the guidelines in the file.
Why Should You Edit Robots.txt File?
There are several benefits of editing your robots.txt file in WordPress. Here are a few considerations:
- Block unwanted bots: Some bots may not be beneficial for your website or may consume valuable resources on your server. This can result in slow website loading times and degrade your site performance. So editing your robots.txt file can help you block unwanted bots from crawling your site and improve your website’s overall speed.
- Protect sensitive information: Certain pages on your website may contain sensitive information you don’t want search engines to index. This may include personal data, confidential business information, password-protected content, or even legal or compliance-related content.
You can prevent these pages from being crawled and indexed by editing your robots.txt file. This will even help to protect your website’s privacy and security. - Direct bots to specific pages: You can also use robots.txt to direct the bots to the particular pages on your website that you want search engines to crawl and index. This allows you to prioritize the pages you want to rank higher in search engine results.
- Prevent indexing of duplicate content: You may have pages on your website with similar content, such as category or tag pages. If so, you can use the robots.txt file to prevent search engine bots from indexing them. This can help avoid duplicate content issues that negatively impact your website’s search engine rankings.
Now that you understand what is robots.txt file and why they are essential, let’s move on to the next section, where we will show you how to customize it.
How to Edit Robots.txt in WordPress
You can edit the robots.txt file in 3 major ways in WordPress:
- Using an FTP client
- cPanel
- With a plugin
We will go through each of these approaches in detail. But if you use the FTP client or cPanel approach, you will have to create a robots.txt file manually first.
WordPress creates a virtual robots.txt file by default when you launch your site. It can be accessed by adding the path “/robots.txt” at the end of your domain.
For example, you can access the robots.txt file of QuadLayers using the link: “https://quadlayers.com/robots.txt.”
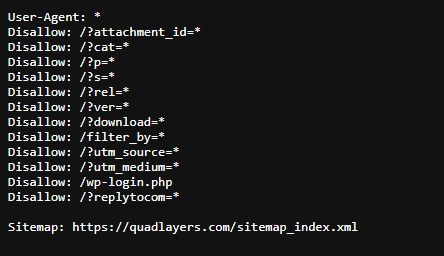
However, we do not use the default robots.txt file. It has been edited to meet the specific needs of QuadLayers. But the default robots.txt file created by WordPress includes just the following information:
User-agent: *
Disallow: /wp-admin/
Allow: /wp-admin/admin-ajax.php
Unfortunately, you cannot edit this file since it’s virtual. To edit the robots.txt file of your WordPress website, you must create one manually.
To do so, you can use any text editor to create an empty file and save the file as “robots.txt.”

Alternatively, if you want to use an SEO plugin to edit the file, it can be done automatically through the plugin. We will learn this later in this guide.
Nonetheless, your robots.txt file must contain the same information no matter what approach you use. So let’s look at what must be included in the robots.txt file too.
What to Include in the Robots.txt file?
To make sure that search engines properly index your website, here are some code commands or directives that you can include in your robots.txt file:
- User-agent: This identifies the search engine or bot to which the instructions apply. You can include one or more user agents in your robots.txt file, depending on the bots you want to control. For example, “User-agent: Googlebot” refers to Google’s web crawler.
- Disallow: This directive tells the bots which pages or directories the search engine bots should not crawl or index. You can specify individual pages or entire directories. For example, “Disallow: /wp-admin/” would block all bots from crawling pages within the WordPress admin directory.
- Sitemap: This directive tells the bots where to find your website’s sitemap file. The sitemap file lists all the pages on your site that you want search engines to index.
You can also use the “allow” directive in the robots.txt file. It tells the bots which pages or directories they should crawl or index. However, remember that it is optional and should be used only when necessary.
Here is an example of a basic robots.txt file:
User-agent: *
Disallow: /wp-admin/
Disallow: /wp-includes/
Sitemap: https://www.example.com/sitemap.xml
In this example, the user-agent is set to “*,” which means that the instructions apply to all bots. The “disallow” directive blocks the bots from crawling the WordPress admin and the “wp-include” directories. Similarly, the sitemap directive specifies the location of the sitemap file.
Now that you have a basic understanding of what to include in the robots.txt file, you can add all the web pages you don’t want the bots to crawl or index. Finally, save the file.
1) Edit Robots.txt using an FTP Client
To edit robots.txt in WordPress using an FTP client, you must install an FTP client and connect your website. There are many FTP clients like FileZilla and Cyberduck that you can use for this method. But we will be using FileZilla for this tutorial.
1.1) Connect your WordPress Website to FTP
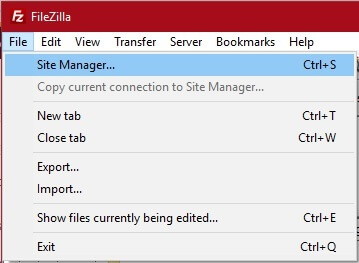
After you install the FTP client, open the application and go to File > Site Manager. You can also open the site manager by pressing Ctrl+S on your keyboard.
Then, click on New Site and enter the name of your website under My Sites.

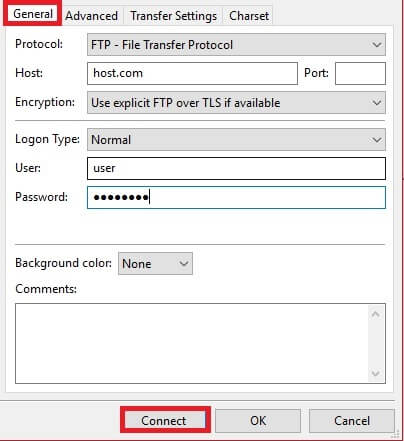
Now, open the General tab and enter your site credentials. You can get the credentials to connect your website to FileZilla from your hosting service.
After you enter the credentials, click on Connect.
You can access the site’s file directory from your computer after the site is connected. So let’s go ahead and upload the robots.txt file from your computer to your website.
1.2) Upload the Robots.txt file to WordPress
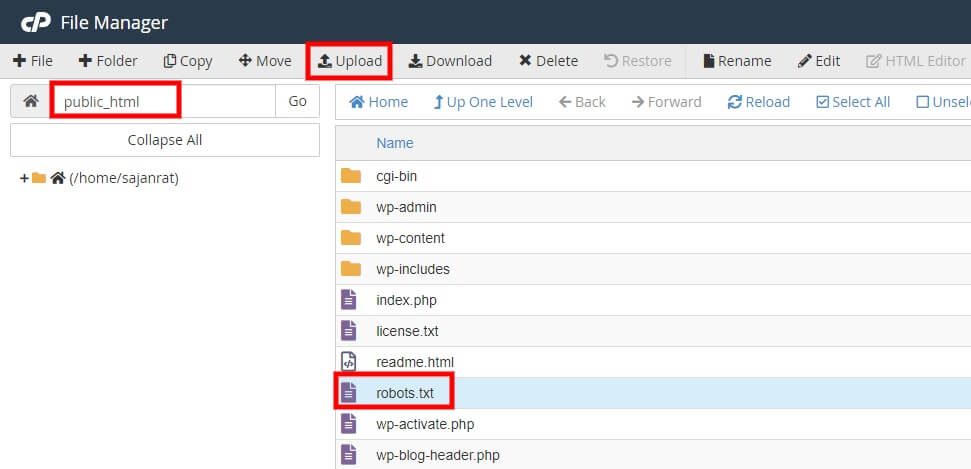
Once you connect your site with the FTP client, you have to navigate to the root directory of your website since this is where the robots.txt file should be located.
The root file is also referred to as the “public_html” file.
You can upload the recently created robots.txt file here. If a robots.txt file already exists in this file, replace it.

That’s it!
Now all you have to do is test the robots.txt file by adding the “/robots.txt” path at the end of the domain, just like we showed you in the previous examples.
2) Edit Robots.txt using cPanel
Editing the robots.txt file with cPanel is very similar to that of the FTP client approach. First, you have to log in to the cPanel of your website. Again, all the necessary login credentials should’ve already been provided by your hosting service.
After you log in to the cPanel, scroll to the Files section and click on File Manager.

Then, navigate to the “public_html” file directory and Upload the recently created robots.txt file here. Once again, if a robots.txt file already exists here, you need to replace it with the newly edited one.
Finally, test your robots.txt file by adding the “/robots.txt” path at the end of your domain.
3) Edit Robots.txt using a Plugin
If you want to save yourself a lot of time and hassle to edit the robots.txt page, you can also use a plugin. Several SEO plugins like Yoast SEO, All in One SEO, and Rank Math SEO allow you to create and edit the robots.txt file.
You can look at our complete list of best WordPress SEO plugins if you need more information to help you decide the plugin you want to use.
But we will be using Rank Math SEO plugin for this demonstration. It is one of the most popular SEO plugins and has a very straightforward interface to edit the robots.txt file. So let’s start by installing the plugin.
![]()
3.1) Install and Activate the Plugin
To install the plugin, you have to go to Plugins > Add New from your WordPress dashboard and search for the keywords of the plugin first. After you see the plugin in the search engines, click Install Now. The installation will take just a few moments.

As soon as the installation is complete, click on Activate to activate the plugin.
If you want to use any of the premium plugins, you must upload it manually. You can look at our detailed guide on installing a WordPress plugin manually for more.
Moreover, if you encounter any issue while setting up Rank Math SEO, we even have a specific guide on how to set up Rank Math.
3.2) Edit Robots.txt File
After the plugin is activated, go to Rank Math > General Settings from your WordPress dashboard and select the Edit robots.txt file tab. You can see that the plugin has provided its text editor for you to edit the robots.txt file in this section.
Here, you must add all the codes and commands depending on the web pages you want the bots to crawl and index. If you need any help with it, we have provided all the necessary guidelines in this tutorial in one of the previous steps.
![]()
Once you have added all the required commands and directives for the robots.txt file, click Save Changes.
Great! Now if you add the “/robots.txt” path at the end of the domain, you will see that the file has been updated accordingly. So the search engine bots will go through only the web pages you have allowed based on the robots.txt file.
Conclusion
This is how you can create and edit the robots.txt file in WordPress. It is essential to do so if you don’t want the search engine bots to go through sensitive or duplicate content of your website. The robots.txt file can also be used to direct the bots to crawl and index specific pages of your website.
To summarize, you can edit robots.txt file using three major ways:
- Using an FTP client
- cPanel
- With a plugin
Using FTP client and cPanel are very similar. All you have to do is log in to the cPanel or connect your website with the FTP client and upload the robots.txt file. Then, you have to upload the robots.txt file that was manually created by you earlier.
On the other hand, the robots.txt file will be automatically added to your website if you use a plugin. The plugins even provide a text editor to help you edit the robots.txt file.
So can you edit the robots.txt file for your website now? Let us know in the comments whether you’ve ever tried it.
Meanwhile, if you found this article helpful, here are some more posts that you can use to customize or improve your WordPress website:
