How to edit WooCommerce coupon code fields
Discount and coupon codes are a great way to increase conversion rates and drive sales to your store. But apart from giving discounts to your users, there’s a lot more you can do to make the most of them. In this guide, we’ll show you how to edit WooCommerce coupon code fields using different beginner-friendly methods.
Why edit the coupon code field in WooCommerce?
If used smartly, coupons can be an excellent way to increase your sales and keep your customers engaged. By giving your shoppers discounts, you show them that you value them and encourage them to buy from you. However, offering too many discounts can have the opposite effect and affect your brand’s image. Sometimes you may want to make your coupons visible to capitalize on a special promotion, whereas you may want to remove the coupon field if you don’t have any active coupons.
That’s why it’s important to have flexibility when it comes to coupons. Being able to edit the coupon code fields in WooCommerce will give you the flexibility you need to make the most of them.
How to edit WooCommerce coupon code
In this guide, we’ll show you different ways to customize coupon codes in WooCommerce. From removing and hiding the coupon code fields to changing the message and more. The best part is that you won’t need any plugins or additional tools. Some changes involve a bit of coding but don’t worry. They’re very simple things that even a beginner can do without any issues.
We’ll assume that you know how to create coupons in WooCommerce. If you need more information about that, check out our guide that explains how to create and set up WooCommerce coupons step-by-step.
1) How to remove the coupon code field
If you don’t have any active coupons, you could completely remove the coupon code field. This way, you won’t let your shoppers use coupons and avoid coupon hunting. This is when users search for coupon codes for your store on the internet. Unfortunately, coupon hunting is a very common practice and can greatly affect your conversions because shoppers tend to leave the checkout page and google discount codes.
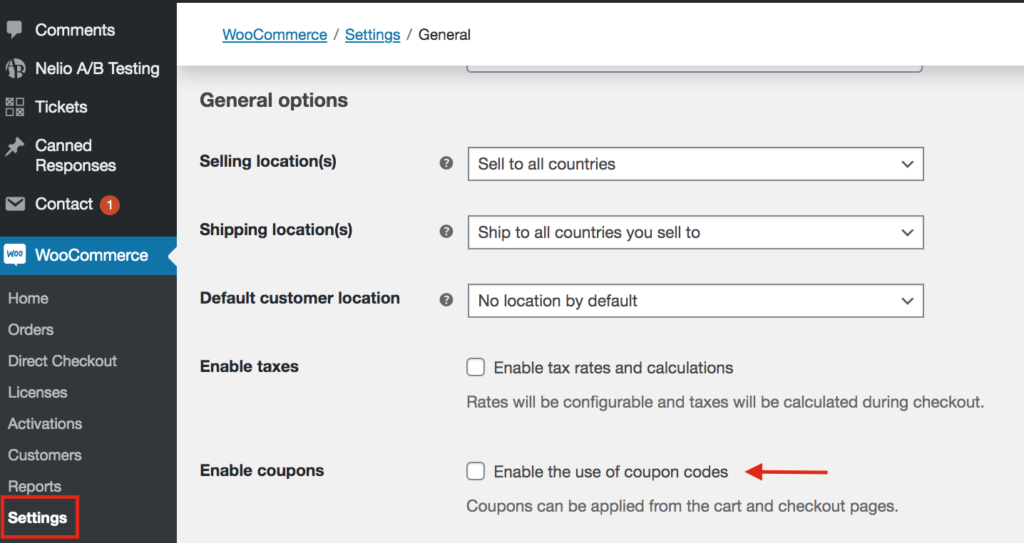
So, the easiest way to remove the coupon form from your checkout page is to use the WordPress admin dashboard.
First, in your WordPress dashboard, go to the WooCommerce > Settings > General. Scroll down to the General options section and uncheck the “Enable the use of coupon codes” option under Enable Coupons. Then, save the changes and that’s it!
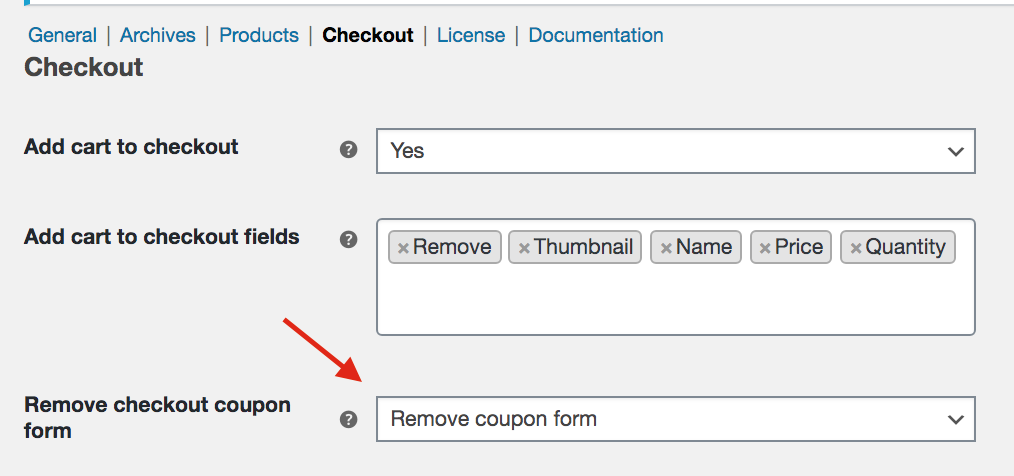
Similarly, if you use plugins such as Direct Checkout or Checkout Manager, you can easily remove the coupon form from the Remove checkout coupon form option.
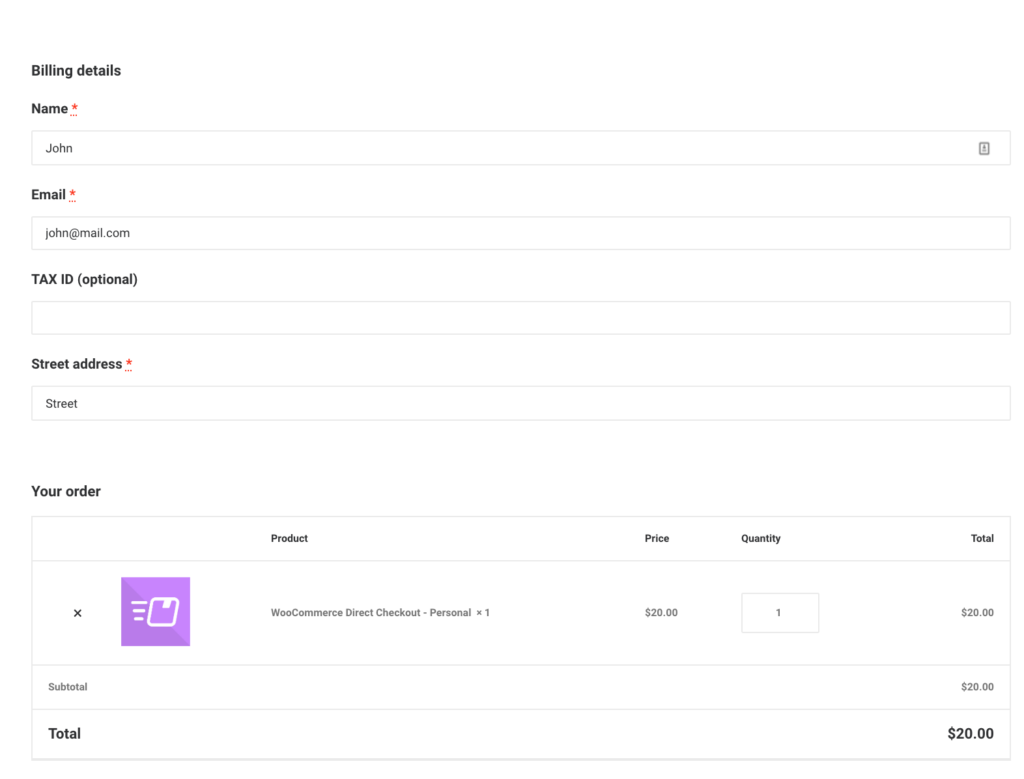
Now, if you check your site’s frontend, you’ll see that the coupon field isn’t there.
However, coupons can help you increase your conversion rates and boost your sales, so we don’t recommend completely removing the coupon field permanently. A useful alternative is to hide the coupon code in the checkout instead. Let’s see how to do it.
2) How to hide the coupon code field
If you’re running a campaign where you automatically give customers a discount when they come from a specific link or URL for example, you may want to hide the coupon code so they can’t share it with other users. This involves a bit of coding but even a beginner can do it.
To replace the coupon code field with a message informing the user that the coupon has already been applied, simply copy and paste the following code in the functions.php file of your child theme. If you don’t have a child theme, you can check this post to create one or use one of these plugins.
add_filter('woocommerce_cart_totals_coupon_label', 'quadlayers_hide_coupon_code', 99, 2 );
function quadlayers_hide_coupon_code($label, $coupon) {
return 'Your coupon has been automatically applied!';
}
3) How to edit the WooCommerce coupon code message
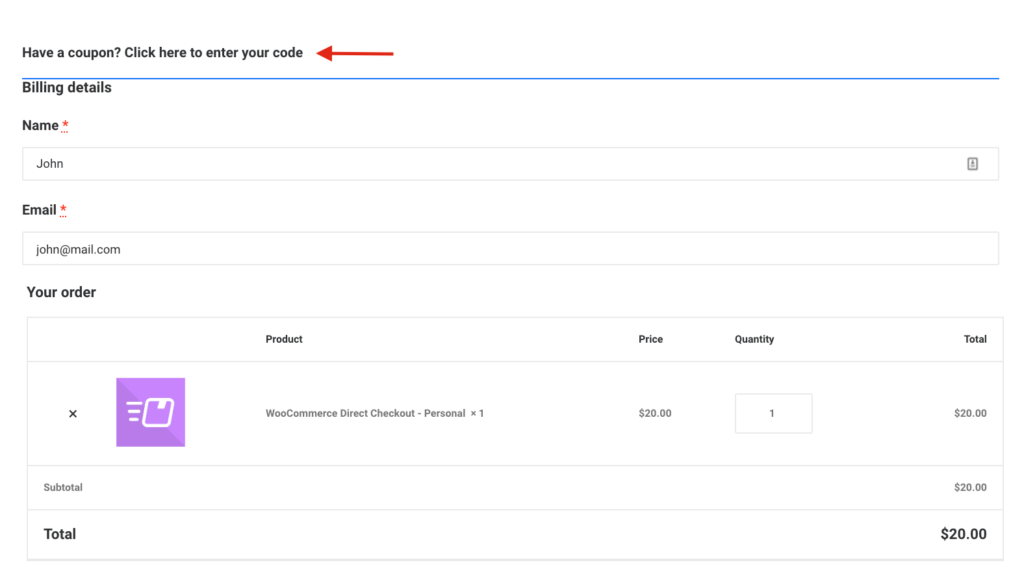
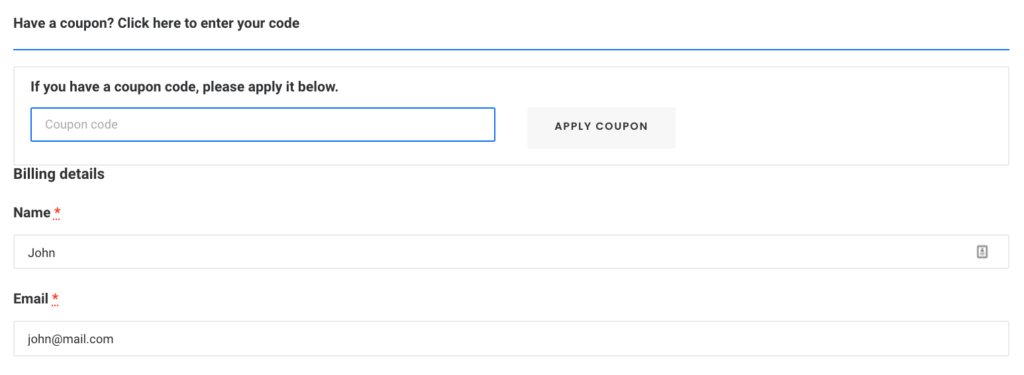
Another way to edit the WooCommerce coupon code is to change the default Have a coupon? Click here to enter your code message.
Let’s say we want to edit the coupon message and change it to something like “Enter your promotional code here and get a discount”. Simply copy and paste the following code in the functions.php file of your child theme:
add_filter( 'woocommerce_checkout_coupon_message', 'quadlayers_edit_coupon_message');
function quadlayers_edit_coupon_message() {
  return 'Enter your promotional code here and get a discount';
}
As you can imagine, there are many other things you can do to customize the default message such as adding icons, changing the font, colors, and many others. So, you can take the above code as a base and then edit it to get exactly the message you want.
4) How to display the form to enter coupon code by default
The default message to apply a coupon code in WooCommerce isn’t very noticeable and it’s easy to miss.
However, the form that opens when you click on the message is much more prominent and visible.
So, when you’re running campaigns where you give your customers discounts, you may want to display the coupon form by default to make it more visible and increase your conversions. To do that, you can override the checkout/form-coupon.php template in your child theme. Simply remove style=display:none from the following line of code:
<form class="checkout_coupon" method="post" style="display:none">
NOTE: Before you make that change, we recommend you create a complete backup of your site and check out this documentation to make sure you override the template correctly.
Bonus: How to automatically apply coupons in WooCommerce
Would you like to be able to automatically apply coupons using coupon URLs? This way, you could directly add the discount to a link and automatically apply the discount to your shoppers’ orders. This is a great option to boost your sales during Black Friday, Christmas, or when you offer flash sales.
For this there are two options:
Apply coupon programmatically
If you have coding skills, you could apply coupons programmatically. You can customize the functions.php file and apply coupons to all products, items with specific IDs, depending on the cart value or the number of products that the user has in the cart, and so on. For more information about this, you can have a look at this guide.
Alternatively, if you want to learn to apply coupons automatically, you can have a look at this tutorial with several examples.
Apply coupons with plugins
If you don’t know how to code, you can automatically apply coupons using plugins. We recommend using Advanced Coupons for WooCommerce. It’s a free plugin that’s very easy to use and allows you to easily add coupons to the URLs. To know more about how to apply coupons with this plugin, check out the bonus section of this tutorial.
Conclusion
All in all, editing the WooCommerce coupon code fields will give you a lot of flexibility to make the most of the discounts on your online store. In this guide, we’ve covered:
- How to completely remove the discount code field from the checkout from the WordPress dashboard and with plugins
- Hide the coupon code field. Very useful when you’re automatically applying discounts and don’t want users to see the discount code
- How to edit the coupon code message to further customize your checkout
- How to make the discount field more visible and display the form to enter the coupon code by default.
All these options are beginner-friendly and don’t require any plugins or additional tools. However, if you want to take your store to the next level, we recommend you have a look at some of the following posts:


Thanks for an excellent breakdown of Woo coupon codes. Editing the coupon field by function is much better than using a plugin.
Thanks Spencer, we’re glad you liked the post
Hey! Great guide.
I would love to have my discount form displayed at all times, but unfortunately, it did not work deleting “style=display:none” because it works as a popup and not a dropdown. Not sure how to fix it. Any suggestions? 🙂