
How to enable shipping address in WooCommerce
For any WooCommerce store, setting up the billing and shipping section of the checkout is one of the keys to improving your customers’ shopping experience. That’s why in this guide, we’ll show you how to enable the shipping address in WooCommerce to help you optimize your checkout and improve your conversions.
Why enable the shipping address in WooCommerce?
First, let’s better understand why you should enable the shipping address. By default, the WooCommerce checkout section doesn’t give you the option to use a shipping address. It implies that your billing and your shipping address are the same. However, shoppers might use a different billing address and a shipping address for various reasons. For example, if you want the products to be sent to the office where you work, the billing and shipping addresses will be different.
As you can imagine, this happens quite often so it’s important to provide your customers with this option. This way, you will improve their shopping experience which might also help you boost conversion rates. Even though some might say that it’s better to have fewer fields on the checkout page, an extra option to specify a shipping address will actually be better for your shoppers.
By adding an option to either provide a completely different shipping address or an optional shipping address field, you’ll cover every possible situation.
How to enable the shipping address in WooCommerce
There are two main ways to enable the shipping address field in WooCommerce:
- With the Checkout Manager plugin
- From the WooCommerce settings
Let’s have a look at both alternatives in detail.
1. With the Checkout Manager plugin
Checkout Manager is one of the best checkout plugins out there and opens up many ways to optimize your checkout page. This is a freemium plugin and has more than 80,000 active installs. There’s a free version that you can download from here and 3 premium plans. For this demonstration, we’ll use the free version.
Now, let’s see how to enable your shipping address fields using Checkout Manager. Let’s start with the plugin installation first.
Open your WordPress Admin Dashboard and go to Plugins > Add New on the sidebar.
Then, use the search bar on the top right to search for Checking Manager for WooCommerce. Then, click the Install button on the plugin card, and once the button changes to activate, press it again to finish the installation.
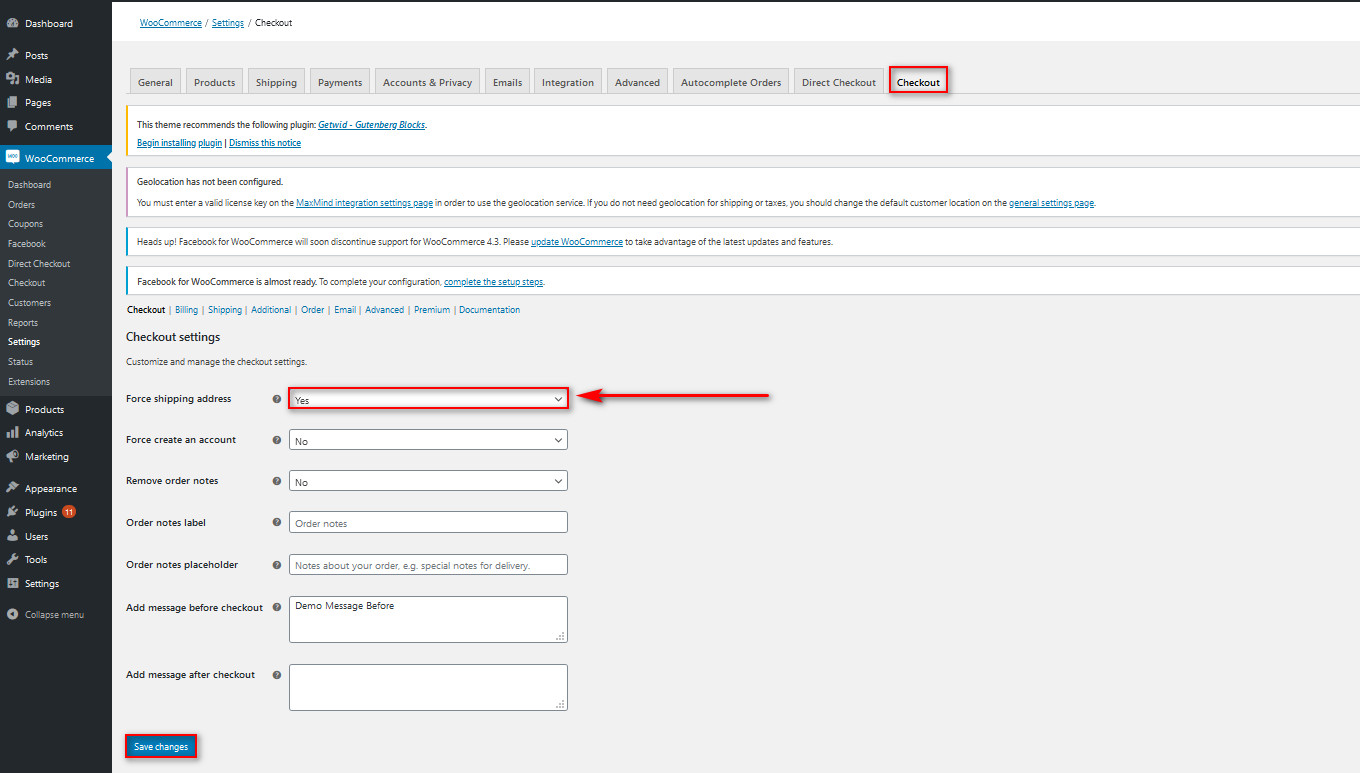
 Now that your plugin is set up, let’s customize your WooCommerce checkout page and enable the shipping address. Open the plugin’s options menu by going to WooCommerce > Checkout on your WP Admin sidebar.
 Then, use the option that says Force Shipping Address and switch it to Yes. Now, your shipping address should be enabled on your WooCommerce checkout page. Your customers can simply add their separate shipping addresses at checkout.
 This method allows you to enable the shipping address on your checkout forms in a few steps. While it requires using a plugin, Checkout Manager has a free version and comes with a huge number of additional features to customize your checkout page.
Checkout Manager – Additional information
One of the most powerful features that Checkout Manager offers is the ability to add conditional fields. By adding conditional logic, you can display or hide fields based on the value of another field. To learn more about how to use the conditional fields and what you can do with them, check out this guide.
Additionally, you can learn more about all the ways you can customize your checkout page using Checkout Manager in this post. If you prefer not to use any plugins for this, keep reading and learn how to enable the shipping address from the WooCommerce settings.
2. Enable WooCommerce shipping address from the WC settings
The second option to display the shipping address on the checkout is to use the WooCommerce in-built options. Although the process is a bit longer than the first one, it allows you to have more control over your checkout page without the need for additional plugins.
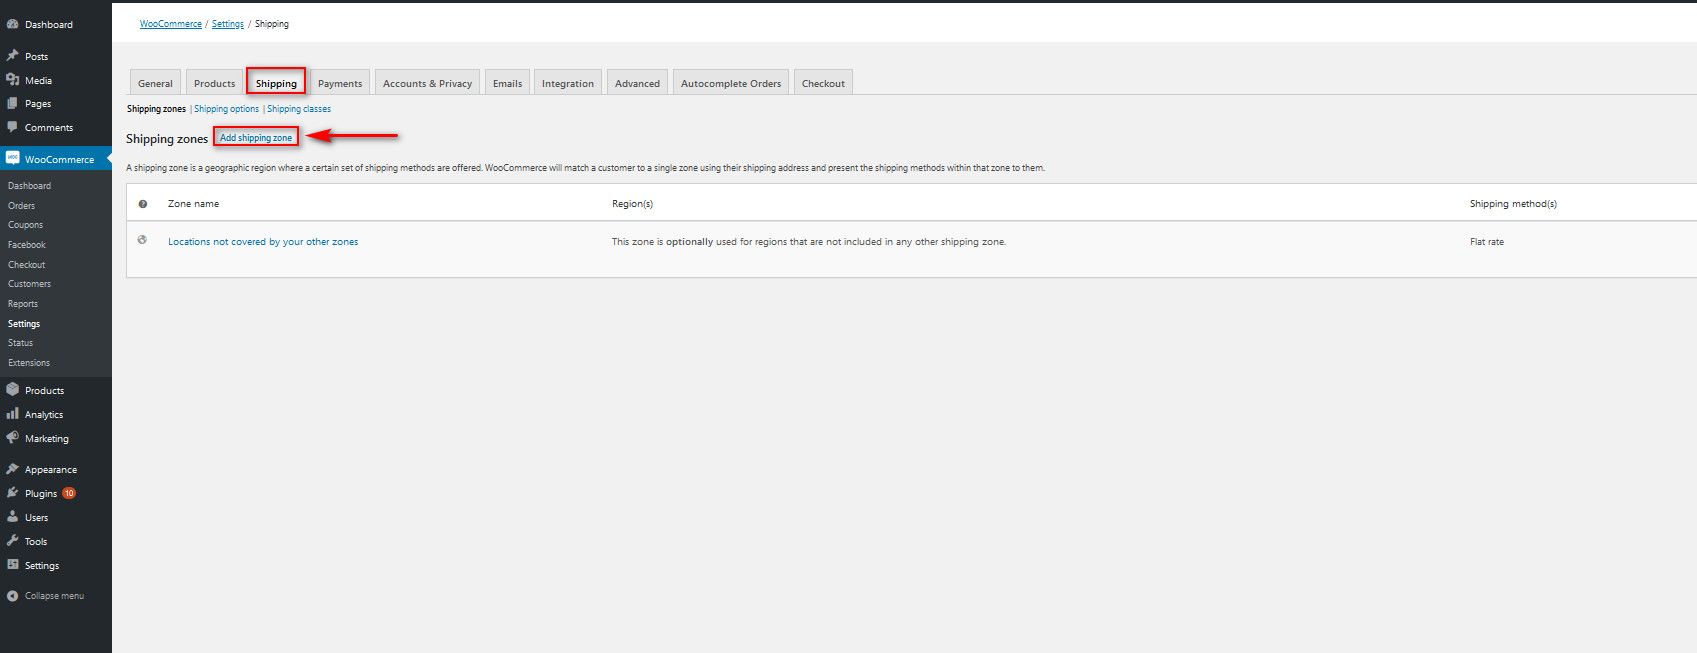
To start with this method, go ahead and open your WooCommerce Settings by clicking WooCommerce > Settings on your dashboard sidebar. Then, go to the Shipping tab.  To enable the option to add shipping addresses, click Add shipping zone.
Now, you can specify a shipping zone for your customers. This allows you to enable specific shipping bills and rates for different regions around the world. Simply type in the shipping zone in the Zone name field (such as Asia, Pacific Region, US, and Canada) and then choose what regions fall under this zone in the Zone regions field.
For example, let’s add a Shipping zone called South Asia, and let’s add regions such as India, the Philippines, Pakistan, and Bangladesh.  Next, click the Add Shipping Method button and choose what kind of shipping method you want for the customers in this region.
For the demo, we’ll just add a Flat Rate for the whole South Asia region. Remember that you can add multiple shipping methods for your customers if you need them.
 After that, click Save Changes and go back to the Shipping tab.
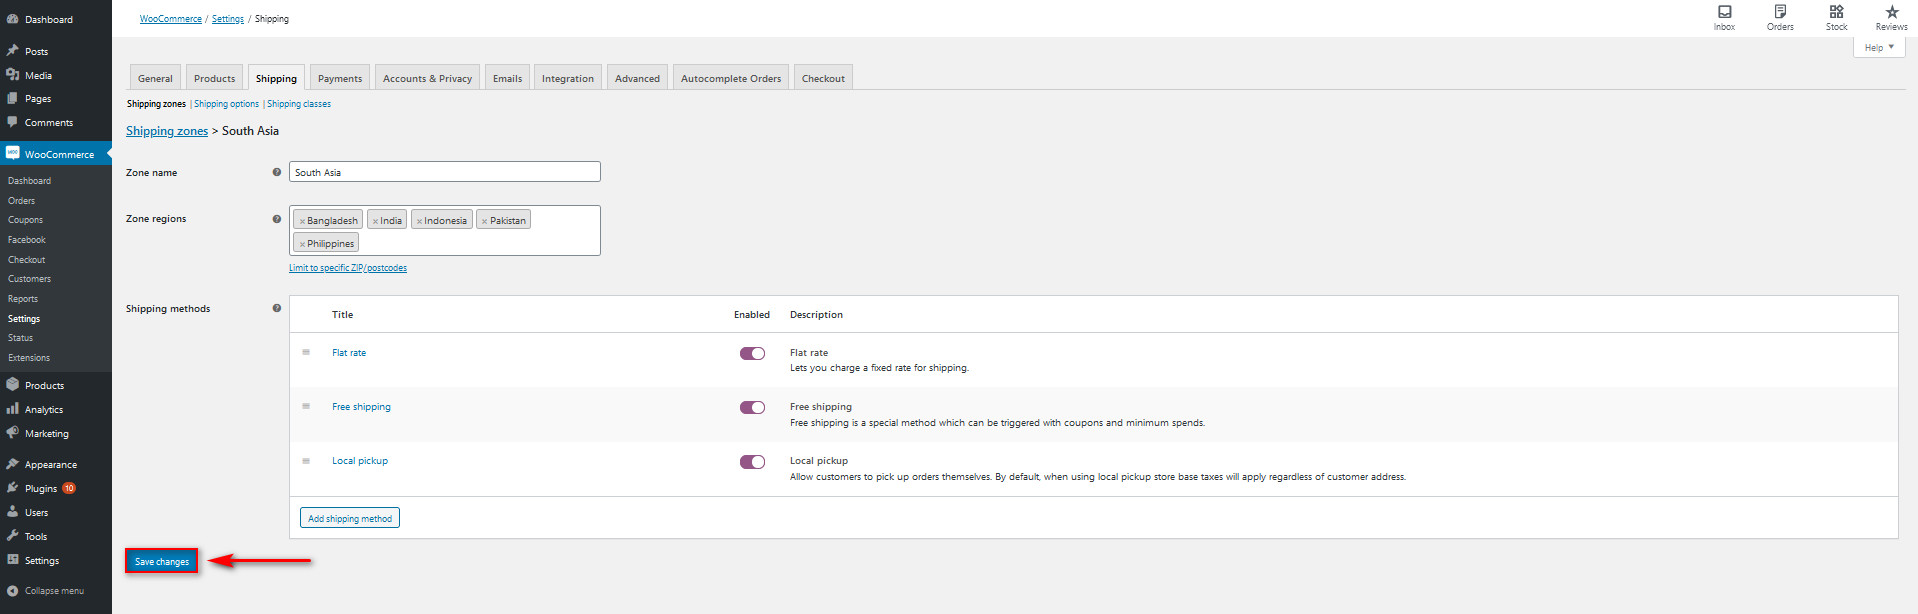
Now, your customers should be able to add a shipping address and the shipping settings will be applied based on the shipping regions you’ve specified.
Options to Customize the Shipping Address
Now, let’s take this a bit further. Let’s see different options to customize the shipping address. Not all these things may apply to your store but at least they give you ideas on what you can do to improve your checkout. In this section, we’ll show you how to:
- Enable the shipping address field by default
- Hide the shipping methods and only display free shipping
- Set the default shipping method in WooCommerce
Enabling Shipping Address Field by Default
The shipping address field that you have just enabled is optional and your customers need to tick the Ship to Different address box to enable the field. However, you can choose to force shoppers to add their shipping addresses. Even though you won’t need a plugin, you will need to add a line of code to your functions.php file.  NOTE: Before you continue, we recommend you generate a full backup of your site. Even though we won’t use any complex script, we’ll edit WordPress core files so better to be safe than sorry. Always make the changes to the child theme. If you don’t have one, you can create it or use any of these plugins.
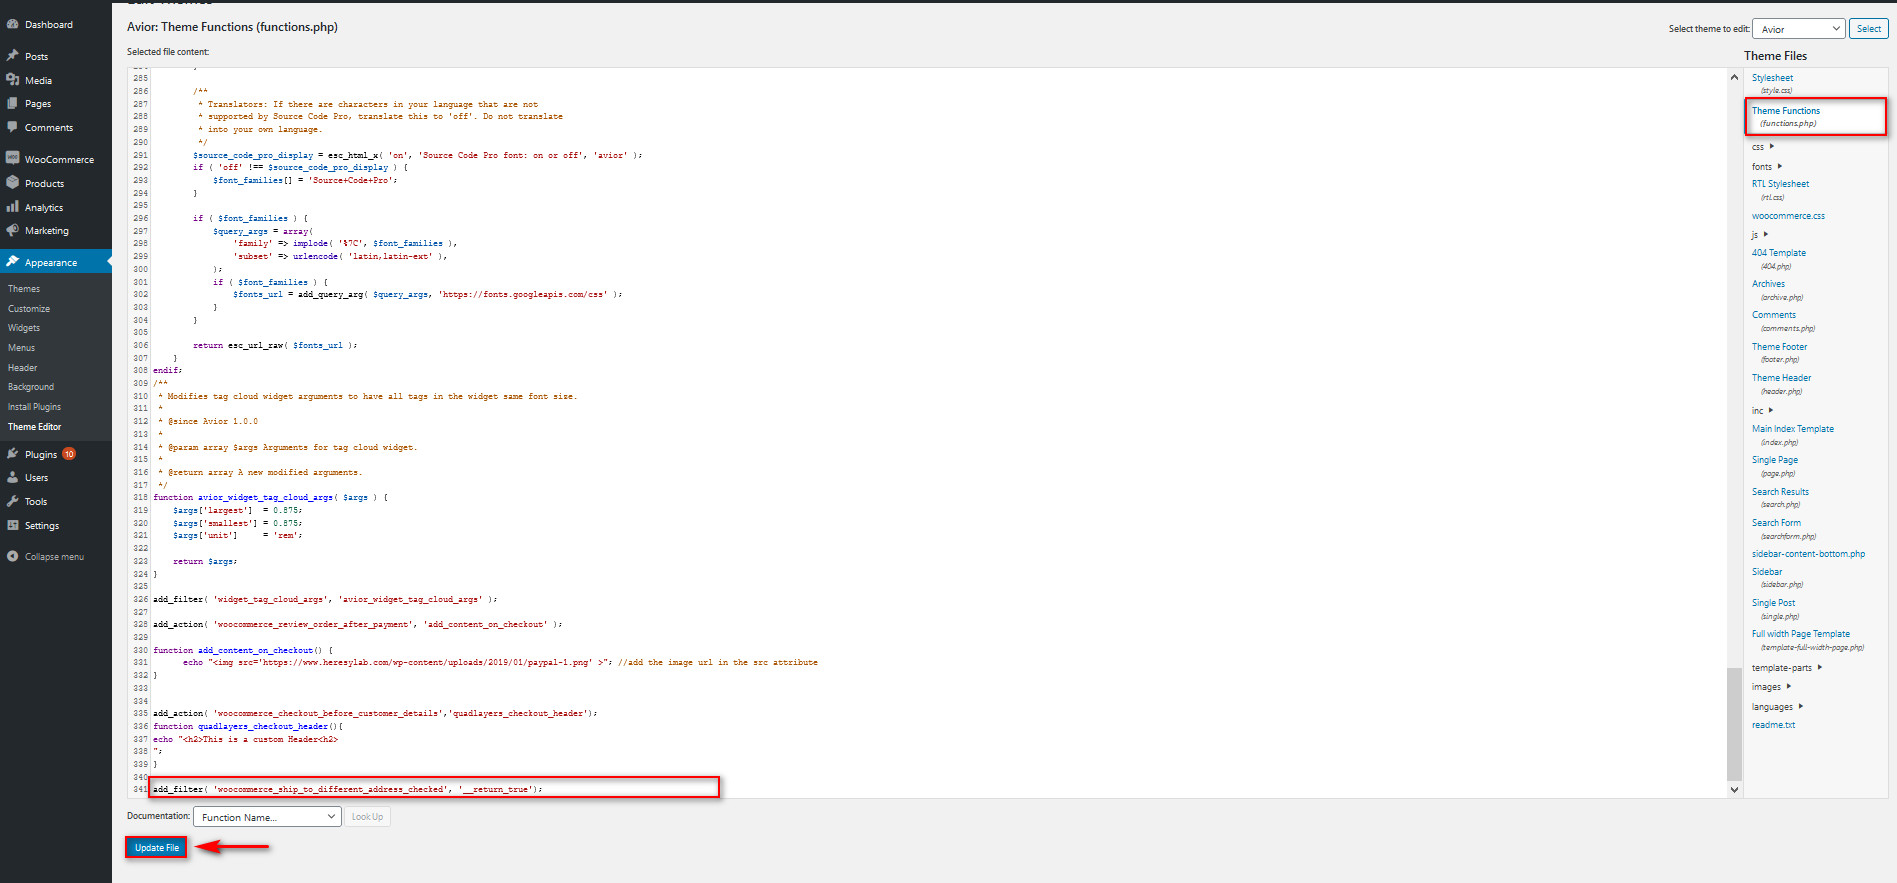
After that, in your WordPress dashboard go to Appearance > Theme editor. Then, click the Theme functions (functions.php) on the right column to open your functions.php file. Here’s where the magic happens.  Add the following line of code to the editor and click the Update file as shown below.
add_filter( 'woocommerce_ship_to_different_address_checked', '__return_true');
That’s it! Now the shipping address is enabled by default on your WooCommerce checkout page.
How to hide shipping methods and only display free shipping
When you enable multiple shipping methods, by default, WooCommerce will display all the shipping options to your customers.
However, you might want to enable free shipping options only for specific zones. When free shipping is available, you can hide all the other shipping methods for certain zones to provide your shoppers with the best buying experience.  The good news is that you can do that by adding a simple script to your functions.php file. In the WordPress dashboard, go to Appearance > Theme editor and click the Theme functions on the right column. Then, paste the following script at the end:
function my_hide_shipping_when_free_is_available( $rates ) {
$free = array();
foreach ( $rates as $rate_id => $rate ) {
if ( 'free_shipping' === $rate->method_id ) {
$free[ $rate_id ] = $rate;
break;
}
}
return ! empty( $free ) ? $free : $rates;
}
add_filter( 'woocommerce_package_rates', 'my_hide_shipping_when_free_is_available', 100 );
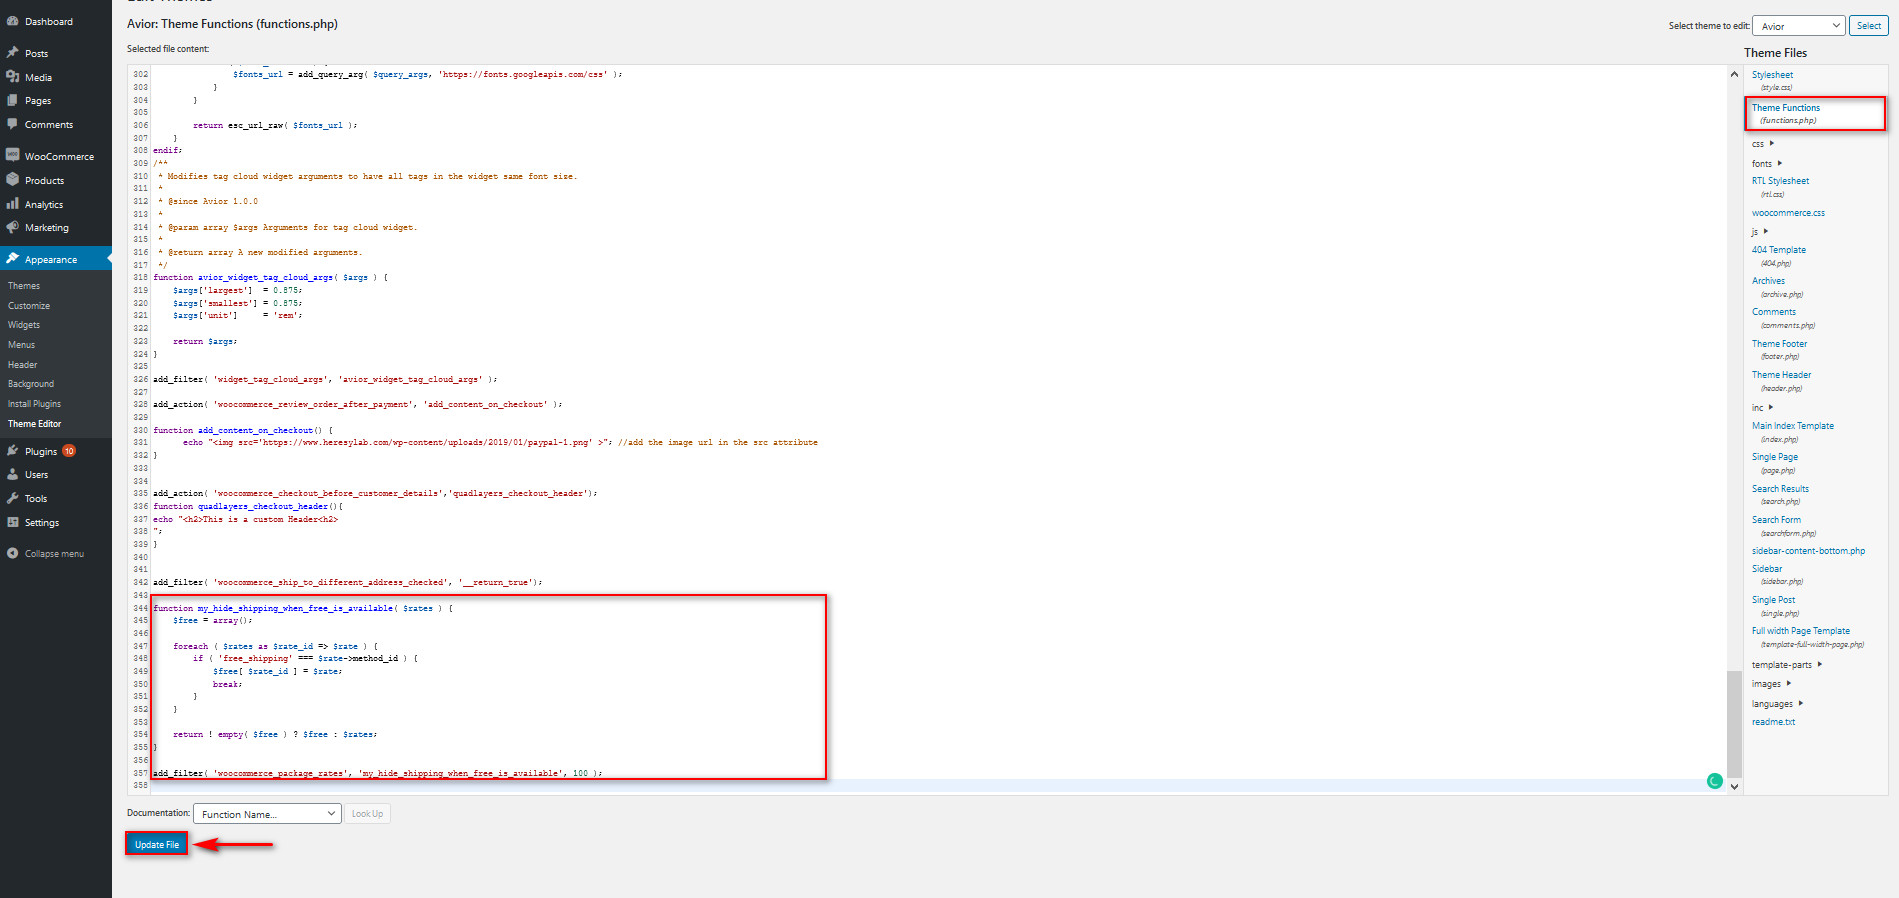
Then, click Update file and you’re good to go. Now every time your customers choose zones with free shipping enabled, all the other shipping methods will be automatically hidden. 
How to set the default shipping method in WooCommerce
Similarly, you can also choose to set a default shipping method on your store. Let’s say that in the zones where it’s available, you want to set free shipping as the default method. This way, you can keep other shipping methods visible while still making it convenient for your users to enjoy free shipping over the other options. 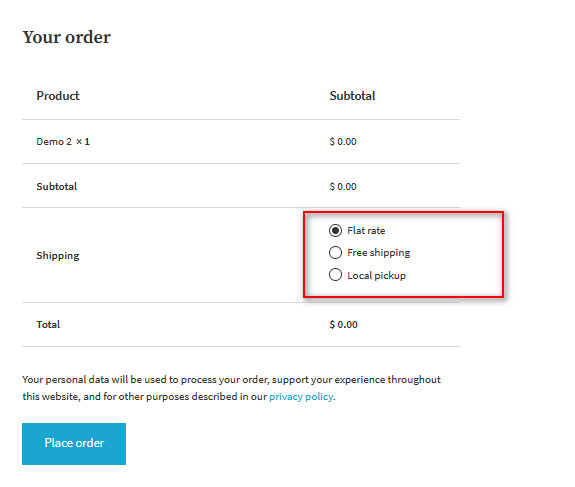
This is very simple and can help you greatly improve your customers’ experience. It’s important to note that the shipping method that it’s shown by default is the top shipping method in the settings.
So, to set a certain shipping method as the default one, simply go to WooCommerce > Settings and re-order your shipping methods.
For example, let’s say you want to set free shipping as your default shipping option for a selected zone. Simply drag the free shipping to the top using the sorting icon as shown below.  Then, click Save Changes. Now, free shipping will be the default shipping method in the areas where it’s available. Short and sweet, wasn’t it?
WooCommerce shipping address not showing in checkout? How to fix it
If the shipping address isn’t showing in your checkout, there are a few things you can try to fix it:
- Shipping method and/or zone not set: This is the most common issue. You must have at least one zone and shipping method setup, otherwise the shipping address won’t be displayed. To add the shipping method for your shipping zone, go to WooCommerce > Settings > Shipping > Shipping Zones. There select your zone and add a shipping method as shown above.
- Force shipping to the customer billing address: This option removes the shipping fields and uses the billing address for both billing and shipping, so make sure that you disable it.
- Theme/plugin conflict: If the shipping method and zones are set correctly and the Force shipping to billing address option is disabled, make sure that there aren’t any conflicts with your theme/plugins. To troubleshoot this, deactivate all of your plugins and leave only WooCommerce activated. Then, switch to the Twenty Twenty or any other default theme and see if the shipping address appears.
- Shipping isn’t allowed in some regions: If a shopper adds an address from a region where shipping isn’t allowed, they may not be able to see the shipping address on the checkout.
- Wrong address: If the customer enters an invalid address, the shipping address may not be available.
- Virtual and downloadable products: If your products are marked as virtual or downloadable, the “Ship to a different address” may not show up on the checkout, so double-check that the products are set up correctly.
NOTE: We recommend you clear your browser cache after you try each of these solutions to make sure that you’re loading the latest version of your site. This guide may help you quickly clear the cache if you use SiteGround.
BONUS: Remove the WooCommerce postcode validation
Having an optimized and clean checkout page is key to improving conversion rates. Now that you’ve enabled the shipping address in WooCommerce, you should make sure that you only display fields that are strictly necessary to your customers.
One of the fields you could get rid of is the postcode. By default, zip code fields are required and they include validation. However, those fields aren’t always necessary so making shoppers fill them in adds friction to the checkout process. For example, many countries in Africa, Central America, and Oceania don’t have or use postcodes.
Additionally, if users type text in the zip code field, WooCommerce will display an error message and customers won’t be able to complete their order. That’s why if it’s not strictly necessary, disabling the zip code validation is a good choice.
To remove the postcode field from the checkout page, paste the following script at the end of the functions.php file of your child theme:
// Disable zip/postcode field
add_filter( 'woocommerce_checkout_fields' , 'QuadLayers_remove_billing_postcode_checkout' );
function QuadLayers_remove_billing_postcode_checkout( $fields ) {
unset($fields['billing']['billing_postcode']);
return $fields;
}
Apart from removing the postcode validation, you can also make it optional, remove the billing fields from the checkout, and edit the labels of the checkout page fields.
For more information about this, check out our complete guide to disabling the postcode validation in WooCommerce.
Conclusion
In summary, enabling and customizing the shipping address in WooCommerce will help you improve your customers’ experience. This way, you’ll improve your conversion rates and you’ll be more likely to transform those shoppers into returning customers.
In this guide, we’ve shown you how to enable the shipping address with a plugin and from the WooCommerce dashboard. Both methods are simple and effective, so choose the one that works best for you. Enabling the shipping field from the WooCommerce settings requires a bit of setup but it’s very easy and gives you control over the shipping regions.
On the other hand, the Checkout Manager plugin is free and allows you to enable the shipping address in one click. Additionally, it comes with many great features to improve your checkout.
We also recommend you set different shipping zones and shipping methods for each to have full control over how your products reach your customers and how you can better manage your business.
On top of this, if you want an easier time handling your website, you should also improve your checkout page. If you’re not sure where to start, check out our full guide on how to optimize the WooCommerce checkout and learn different ways to improve your conversion rates.
For more information on how to customize the checkout, have a look at these posts:
- How to edit the WooCommerce checkout page
- Add custom fields to the WooCommerce checkout page
- How to create a WooCommerce direct checkout link
Have you enabled the shipping address in your store? Do you have any questions? Let us know in the comments section below! We’ll be happy to hear from you.

How do I add Puerto Rico and the US Virgin Islands as a State in the USA?