Are you looking for an easy way to export your WooCommerce orders? In this guide, we will show you how to easily export orders from your online store and keep your data safe.
Why Export WooCommerce Orders?
There are a couple of situations where you may need to export your WooCommerce orders:
- When saving the data to local storage
- If you’re migrating an existing store to a new one
- When changing your hosting service
Having a backup of your customer orders is always a good idea. Orders contain essential information such as customer name, email address, order ID, billing and shipping address, and so on. So, instead of relying on your web server, you can always download a copy of this data to your local computer or any third-party cloud services like Dropbox or Google Drive.
Alternatively, when you are moving your store to another domain or hosting company, you’ll need to export your orders. Once you have installed and set up WooCommerce on your new site, you can import the orders from the old store and keep everything up and running.
Exporting WooCommerce orders isn’t hard but it’s a delicate process that involves valuable information, so it’s important to do it well from the start. The good news is that you don’t need to hire a developer for it. In this tutorial, we’ll show you how you can export WooCommerce customer orders safely in less than five minutes.
How to Export WooCommerce Orders
To export orders from your store, you’ll need a dedicated WooCommerce plugin. In this section, we’ll show you how to export orders step-by-step using three different plugins. There are many other tools that you can use. For more information, check out our guide on the best plugins to export orders in WooCommerce.
1) WP All Import
WP All Import is a premium tool that allows you to easily export orders from your WooCommerce store. With this tool, you can filter your exports, use a drag and drop editor to customize the export file, rearrange the columns, schedule automatic exports, and much more.
Let’s see how to use this tool to export your orders.
Installation and Activation
First, you need to install and activate this plugin on your site. Since it is a premium plugin, you have to purchase it to access the file. It has different plans and packages that start at 99 USD (one-time payment). Once you have completed the purchase, log in to the account dashboard and download the plugin.
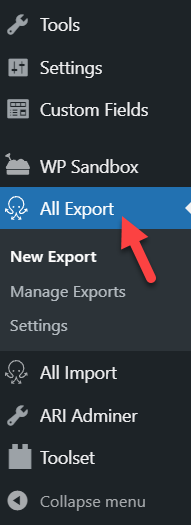
Activate the plugin on your site and then you will see the plugin’s settings on the left-hand side of your WordPress admin dashboard.
Plugin Configuration
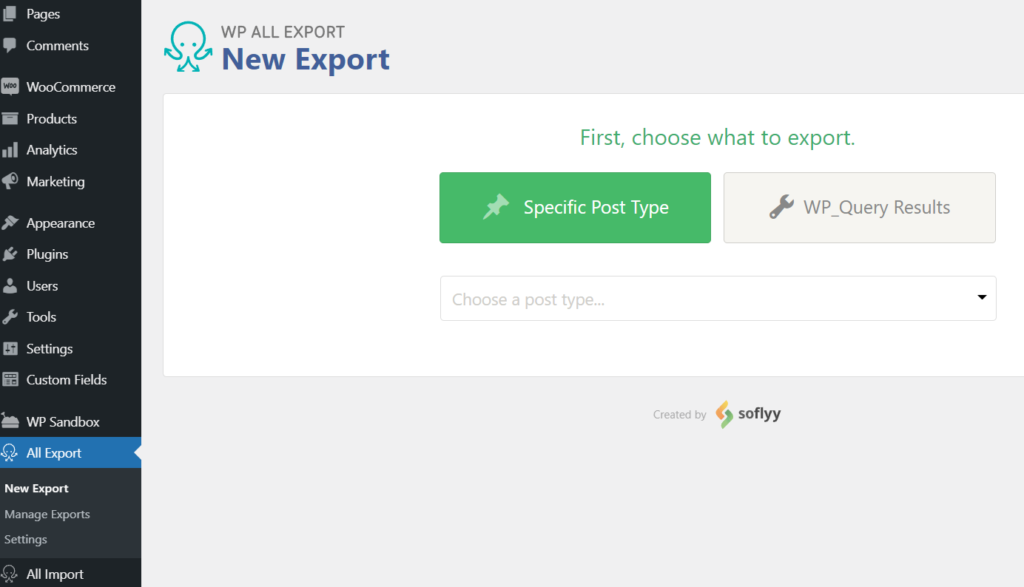
Exporting WooCommerce orders with WP All Import is super easy. The tool comes with simple configuration options so even a beginner user can perform this task without any issues. All you need to do is press New Export.
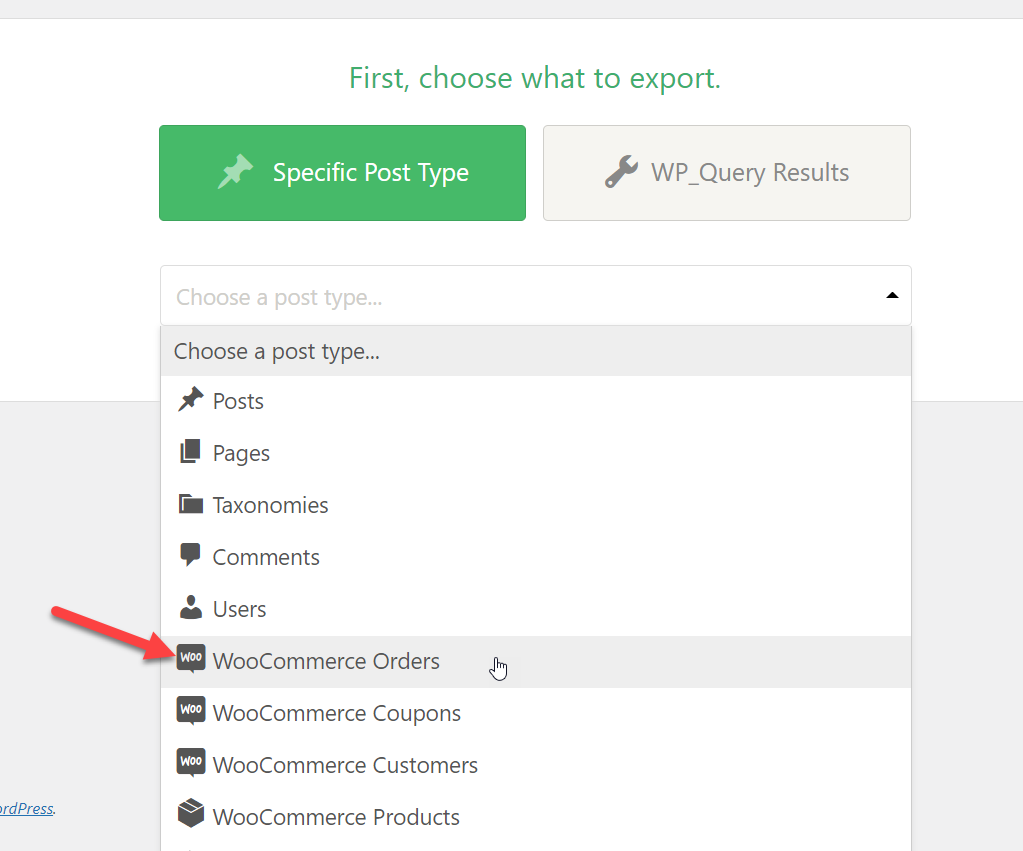
From the dropdown, choose the post type you want to export. For this demonstration, we will pick WooCommerce orders.
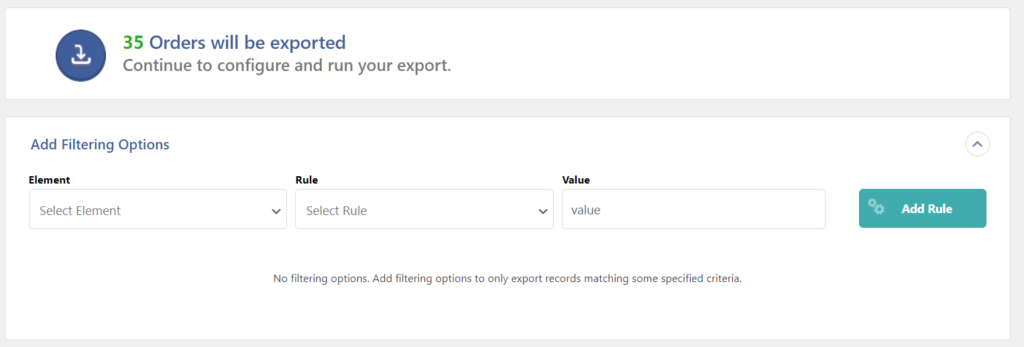
After that, you can configure your export and apply filters and rules to different elements to export specific orders. If you want to migrate all the orders, you can skip this step.
Once you’re done, you have two options. You can either migrate your orders or customize the export file.
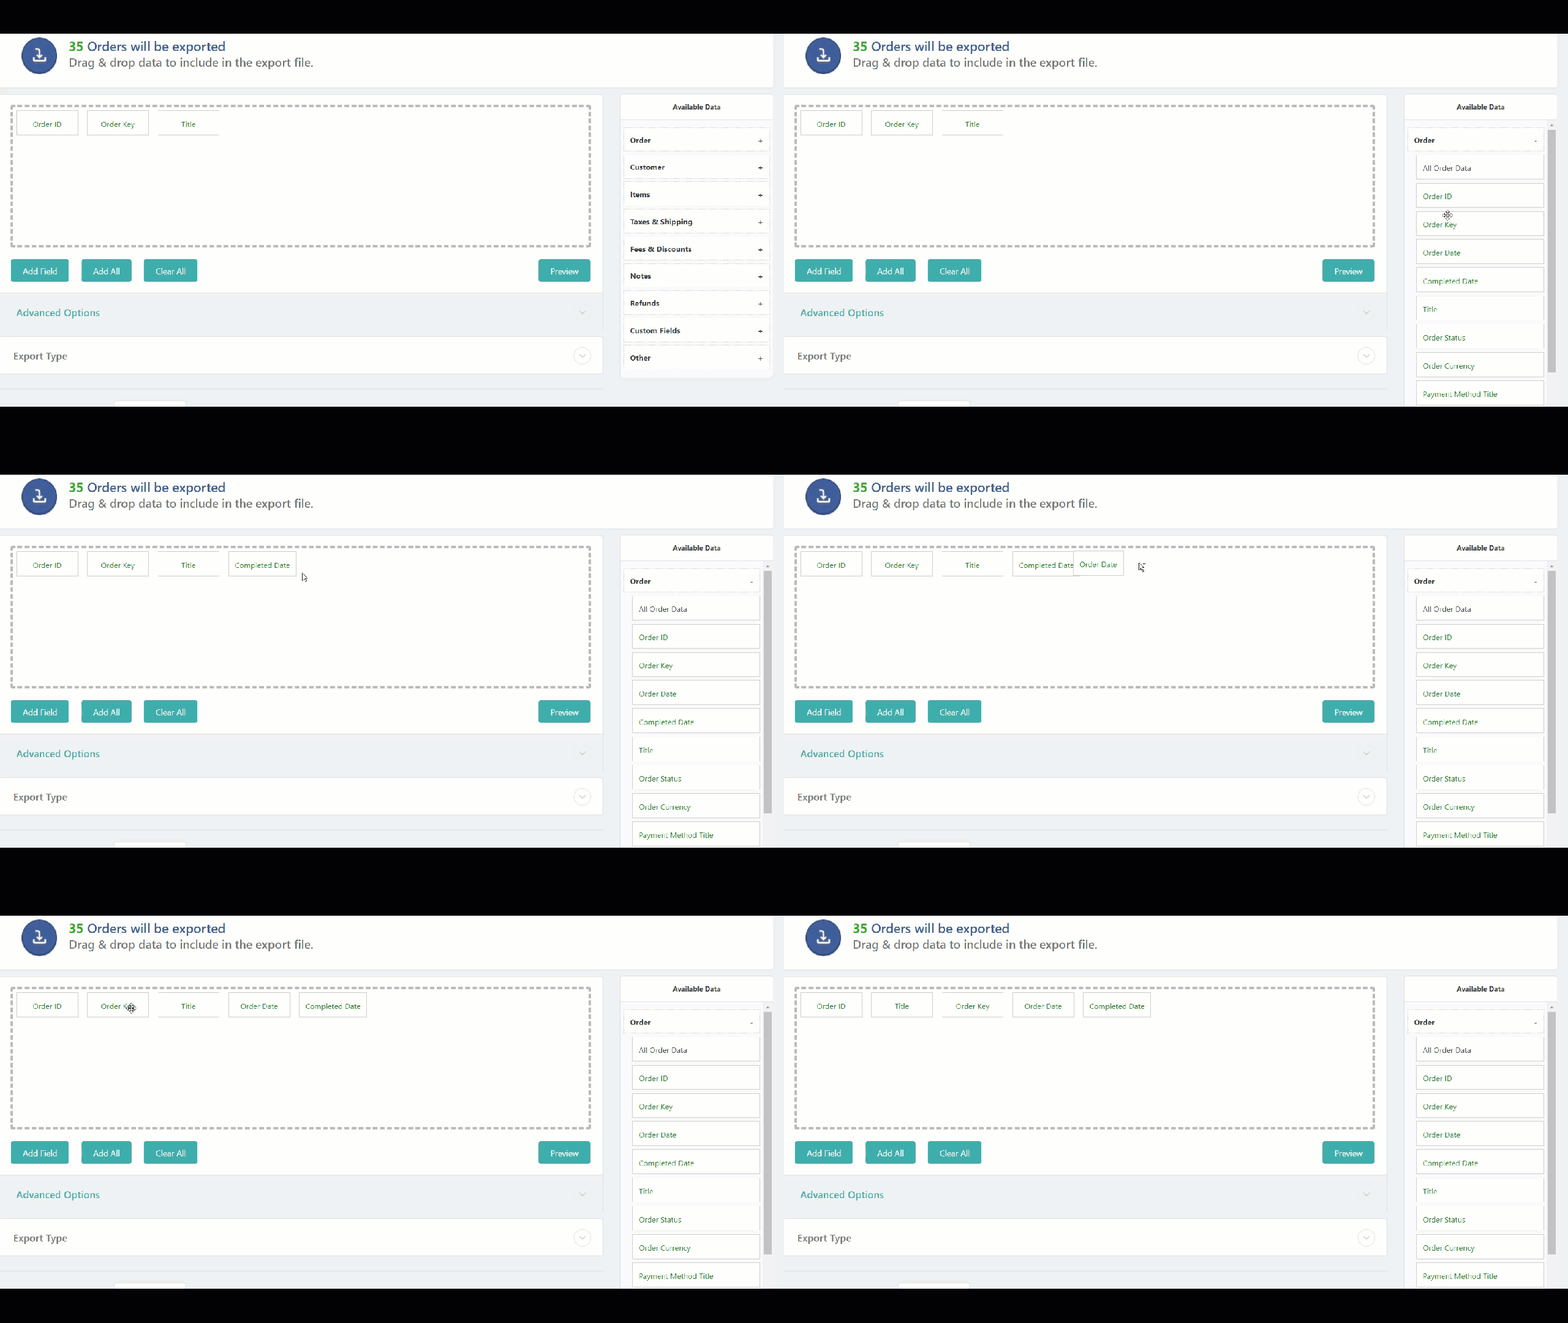
If you choose to customize the file, you will be redirected to the drag and drop editor. From here, you can customize the export file and rearrange columns, add, remove and combine fields, and much more.
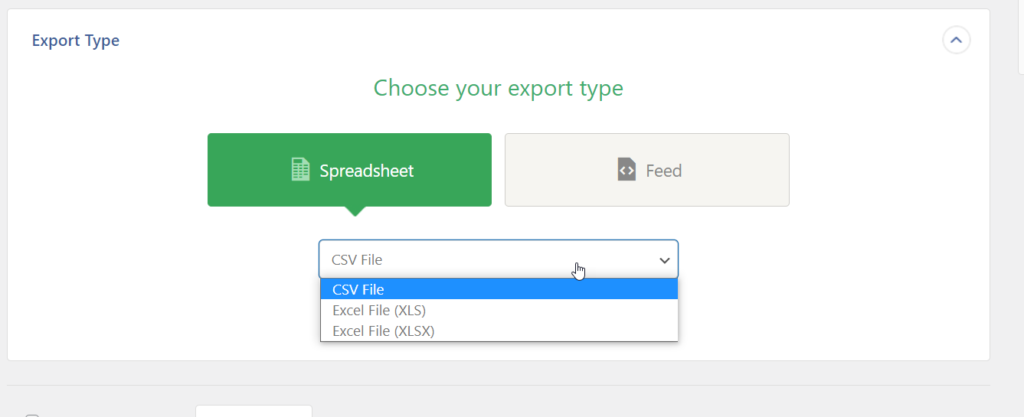
Additionally, you can also select the type of file you want to export and choose between CSV, XLS, and XLSX.
Once you have customized the export file according to your requirements, click on the Continue button.
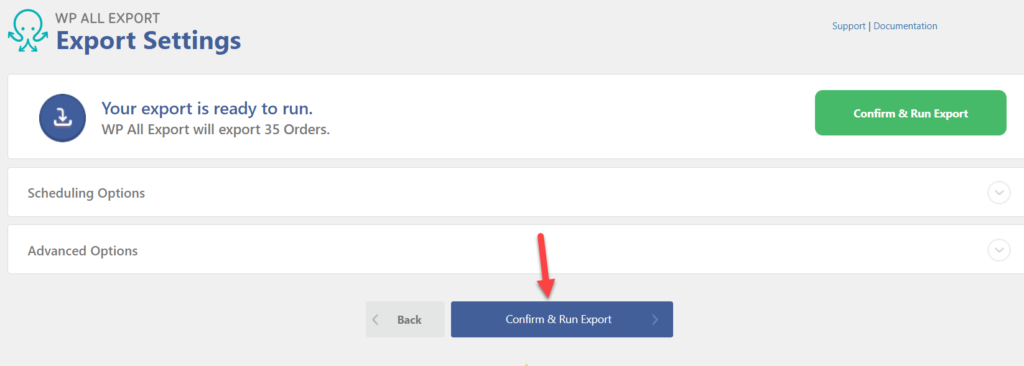
Finally, you can press Confirm & Run Export to download the file.
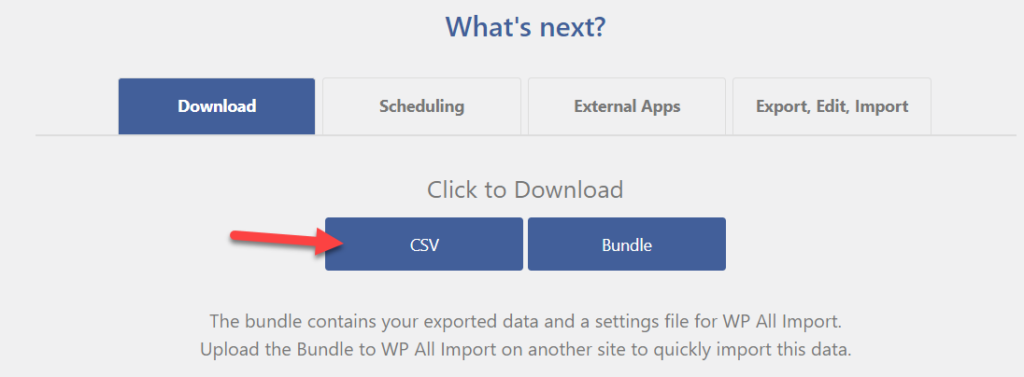
From the next page, you can download the export file. Here, you’ll also see options to schedule exports, and connect the plugin with external apps.
That’s it! This way, you can export WooCommerce orders using WP All Import. As you can see, this is a very-to-use plugin that includes great features. for every type of online store.
2) Advanced Order Export For WooCommerce
First, install and activate the Advanced Order Export plugin on your WooCommerce store. Since this is a freemium plugin, you can get the free version from the WordPress repository or one of the premium plans from their official site. To export orders, you only need the free version so that’s what we’ll use for this tutorial.
Installation and Activation
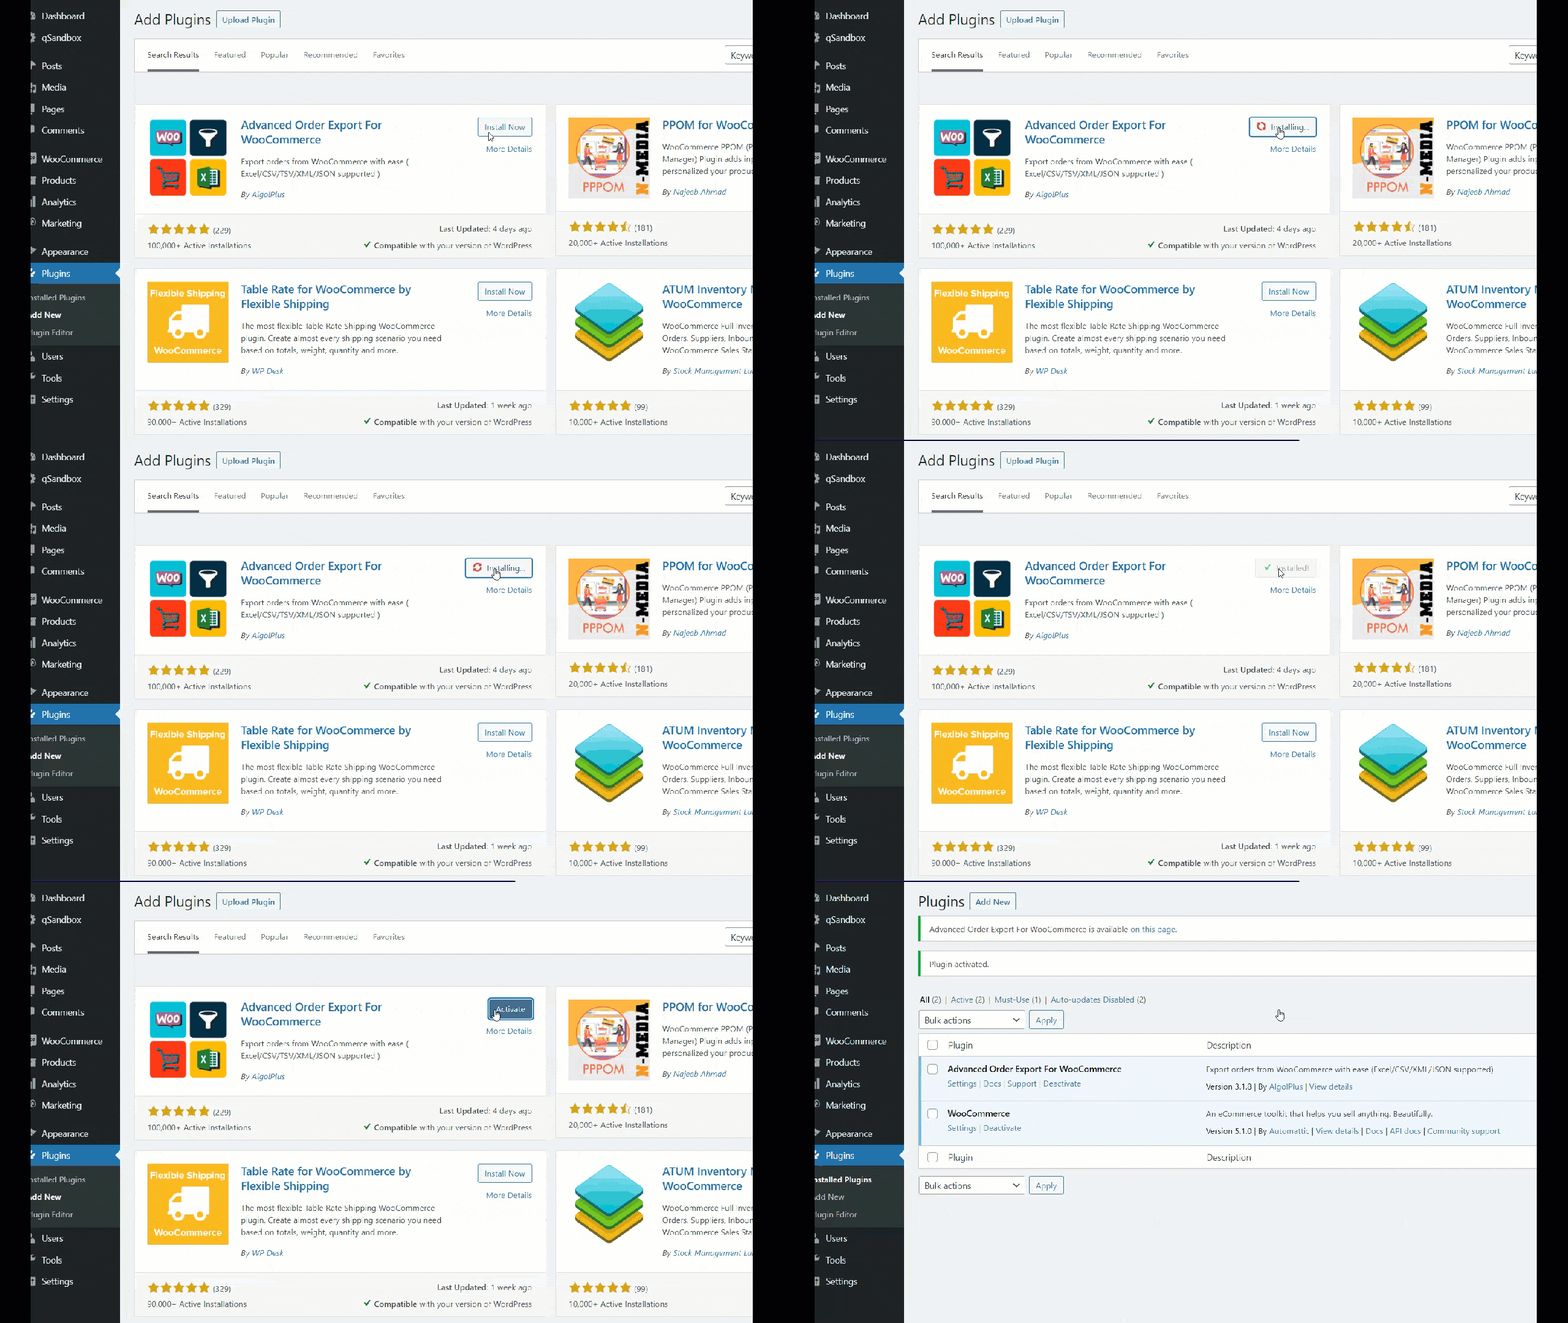
In your WordPress dashboard, go to Plugins > Add New and search for Advanced Order Export for WooCommerce. Install the plugin and then activate it.
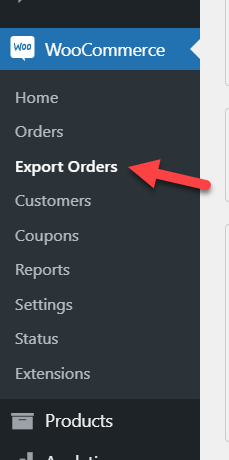
After that, navigate to the WooCommerce settings and press Export Orders.
Plugin Configuration
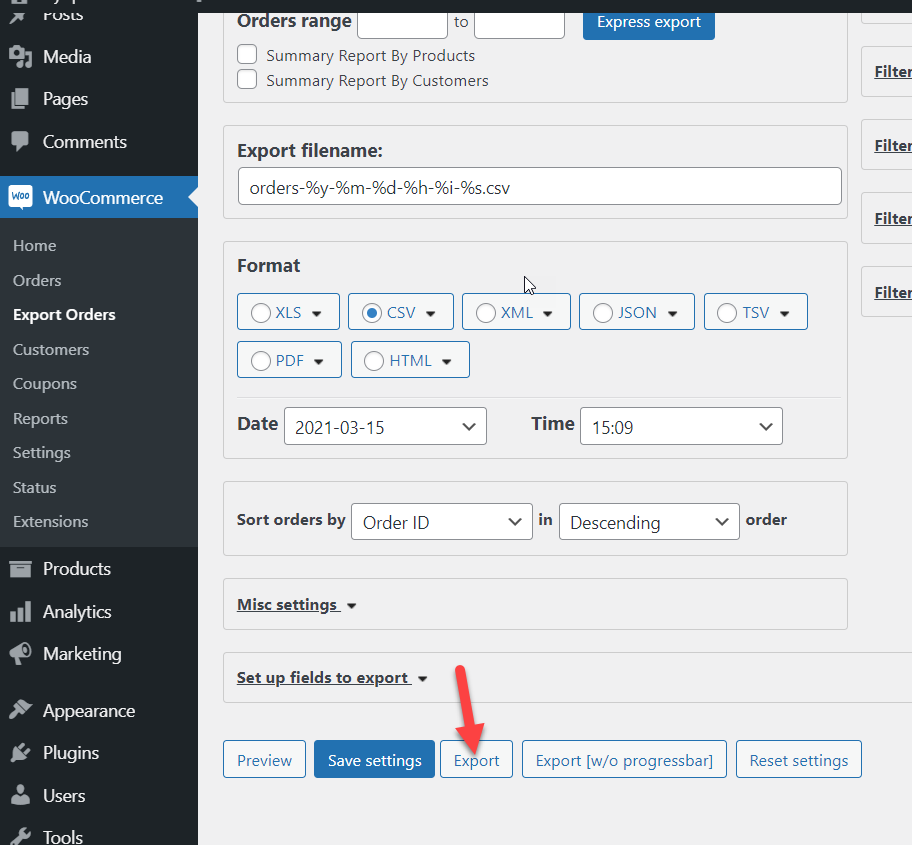
The plugin comes with many features. At the top of the screen, you’ll see some options to filter orders by order or modification date, as well as paid and completed date.
Additionally, you can also filter the orders based on custom dates. This is a great feature when you need to export certain orders from your store.
You can also choose the format of the file you’ll export.
- XLS
- CSV
- XML
- JSON
- TSV
- HTML
On top of that, you can filter your store orders based on different options such as:
- Product
- Customer
- Coupon
- Billing
- Shipping
- Item and metadata
Finally, you can also sort the orders in different ways. Once you have configured the tool to export the order you need, press Export.
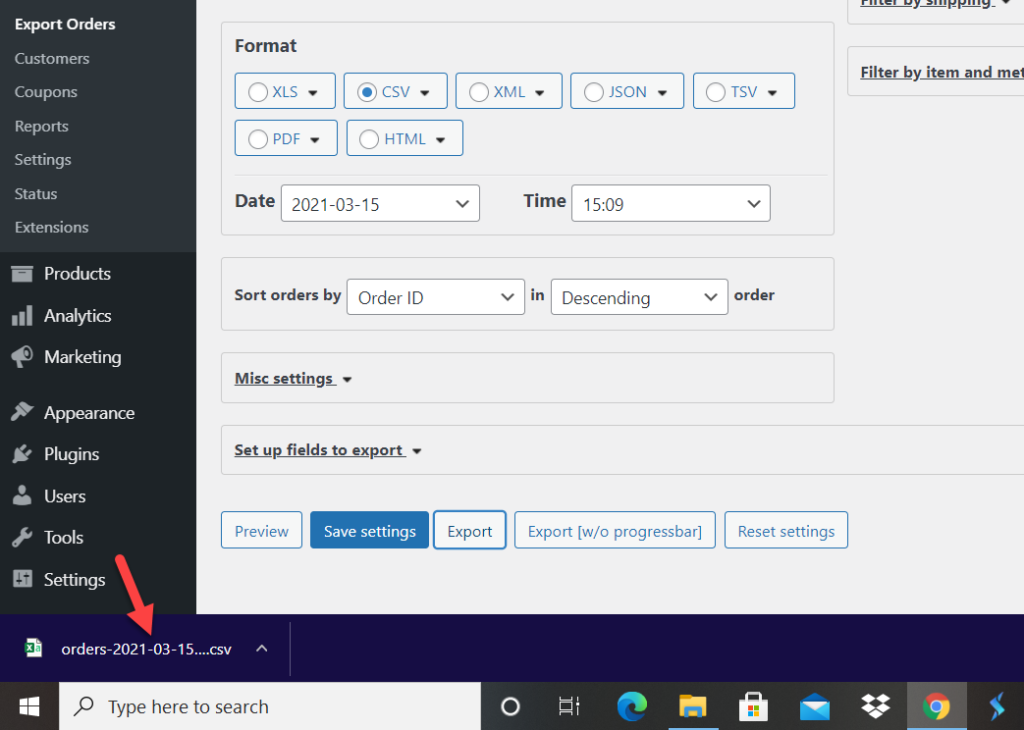
The plugin will generate a report for you that may take more or less time depending on the number of orders you have.
That’s it! Now you can open the file with all your exported orders.
3) Order Export & Order Import For WooCommerce
Another excellent plugin to export WooCommerce orders is Order Export & Order Import. It has a free version with basic features and three premium plans that start at 69 USD per year.
Installation and Activation
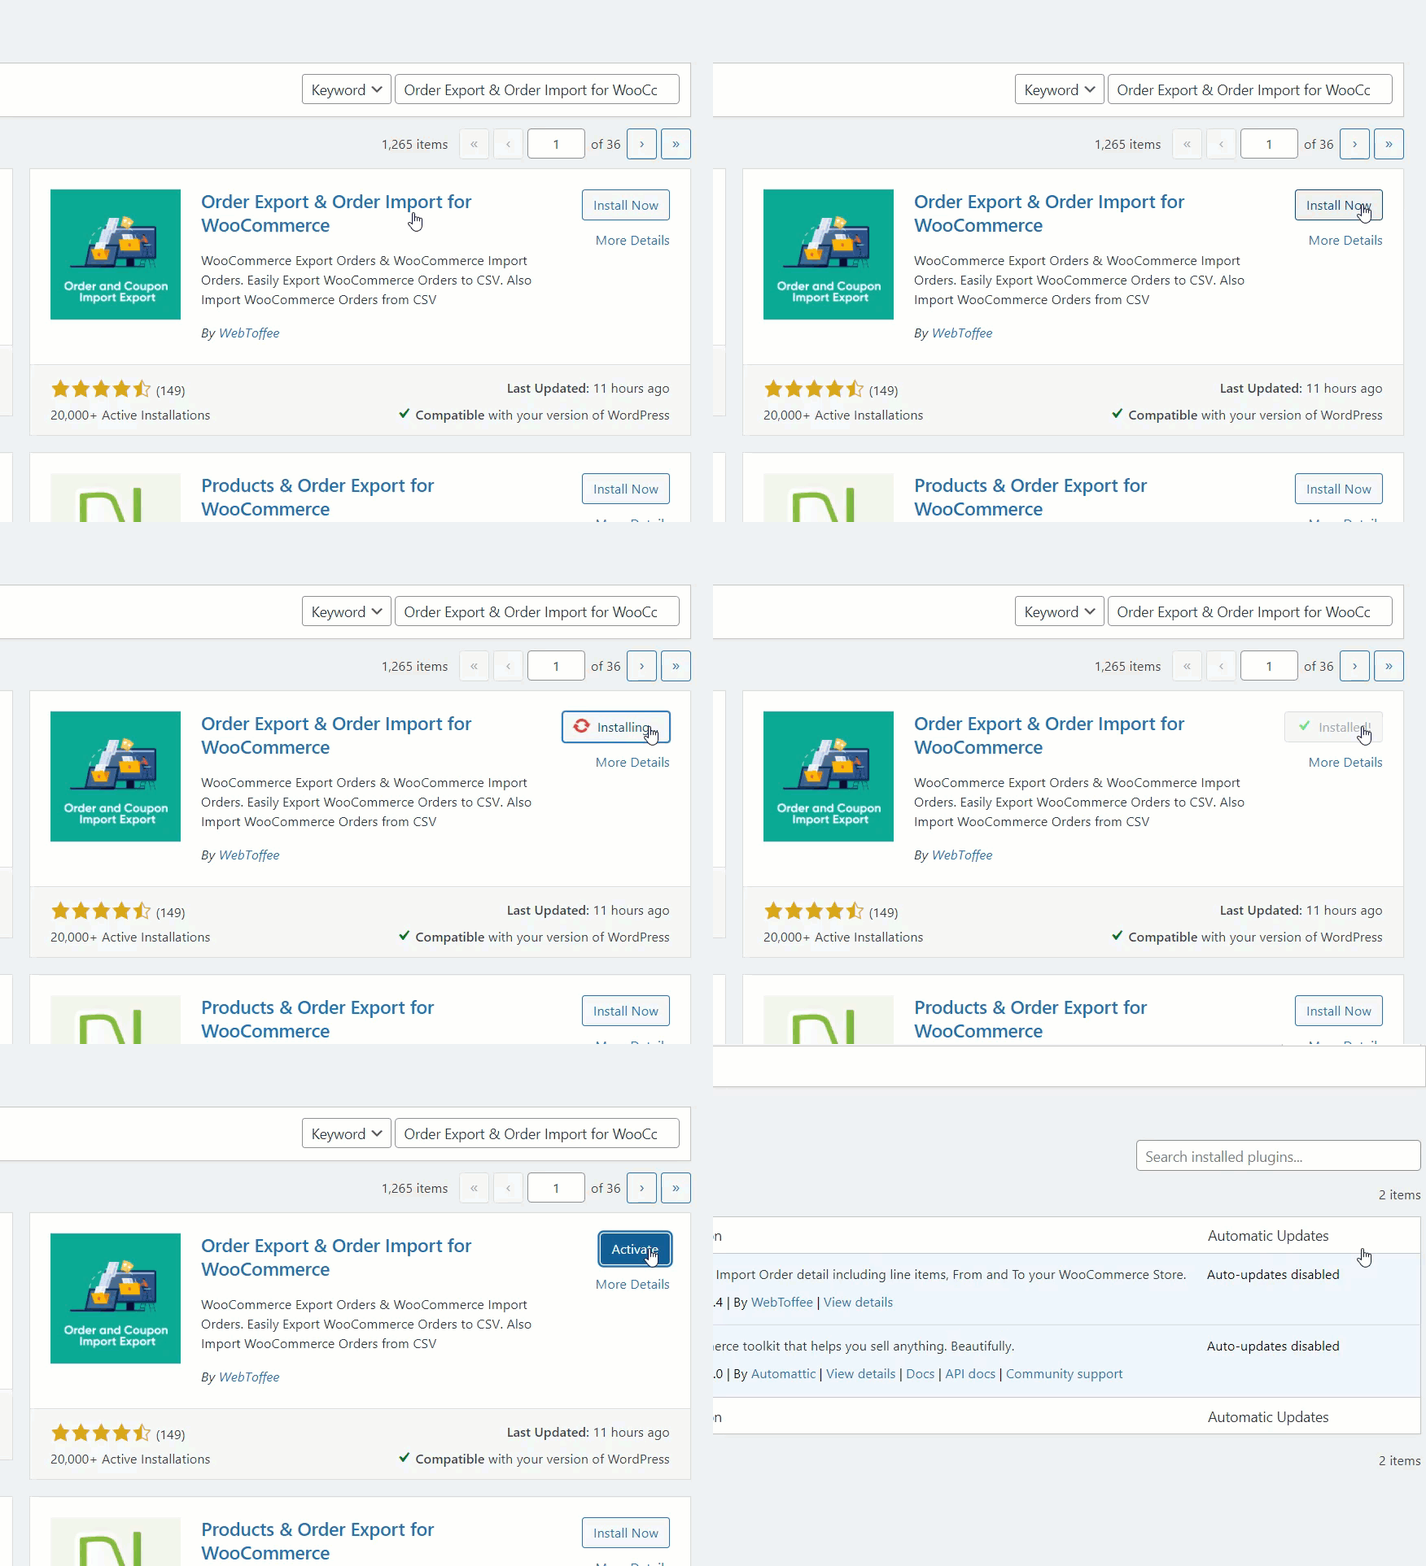
First, you need to install and activate this tool on your site, so in your WordPress dashboard, go to Plugins > Add New and look for Order Export & Order Import for WooCommerce. Then, install it and activate it.
After that, you will see some new settings under WooCommerce in the sidebar.
Plugin Configuration
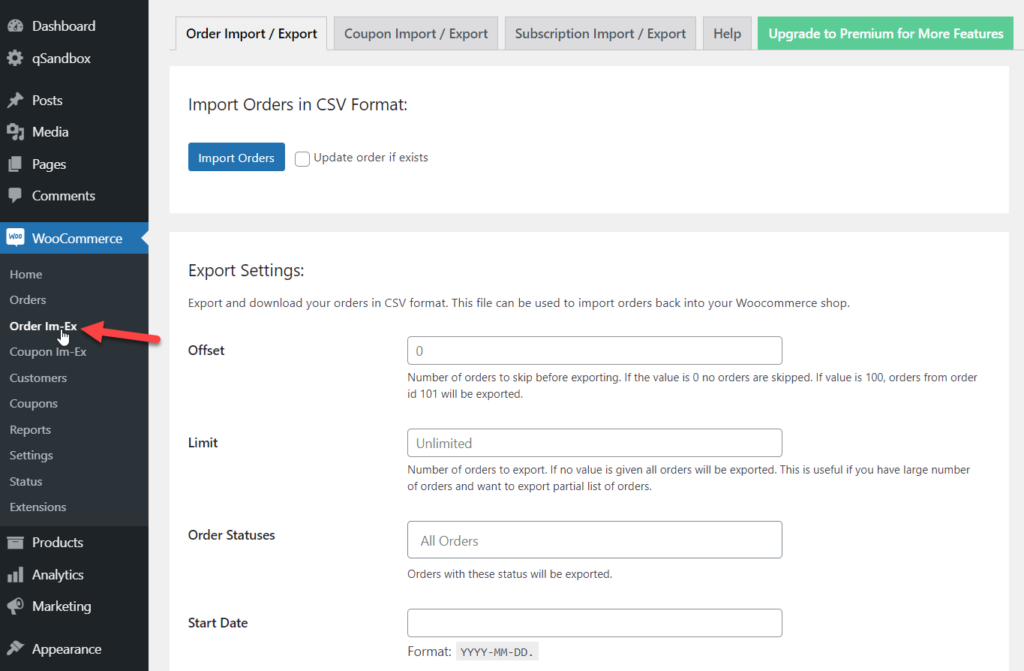
To export your customer orders, go to the Order Im-Ex.
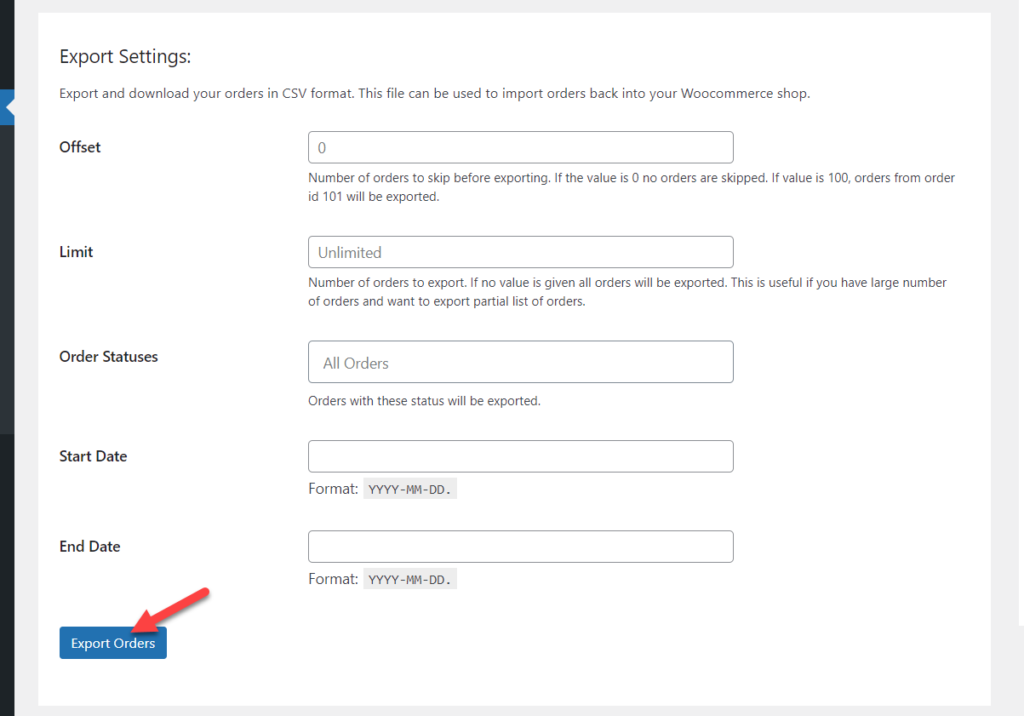
From here, you can export/import your customer orders. In this section, we’ll show you how to export orders, so choose the date range you want and press Export Orders.
The plugin will create a custom CSV file with your WooCommerce orders that you can use. As you can see, this tool doesn’t have as many options as Advanced Order Export but it’s easy to use and gets the job done.
After you export orders from your WooCommerce store, you’ll probably need to import them to another store. Let’s see how to do that.
How To Import Orders in WooCommerce
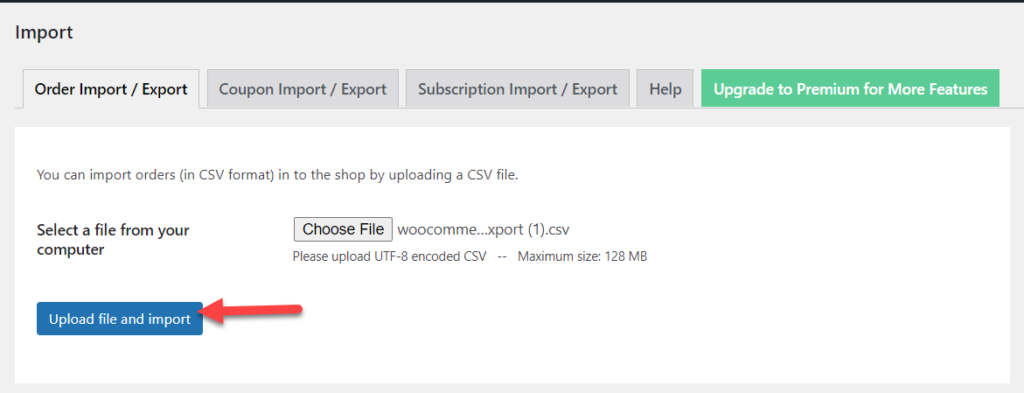
To import orders, you’ll need the Order Export & Order Import plugin, so first, log in to your store and install it. As you’ll import orders, you’ll need to use the import function, so click Import Orders.
Then, choose the CSV file you have downloaded in the previous step, and press Upload file and import.
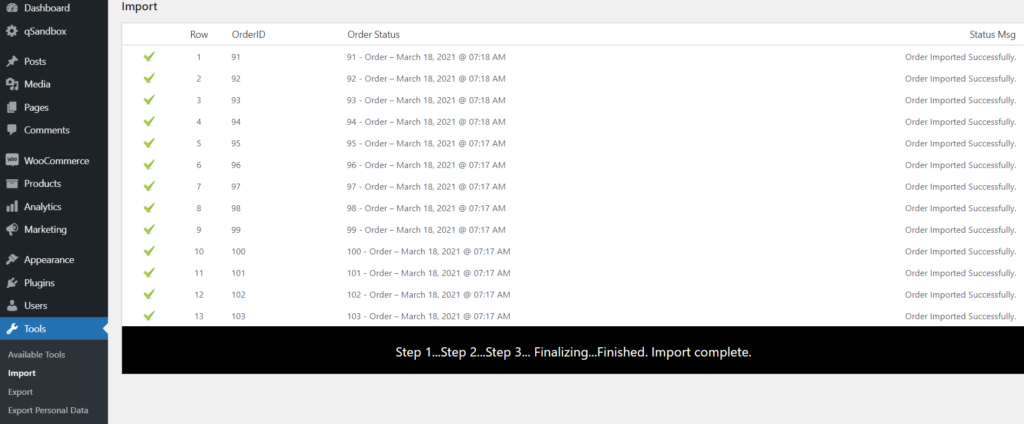
The plugin will start importing your orders and once it finishes, it will show you the detail of the orders it imported. If you have many orders, this may take a few minutes, so be patient.
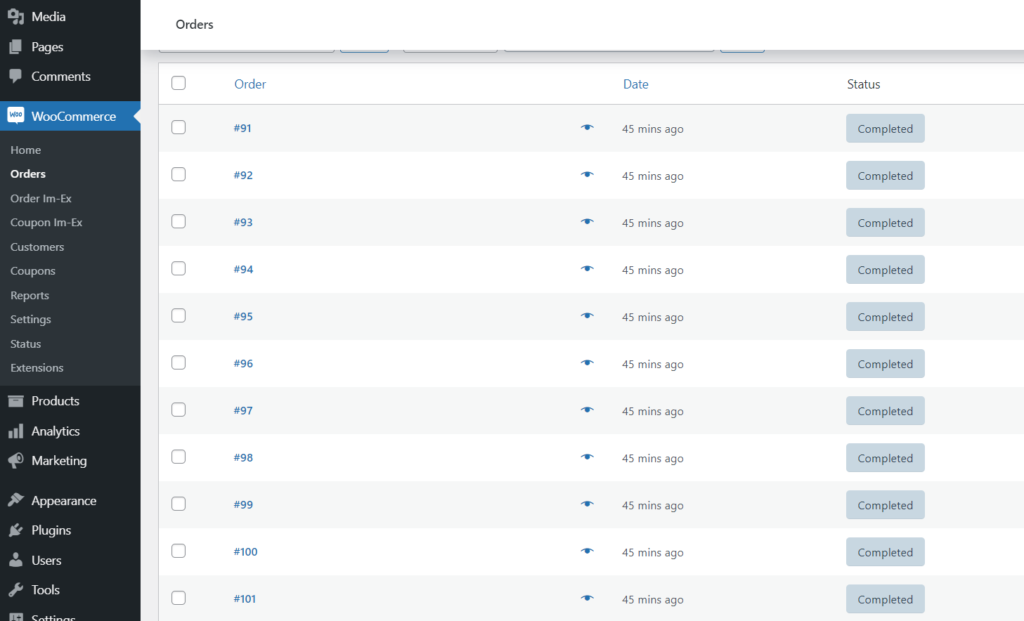
After that, let’s verify that everything went well, so go to WooCommerce > Orders and see if the orders appear there.
You have successfully imported all your WooCommerce orders. This way, you can easily export and import orders to your eCommerce store.
How To Export WooCommerce Products
If you’re migrating your store, apart from exporting your orders, you’ll probably have to export your products too. Let’s see how to do it in a few steps. For this demonstration, we’ll use the built-in WooCommerce exporter.
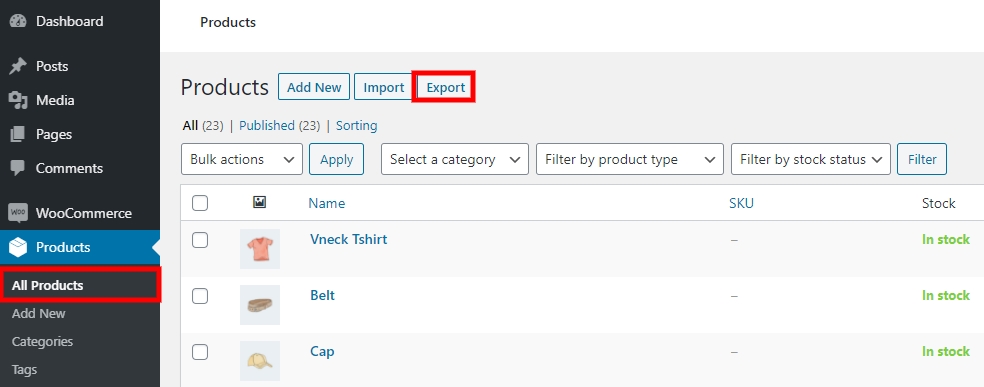
In your WordPress admin dashboard, go to Products > All Products and click Export.
You’ll be able to export products based on columns, product types, and categories. Once you configure what you want to export, simply press Generate CSV and that’s it.
For more information about details on this process and the plugins, you can use, check out our full guide on how to export products in WooCommerce.
How To Export Customers in WooCommerce
Another important element when migrating your store is to export your WooCommerce customers. To do this, you’ll need a plugin, so let’s see the process using Import and Export Users and Customers.
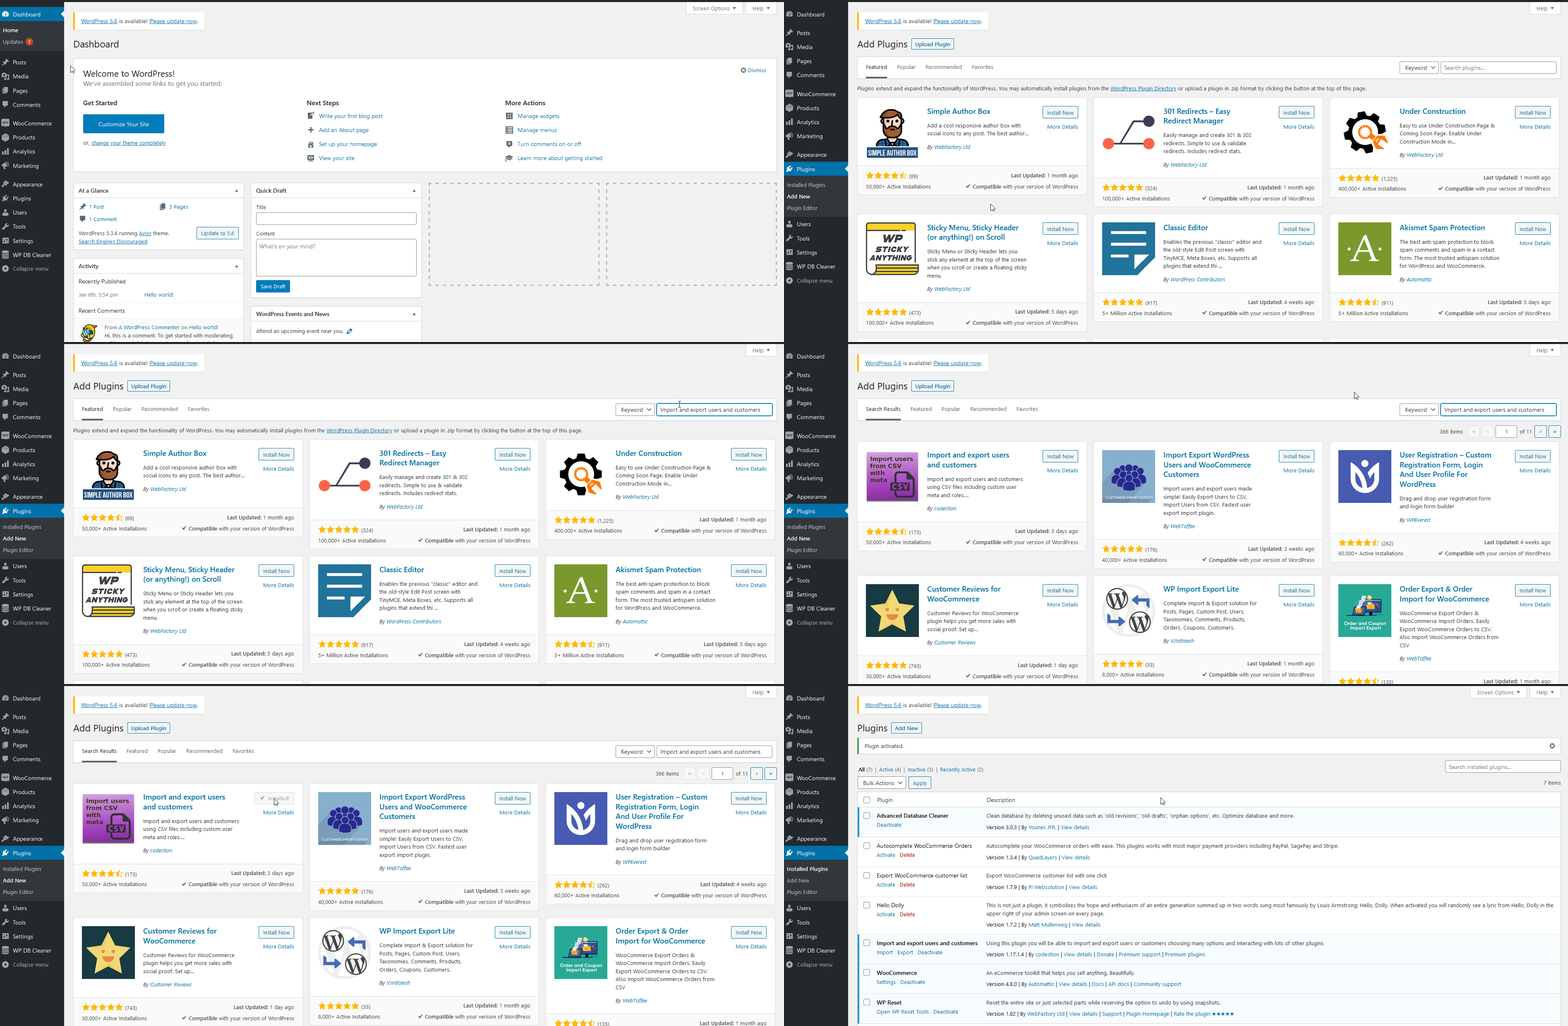
First, install and activate the plugin on your WooCommerce store.
After that, you will have a new section called Import and export users and customers under the Tools section. Go there and navigate to the Export tab.
Select the roles and dates you want and press Download to create a CSV file with all your customers.
Additionally, this plugin also allows you to import your users. For a detailed step-by-step guide, check out our tutorial on how to import and export customers in WooCommerce.
How To Autocomplete Orders
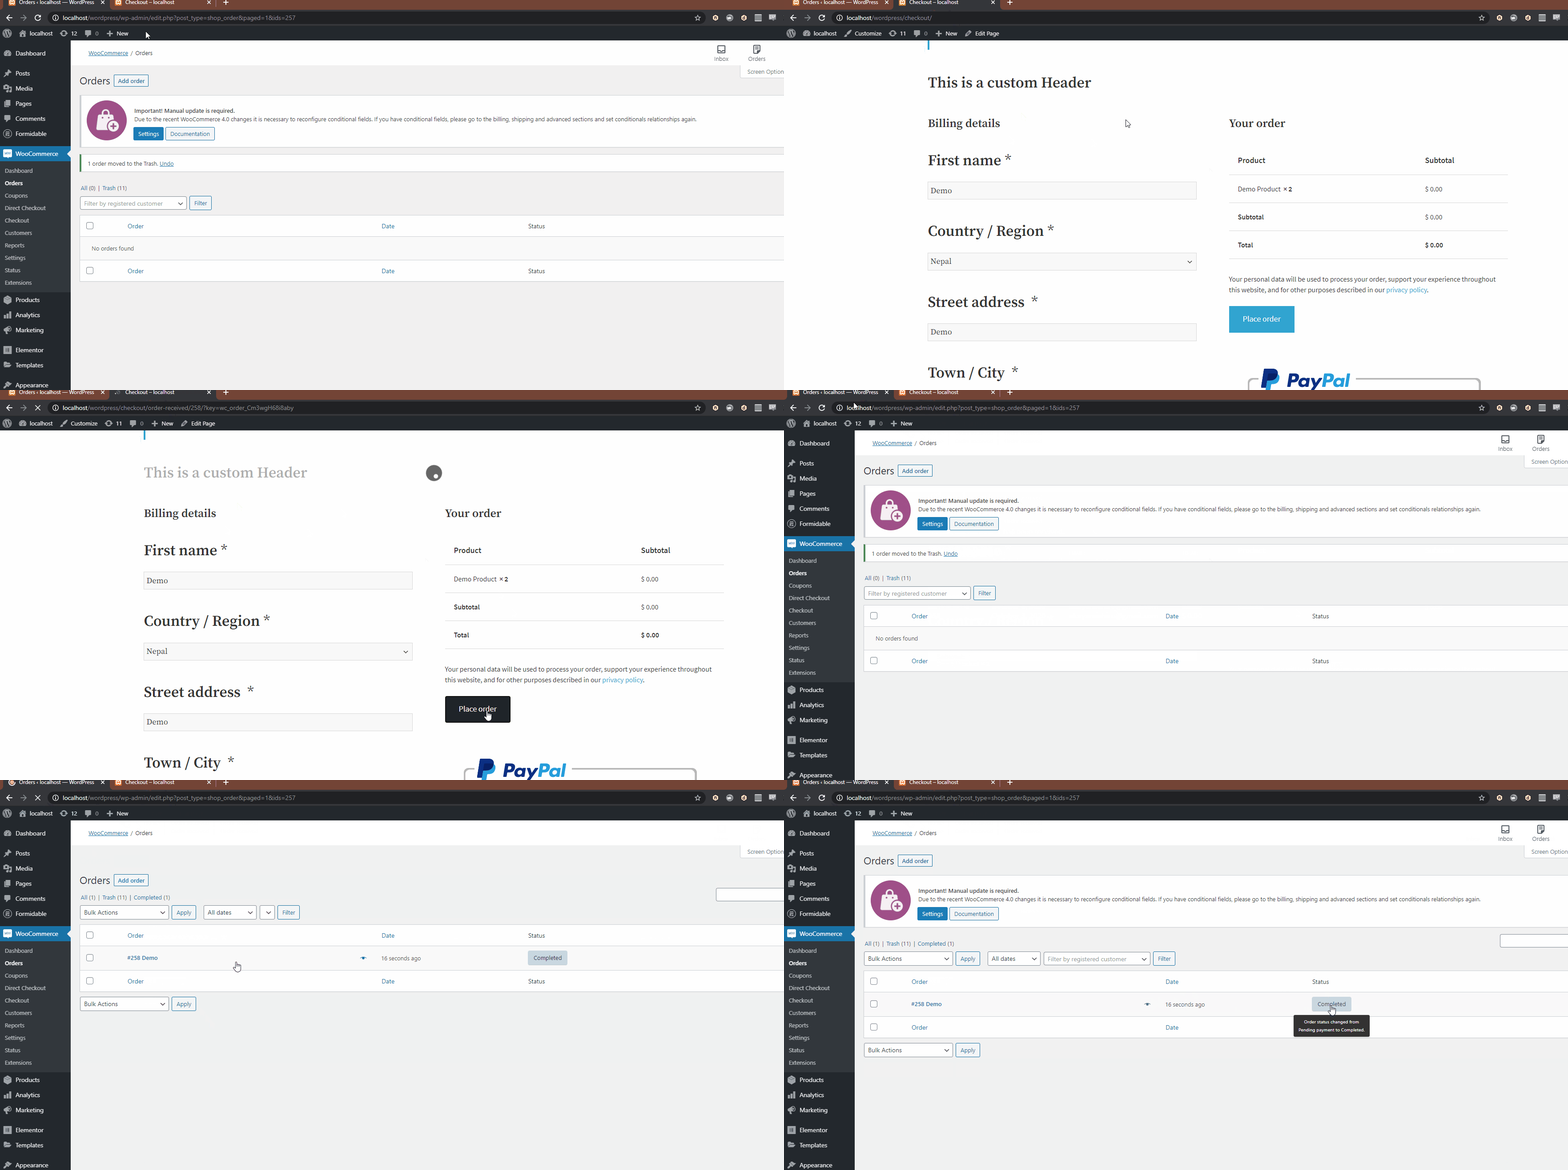
One interesting option to increase your conversion rates is to autocomplete orders on your store and avoid having pending orders for hours. This is an excellent alternative especially for stores that sell virtual and downloadable products. Let’s see how you can autocomplete WooCommerce orders and increase sales.
The easiest way to do it is by using a plugin. For this demonstration, we’ll use AutoComplete WooCommerce Orders.
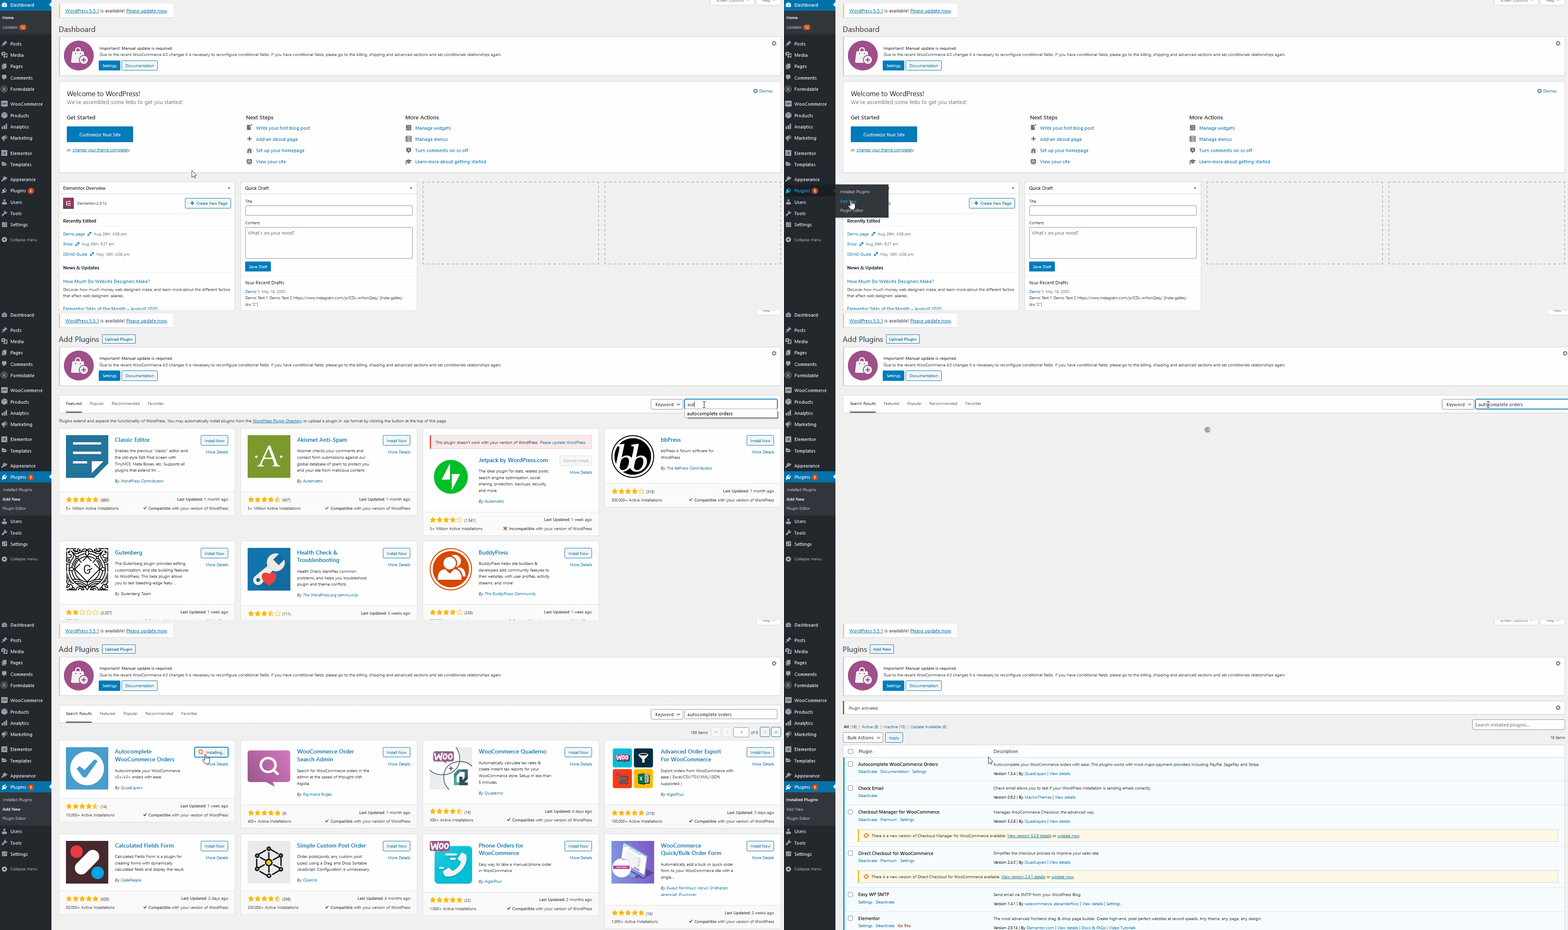
First, in your WordPress dashboard, go to Plugins > Add New and search for this plugin. Then install it and activate it.
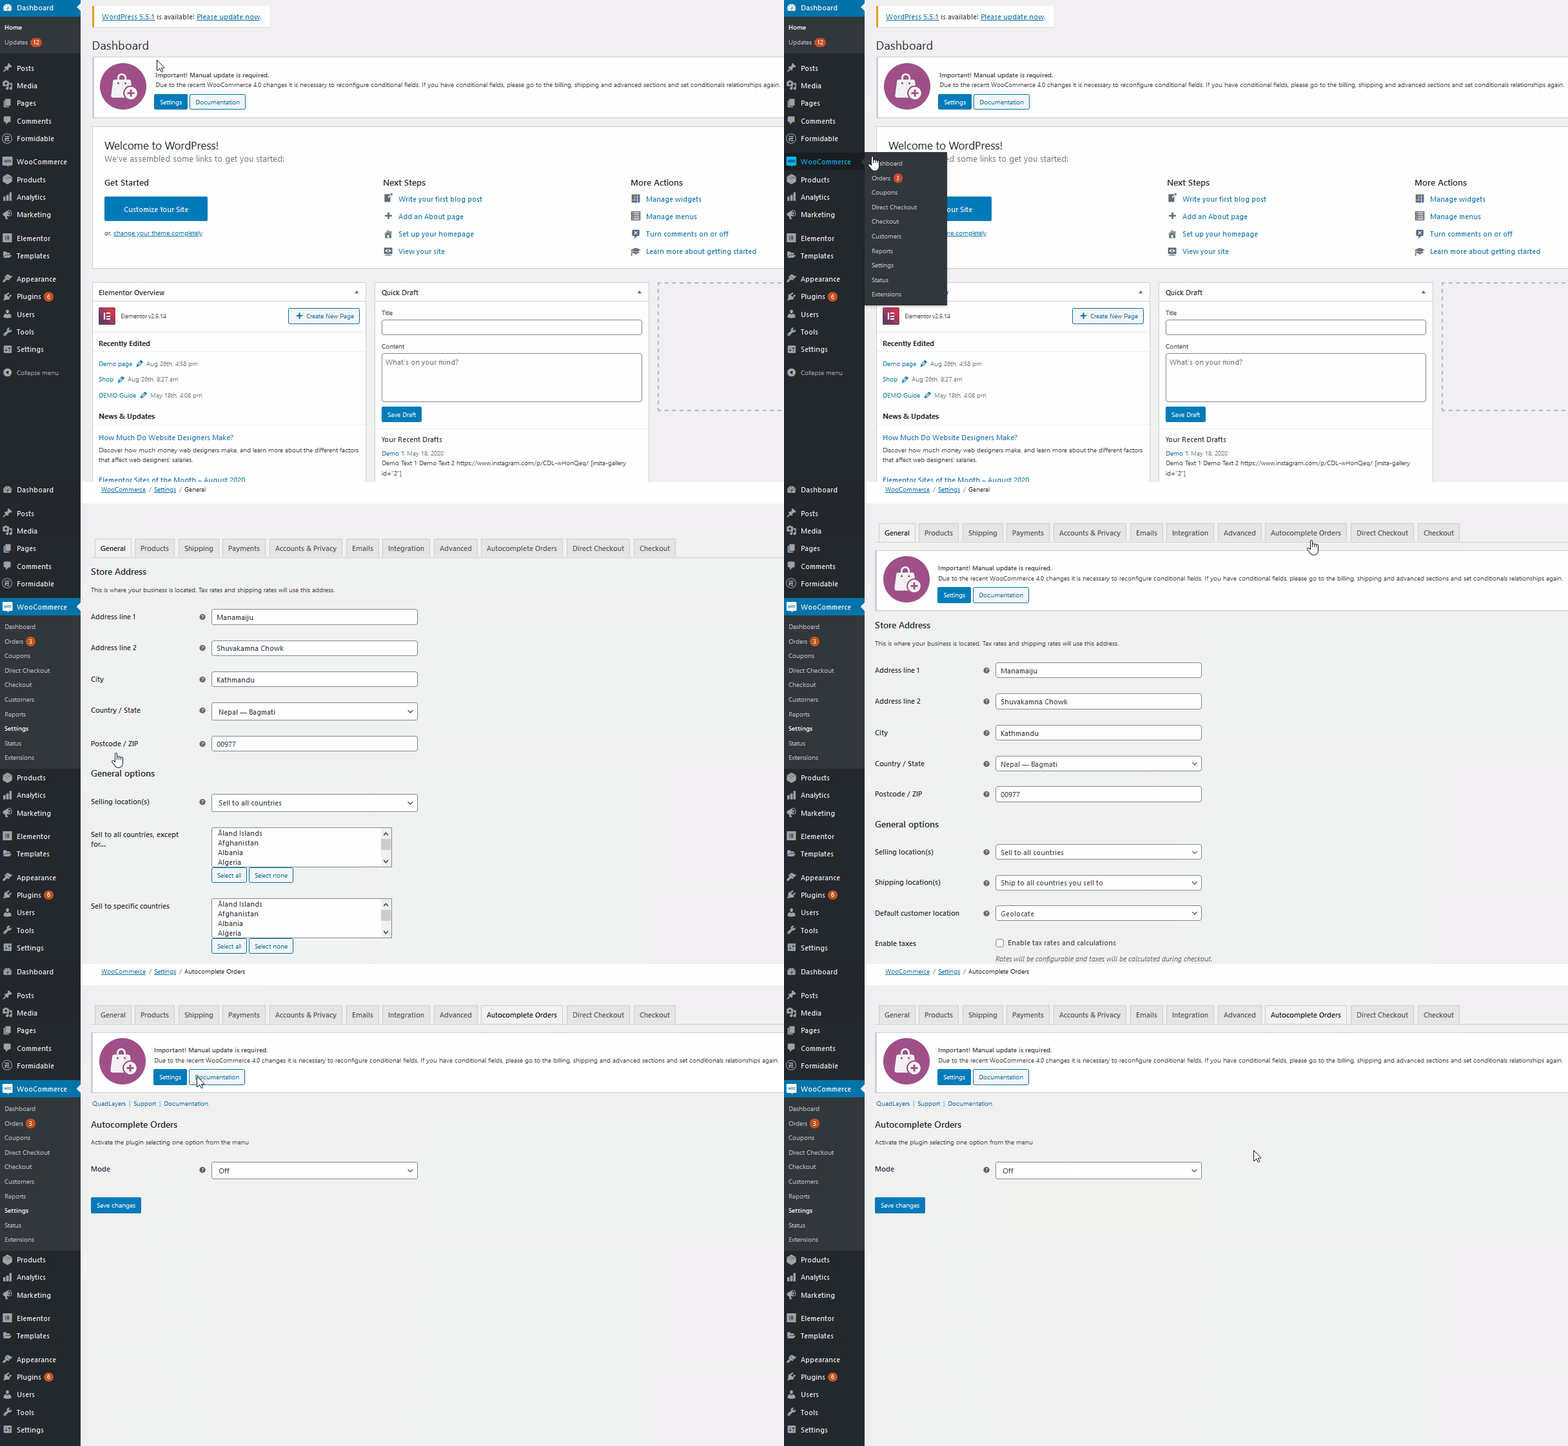
Then go to WooCommerce > Settings > Autocomplete orders. There, you will be able to select the type of order you want to autocomplete:
- Paid orders of virtual products only
- All paid orders of any product
- Any order (paid or unpaid)
To complete the configuration, you’ll need a PayPal token, so set up a PayPal data transfer token here. It will help the plugin mark the verified orders. You need to use a PayPal business account.
Go to the PayPal settings and seller tools and choose the Business preferences option. Turn on the auto-return feature and scroll to the bottom where you will see the personalized identity token. Additionally, turn on the data transfer from the same screen. Now copy the token and place it somewhere handy.
After that, you need to set up the PayPal data transfer token on your WooCommerce store, so go to the Payments tab. You will see the PayPal payment processor there. Click Manage, paste the PayPal identity token in the appropriate field and save the settings.
That’s it! From now on, the plugin will take care of the rest and automatically complete the orders.
For a more detailed explanation of the process, check out our guide on how to autocomplete WooCommerce orders.
Conclusion
All in all, there are a few situations where you may have to export orders in WooCommerce:
- When you want to save the data to a local storage
- If you’re migrating an existing store to a new one
- When you’re changing your hosting company
The easiest way to do this is by using a dedicated order export plugin. In this guide, we’ve shown you how to export orders using two different tools:
- WP All Import
- Advanced Order Export for WooCommerce
- Order Export and Order Import
All these plugins make exporting orders quite simple. Once you install the plugin, you can start exporting custom orders based on your interests. WP All Import is a premium tool while the other two are freemium tools. Which one should you use? It depends on your needs.
WP All Import comes with plenty of great features and allows you to import orders too. It has a demo but doesn’t include a free version. Advanced Order Export, on the other hand, has more options to filter orders to export but doesn’t come with importing order features. The Order Export and Order Import plugin has a free version and overall doesn’t offer as many options as the other tools but includes features to import orders.
If you want to have a look at other tools to export WooCommerce orders, check out our list of the best plugins.
We hope you enjoyed the post and found it helpful. Please consider sharing it on social media and keep an eye on our blog for more useful content.
Have you ever exported orders from your store? Which tool did you use? Let us know in the comments section below.

