Having problems with the jumping header in Divi? You’ve come to the right place. In this guide, we’ll show you 3 methods to easily fix the jumping header issue in Divi step-by-step.
Divi Jumping Header
With millions of users around the world, Divi is one of the most popular WordPress themes out there. It comes with plenty of features that allow you to hide the header, customize the WooCommerce Product page, and even include the Add to Cart Button in Shop pages. However, Divi also has a few common issues. We’ve already seen how to fix the problem with the contact form and today we’ll show you how to fix the jumping header issue.
Many users experience problems with the header in Divi, so in this guide, we’ll see how to fix it. Before we jump into the guide, let’s understand what issues this problem causes and why it occurs.
What’s the Divi jumping header?
Sometimes, when you visit some sites that use Divi, you notice that when the page is loading, the header isn’t at the top. Instead, it jumps until the page is fully loaded and that’s why it’s known as Divi jumping header.
Why does the jumping header happen?
The jumping header in Divi occurs due to a conflict between CSS and JavaScript. When you apply changes to your site using the Customizer, Divi uses JavaScript and adds those changes via style attributes to both your padding-top and top values using CSS. The problem is that the browser renders CSS before JavaScript and this delay in the loading time creates the jumping header illusion.
To fix the jumping header in Divi, you need to locate the padding-top and top values and check the padding that is injected using Javascript. Then, simply add them to your stylesheet. Let’s have a look at how to do this.
How to Fix The Jumping Header In Divi?
The best way to fix the jumping header issue in Divi is to manually mention the padding-top and some other CSS class values through the style.css file or the WordPress customizer. Let’s see how to do this step-by-step.
NOTE: To avoid causing any problems on your site, we recommend you test these changes in staging mode first. Some WordPress hosting companies have a staging environment by default but if your hosting provider doesn’t have one, you can also create a local staging environment.
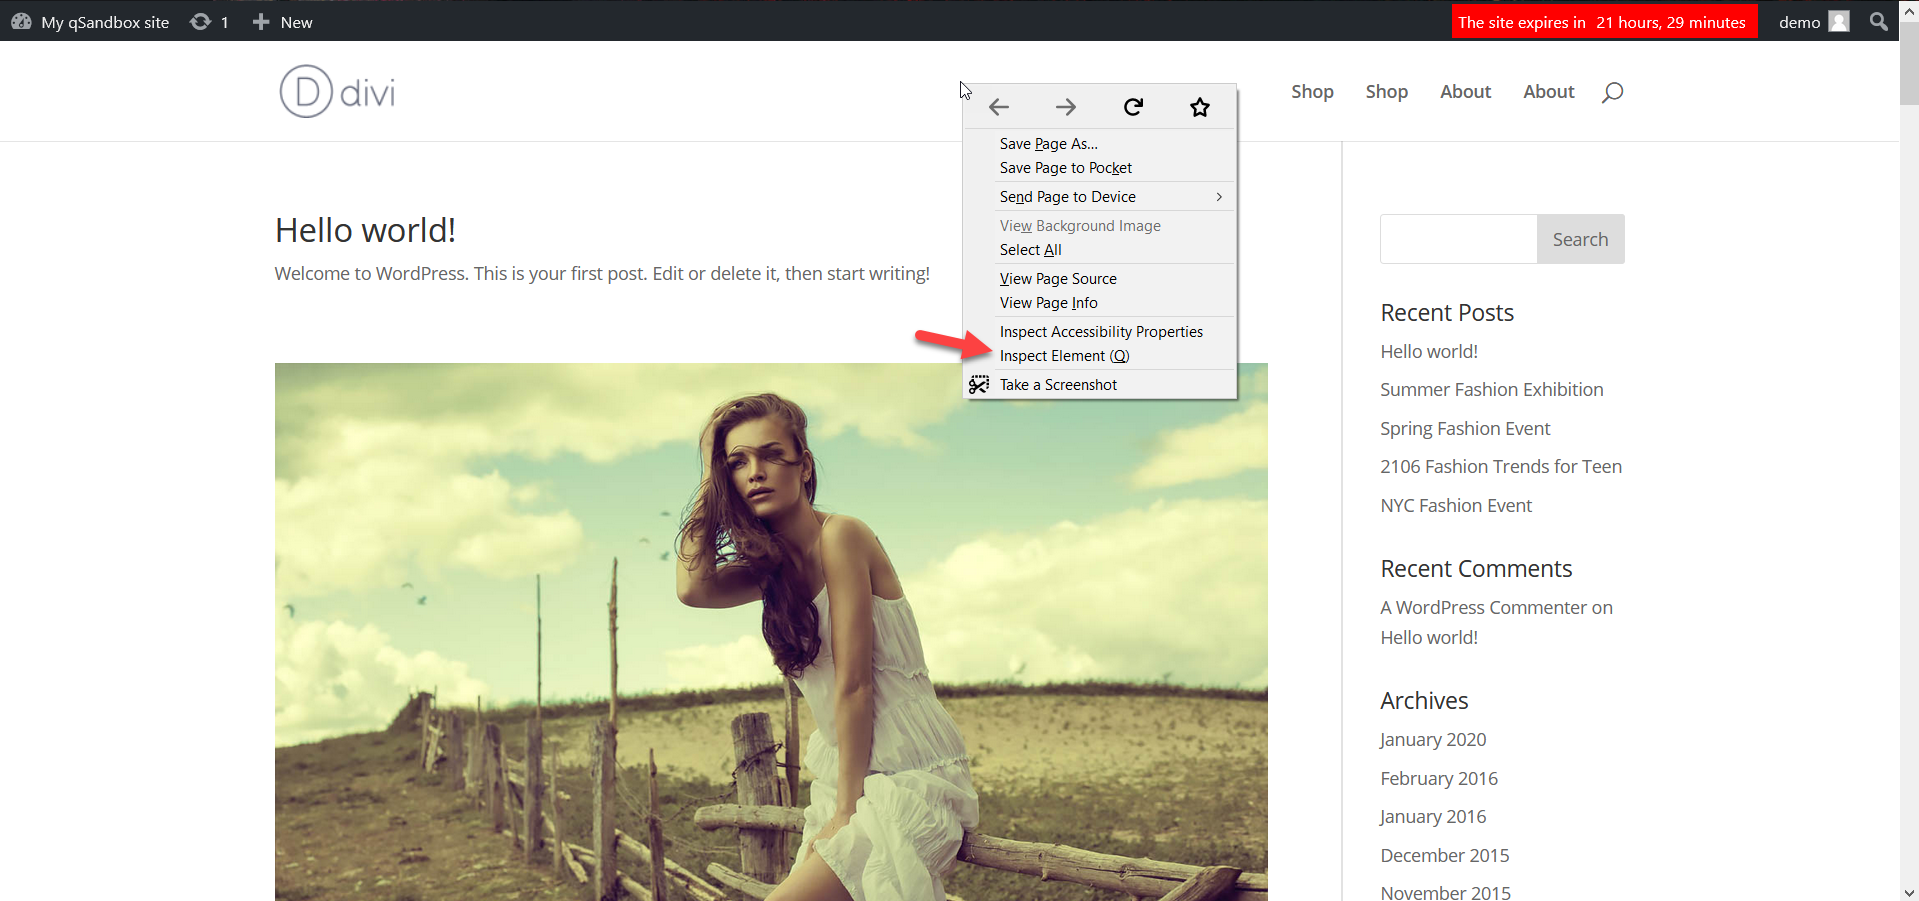
Step 1: Inspection
First, open your website in a browser and run the Inspect tool on your header. Simply place your mouse on the header, right-click, and select Inspect element (or simply Inspect in other browsers).
In the Inspector tab, look for 2 CSS values.
- padding-top
- top
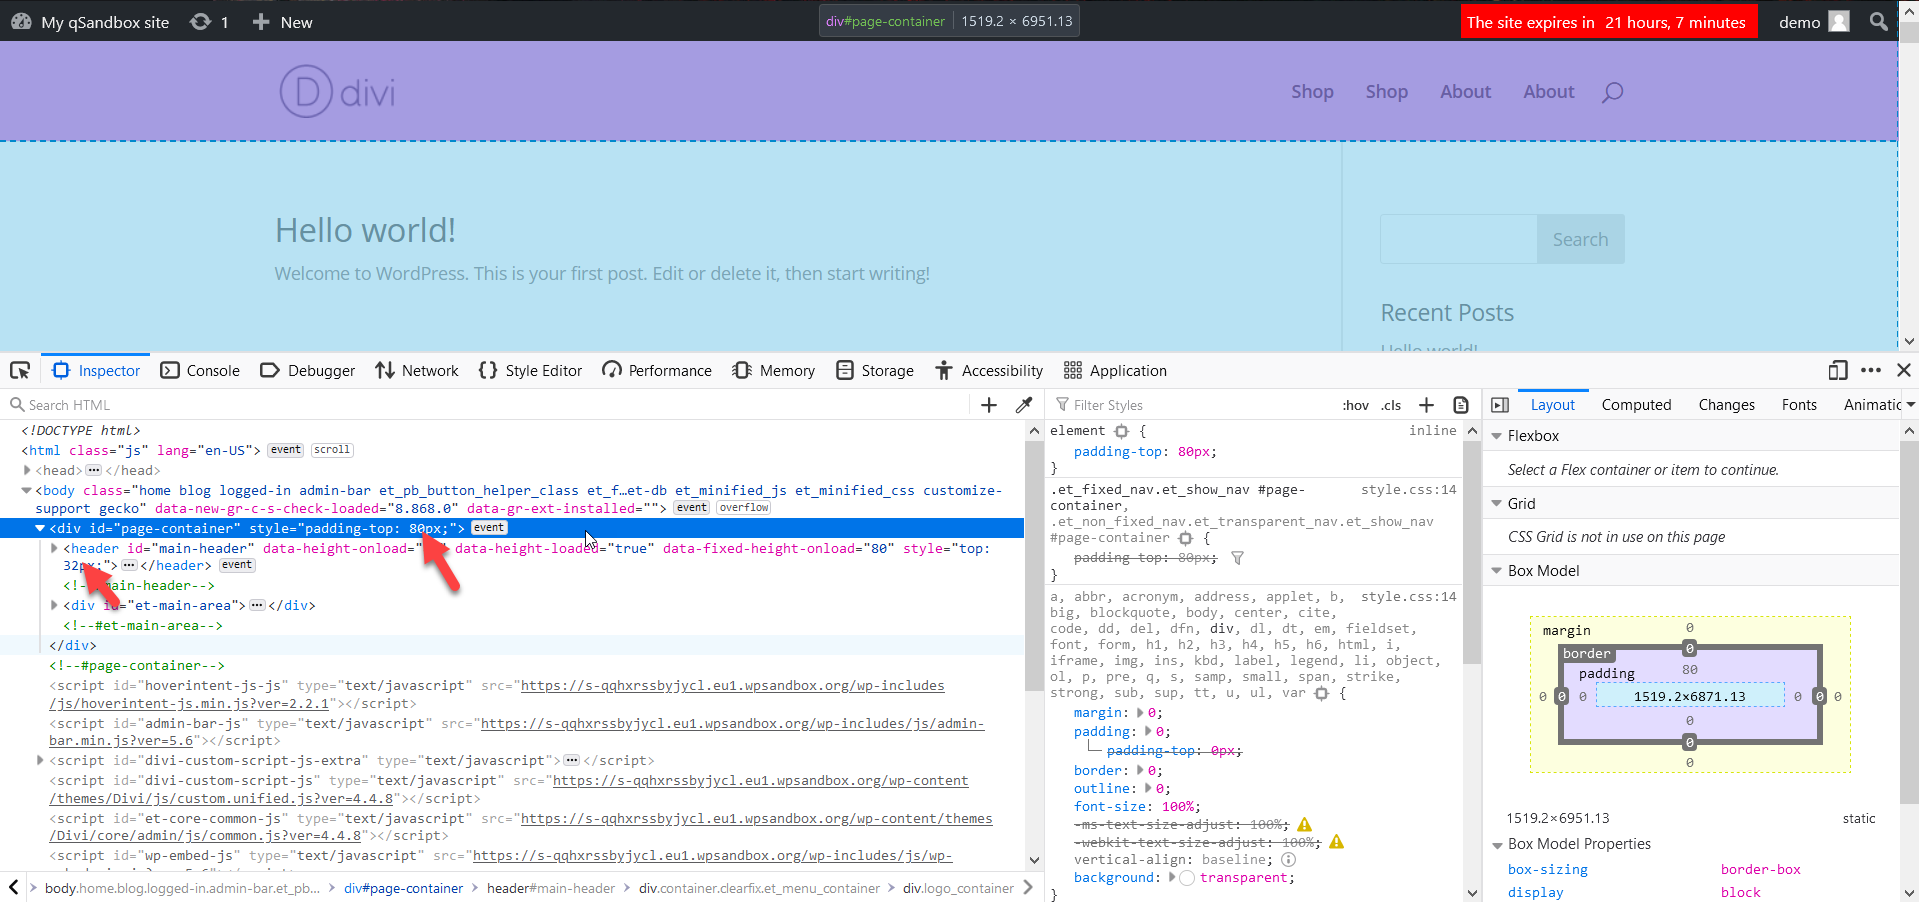
As you can see in our example, the padding-top is 80 px and the top is 32 px. These sizes are automatically generated by the server, so we need to mention them in our website’s style.css file.
Step 2: Adding CSS to Divi
The next step to fix the jumping header issue in Divi is to add CSS code to your theme. Simply copy the following CSS code.
#page-container {
padding-top: 80px;
}

#main-header {
top: 32px;
}
These are the values for our website but they may be different for your site, so remember to replace the values accordingly. Now, you need to add this code to your site. There are 3 methods to do this:
- Using the Divi Theme Editor
- From the WordPress Customizer
- Using Code Snippets
Method 1: Divi Theme Editor
The Divi theme comes with an inbuilt theme editor that you can find under Divi > Theme Options > Custom CSS.
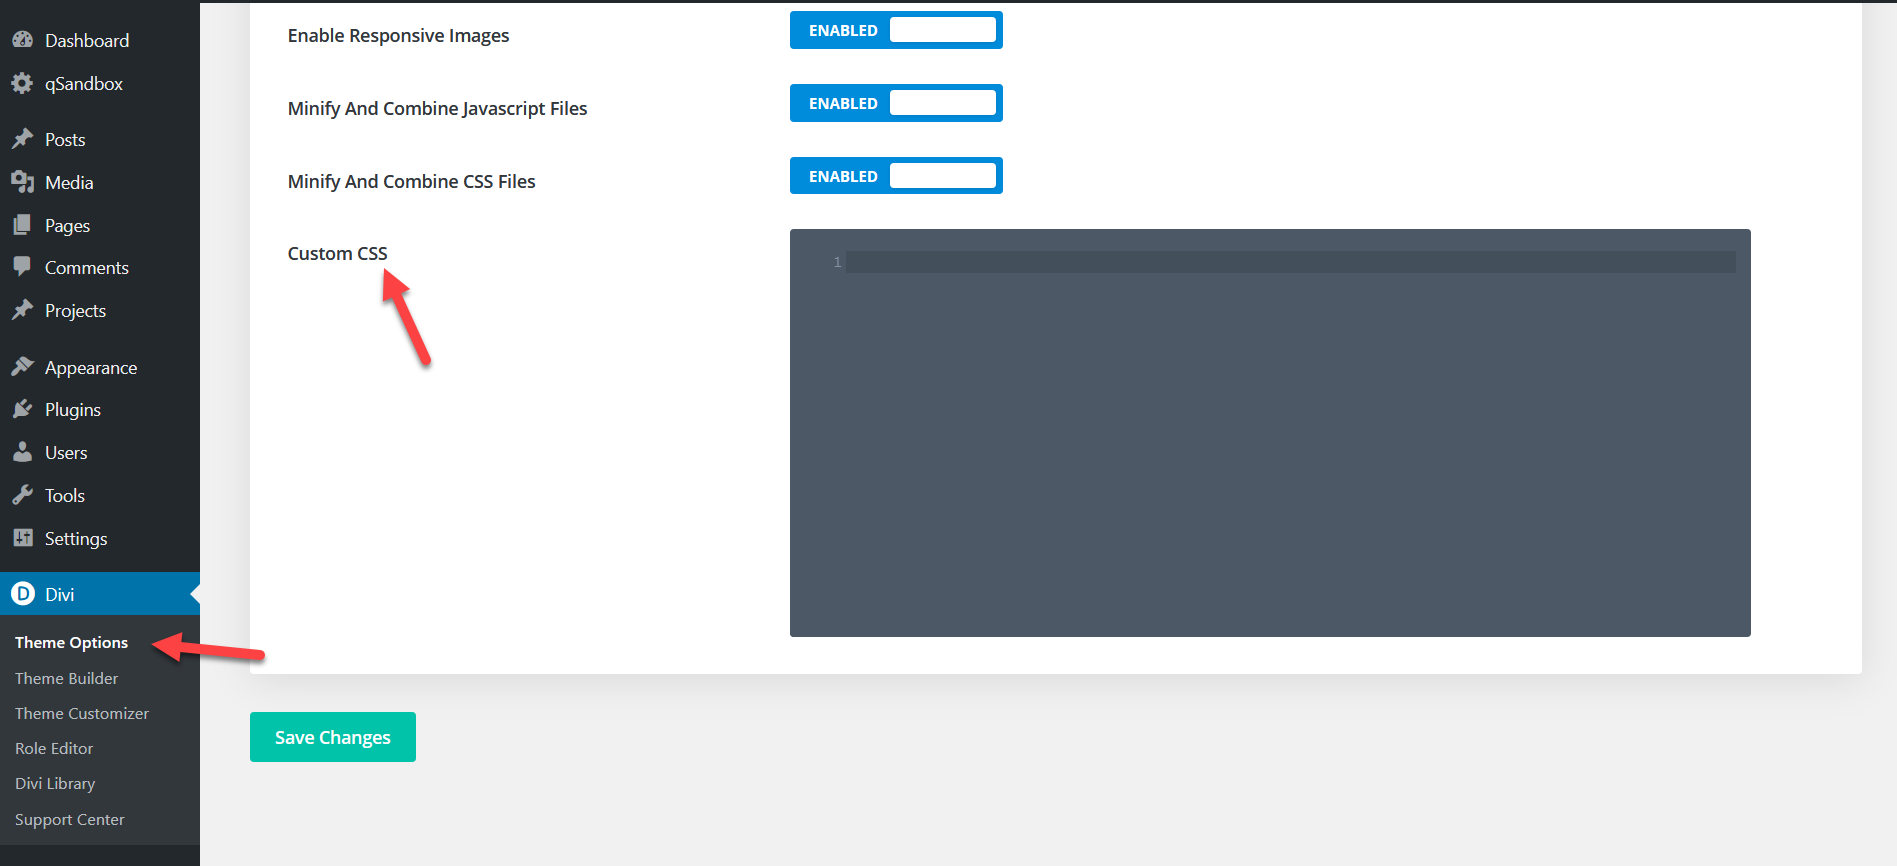
Once you’re there, paste the code you’ve just copied and save the changes.

That’s it! Your jumping header should be fixed!
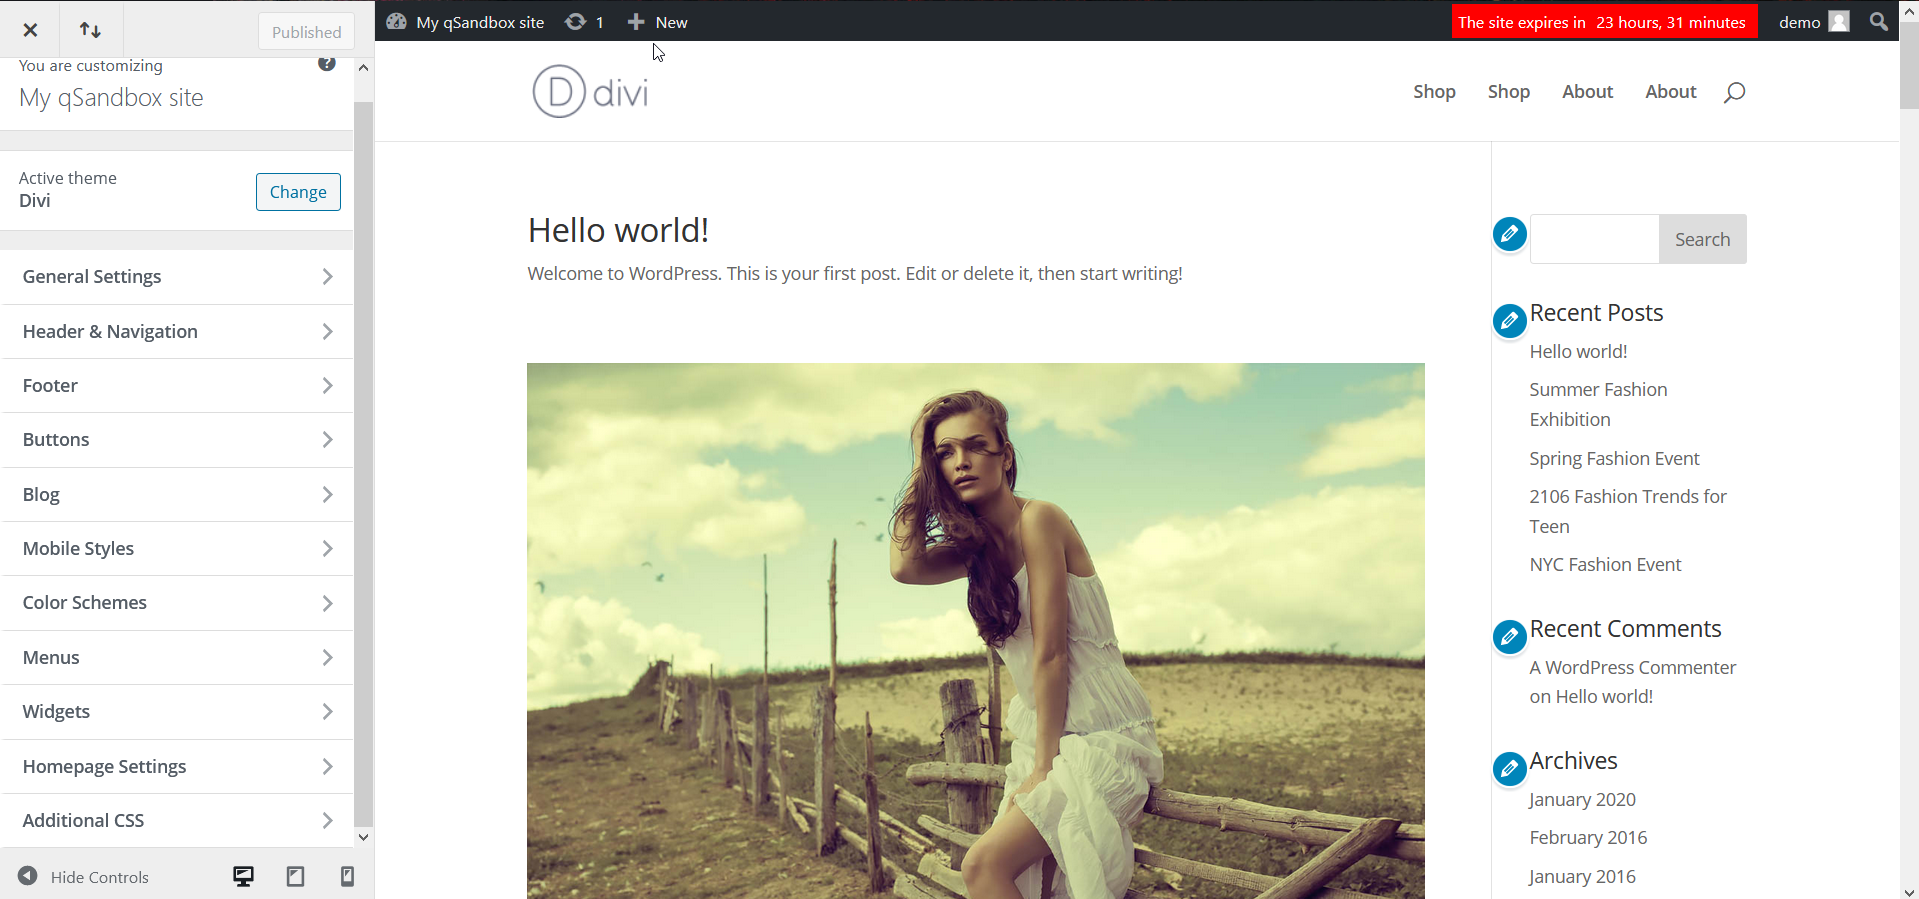
Method 2: WordPress Customizer – Additional CSS
The second option is to use the WordPress Customizer. In your WordPress dashboard, go to Appearance > Customize. Then, go to the Additional CSS section and paste the CSS code you’ve copied in the previous step.
After that, publish the changes and that’s it!
Method 3: Code Snippets
If you don’t feel comfortable adding code directly to your theme’s files, you can use Code Snippets, an excellent tool to add HTML, PHP, CSS, and JavaScript code snippets to your site.
First, in your WordPress dashboard, go to Plugins > Add New and look for Code Snippets. Install it and activate it on your website.
After activating the plugin, you will see the plugin’s settings in the WordPress admin section.

Code Snippets allows you to add or edit the existing code on your site. For this demo, we’ll edit the existing CSS snippet. This plugin comes with one dummy CSS snippet by default that you can activate.
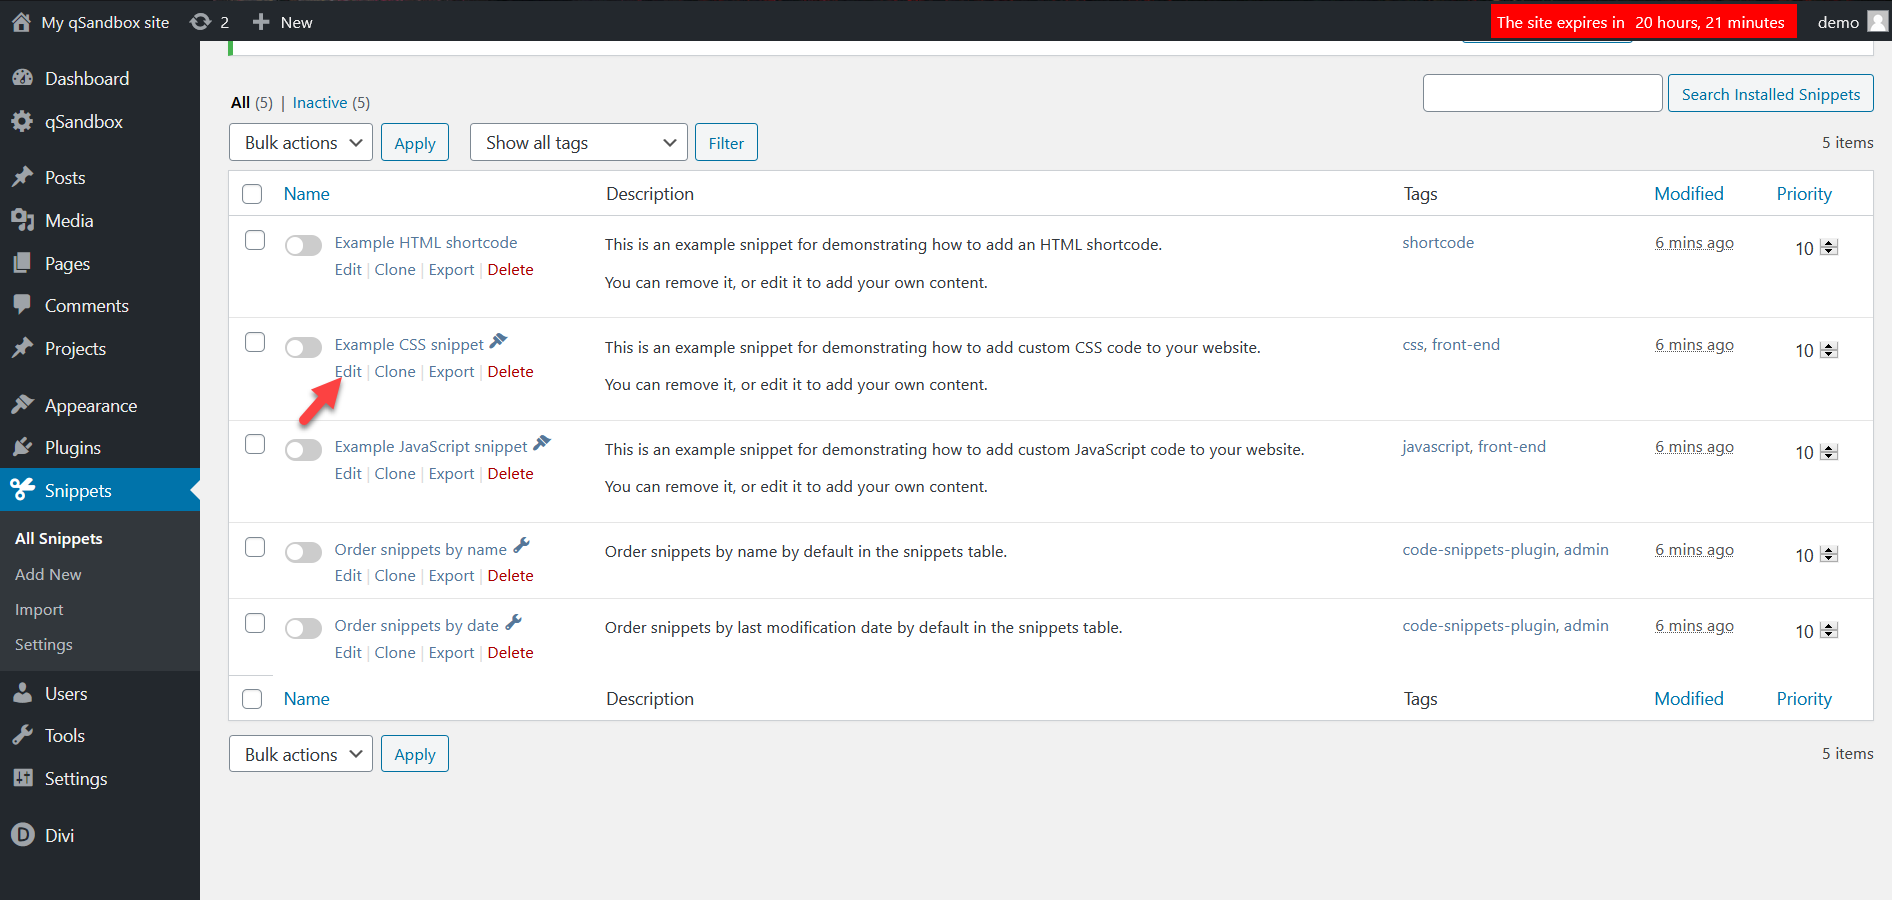
Simply click on the snippet to edit it. Then rename it and add the CSS code you’ve copied in the previous step.
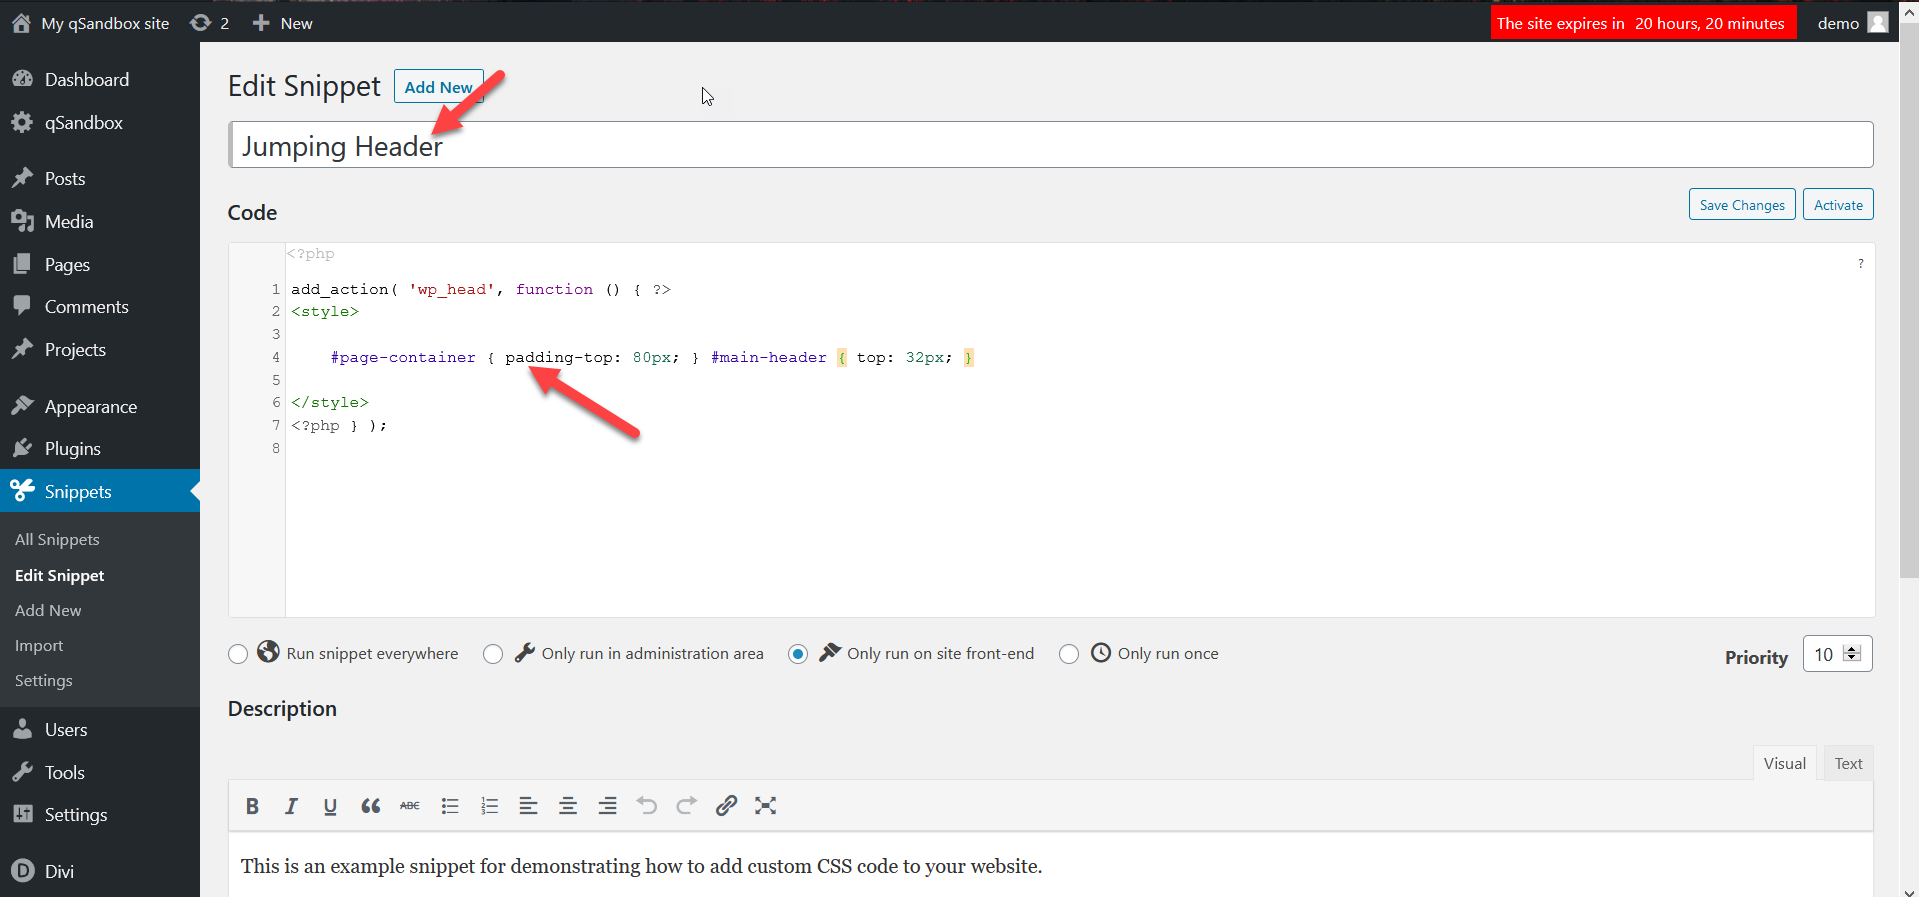
After that simply save the modifications and you are good to go.
Step 3: Clearing Your Cache
After applying the changes on your site, you need to clear the cache. There are many WordPress caching plugins available on the market. If you’re not sure which one to use, choose your favorite from this list.
After installing and activating the caching plugin of your choice, you will need to clear your cache. For example, we’re using WP Fastest Cache, so in our WordPress dashboard, we simply go to the plugin’s settings and press a button to clear the entire WordPress website cache.

That’s it! Now your header in Divi won’t jump anymore.
Conclusion
All in all, the jumping header issue in Divi is very common. The good news is that it’s pretty simple to solve too. In this guide, we’ve shown you how to fix this problem by adding a few lines of CSS code to your WordPress installation. There are 3 different ways you can do this:
- Add the code to your WordPress theme’s style.css file
- Add the code using the WordPress Customizer
- Use Code Snippets
All of these methods will fix the jumping header issue, so choose the one that suits you best. Additionally, if after adding the CSS code your header still jumps, remember to clear your cache (local, browser, and DNS cache). You can also access your site from another computer or using incognito mode.
For more tutorials about Divi, check out the following guides:
- How to make any Divi element sticky
- Divi Contact Form isn’t working: How to fix it
- How to Fix the Divi timeout error
Finally, we hope you have found this article helpful. If you did, please share this post on social media. Have you experienced any issues with Divi? Did you have any problems following this guide? Let us know in the comments section below.

This method seems to work on Chrome for me but leaves a large gap on Firefox. Let me know if you end up with the same results. I have reverted to the jumping header in the meantime until I can find a fix.
To the best of my recollection, you only need to change the default settings for the #page-container.
Regardless of that, the padding-top is INLINE code (because it is getting added via Javascript) and if you want to overwrite inline code, you need to use !important.
So it should look something like this:
@media screen and (min-width: 981px) {
#page-container {
padding-top: 80px;
}
}
I have added a media query as the padding-top value on mobile devices (small laptops, smartphones, tablets, etc.) should be different than the value you need for desktops.
Hey thanks for the post, been looking for a solution to this. I added the following to my CSS:
#page-container {
padding-top: 79px;
}
#main-header {
margine-top: 11px;
}
There is nothing defined as top under #main-header. This has improved the jumping, but hasnt’ solved it fully.
It works great on Chrome but still jumping in the Firefox 🙂 anyway, thanks. Still nice add-on.
Thanks! This worked great for me on Chrome and Firefox. There is a gap in Firefox, BUT that’s only if I’m logged in. Once I log out it looks great.
You’re welcome, Pat
This solution no longer works with newest version of Divi, but I found a solution that did.
Use console to find Find the div<class="et_builder_inner_content or sticky_module that appears when the sticky header engages. That is the culprit. Copy the css selector for that element.
My solution in custom CSS looked like this:
div.et_pb_section_0_tb_header:nth-child(1){
top: 0!important;
}
It only appears to work in Chrome because Chrome has a built in feature that fixes jumping elements. https://www.theverge.com/2017/4/11/15260994/google-chrome-update-fixes-page-jumps-scroll-anchoring
Thanks for the info Ashton!