
How to Create Licenses in WooCommerce (Step-By-Step Guide)
Are you selling digital products through WooCommerce? Do you need to add an authentication system to prevent unauthorized users from using your product? If you are looking for a step-by-step guide to solve this issue, we have got you covered. This article will show you how to create licenses in WooCommerce and protect your products from third-party users.
But first, let’s see what WooCommerce licenses are and how they can be helpful.
Why Create Licenses in WooCommerce
Creating licenses in WooCommerce will help you prevent unauthorized use of your products.
Let’s say you are running a WordPress development company and selling premium plugins for a product. Since you sell it for a profit, you must ensure no third-party websites deliver the files for free. Otherwise, it will cause a big hole in your pocket. By default, there is no way to protect your files from unauthorized users.
But, if you have added a license validation to the plugin, you could protect your files.
If you search the internet for the nulled version of premium plugins, you will see several websites promoting the pirated version. To get rid of this issue, a license validation will come in handy.
Hence, adding licenses is a great way to protect your product and business.
How to Create Licenses in WooCommerce
This section will show you how to create licenses in WooCommerce.
Since WooCommerce doesn’t have this feature by default, we will use a dedicated license manager plugin. And thankfully, we have created one of the finest WooCommerce license manager plugins in the market – WooCommerce License Manager.
We will be using it to create a license inside the WooCommerce store.
1) Purchasing the Plugin
The first thing you need to do is, purchase the WooCommerce License Manager plugin. If you check the pricing section, you can see three subscription options there:
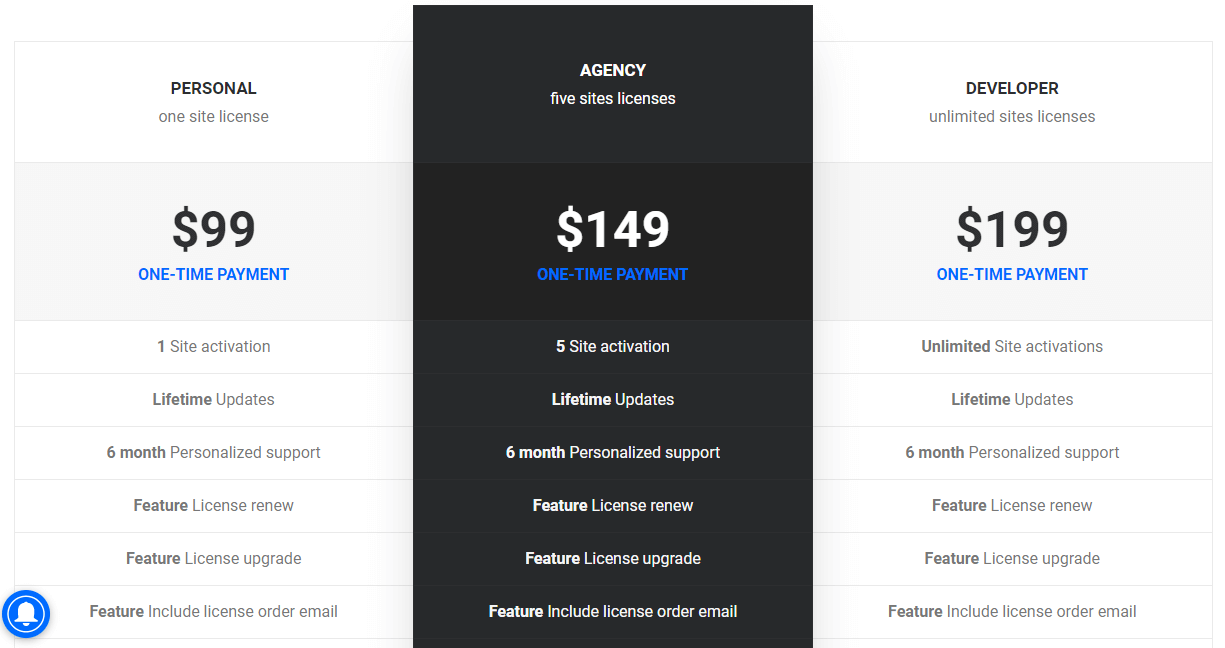
- Personal – 1 Website License – $99 (one-time fee)
- Agency – 5 Website Licenses – $149 (one-time fee)
- Developer – Unlimited Websites Licenses – $199 (one-time fee)
You can choose a plan according to your requirement. For example, the Personal subscription would be a good fit if you are an online store owner and need the plugin for only a single WooCommerce installation. On the other hand, when you work with multiple online stores or clients, the Agency or Developer plans are great.
In this case, we will be using the Developer subscription.
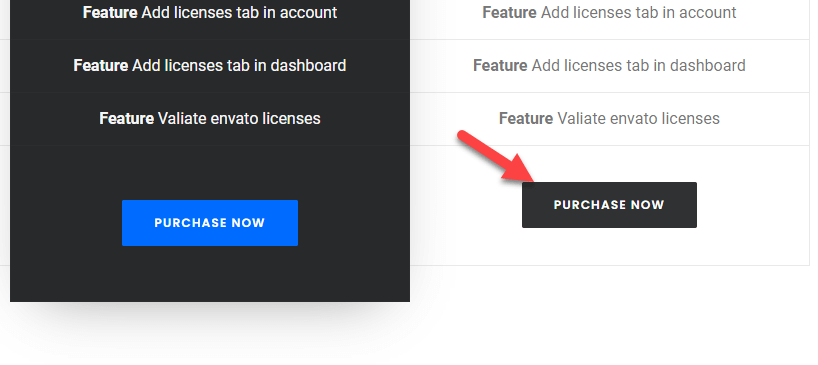
Soon, you will be redirected to the checkout page. You can complete the purchase with your PayPal account or Paddle.
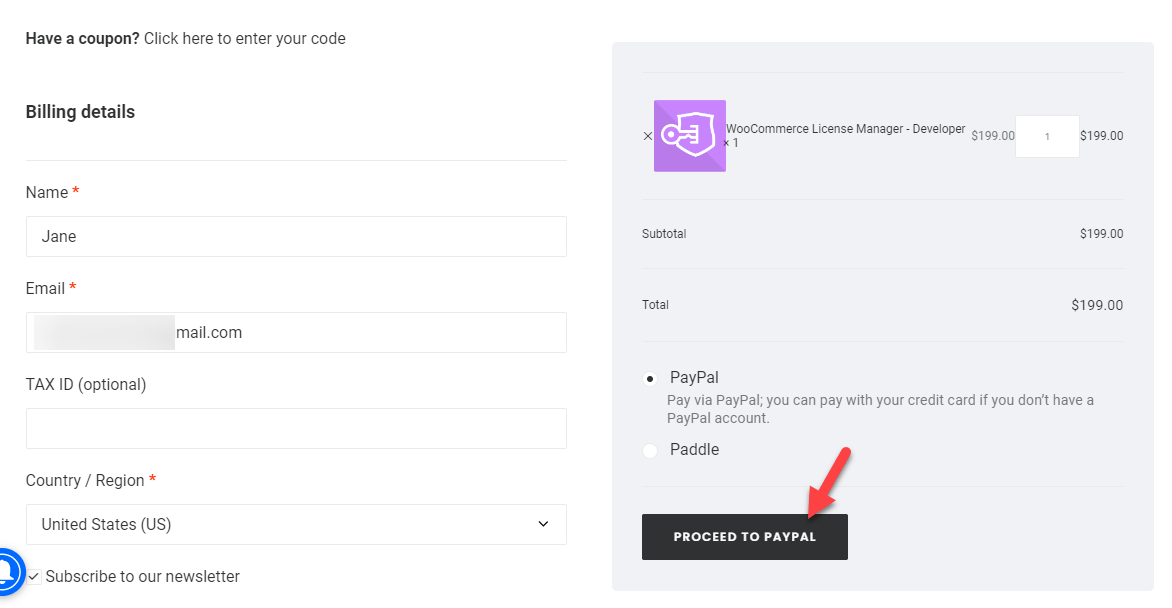
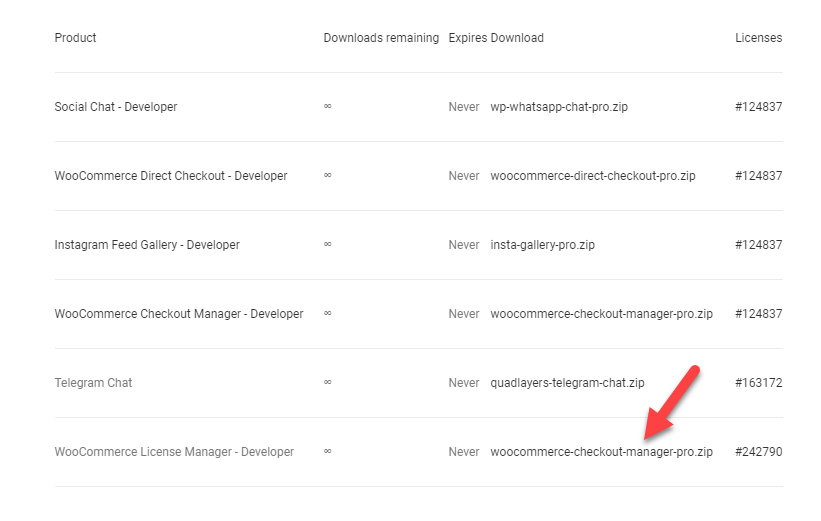
After the payment, you will get access to the plugin files. You can log in to your QuadLayers account and see the available downloads under the accounts section.
2) Installing and Activating WooCommerce License Manager
Under the downloads, you can see every plugin you have access to. From there, you can download the WooCommerce License Manager plugin.
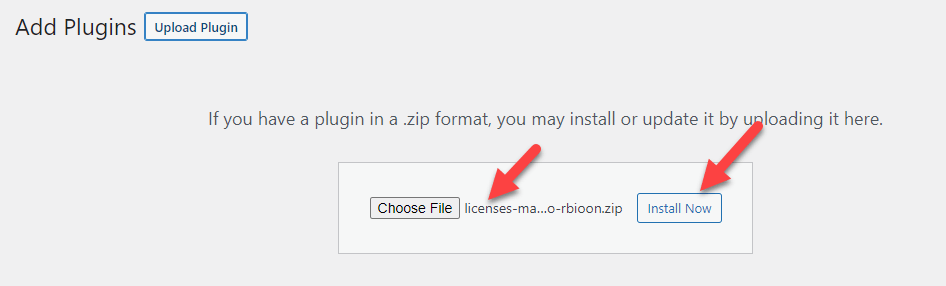
After downloading the plugin, log in to your WooCommerce store’s backend, and go to Plugins > Add New. From there, you can upload and install the WooCommerce License Manager plugin.
But before that, ensure you have installed and activated the free version of License Manager for WooCommerce first.
After installing the free version, you can install the premium version plugin.
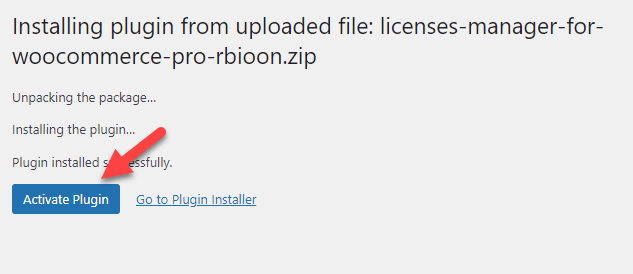
Once you have installed the tool, you can activate it.
Next, you need to validate your license key. Validating the license key will help you get priority support and updates for the plugin. Under the Licenses section inside your QuadLayers account, you can view all the license keys.
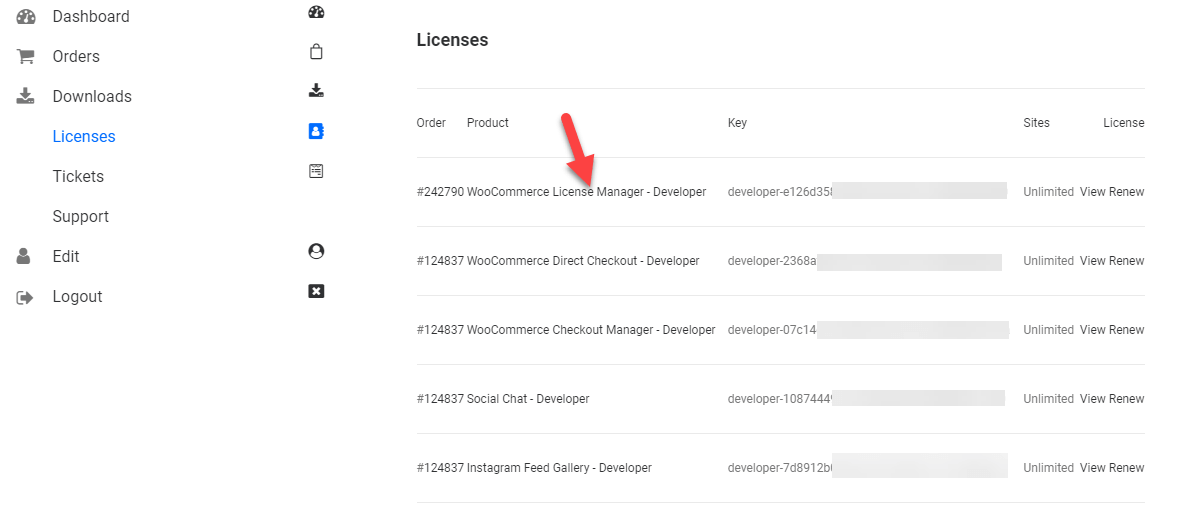
Grab your license key from there and activate your plugin.
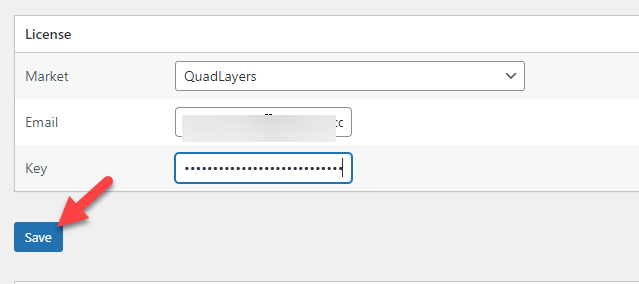
After that, you are ready to move to the next stage.
The WooCommerce License Manager settings can be found under WooCommerce customization options.

Next, let’s move to the main configuration options.
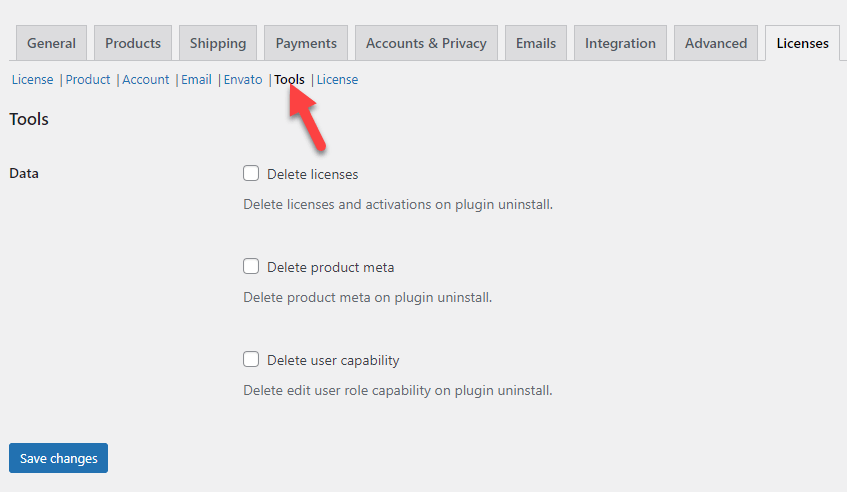
3) Configuring WooCommerce License Manager
Under the WordPress Settings, you will see the License Manager settings.

There are six main configuration options:
- License
- Product
- Account
- Envato
- Tools
Let’s take a deep look at each option.
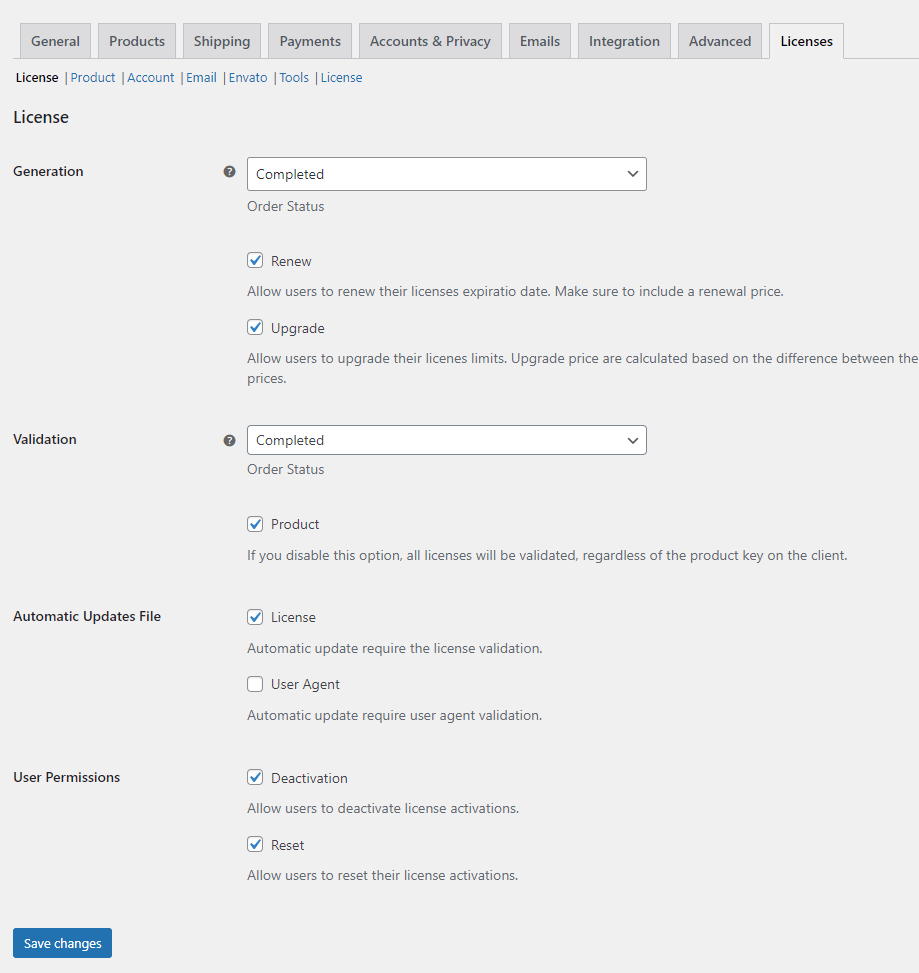
From the main option (License), you can configure when you need to generate and validate a license. Apart from those, you can also configure the automatic update settings and select the user permissions.
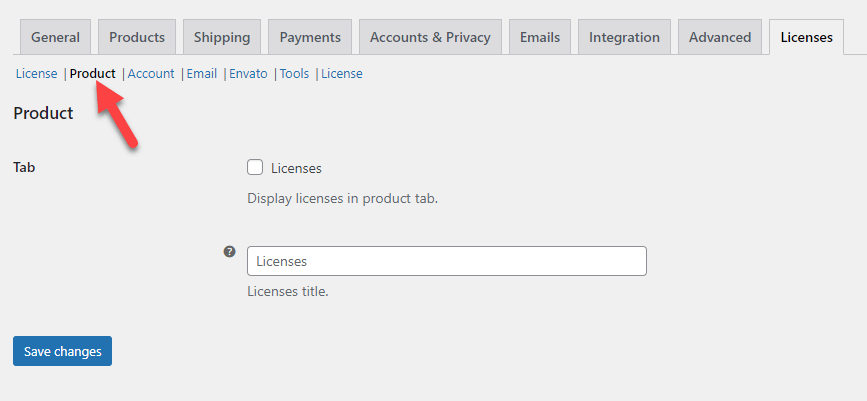
If you need to show the license options on individual product pages, use the Products configuration.
From the account section, you can choose how you need to display the license to the end users.

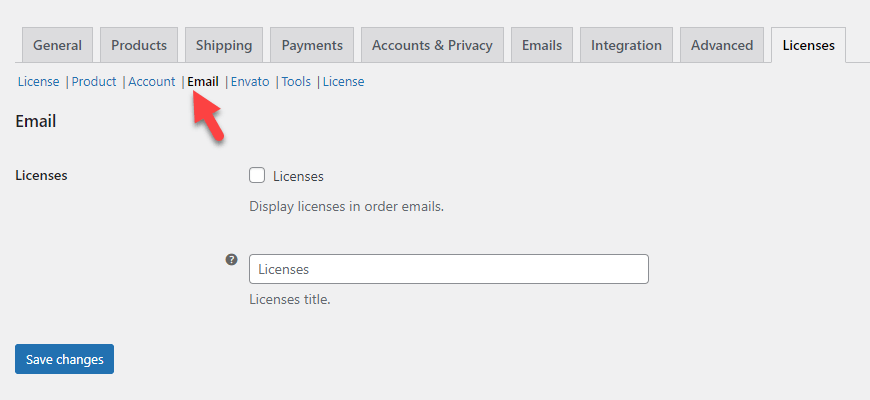
If you need to include the licensing information in your emails, use the Email Customization tab.
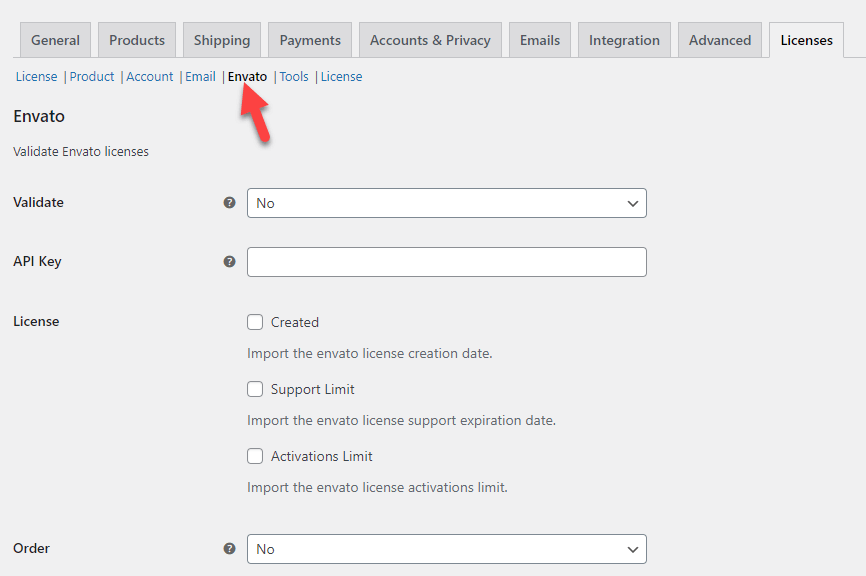
If you use Envato to sell your code and need to validate those, too, you should tweak the Envato settings.
Finally, the tools section will allow you to delete licenses, product meta, and user capability on uninstall.
You can modify the plugin’s settings according to your requirements. Ensure you have saved the changes after tweaking the options.
4) License Generation
You should configure the products individually to include a licensing option. To do this, go to individual product pages. Under the Product data option, you can see a checkbox with License as a label.
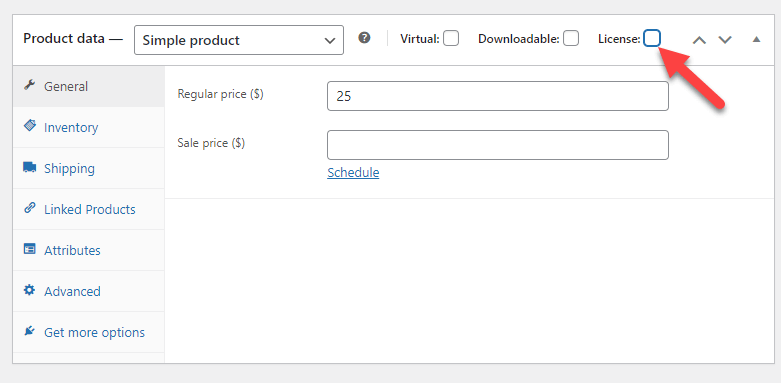
Once you have enabled the licensing option, you will see a licensing tab on the left-hand side.
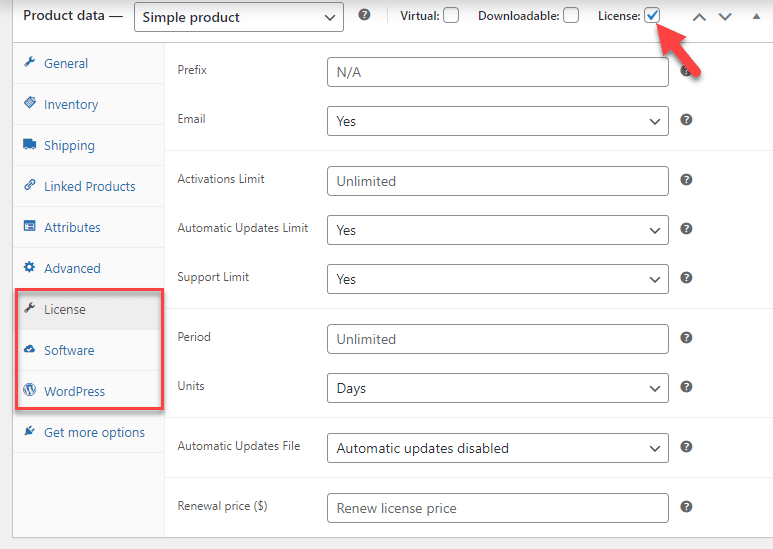
The licensing tab contains options like:
- Prefix: If you need to use a prefix for the generated license keys, use the box. This is optional. If you leave it blank, the system will generate license keys with random prefixes.
- Email: Do the users need to use their email addresses for license authentication?
- Activation limit: Decide how many activations you allow for individual license keys.
- Automatic updation limit: You can use this field to limit automatic file updation after getting the license expires.
- Support limit: Limit support on the plugin after license expiration.
- Period: Select the license expiration period.
- Units: Choose the period in days, months, or years.
- Automatic updates file: Select a file for automatic updates.
- Renewal price: Use this field to add the amount you need to renew the license support period.
Under the software tab, you will get every technical stuff.
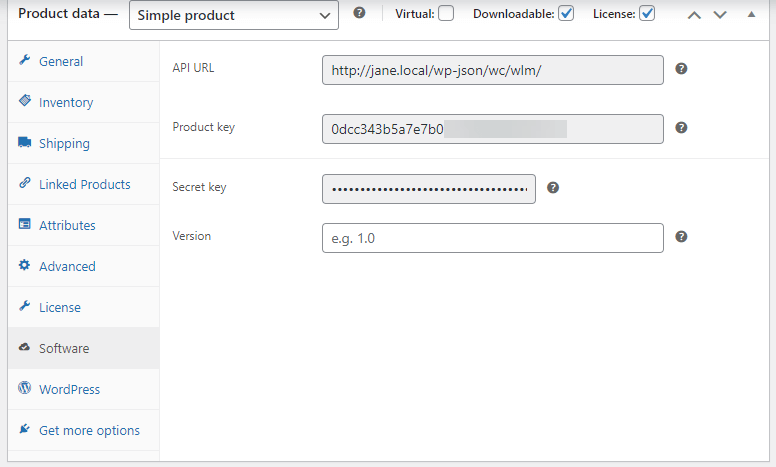
If you need to do something related to development and API, you could use this information. Below that section, you will see the WordPress tab.

Once you have configured these things, you are done
5) Testing Licenses
To test the license key generation, you have to make a sample purchase of the product you have modified. According to our configuration, the license keys will only be generated after the order status is set to complete.
So, from the order history page, select the specific order, and mark it as completed.
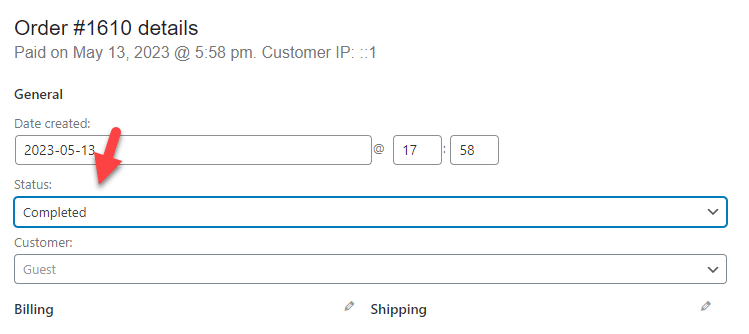
Once you have marked it as complete, you can see a license key is generated for the same.
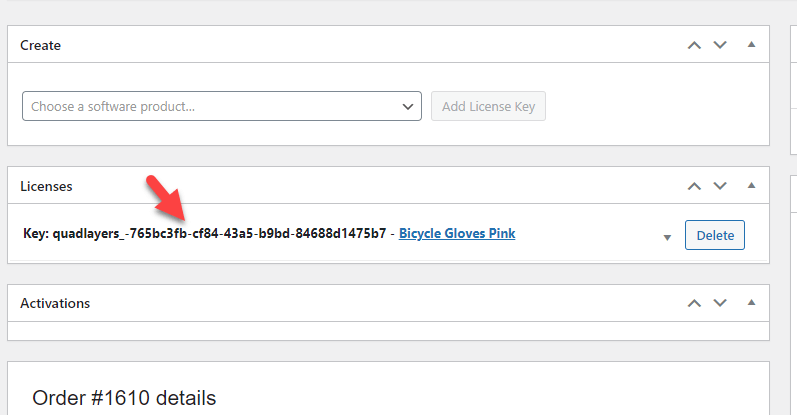
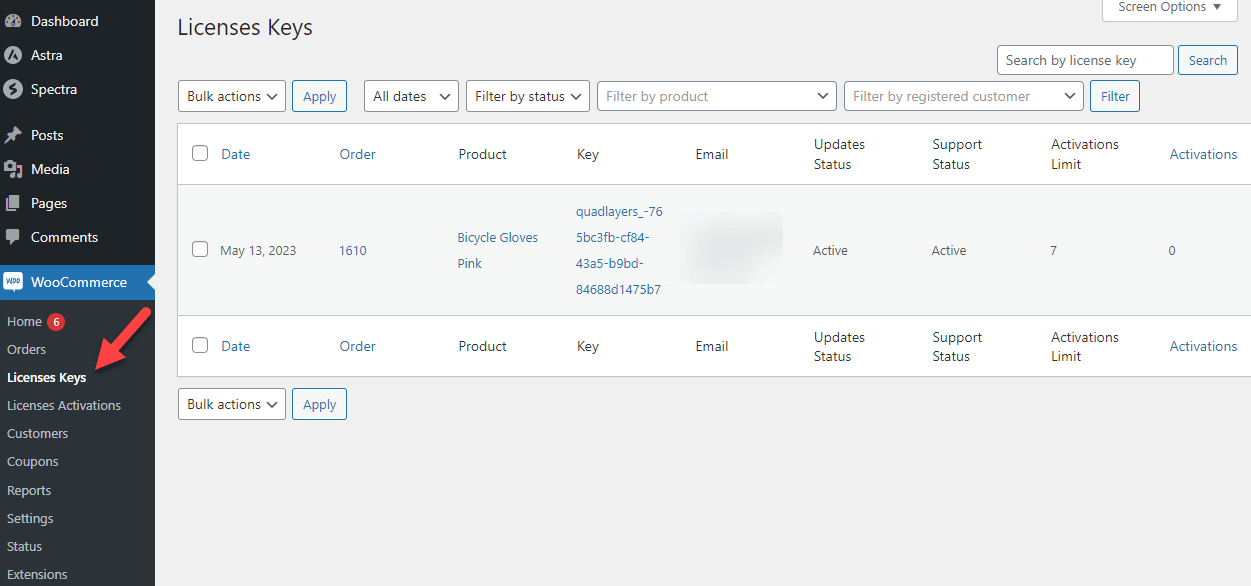
If you need more information on the license keys generated so far, check out the License Keys option available under WooCommerce settings.
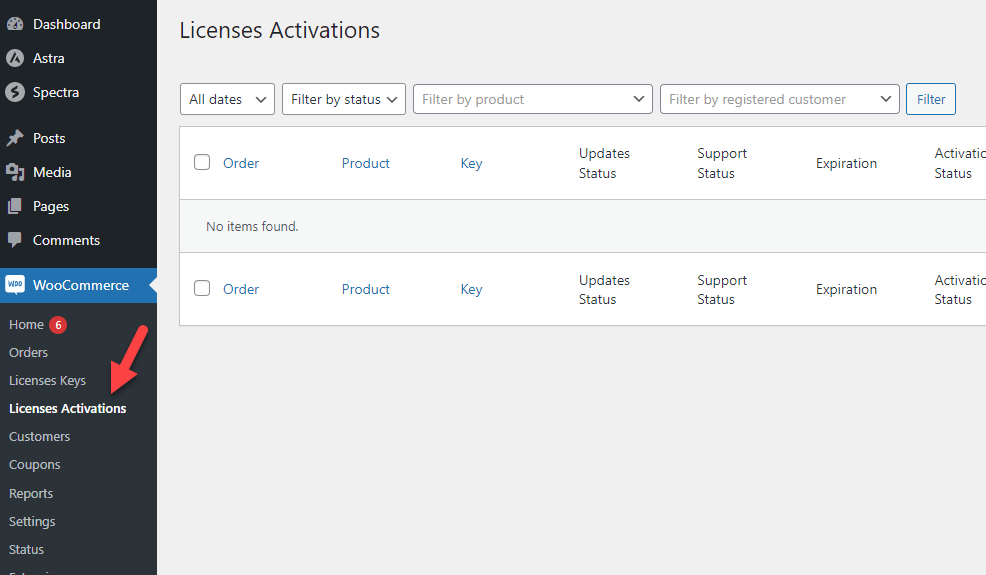
Under the license activation, you can see all the information regarding key activations.
That’s it!
This is how you can create licenses in WooCommerce. If you need more help, check out the plugin’s documentation section.
Bonus: Best WooCommerce License Manager Plugins
Apart from WooCommerce License Manager by QuadLayers, a couple more tools can do the same thing. This section will list a couple of plugins that can be used to create and manage license keys in WooCommerce.
1) License Manager for WooCommerce
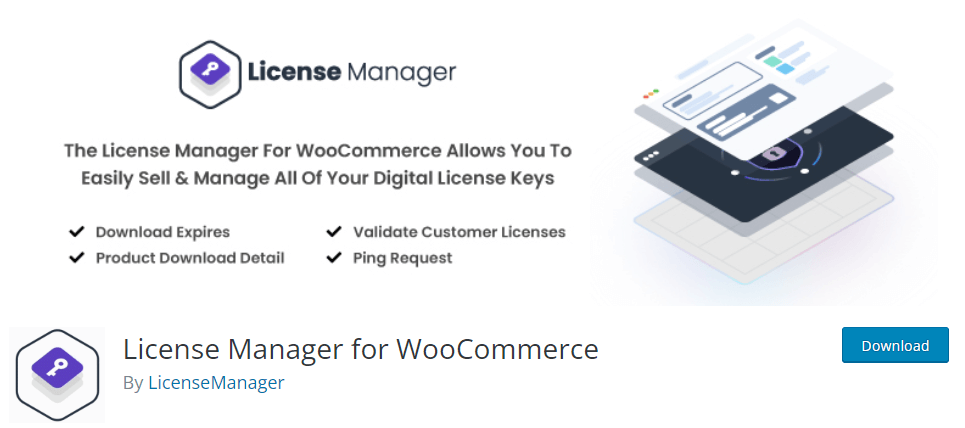
If you need an easy-to-use solution for managing your licenses, you should use License Manager for WooCommerce. The plugin has an elegant user interface that will help store owners customize their license keys according to their preferences. Since the plugin can generate and validate licenses independently, this would be a great addition to WooCommerce stores with many sales.
With the help of REST API, you can even enhance the plugin’s features and do more technical stuff. All the license keys generated through this tool would be encrypted. This helps prevent unauthorized users and keeps your business safe from third parties. You can also import/export license keys and move them between your stores.
This will be a convenient option if you need to move your customers with their keys to an entirely new WooCommerce website.
Features
- Secured environment
- Lightweight code
- Easy to use
- Developer friendly
- Import/export keys
Pricing
License Manager for WooCommerce is a freemium plugin. From the repository, you can download the free version tool. The lite version comes with very basic features. The premium version will cost you $129 a year for a single website license.
2) Serial Numbers for WoooCommerce
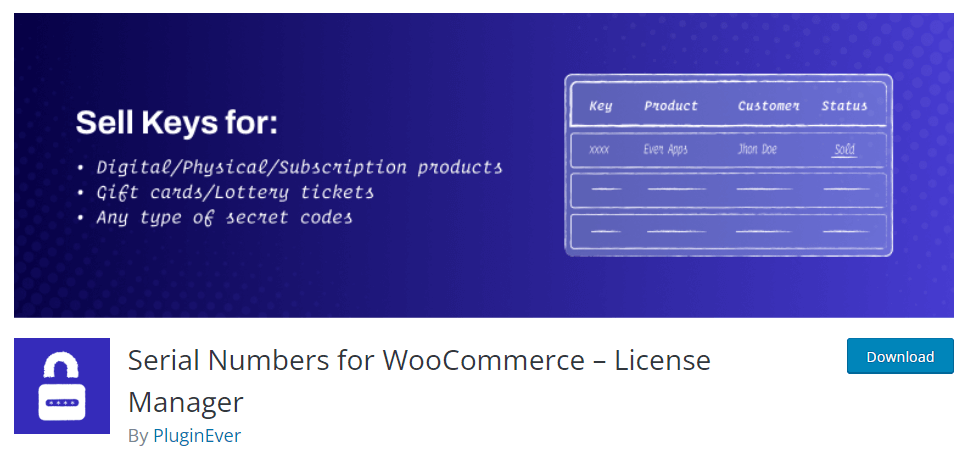
When you prioritize using a powerful license manager plugin, you must check out Serial Numbers for WooCommerce. The plugin can help you generate license keys for physical products, digital products, subscription products, gift cards, and so on. So, this would be a great addition to your online store in every manner. Apart from those, you can also generate license keys for variable products.
The tool also supports WPML, a popular WordPress translation plugin. With it, you could translate the plugin and use it on multilingual websites. Apart from WPML, the tool also supports PDF packing slip plugins. The integrations offered in this plugin are powerful and very useful.
You can also set automatic order completion for licensed products. By doing this, you do not need to change the order status to completed manually. The customers will get access to the product and the license key almost immediately.
Features
- Admin notification
- Automated process
- Compatible with third-party plugins
- Bulk import/export
- Encrypted
- Validation through API
Pricing
It is a freemium tool. From the WordPress plugins repository, you can download the free version plugin. The premium version will cost you $99/year.
If you need to know more about WooCommerce license manager plugins, check out this post.
Conclusion
Adding authentication to your digital products is a great way to protect your business. When you release a new plugin or a WordPress theme in the market, most people will release a cracked/patched version of it and spread it. This will affect your business badly (very badly).
Adding a license key validation will prevent unauthorized users from accessing your plugin’s features. Since the license keys are a set of unique codes, no one will be able to guess or crack them. It will help you boost your revenue and credibility.
As you can see in this tutorial, you can quickly generate and verify the license keys with a powerful plugin like WooCommerce License Manager by QuadLayers. You do not need to mess with any technical side; even a beginner can do that.
We hope you have enjoyed reading this article and learned how to create license keys in WooCommerce. If you did, please consider sharing this post with your friends and fellow bloggers on social media.
How are you planning to add extra authentication for your digital products?
Do you know any other ways?
Let us know in the comments.
Similar articles you might like:
