
How to Limit WordPress Post Revisions (with and without Plugins)
Do you want to limit WordPress post revisions and improve your website’s speed? If you are looking for a step-by-step guide, we have got it covered. This article will teach you how to limit or completely disable the post revisions feature in your WordPress or WooCommerce website with or without a plugin.
But first, let’s see what revisions are and why limiting them is a good choice.
What Are Post Revisions and Why Limit Them
WordPress will save a copy of the post, page, or custom post you are working on after you update it. These copies are known as revisions. Revisions will become super helpful in some situations. For example, if you have made a mistake and need to use the older version of the blog post, you can browse the old revisions and import the right one to the editor.
Limiting post revisions will help you optimize your database. When you run a multi-author blog, all those authors might be saving multiple edits to a blog post. Each revision will be added to your MySQL database, and the database will become bulky.
Only a certain amount of revisions will be saved in the database when you limit the revisions. All the old ones will be removed automatically when you save new edits.
It is one of the best practices you can do to optimize the speed of your website when you have a multi-author blog.
Where to Find Revisions
You can find revisions through your editor.
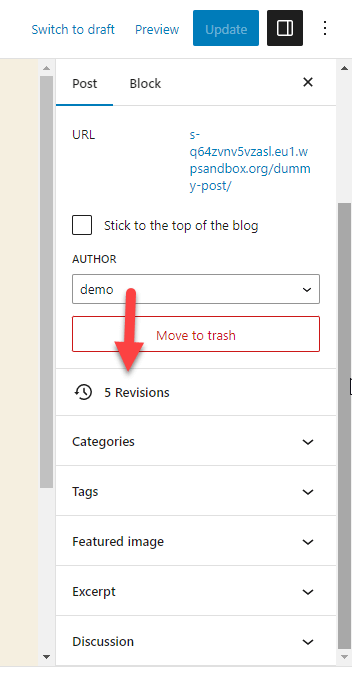
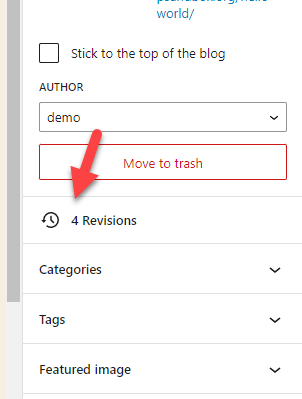
For example, open any post you like. It can be through the Gutenberg editor or Classic Editor. Once you have opened the post, check out the right-hand side of the editor. You can see how many revisions you have for that specific post there.
On the other hand, if you use a plugin like WP-Optimize, it will show you how many revisions you have inside the database. So far, you’ve learned what revisions are and where to find them.
Next, let’s move to the article’s core, which is properly disabling WordPress post revisions.
How to Limit WordPress Post Revisions
You can limit WordPress post revisions in two ways.
- Programmatically
- Using a dedicated WordPress plugin
We will show you both methods below so you can choose one according to your preferences.
Let’s start the tutorial by limiting the revisions with code.
1) With code
In this method, we will be editing the WordPress core files. So, before moving forward, we highly recommend generating a complete website backup. If something goes wrong, you can always restore the backup and keep the website running.
Check out this guide to learn more about generating website backup.
Once you are done with the backup, you need to access the wp-config.php file of your website. You can do it using FTP or a dedicated file manager plugin. In this case, we will use a file manager plugin for the task because it makes the job simple.
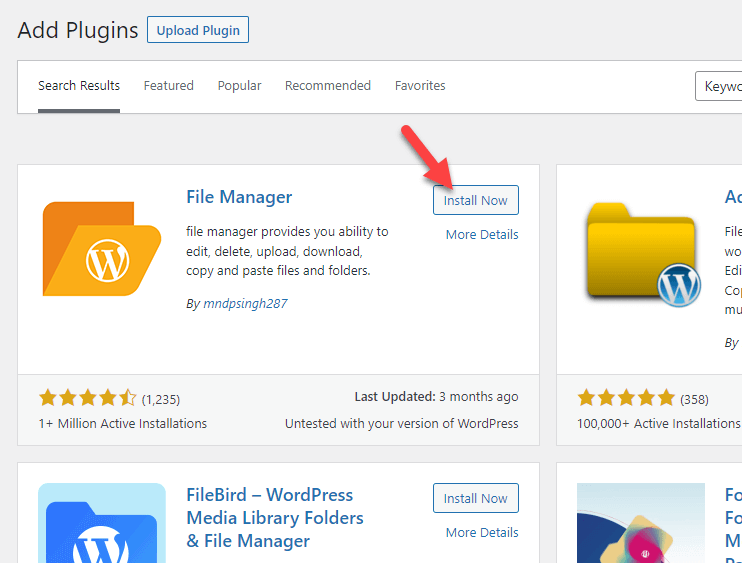
Firstly, install File Manager on your website.
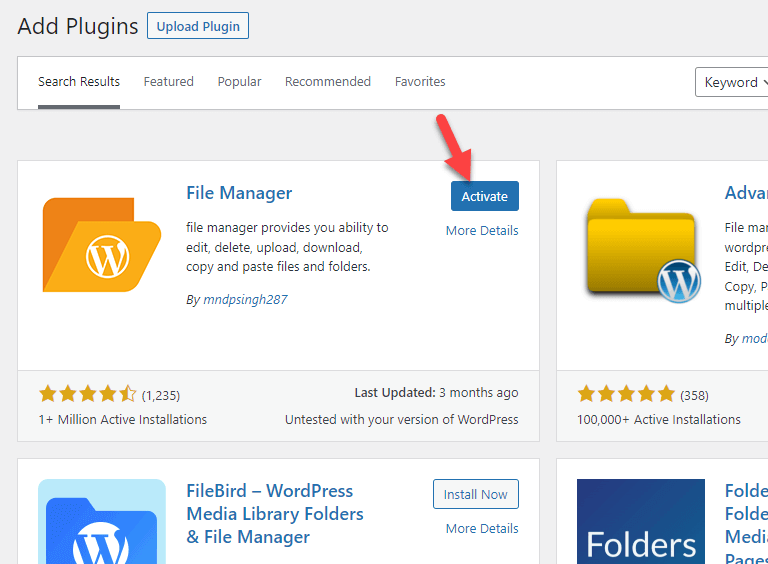
Once you have completed the installation, activate the plugin.
After activation, you can see the plugin’s settings on the left-hand side.

After opening the plugin settings, you will be redirected to the htdocs directory.
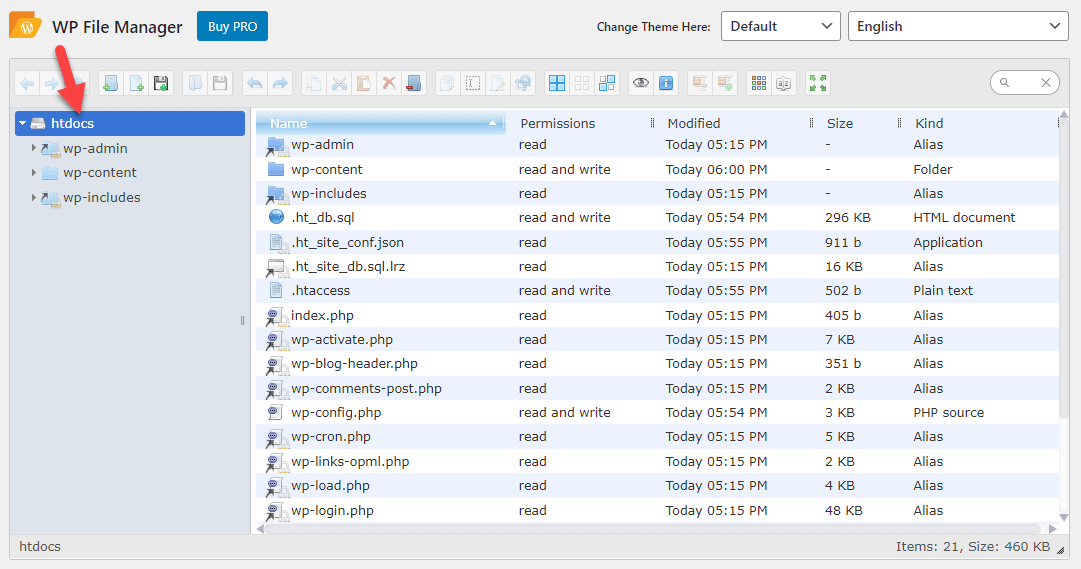
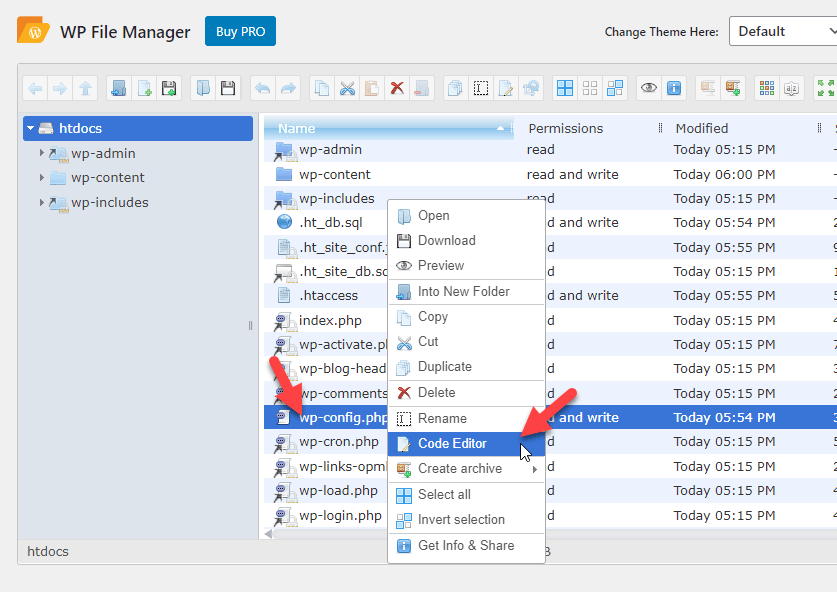
There, you can see every WordPress core file. The next thing you need to do is, select the wp-config.php file, right-click on it, and select the edit option.
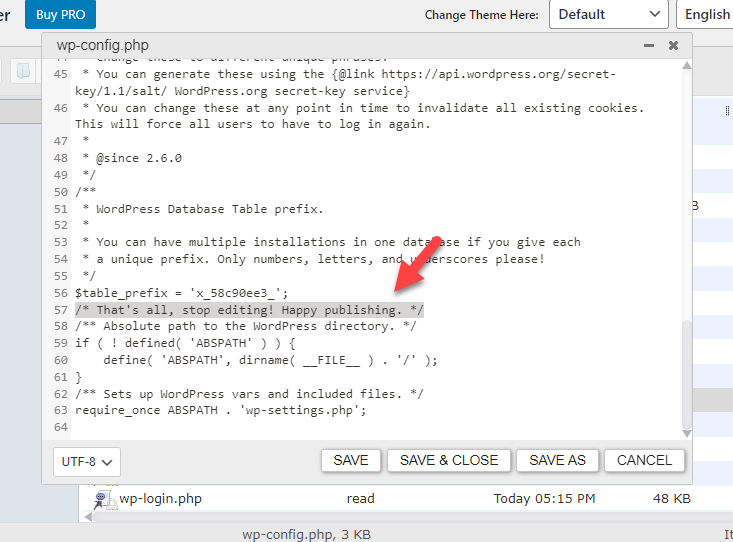
In the code editor, scroll down and find the line that says /* That’s all; stop editing! Happy publishing. */.
Copy this code:
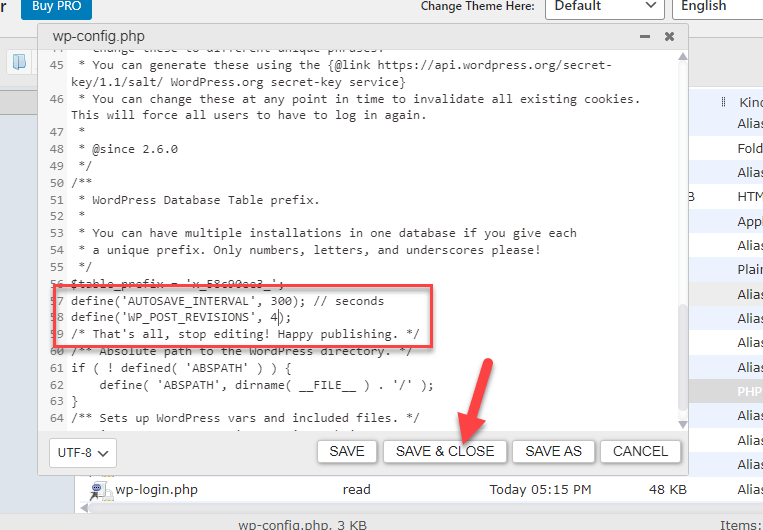
define('AUTOSAVE_INTERVAL', 300); // seconds
define('WP_POST_REVISIONS', 4);
The code modifies the autosave interval into 300 seconds, which is 5 minutes. Plus, the code will also limit the revisions to 4. You are free to tweak the code the way you like. After making the changes in the code, paste it before the line that says /* That’s all; stop editing! Happy publishing. */.
Save the file; from now on, WordPress will only save 4 of your latest revisions. You can confirm it by updating your drafts or published posts.
That’s it!
This way, with a simple code, you can limit the revisions and optimize the MySQL database tables.
In the next section, we will show you how to do the same thing (limiting revisions) with a plugin.
2) With a Plugin
Let’s say you do not need to touch your core files but need to limit the revisions. The plugin method would be your best option. There are so many plugins available for WordPress speed optimization.
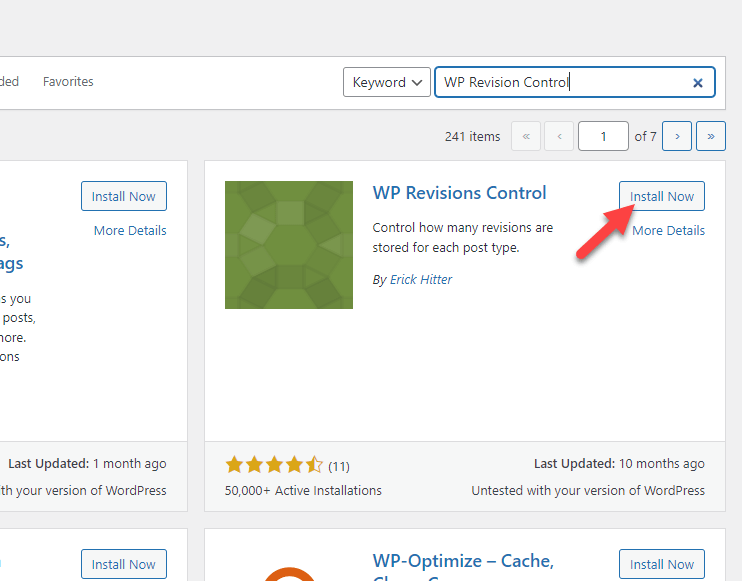
For this tutorial, we will be using WP Revisions Control. It is an easy-to-use plugin that can help you with the task. As usual, you have to install it on your website.
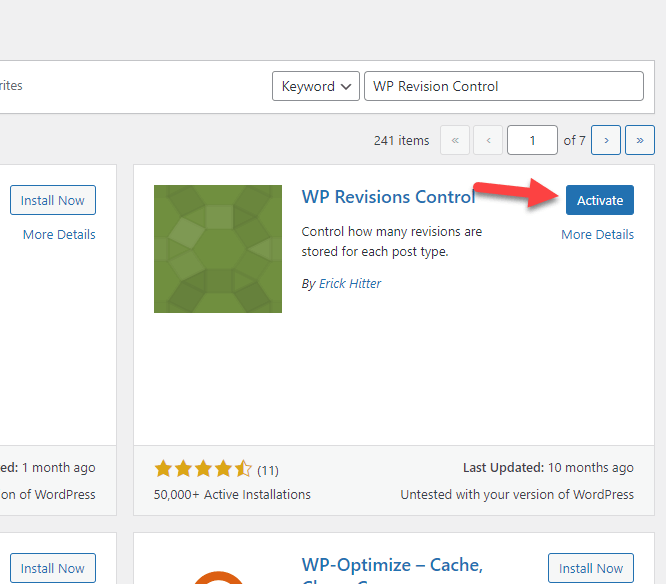
Activate the tool after installation.
Under the WordPress writing setting, you can see the plugin’s settings.
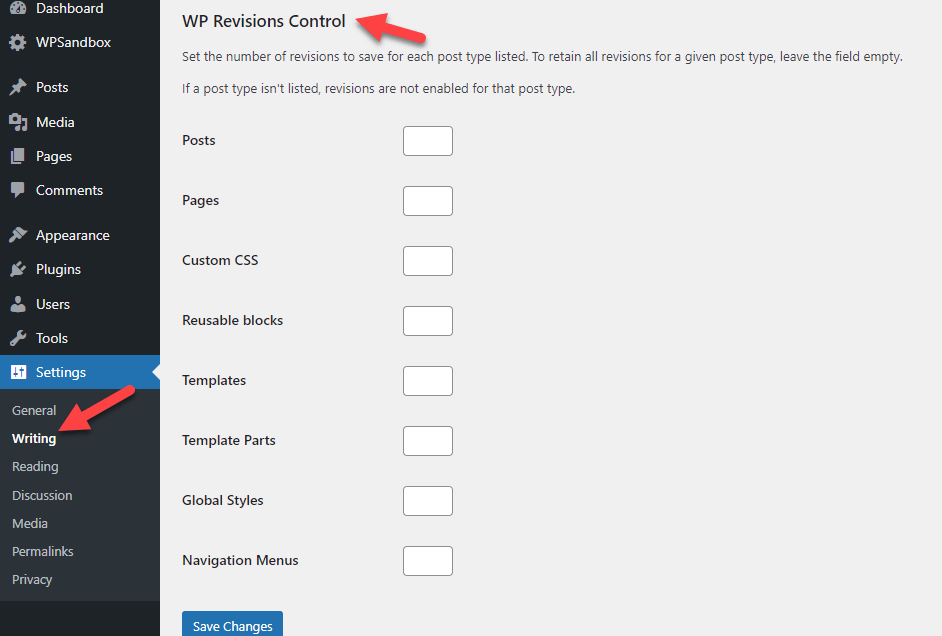
There, you can mention how many revisions you need to keep in the database.
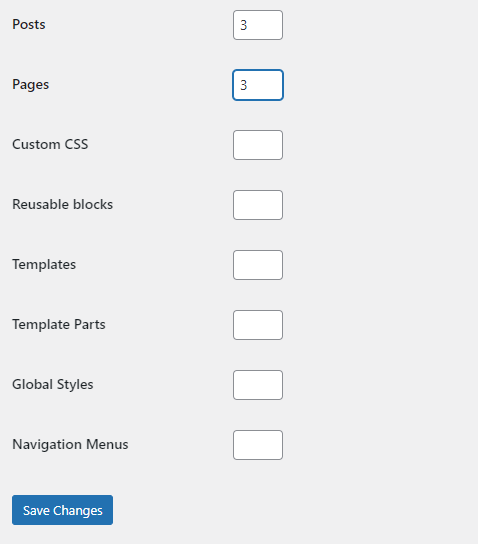
After tweaking the options, save the changes.
That’s it!
This way, you can use WP Revisions Control to take care of the task. It is a more simple way to limit the revisions. You will have more control over it and can tweak the numbers wherever you need.
How to Disable WordPress Post Revisions
Sometimes, you must disable the post revisions entirely instead of limiting them. This opinion will come in handy when you run a business website where you do not publish many blog posts.
If you need to disable the revisions, keep reading this section. You can complete the task using
- Code
- with a dedicated plugin
Let’s start with the coding method.
1) With Code
As we did earlier, we will be editing the wp-config.php file. But we will be tweaking the code a little bit. Instead of the code we used earlier, use this one:
define('AUTOSAVE_INTERVAL', 300); // seconds
define('WP_POST_REVISIONS', false);
You can copy this code and paste it inside the wp-config.php file before the line that says /* That’s all; stop editing! Happy publishing. */.
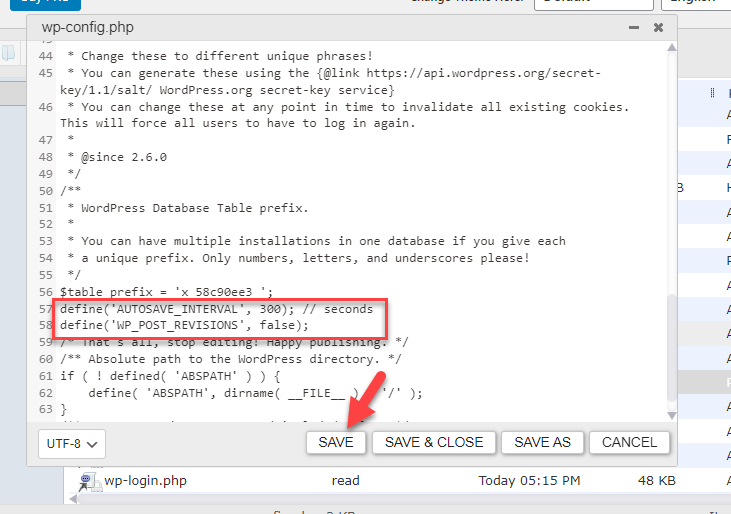
After pasting the code, save the file.
This way, you can disable revisions with code. From now on, no revisions will be saved in the database.
2) With a Plugin
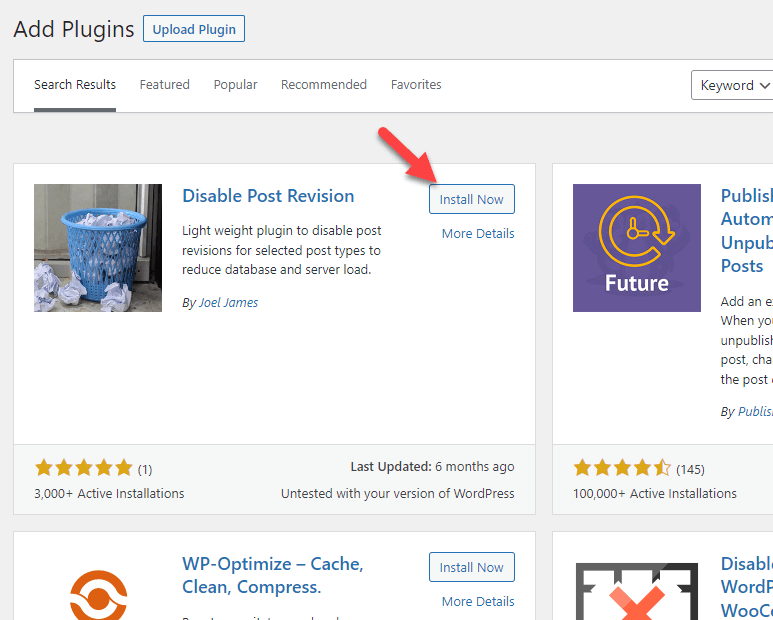
You can use the Disable Post Revisions plugin to eliminate the WordPress post revision feature.
First, install the plugin on your website.
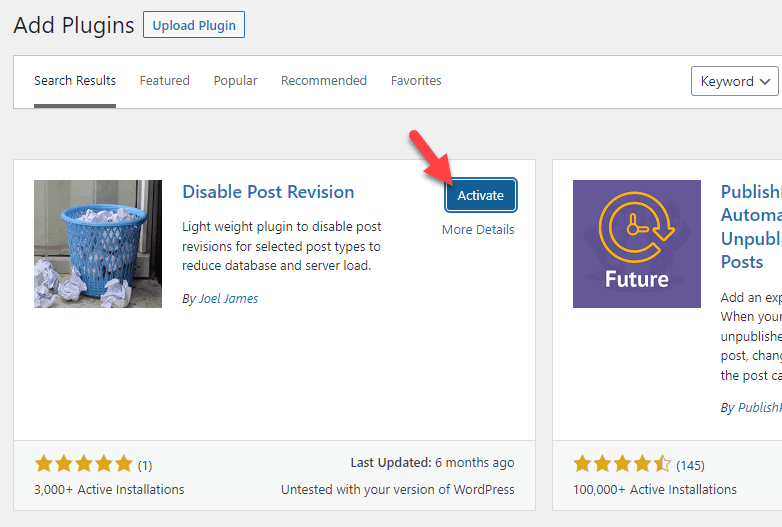
After installing it, activate the tool.
Next, go to the writing settings. There, you can see every post type. You can choose the post types you wish to remove from creating revisions. If you need to select multiple options, use the CTRL key.
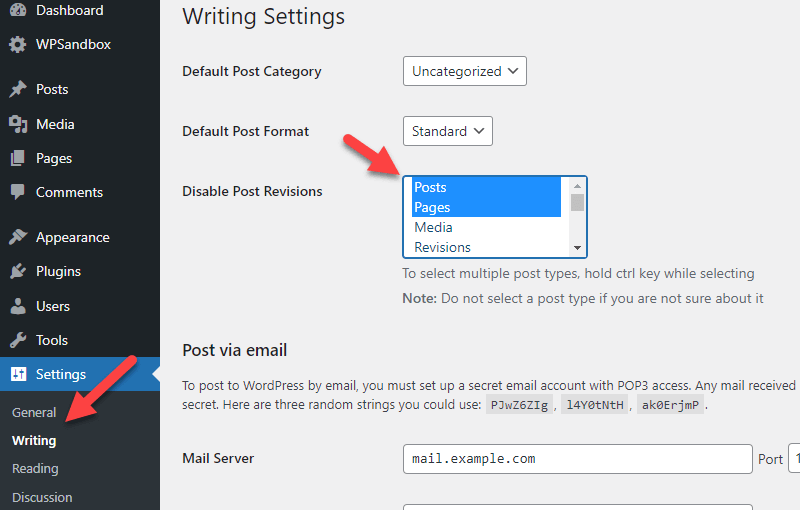
In this case, we will be disabling revisions for posts and pages. Once you have made the necessary changes, save the settings.
That’s it!
This is how you can disable the post revisions feature in WordPress with a dedicated plugin.
Bonus: WordPress Performance Improvement Tricks
To help you further with speed and performance optimization, here are a few things you should consider:
- A good web hosting: If you need to have a speedy website, the first thing you need to consider is a good web hosting provider.
- Lightweight theme: Choosing a lightweight theme will help you speed up the website. So many themes like GeneratePress, Astra, and OceanWP are optimized for speed.
- Well-coded plugins: Use only plugins that come with lightweight code. You can see several plugins for doing the same task. So, choose one accordingly.
- Image optimization: Optimizing your images are a great way to boost the speed of your website. You can reduce the image’s file size without losing quality with an image compression plugin. Plus, use lazy load to optimize image serving.
- Caching solution: Use an excellent WordPress caching plugin to optimize the performance of your website. Here are the top WordPress caching plugins you need to try.
- Static file modification: Optimizing static files like HTML, CSS, and JS can help you boost performance. Use a minification plugin for the task.
Since Google said speed would be a ranking factor, you should invest in optimizing your website for performance. With these methods, you can score better than your competitors and improve your overall ranking.
Conclusion
Optimizing your website’s speed is one of the best things you can do. Since it affects the user experience and your WooCommerce store’s sales and conversions, you should invest in multiple ways to boost the performance.
If you have a blog and writing articles there, revisions can slow down your website. So instead of making the MySQL database bulky, optimizing it by limiting or disabling the revisions would be great.
In this guide, we have shown you how to limit or disable post revisions in your WordPress website or WooCommerce store. If you are OK with editing core files, you can choose the coding method. This way, you can do the job without using extra plugins or tools.
On the other hand, if you are not comfortable editing the core file manually, choose the plugin. It is also an easy way to limit/disable the revisions.
We hope you have found this article useful and learned how to limit WordPress post revisions. Which method are you going to choose? Or do you know any other ways to boost the website’s speed?
Let us know in the comments.
If you are interested in reading a couple more posts that will help you optimize the speed of your WordPress website or WooCommerce store, have a look at these posts:
