
How to Set Up Apple Pay in WooCommerce
Setting up multiple payment methods is essential when trying to optimize your customer checkout process. Apple Pay is currently one of the most used forms of payment, both offline and online. Its convenience and quick transaction makes it one of the best payment methods available to users. This is why we’ve brought you our guide on How to set up Apple Pay in WooCommerce.
But first, let’s look at how Apple Pay works with WooCommerce and why you should consider using it.
Why Set Up Apple Pay to Recieve WooCommerce Payments?
We’ve covered in our previous articles how improving your checkout is essential to improving your lead conversions. The better your checkout flows, the more likely your customers will go through the checkout process. In fact, not having enough payment gateways can easily dismay customers if they don’t have a convenient, secure means of paying for your products. Data suggests that over 9% of cart abandonment is due to a lack of enough payment options.
So, adding payment gateways like Stripe or Paypal is almost crucial if you’re trying to create trust between you and your customers. And one of the more recent and user-friendly payment gateways these days is Apple Pay.
Apple Pay is one of the most used forms of online payment these days, and Apple users, in particular, revel in its convenience and security. Naturally, this means that your users are more likely to pay for your products if they know that their transactions are done through Apple Pay. Moreover, with Apple Pay enabled, your customers could altogether skip the normal checkout process for easy payments.
As a business, it is important to provide convenient payment features to your customers, especially ones that are very popular with mobile users. You’d be losing money if you were to ignore the significant population of mobile users that use Apple Pay.
So, in this article, we will cover all the steps you’ll need to integrate Apple Pay with your WooCommerce store. So let’s look at how you can set up Apple pay in WooCommerce. We’ll be using the Stripe plugin for this tutorial. Setting up Apple Pay in WooCommerce with the Stripe Payment plugin is relatively easy. Moreover, the plugin is also developed and backed by WooCommerce, so there’s no risk in using it.
Requirements for Apple Pay
Before we start, we need to ensure that your website is set up for Apple Pay. Apple Pay requires a few prerequisites to be fulfilled for security purposes. So, to make sure Apple Pay works for your website, please make sure:
- Your entire site has HTTPS enabled.
- Your domain has a valid SSL certificate.
- Make sure that your server supports the TLS 1.2 protocol or later.
- That your server has port 443 enabled.
Most of these issues are resolved with a good hosting service provider. So, if you’re looking for providers that check the mark for these requirements and more, you can check out our article to find the best hosting providers for WordPress.
Besides these, you might also need to fulfill some additional requirements to set up Apple Pay in WooCommerce like:
- A verified Stripe account.
- WooCommerce Stripe Payment Gateway plugin.
First, look at the WooCommerce Stripe Payment Gateway plugin and how you can configure it to add Apple Pay to your WooCommerce payment options.
Set Up Apple Pay in WooCommerce Using the WooCommerce Stripe plugin.
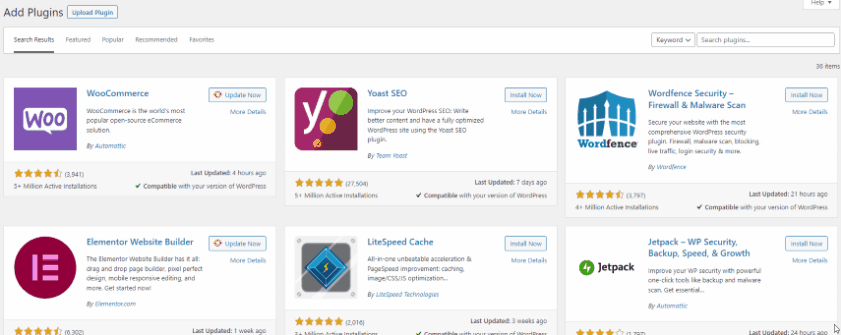
Let’s start by installing the Stripe Plugin. Go ahead and Install the Stripe plugin by clicking on Plugins > Add New on your WP Admin Dashboard.
Then, use the search bar on the top right to search for WooCommerce Stripe Payment Gateway. Click on the Install button on the plugin’s tab and then click on Activate once the button changes. This will install and activate the plugin on your website.
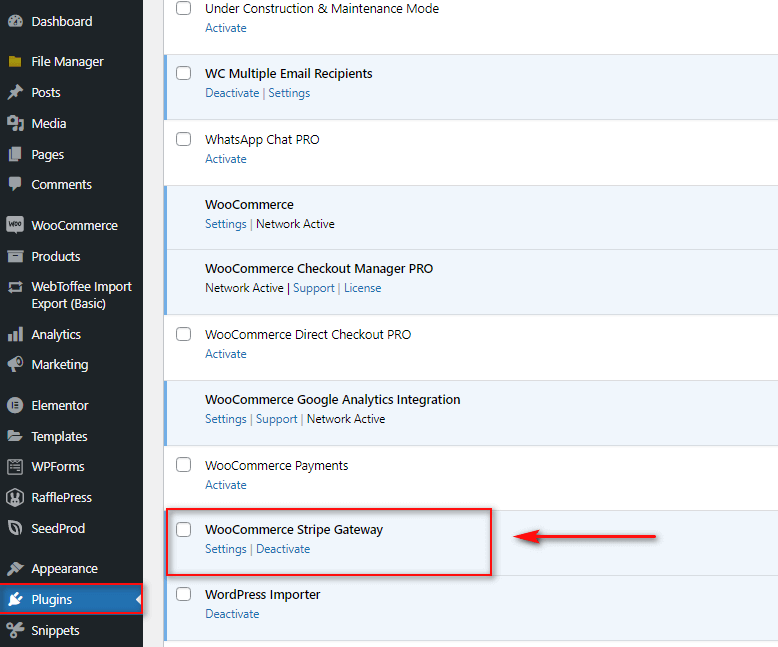
Alternatively, you can manually activate/deactivate your WooCommerce Stripe Payment Gateway by going to your WP Admin Dashboard > Plugins. Here, click on activate/deactivate under the plugin listing for your required results.
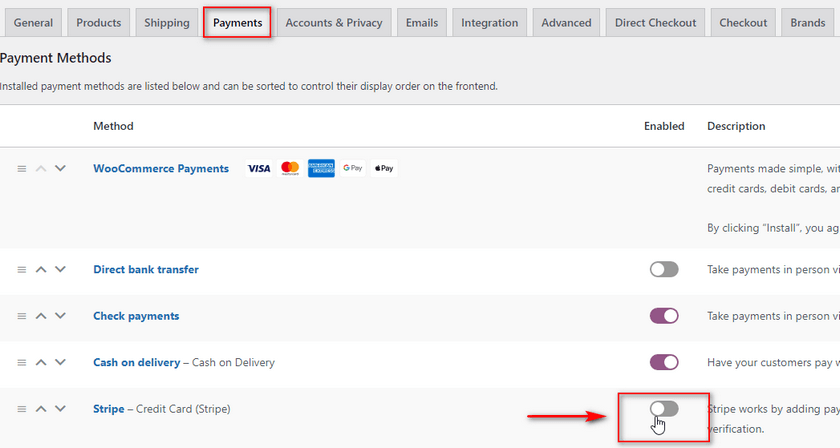
Once the plugin is activated, you’ll need to enable Stripe as a payment gateway in the WooCommerce settings. For this, click on WooCommerce > Settings on your dashboard and click on the Payments tab.
After that, enable the Stripe option, and you’ll be taken to the Stripe setup screen.
To set up apple pay in WooCommerce, you’ll need to have Stripe set up for your website. For this, you’ll need to create a Stripe account and retrieve API keys. You can go through our article on how to configure Stripe for WooCommerce if you want a more dedicated guide on how to do this.
Integrating Stripe with WooCommerce
To set up Stripe and Apple Pay, you’ll need some API keys generated for your Stripe account. These keys let your plugin communicate with Stripe’s API tools and connect all the payments from your website to your account. So, for starters, you’ll need to log in to your Stripe account to receive your API keys.
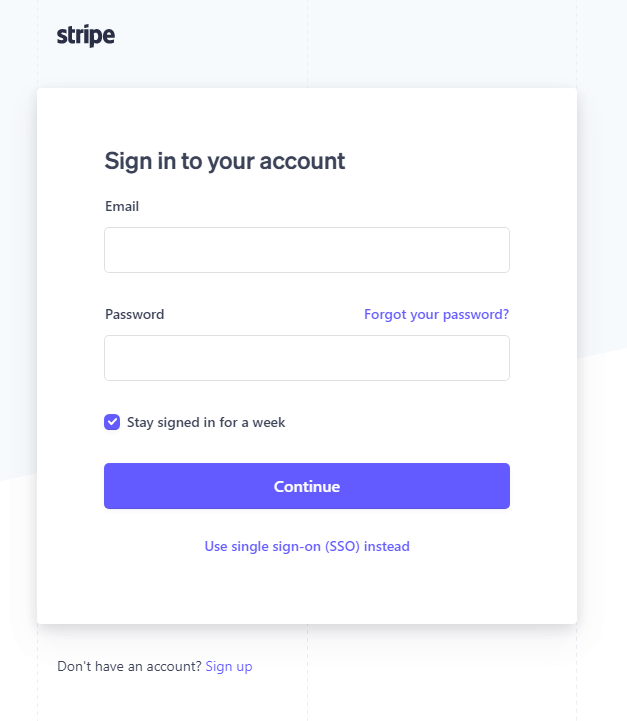
1) log in to Stripe
First, go to the Stripe login page. Here, you can sign up for a new Stripe account or log in directly to your existing Stripe account using your email and password.
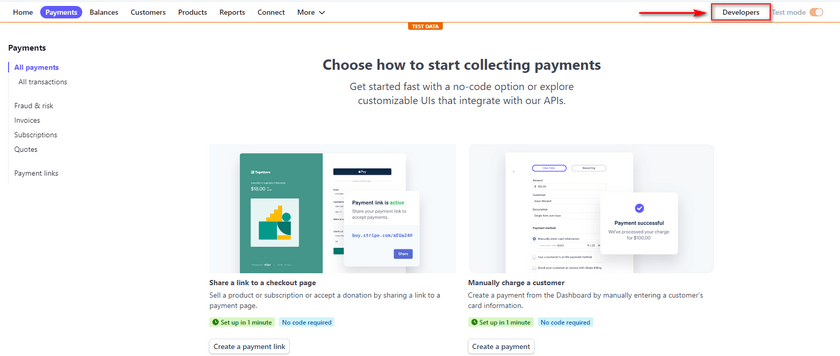
2) Get Stripe API Keys
To integrate your Stripe account with your WooCommerce shop, you’ll have to create some API keys. Once you’ve logged into Stripe, start by opening your Stripe Dashboard and then click on Developers.
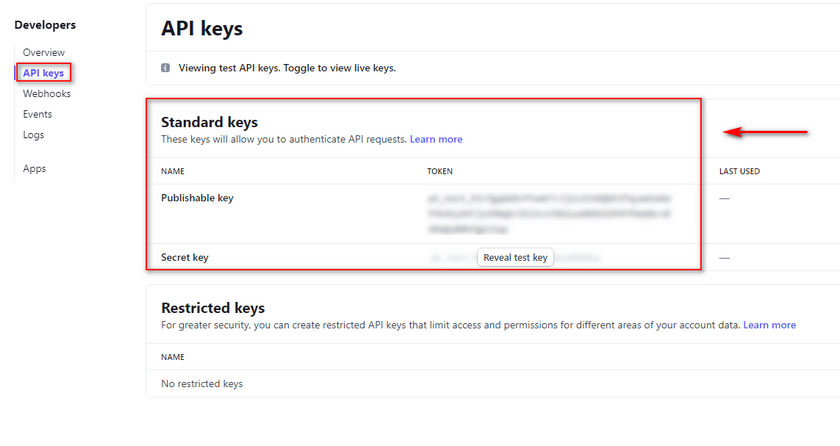
Click on API keys, and you’ll be given a publishable key and a secret key. Save both of them for now.
3) Add Your API keys to WooCommerce
Open your WordPress Admin Dashboard, click on WooCommerce > Settings > Payments, and click on Set up next to Stripe.
You’ll see a pop-up asking you to integrate your account to stripe. You can do this by clicking on Create or Connect Your Account. Or, you can integrate your account directly by clicking on Enter Account Keys.
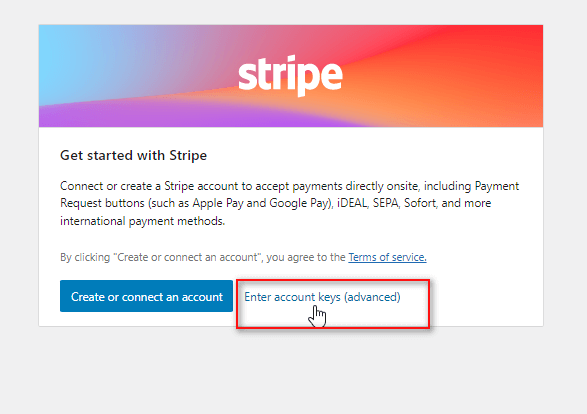
For this demo, we’ll use the second option. Insert the previously saved published key and secret key into the account keys fields.
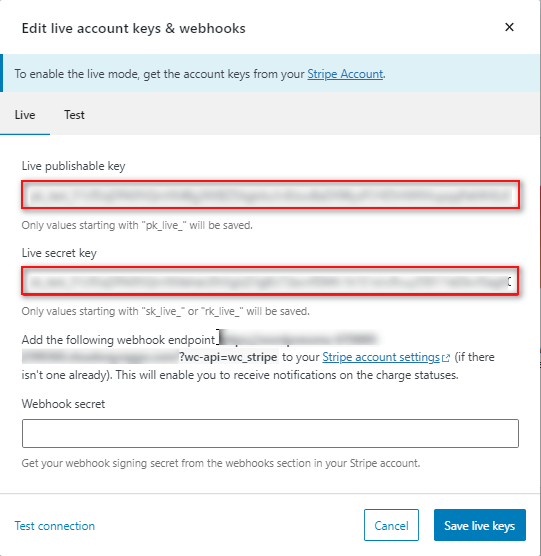
4) Add Webhook Endpoint
Above the Webhook Secret field, you’ll also be given a URL to add to your webhook endpoint.

Open your Stripe developers dashboard again, and click on Webhooks.
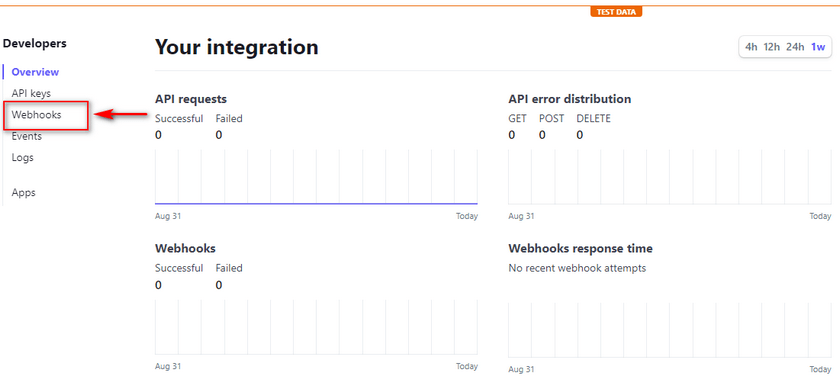
Click on Add an endpoint and paste the previously copied URL to the endpoint URL field.
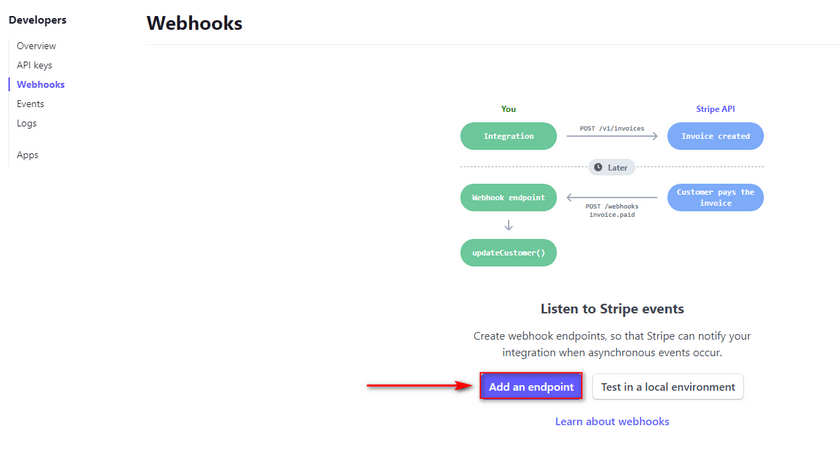
Add a description to the field and click on the Select Events button. This will list all the web events you’d like to track with Stripe.
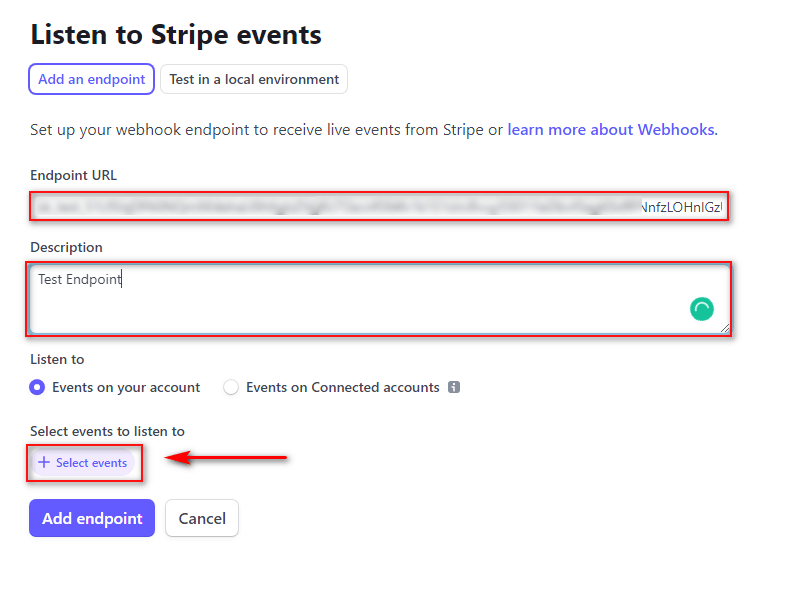
For the demo, we’ll click on Select All Events and finish by clicking on Add events. Scroll down and click on Add Endpoint to finish.

5) Add Webhook Secret Key to WooCommerce
Next, you’ll be taken to the Webhooks page on your Stripe Dashboard. You should see a reveal button under Signing Secret. Click on it and copy the given code.
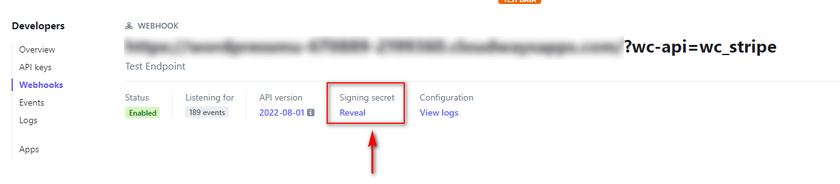
Now, return to your WooCommerce Stripe page and insert the Signing Secret key in the Webhook secret field.
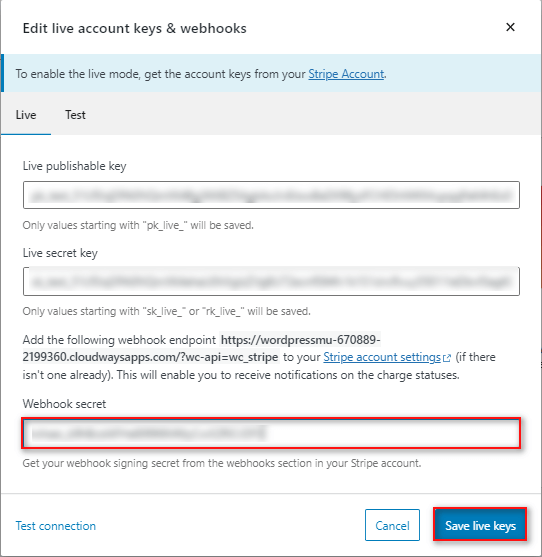
Click on Save live keys, and you should be done.
Enable Apple Pay in WooCommerce Stripe
You’re not done just yet. Now that you have integrated and enabled Stripe on your website, you’ll need to move to the next step. To enable Apple Pay in WooCommerce, you’ll need to do two things.
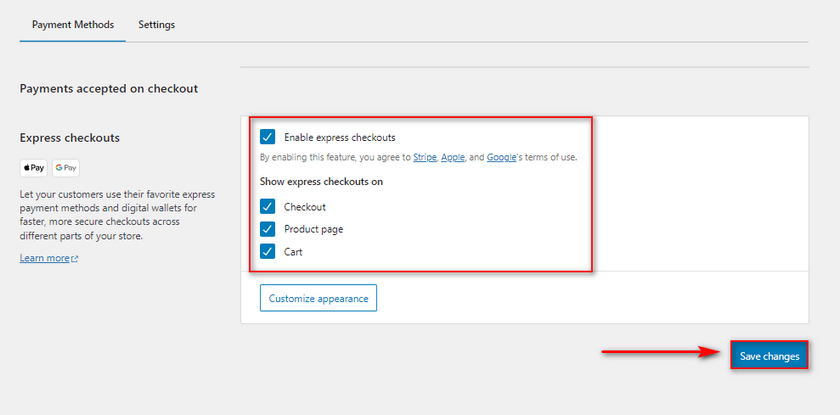
1) Enable Express Checkout in WooCommerce
First, you’ll need to allow the Express Checkout option on the Stripe payment methods page. Click on Save changes once you enable the express checkout option.
2) Register Your Doman in Stripe’s Apple Pay Settings
Next, you’ll need to register your Domain in Stripe’s Apple Pay settings. This registers your domain into Apple Pay’s API so your stripe plugin can accept Apple Pay payments.
To do so, open Apple Pay Settings inside Stripe, and click on Add new domain.
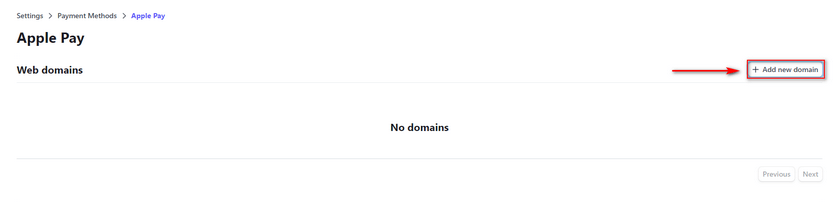
A new prompt should appear, asking you to enter your domain name.
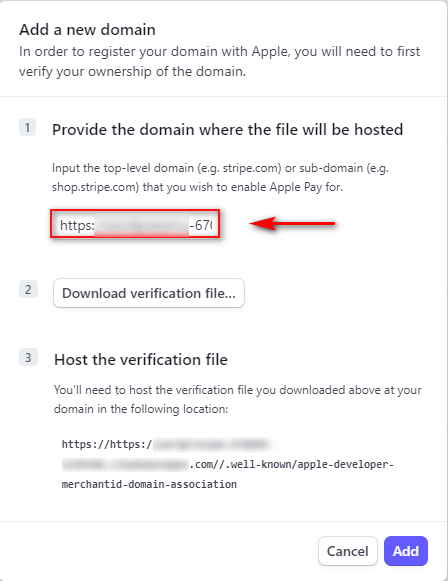
Add your domain to the field and click on the Download Verification file, which will download a file.
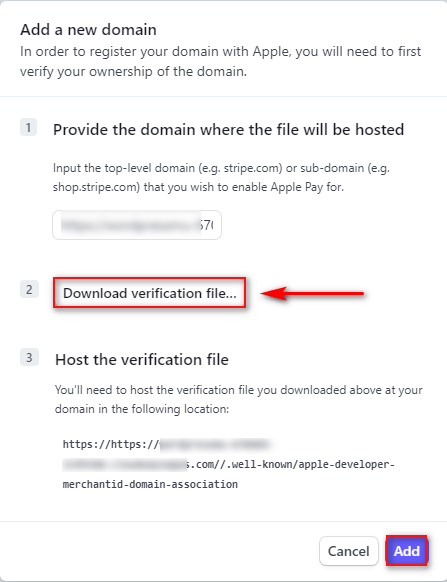
Then, click on Add to save your new domain.
Now, you’ll need to add the downloaded file to your website directory under your-domain-name.com//.well-known//apple-developer-merchantid-domain-association.
For a more straightforward solution, you can directly provide the file to your hosting provider and ask them to add it to the required location.
Once your provider adds the file, you should be done with setting up apple pay in WooCommerce.
Bonus: How to Edit Payment Gateways in WooCommerce
Now, suppose you have multiple payment gateways set up alongside Apple Pay. In that case, it might be necessary to edit your payment gateways, so they appear more user-friendly on your checkout page.
For example, with Apple Pay enabled, you might want to disable Direct Bank Transfer as an option or re-arrange how your payment gateways are sorted. You can simply manage your payment gateways by clicking on WooCommerce > Settings > Payments.

Here, you can click the enable/disable button to activate or deactivate any payment gateways.

You can also click the move button on the left side of the payment gateways to sort them manually.
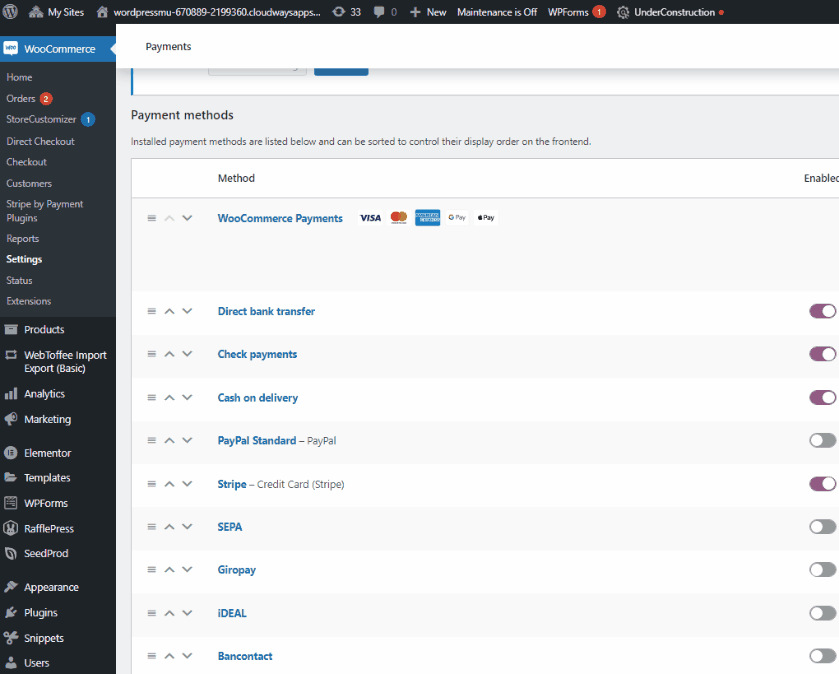
You can customize your payment gateways, their titles, and more by clicking on the Manage button next to them.
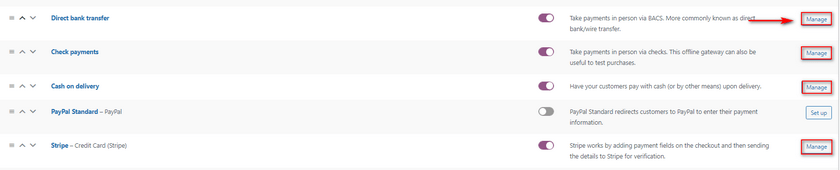
For example, if we click on Manage on the Direct Bank Transfer, we’ll be taken to this page. From here, we can customize the title and description of the gateway and add specific instructions for bank transfers for our customers. Of course, we can also add our bank account details too.
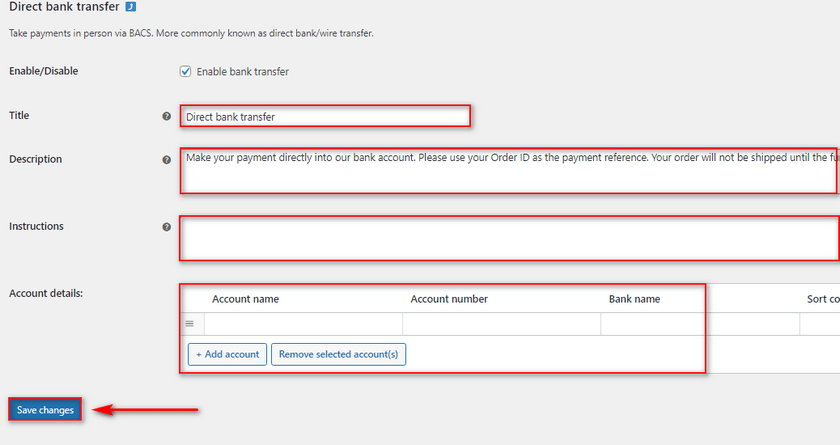
Once you’re done, click on Save Changes, and your edit to the payment gateway should be saved. In the same way, you can customize and manage the rest of your payment gateways the way you like.
However, that’s not all you can do with Payment Gateways. For more possibilities, check out our dedicated guide on how to edit payment gateways.
Conclusion
And that ends our guide on how to set up Apple Pay in WooCommerce. Let’s quickly summarize all the steps we’ve covered in today’s guide:
- Installing and Activating the Stripe plugin
- Signing into the Stripe Dashboard
- Integrating Stripe with your WooCommerce website
- Retrieving and saving Stripe API keys into the plugin’s settings.
- Setting up webhook URL.
- Adding Domain Verification file to your WordPress installation.
- Activating Apple Pay
While the process is relatively easy, many steps are involved here, which might confuse our readers. If that is the case for you, feel free to drop any of your questions in the comments, and we’ll get right on top of it.
Similarly, Apple Pay isn’t the only addition you can have to your WooCommerce checkout and payments. For instance, you can add Paypal payments or even remove your checkout fields to make it easier for your customer to checkout. If you want to learn more about other tools that you can use to improve your customer’s checkout experience, why not check out some of our other articles here:
