Setting up better usability and responsive pages for mobile users can go a long way in improving your website’s traffic and lead conversions. With the need for quick loading and high page speed, especially for mobile users, Google AMP has become an essential tool to ensure that you don’t lose any of your website viewers. This is why we at QuadLayers have brought you a complete guide on How to Set up Google AMP on WordPress.
But first, let’s look at Google AMP and what it brings to the table regarding site optimization.
What is Google AMP? Why Should We Use It?
Let’s talk about Google AMP first. Google AMP is an open-sourced platform designed to improve your website’s load on mobile devices. This is done by creating an AMP version of your pages that is stripped of a lot of elements such as CSS, iframes, scripts, etc. Due to this, your website loads much faster on mobile devices, ensuring that you retain your mobile visitors. Improving website performance is, after all, quite important since you can lose over 33% of your potential sales if your website isn’t mobile-optimized.
Google suggests that bounce rates can go up to 90% or higher if your website takes 5 seconds or longer to load.
Moreover, there’s also the SEO factor. You’re likely to see your website rank higher if your website’s page speed is on the higher end. This is why we recommend our users build AMP versions of their websites. So, if you’re looking for the reasons why you should use Google AMP, you should consider these pros:
- An Open Sourced method to page speed and user experience on mobile devices.
- Better click-through rate, better lead generation, and improved SERP rankings.
- Automatic media and image optimization, especially for mobile browsers.
- Better site loading and less data usage on slower networks, including cellular networks for mobile devices.
Moreover, it is pretty easy for users to set up Google AMP on WordPress websites with AMP-compatible WordPress themes and tons of Google AMP plugins that you can choose from.
Plugins to Set Up Google AMP on WordPress
Now, while the platform is free and open-sourced, the easiest and, in our opinion, the best way to set up Google AMP on WordPress websites is to use a dedicated Google AMP plugin. If you’re looking for the best options, you can check out our list of the Best Google AMP plugins for WordPress.
We recommend using free plugins that make it relatively easy to enable Google AMP and add more features such as advertisements, SSL, customizable template modes, and more. As for our recommendations, some of the plugins you can use are:
For our tutorial, we’ll be using AMP for WP.
The overall process for setting up Google AMP on your WordPress website should be similar to most plugins. A quick look at your plugin’s documentation, along with our guide, should help you figure it out in no time. However, if you have difficulty with the process, let us know in the comment section, and we’ll do our best to help you out.
Now let’s see how we can set up Google AMP on WordPress using the plugin.
How to Set Up Google AMP on WordPress
Let’s start by installing and activating the plugin. Start by opening your WP Admin Dashboard and clicking on Plugins > Add New.
Then, use the search bar on the top right to search for AMP for WP. Click on Install on the plugin’s tab, and once the button switches to Activate, click on it again to activate the plugin on your site.
Alternatively, you can activate/deactivate the plugin by opening the Plugins page and clicking on Activate/Deactivate under the plugin’s listing.
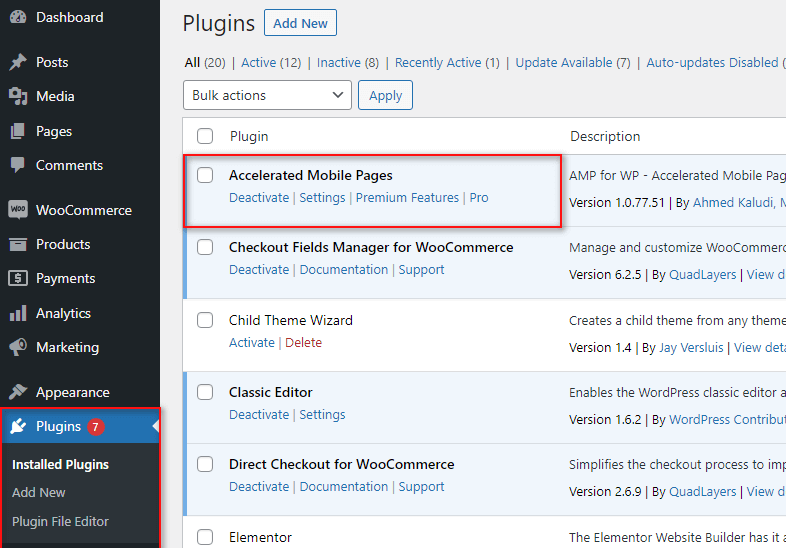
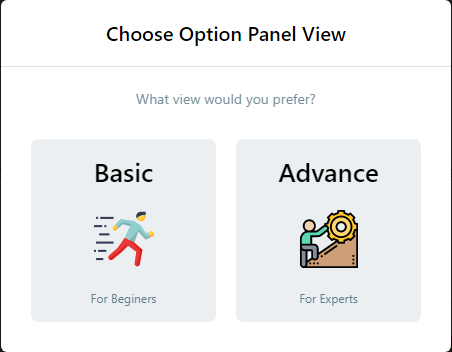
Once you activate the plugin, you’ll be taken to the plugin’s options page, where you’ll be asked to choose between a panel view for the plugin. You can choose between Basic and Advanced. We recommend going with Basic for now for just setting up Google AMP.
If you want to open the AMP for WP plugin’s page manually, you can also do so by clicking on the AMP listing on your WP Admin Dashboard.
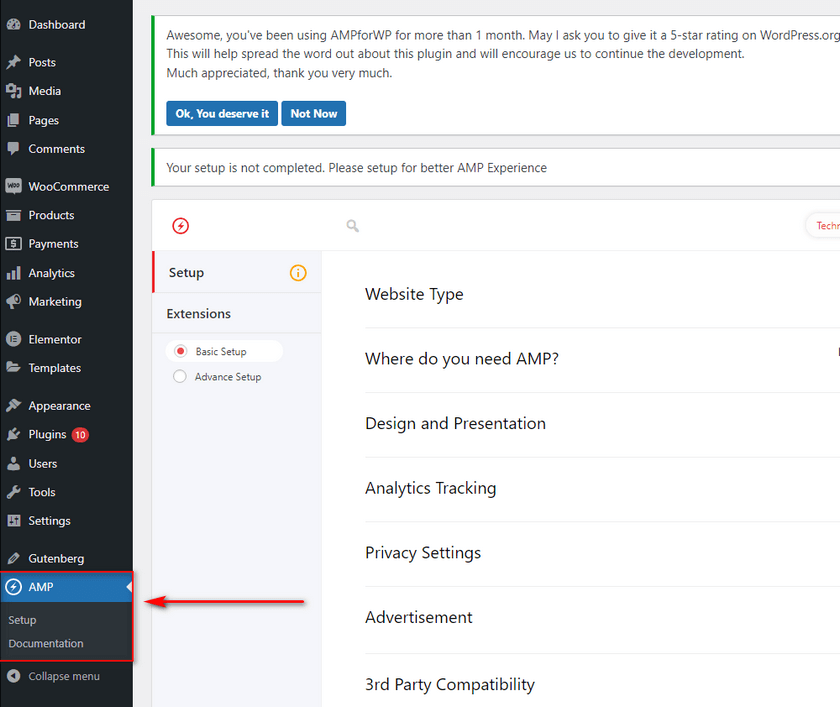
You’ll have to adjust some settings to enable Google AMP for your WordPress website. Let’s go through each step one by one.
Set Up Google AMP on WordPress Using AMP for WP
To set up Google AMP on your WordPress website with AMP for WP plugin, you’ll have to adjust a few options, starting with website type and AMP selection for your website pages. You can also use the Other option and add your own custom website type if you’d like.
Click on the Select button on Website Type and choose your website type using the Drop-down menu.
For our demo, we’ll use E-commerce. Next, we select where we want AMP enabled. Use the Where do you need AMP? Option and click on Choose. This lets you add AMP to the following:
- Your Homepage
- WP Pages
- WP Posts
- Archive
Moreover, if you have a custom Homepage, you can also choose it using the Homepage option.
Next, with the Design and Presentation option, you can select a specific logo to add to your AMP pages and a unique global scheme.
Additionally, if you enable Advanced view, you can also select unique AMP themes and custom page elements like Headers, Footers, Social Sharing buttons, and more.
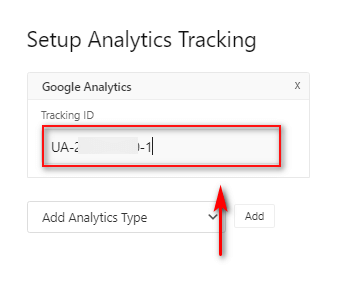
After this, we can use the Analytics option to enable Google Analytics tracking for your AMP pages. For this, you’ll need a Google Analytics tracking ID. If you want to learn how to get your tracking ID, you can use our guide on How to enable Google Tracking for WordPress websites.
Once you grab your Analytics tracking ID from the above tutorial, you can paste in the Tracking ID field like so:
These are the main settings you must configure to set up Google AMP on WordPress websites. However, you also have a few other options, including Privacy settings, Advertisement, and 3rd party compatibility.
Additional options for AMP for WP
With the Privacy Settings option, you can add a Cookie consent bar and enable GDPR for your AMP pages. Click on Choose on Privacy Settings and enable one of the two options.
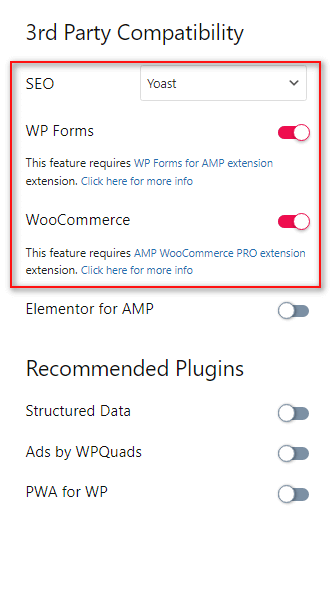
The Third-party compatibility option lets you designate which SEO plugin you use as well as add additional support for WooCommerce, Elementor, and Structured Data, amongst other things. We suggest using the plugin’s documentation to enable options you’d like, as some of these features require premium extensions.
Using the Advertisement setting, you can enable ads on your AMP pages specifically. This is an optional setting that takes a bit more time to configure. If you want to learn about this option specifically, scroll down to the bonus section of this article to figure out how you can enable advertisements on Google AMP.
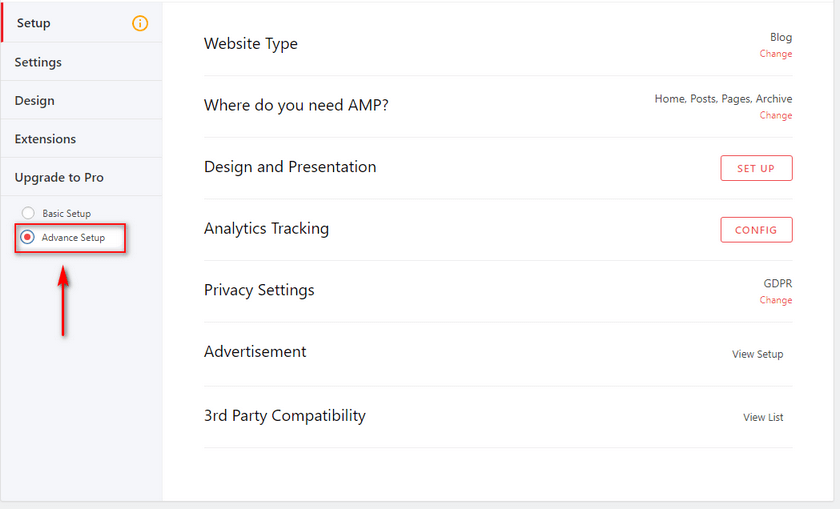
These cover the basic settings you want to set up Google AMP on WordPress websites. However, you can also enable the Advanced setup option to access additional customization options.

Using the Advanced Setup, you can:
- Add Google AMP for custom post types and taxonomies.
- Designate an SEO plugin, customize SEO meta descriptions for AMP pages, and more.
- Add WooCommerce support for Google AMP.
- Add and customize Structured Data and Schema for AMP.
- Enable/Disable comments on AMP pages.
These are only a few major features that AMP for WP provides you with. However, since many of these features are optional and designed for more experienced users, we’ll skip them for our tutorial. However, you can quickly review the plugin’s website to learn how to enable them if you’d like.
Once you’re done with these options, you should have Google AMP enabled for your website. To check whether Google AMP is functioning correctly for your website, you can use a few validation methods to test your AMP functionality.
Validate and Preview Your Google AMP Content
Now, if you want to preview your website’s AMP content simply, you can easily do so by adding ‘/AMP’ to your page’s URL. So, for example, if our page is:
testwebsite.com/testpage
We’d just change it to:
testwebsite.com/testpage/AMP
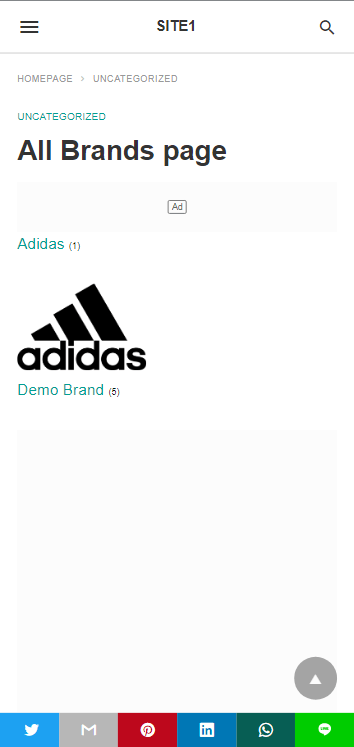
Open this URL on your browser, and you should see an AMP version of your website. Of course, the preview would be much better on mobile devices.
However, If you want to validate whether or not the Google AMP versions of your site are working or not, you can easily do so using your browser’s developer. First, open any of your pages with Google AMP enabled. Then, add this to your page’s AMP URL:
#development=1
So, similar to the above edit, you’d change it to:
testwebsite.com/testpage/amp#development=1
Open the new page with the above editor with the URL and enable Developer Console mode on your browser. For most Windows browsers, it would be Ctrl + Shift + J, While for macs, this would be Cmd + option + J.
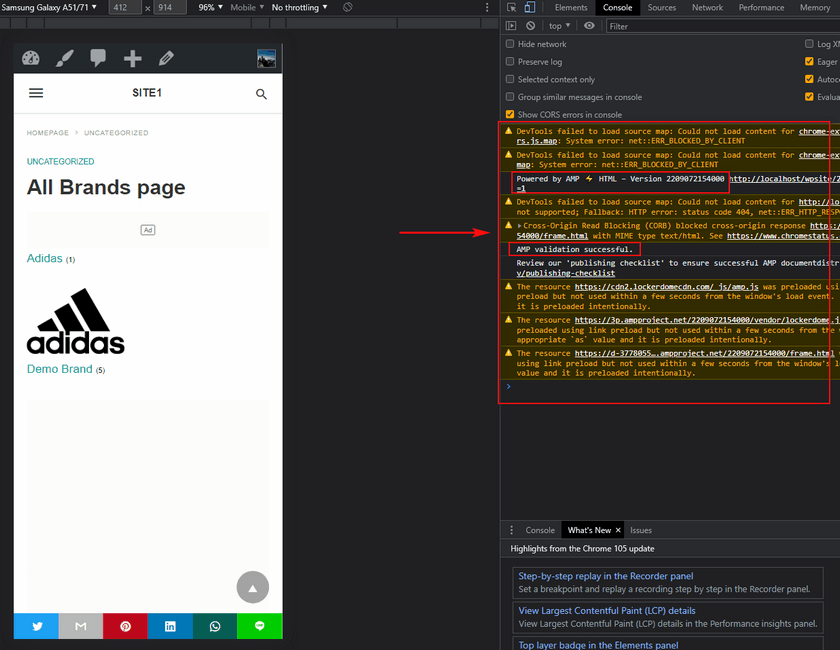
Now, you’ll see all the validation results on the console window on the right. You want to check for any red messages since those are error messages. If you see a Powered by AMP and AMP validation successful alert, your Google AMP works perfectly.
Bonus: Enable Advertisements in Google AMP
Due to the nature of Google AMP, ads do not work for AMP pages by default. However, plugins like AMP for WP also provide specific features to enable ads for your AMP content. Let’s take a quick look at how you can enable advertisements in Google AMP.
Go back to the AMP for WP’s plugin options by clicking on AMP on your WP Admin Sidebar.
Click on Advertisement, and you’ll be taken to the plugin’s Advertisement settings. Under Advertisement Options, enable any of the Ads(depending on the position you’d like.) For our demo, we’ll use AD#1, which lets you add an ad below your Site header.
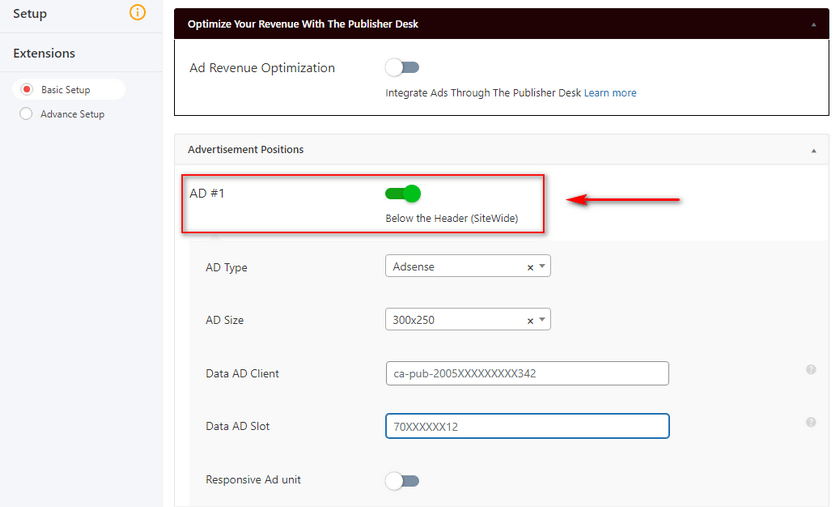
Next, you’ll want to open your Google Adsense account and retrieve your ad unit info. This includes your AD size, AD client, and AD slot.
You can do this by logging into your Adsense account and clicking on Ads > By ad unit. Click on any of the Ad types shown under Create new Ad unit. Name your ad and choose your Display Ad Preview.
You can also change your Ad size between Responsive and Fixed(define your Ad size) on the right sidebar.
Once you’re done, you’ll be given an HTML code for the ad. Note down the ad client and ad slot details.
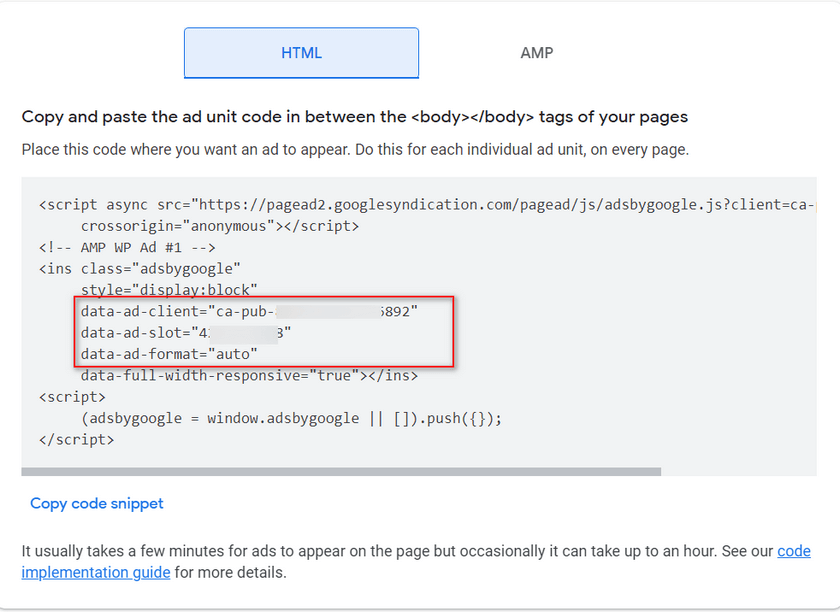
Now, go back to the plugin’s settings and insert the previously saved details into their respective fields. You can also enable the Responsive Ad unit and switch your AD size depending on your ad unit settings.

Click on Save Changes when you’re done, and your Adsense ad should show up on your AMP pages.
Conclusion
And that ends our guide on How to set up Google AMP on WordPress. Let’s do a quick summary of all the things we covered in today’s article:
- Installing and Activating AMP for WP plugin.
- Configuring the plugin to enable AMP for your WP content.
- Various Basic and Advanced settings that you can use for AMP content.
- Validating and Previewing your AMP pages.
- Enable Advertisement in Google AMP.
Of course, parts of this tutorial might be confusing to some of our beginner WordPress readers. If that is the case, please feel free to let us know in the comments, and we’ll do our best to help you. Overall, using and setting up Google AMP with AMP for WP plugin is quite an easy process, and the extra options it comes with are pretty easy to set up. However, if you’d like us to cover the official AMP plugin, let us know, and we’ll get right on top of it.
Additionally, if you want to learn about other free optimization tools that you can set up for your WordPress websites, why not check out some of our other articles here:

This is a beautifully written piece on AMP for WordPress. Thank you!