How to Install WordPress Locally
Do you want to install WordPress on your PC or laptop? In this guide, we’ll show you different methods to install WordPress locally both on Windows and Mac.
Why Install WordPress Locally?
Most website owners create a local environment to have a testing environment where they can try changes on their site. Whether you run an eCommerce store or any other type of website, it’s not recommended to apply changes to your live site. It can cause issues, break your site, and even affect your website’s security.
That’s why you should have a test environment where you can test the new code before deploying it. Additionally, installing WordPress locally and creating a staging environment allows you to test plugins and themes to make sure they don’t cause any conflicts with your existing plugins. On top of that, installing WordPress on your local computer allows you to work on it even if you don’t have internet and it tends to be faster than doing it on the cloud.
To create a WordPress site on your computer, you’ll need to set up an AMP stack that stands for Apache, MySQL, and PHP. To do this, there are several online services. One of the most popular ones is WPSandbox.net. However, if you want a restriction-free environment, you will need to purchase their premium plans or create your own staging environment.
Do you want to have a staging environment but you’re on a budget and don’t want to pay for it? Keep reading.
How to Install WordPress Locally
There are several tools to install WordPress locally and create a WordPress staging environment. To make your life easier, we’ll use two of the best ones:
- Local
- XAMPP
In this section, we are going to show you how to create a staging environment on both Windows and Mac using both software.
NOTE: Keep in mind that you will create a local website. This means that it will only be visible to you on the computer that you install it. To create a public live website, you need a domain and a hosting service.
Method 1: Install WordPress with Local By Flywheel
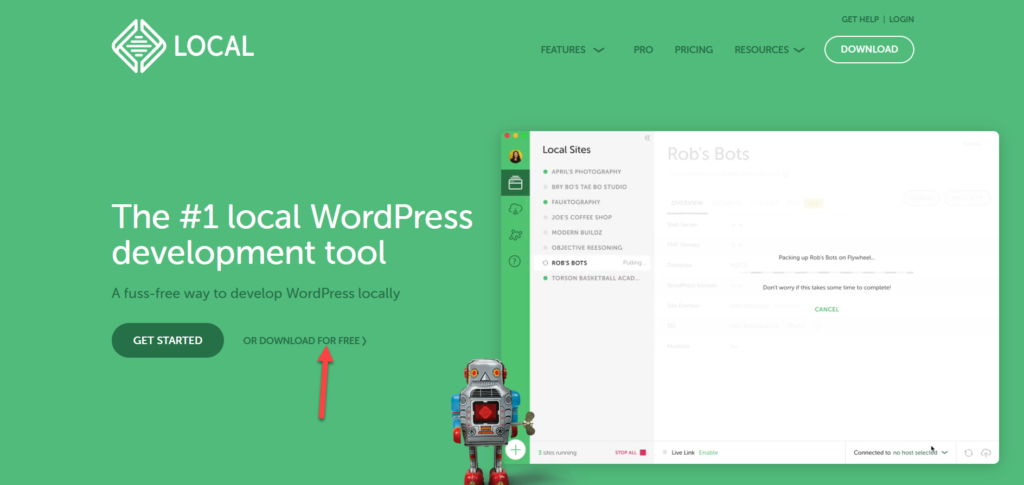
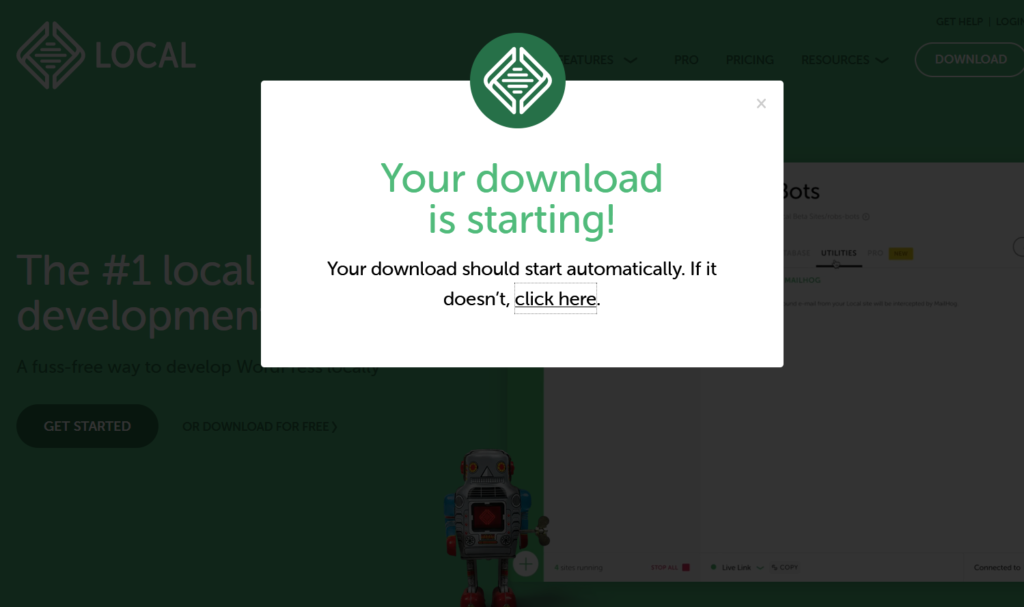
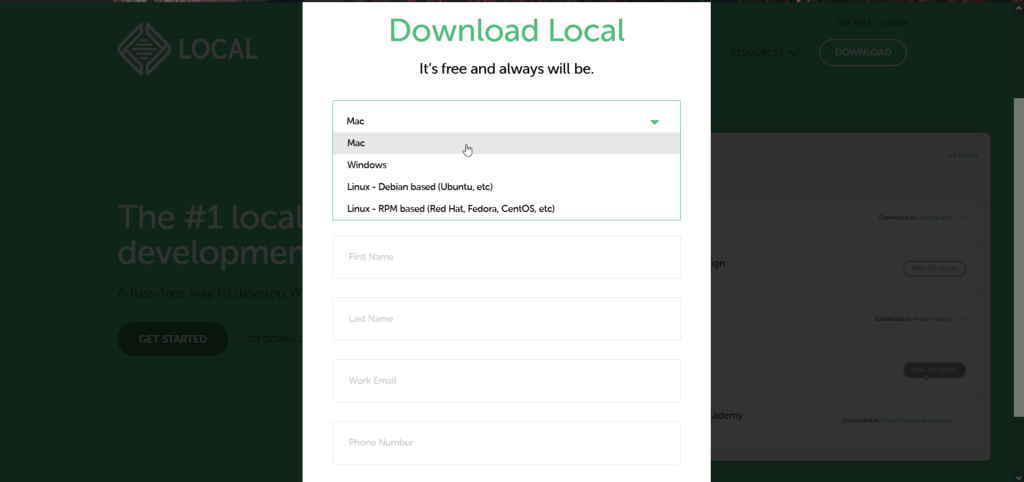
The first thing you need to do is download Local by Flywheel. Simply click here to go to the official website and download it for free.
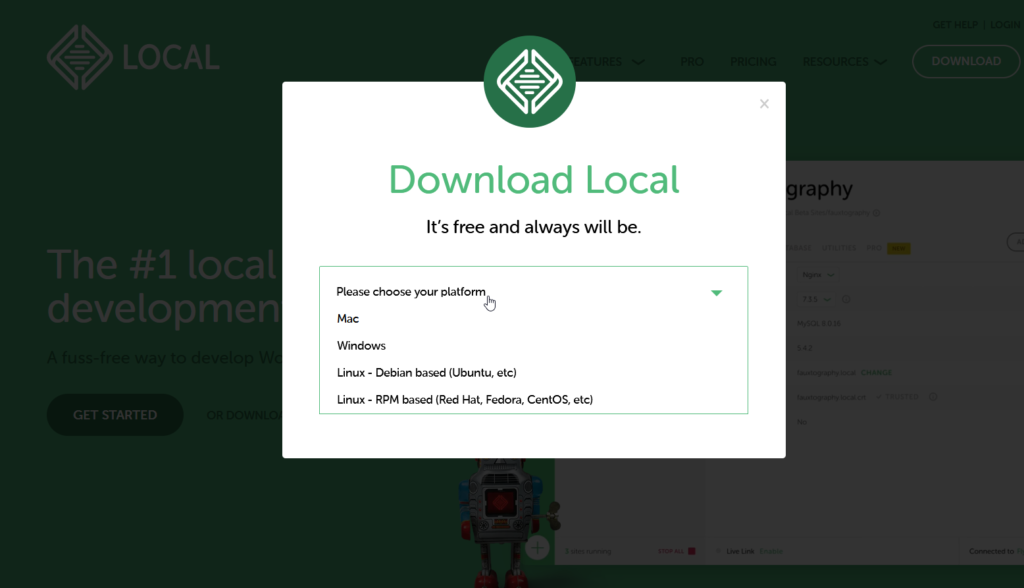
Then, you will need to choose your platform.
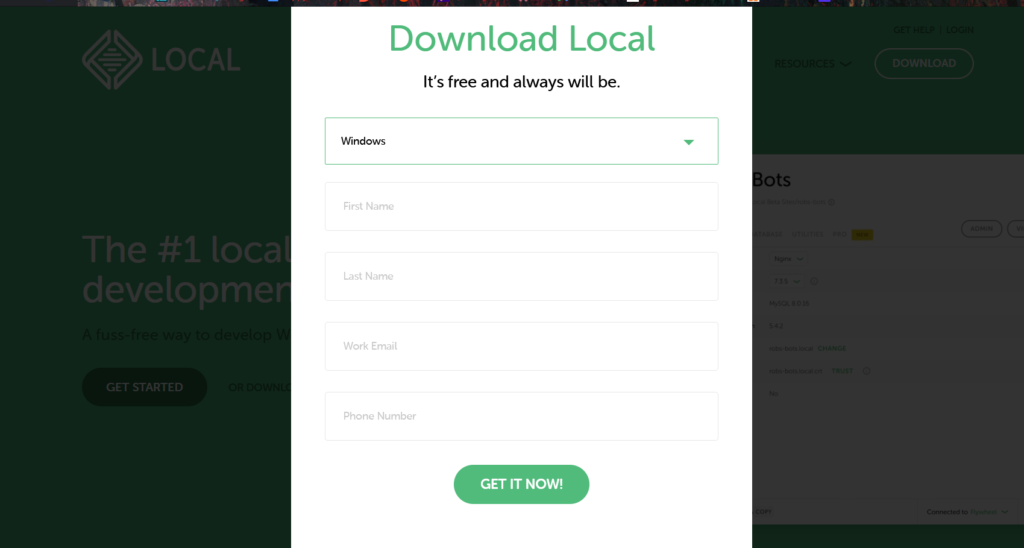
After that, fill in some basic details and press Get it now.
Your download will start automatically. If it doesn’t, click on the download link to start it manually.
After downloading the software, install it on your system.
Installation
Simply, select a folder to store the server data and click Install.
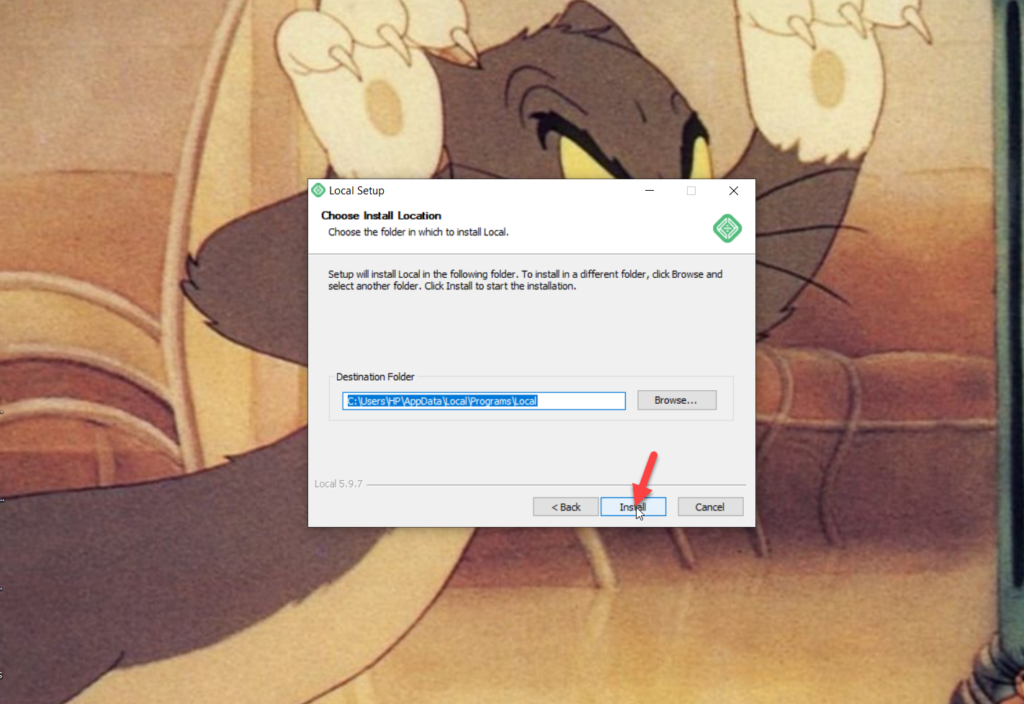
The installation process may take some time so be patient. After the installation finishes, you can run the software from the same wizard.
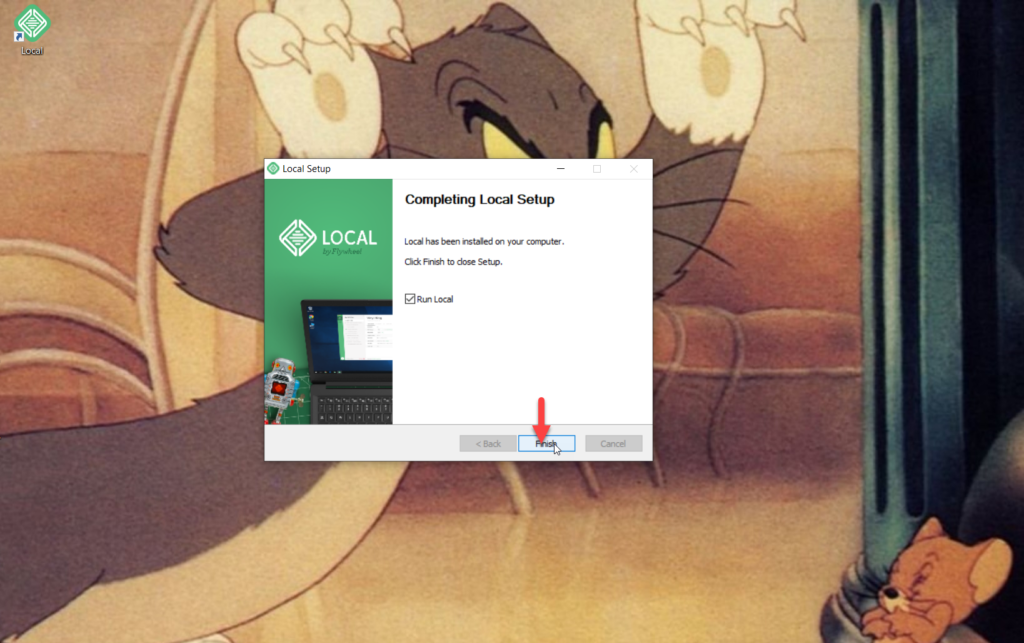
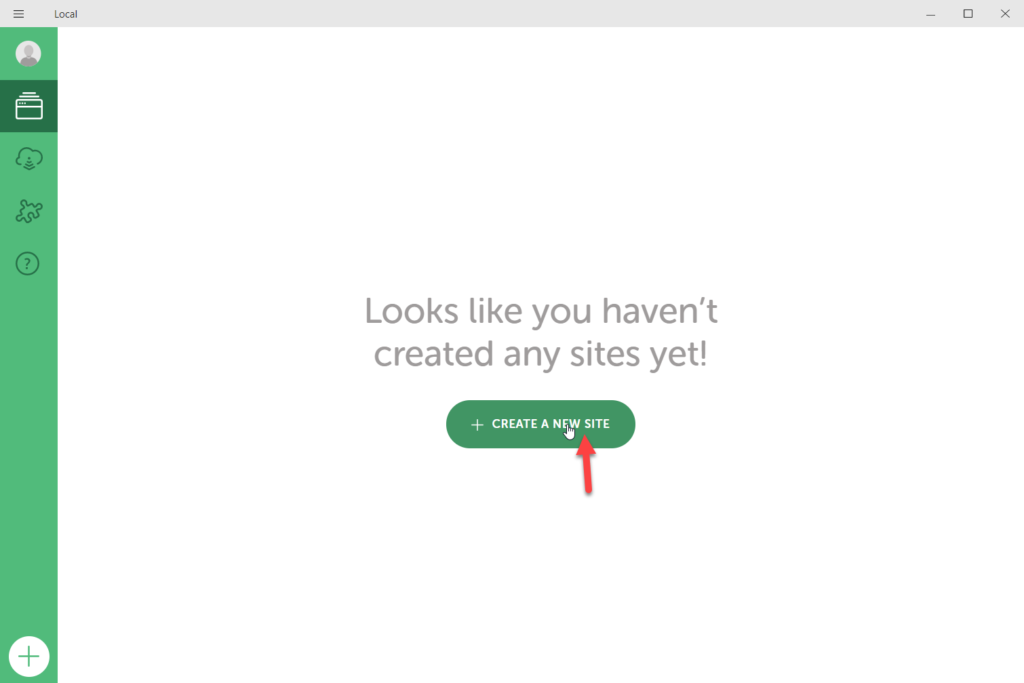
If you are installing Local on your system for the first time, you won’t see any sites listed. Let’s see how to create your first staging environment.
Creating a Staging Environment
To install WordPress locally and create a staging environment, open the Local software and press Create a new site.
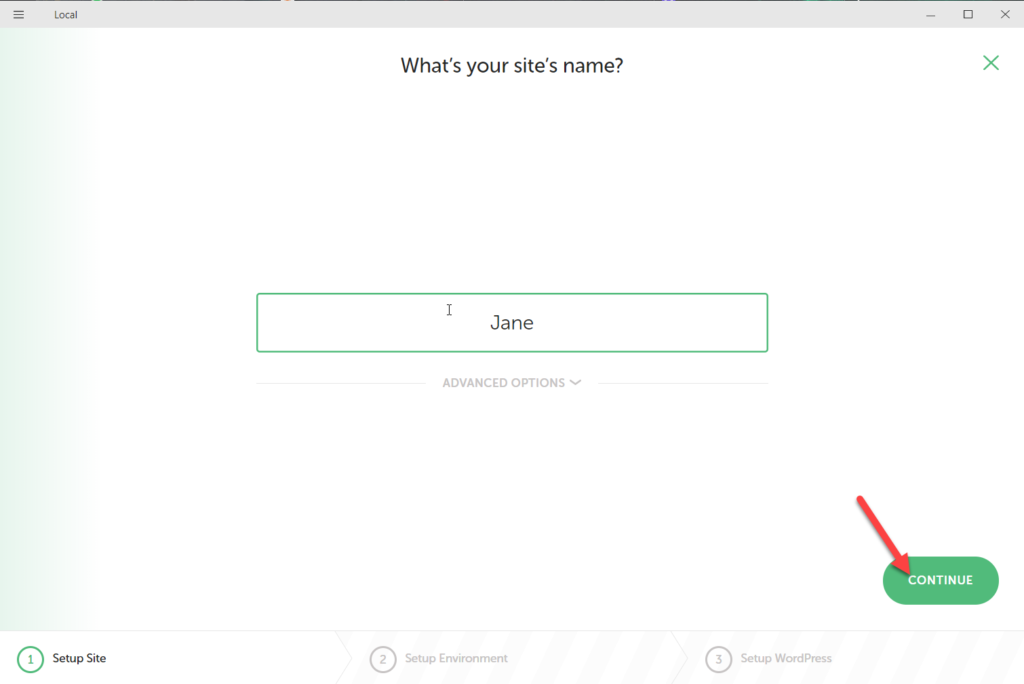
You’ll need to choose a site name that will act like your WordPress website title (you can change it from the site admin area after installation). After that, click Continue.
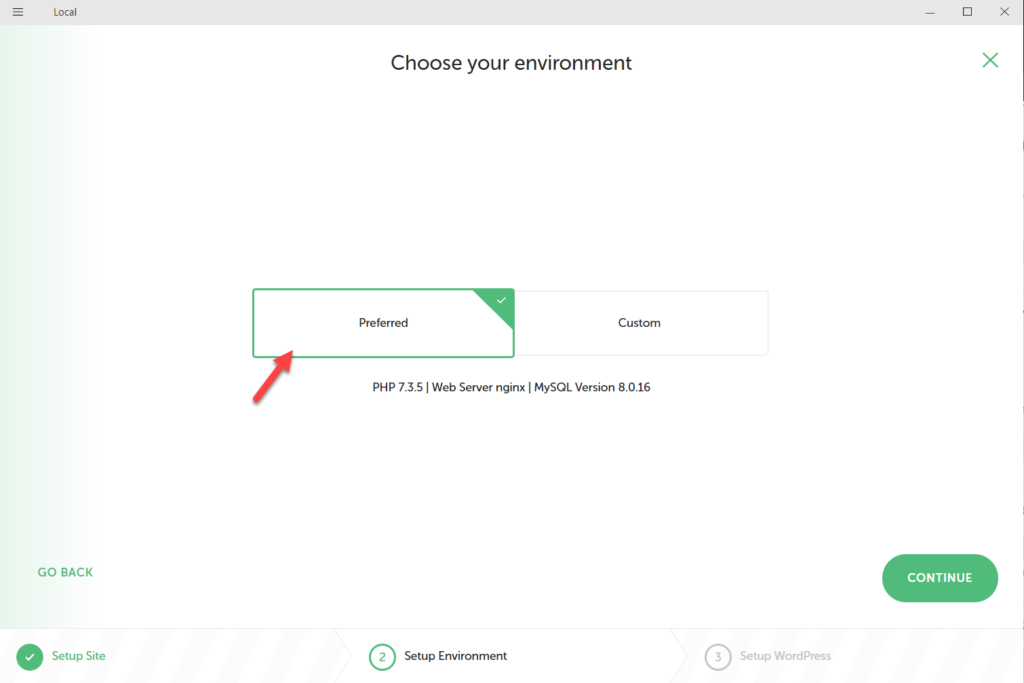
In the next step, you will need to select the environment. The preferred environment is the latest version of PHP and the NGNIX web server with the latest stable version of MySQL. On the other hand, you can set up a custom environment and choose the PHP version, web server, and MySQL version you want. In our case, we’ll select the Preferred environment.
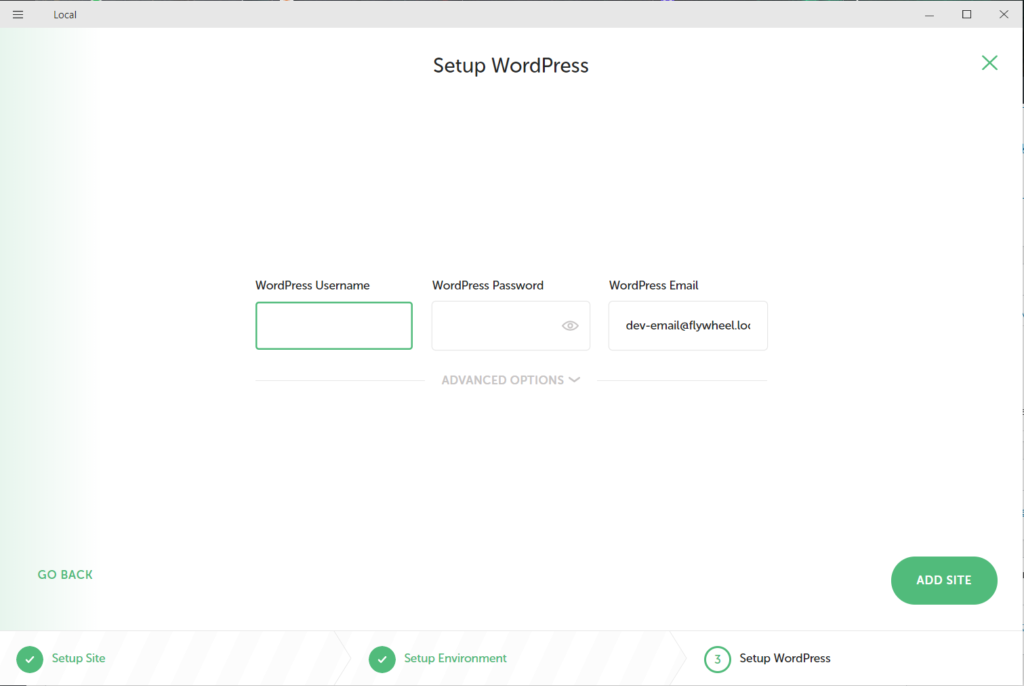
Then, you will need to set up a username and password to access the admin area as well as your email address. After that, press Add your site.
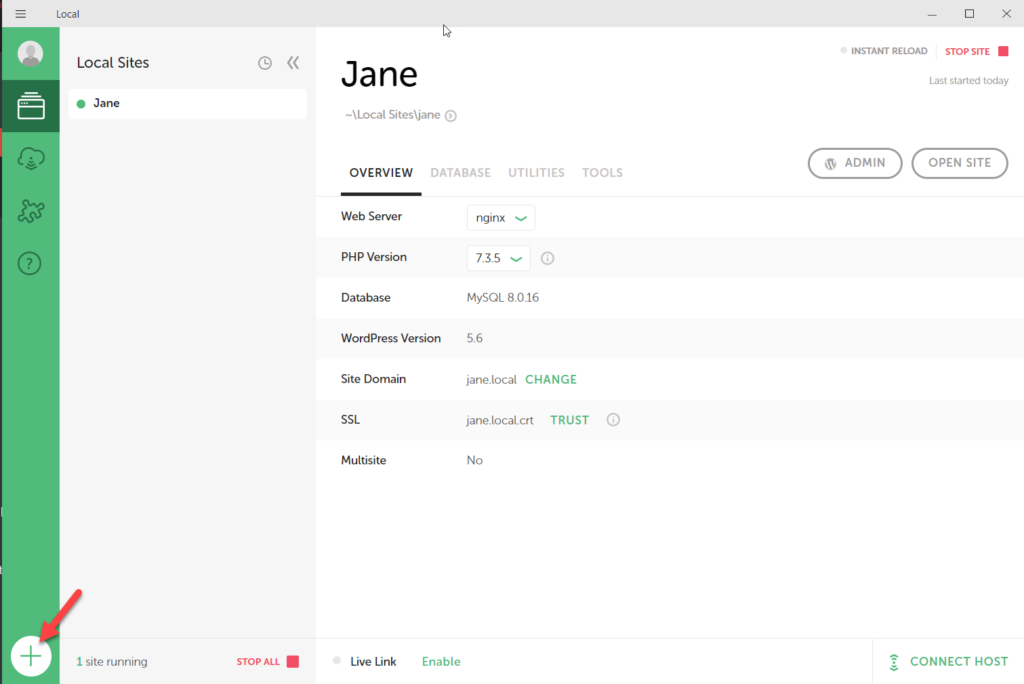
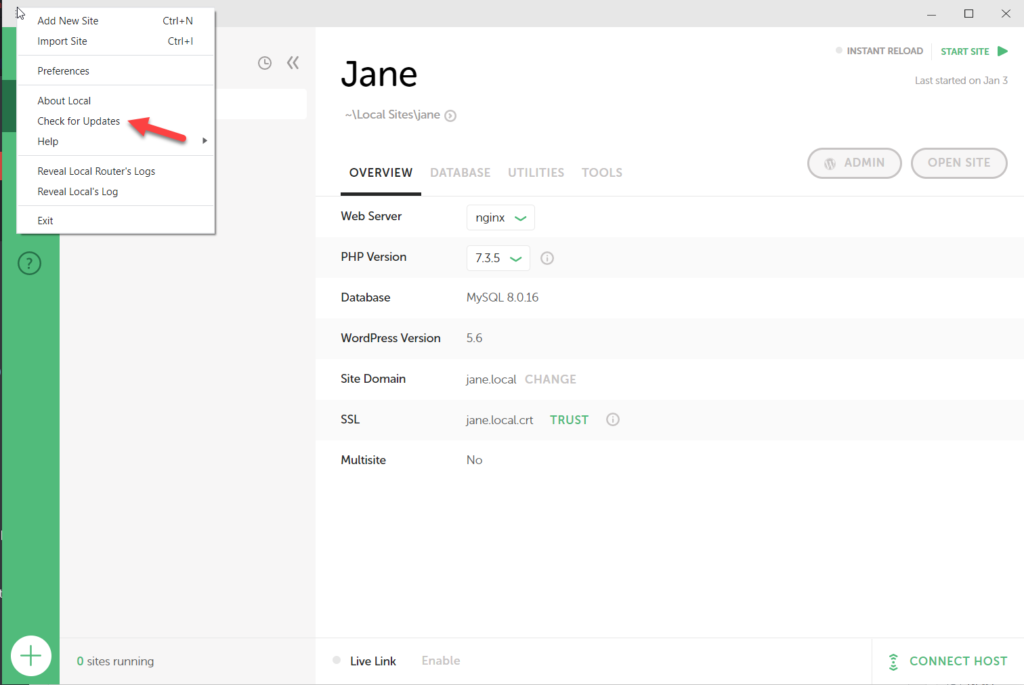
The configuration will take a few minutes and once it finishes, you will see all the basic site information from the Overview tab.
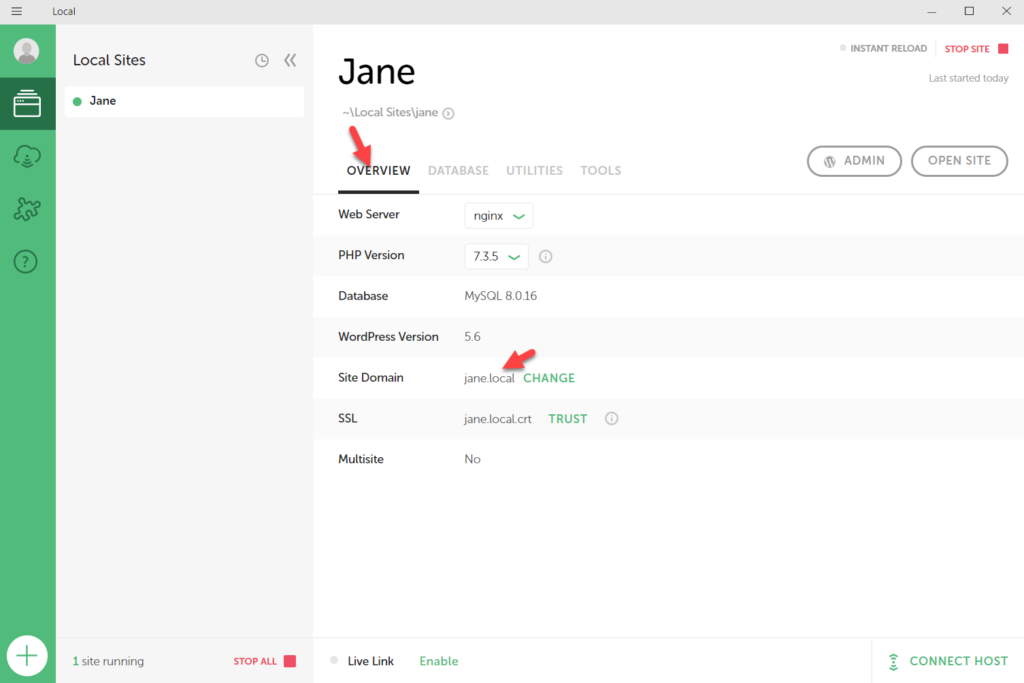
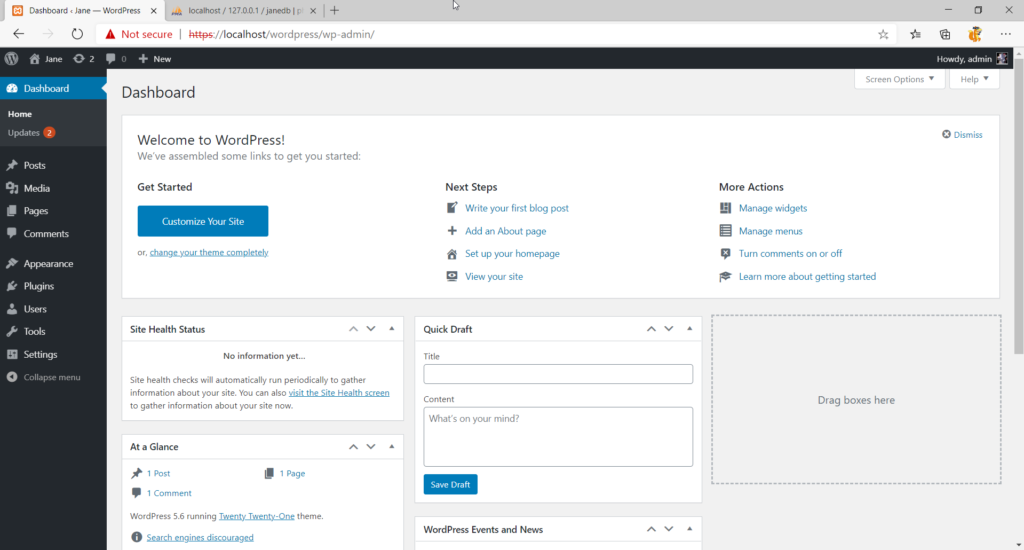
As you can see, my site domain name is jane.local, so if we open the domain name on a browser, we will see the installation.
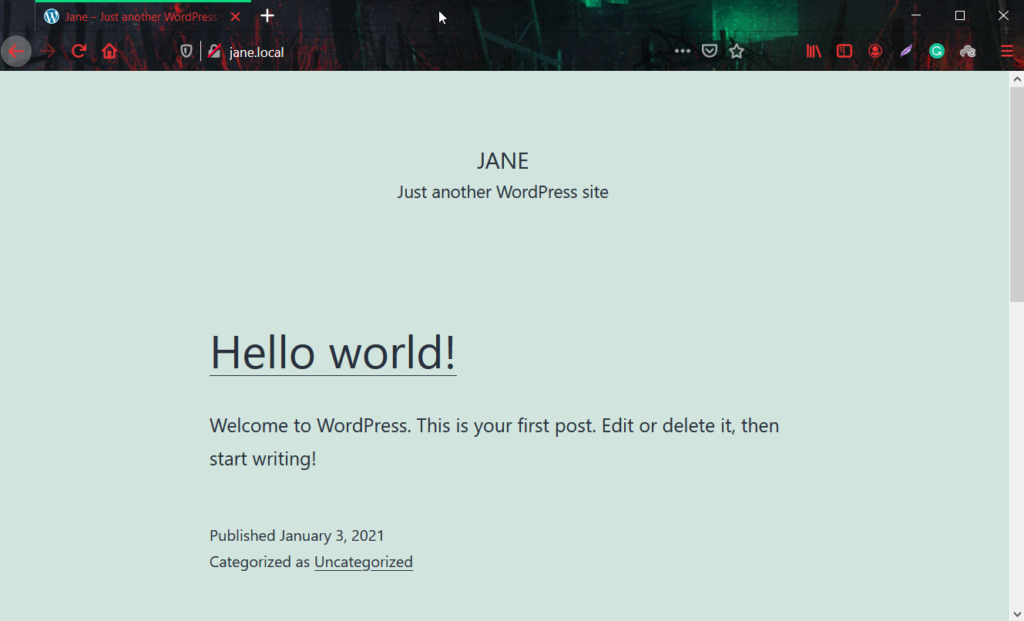
We have successfully accessed the front end of the site. For changes and modifications, we will need to access the admin area.
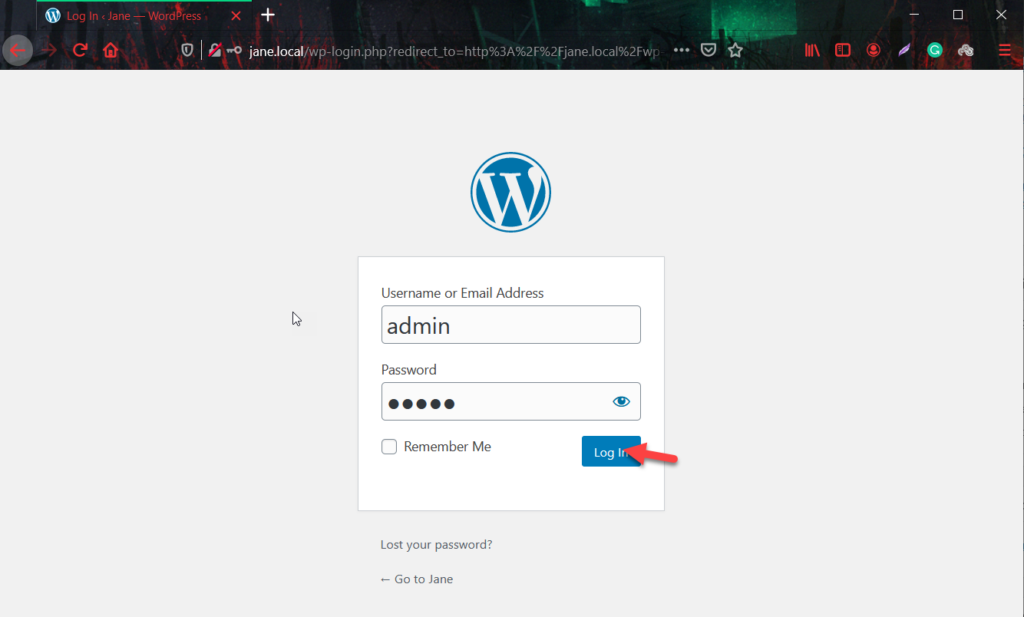
Accessing Admin Area
The admin URL of our local site will be yoursitedomain/wp-admin. To log in, use the username and password you chose during the setup.
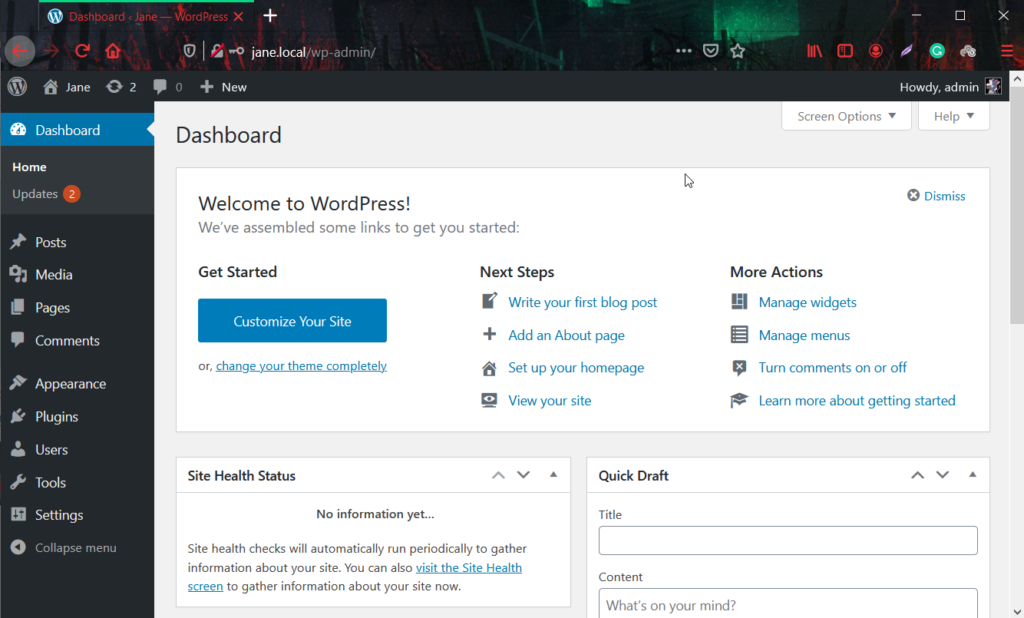
From the admin area, you will be able to manage your staging environment. Just like any WordPress installation, you can add pages, install new plugins, change the theme, add third-party themes, and so on.
If you don’t remember your WordPress admin URL, simply open the Local by Flywheel software, select your site and press the Admin button.
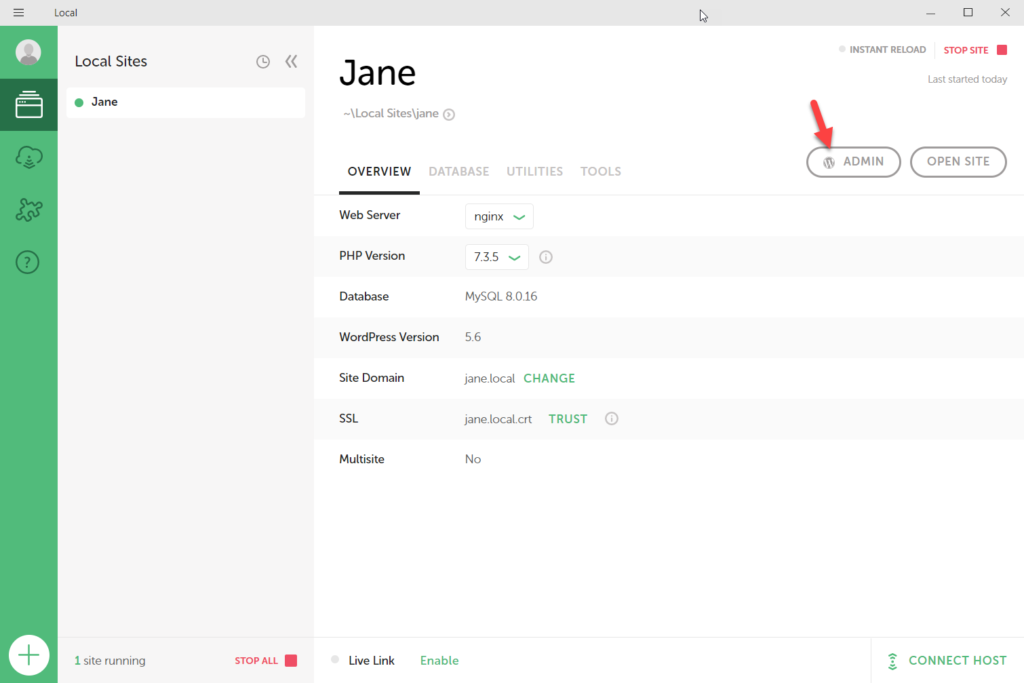
That will redirect you to the admin panel where you’ll be able to log in using your username and password.
Additional WordPress Installations
When you install WordPress locally, you can create unlimited WordPress staging environments. By clicking the + button at the bottom left, you can add as many new staging environments as you want.
After you test different plugins or codes on your staging environment, make sure you stop the site in the Local setup.
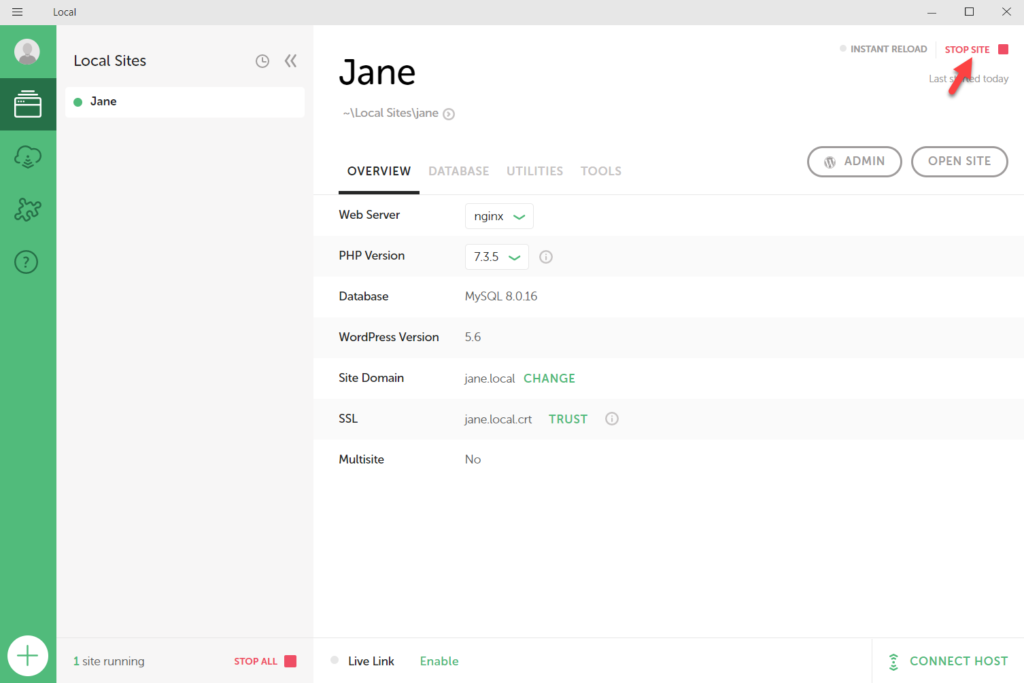
Additionally, when you open the Local app, you will see an option to start the site. It’s worth noting that before accessing the site’s frontend or admin area, you will need to start the site. So if your site is offline in the Local app, you won’t be able to access it via your browsers.
Using Extensions
Apart from installing WordPress on your computer, Local by Flywheel allows you to add extensions to make your life easier. Simply go to the Add-ons section and choose the extensions you want to install.
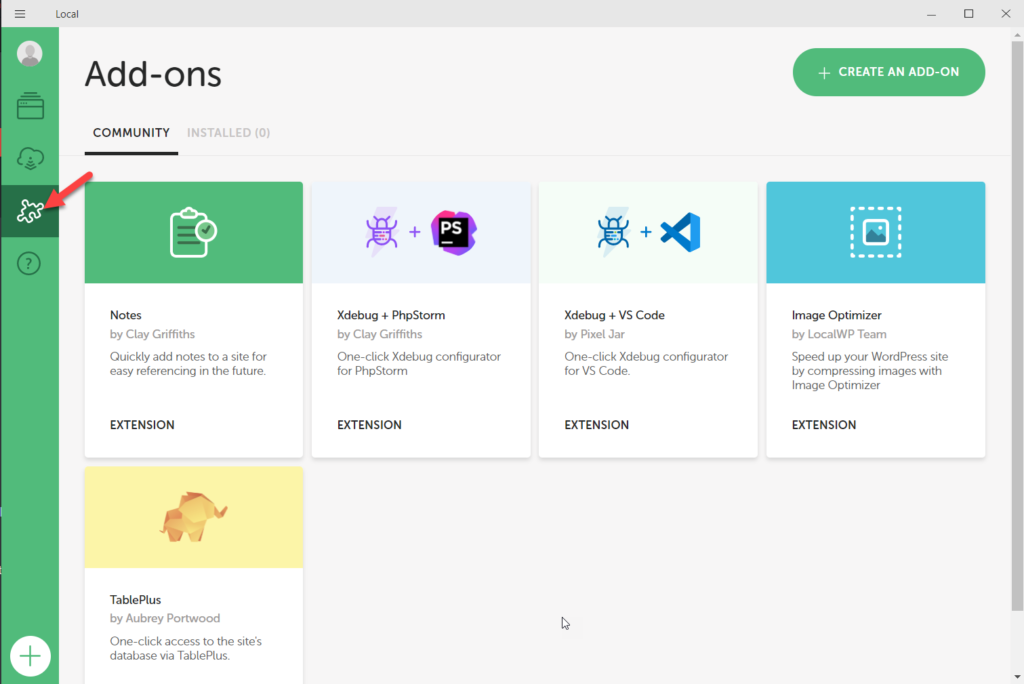
There are currently five official add-ons available:
- Notes
- Xdebug + Phpstorm
- Xdebug + VS Code
- Image Optimizer
- TablePlus
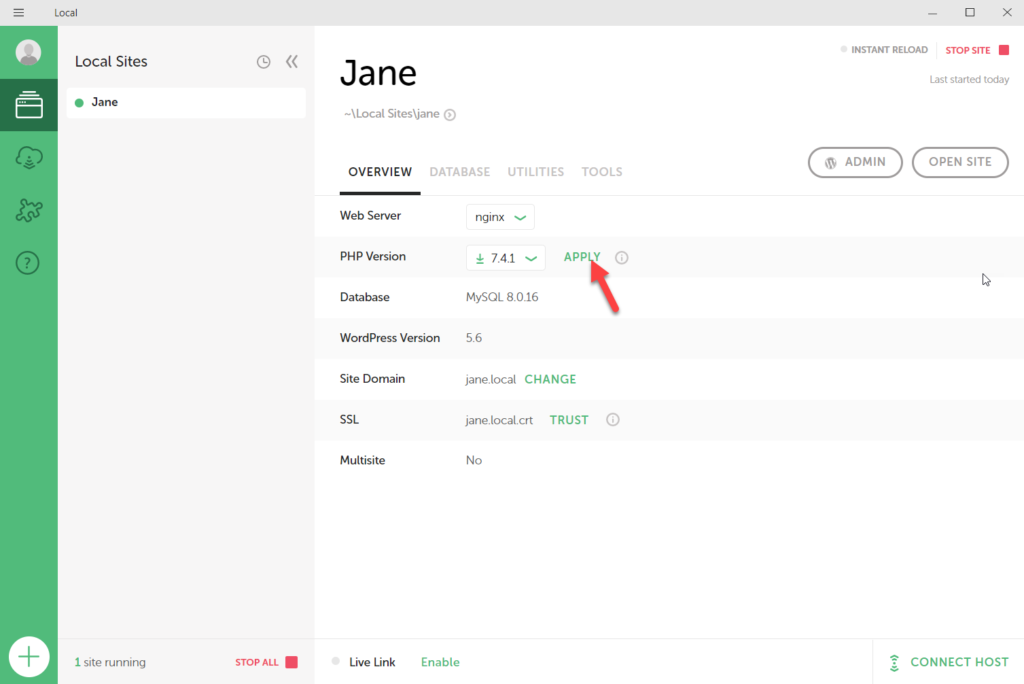
Changing The Server and PHP Version
Finally, if you want to change your web server or PHP version, head to the Overview tab, choose the webserver from the dropdown, and apply the changes.
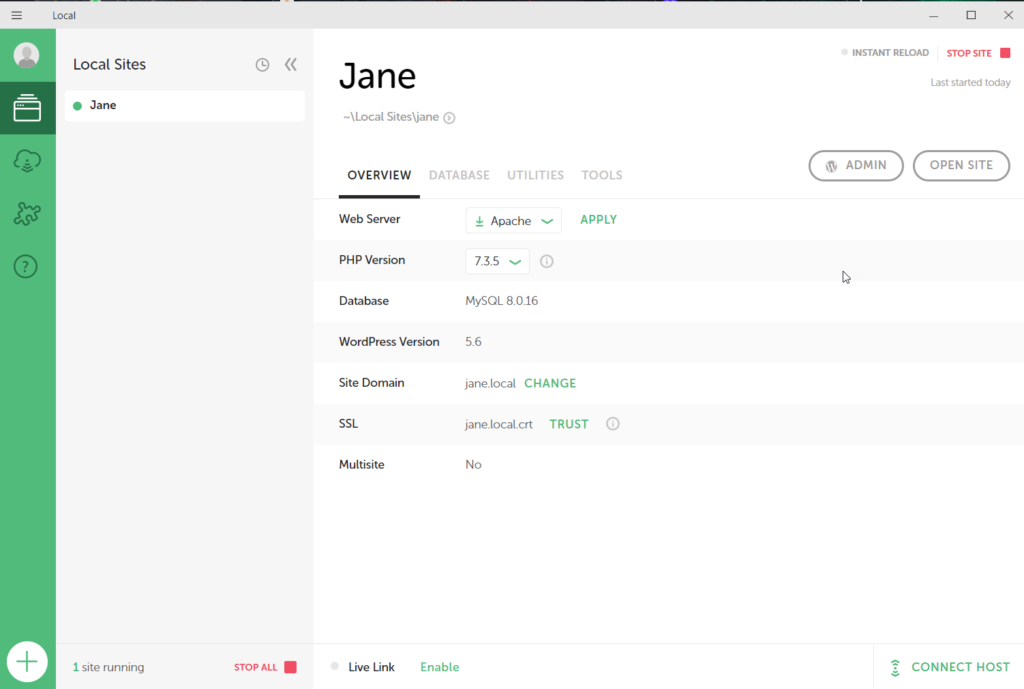
For example, we’ve just changed the PHP version from 7.3.5 to 7.4.1.
This is how you can create a staging site by using Local by Flywheel. Now, let’s see how to install WordPress locally using XAMPP.
Method 2: Install WordPress locally with XAMPP
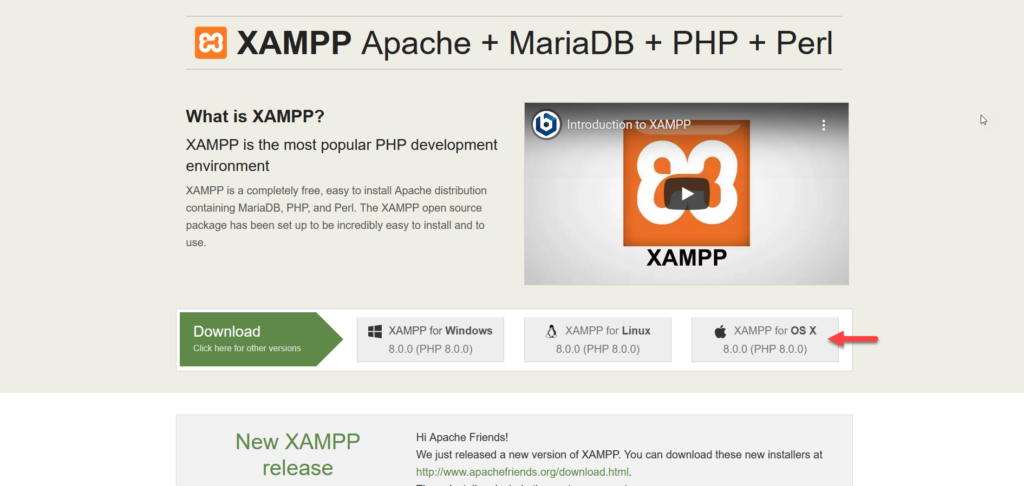
XAMPP is another free software that will help you create a staging environment. It uses Apache, MariaDB, PHP, and Perl. To download XAMPP simply go to the official website and choose your computer’s operating system.
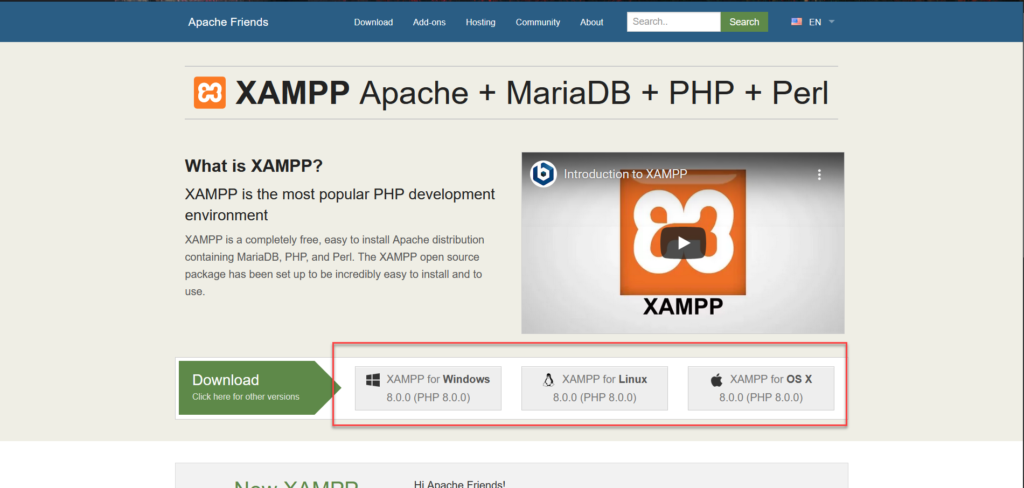
For this demo, we are going to download XAMPP for Windows.
Installing XAMPP Software
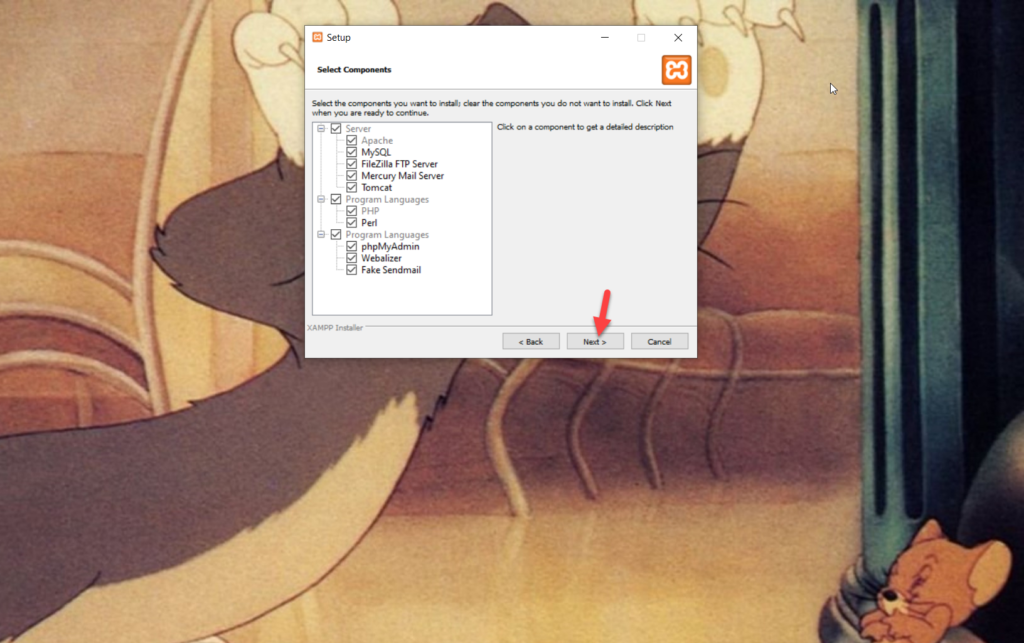
After downloading the software, run it. In the next step, select the components you need to use on your local server. By default, all of them are selected. For now, we’re going to leave that as it is and press Next.
Then, choose the installation directory and move to the next step.
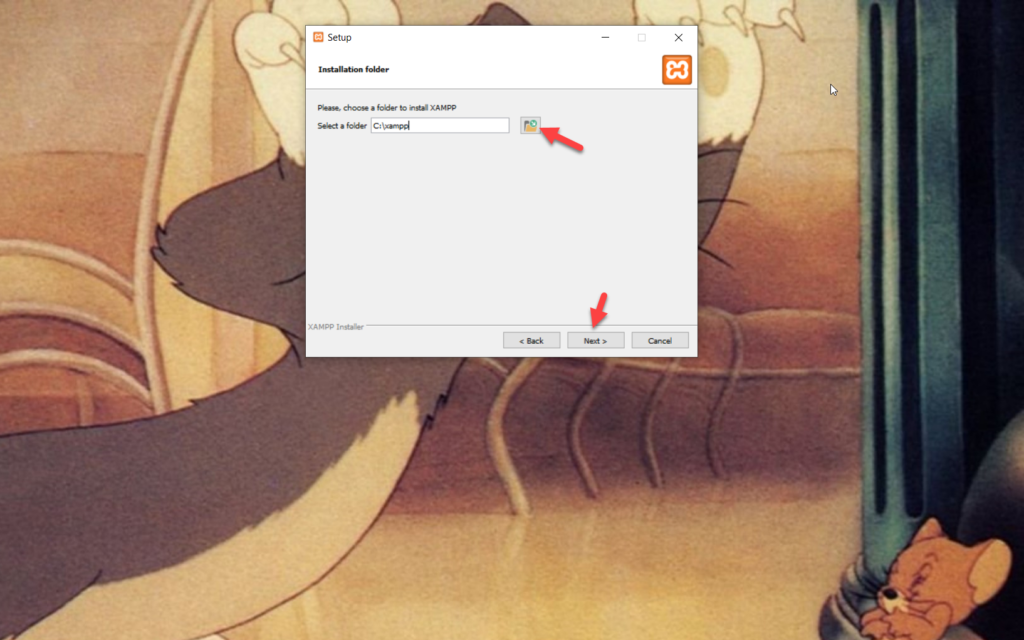
The installation process will begin and may take a few minutes. After the installation is complete, you’ll have to configure the environment. To do this, open XAMPP’s control panel.
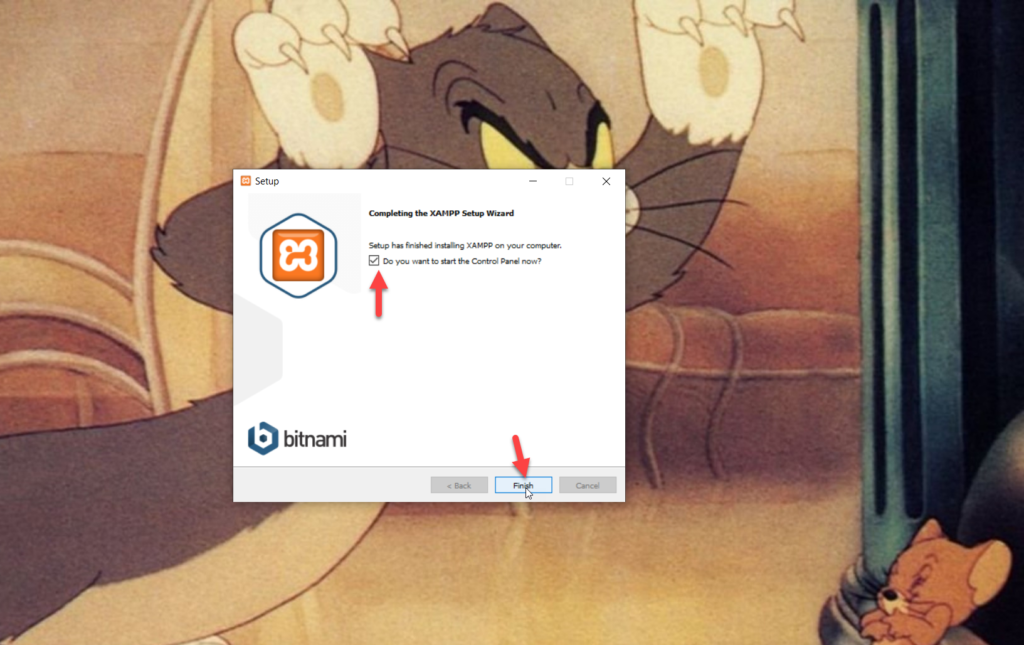
Turning on The Engine
To create a local WordPress installation, start Apache and MySQL.

Then, you need to download the latest version of WordPress.
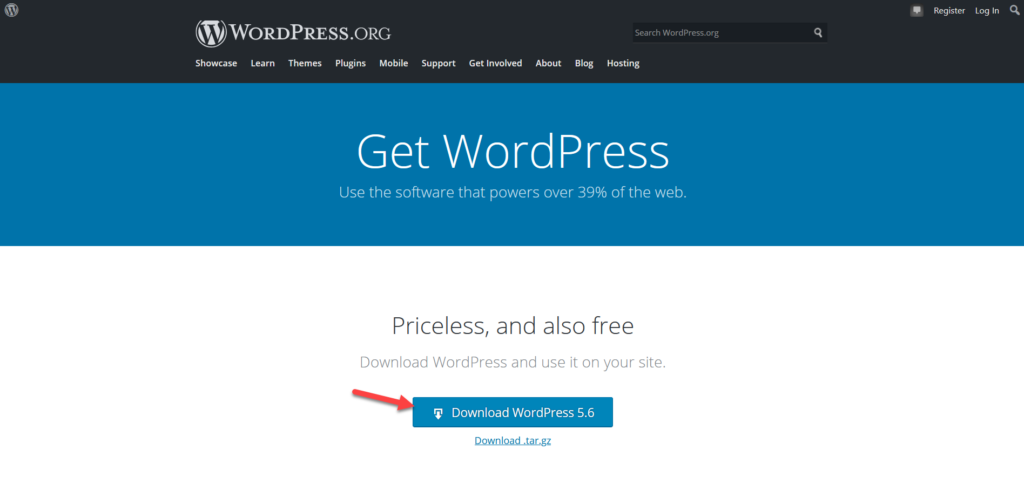
Downloading WordPress CMS
Go to the WordPress repository and press Download WordPress.
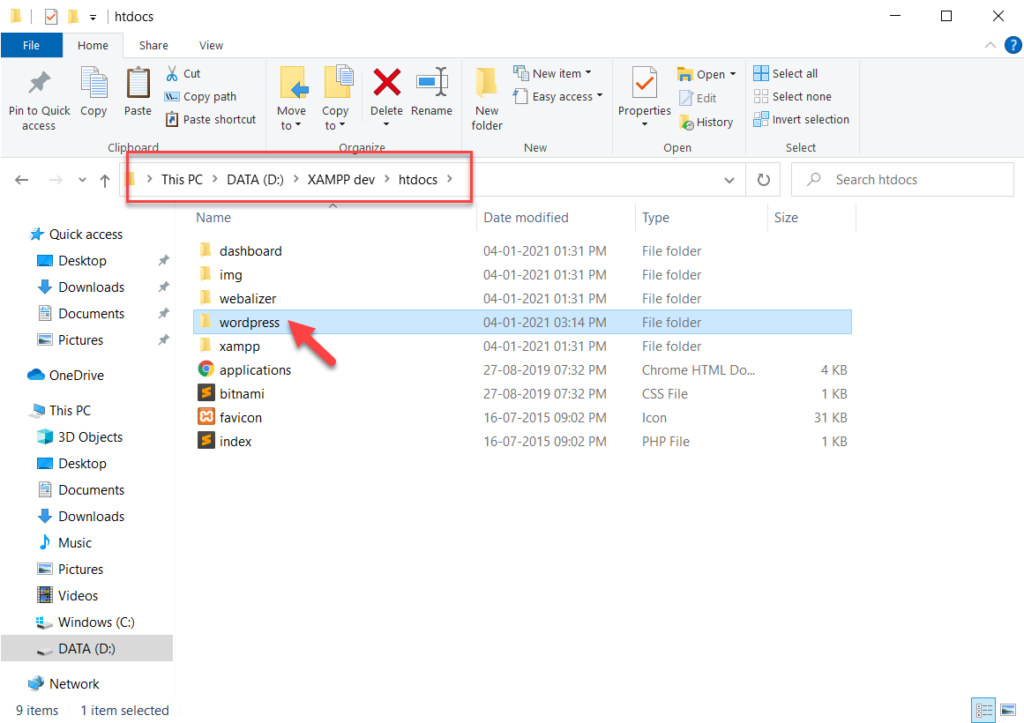
After downloading the ZIP file, extract it with WinRAR or any other compression software. Then, copy the entire WordPress folder and go to the XAMPP installation folder. There, you will see a subfolder called htdocs. Open it and paste the WordPress folder you’ve just copied there.
After that, open your browser and enter your site address https://localhost/wordpress/. Now, it’s time to install WordPress.
Installing WordPress Manually
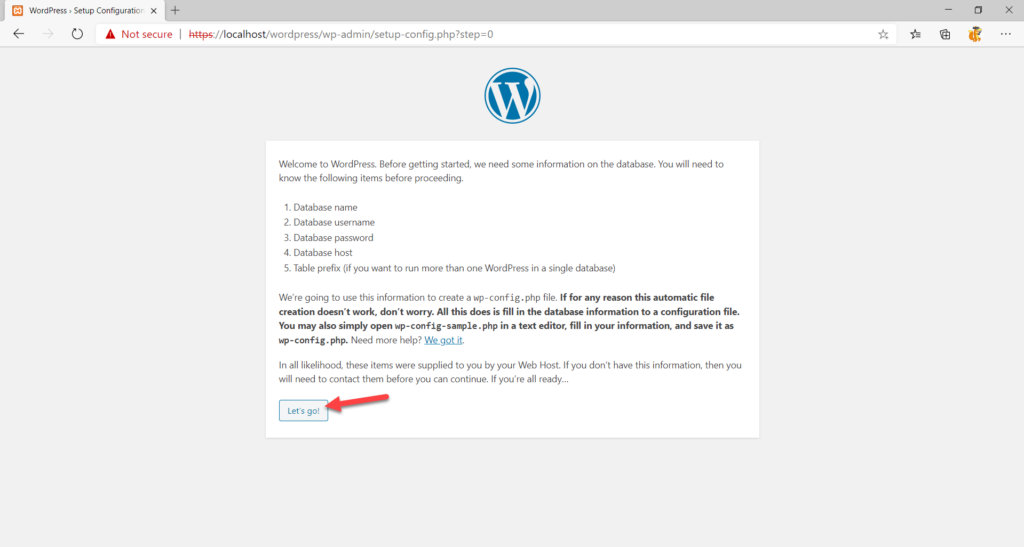
Localhost is our domain name and WordPress is our directory name. Once you have entered that in your address bar, you will see the WordPress installation screen.
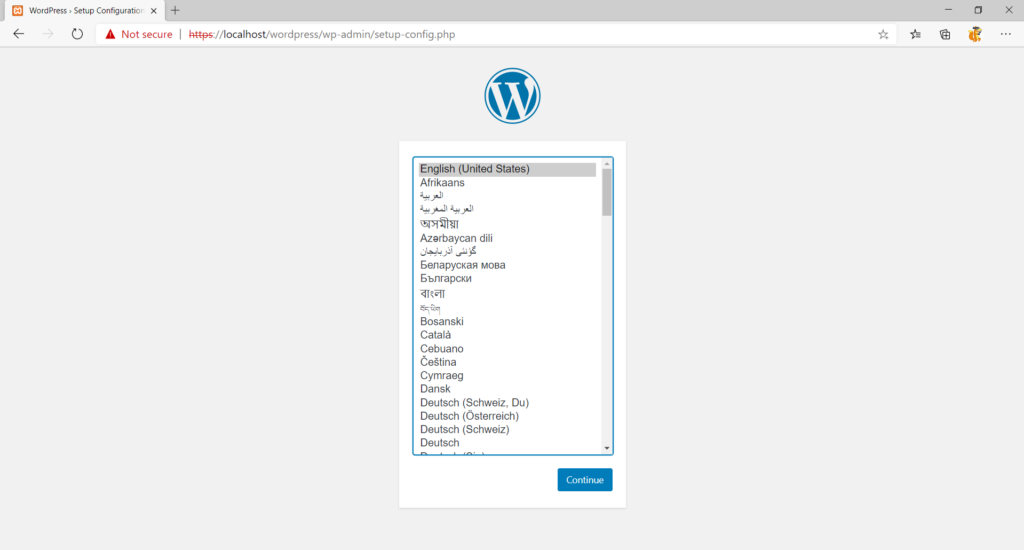
You will need to select a language and click Continue. Then, you will be asked for the database credentials.
So far, we haven’t created a database and assigned any user to it, so open a new browser tab and enter this address https://localhost/phpmyadmin/. It will redirect you to the phpMyAdmin section.
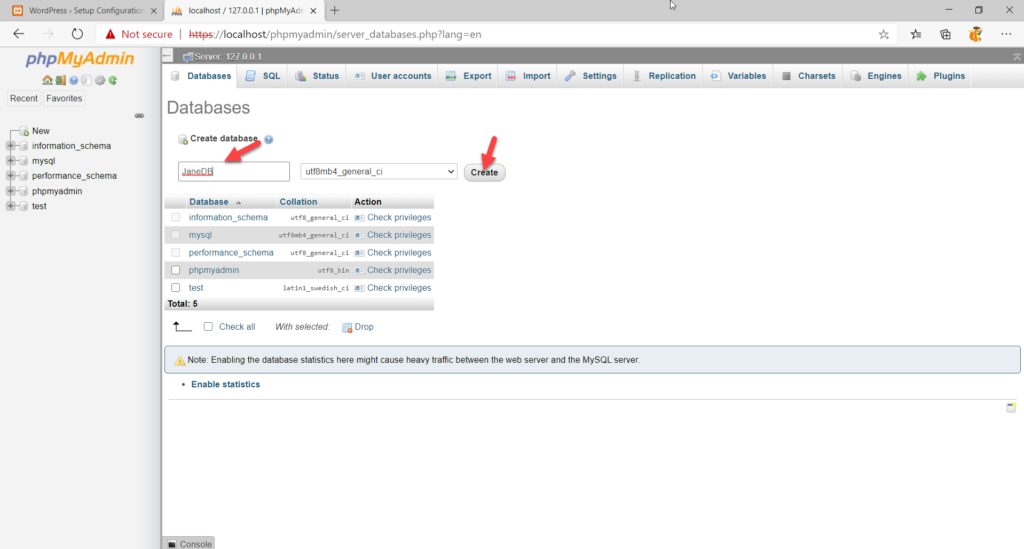
Creating a Database
Now it’s time to create a database for your local site, so head to the Databases tab.

To create a database, all you need to do is give it a name and click Create.
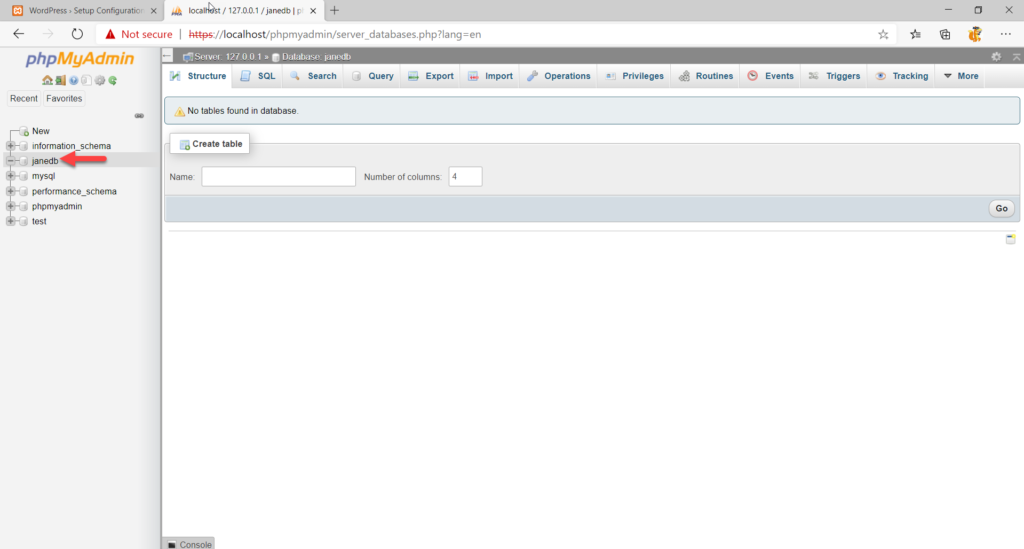
You have successfully created a database and you’ll be able to see it on the left column.
After that, go back to the WordPress installation tab and fill in the details.
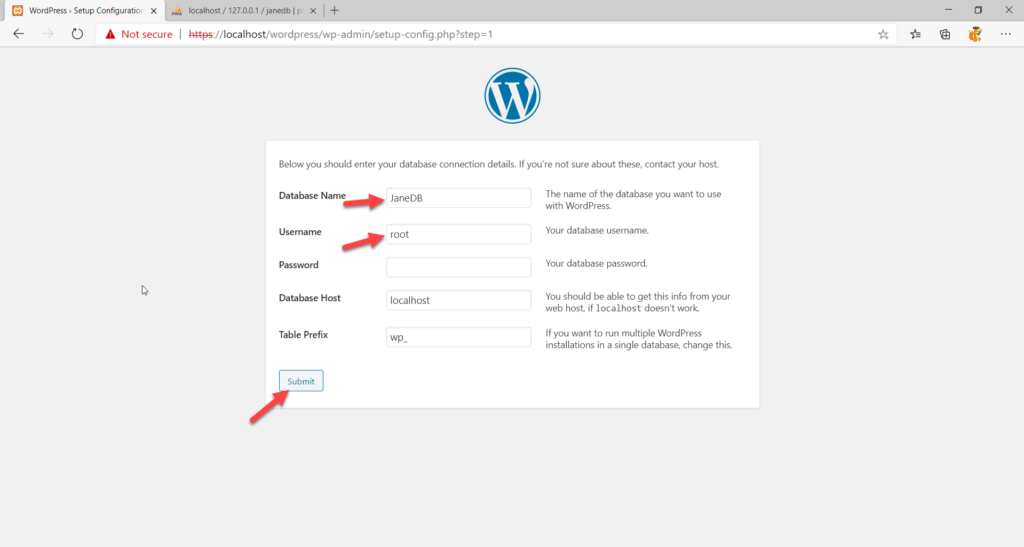
Use your recently created database’s name in the first field. Your default MySQL username will be the root and you won’t need any password, so you can clear the password field. Once you fill in all the fields, click Submit.
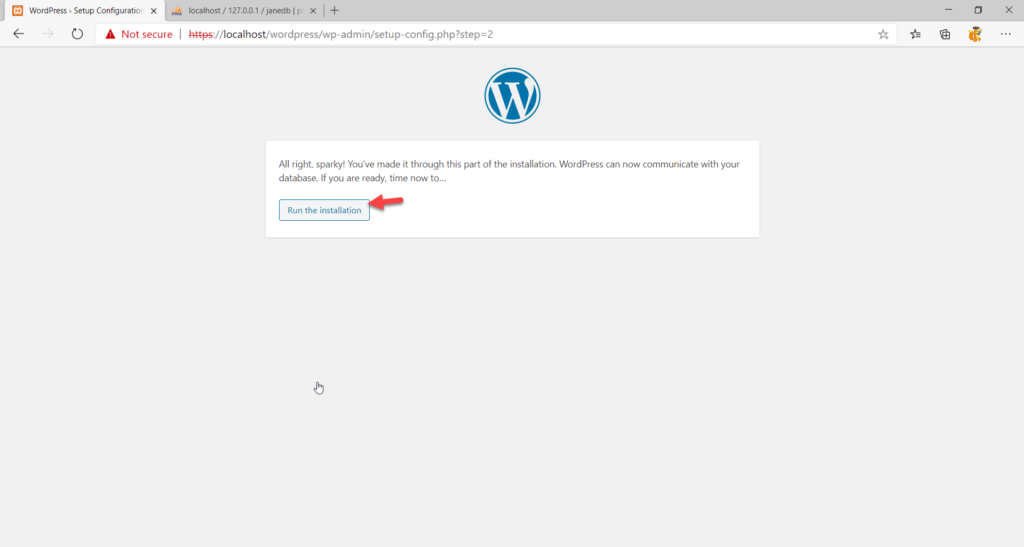
If all the credentials are correct, WordPress will communicate with your database and you’ll be able to run the installation.
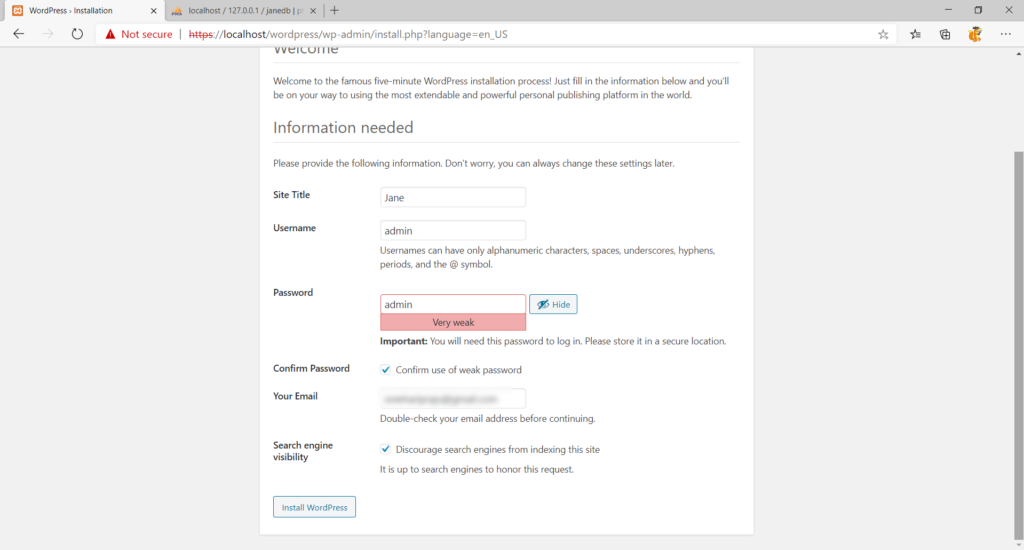
After that, it’s time to install WordPress locally. Simply fill in the required fields and press Install WordPress. Once the installation finishes, you will be able to login to your site using your username and password.
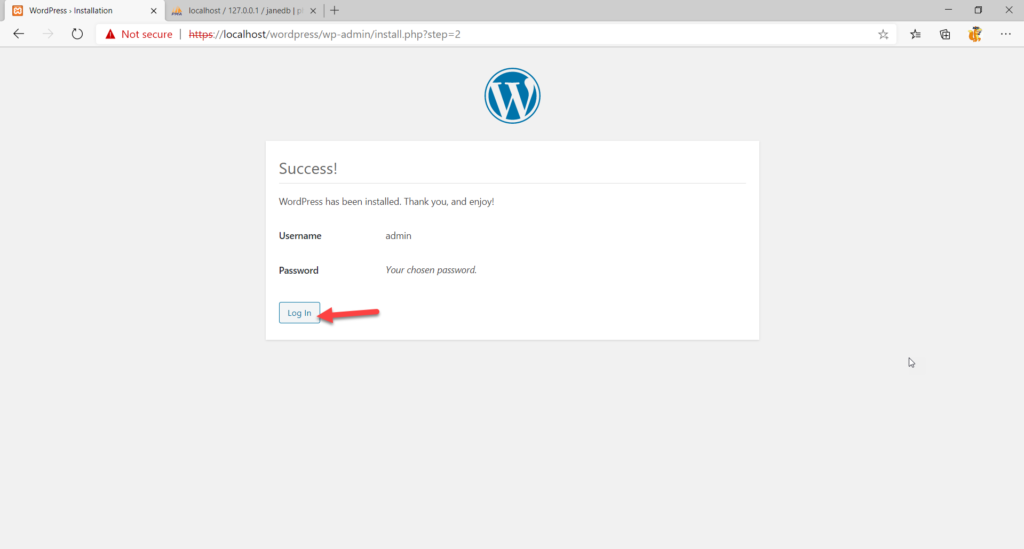
Simply click the Login button or enter wp-admin to the end of your WordPress installation directory.
Accessing The Admin Area
On the login page, enter your username and password.
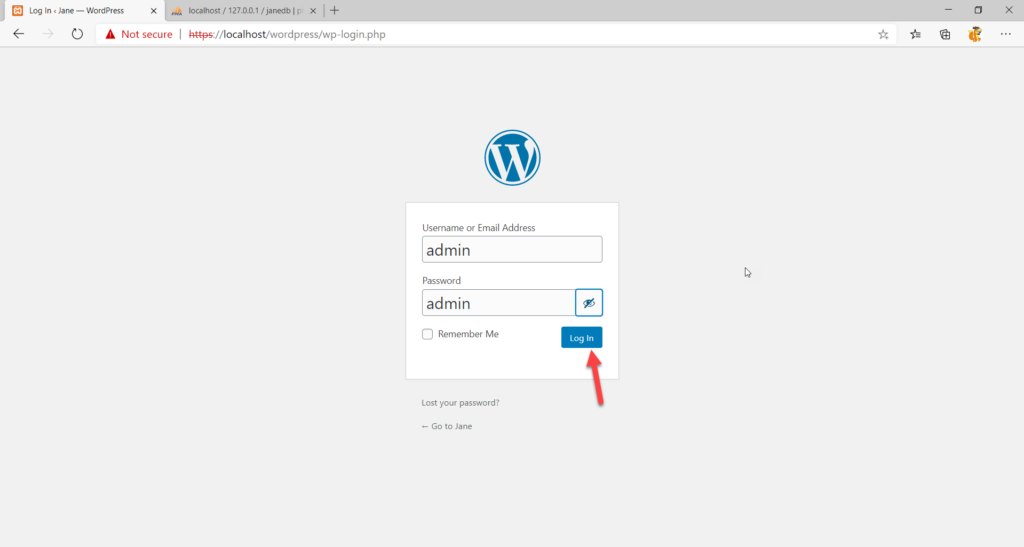
Once you’re on the WordPress admin page, you can manage everything on your site from adding posts to installing plugins to adding users and more.
Finally, it’s worth noting that after using the staging environment, you should open the XAMPP app settings and stop the modules that are currently running. We’ve activated Apache and MySQL modules at the beginning of the process so we’ll stop them.
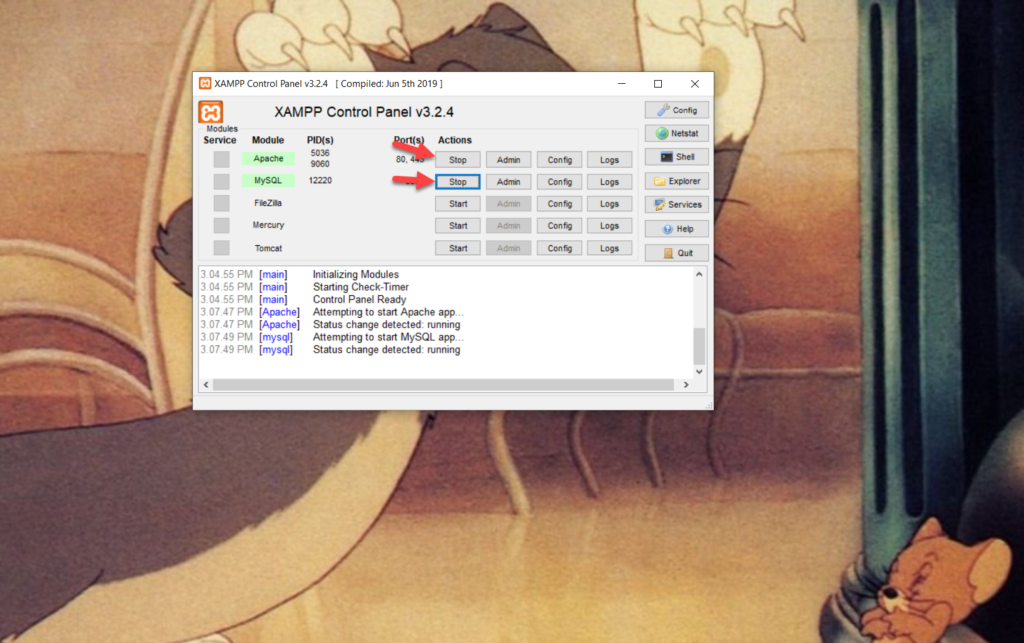
Every time you want to start the dev environment, you’ll need to start both Apache and MySQL modules. After that, you can log in to your WordPress backend by using the user credentials as we described here.
How to Install WordPress on Mac
So far, we’ve shown you how to create a staging environment on Windows, but how can you install WordPress locally when you are running a Mac? When you download the software to create the staging environment, you’ll have the option to choose the platform you use. For example, if you want to download Local, you will have to choose your operating system from the dropdown in the first step.
The same happens if you use XAMPP.
After you download the software, the installation and setup process is the same as the one we described above for Windows.
Recommendations
Check Your Hosting For a Staging Environment
Some managed WordPress hosting companies such as WP Engine, Kinsta, and Cloudways provide you with a staging environment. With just a simple mouse click, you will be able to create a staging environment. So before you install WordPress locally on your computer, check if your hosting offers something similar. From our experience, the staging environments that hosting services provide work smoothly and allow you to make changes to your site without affecting your live site.
Hosting recommendation
As there are several hosting options out there, you may be wondering which one is the best for you. Even though it depends on your needs, in our experience, Cloudways is definitely one of the best-managed cloud-based hosting platforms. It offers the best WooCommerce hosting services for any type of business and comes with lots of great features for a fair price.
Some of Cloudways’ main functionalities are:
- Great staging environment
- Server & application cloning and monitoring
- Free SSL certificate
- Custom Varnish settings
- 24/7 support
- Built-in CDN
- Many integrations and extensions to add functionalities
Check For Software Updates
If you use software to create a staging environment, make sure that there are no compatibility issues. Both Local and XAMPP release new updates with better optimization options, features, and bug fixes often. To keep an eye on them, simply check for updates on your software.
Local or Online?
When you install WordPress on your local computer, you have 100% control of it. It will be on your computer until you delete the installation or uninstall the software. But, if you need an environment just for a few minutes, consider using WPSandbox.net that allows you to install any WordPress plugins or themes.
The main advantage is that you don’t need to download or install any third-party software on your computer. With a few clicks, you will be able to create a staging environment for testing purposes. With WPSandbox’s free plan, the site will be online for 24 hours. However, if you’re looking for a long-term solution, you’ll be better off installing WordPress locally on your computer.
Conclusion
All in all, installing WordPress locally is a great option to create a test environment and even work on your site offline. And the best part is that creating a staging environment on your computer is pretty simple regardless if you use Windows or Mac.
Both Local and XAMPP are excellent tools. However, in our experience, Local by Flywheel is easier to use making it an excellent option for beginners. The installation process is easier and it’s ready to use after installation. Unlike XAMPP, you can create a staging environment without manually downloading WordPress from the repository and creating a manual database. On top of that, Local allows you to create unlimited development environments with a few mouse clicks, whereas to create multiple websites with XAMPP, you’ll need to install WordPress manually and create custom databases on each site.
On the other hand, XAMPP is also an excellent tool to create a staging environment. It requires a bit more set up and it’s not as easy to use as Local so it has a bit of a learning curve.
Are you going to install WordPress on your computer? Which method are you going to use? Let us know in the comments section below and share this post with your friends on social media!

thanks for the useful article on installing WordPress
You are welcome, Ashok
Thanks for the great post! Looking forward for such articles on your website.
Thank you, Maya
It is a useful article for anyone working on WordPress. My custom template can be locally tested without much trouble.
Thank you, Neha
Really Great Article,
Thanks for sharing.
Thanks Aashu
Thank you for this article. Please keep up the good work.
Can I use this installation or the website I create, on an installed WordPress instance on my publicly hosted website? Can I edit it there as well?
Thank You For Sharing This. Simple steps outlined very well with a perfect installation.
Thank you Olivia, glad it was helpful
it was really helpful for me from few days i was trying to install wordpress and facing issue after this reading this points my issue is solved.
We’re glad the tutorial was useful
Great post! As a beginner, I found this tutorial to be incredibly helpful and easy to follow. The step-by-step instructions were clear and concise, making the whole process of setting up a local WordPress installation seem less intimidating.
I appreciate how you covered all the necessary steps, from downloading and installing a local server software to creating a database and configuring WordPress. It’s great that you also included troubleshooting tips for common issues that may arise during the installation process.
One thing that I particularly liked about this post is that you provided links to additional resources for readers who want to learn more about WordPress development. This shows that you really care about helping your readers succeed and grow their skills.
Overall, I think this is an excellent resource for anyone who wants to learn how to install WordPress locally. Thank you for putting this together and sharing your knowledge with us!