
How to Lazy Load Images in WordPress
Do you want to lazy load images in WordPress? Lazy loading images is one of the most basic techniques to improve WordPress speed and performance. It will help you reduce the web server’s load by sending fewer HTTP requests, which in turn improves page load speeds.
So, in this guide, we will show you how to lazy load images in WordPress without any issues.
But what is lazy loading, and why should we lazy load images in WordPress? Let’s get that out of the way first.
What is Lazy Loading and How Does it Work?
Lazy loading is a simple technology bloggers and web developers use to boost their website’s speed. The idea is pretty simple.
For a WordPress website with no lazy loading, when a visitor land on any of your blog posts, all the images in the blog post will be loaded at once. Now, this might sound like a better option, but there is a drawback to it. If your blog post has too many high-quality photos, it can take considerable time to load.
On the other hand, what lazy loading does is it only loads the images present inside the visitor’s current view. Then, as they scroll down, the rest of the images are loaded as they come inside the user’s view.
As a result, the server has to load fewer images in each HTTP request, which reduces the processing load on the server and makes the response time faster.
So many websites today use lazy loading to get better page speeds. Besides, it is easy to set up and manage, so why not give it a go?
Let’s see some of the advantages of lazy loading and understand why we should lazy load images.
Why Lazy Load Images in WordPress?
Google is using page speed as one of the ranking factors. So, if you have better content but poor website speed, you are wasting your efforts. Your competitors can easily outrank you with the same content but better website speed.
Lazy loading is one of the simplest and most efficient ways to make your images serve faster than usual.
When you write how-to blog posts or something similar that contains thousands of words and a lot of detailed images, you have to ensure that the images don’t affect the website’s overall performance.
If left unoptimized, images can drastically reduce the performance of your web page. A higher server response time and lower page speed may increase the bounce rate of your website, which you don’t want to happen at all costs.
Apart from regular WordPress caching, lazy loading can be convenient in most situations and is one of the widely employed techniques to improve your site’s performance.
I’m sure you get the importance of lazy loading images in WordPress. Fortunately, WordPress also recognizes this as an important feature and offers lazy loading natively. Let’s dive into WordPress native lazy loading.
What is Native Lazy Loading?
WordPress 5.5 came up with a native lazy loading feature. The feature is enabled by default, and you do not need to do anything else to configure it. The main advantage of native lazy loading is everyone can get their hands on the feature without relying on extra tools or services.
When you insert images or iframe media inside your page or post, WordPress will automatically add the loading=”lazy” tag to the HTML version.
For example, the updated HTML version of an image will look like this:
<img src="QuadLayer-Blog.jpg" loading="lazy" alt="QuadLayers" />
And iframes will be like:
<iframe src="QuadLayers-products.html" loading="lazy"></iframe>
All the images and iframes will be automatically updated after publishing or updating the blog post. Following are the types of images that will be modified by the new native lazy loading feature:
- Content images
- Excerpt images
- Widget images
- Avatar
- Template images
However, if you don’t want native lazy loading, you can turn it off by adding the following code snippet:
add_filter( 'wp_lazy_loading_enabled', '__return_false' );
With native lazy loading disabled, you can lazy load images in WordPress using a dedicated plugin. A dedicated lazy loading plugin is the best and preferred method to deal with lazy load. In addition, you can add images and iframe videos to lazy loading with the plugins.
Below, we have listed some popular plugins you can use to add lazy loading to your WordPress website.
Best Plugins to Lazy Load Images in WordPress
If you search for a lazy load plugin for WordPress, you will land on multiple free, freemium, and premium solutions. This section will introduce three popular and feature-rich plugins you can use to lazy load images. They are:
- BJ Lazy Load – Free
- WP Rocket – Premium
- Smush – Freemium
Let’s have a look at each plugin’s major features and see which can be a better choice for your site.
1) BJ Lazy Load
BJ Lazy Load is the right tool if you prefer a plugin with minimal configuration options. The plugin is available with a straightforward setup wizard, and anyone with some knowledge can configure it. The plugin can be used for lazy loading your image files and iFrame videos.
Moreover, if you need to translate the plugin to any other language than English, that’s possible too.
BJ Lazy Load is the perfect partner when you need a dedicated plugin for lazy-loading images and videos.
Features
- Compatible with CDN
- Easy to Use
- Minimal Settings
- Translations Ready
- Works with iFrames
Pricing
BJ Lazy Load is a free WordPress plugin.
2) WP Rocket
WP Rocket is one of the most feature-rich WordPress caching plugins available. It has many features, including page caching, cache preloading, gzip compression, eCommerce optimization, database optimization, image optimization, and CDN integration.
One of the main advantages of the plugin is its compatibility. WP Rocket is compatible with most WordPress themes and plugins, so there will be no conflict. Moreover, database optimization is another cool feature offered by WP Rocket to optimize your website.
Besides all these amazing features, the plugin lets you enable lazy loading on your website. With WP Rocket, you do not need a separate dedicated lazy load plugin.
Features
- Page Caching
- Database Optimization
- eCommerce Optimization
- GZIP Compression
- CDN Integration
- Cache Preloading
Pricing
WP Rocket is a premium caching plugin. It has many features, as you can see, and you can get it for $49 a year for a single site.
3) Smush
If you need to optimize your images to the next level, Smush is one of the best tools you can use. Smush is a dedicated plugin for image compression and optimization. It is created to boost the performance of your WordPress website by reducing the image’s size and enabling lazy load. With the plugin, you can compress unlimited pictures and directories.
On top of that, the team has created a custom CDN (Content Delivery Network) to boost image serving. In addition, the multiple integration opportunities like Gutenberg, WP Bakery, Gravity Forms, and Amazon S3 can help the website owner to build more powerful integrations and boost productivity.
Features
- Easy to Manage
- Unlimited Image Optimization
- Custom CDN
- Directory Smush
- Multiple Integrations
Pricing
Smush is a freemium solution. The free version of the plugin may be enough for the basic operations but does feel somewhat limited. If you want the full experience, you can get the premium membership starting at $7.5 a month for a single site.
So, these were some of the best options to add lazy load to WordPress. However, if you want to see more available options, feel free to check out our dedicated list of the best lazy load plugins for WordPress.
With that out of the way, let’s finally see how we can lazy load images in WordPress.
How to Lazy Load Images in WordPress
This section will teach you how to lazy load images in WordPress using the BJ Lazy Load plugin. So, without any further ado, let’s get started.
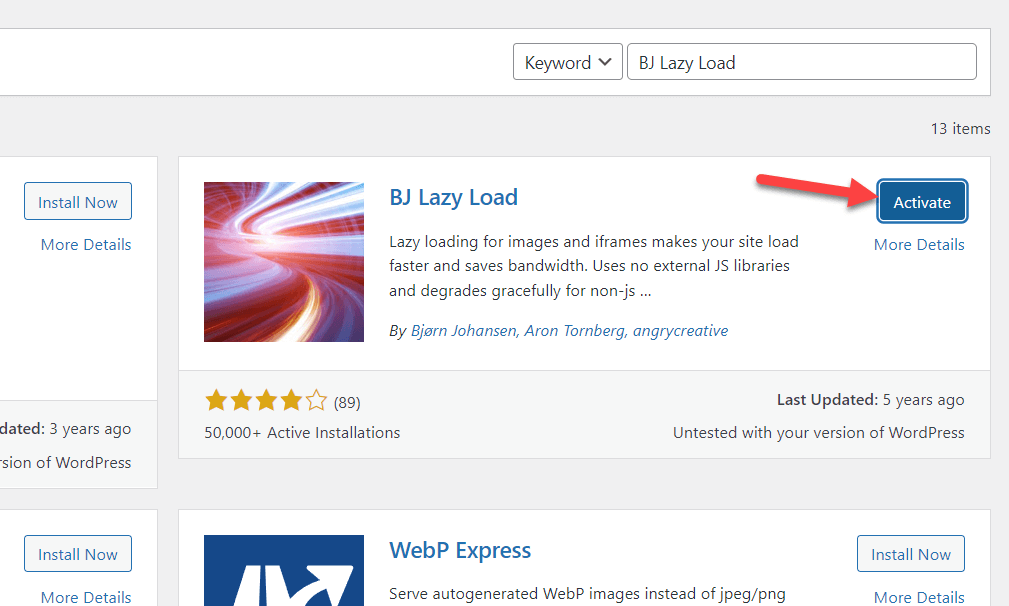
The very first thing you want to do is install and activate the plugin on your WordPress website. Next, log in to the WordPress Admin Dashboard and go to the Add New plugins section.
From there, you can search for BJ Lazy Load.
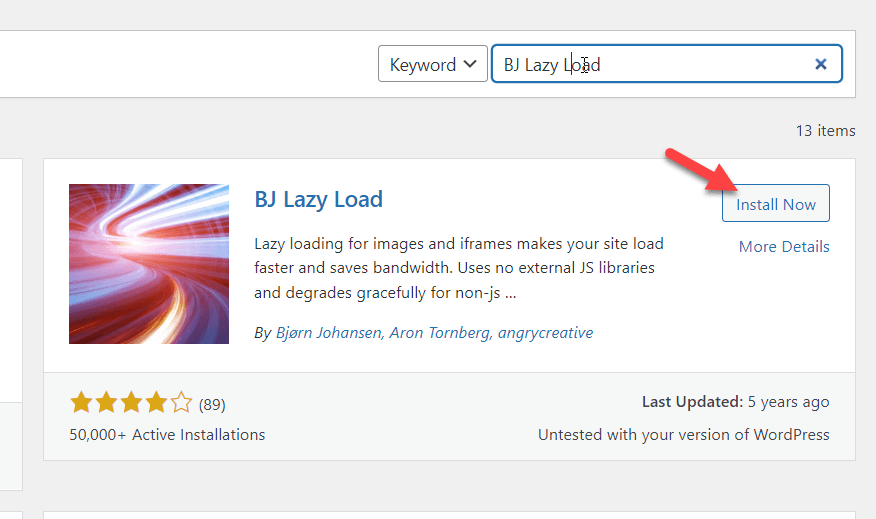
Once you have installed the plugin, activate it.
Once the plugin is active, under the WordPress settings, you can see the plugin’s configuration.

There, you will see all the available configuration options.

The default configuration that comes with the plugin is pretty good. But if you need to tweak it, you can do it from the plugin’s settings page. Whatever you do, ensure you have enabled lazy loading images and iframes.
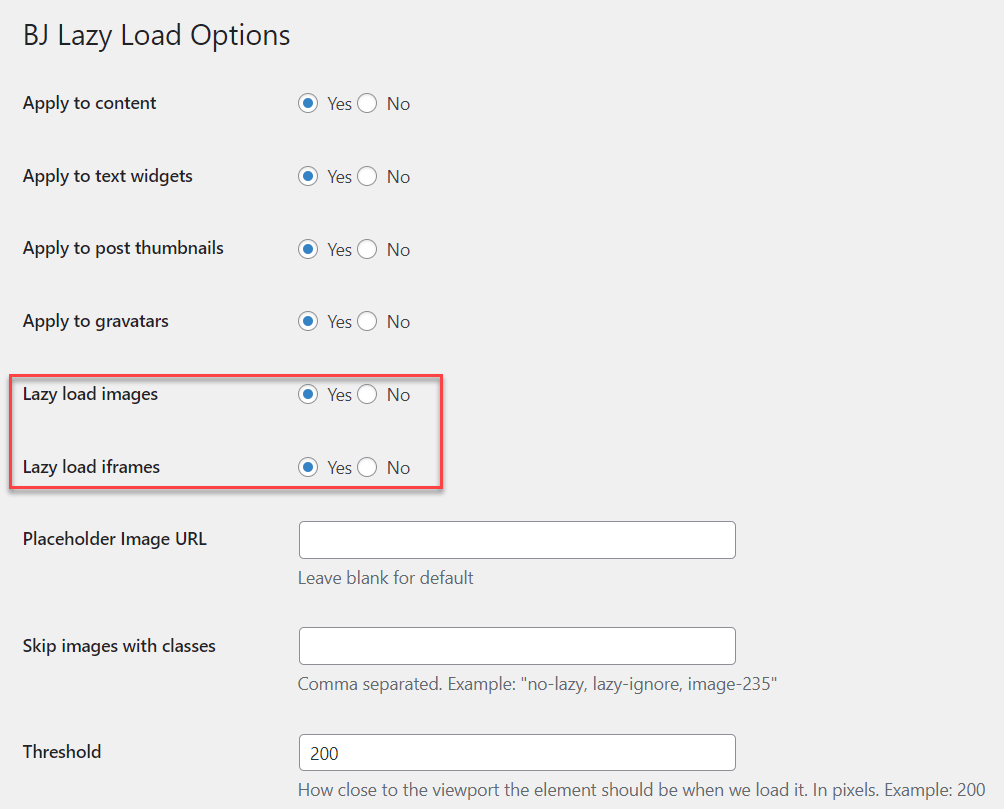
Next, choose what type of content you need to lazy load.

If you need to prevent specific images from lazy loading, you can use this feature to skip images that contain the specified classes.
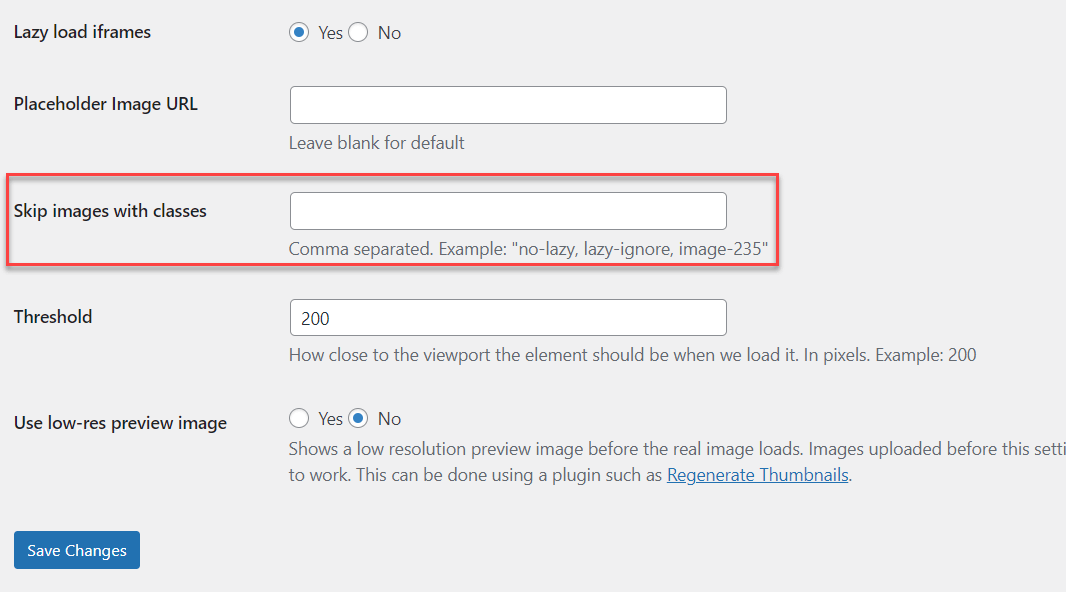
To do it properly, you can add a CSS class to the image and mention the CSS class inside the BJ Lazy Load settings. The threshold can be 200. You do not need to change the value there.
Once you have modified the settings, save the changes.
That’s it.
This is how you can add lazy loading to your WordPress website. As you can see, with the BJ Lazy Load plugin, this is pretty simple.
Now lazy loading is just one bit you can do to optimize images on your site. However, there are other ways to further optimize your images. For example, compressing images to a smaller size and decrease the load on your server. So, let’s see how to do that.
BONUS: How to Compress Images Online for Boosting Performance
Apart from lazy loading, compressing the images is another good practice for keeping the website’s performance optimal. Usually, we download a stock image or take a screenshot and upload it directly to the WordPress media library.
Well, this is not a good practice.
Some images might have 1MB or larger size, so uploading these images will exhaust all your available storage space in the web server. Some web hosting companies will also limit the available storage space, so you must be careful when dealing with media with larger file sizes.
This section will show how you can compress images online and reduce the file size without affecting the quality.
Method 1: Online Image Compressor
You can use an online tool if you do not want to use an extra WordPress plugin for compressing images. Many tools are available, like TinyPNG, TinyJPG, ImageCompressor, etc.
We will use a free tool called ShortPixel image compressor for this tutorial.
![]()
They have multiple compression levels available.
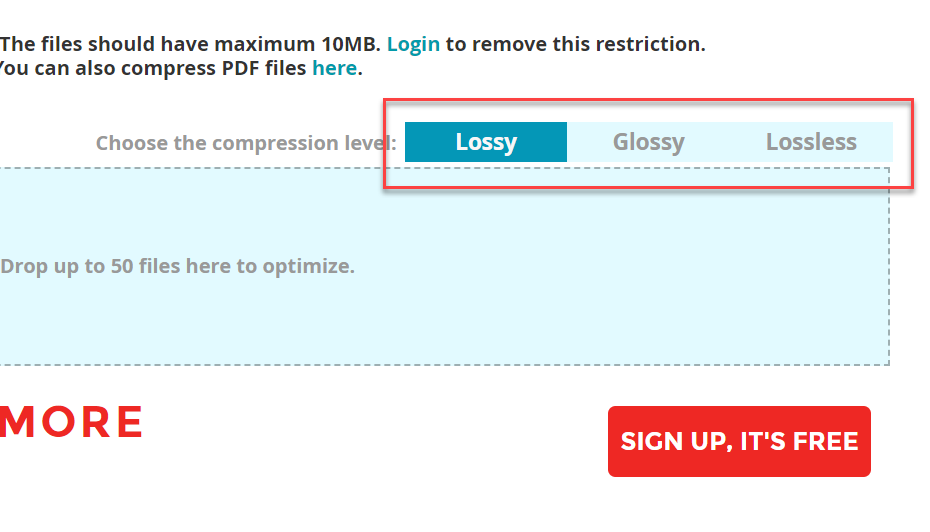
If you are unsure about it, keep Lossy as the compression type. It is good, and so many people are using it. When ready to optimize the images, drag them from your local storage and drop them inside the box.

It will take a couple of seconds to complete the compression. Once the tool is done with the optimization, you can see the actual size of the image and the current size of the image on the screen.
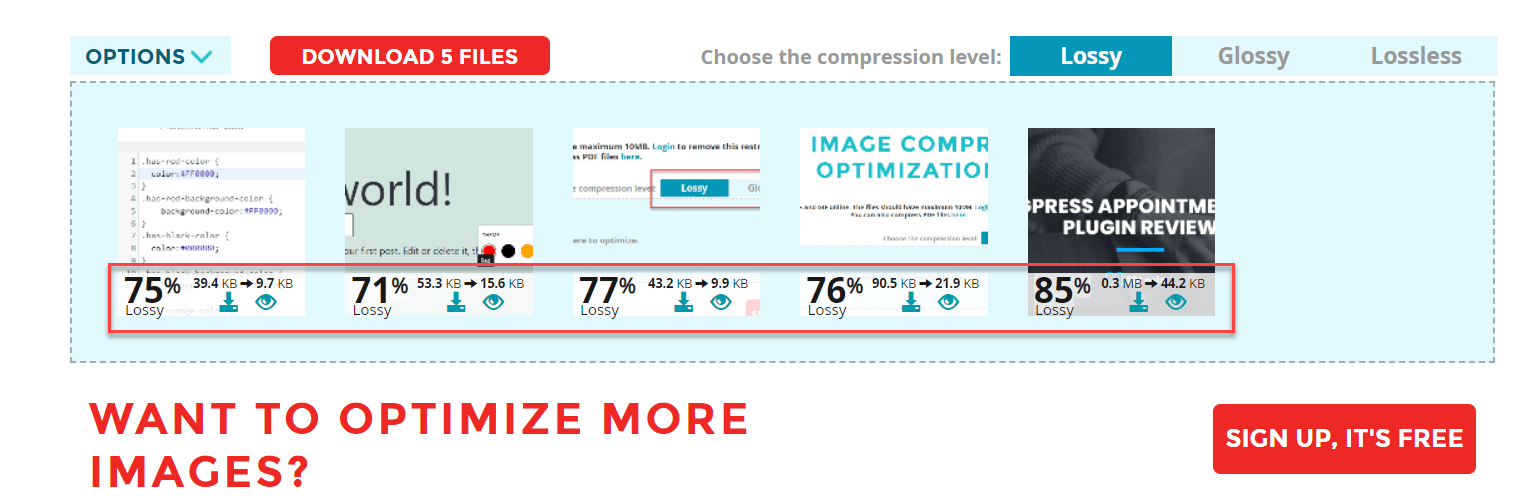
After the tool compresses the images, you can download them individually or download all five files inside a ZIP. You can keep using the tool if the image size is below 10MB. However, if your attachment size exceeds 10MB, you must create an account there.
This is how you can use the ShortPixel image compressor tool to reduce the image size without losing quality.
Method 2: With a WordPress Plugin
If you need to automate the task of image compressing, you need to use a dedicated WordPress plugin. This way, the plugin will take care of image optimization right after you upload it.
ShortPixel also offers a WordPress plugin that comes with every possible feature a typical image compression plugin needs. You can use it to compress images automatically.
The very first thing you need to do is install and activate the ShortPixel plugin on your site.
![]()
To use the tool, you need an API key. The key can be generated by entering your email address. After configuring it, go to General settings to configure the plugin.
![]()
After tweaking the settings, save the changes. From now on, the plugin will optimize every image you upload to the server.
That’s it.
These two methods are the most prevalent for adding multiple images to your WordPress website. If you need a dedicated guide, we have one for you on compressing images in WordPress.
Plus, you can check this article to learn more about the best WordPress image compression plugins.
Conclusion
As we mentioned earlier, Google considers page speed as a ranking factor. So if you need to rank higher than your competitors, you should develop technologies to boost your website’s speed and performance.
Lazy loading is a simple and valuable feature to improve the speed and performance of your site. Implementing lazy load in a WordPress website is also simple. Multiple plugins are available for the task, and you can pick any of them.
In this article, we have seen how to lazy load images in WordPress. We have chosen the BJ Lazy Load plugin for this tutorial, which comes with very minimal configurations. Once you have tweaked the existing features, you are good to go. It is very easy to use, and no coding or technical knowledge is needed.
We hope you have found this article helpful and learned how to lazy load images in WordPress. Please consider sharing this post with your friends and fellow bloggers on social media if you do. For more helpful guides and tutorials, feel free to check our blog.
Similar articles you might like:
