
How to make WooCommerce checkout like Shopify
Do you want to change your checkout and make it look like Shopify? We’ve got the perfect tutorial for you. In this guide, we’ll show you how to make your WooCommerce checkout like Shopify.
WooCommerce is one of the most flexible eCommerce platforms with numerous customization options. But sometimes, all these perks can be overwhelming for site admins and customers. For example, we’ve already seen that a complicated checkout page with lots of fields can affect your conversion rates. That’s why you should remove unnecessary fields and keep your checkout clean and simple.
This can be an advantage for other platforms like Shopify that have a very simple checkout page. Even though you can customize your checkout and create a one-page checkout, for example, some users still prefer to have a Shopify-like checkout page. The good news is that the immense flexibility of WooCommerce allows you to make a checkout like the one Shopify offers.
Before we see how to do that, let’s have a look at the differences between the WooCommerce and Shopify checkout pages.
WooCommerce Checkout vs Shopify Checkout
You already know that you can add many checkout fields in WooCommerce. But if you add too many, you might end up with a long and complicated checkout page. This may increase cart abandonment and affect your conversion rate because users may find it tedious to fill in so many fields.
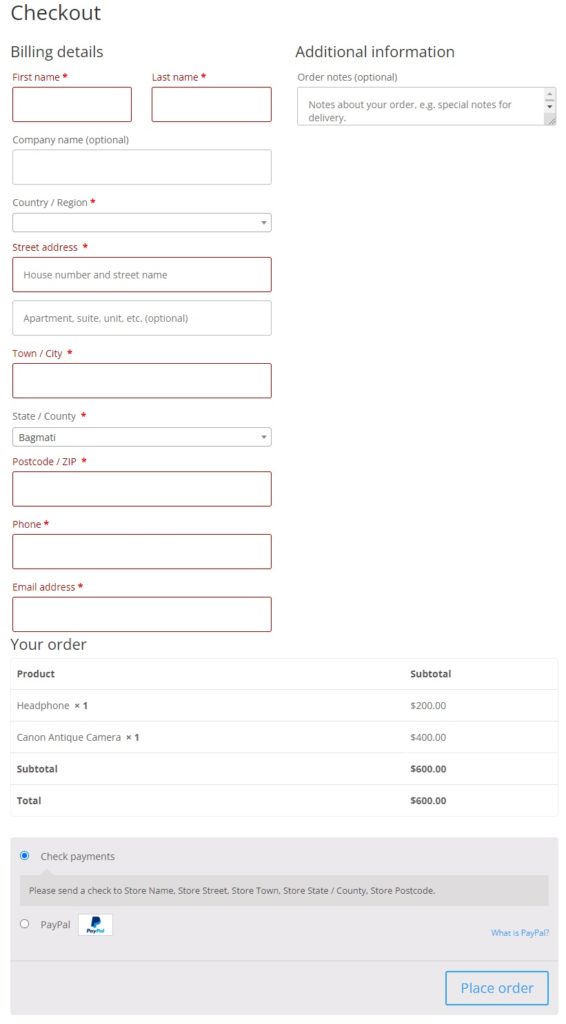
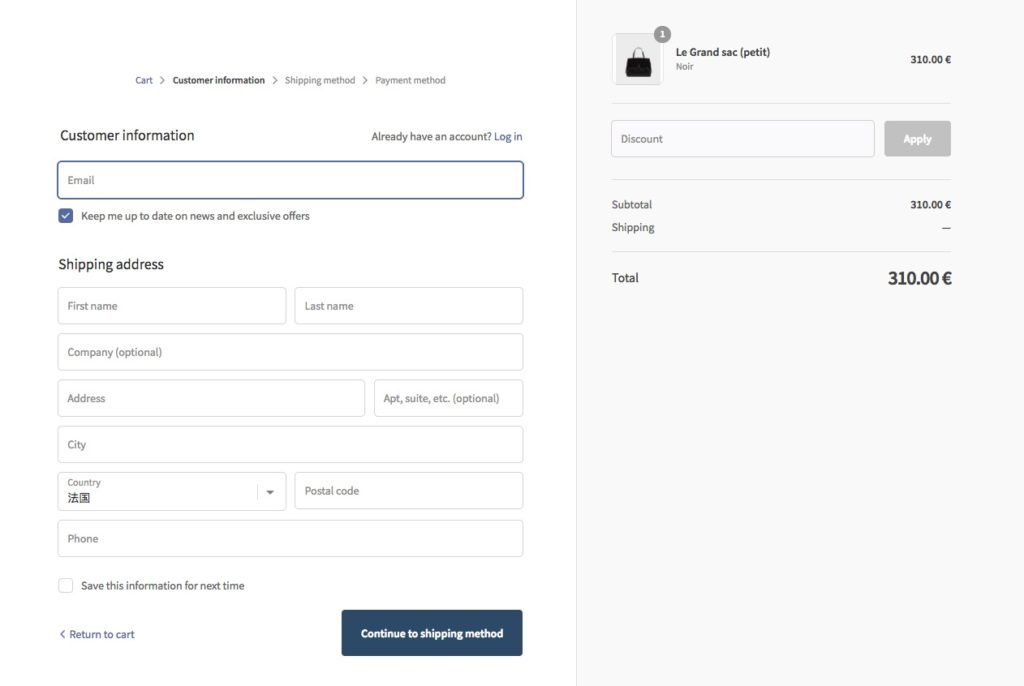
On the other hand, if you look at the default Shopify checkout page, it has a simple and beautiful design with only the necessary checkout fields. In comparison, the WooCommerce checkout page can surely be improved to make it more efficient.
The good news is that since WooCommerce has a lot of customization options, you can easily make your WooCommerce checkout look like Shopify.
How to make WooCommerce Checkout like Shopify
The easiest way to create a Shopify checkout in WooCommerce is to use a plugin. WordPress offers a lot of plugins that you can use to customize your checkout. In this section, we’ll analyze a couple of the best tools to make your WooCommerce checkout look like Shopify.
WooCommerce Blocks
WooCommerce Blocks is a free plugin developed by Automattic. It has many Gutenberg blocks that are specifically designed for WooCommerce and one dedicated to the checkout.
With the help of the checkout block, You can easily make your WooCommerce checkout look like the Shopify checkout. It even has similar layouts and content sections by default making the transformation quite easy. This tool also provides a variety of options for the checkout block, so that you can customize it to suit your needs.
Key Features
- Simplified checkout block
- Multiple product block options
- Reviews by category and product blocks
- Awesome support
Price
This is a free plugin that you can download from the WordPress repository.
CheckoutWC

CheckoutWC is one of the most popular plugins to customize your WooCommerce checkout. It comes with several templates that are inspired by Shopify, so you can use them to make your WooCommerce checkout look like Shopify.
This plugin also has a responsive design as well as great compatibility options with most major WordPress plugins and themes. Moreover, it comes with convenient options for your customers such as password generators, an address autocomplete feature and more.
Key Features
- Multiple checkout page templates
- Fully responsive design
- Address autocomplete
- Cart editing
Price
CheckoutWC is a premium plugin that starts at 15 USD per month or 149 USD per year. It also includes a 30-day money-back guarantee, free updates, and support for one site.
Create a Shopify Checkout in WooCommerce with a Plugin
For this tutorial, we will use WooCommerce Blocks to make your WooCommerce checkout like Shopify. It is an excellent free plugin with a lot of features to edit your WooCommerce store and a dedicated checkout block.
Before we start, make sure you have properly set up WooCommerce your site. Also keep in mind that we’ll use the Divi theme, so some of the pages and options might be different on your website if you use another theme. However, you should be able to follow the steps without any issues.
1. Install and Activate WooCommerce Blocks
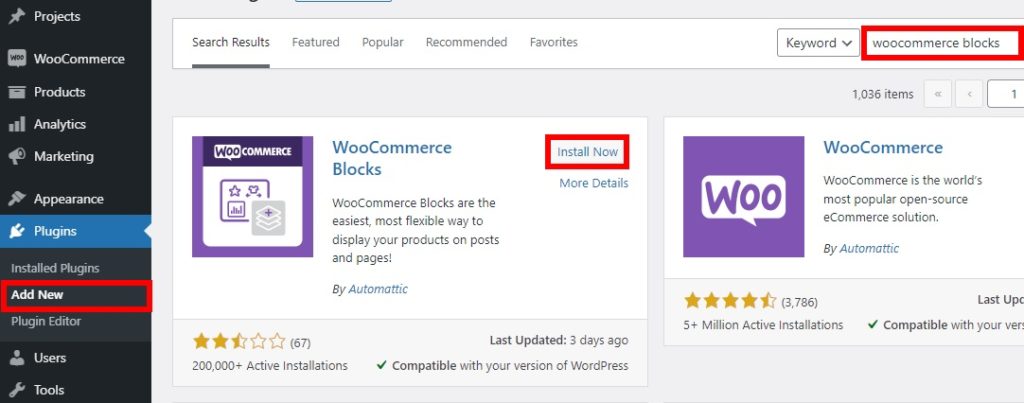
First, install and activate the plugin. For that, go to Plugins > Add New in your WordPress dashboard and search for the WooCommerce Blocks plugin. Once you find it, install it by clicking Install Now.
After the installation is complete, Activate the plugin. If you need any more information on this process, have a look at our guide on how to install a WordPress plugin manually.
2. Configure and Customize the Checkout Page
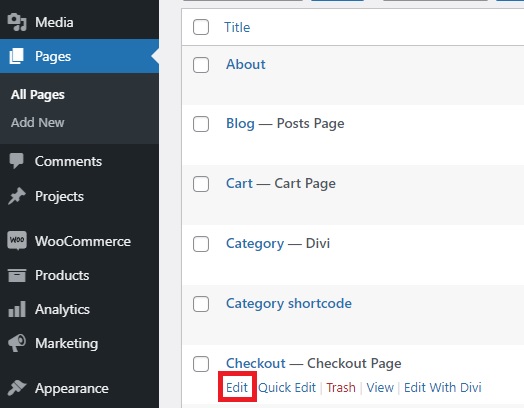
Now all you have to do is go to Pages in your dashboard, find the Checkout page, and press Edit.
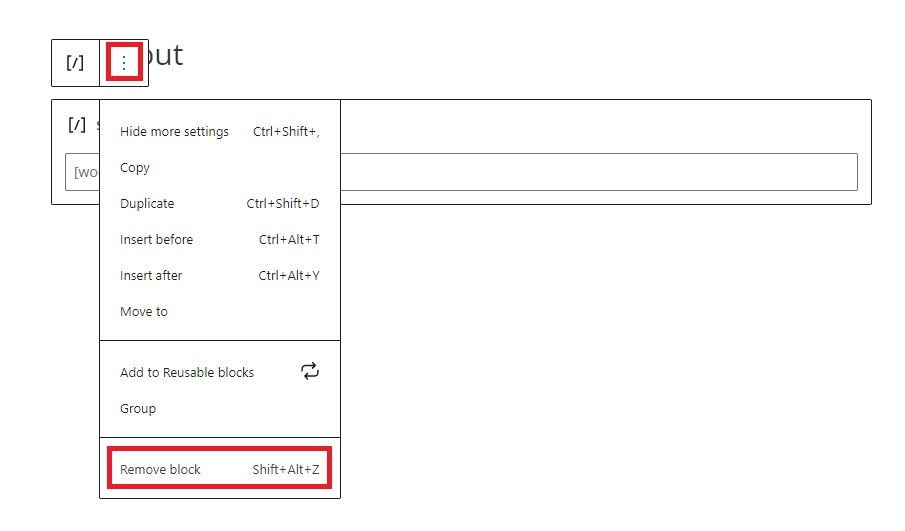
Then, you will see the default WooCommerce checkout page shortcode here. As we want to make the WooCommerce checkout look like Shopify, you need to remove the shortcode. To remove it, just click on the shortcode and open the options by pressing the three vertical dots.
Then, click Remove block to remove the shortcode. Alternatively, you can click on the block and then press Ctrl+Alt+Z as shown in the options shortcut.
After that, click on the ‘+’ icon or type ‘/’ to add a new block and search for “Checkout”. Select the checkout block and update the page. You will be able to see your new Shopify-inspired checkout page in WooCommerce.

Now you have two options: leave it as it is or customize it. Let’s have a look at how to edit it.
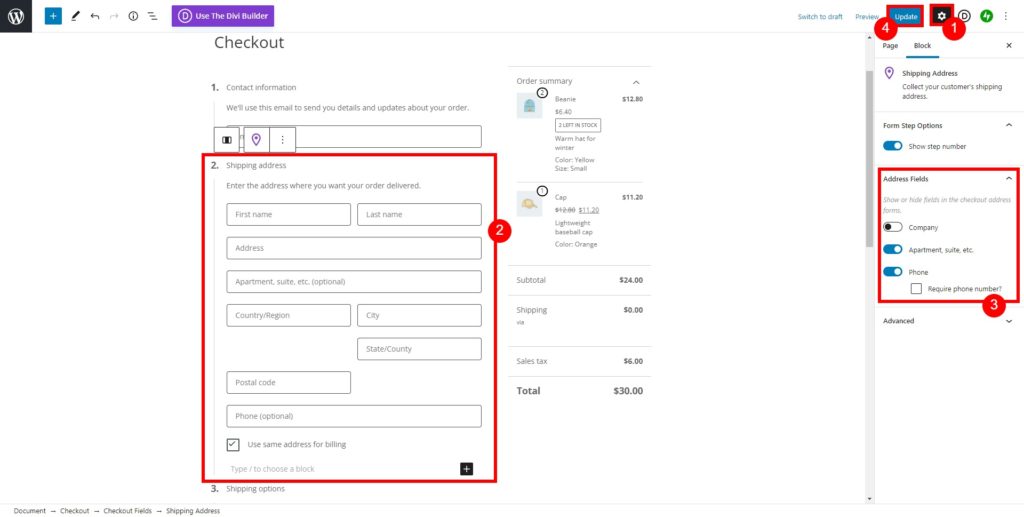
First, open the settings icon on the top right corner of your screen. The page and block settings will appear in the right sidebar. Then, click on one of the blocks and you can start editing the particular block from the block setting sidebar.
For example, if you want to edit the fields of the shipping address, just press the shipping address block and you will see all the available settings in the right sidebar. From there, you can show or hide the field editors for your checkout page.
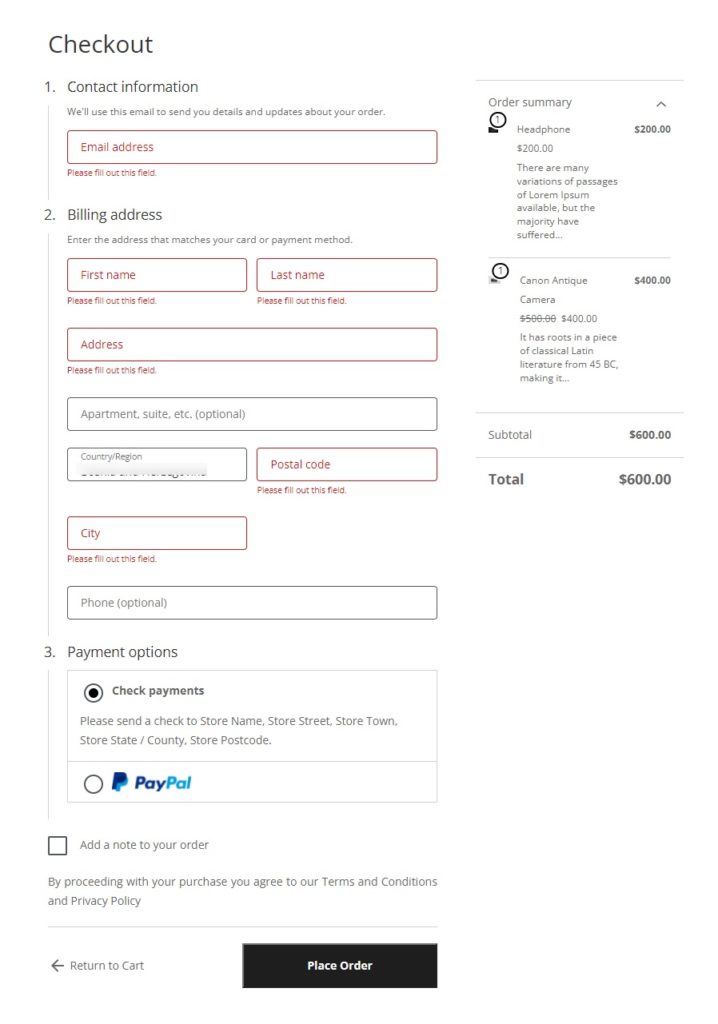
Once you have made all the necessary changes, Update the page. Check out your checkout from the front end and you will see your new Spotify-inspired checkout page.
Pro Tip: Match the Cart page with the Checkout page
If you have a cart page, you can repeat the above process for the cart page and match the style of both the checkout and cart page.
In your WordPress dashboard, simply go to Pages, find the Cart page and remove the default WooCommerce cart page shortcode. Then, add a new cart block with the cart page and update it.
It depends on the type of product or service that you have, but as a general rule, we recommend skipping the cart page to make the checkout process shorter. If you want to know more about this, check out our guide on how to skip the cart page in WooCommerce.
Another way to make your WooCommerce Checkout like Shopify
If you think that customizing the checkout page by editing it is too much work, there’s another alternative for you. You can use CheckoutWC, a premium plugin, to make your WooCommerce checkout look like Shopify.
For that, you will need to subscribe to one of their plans since it is a paid product. You can also use their 7-day free trial to test whether the tool offers what you need.
Now let’s have a look at the process to create a Shopify checkout in WooCommerce with CheckoutWC.
1. Install and Activate CheckoutWC
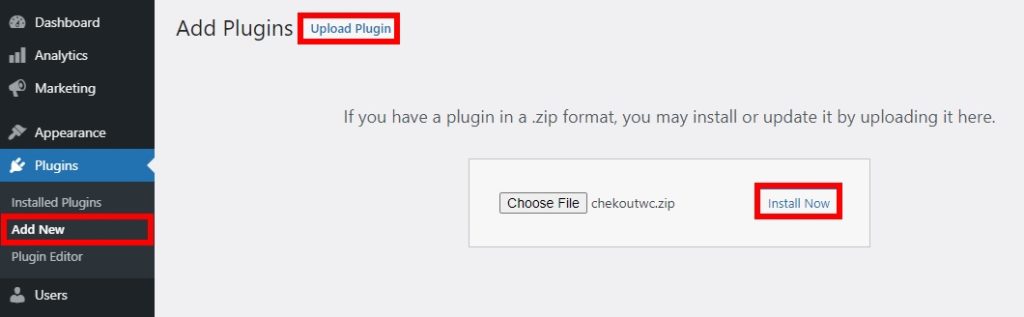
First, you need to activate and install the plugin to start using it. In your dashboard, go to Plugins > Add New and click Upload Plugin. Upload the zip file that you downloaded during the purchase and once the upload is complete, press Install Now.
After the installation is complete, activate the plugin. Once again, you can have a look at our guide to install a WordPress plugin manually if you have doubts about this process.
2. Select a checkout template
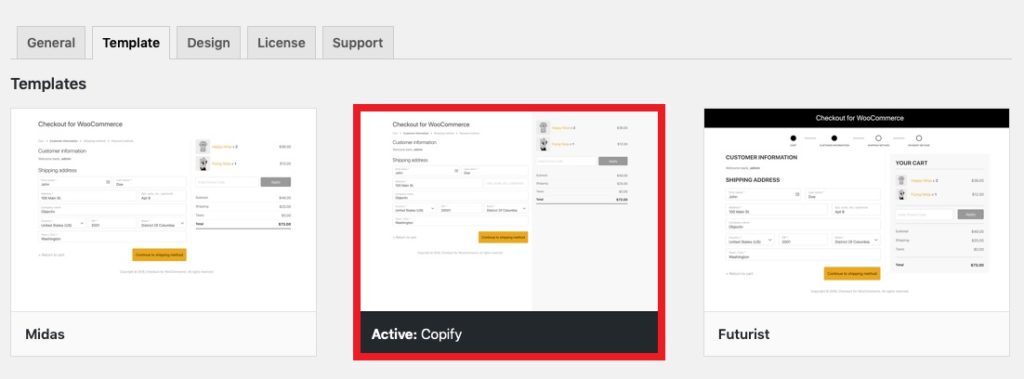
The main advantage of this plugin is that it has checkout templates specifically designed with the Shopify checkout page in mind. There are 4 templates, so choose the one that you like better for your store.
Just go to Settings > Checkout for WooCommerce > Templates in your WordPress dashboard and you will be presented with four template options:
- Default
- Futurist
- Copify
- Glass
The Copify template is the closest resemblance to the Shopify checkout page, but the other three also have some Shopify elements.
Once you choose the template, it’s time to customize it with your logo. Open the Design tab and click Upload Logo. After uploading the image, make sure to save the changes.
![]()
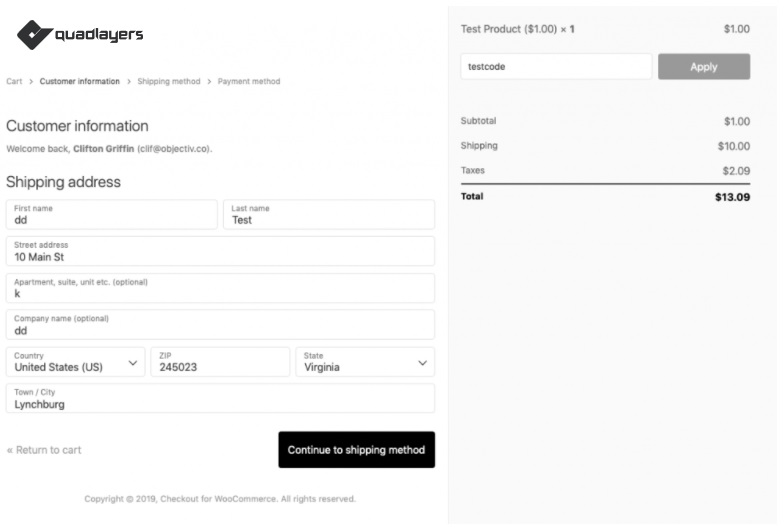
That’s it! Now check your checkout from the front end and you will see the Shopify checkout page on your WooCommerce store.
Bonus: Remove WooCommerce Checkout Fields
Finally, let’s see how you can remove some fields from the checkout.
Let’s say you don’t want to make your WooCommerce checkout exactly like Shopify, but you still want to simplify the checkout page and hide some unnecessary fields. As this makes the checkout process faster, this will help you increase your conversion rates and decrease cart abandonment.
The easiest way to remove checkout is to use the WooCommerce Checkout Manager plugin.
This tool lets you easily customize your checkout page by adding, hiding, and editing checkout fields according to your needs.
Install and Activate the Plugin
First, go to Plugins > Add New and search for the plugin. Then, install it and activate it. This is the freemium tool so you can download the free version or get one of the premium plans that come with more advanced features and start at just 19 USD (one-time payment).
Edit the Checkout Page
Once you’ve installed the plugin, go to WooCommerce > Settings and open the Checkout tab. You will see all the options to edit your WooCommerce checkout page.
Additionally, go to the Billing tab since most checkout fields are there. Simply go to the Billing tab and use the Disabled toggle to remove the checkout fields you want. You can also make them mandatory or not using the Required toggle.

Once you’re happy with your selection, don’t forget to save your changes. Then, have a look at the checkout from the front end and you’ll see your new checkout page.
If you need more help with this process, have a look at our guide to remove WooCommerce checkout fields. If you only want to remove fields without adding or editing existing fields, you can use another plugin called Direct Checkout.
Conclusion
In summary, the default Shopify checkout is cleaner and simpler than the WooCommerce one. In this guide, we’ve seen how you can make the WooCommerce checkout look like Shopify on your store. The most convenient method to do so is to use plugins and we have shown you the process using two different tools.
WooCommerce Blocks is free and uses blocks to edit the checkout page, whereas CheckoutWC is a premium plugin that comes with multiple checkout templates to help you customize your checkout page. Both the plugins get the job done and are very easy to use, so choose the one that best fits your needs.
Additionally, we have also shown you how to remove WooCommerce checkout fields to further customize your checkout page and improve your conversion rates. This will make your checkout page simpler and speed up the checkout process.
To learn more about how to make the most of the checkout, have a look at how to edit the WooCommerce checkout page. If you enjoyed this post, check out the following tutorials:
