
How to Minify WordPress Files (CSS, HTML and JavaScript)
Do you want to minify WordPress files like CSS, HTML, or JavaScript? If you want to know how it’s done, we have got you covered. This article will show you how to minify WordPress files and speed up your WordPress website.
But before that, let’s discuss what minification is and what are the advantages of minification. Let’s get started.
What is Minification?
Minification is a popular technique used by web developers to reduce the overall website’s loading time by compressing static files like HTML, CSS, and JavaScript. The whole point of the process is to make your static file’s size smaller.
What minification does is it removes all the white spaces in the files that serve no other purpose than improving readability for humans. Since the server doesn’t care about readability, we can safely remove all the white spaces. As a result, the size of a file gets reduced by a small margin. However, if all the static files are reduced by a small margin the overall effect is much more significant.
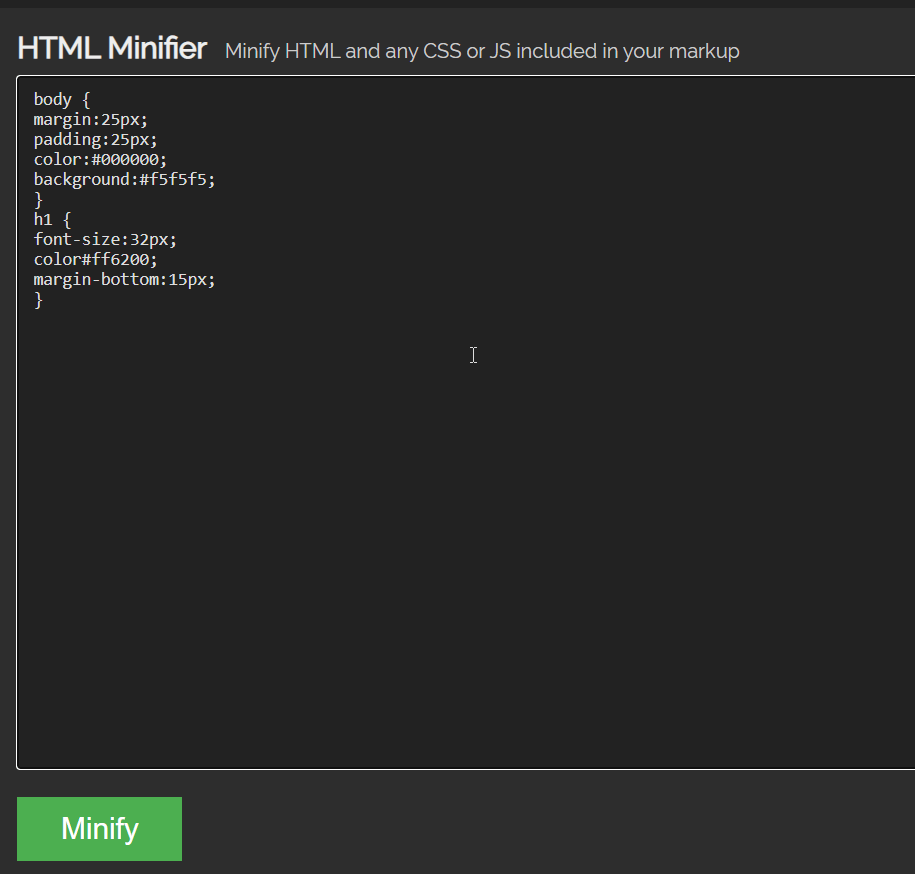
For example, a regular CSS code will look like this:
body {
margin:25px;
padding:25px;
color:#000000;
background:#f5f5f5;
}
h1 {
font-size:32px;
color#ff6200;
margin-bottom:15px;
}
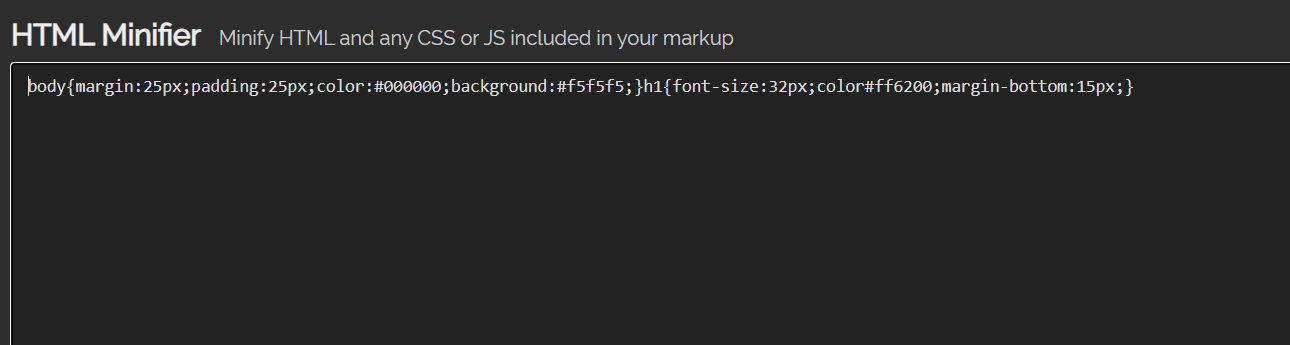
But after minification, we can make it like this:
body{margin:25px;padding:25px;color:#000000;background:#f5f5f5;}h1{font-size:32px;color#ff6200;margin-bottom:15px;}
As you can see, the minification process removed the extra line breaks and white spaces from the code. This will reduce file size and make the server read the file faster and quickly serve the website to its visitors.
Similar to CSS, the optimization technique can also compress HTML and JavaScript.
If you have a lot of static files lying around your WordPress website, you should try minifying them. Probably, it will help you reduce the file size and make the website faster.
Why Should We Minify HTML, CSS, and Javascript in WordPress
Along with other optimization techniques like caching, lazy loading, etc., you should minify HTML, CSS, and JavaScript in WordPress to make your website even faster.
According to statics, WordPress is used by more than 64% of websites worldwide. So, it is safe to say that you are competing with other WordPress blogs in the same industry.
Plus, Google also said that they would consider a website’s speed as one of the ranking factors.
So, by implementing minification and other optimization techniques, you are making your website/blog faster. This will result in more conversion, sales (if you are using a WooCommerce store), and revenue. However, the minification won’t give you a significant performance boost if you have only a limited amount of static files on the site.
On the other hand, if your website handles a ton of CSS, JS, and HTML files, minification can be one of the best things to do.
Now, you know minification and why you need to minify the files. Next, let’s move to the main topic: how to minify HTML, CSS, and JS in WordPress.
How to Minify HTML, CSS, and Javascript in WordPress
You can minify HTML, CSS, and JavaScript in WordPress in two ways.
- Manually
- Using a dedicated plugin
Below, we will show you both methods. So, you can pick a way that suits your requirement.
Manually Minify WordPress Files
You can use this online tool if you do not want to use extra plugins on your WordPress site for minification. However, when you use the manual method, you need to optimize every file individually. This is how it is done.
If you check the website, you will see a submit box.
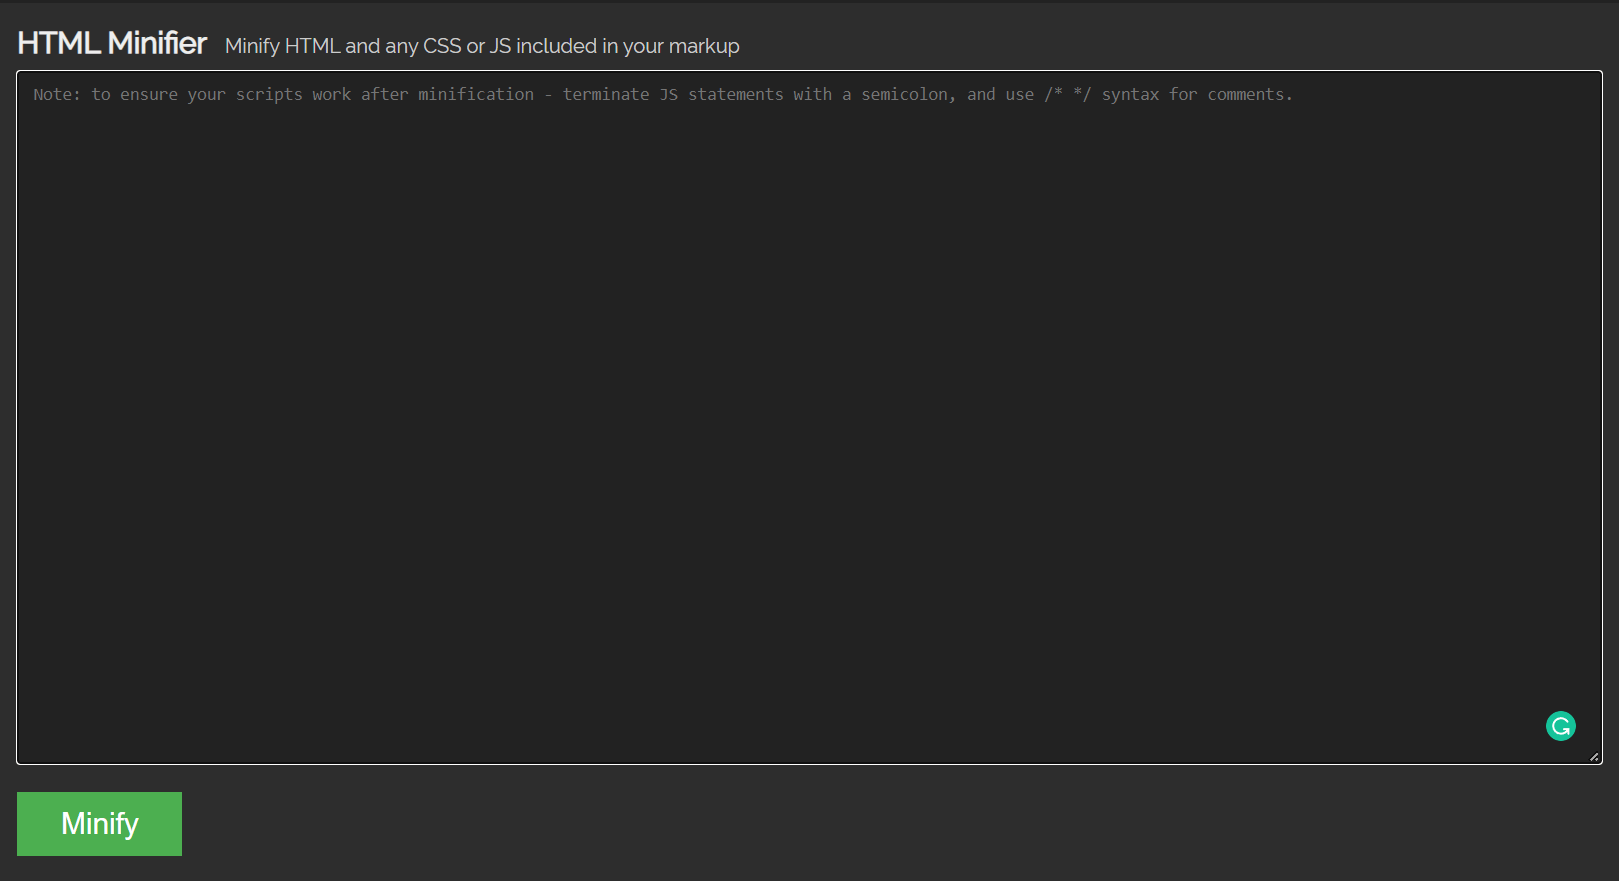
There, you need to paste the code you need to minify.
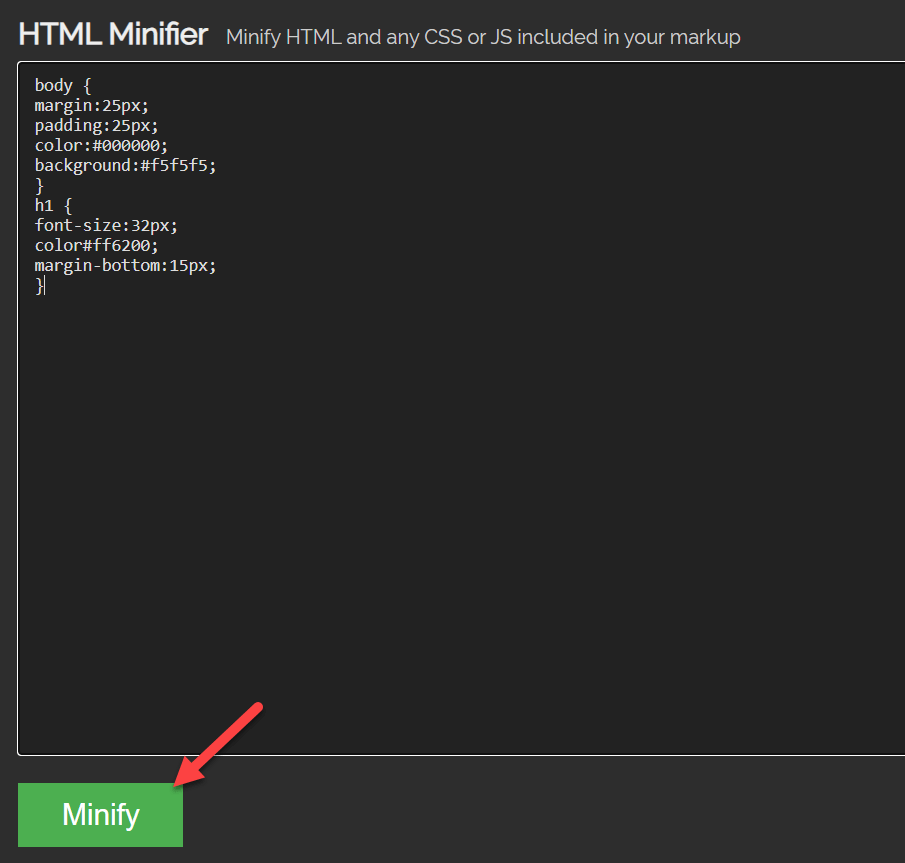
You can minify CSS, JS, or HTML code. Once you have pasted the code, click on Minify.
On the next page, you will get the minified version of CSS.
As you can see in the screenshot, the tool removed all the excess white spaces and line breaks from the code. This way, you can optimize your CSS, JavaScript, and HTML.
Afterward, you need to upload this minified version of the code to your server.
The tool is straightforward to use. But the main disadvantage is you have to minify every WordPress file manually. This can be quite a time taking and tedious process. What if you can automate the whole process for all files on your server?
That is where WordPress minification plugins come in. Let’s see how we can minify CSS, HTML, and JavaScript in WordPress.
Minify CSS, HTML, and JavaScript Using WordPress Plugins
Two of the best WordPress plugins you can use to Minify the static files are:
- WP Rocket
- Autoptimize
Before moving to the tutorial, let’s see what each plugin offers.
1) WP Rocket
If you are looking for the most powerful WordPress caching and speed optimization plugin, you must look at WP Rocket. WP Rocket is a lightweight but feature-rich caching plugin for WordPress that can help every blogger and business owner boost the website’s speed with simple mouse clicks.
The main advantage of WP Rocket is the easy-to-use interface. The plugin has an easy-to-use dashboard that will help everyone understand the best features and when to turn them on. With this plugin, you can do much more besides minifying your CSS, HTML, and JavaScript files in WordPress.
The popular features we loved in the WP Rocket plugin are CDN integration, WooCommerce integration, and database integration.
Since they provide CDN integration, you can integrate the plugin with any CDN service you like. CDN (Content Delivery Network) services are created to make the file serving faster. You can use BunnyCDN, Cloudflare, Stackpath, or anything you like.
Moreover, the WooCommerce optimization feature will ensure that the cart, checkout, and related important pages are removed from the cache. This will make your WooCommerce store more user-friendly.
Finally, the database optimization feature eliminates all the unwanted tables, comments, and trashed posts from your MySQL database. Probably, this will help the website owner boost the website speed and reduce the load on the server.
Features
- Lightweight
- Easy to use
- CDN integration
- WooCommerce integration
- Database optimization
- File optimization
Pricing
WP Rocket is a premium caching plugin. You can get a subscription according to your needs. Just for reference, their cheapest plan will cost $49 a year.
2) Autoptimize
If you prefer using a lightweight WordPress plugin to manage the WordPress file minification, you should try Autoptimize.
Autoptimize is a popular plugin that speeds up any WordPress or WooCommerce website. The plugin is used by over a million WordPress sites around the globe. On top of that, they come with unique features too.
For example, to optimize the image performance, you can use the lazy loading feature of Autoptimize. It will ensure the images are served only when visitors scroll down.
Besides lazy loading, Google font optimization is another cool feature. Most WordPress theme authors normally use Google fonts inside their theme, so when the end user uses it, the website will send additional HTTP requests to the Google font’s server. You can reduce that with Autoptimize.
Since it is a lightweight tool, the plugin will not add additional load to the server or the overall website’s size. When you need a simple solution that gives you all the required features, you need to choose Autoptimize. However, the development team suggests using a caching plugin for better optimization.
Features
- Lazy loading
- Minification
- Google fonts optimization
- Lightweight
Pricing
Autoptimize is a free WordPress plugin available for download via the WordPress plugins repository.
So, these were the two most popular plugins to minify WordPress files. However, they are not the only available options. If you want to explore, feel free to check out our guide on the best WordPress minification plugins.
Next up, we will show you how to use these plugins to minify the files.
How to Minify WordPress Files with WP Rocket
WP Rocket is a good option if you need to take your website’s performance to the next level. Apart from minification, it has many features that can help boost page loading time.
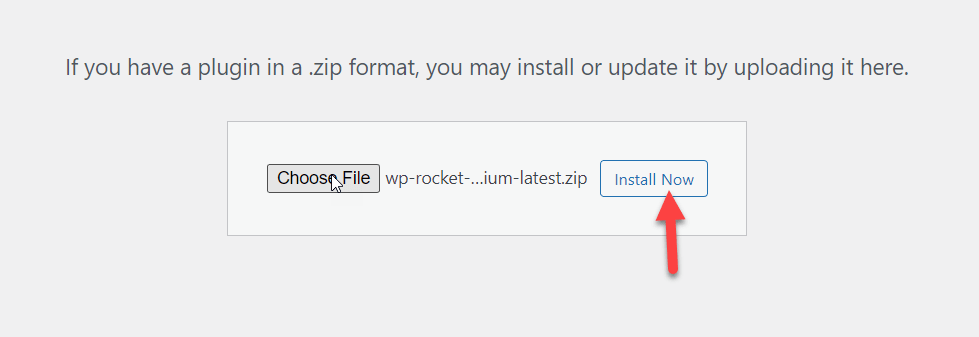
Since it is a premium plugin, you won’t be able to install it directly from the WordPress repository. Instead, you have to purchase it from the official website and download it from there.
Once you have downloaded the premium plugin, you will need to manually install the plugin on your WordPress website.
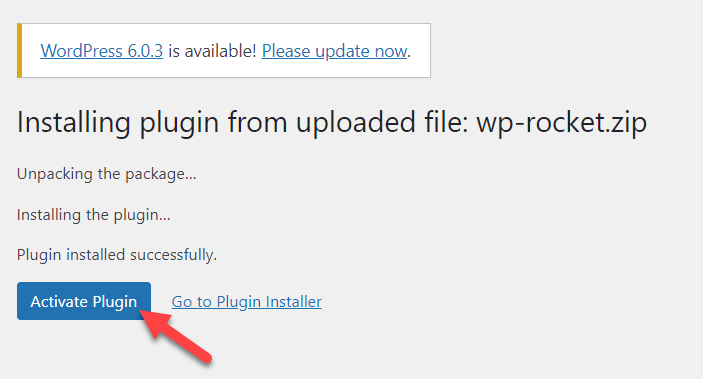
After installation, activate the plugin.
Inside WordPress settings, you will see the WP Rocket configuration.
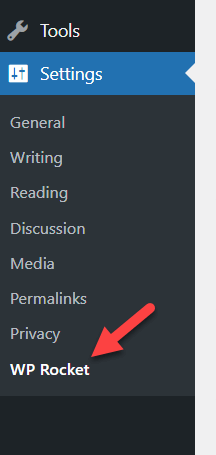
You will see all the configuration options you can use on the left-hand side.
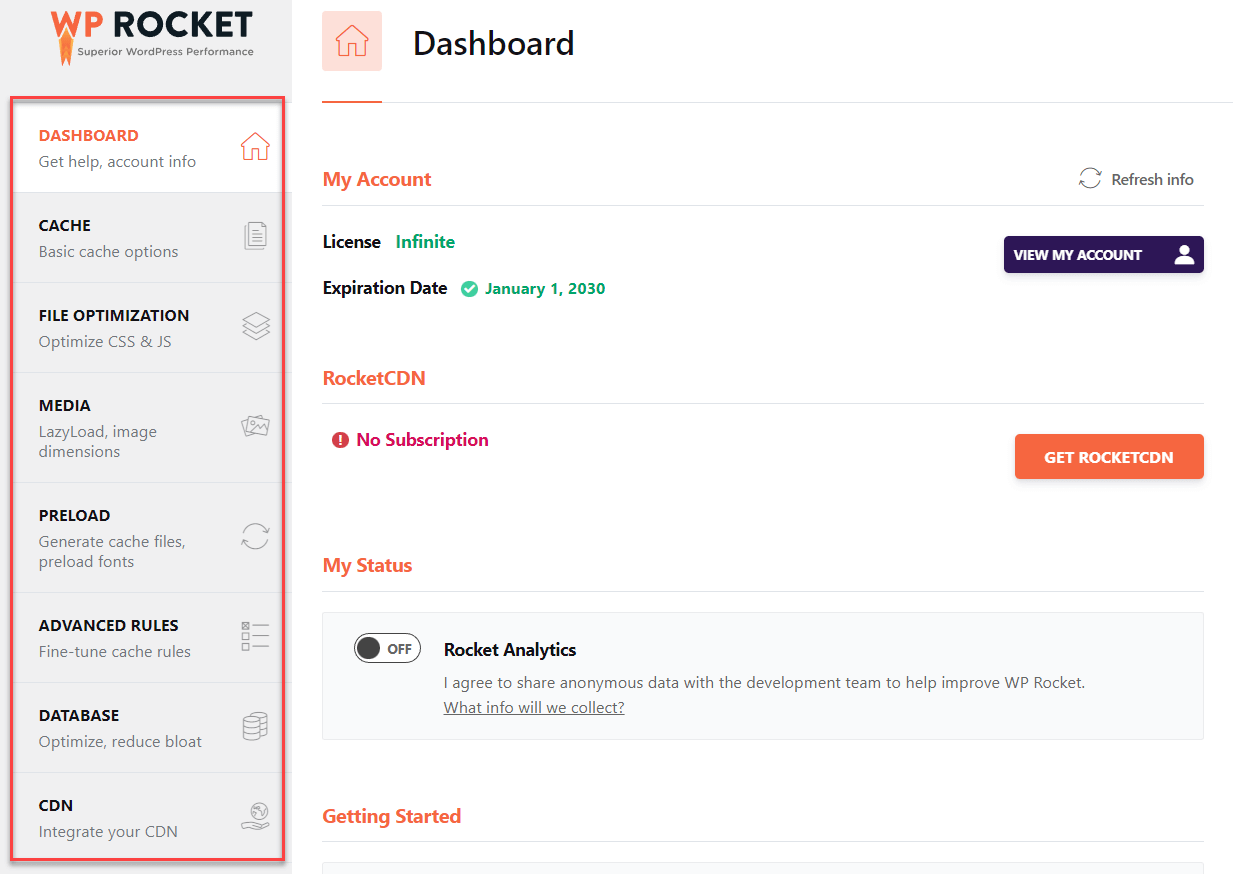
The main options are:
- Dashboard
- Cache
- File optimization
- Media
- Preload
- Advanced rules
- Database
- CDN
etc.
All you need to do is, go to the File Optimization tab. You will see settings for minifying the JS and CSS files there.
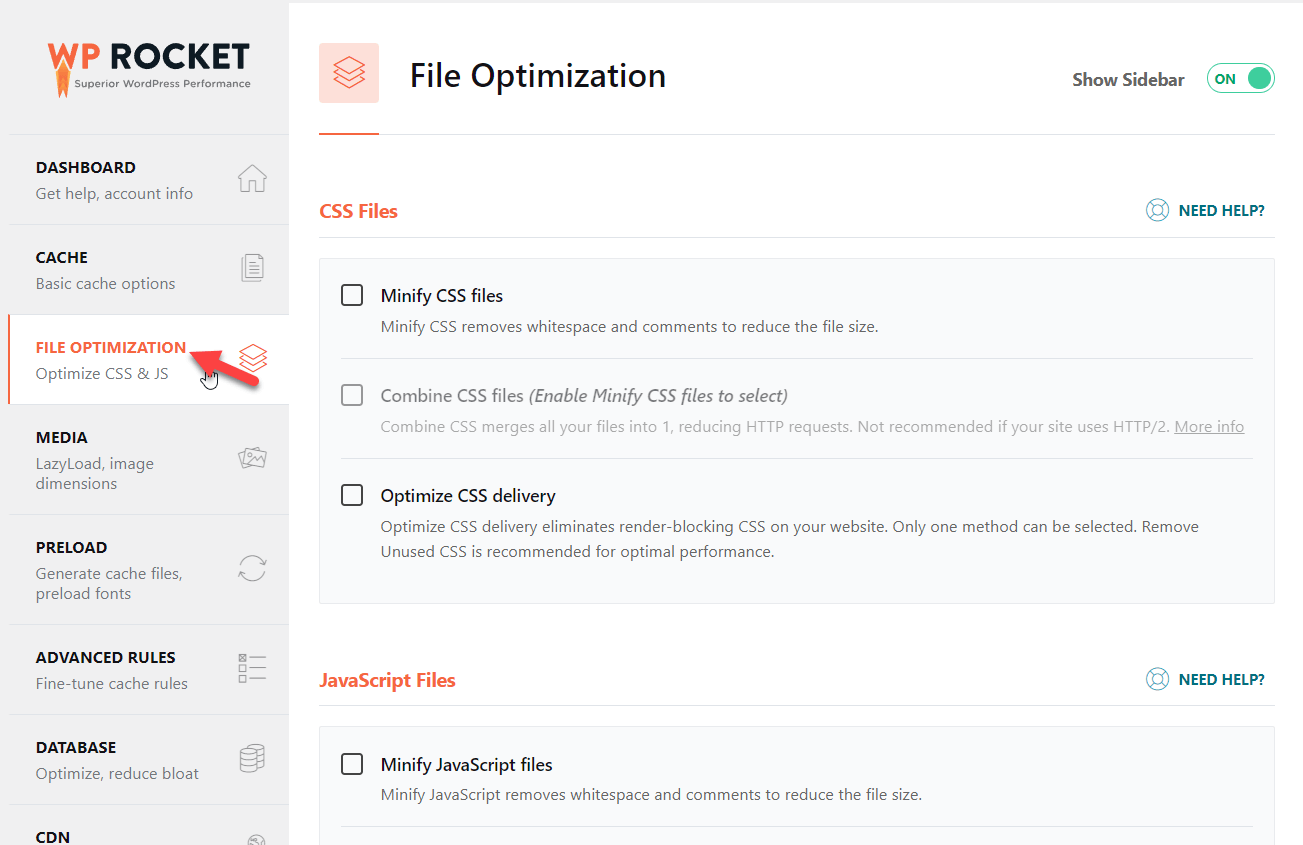
From there, minify the files you want.
CSS Minification
Enable the option inside the CSS minification section, and you are ready.
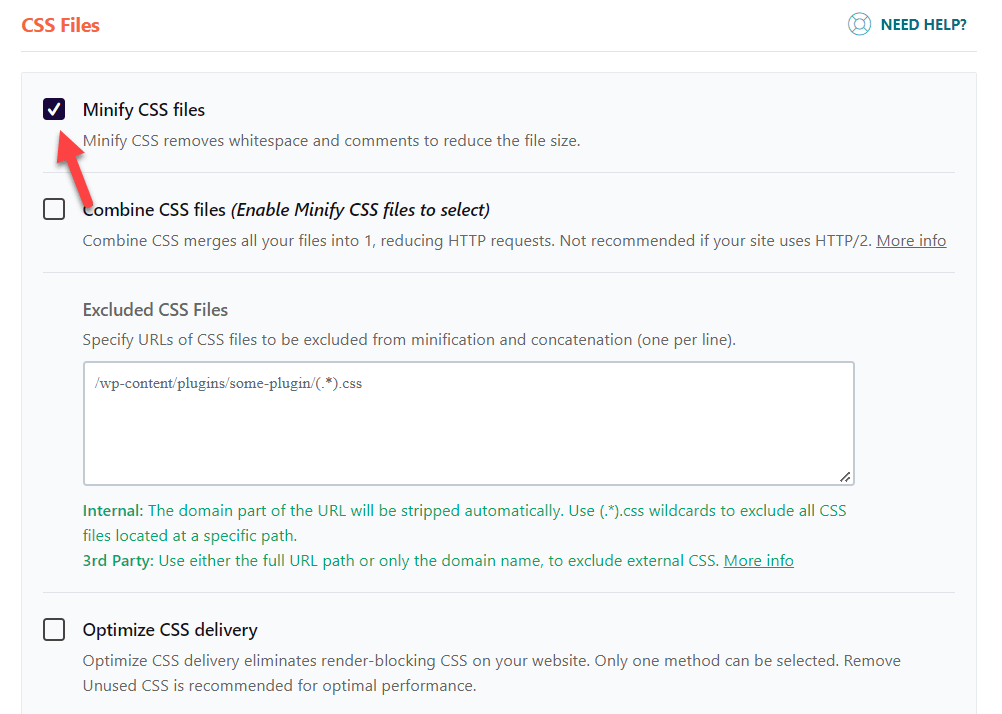
You can also exclude custom CSS files from minification.
JavaScript Minification
Scroll down to the JavaScript minification tab and enable the minification from there.
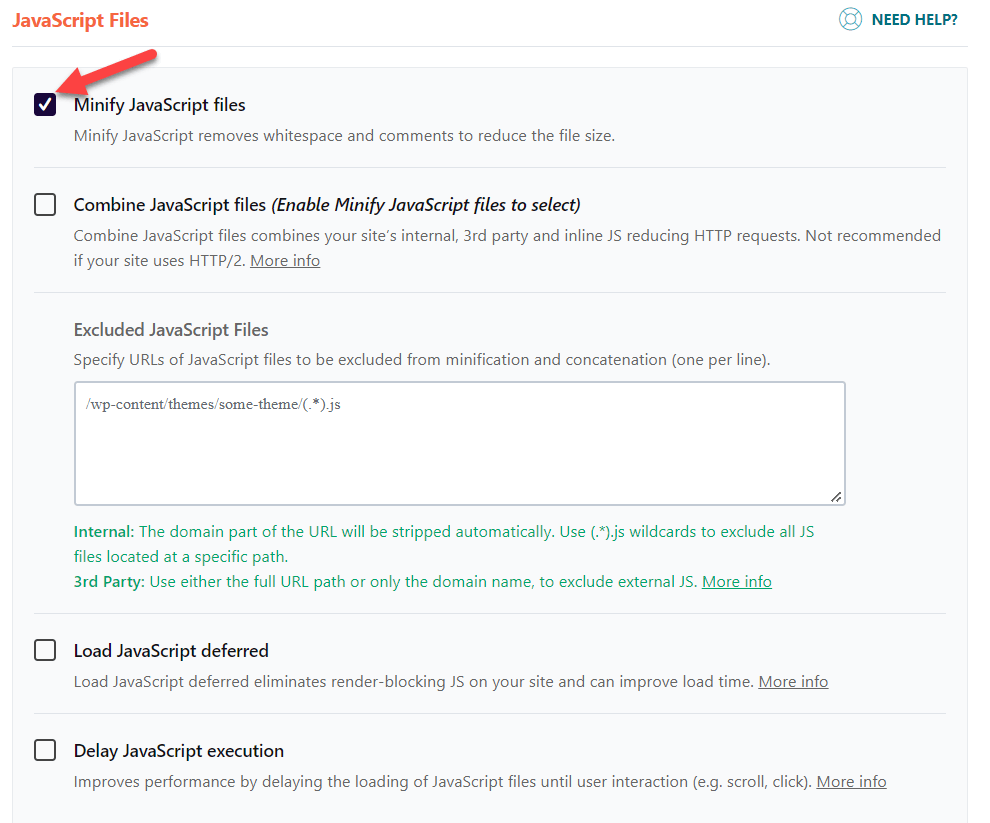
After making these changes, you need to save the settings. As of now, WP Rocket doesn’t support HTML file minification.
This way, you can use WP Rocket for WordPress minification. Next, we will see how we can use the Autoptimize plugin for minification.
How to Minify WordPress Files with Autoptimize
As you know, you first need to install and activate Autoptimize inside your WordPress site. To do that, you can go to Plugins > Add New and search for Autoptimize. Once you have found it, install and activate the tool.
Once you have installed the plugin, you can see it under the WordPress settings.

The development team added four customization options to the plugin.
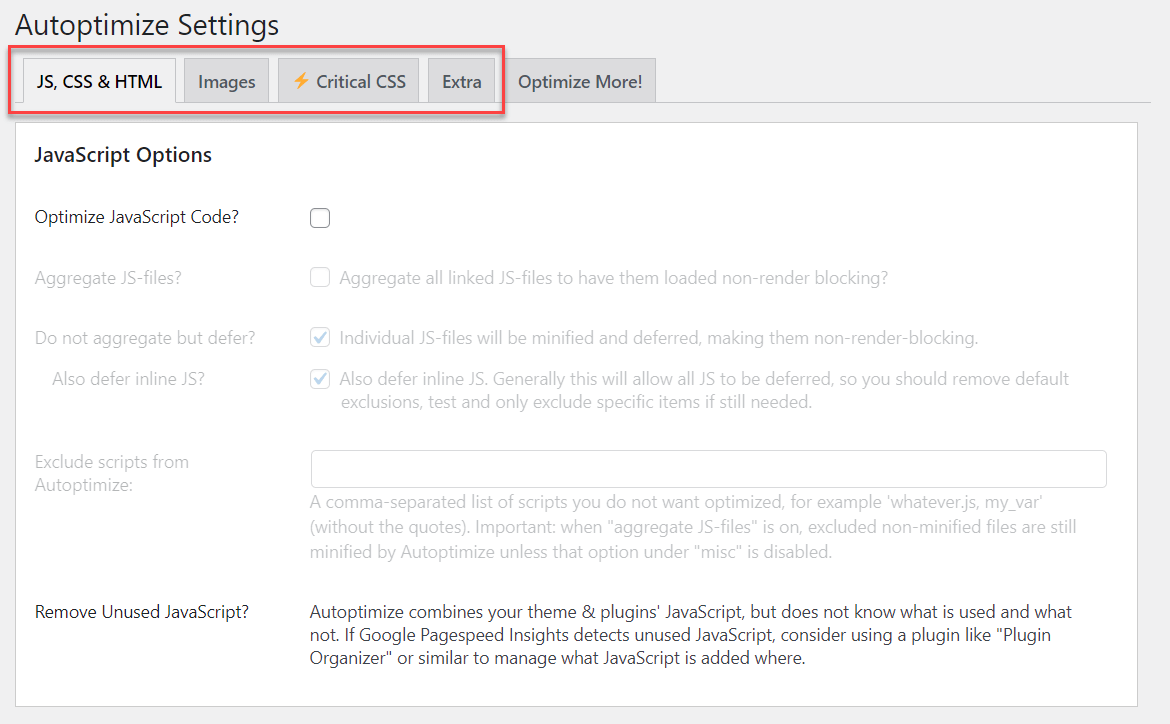
- JS, CSS, and HTML
- Images
- Critical CSS
- Extra
You must follow these steps to minify the CSS, HTML, and JavaScript files.
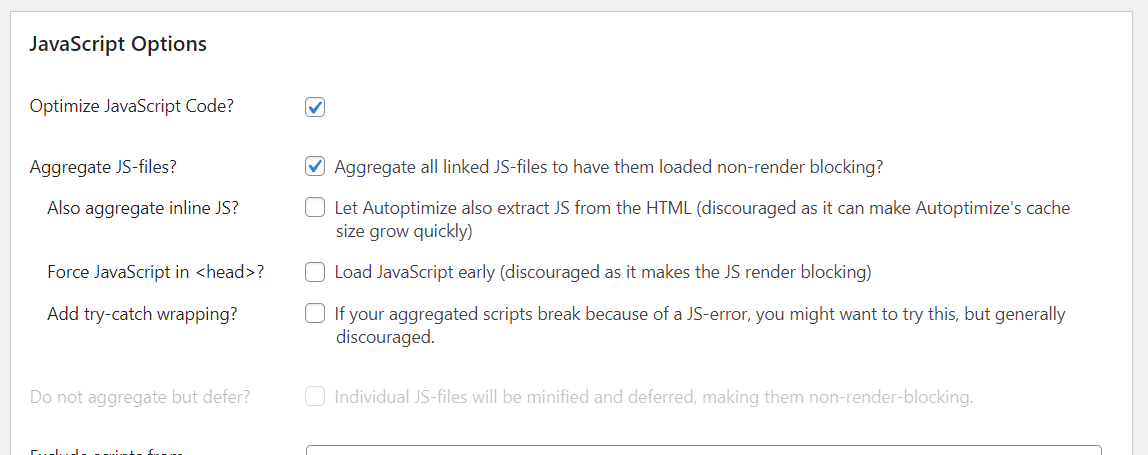
JavaScript Optimization
JavaScript optimization is the first thing you will see on the plugin’s Settings page. Enable the Optimize JavaScript Code option to minify JavaScript files and move to the next step.
CSS Optimization
Right below the JavaScript options, you can see CSS optimization. Enable the Aggregate CSS-files and Also aggregate inline CSS options to minify all the CSS files on your server.
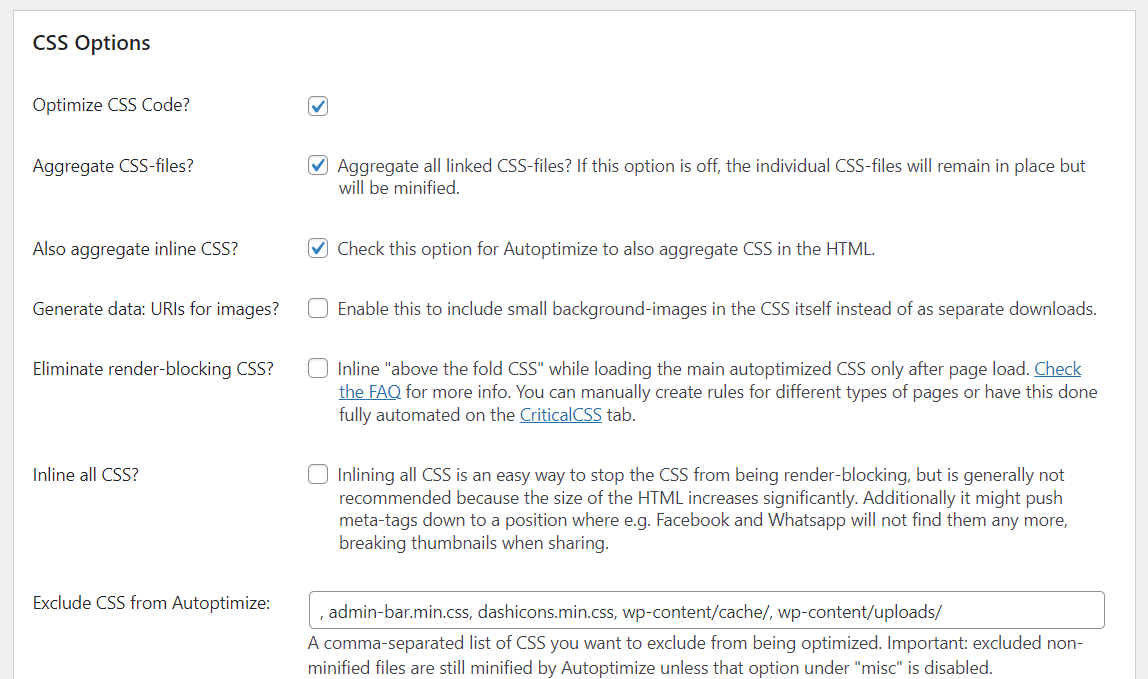
HTML Optimization
To optimize the HTML files, move to the HTML options.
There, enable the Optimize HTML Code option.

Once you have made all the required changes, you must save the plugin’s settings.
This way, you can optimize the static files on your WordPress/WooCommerce website. In addition, Autoptimize has many more optimization features so that you can explore the plugin for more speed and performance improvements.
That’s it.
This is how you can minify WordPress files with Autoptimize.
NOTE: Sometimes, minifying specific theme files will break your website. So, check your website from the front end every time after you apply minification to files.
Testing/Comparing Minification Results
Now you have successfully minified your WordPress or WooCommerce static files (CSS, HTML, and JavaScript). Next, let’s see the before and after results. There are multiple tools available for testing the website’s speed, such as:
For this testing, we are going to use GTmetrix. It is a popular tool available for website speed testing. So here are the results.
NOTE: We have created a new WordPress website and imported some dummy content for testing. Testing the speed of a new website with no content is not recommended.
Before
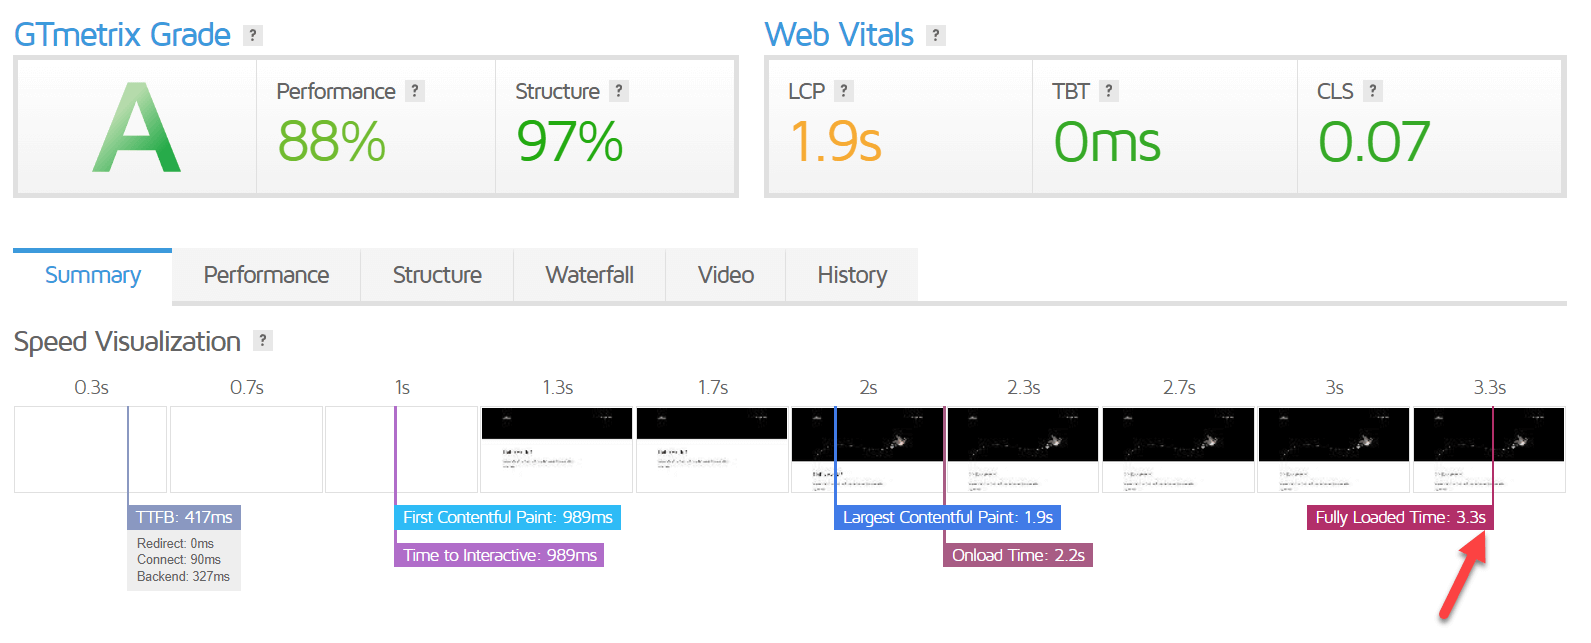
- Performance – 88%
- Structure – 97%
- Fully loaded time – 3.3 Seconds
After
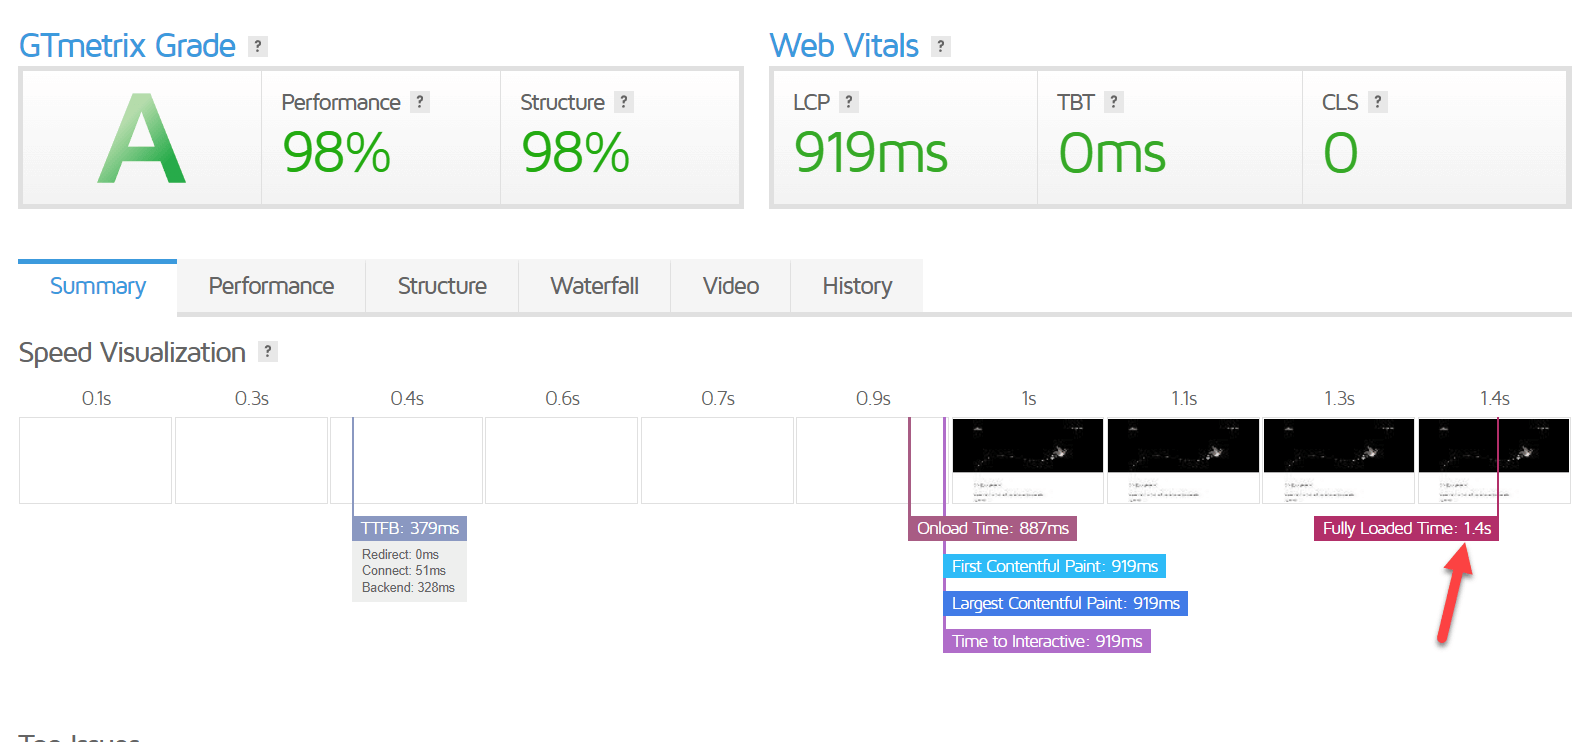
- Performance – 98%
- Structure – 98%
- Fully loaded time – 1.4 Seconds
As you can see, we have reduced the website’s loading time to 1.4 seconds from 3.3 seconds. It is a significant improvement.
Conclusion
As you can see above, if you need to make your WordPress or WooCommerce website faster, you must optimize it to the maximum level. Minifying WordPress static files is a common and easy way to speed up a site. The main advantage of this is you do not need to deal with any codes or need to edit core/theme templates.
Optimizing all the static files manually can be challenging and time-consuming. Whenever you add new CSS/HTML or JS files to the website, you have to optimize it through the website. This is not a beginner-friendly or convenient method.
WP Rocket and Autoptimize are the two best plugins you can use to optimize static files. Both come with easy-to-use features, and even a non-tech-savvy person can easily configure them. The plugin method is the best choice if you are looking for the best way to optimize all your existing and future static files.
We hope you have found this helpful article and learned how to minify WordPress files. Please consider sharing this post with your friends and fellow bloggers on social media if you do. In addition, you might want to check out our blog archive for more related articles.
Which method are you going to use? Let us know in the comments!
Similar articles you might want to read:
