
How to Organize WooCommerce Products by Brand
Do you want to add brands to your store but aren’t sure how to do it because WooCommerce doesn’t provide such an option by default? Don’t worry! In this guide, we’ll show you different ways to organize WooCommerce products by brand.
With over 5 million active users, WooCommerce is one of the best tools to create and manage an online store. By default, it offers multiple features that make it easy to sort and manage your shop. However, it lacks options that allow store owners to organize their products by brands, which can be a dealbreaker for some users.
The good news is that there’s a solution for that, but before we jump into it, let’s first understand why you should organize your products by brand.
Why Organize Products by Brands in WooCommerce?
Whether we realize it or not, brands influence our decisions. They are a representation of quality and trust gained over time. Some brands even have a cult following. Their customers have a special attachment to that specific brand and will never go for a rival brand – especially a rival brand. For example, Apple has very loyal customers that only buy Apple products and typically don’t even consider buying phones or laptops from any other brand.
Moreover, die-hard fans of a brand are not just interested in the products but in the products that that specific brand launches. Following the same example, Apple customers will search specifically for Apple phones, laptops, and so on.
Working with brands is essential for e-commerce ventures as it allows you to improve customer experience and increase your sales. From the customer’s viewpoint, it’s a great experience to land on an online shop that provides the ability to organize the products by brand.
Sadly enough, WooCommerce doesn’t come with such an option out of the box. Luckily, with WordPress, everything is possible! In this guide, we’ll show you the default sorting options that WooCommerce offers as well as different ways to organize your products by brand.
Default sorting options in WooCommerce
Sorting products in a certain way allows you to highlight specific products by bringing them to the top of the page. This way, you can catch your customers’ eyes by displaying your most attractive products at the top of the page.
WooCommerce comes with six different sorting options, and you can select any of them as your default sorting method. These options include:
- Default sorting (custom sorting + name): Sorts the products by name, by default, while allowing you to custom sort the products manually. This is useful when you want to highlight several products that don’t fit a single criterion.
- Popularity (sales): Sorts the items by the number of sales in descending order. This will bring your highest-selling items to the top of the page.
- Average Rating: Sorts the products by average rating from top to bottom. This is useful when you want to highlight your top-rated products.
- Sort by Most Recent: It places the latest products on top. You can use this option to introduce your new collections to the customer.
- Sort by Price (asc, desc): Sorts products based on their price. You can choose to either sort them in ascending (lowest to highest) or descending (highest to lowest) order.
Now that you know all the sorting options that WooCommerce offers, let’s see how to select and apply these options.
Select a Default Sorting Method in WooCommerce
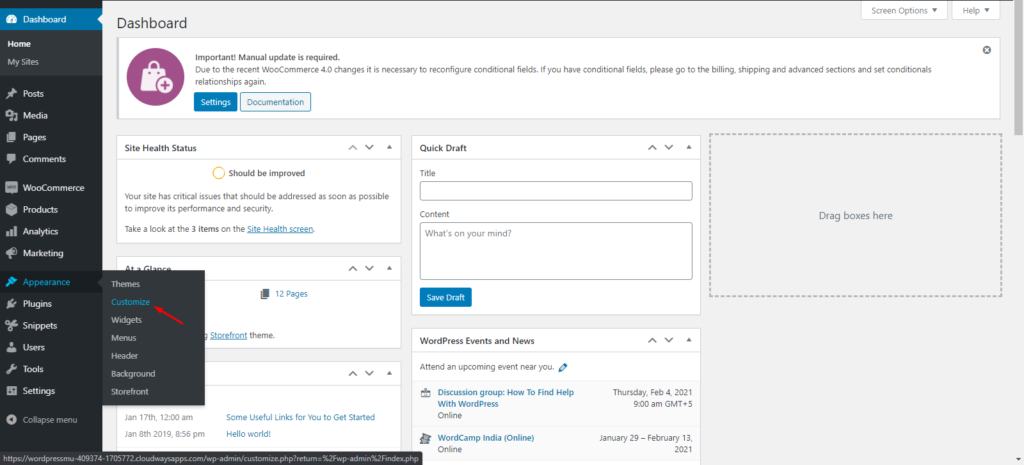
1) First, go to your WordPress Admin Dashboard and navigate to Appearance > Customize.
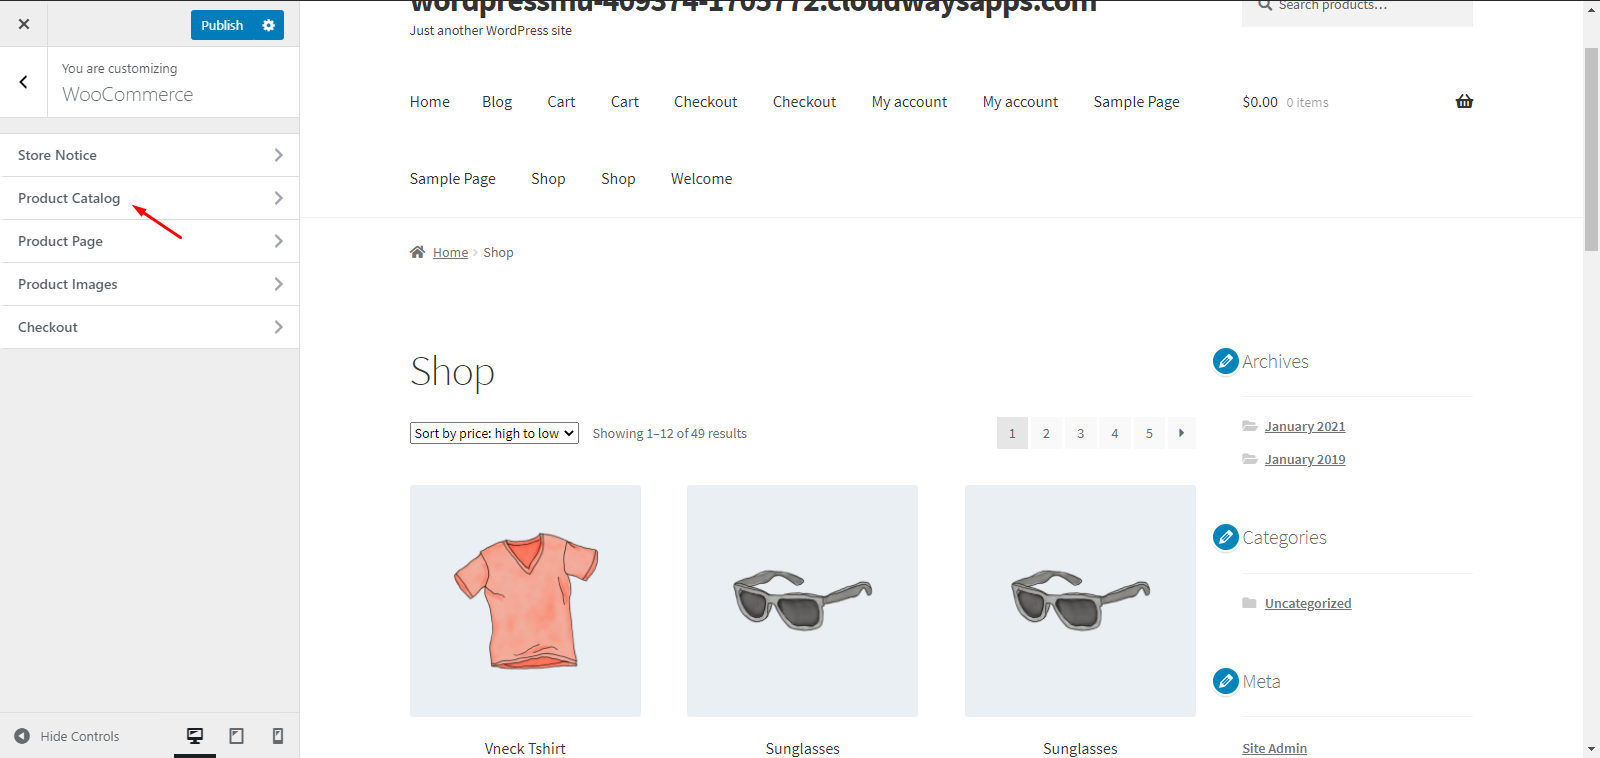
2) From the customization options list, go to WooCommerce > Product Catalog.
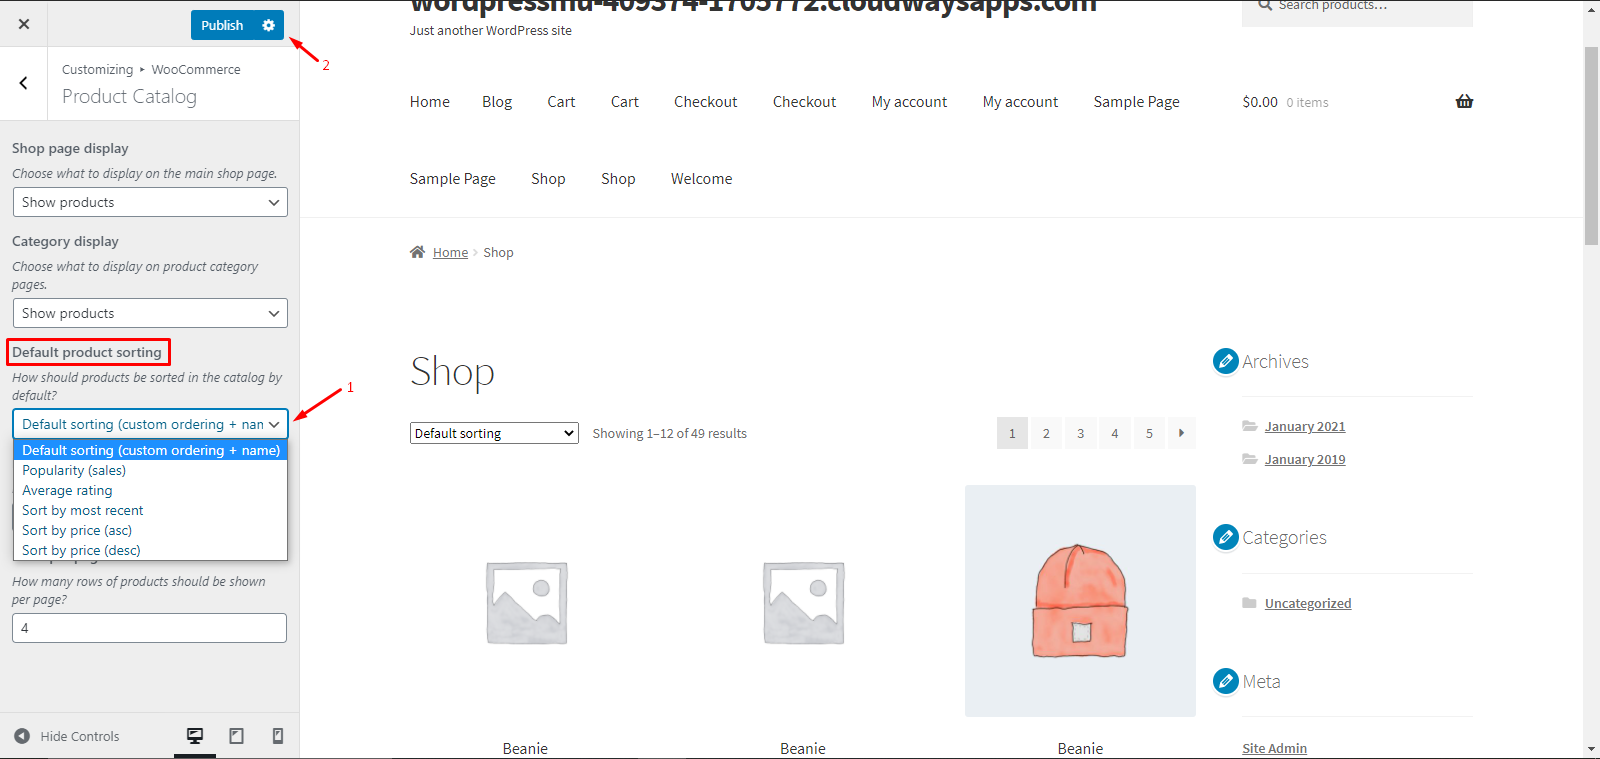
3) Under the Product Catalog settings, find the Default Product Sorting option. Click on the drop-down menu and select your desired sorting method. In our case, we’ll select the default option. Then, click Publish to save the changes.
That’s it! You have now successfully organized your products using WooCommerce’s sorting options.
Custom Sorting Products in WooCommerce
Now let’s see another example and learn how to apply custom sorting.
1) First, choose the Default sorting (Custom Ordering + name) option from the catalog settings as explained above. By default, it will sort all the products by their name but you can change that.
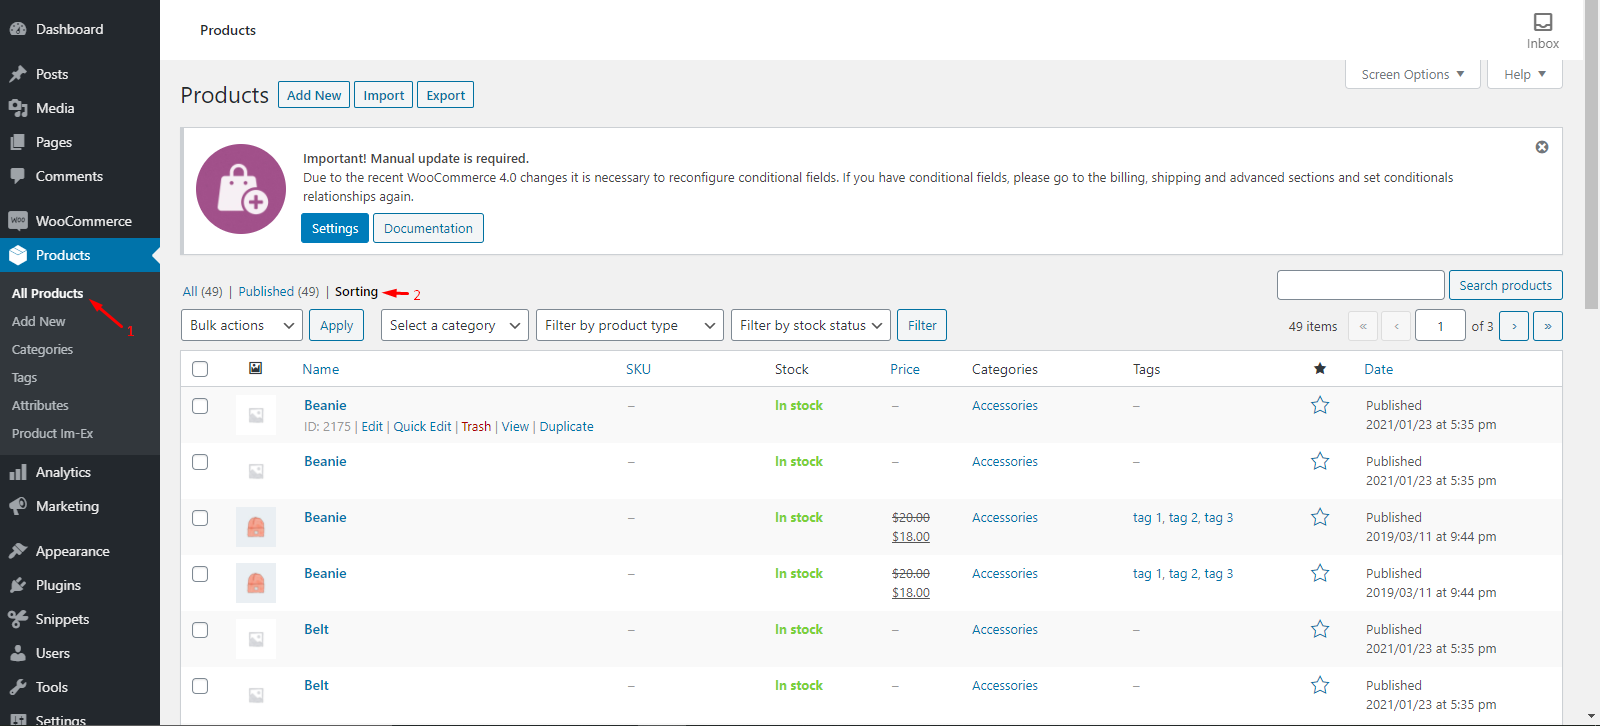
2) Then, in your WordPress Admin Dashboard go to Products > All Products and select the Sorting option.
3) Hover over a product and click and drag it to change its position. Keep in mind that the order of the products will determine their position on the front end, so rearrange them in a way that makes sense for your store. Similarly, you can re-order all the other products.
Congratulations! You are now familiar with all the default sorting methods that WooCommerce offers.
If you want to have more options and be able to organize WooCommerce products by brand, you’ll need to use a plugin. Let’s see how to do it.
How to Organize WooCommerce Products by Brand
There are several tools to organize items by brand. For this demonstration, we’ll use a free plugin developed by Quadlayers called Perfect Brands for WooCommerce.
This plugin has more than 40,000 active downloads and allows you to set up and manage brands in multiple ways. Some of the things you can do with this plugin are:
- Assign brands to your products
- Add a banner to the brands’ attribute page
- Add a link to each brand page
- Filter products by brand – widgets to display brands as a drop-down menu or a list (brand names or brand logos)
- Display brands in product loops
Now let’s dive into the process of organizing products by brand using the plugin.
Organize Products by Brand with Perfect WooCommerce Brands
Step 1: Download and Install the plugin
1) Let’s start by downloading and activating the plugin. Go to WordPress Admin Dashboard, navigate to Plugins > Add New and search for Perfect Brands for WooCommerce. Press Install Now and after the installation is successful, activate the plugin.
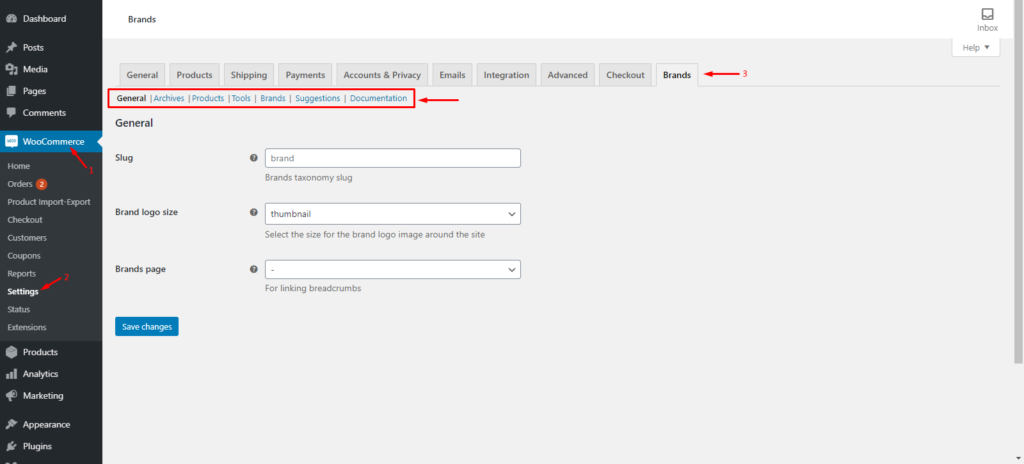
2. After that, go to WooCommerce > Settings > Brands. There you will be able to tweak the settings for all your brands at any point.
Now it’s time to create the brands.
Step 2: Create New Brand
1.In your WordPress Admin Dashboard, navigate to Products > Brands. You will find the Add New Brand section on the left half of the page.
2. Fill out all the required fields and click on the Add New Brand button to save the changes. Your brand will now appear in the brands’ list on the right half.

Once you’ve created your brands, you need to assign brands to your products.
Step 3: Assign Brands to a Product
1. In your Admin Dashboard, go to Products > All Products. Then, hover over a product that you want to assign a brand to and click Edit.
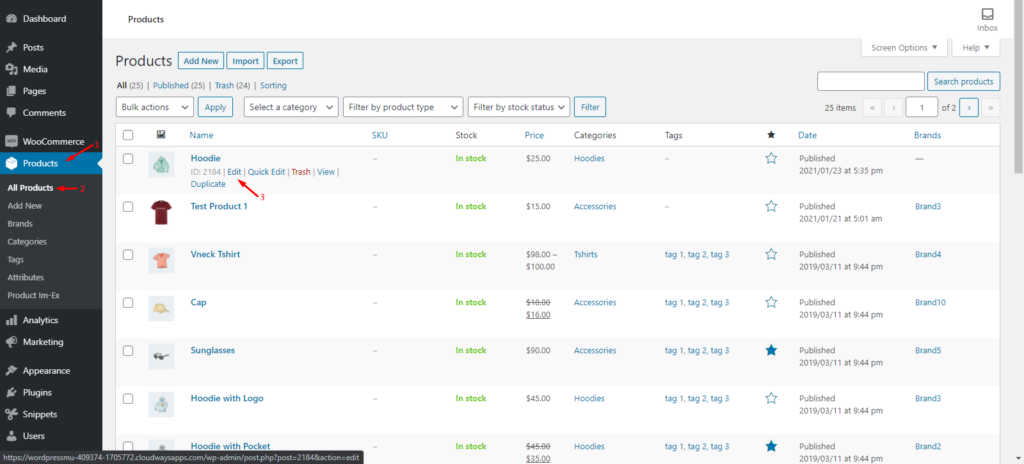
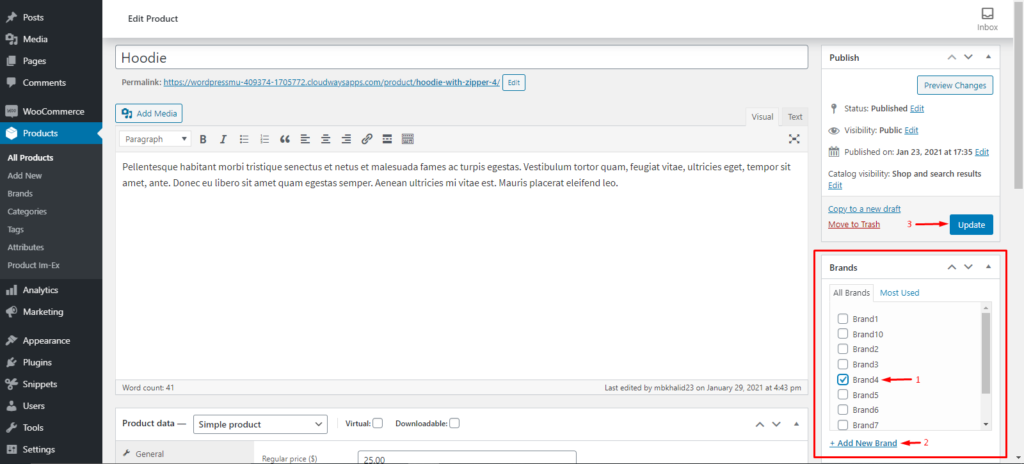
2. On the Edit Product Page, find the Brands section on the far right and select the brand or brands you want to assign to this product. Alternatively, you can add a new brand here as well. Once you are done, hit the Update button to save the changes.
That’s it! You have successfully created new brands and added assigned brands to your products. Remember to repeat the process to add brands to all the items you sell.
For the next steps, we will be working with shortcodes. So before going into that, let’s see how to add shortcodes to a WordPress page or post.
How to Add Shortcodes to a WordPress Page or a Post
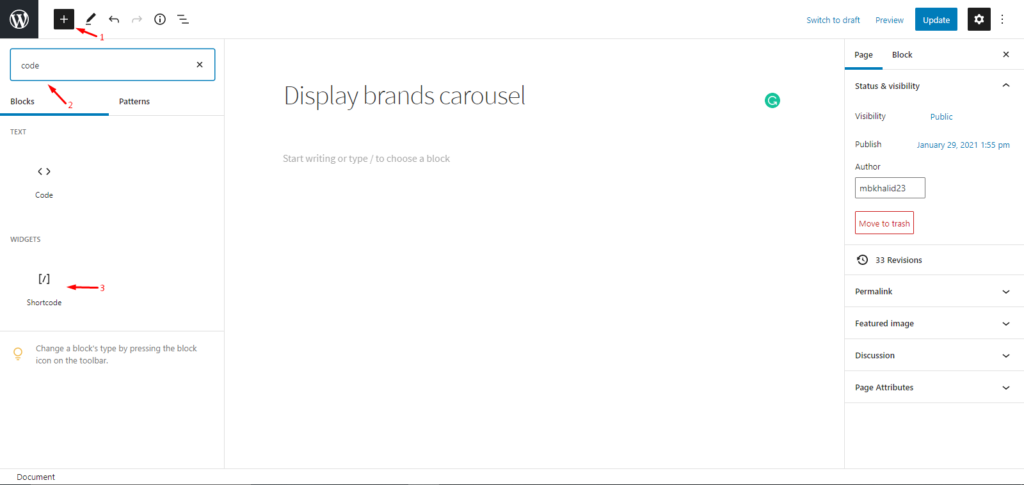
1.In your WordPress Admin Dashboard, navigate to the page or post where you want to add the shortcode. Click on the + icon on the top left, search for “code” in the search bar and select the shortcode widget. You will see that the widget will automatically appear on your post/page.
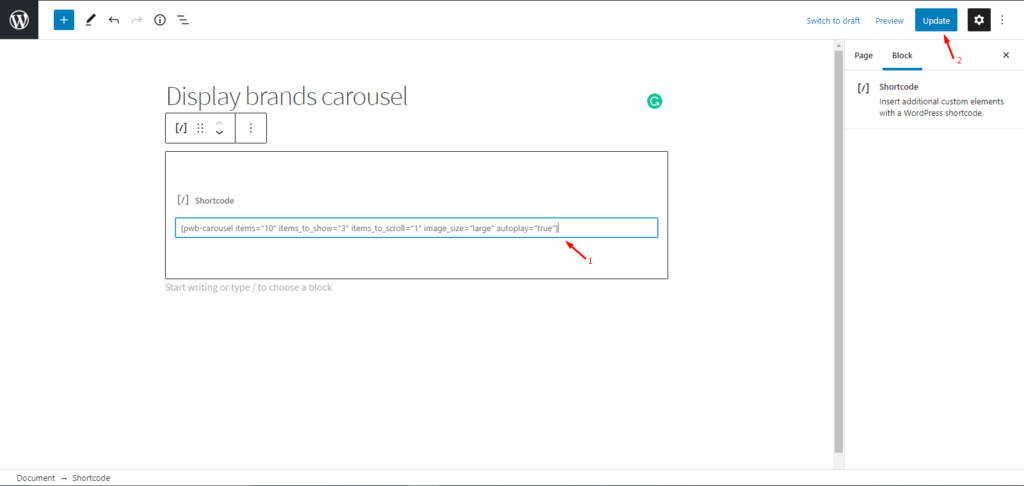
2. Then, paste your shortcode in the widget and click Update to save changes. That’s all, it’s as simple as this.
There’s a lot more you can do with shortcodes. For more information, check out our complete guide on WooCommerce shortcodes.
Now let’s see different ways to display brands using the shortcodes that Perfect Brands offers.
Organize Products by Brand with Perfect WooCommerce Brands
There are several ways in which you can organize your WooCommerce products with Perfect Brands:
- Display brand carousel
- Display products carousel by brand
- Products of specific brands
- Display all brands
- A-Z brand list
- Display brands for a specific product
For all the cases, we’ll use shortcodes to organize the products.
1. Display Brand Carousel
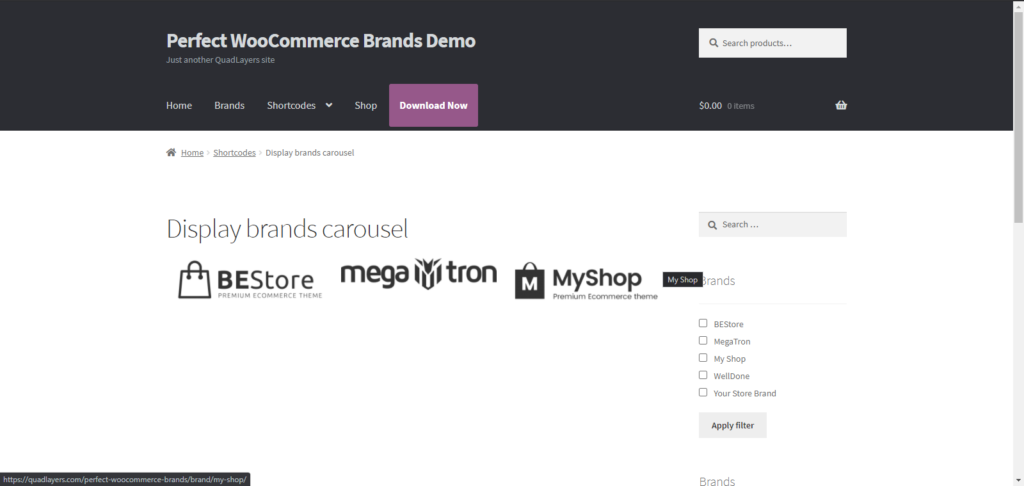
A Brand Carousel displays a slider including all the brands. To display a brand carousel, just copy and paste the following shortcode to the page/post you want as explained in the previous section:
[pwb-carousel items="10" items_to_show="5" items_to_scroll="1" image_size="thumbnail" autoplay="true"]
Additionally, you can add, edit or change the code parameters. The display brand carousel shortcode takes the following parameters.
- “items” [int / featured] Total number of brands
- “items_to_show” [int] Number of brands per page
- “items_to_scroll” [int] Number of brands to scroll each time
- “image_size” [thumbnail / medium / large / full / custom size] Brand image size
- “autoplay” [true / false] Carousel autoplay
- “arrows” [true / false] Show or hide the navigation arrows
- “hide_empty” [true / false] Hide brands that have no products associated
For example, let’s say we want to change the image size to medium and add navigation arrows to allow the user to navigate manually. To achieve this, we will change the respective parameters in the shortcode. The new shortcode will look like this:
[pwb-carousel items="10" items_to_show="5" items_to_scroll="1" image_size="medium" autoplay="true" arrows="true"
As you can imagine, the possibilities are endless. Simply modify the code as much as you want to suit your liking.
2. Display Products Carousel by Brand

Perfect WooCommerce Brands allows you to display a slider carousel of all the products of a specific brand using the following shortcode:
[pwb-product-carousel brand="all" products="10" products_to_show="5" products_to_scroll="1" autoplay="true"]
The code takes the following parameters:
- “brand” [all / brand slug]
- “products” [int] Total number of products
- “products_to_show” [int] Number of products per page
- “products_to_scroll” [int] Number of products to scroll each time
- “autoplay” [true / false] Carousel autoplay
- “arrows” [true / false] Show or hide the navigation arrows
In the same way, you can edit the shortcode to suit your needs.
3. Display Products of Specific Brand
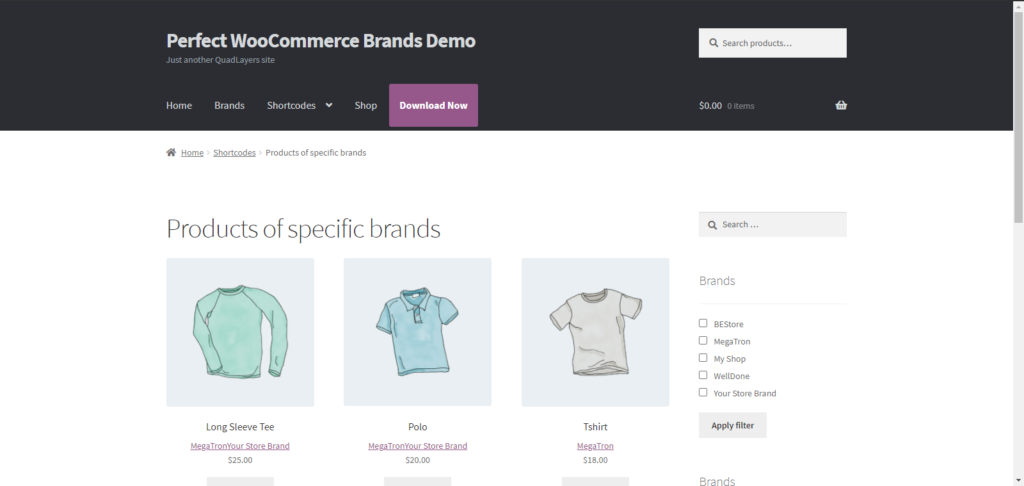
Use this shortcode to display products that are associated with one or more brands. This shortcode is basically an extension of the default product’s shortcode.
[products brands="brand-slug"]
Its parameters are:
- “brands” [comma separated brand slugs] – Show products associated with these brands
- Inherited parameters from the WooCommerce [ products ] shortcode
4. Display All Brands
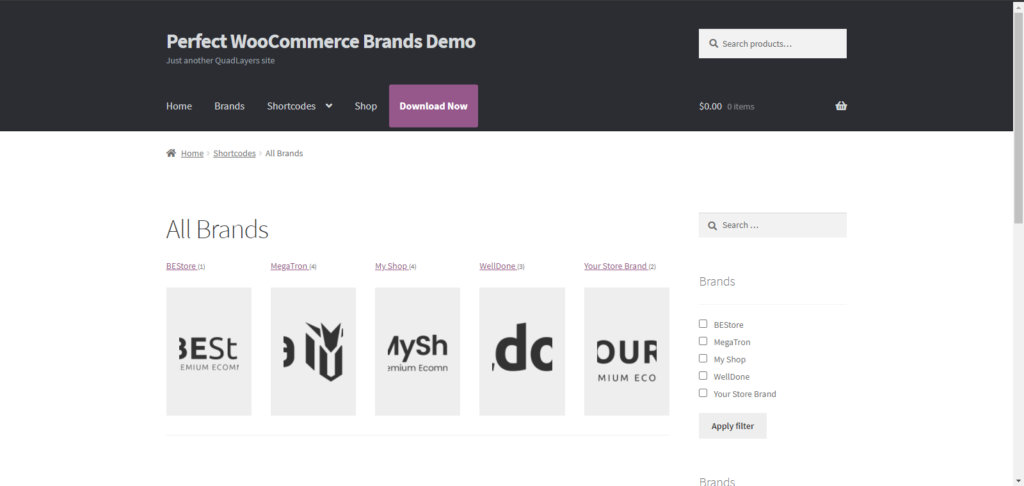
You can use the following shortcode to display a list of all brands along with their logos.
[pwb-all-brands per_page="10" image_size="thumbnail" hide_empty="true" order_by="name" order="ASC" title_position="before"]
The parameter you can modify in this code is:
- “title_position” [before/ after / none]
5. Display A-Z Brand List

You can use this shortcode to display all the brands in an alphabetically ordered list.
[pwb-az-listing]
6. Display Brands for a Specific Product
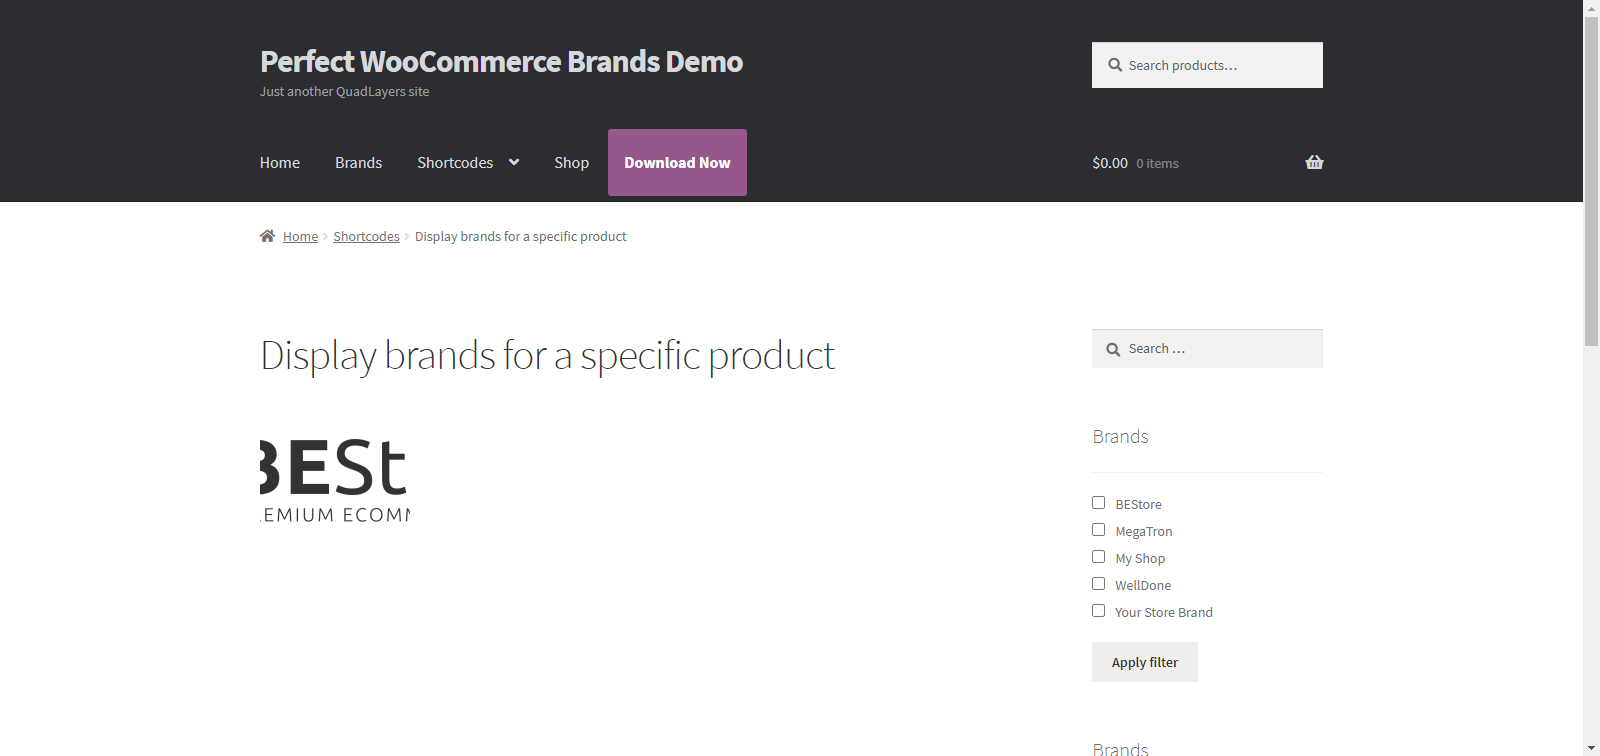 With this shortcode, you can display brands of a specific product. If the “product_id” is empty, the shortcode will try to get this value by itself.
[pwb-brand product_id="5" image_size="thumbnail"]
Additionally, you can tweak the parameters of this code:
- “product_id” [int / empty] – Show brands for this product
- “as_link” [true / false] – Show brand image or a text link
- “image_size” [thumbnail / medium / large / full / custom size] – Brand image size
Congratulations! You are now familiar with multiple ways to organize your WooCommerce products by brand. For more information about this, check out the plugin’s documentation page.
But that’s not all! You can add a brand filter to your store and help customers find the products they’re looking for quickly. This will improve your customers’ experience and help you increase your sales.
How to Filter Products by Brand
Perfect WooCommerce Brands comes with built-in widgets that allow you to filter products by brands using either a drop-down menu or a brands list. You can easily add any of these to your widget area by following these simple steps.
1) In your WordPress Admin Dashboard, navigate to Appearance > Widgets. Find the Brands Dropdown and Brands List widgets and drag and drop them to your desired widget area. For this demo, we’ll add them to our sidebar.
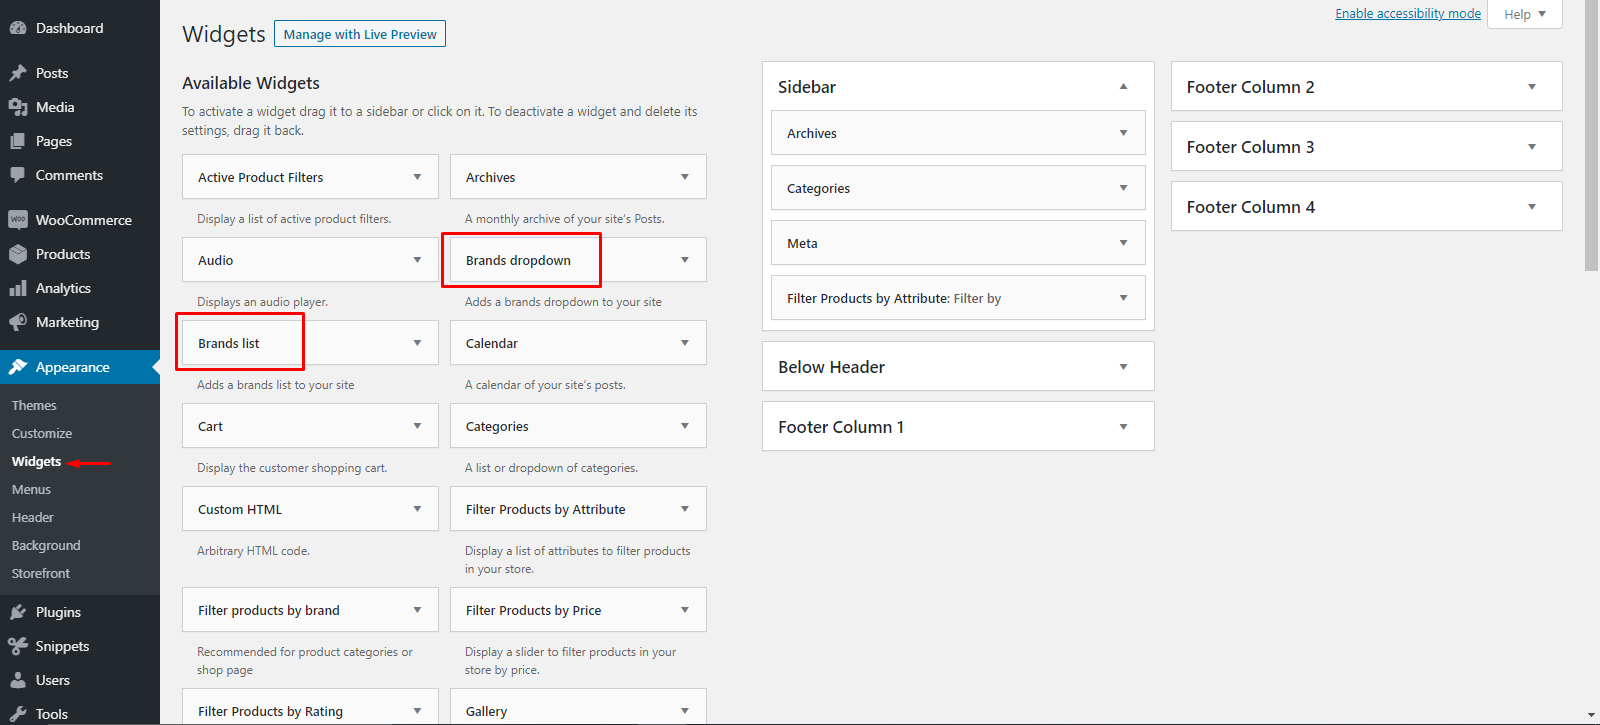
2) Then navigate to the frontend of your store and you will see both the widgets in action. You can choose to add one or both of these filters.
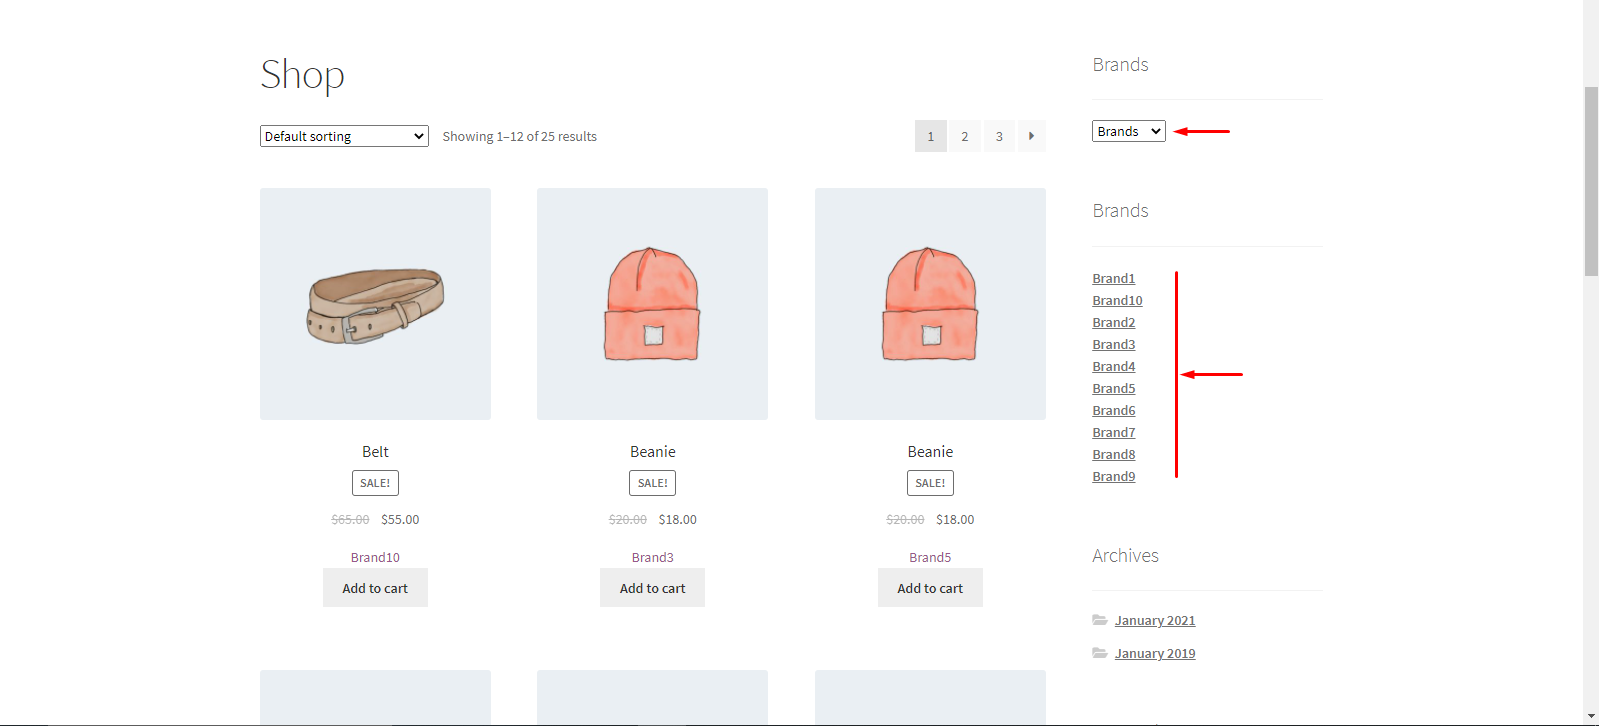
That’s it! That’s how easy it is to add brand filters to your online store with Perfect WooCommerce Brands.
Conclusion
All in all, working with brands is essential for eCommerce stores to improve customer experience and boost their sales. Even though WooCommerce only offers sorting options, in this guide, we have shown you different ways to organize your products by brand. As a summary, in this post we’ve covered:
- Default sorting options in WooCommerce, including custom sorting
- How to create and assign brands using Perfect WooCommerce Brands
- Step-by-step instructions on how to organize WooCommerce products by brand
- How to add shortcodes to a WordPress page or a post
- Six different ways to display brands using shortcodes from the Perfect Brands for WooCommerce plugin
- How to add filters (brands list and dropdown menu) to your shop page
Finally, we recommend you check out our guide to learn more about how to add AJAX product filters in WooCommerce.
Have you tried to add brands to your WooCommerce store? What method did you use? Let us know your experiences in the comments section below!

What size are the brand logos suppose to be and what is a brand banner?
Hi Melissa, there is no hard and fast rule for a logo size. It all depends on where you want to display the logo. For example, if you want to use it for a thumbnail, you can go with the smallest size (thumbnail). If you want to display it in a carousel, you better go with a bigger size (medium, or medium-large), etc. So, it all depends.
A brand banner is displayed on top of your brand page. It is an image that contains your brand info like; name, logo, tagline, social icons, and other highlighting features of the brand.
Hi,
I hope you can help with this question I have been searching for for a while. We only sell handmade jewelry items that we make. Some there is only one brand. We have about 5,000 different designs. Do I have to go and enter the same brand name individually? Or there is a code snippet that will do for all of them. (I hope)
I will appreciate your advice.
Thank you and kind regards.
Hi Tony,
You don’t need any code snippets. Just follow this guide to edit the products in bulk (using default WooCommerce options). In the product editing form, you will see a Brands section (Perfect Brands for WooCommerce plugin adds this section there). Just checkmark the brand you wish to add to the selected products and click on the update button to save changes. The brand will be added to all the selected products at once.
Hope that helps!
Changing my open cart store to woocommerce. I realized that I can’t edit my products on my woo admin panel by brand!! I have been using this simple feature on opencart and it is really handy.
Is there a way of filtering products by brand on admin panel? When I need to edit the products for just one brand , how do I do this?
Hi Ioanna, the Perfect Brands for WooCommerce plugin allows you to filter WooCommerce products by brand.
To do that, from your Admin Dashboard, go to Products > Brands. It will take you to the Brand Settings menu. Here you can see the product count against each brand. Click on the number in the Count column against the brand whose products you wish to edit. It will give you all the products of that particular brand.
Hope this helps.
Seems this plugin is exactly what i have searched for. Thanks for the great work!
Do you have any idea if I try to import a large list of new products with CSV file, is there any possibility to add brands directly in this file instead of assign brands later via woo dashboard?
Hi Ivo,
Yes, you can add brands to the CSV file and import it into WooCommerce. Just make sure to have the plugin installed and brands configured before you start importing. While importing, double-check to confirm the mapping of Brand column to the Brand attribute. Also, make sure the names of Brands in the CSV file match exactly with the ones you have configured in the plugin. If done correctly, it should work.
Hi! I love your plugin! It´s awesome. I need to increase speed on carrousel option? It´s possible to do that adding some text into a shortcode? What options do I have to do that? Regards!
Hi Juan!
Thanks for the appreciation. We are glad to hear that.
Unfortunately, there is no speed parameter for the shortcode. You can find the list of all available parameters here.
Hi,
I work with elementor and brands logo will not display on single products? Is there a shortcode to display it?
Hello,
This could be an issue with your theme or Elementor. We recommend contacting the support team for better assistance.