Do you want to add some extra security to your WordPress site? Do you need to protect your pages from the public? If you are looking for an easy method to add password protection to your site, this post is for you. This guide will show you how to password protect a page in WordPress.
Why Use Password Protect a Page in WordPress?
Protecting a page with a password is a good way to add an extra layer of security to your site. Once you launch your site, anyone can access it and view its content. However, in some cases, you may want to prevent users from viewing certain pages, posts, or parts of a post. For example, if you’re building a custom landing page for your next product launch, you may not want visitors to access that page.
In these cases, you can protect a page with a password. On top of that, if you have exclusive content that only some members can see, you can add password protection to certain posts. This can be a good idea for membership sites.
Even though WordPress comes with some password protection options, they’re quite basic. So for more advanced options, you’ll need to rely on third-party tools.
How to Create a WordPress Password Protected Page
Let’s start by learning how to create a password-protected page in WordPress. This is a good option when you want to restrict access to certain pages. By default, anyone with the page link can view the contents, so you can add a password and prevent unauthorized users from viewing some pages.
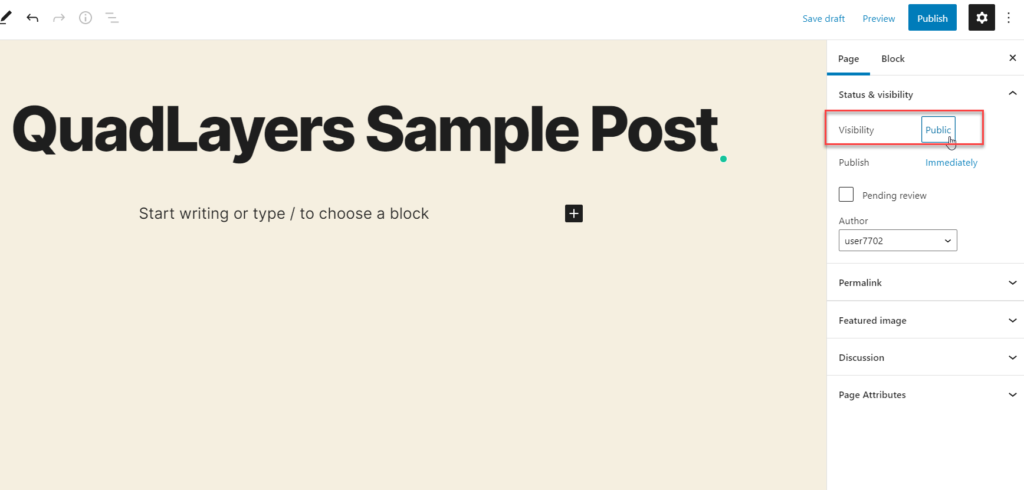
To add a password to a page in WordPress, first, create a new page. If you are planning to protect an existing page, open the page using the WordPress editor. On the right-hand side, you will see an option called Visibility.
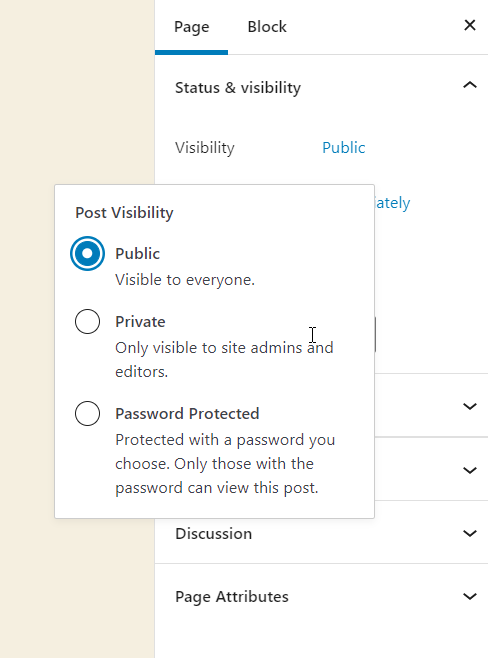
By default, the visibility will be set as public. To protect the page with a password, you’ll need to change that. Press Public and you’ll see three different options.
- Public: Anyone with the page’s permalink can access it, view the page content
- Private: Only site admins and editors will see the page
- Password Protected: Users will need to add a password to view the content
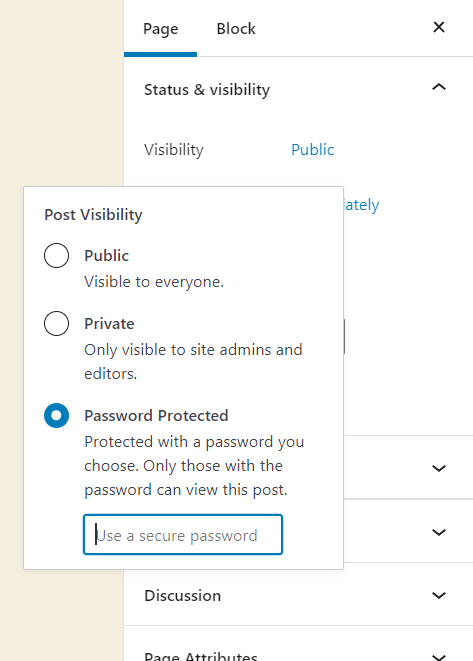
Select the password-protected option and enter a password.
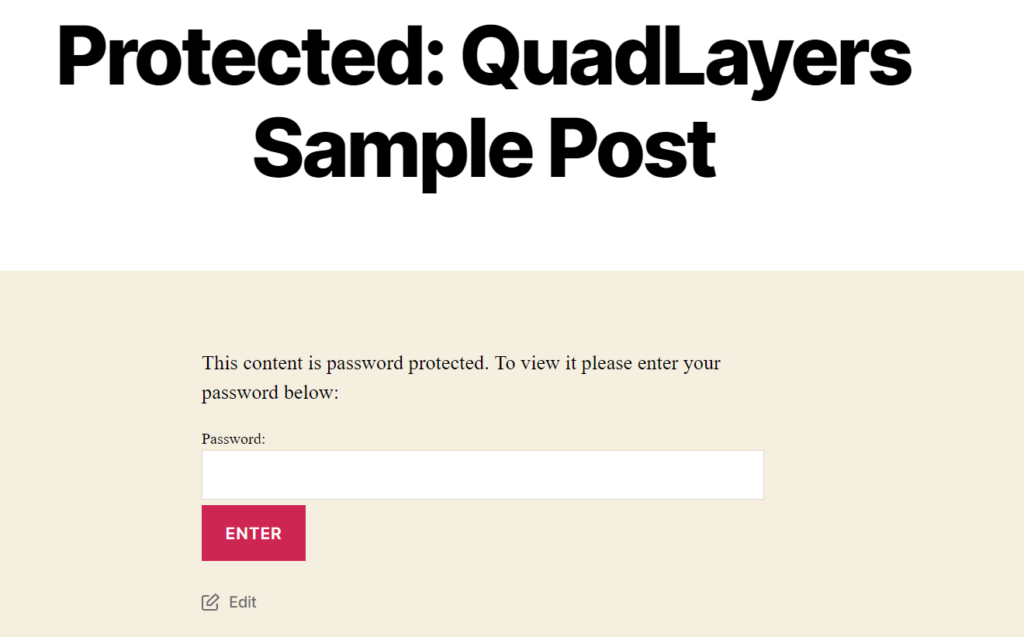
After that, publish the page or update it. Now when you check the page from the front end, you will need to enter a password to view the content.
This is how you can easily protect a page with a password in WordPress.
If you want to remove the password protection, change the visibility option to Public from the WordPress editor.
How to Password Protect the Entire Site
Apart from adding a password to a specific page, you can also protect an entire site. This can be a good option when you’re:
- Preparing an important product that may have its own site
- Working on new projects and don’t want people to see it until it’s ready
- Providing exclusive access to certain users
In this section, we will show you how to protect an entire WordPress site with a password and block visitors from accessing the content. To do this, we will use a plugin called Password Protected WordPress.
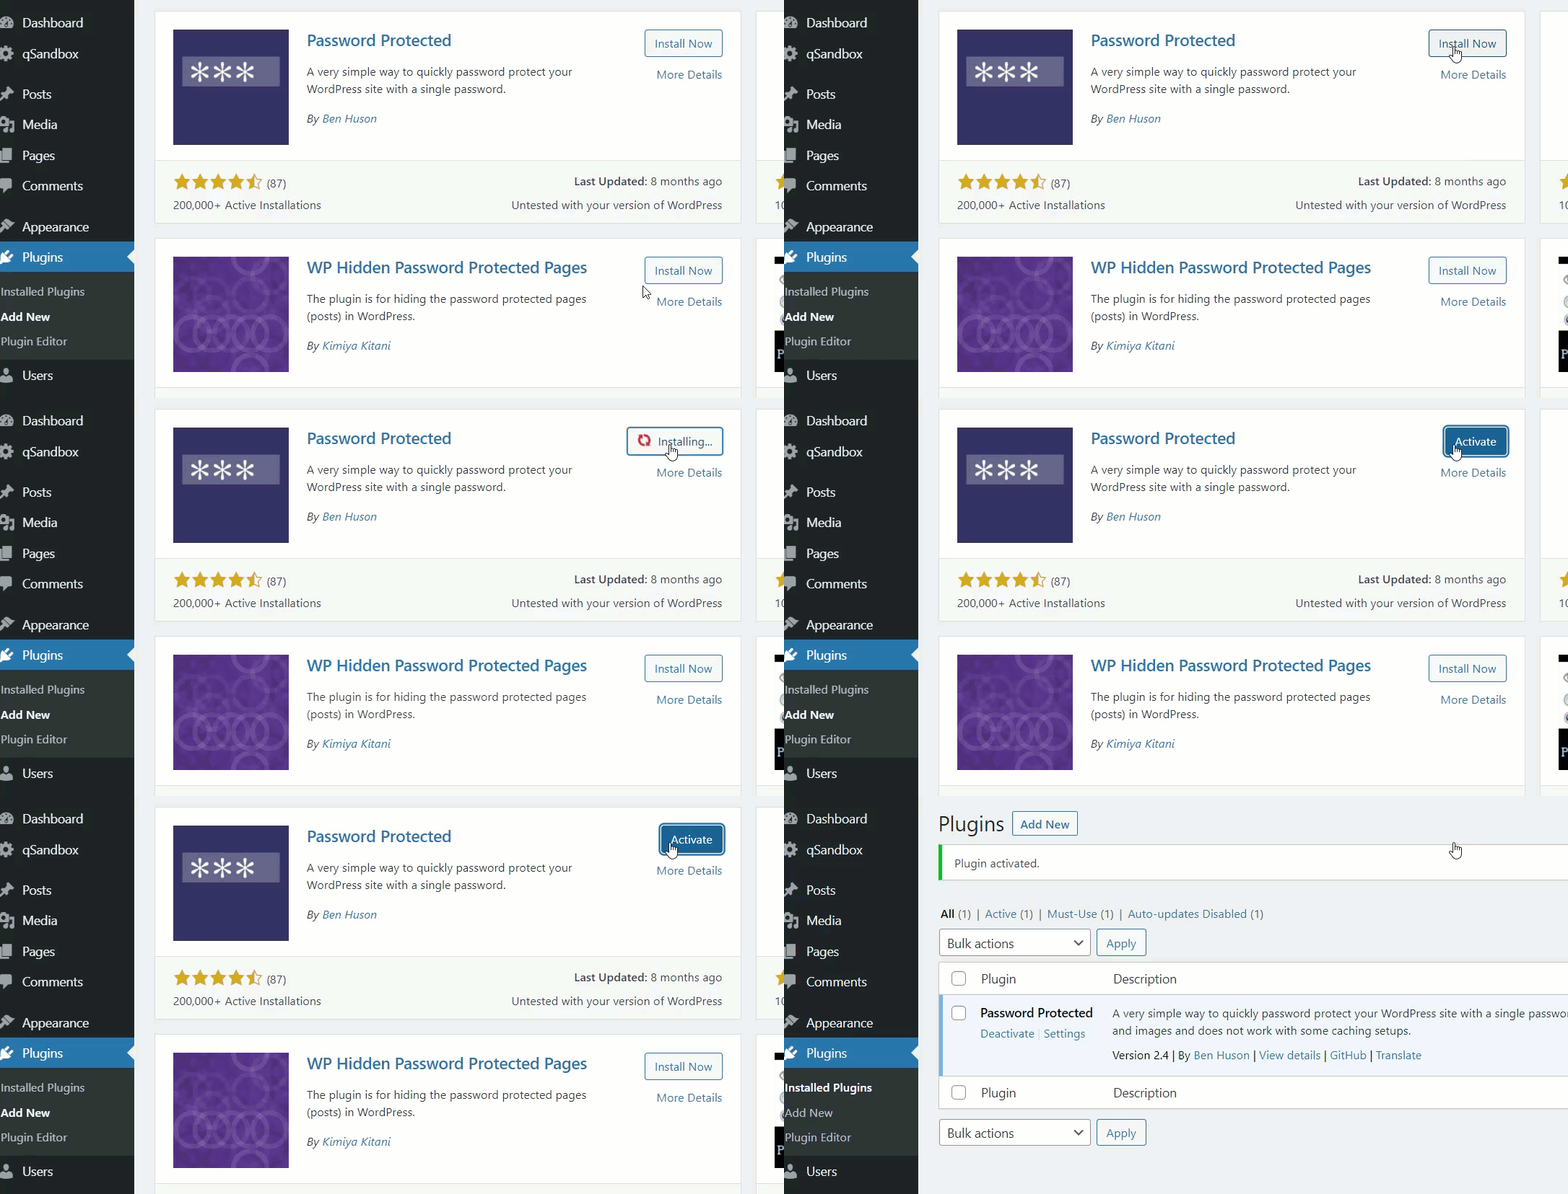
First, install the plugin on your site. In your WordPress dashboard, go to Plugins > Add New and look for the tool. Then install it and activate it.
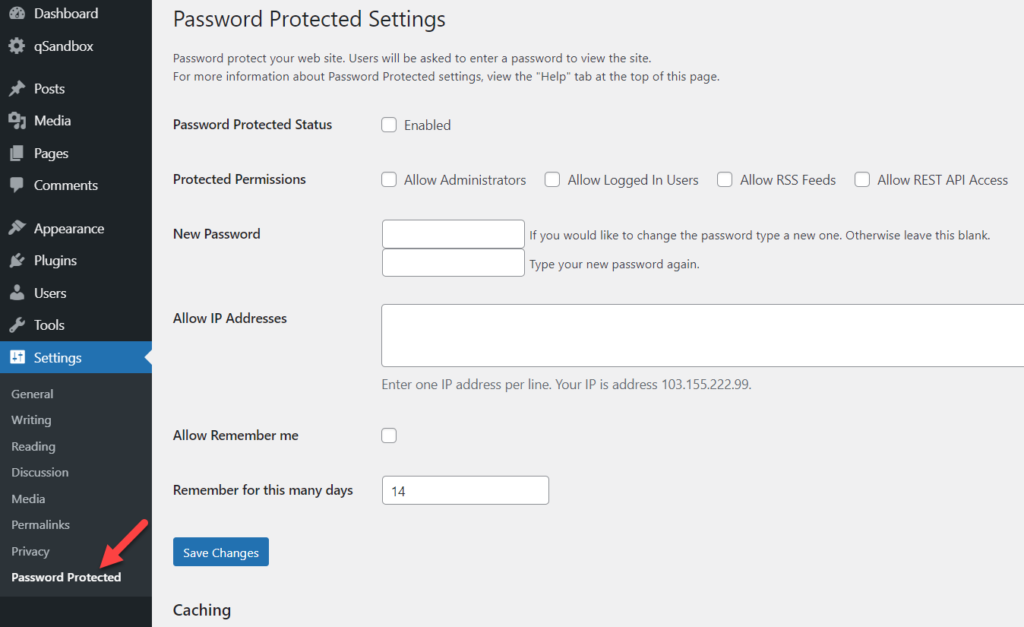
Under the Settings section, you will see the plugin’s settings.
Password Protected WordPress comes with simple customization options. The main ones are:
- Status
- Protected permissions
- Password
- Allowed IP addresses
- Remember me option
- Remember me duration
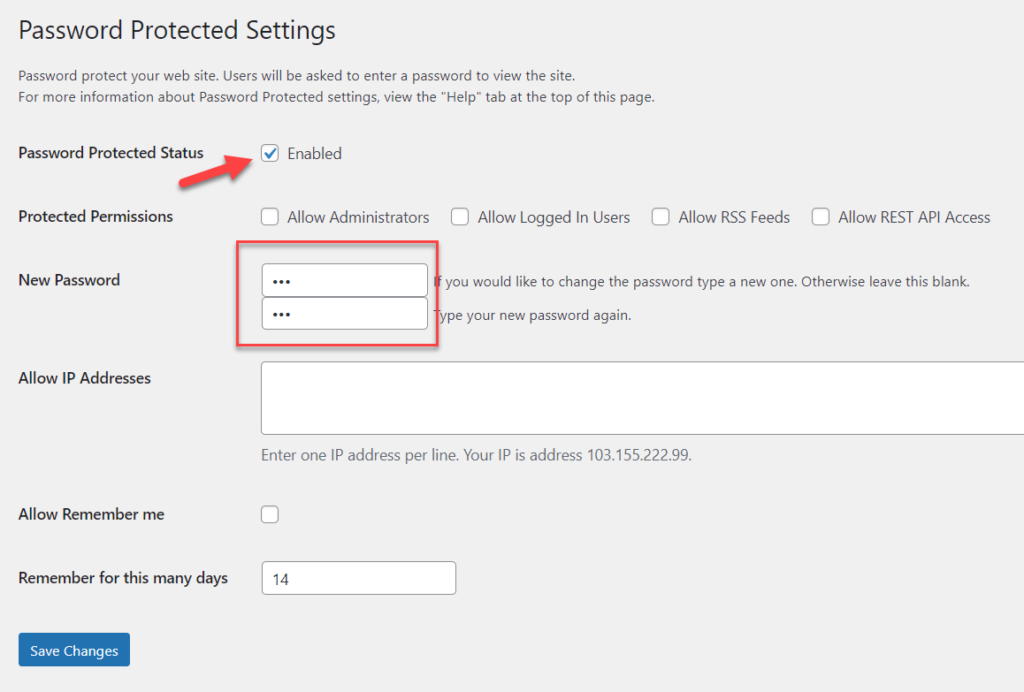
Make sure you enable the password-protected option and then enter your password in the corresponding field.
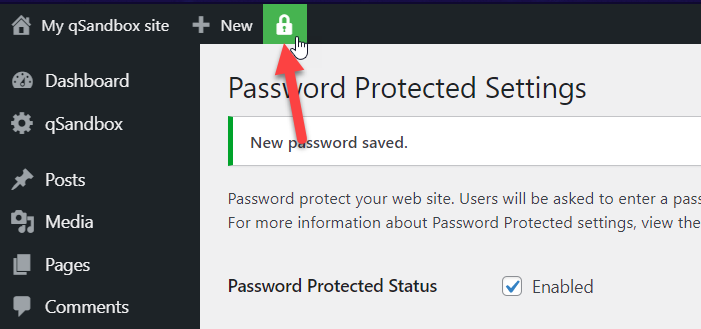
Then save the changes and you will see a padlock sign in the WordPress admin bar. That means that the site is protected with a password.
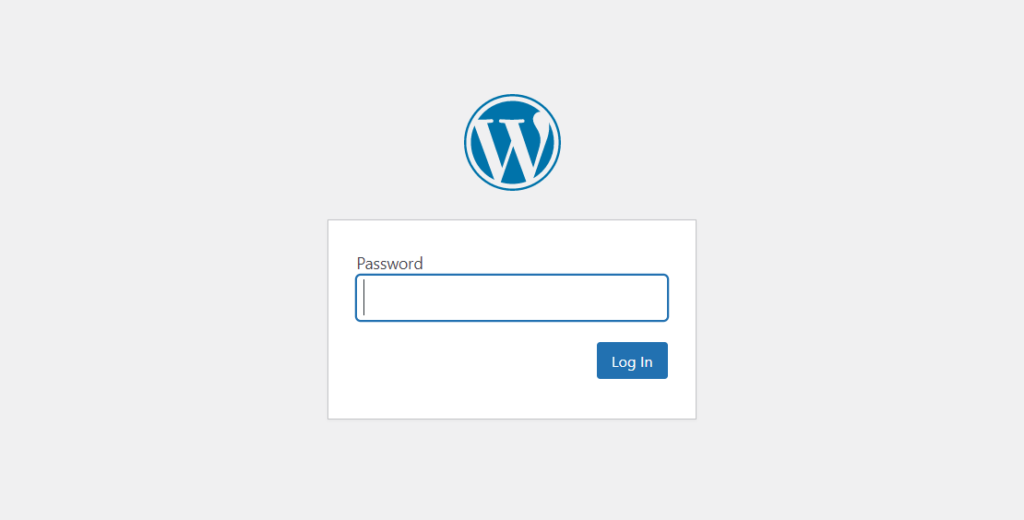
To verify it, check your website from the front end and you will see something like this:
After entering the correct password, you will be able to view the website’s content.
To remove the password protection, simply go to the plugin’s settings and uncheck disable the password protection option.
How to Protect Categories
Apart from protecting WordPress pages and websites, you can also add a password to categories. For this, we’ll use a plugin called Access Category Password.
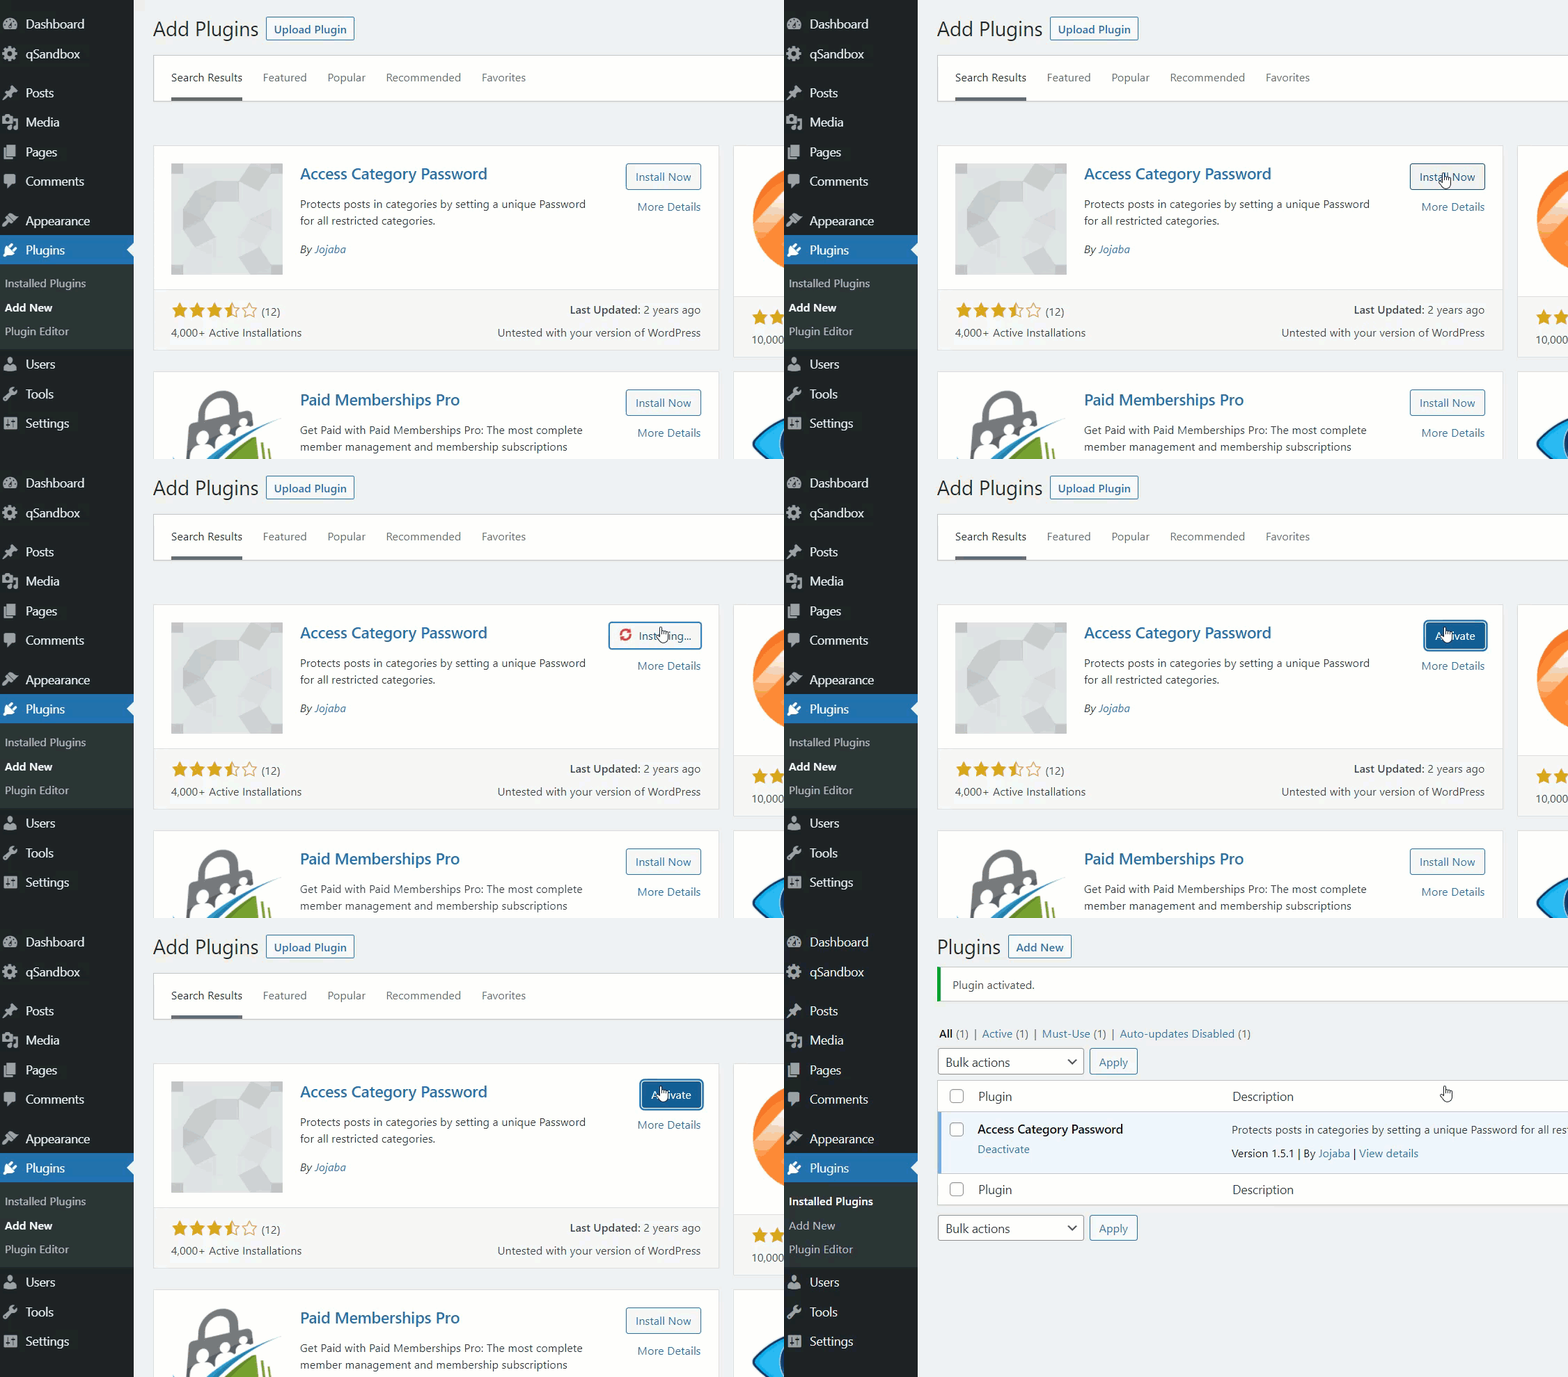
First, go to Plugins > Add New in your dashboard and look for the tool. Then install it and activate it as shown below.
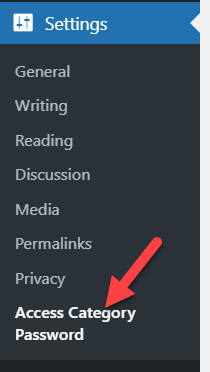
After that, open the plugin’s configuration under the WordPress Settings.
There you will see the main configuration options:
- Protection type
- Password
- Impacted categories
- Granting users
- Sign post protection
- Display excerpt
- Info message
- Placeholder
- Error message
- Form styling
You will be able to see all your categories on the settings page. Depending on what you want to do, you can choose all the categories or individual ones.
After that, you need to select a protection type and password. The plugin comes with two protection types:
- Session
- Cookie
Choose the most appropriate for you and enter a password in the corresponding field.
You can also remove the password and grant automatic access to users with certain custom roles to prevent them from having to enter the password every time. Simply select the roles from the “Granting users” section.
Once you have selected the categories you want to protect and added a password, save the changes.
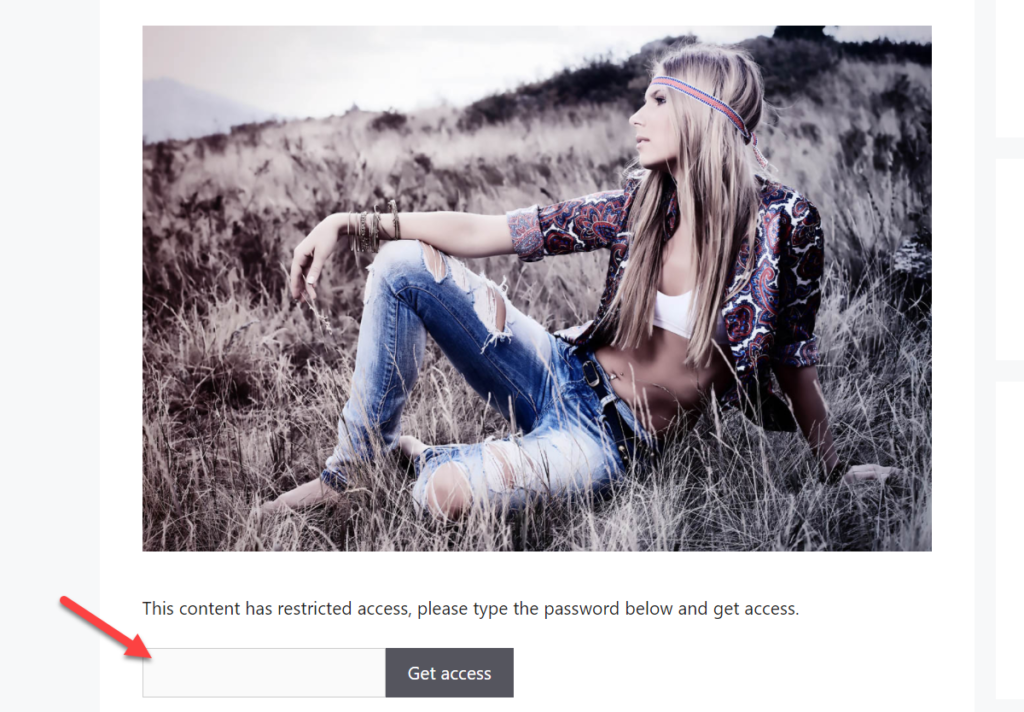
Then check the category archives page from the frontend to verify that the category has restricted access.
Edit the password form
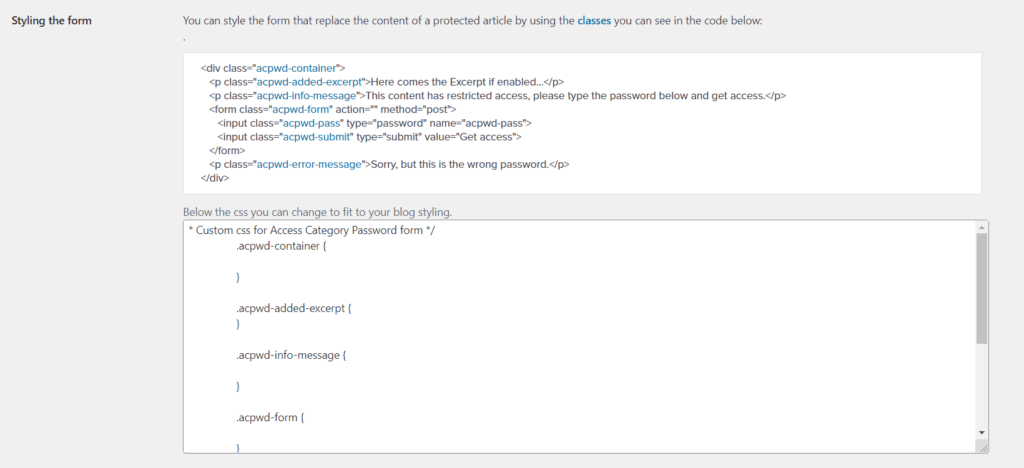
On top of that, the plugin also allows you to change the styling of the form. For this, you’ll need some coding skills so it may be an interesting option for advanced users.
Under the “Styling the form” section, you will see two options to add custom HTML and CSS. Edit the code as you like to make the password box more user-friendly and then save the changes.
Bonus: How to Password Protect Part of a Post
Another interesting alternative is to protect part of a post with a password. To do this, we’ll use a tool called Passster. With this free plugin, you can protect your whole site, single pages, posts, and even certain areas of a post.
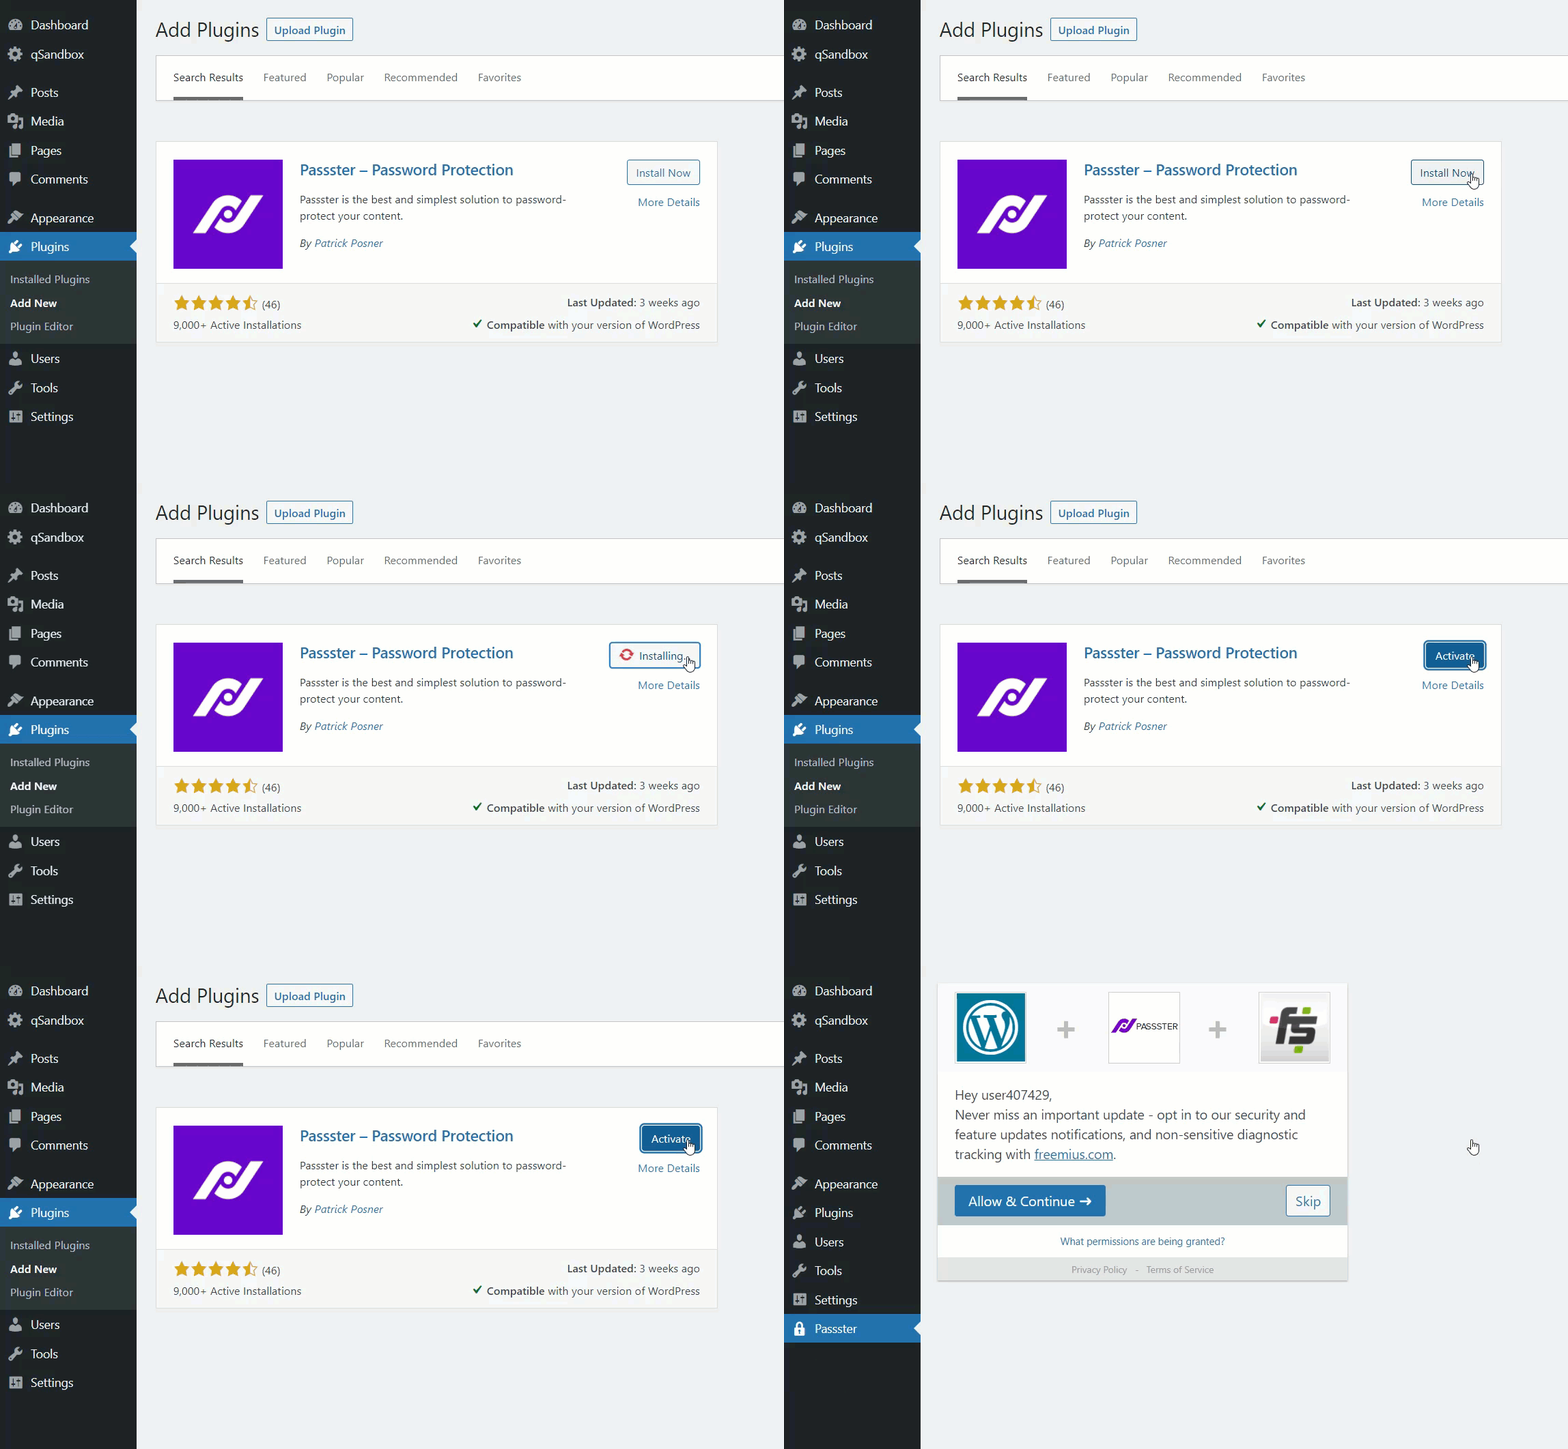
First, in your WordPress dashboard, go to Plugins > Add New and install the plugin as shown below.
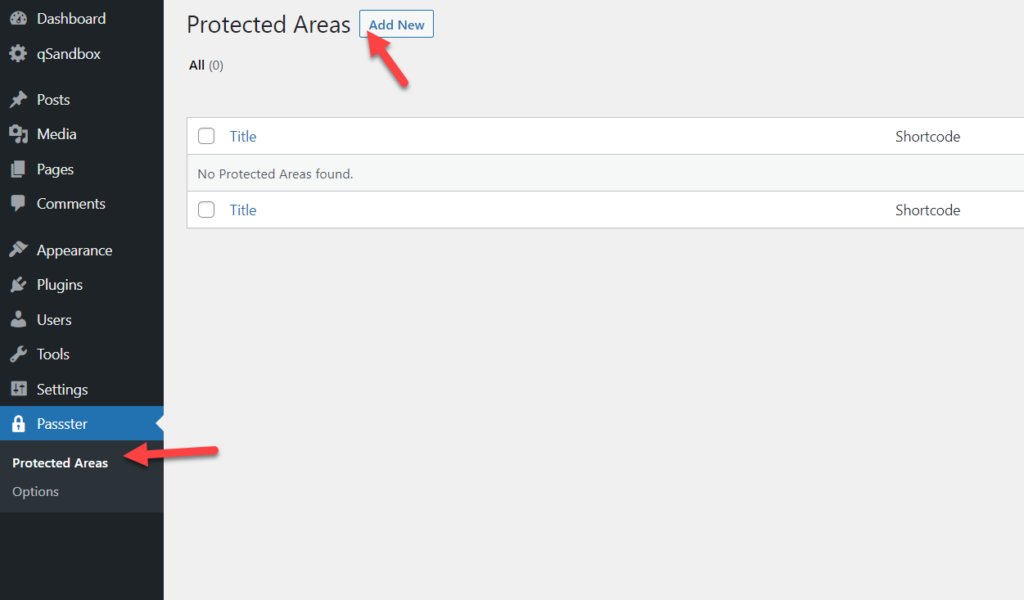
Then go to the Passster settings and press Add New to create a new protected area.
You need to give the protected area a name and write the content that only users with the password will be able to access. On the right-hand side, select Password under Protection Type, and enter a password.
After creating the protected area, the plugin will generate a unique shortcode.
Copy it and paste it in the post where you want to display it. For example, our custom shortcode is:
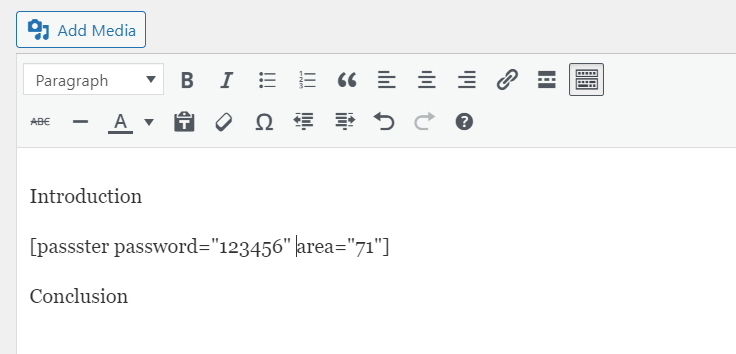
[passster password="123456" area="71"]
So we paste it into our post as follows:
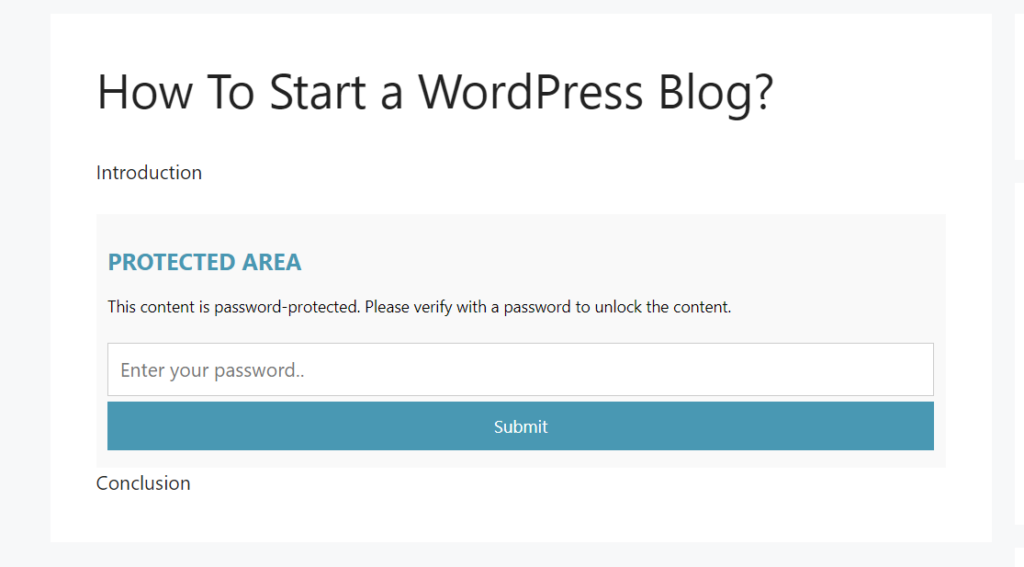
After publishing the page, you will see the post with an area that’s protected by a password.
This way, you can add exclusive content to your posts without having to protect the whole article with a password.
Passster allows you to create unlimited protected areas and custom shortcodes, so you can add as many as you want.
Conclusion
All in all, protecting content can be useful to add an extra layer of security to your site and make certain pages, categories, and even parts of a post exclusive.
In this guide, we’ve shown you how to password protect a page in WordPress without any extra tools. Additionally, we’ve seen different methods to protect an entire site, categories, and areas of a post.
Protecting individual pages with a password can be helpful when you want to prevent unauthorized users from accessing certain pages. Adding a password to your entire site, on the other hand, can be a good idea when you’re preparing an important product, working on new projects, or giving exclusive access to some users. Alternatively, you can also protect your categories or certain parts of a post with a password.
For more information on how to improve your site’s security, have a look at our post about Security Tactics in WordPress.
Have you protected some pages on your WordPress site? How did you do it? Let us know in the comments below!

