
How to Change Prices Based on the Country in WooCommerce
Are you trying to figure out how to change prices based on the country in WooCommerce? If yes, then you have come to the right place. In this article, you’ll find all the information you require to change the prices of products based on your customer’s location.
Before we start, let’s see why it is essential to include such a feature in WooCommerce.
Why Should We Change Prices Based on Country?
It is no secret that prices vary from country to country. The cost of living in one place can be significantly different than in another, and this is especially true when it comes to major cities. For example, the cost of living in New York City is much higher than in most other parts of the United States. That is why it is essential to consider the cost of living in a given country when setting prices for products and services.
There are several reasons why you might want to change prices based on country. Perhaps you have a product that is popular in one country but not so much in another. Or maybe you want to target a specific market with your pricing. Whatever the reason, there are a few things you need to keep in mind when changing prices based on country.
First, you need to consider the exchange rate between the countries involved. The exchange rate can fluctuate, so you need to know how this will affect your prices. If you are selling a product in US dollars, but your customer is located in Europe, they will need to convert the price into their local currency.
Second, you need to consider the different tax levels applied in different countries. In some places, taxes can add a significant amount to the final price of a product or service. In others, taxes may be much lower. Furthermore, you need to factor this into your pricing so that you are not inadvertently charging customers more than they expect.
So, how can you adjust your WooCommerce prices based on the customer’s country? It is pretty easy to do so.
How to Change Prices Based on Country in WooCommerce
This section covers how to change prices based on the country in WooCommerce. Here we have two ways to change the prices in WooCommerce.
- Using a Plugin
- Programmatically
Method 1: Change Prices Based on Country with a Plugin
There are several plugins to change the prices based on the country in WooCommerce. For this tutorial, we will use Price Based on Country for WooCommerce. This freemium tool offers multiple features for changing the product price according to the country. Also, this plugin is straightforward to use.
However, it is essential to note that the free version of the plugin does not allow you to edit the prices of variations. If you want to edit the variations prices in bulk, you need to get one of the premium versions that start at 59 USD. With that said, let’s see how you can change the prices based on the country using this plugin.
Step I: Install and Activate the Plugin
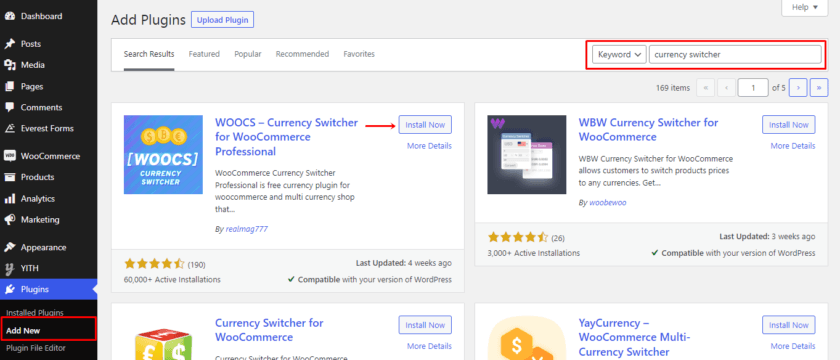
First thing first, we’ll start by installing the plugin. In your WP Admin Dashboard, navigate to Plugins > Add New. Search for the Price Based on Country for WooCommerce in the search bar on the top right side.
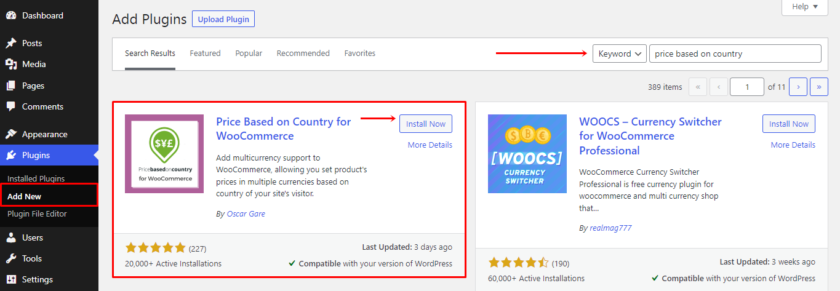
Once the plugin is displayed, click on Install Now. After the plugin is installed, activate it.
Step II: Configure the Plugin’s Settings
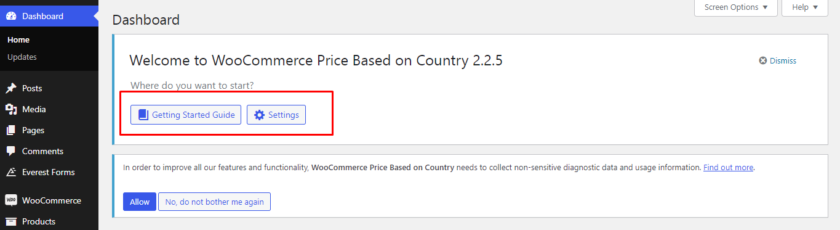
Next up, the settings for this plugin are included within the main WooCommerce settings menu. To navigate that, go to WooCommerce > Settings. Or else, you can see a box display on the top of your plugins page right after the activation, along with a Get Started Guide. If you encounter some issues, you can check out the guide.
Once you have navigated to the settings page of your WooCommerce site, locate a Zone Pricing tab. This plugin mainly offers two settings one is General Settings, and another one is Pricing Zones.
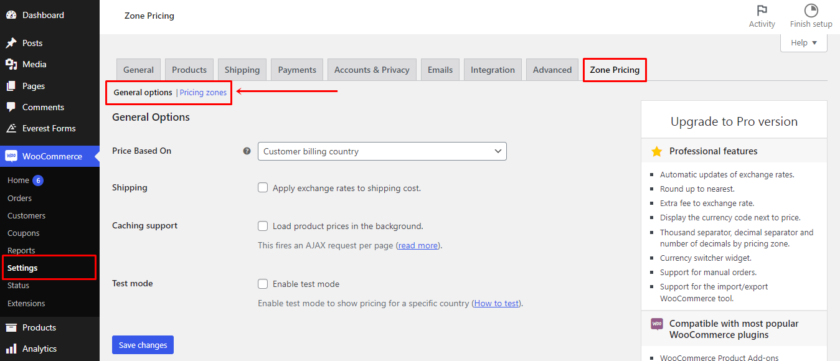
On the general options, you can instruct the plugin to calculate the pricing, and then you’ll decide whether or not to include exchange rates in your shipping costs.
After that, decide whether or not you want to enable caching support or the test mode.
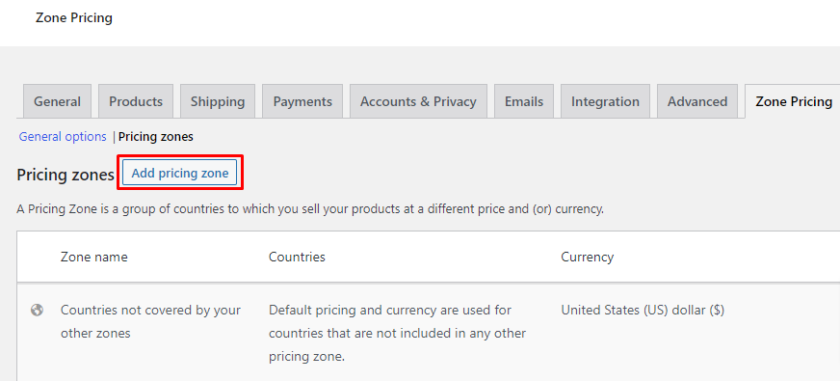
Now after configuring the general settings, let’s go ahead and add the prices based on the country. For that, click on the Pricing Zones link and select the Add pricing zone button.
After selecting a country, currency, and exchange rate, you will choose a Zone name (an abbreviation is acceptable). Fill up this information with your desired country and currency. And then, you will then be presented with a few alternatives for setting up a price zone.
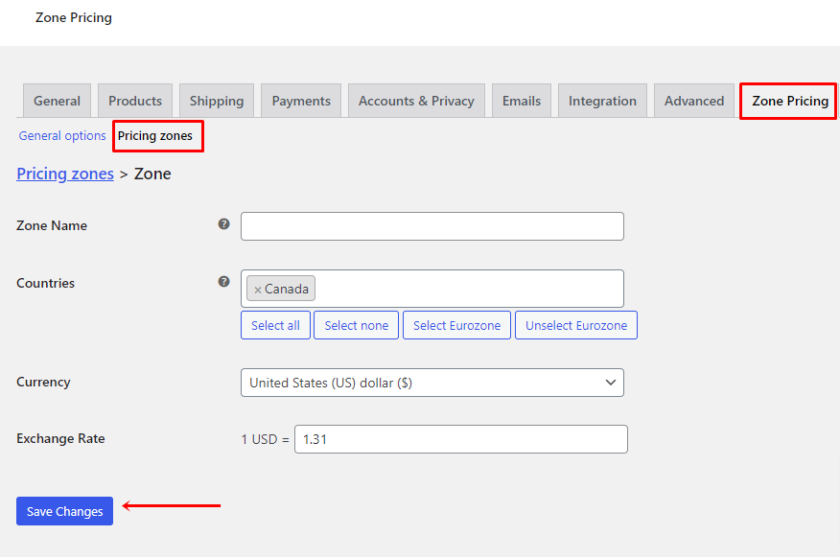
To create your first price zone, simply click the Save Changes button. You’ll receive a message which indicates that adding the zone was successful.
Step III: Test Pricing Based on Country in WooCommerce
To check if the plugin has worked or not, go to Products > All Products and select an existing product, or you may add a new one by selecting Add a New Product button. Then scroll further down the product page. As you can see new pricing zone is added under the General tab in the Product Data section.

Here the prices can be automatically determined using the currency rate while configuring the setting, or you may manually specify pricing if you like.
That’s it! With the help of this plugin and these simple steps, you can change the prices of the products based on any country.
Method 2: Programatically Change Prices Based on Country in WooCommerce
Here we’ve presented another method to change the prices of WooCommerce products based on country. This method is ideal if you are comfortable with coding and making changes to the core files.
However, while tempering with the core files, we would always recommend making a backup of your entire website to make sure that it avoids causing conflicts with any plugins or code.
Since this method requires adding custom codes, you can either use a plugin like Code Snippets or paste the snippet directly into the functions.php file of your child theme. According to your preference, you can either create a child theme manually or use a child theme plugin.
We’ll be using Code Snippets for this tutorial. First, you need to install and activate it like any other plugin.
After installing and activating the plugin, you can find the plugin’s configuration on the left panel of your dashboard. Then you can easily add a new snippet to your website by visiting the plugin and selecting Add New.
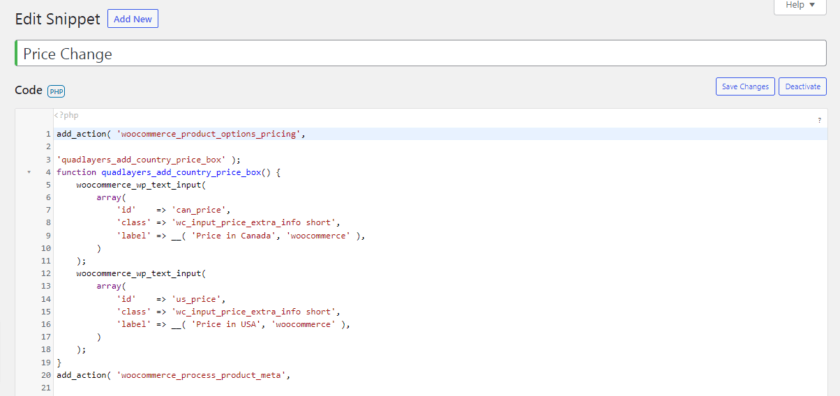
Code Snippet to Add a Price According to a Specific Country
You can copy the following code to add a text area with the alternative price for the country that you want to set:
add_action( 'woocommerce_product_options_pricing', 'quadlayers_add_country_price_box' );

function quadlayers_add_country_price_box() {

    woocommerce_wp_text_input(
        array('id' => 'can_price',
            'class' => 'wc_input_price_extra_info short',
'           'label' => __( 'Price in Canada', 'woocommerce' ),
        )
    );

    woocommerce_wp_text_input(
        array('id' => 'us_price',
            'class' => 'wc_input_price_extra_info short',
            'label' => __( 'Price in USA', 'woocommerce' ),
        )
    );
}

add_action( 'woocommerce_process_product_meta', 'quadlayers_save_country_price', 2, 2 );

function quadlayers_save_country_price( $post_id, $post ) {

    if ( ! empty( $_POST['can_price'] ) ) {
        update_post_meta( $post_id, 'can_price', stripslashes( $_POST ['can_price'] ) );
    }

    if ( ! empty( $_POST['us_price'] ) ) {
        update_post_meta( $post_id, 'us_price', stripslashes( $_POST ['us_price'] ) );
    }
}

if ( ! is_admin() ) {
    add_filter( 'woocommerce_product_get_price', 'quadlayers_change_price', 10, 2 );

    function quadlayers_change_price( $price, $product ) {

        global $woocommerce;

        $customer_country = $woocommerce->customer->get_billing_country();

        $can_price = $product->get_meta( 'can_price', true );

        if ( $customer_country == 'CA' && $can_price ) {
            return $can_price;
        }

        $us_price = $product->get_meta( 'us_price', true );

        if ( $customer_country == 'US' && $us_price ) {
            return get_post_meta( $product->id, 'us_price', true );
        }

        return $price;
    }
}
After you have added the snippet inside the code area, go to your product page. Then, select any product and click on Edit. Now in the product data section, you can see that a new field has been added where you can add the alternative price. Because we have added USA and Canada as our specific countries, you can set the USD and Canadian prices inside the field.

Now to display the price based on the country on the front page we have to change the billing address. For that, go to Users from your main dashboard and click on Profile. If you scroll further, you’ll find a section Customer Billing Address. After that, simply select the country according to the code. In our case, we have added Canada, so we have selected Canada.
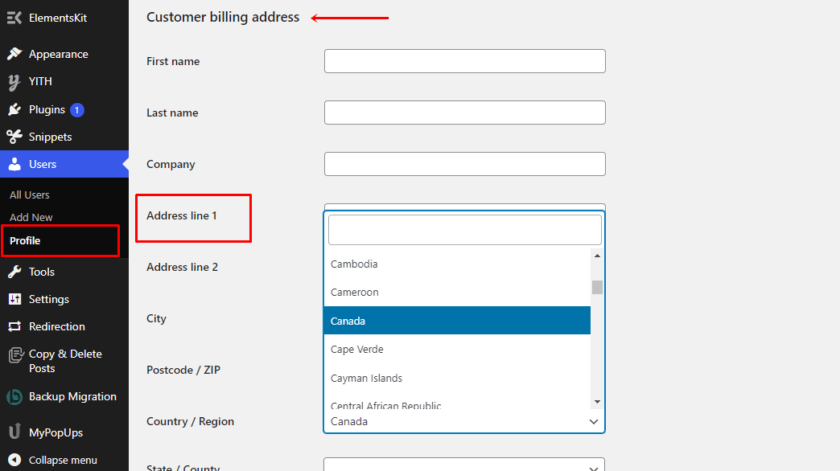
Likewise, you can add many countries as you like and later select the country to display the price of that specific country. After choosing the country, click on the Update Profile button.
You can view the product to check if the settings worked. As you can see in the image below, the product price has been displayed based on the country we set.

Bonus: How to Change Currency in WooCommerce
We have already presented you with one of the easiest ways to change prices based on the country in WooCommerce. But as a bonus, we’ll also provide this guide to changing the default currency of your WooCommerce store.
Since WooCommerce displays pricing in American dollars (USD) by default, it won’t be very convenient to calculate and convert the prices for customers from different countries. To give customers a better shopping experience and appeal the buyers from all over the world, you can allow them to select the currency they want to use.
Even though WooCommerce has a feature to change the currency, the options are very limited. That’s why the best solution is to use a dedicated plugin that provides your customers with a better shopping experience by allowing them to use their local currency.
For the demonstration, we’ll be using a freemium plugin WooCommerce currency switcher by Realmag.
Step I: Install and Activate the Plugin
Like any other plugin, first, we must install and activate the plugin. For that, go to Plugins > Add New on your WordPress dashboard. After that, type the plugin’s name and click Install Now to install the plugin. Activate the plugin right after the installation is completed.
Step II: Configure the Plugin
Next, go to the plugin settings which you can find under WooCommerce > Settings > Currency. You can modify all of the currency-related settings under that tab.
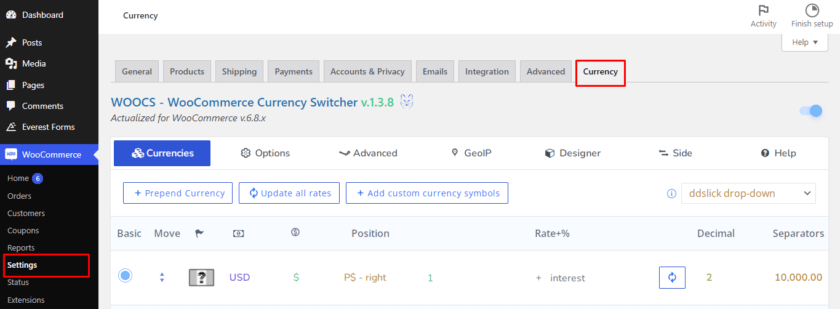
Furthermore, you can add and edit the currencies that you wish to show on your site under the Currencies section. Additionally, you may change each currency’s symbol, location, decimal, interest and rate, cents, visibility, and description.
Not only that, you can display currencies using some additional options found in the Options and Advanced sections. A currency aggregator, a fixed amount for each coupon or shipment, a welcome currency, and many other options are among them.
Similarly, you can activate, personalize, and add GeoIP rules and profiles to the Side Switcher to automatically display currencies according to the user’s IP address. Remember to save the settings once you are satisfied with the adjustments.
At last, you can find a help section that includes FAQs and video tutorials to help you use the plugin.
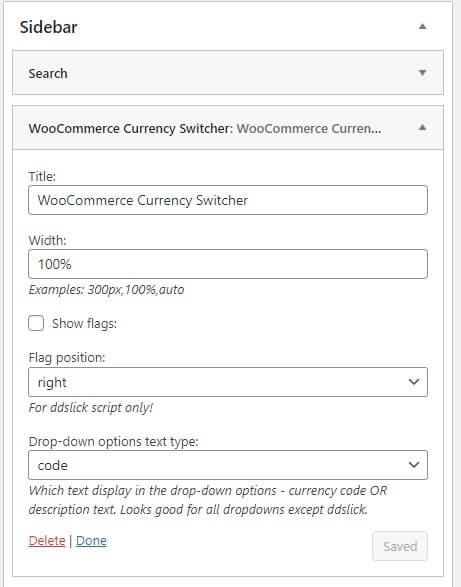
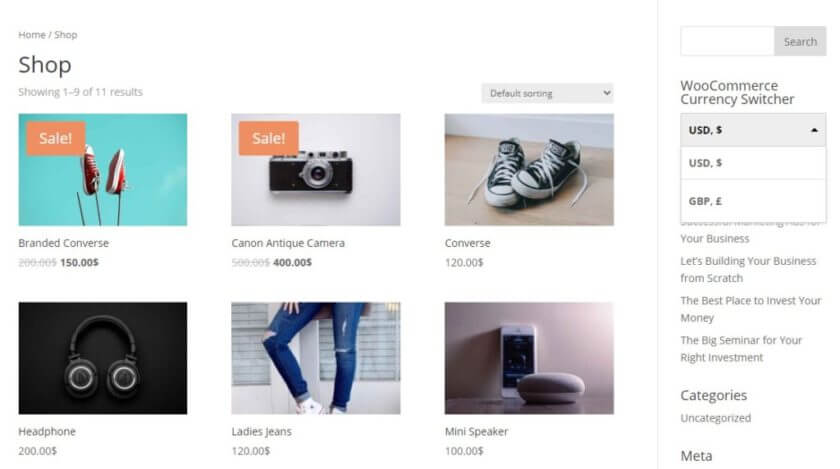
After you’ve finished editing, go to Appearance > Widget to add the currency changer as a widget. Simply drag the Currency Switcher widget to your website’s selected widget area to add it.
Step III: Preview the Changes
That’s it. WooCommerce currency switcher is now added to your store. You can preview the website to see if the currency switcher is working or not.
This is how you can let your customers select their own currency and save them from the hassle of converting the exchange rate.
We presented a very simple solution above. However, if you do not want to install any plugin then you can check out our full post where you can learn various other methods to change the currency in WooCommerce.
Conclusion
All in all, changing the prices based on the country in WooCommerce helps customers to get a fair price for any product. Moreover, by tailoring your price for each country, you can more accurately reflect the true value of your products.
In this article, we have seen different methods to change the prices based on the country in WooCommerce. The two methods we recommend are:
- Plugins
- Code Snippets
You can simply choose any of the dedicated plugins and automate the whole process from calculating the shipping and taxes to converting the exchange rate.
On the other hand, if you want to add different countries and prices of those specific countries manually, then you can choose the second option, which doesn’t require any additional plugins.
The methods we covered today are simple enough to be implemented by any beginners.
We really hope you found this article to be interesting to read and informative. So, did you try changing your WooCommerce product prices based on the country? How did it go? Let us know about your experience in the comments below.
Meanwhile, you can check out some of our other WooCommerce and WordPress-related blog posts that you may find useful. For instance, the following articles may be of interest to you:
