How to Remove Additional Information Tab in WooCommerce
It’s no secret that optimizing your online store will boost your sales and conversions. If you’ve tried everything and are looking for something different to improve your business, this post is for you. In this article, we will show you how to remove the additional information tab in WooCommerce and change individual product pages.
Why Remove the Additional Information Tab?
The Additional Information tab is mainly used to display extra details about your products such as weight, length, with, and height. This helps customers to get an idea of how big and heavy the item is, so they choose the right package size when they place an order.
This tab is important when you sell physical products, but doesn’t make much sense if you offer digital products or services that don’t involve any shipping. In these cases, the Additional Information tab isn’t necessary.
Considering how much competition there’s today in eCommerce, you should remove unnecessary fields and keep your store as clean as possible. If something doesn’t help your business, it’s better to get rid of it. For example, if you sell digital products, you probably don’t need the zip code field, so it’s better to disable it or make it optional.
Similarly, you should remove the Additional Information tab if it doesn’t add any value to your customers or your business. In the following section, we’ll show you exactly how to do that.
How to Remove the Additional Information Tab in WooCommerce
In this section, we’ll show you two ways to remove the Additional Information tab in WooCommerce in the right way.
- With PHP
- Using CSS
We’ll use a bit of code, but don’t worry. Even if you’re a beginner you’ll be able to follow every step to make sure you don’t make any mistakes.
NOTE: As we will modify core theme files and add extra code to the template, before you start, make sure you have generated a complete backup of your website. Also, we recommend you create a child theme and edit those files. This way, you won’t lose any customization when you update your parent theme.
To edit files with code, you can directly customize the child theme or use a plugin. In this guide, we’ll use Code Snippets. It’s a very useful tool for beginners because it makes it easy to add code. Instead of adding the snippets to the functions.php file of your child theme, the plugin manages that for you.
Now without further ado, let’s check out both methods.
1) Remove Additional Information tab with PHP
To remove the Additional Information tab in WooCommerce using PHP, the first thing you need to do is install and activate the Code Snippets plugin on your website. This way, you will be able to add custom snippets without modifying your core theme files.
In your dashboard, go to Plugins > Add New, look for the plugin and install it.
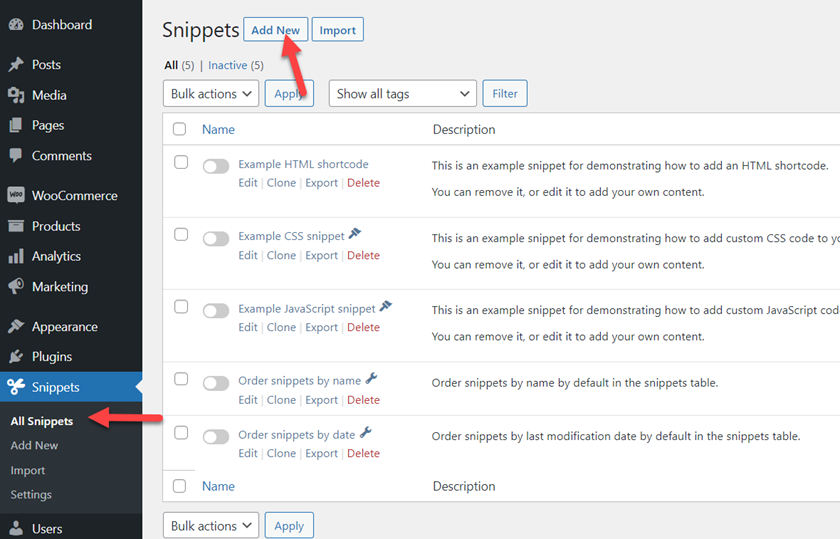
Once you have installed and activated it, you need to create a new snippet. Go to Snippets > All Snippets and press Add New.
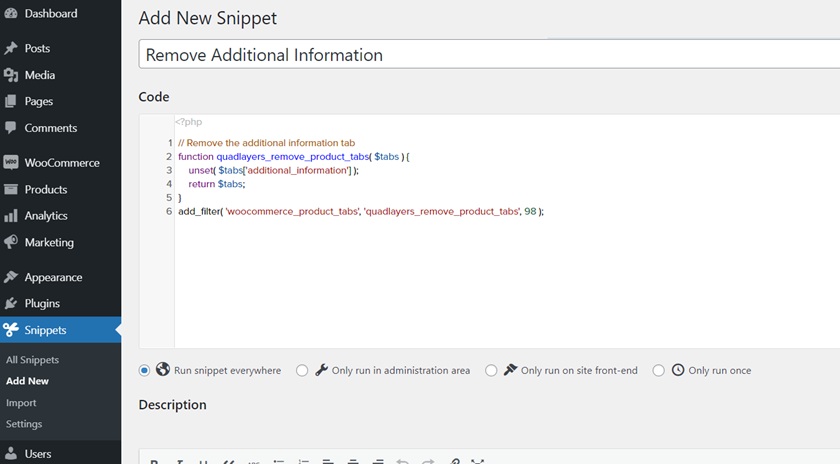
Now copy the following code, paste it in the snippet section and activate it.
// Remove the additional information tab
function quadlayers_remove_product_tabs( $tabs ) {
unset( $tabs['additional_information'] );
return $tabs;
}
add_filter( 'woocommerce_product_tabs', 'quadlayers_remove_product_tabs', 98 );
Then, check your product page from the front end and you will see that the Additional Information tab has disappeared.
This is how you can use PHP to delete the Additional Information tab.
To remove other tabs, you can simply change the name of the tab in this line:
unset( $tabs['tab you want to remove'] );
As you can see, this method is pretty straightforward but it’s not the only one. In the following section, we’ll show you how to remove the Additional Information tab from your WooCommerce store using CSS.
2) Remove Additional Information Tab with CSS
The good thing about the CSS method is that you don’t need any plugins. You can simply use the Additional CSS feature available in the WordPress Customizer to complete the task. Let’s see how to do it.
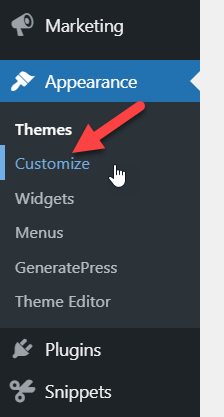
In your WordPress dashboard, go to Appearance > Customize.
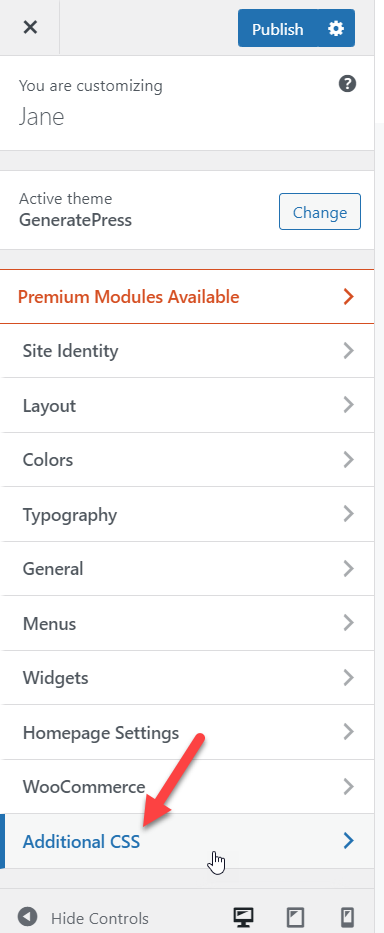
Once in the Customizer, go to the Additional CSS section.
Now copy the following CSS code and paste it inside the editor. Check out the preview and you’ll see the changes instantly.
/* Hide additional information tab */
li.additional_information_tab {
display: none !important;
}
If you are happy with the result, remember to publish the updates.
That’s it! That’s how you can remove the Additional Information tab from your WooCommerce store using CSS.
Remove Additional Information Tab from the Checkout Page
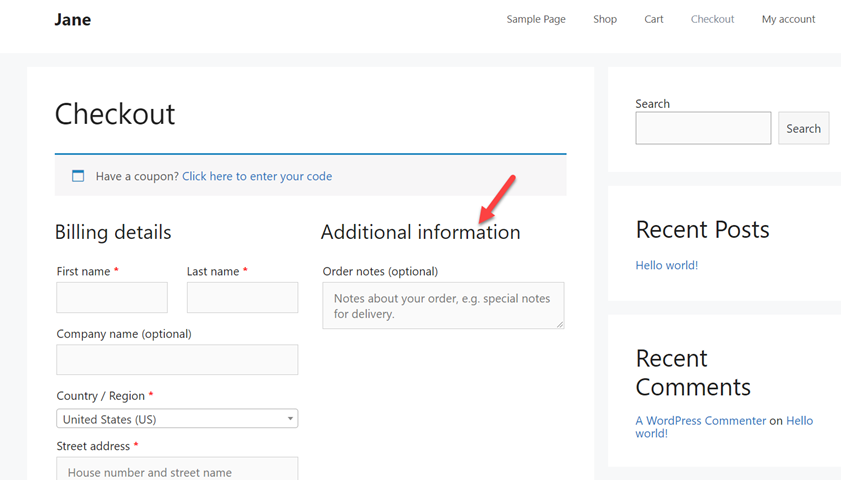
So far, we’ve seen how to delete the Additional Information tab from the product page. However, this tab also appears on the checkout page. In this case, it allows the shoppers to provide more information and notes about their orders.
If you want to remove the Additional Information tab from the WooCommerce checkout page, this section is for you.
Before we start, let’s see how the Additional Information tab looks on the checkout page:
Now to remove that tab, we’ll use a bit of CSS.
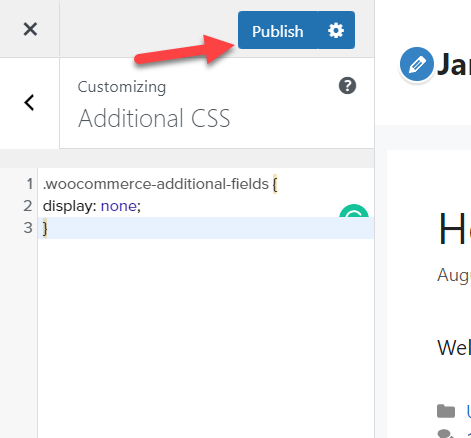
Simply copy the following code, paste it in the Additional CSS section of the Customizer, and press Publish.
.woocommerce-additional-fields {
display: none;
}
Then refresh the checkout page and you will see that the Additional Information has disappeared.

That’s it! That’s how you can remove the Additional Information tab from the checkout page with a bit of CSS.
How to Customize the Additional Information Tab
Now let’s say that instead of directly deleting the Additional Information tab from your store, you want to customize it. In this section, we’ll show you a few different options to customize the Additional Information tab.
Rename the Additional Information tab
If you want to make clear what’s in the Additional Information tab, you can rename it. Apart from describing what’s in it, you’ll stand out from your competitors as most online stores don’t do this.
Using the Code Snippets plugin, create a new snippet and paste the following code:
/**
* Rename Additional Information tab
*/
add_filter( 'woocommerce_product_tabs', 'quadlayers_rename_tabs', 98 );
function quadlayers_rename_tabs( $tabs ) {
$tabs['additional_information']['title'] = __( 'Product Information' ); // Rename the Additional Information tab
return $tabs;
}
If you take a close look at the code, you’ll see that we use this line to change the tab name:
$tabs['additional_information']['title'] = __( 'Product Information' ); // Rename the Additional Information tab
In this example, we’ve changed the name to Product Information, but feel free to take the code and adjust it according to your preferences.
After entering the code, publish the changes and you’ll see how the Additional Information tab has changed its name to Product Information.
So far, we’ve seen how to remove the Additional Information tab and how to rename it in WooCommerce. But there’s more you can do. Let’s see how you can add a new tab to your product page.
How to Add a New Tab
If you sell something unique or a product that’s new or has a lot of specifications, you might want to add extra tabs to the product page. In this section, we’ll show you how you can add a tab to a single product page using some PHP snippets.
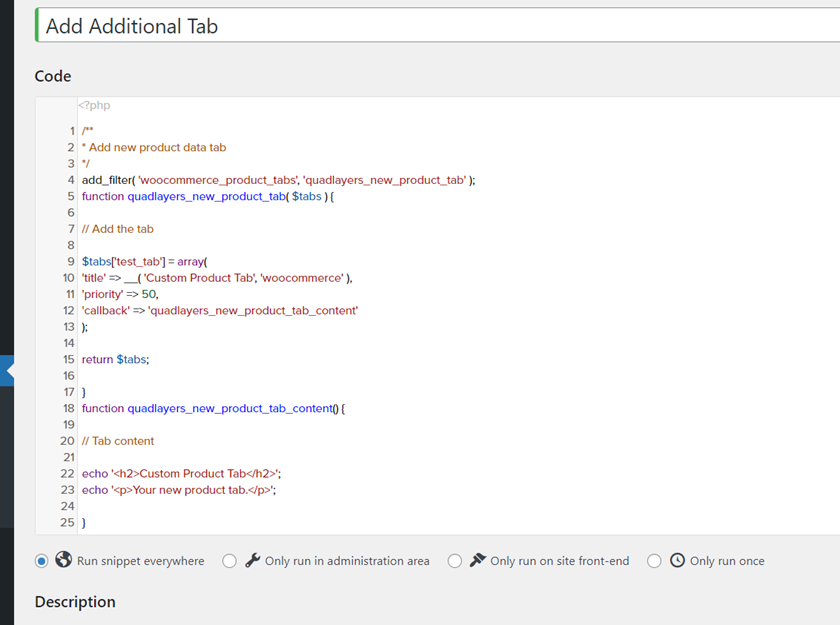
First, open the Code Snippets settings and create a new PHP snippet. Then, paste the following code into it.
/**
* Add a new product data tab
*/
add_filter( 'woocommerce_product_tabs', 'quadlayers_new_product_tab' );
function quadlayers_new_product_tab( $tabs ) {

// Add the tab

$tabs['test_tab'] = array(
'title' => __( 'Custom Product Tab', 'woocommerce' ),
'priority' => 50,
'callback' => 'quadlayers_new_product_tab_content'
);

return $tabs;

}
function quadlayers_new_product_tab_content() {

// Tab content

echo '<h2>Custom Product Tab</h2>';
echo '<p>Your new product tab.</p>';

}
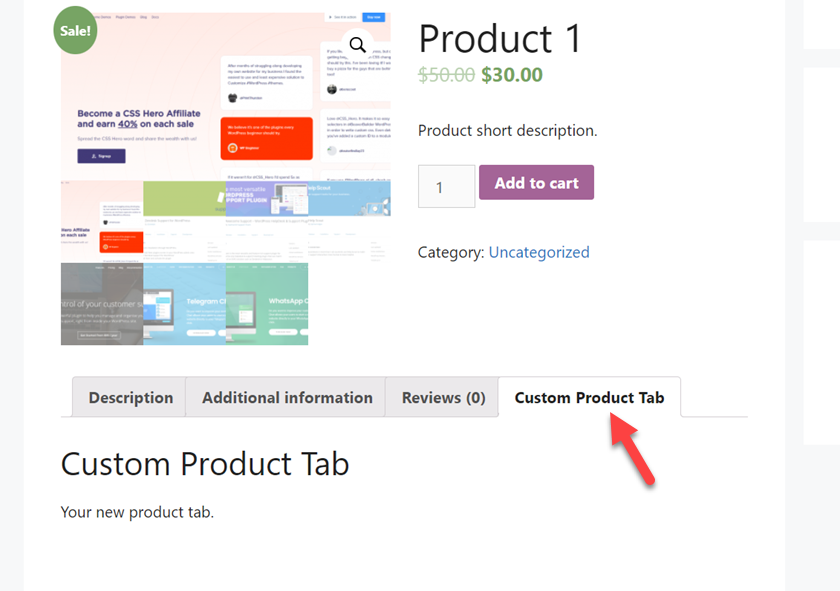
After pasting the code, save it to apply the changes.
Now check any of your product pages from the front end and you will see the new tab.
Using the same code, you can edit it to add multiple tabs if you need to. And that’s it! This is how you can add custom tabs to your WooCommerce product page.
Now before we finish the post, let’s see one more thing you can do to customize the Additional Information tab.
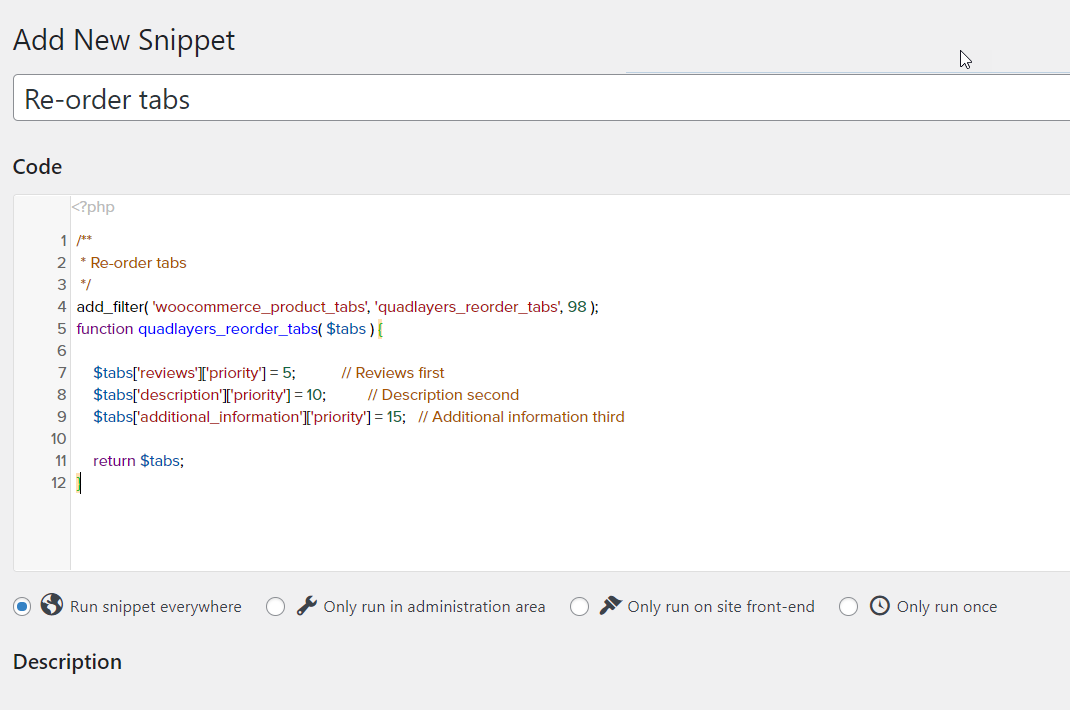
How to Re-order Tabs
Another helpful trick you can use in your store is re-ordering the tabs on the product page. Without using any plugins, you can change the order of the tabs. Let’s see how to do it using some PHP snippets.
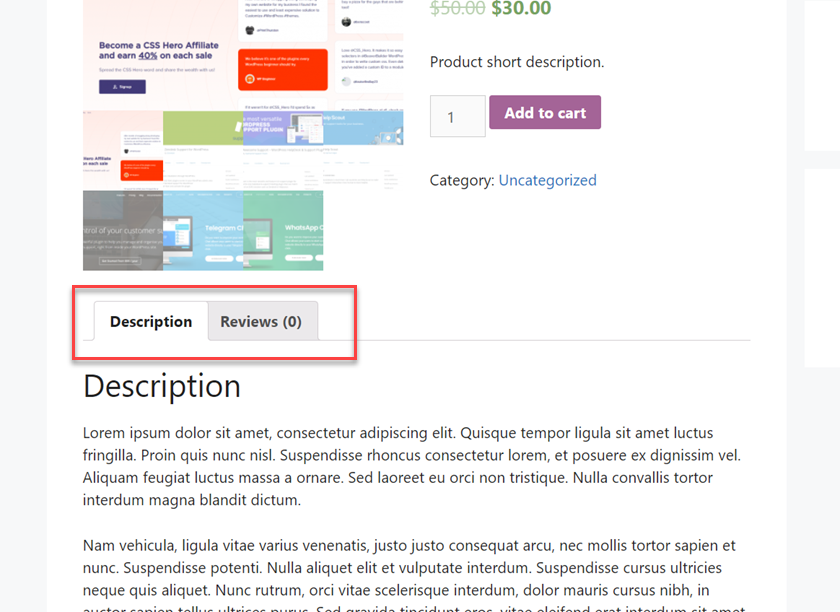
By default, WooCommerce arranges the tabs as follows:
- Description
- Additional Information
- Reviews
Let’s say you want to highlight the Reviews and put that first. To rearrange the tabs, you would use this code:
/**
* Re-order tabs
*/
add_filter( 'woocommerce_product_tabs', 'quadlayers_reorder_tabs', 98 );
function quadlayers_reorder_tabs( $tabs ) {

$tabs['reviews']['priority'] = 5; // Reviews first
$tabs['description']['priority'] = 10; // Description second
$tabs['additional_information']['priority'] = 15; // Additional information third

return $tabs;
}
As you can see, we use the priority attribute to place the tabs in the orders we want. In this case, we’ll put the Reviews first, then Description, and finally the Additional Information tab. Take the code as a base and tweak it according to your needs.
Once you’ve decided on the order, paste the code in the Code Snippets plugin settings and activate it.
Now check any of your product pages from the front end and you will see the tabs re-ordered according to your new priority.

For more information and examples about how to make changes to your product page, check out our guide on how to customize the WooCommerce product page.
For more information and example snippets, check out WooCommerce’s documentation page.
Conclusion
All in all, the Additional Information tab usually contains details about your products such as weight, length, with, and height. However, if you aren’t selling physical products, it might make sense to get rid of that tab.
In this guide, we’ve shown you how to remove the additional information tab in WooCommerce using two different methods.
- PHP
- CSS
Both ways are quite simple and don’t require much programming knowledge. If you know PHP, you can use a site-specific plugin to add the snippet or edit the functions.php file of your child theme directly. Alternatively, if you aren’t comfortable editing your theme files, you can go with the CSS method. It doesn’t require any additional tools and you can add the code using the WordPress Customizer. Thanks to the Customizer live preview, you will be able to see the modification in real-time.
Additionally, we’ve seen how to remove the Additional Information tab from the checkout page and a few different examples about how to change the name of the tab, add a new tab and change the order of the tabs.
Which method have you used to delete the Additional Information tab from your WooCommerce store? Do you know of any other method? Let us know in the comment section below!
For more tutorials on how to customize your store, have a look at the following articles:

Hi , this is very useful information, thank you for sharing, however I’m looking into removing/hide a sole line of text in the product description. How can i do that? The line is: Make sure this fits by entering your model number. When i inspect it i get:
Make sure this fits by entering your model number.
xxxx text
xx text
Is it possible to remove such line of text?
Thank you
Adi