How to Set Up Google Pay on WooCommerce
Do you want to set up Google pay on WooCommerce? We’ll show you exactly how to do so in this tutorial.
WooCommerce has always been flexible with providing more payment options for your customers. This is because adding more payment options really helps with customer convenience for your store.
But before we look at the steps to add Google Pay to your WooCommerce store, let’s go through why you may need to accept Google Pay for your website.
Why Accept Google Pay on WooCommerce?
Apart from credit cards and PayPal, Google Pay is also one of the most popular payment methods that have been widely used for online transactions nowadays. Even though it can be only used on Android devices with version Lollipop 5.0 or higher, it’s still used quite frequently. This is because it is very easy to connect your Google account for payments with Google Pay.
If you have an online store, you surely must have added the credit card and PayPal options on your website. But adding more payment options like Google Pay or even Apple Pay will make it more convenient for your customers. They can select the exact payment method they want to use while purchasing on your website.
In fact, the Google Pay payment option can even shorten the overall checkout process for your customers. You can easily add a Google Pay payment button on various parts of your store, like the cart page or the product page itself. Therefore, your customers won’t even need to go to the checkout page to complete the buying process.
Now that you’ve had a brief idea of why you may need Google Pay on your website, let’s go ahead and look at how to set it up.
Best Plugins to Set Up Google Pay on WooCommerce
The best way to set up Google Pay on WooCommerce is by using a plugin. A plugin helps you increase the functionality of your website by providing you with additional features that are not included in your active theme. So, they can be very helpful in adding the Google Pay payment method to your website.
There are many WordPress plugins that help you use Google Pay for your WooCommerce store. Out of them, here are some of the best ones that you can use.
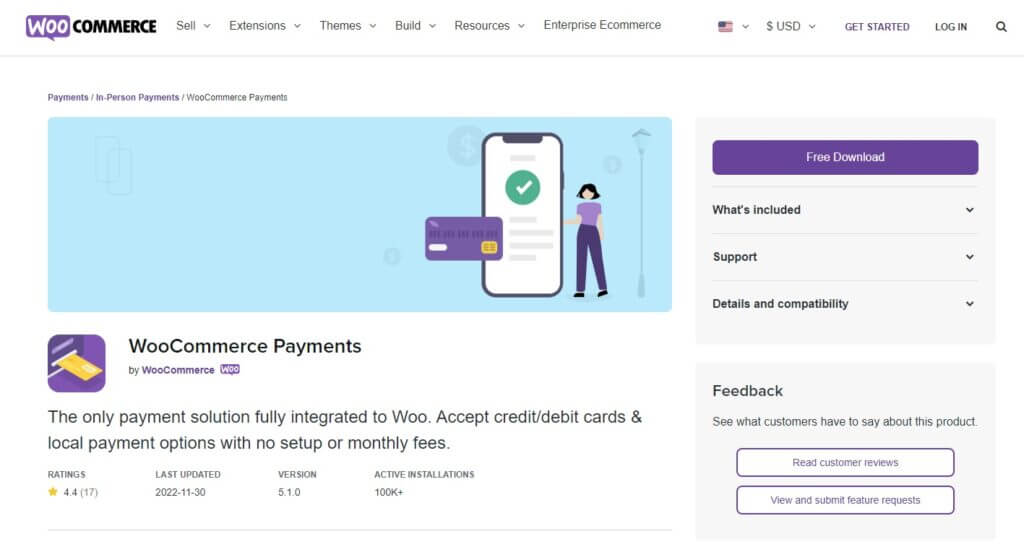
WooCommerce Payments
WooCommerce Payments is one of the most popular plugins to add almost any payment method to your eCommerce site. More importantly, it is also one of the best plugins included in the official WooCommerce site that lets you set up Google Pay on your WooCommerce store.
It provides you with all the local payment methods and even accepts credit and debit cards used in major countries. Since the plugin allows you to make transactions globally, it also assures you with multicurrency support that can accept payments from over 135 countries.
Apart from Google Pay, you can also integrate your WooCommerce store with Apple Pay, Giropay, iDEAL, and much more. You can even reduce cart abandonment with the streamlined checkout process through this plugin.
Key Features
- Multicurrency support
- Accepts payments from 135+ countries
- Additional integration options for Apple Pay, iDEAL, and more
- Fully compatible with WooCommerce
Pricing
WooCommerce Payments is a free plugin and can be downloaded from the official WooCommerce website. The free version even includes free updates and support from WooCommerce as well.
Payment Plugins for Stripe WooCommerce
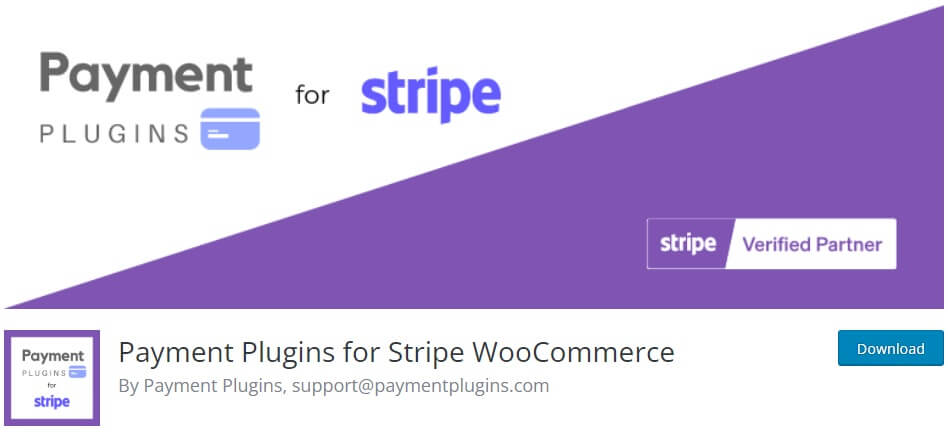
Payment Plugins for Stripe WooCommerce is one of the payment plugins designed specifically for Stripe payments. However, it can also be easily integrated with Google Pay for your WooCommerce store through Stripe. And since Payment Plugins is one of the official partners of Stripe, you can ensure a secure connection with your Stripe account too.
The plugin also lets you customize how you want to show the Google Pay button based on the type and color of the button. Along with it, you can also select the areas of your WooCommerce store where you want to show the Google Pay button. It also allows you to connect your WooCommerce store with Apple Pay, iDEAL, Afterpay, and so on, besides Google Pay.
Key Features
- Easy integration with Google Pay and Stripe
- WooCommerce subscriptions, pre-orders, and blocks options
- Installments for supported countries and local payment methods
- Supports additional payment methods like Apple Pay, credit cards, Afterpay, and more
Pricing
Payment Plugins for Stripe WooCommerce is a free plugin. It can be downloaded from the official WordPress plugin repository.
WP Simple Pay
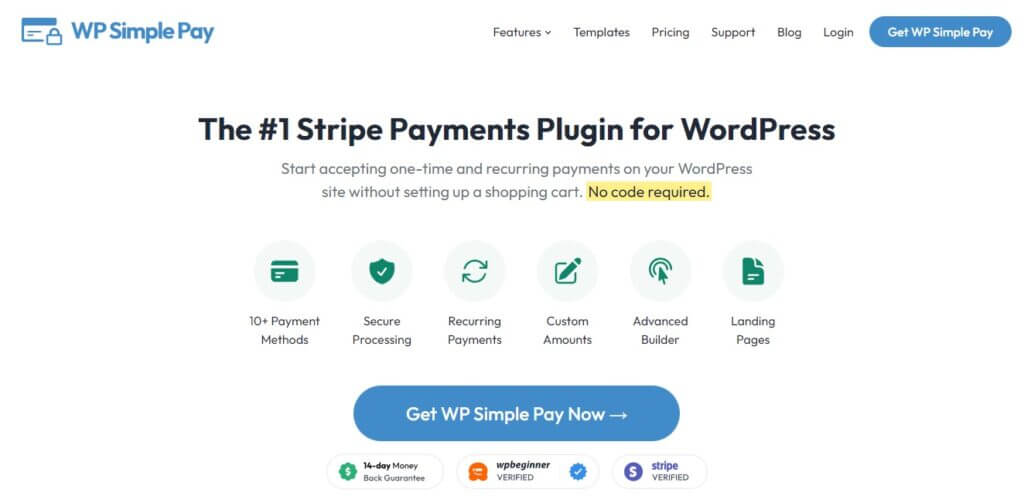
As suggested in the name itself, WP Simple Pay is a WooCommerce payment plugin that simplifies adding payment options to your eCommerce website. Although the plugin is also primarily focused on connecting Stripe with your website, it can also be used to easily accept Google Pay on your online store.
Google Pay is enabled by default using the Stripe checkout as soon as you set up your WooCommerce store with your Stripe account using this plugin. Additionally, it can also be used with other payment options like credit cards, US bank accounts, Afterpay, and so on, like most payment plugins.
Moreover, the plugin also comes with an advanced form builder that allows you to build your own payment forms if necessary. You can also activate recurring payments for weekly, monthly, and yearly payments in case your website provides any subscription payments.
Key Features
- Default activation of Google Pay after Stripe integration
- Customizable receipt options
- Offer discount codes and free trials
- Advanced form builder to create custom payment forms
Pricing
WP Simple Pay is a premium plugin. It starts at 99 USD per year for 1 site license and includes a 14-day money-back guarantee. You can buy it from its official website.
How to Set Up Google Pay on WooCommerce
To set up Google Pay on WooCommerce using a plugin, you must install and activate it first. We will be using the Payment Plugins for Stripe WooCommerce plugin for this demonstration. It is very easy to use and can be easily integrated with Stripe.
However, you can use any other plugin that suits your needs and start installing it.
1. Install and Activate the Plugin
Open your WordPress dashboard and go to Plugins > Add New to install the plugin. Then, search for the keywords of the plugin in the search box on the right side of your screen. You should find the plugin in the search results.
Once you see the plugin, click on Install Now, and the installation process will start. The plugin will be installed after just a few moments. Now, click on Activate to activate the plugin.
If you want to use any other plugin that is not included in the official WordPress plugin repository, you’ll have to install the plugin manually. Please have a look at our quick guide on how to install a WordPress plugin manually for more information on it.
2. Configure the Google Pay Settings
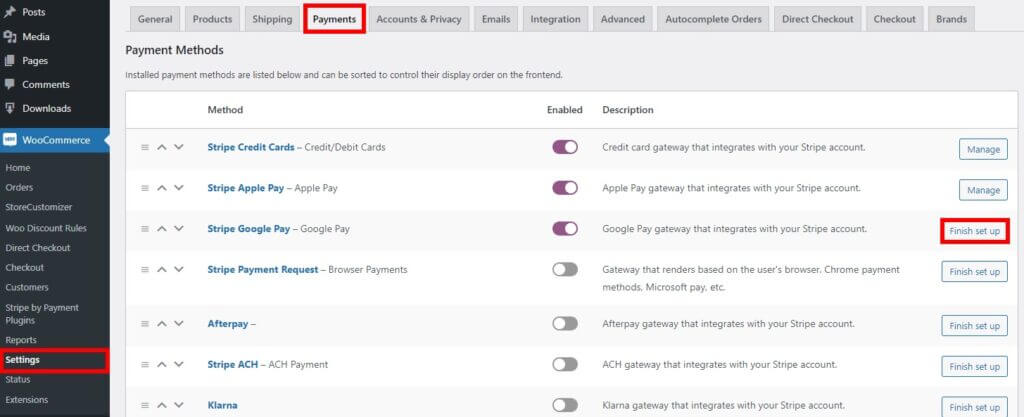
After the plugin is activated, you can now start setting up the plugin. Just go to WooCommerce > Settings and open the Payments tab.
Now, scroll through the payment gateways, and you will be able to see the Stripe Google Pay option here. You’ll need to set it up first. So click on Finish set up.
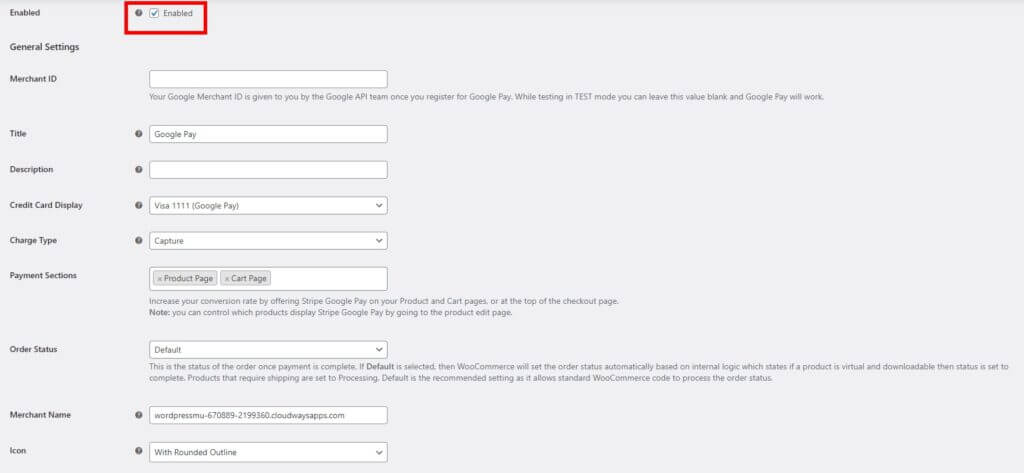
Here, you will be presented with all the options for Google Pay. First of all, you have to check the Enabled option to enable Google Pay for your store.
Then, in the general settings, add the merchant ID of your Google Pay account. It’s given by the Google API team when you register for your Google Pay account. Now, you can change some more general settings for your Google Pay payment methods, such as title, description, and merchant name.
But more importantly, you may want to add additional sections to your website where you want to add the Google Pay option on your online store too. They include a product page, cart page, top of checkout, and even mini carts if your website has them. This can help you increase the conversion rate on your website as it will help with customer convenience in your store.
Similarly, there are some more settings that include dropdown menu options with which you can change the credit card display, charge type, order status, and icon. Just select the appropriate options using the dropdown menu that suits your needs.
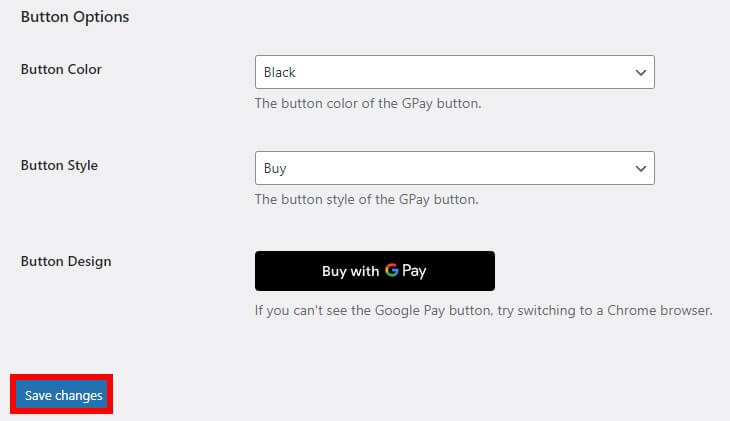
Finally, you can also modify your GPay button using the button options provided to you. The style and color of the button can be changed from here, and you can also see a preview of the button.
Once you make all the necessary changes, click on Save changes.
3. Connect to Stripe with the Plugin Settings
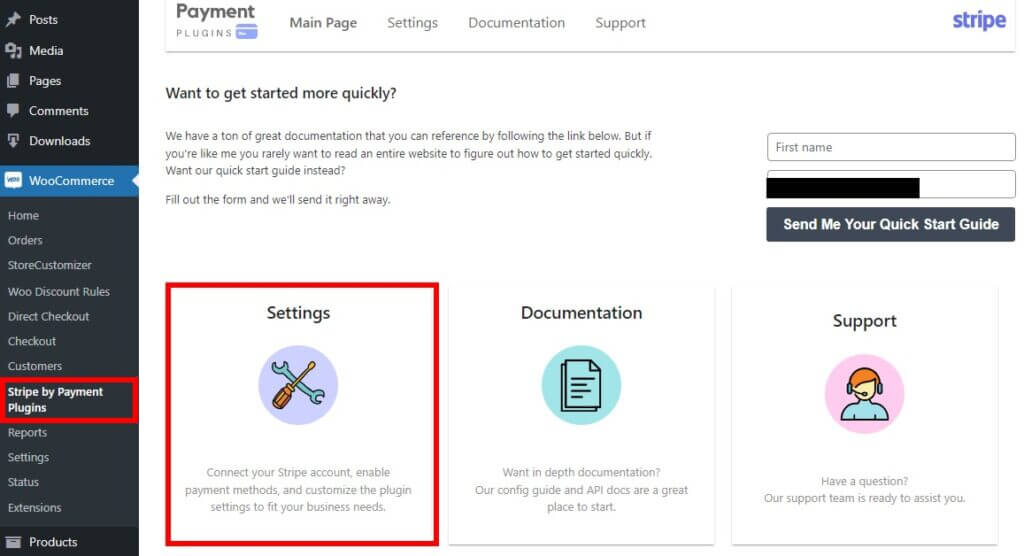
Since Google Pay works with Stripe in this plugin, you’ll have to integrate your Stripe account as well. For that, go to WooCommerce > Stripe by Payment Plugins from your WordPress dashboard once and click on Settings. This will redirect you to the Stripe payment API Settings.
Here, you’ll need to select the Mode as Live and click on the Click to Connect button to connect your WooCommerce store with Stripe. After that, you’ll have to secure your account with your phone number to connect with your Stripe account.
Then, you have to fill in the necessary details to verify and connect your Stripe account. They include your personal details, professional details, bank payouts, and other public details for customers.
As soon as you fill in all the required details and submit them, you will be connected to your Stripe account. Just don’t forget to save the changes at the end. If you need further assistance in connecting your Stripe account, you can also take reference from our detailed guide on how to integrate WooCommerce with Stripe.
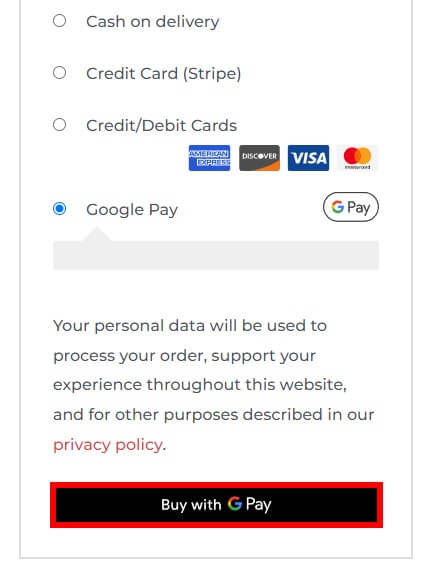
Now, if you go to the front end of your website, add a product to your cart and proceed to checkout, you’ll see the Google Pay payment method as well.
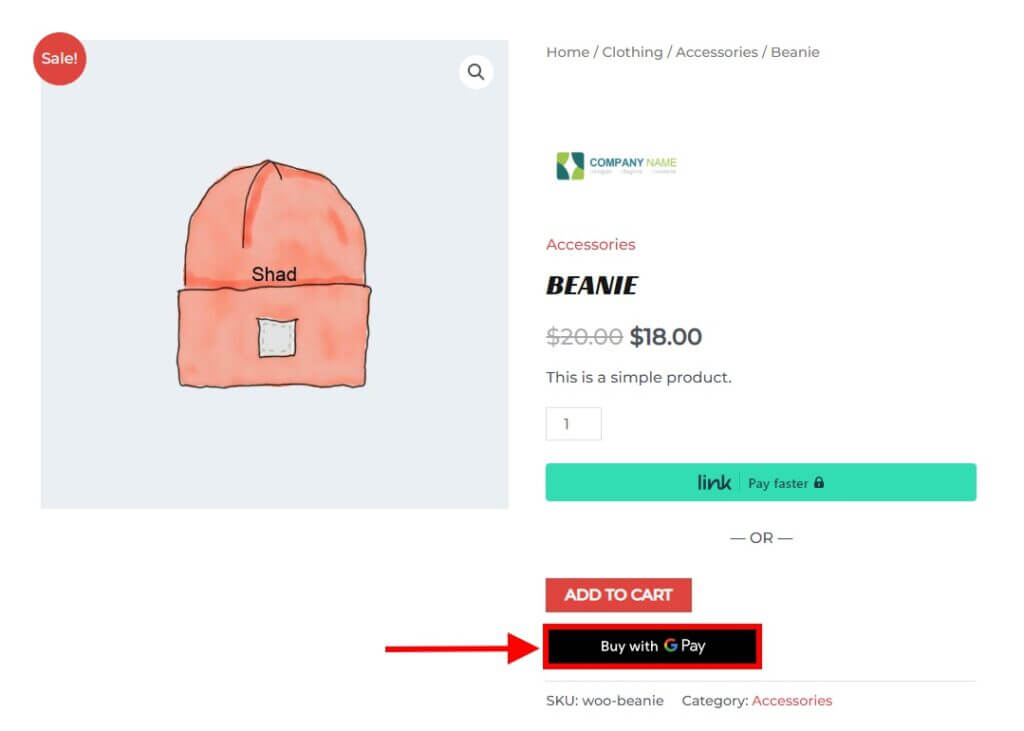
But since we have selected to show the Google Pay button on the product page as well as the cart page, you can see it on these pages as well. In the image given below, you can see the button on the product page itself.
3.1. Test Mode
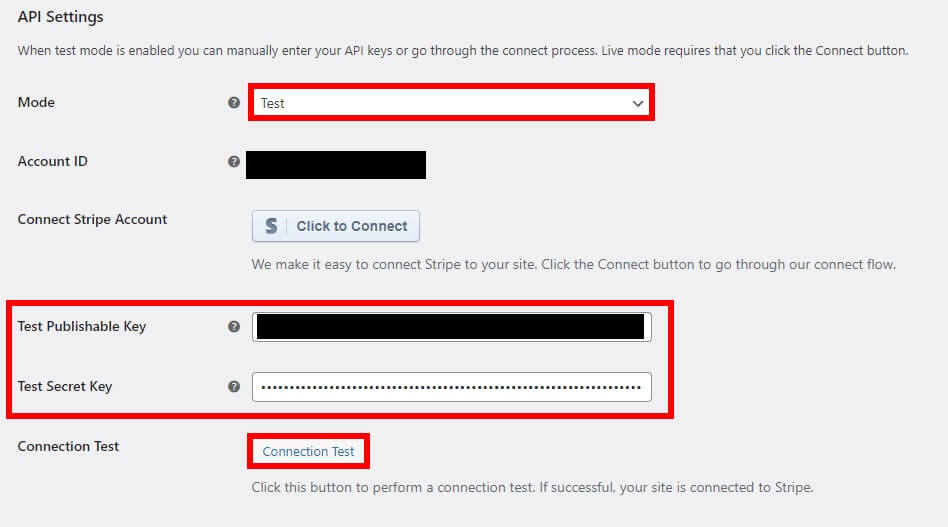
If you want to test the process first, you can also do that. All you have to do is go to the API settings from your dashboard, like in the previous step, and add the test publishable and secret keys.
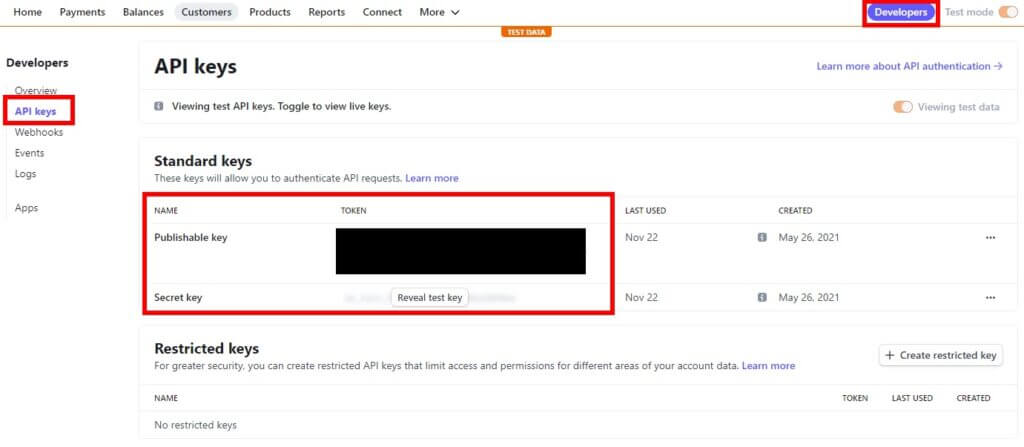
You can obtain these keys from your Stripe account dashboard. Log in to your Stripe account and enable the Test mode by clicking on the toggle on the top right of your screen. Then, click on the Developers options and open the API Keys tab.
Now, copy the Publishable key and the Secret key from here.
Then, go to WooCommerce > Stripe by Payment Plugins from your WordPress dashboard and click on Settings once again. Finally, paste these keys on the respective Test Publishable Key and Test Secret Key.
Click on the Connection Test to test the connection. If it’s successful, save the changes.
Conclusion
So, this is how you set up Google Pay on your WooCommerce website. Adding Google Pay and some more payment options can be very helpful in improving the purchasing experience of your customers. And to add it to your online store, the best approach is to use a plugin.
To summarize, we’ve shown you the major reasons why you may need Google Pay on your website, along with a number of plugins to add it and how to do so. The plugins include WooCommerce Payments, Payment Plugins for Stripe WooCommerce, and WP Simple Pay.
WooCommerce Payments and WP Simple Pay both are very easy to use and work perfectly to integrate Google Pay on your website. But the Payment Plugins for Stripe WooCommerce plugin have been used for this tutorial as we found it easiest to work with. The major steps include the following:
- Install the plugin
- Setup Google Pay settings
- Connect to Stripe with the plugin settings
If you prefer any other plugin other than this, you can use it as well. The steps are almost similar to every plugin.
You can even manage your checkout and purchase processes more efficiently by using plugins such as WooCommerce Direct Checkout and WooCommerce Checkout Manager if needed.
So can you add the Google Pay payment option to your website now? Let us know in the comments. If you want to have a look at more helpful tutorials like this, visit the following links:

