
How to test WooCommerce orders: 3 Methods
Do you want to learn how to place a test order in WordPress? In this guide, we’ll show you different methods to test WooCommerce orders in your store.
If you have an eCommerce store where you sell products and services, testing orders is very important to make sure that the transactions and payments work as expected. The issue is that your site needs to be live before you can test orders properly.
In this guide, we’ll show you different methods to test orders in WooCommerce. But before we learn how to do that, let’s better understand why you should test your orders and transactions.
Why should you test orders in your store?
When you create an online store or a website to sell products, one of the biggest advantages is the ease of payments through online transactions. These transactions are secure and convenient both for the seller and buyers.
But to make sure that the process runs smoothly, shoppers need to place an order to buy a product first. That’s why you also need to ensure that all the orders placed on your WooCommerce store are completed without issues. If that fails, not only do you run the risk of losing your customers’ trust but you could also face legal actions.
The good news is that you can prevent all that by testing your WooCommerce orders using various methods and payment gateways. This way, you will find bugs and errors related to placing orders before your website goes live. You will be able to fix any issues, won’t have to worry about losing your customers’ trust, and avoid a lot of headaches in the future.
Now that we have a better understanding of the importance of testing WooCommerce orders, let’s see how to do it.
How to Test WooCommerce Orders
There are 3 main ways to test WooCommerce orders in WordPress:
- Using Plugins
- From WooCommerce Dashboard (enabling cheques)
- Real Transactions + Refund
Let’s have a look at each method.
NOTE: Before you start, make sure that you have properly set up WooCommerce.
1. Test WooCommerce Orders using a Plugin
One of the easiest ways to test WooCommerce orders is by using a plugin. All you need to do is install one of the following tools depending on the payment gateways you use. In this section, we will show you how to do so using each of these plugins.
If you want to use the plugin, all you need to do is install and activate the plugin by either downloading it or from the WordPress dashboard itself. You can have a look at our guide to install a WordPress plugin manually for more information if needed.
1.1. WooCommerce Stripe Payment Gateway
WooCommerce Stripe Payment Gateway is a WordPress plugin that allows you to integrate Stripe with WooCommerce. Since Stripe is one of the most popular payment gateways, this tool can be very helpful for online stores that have customers from around the world. Additionally, it comes with features to test WooCommerce orders in your online store.
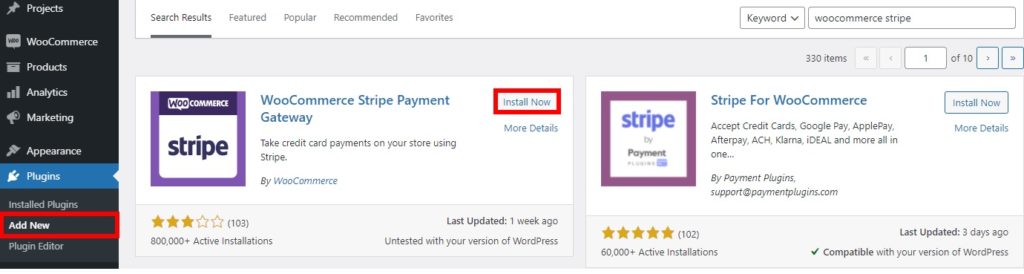
Since this is a WordPress plugin, you have to install and activate it first. Go to Plugins > Add New and search for “WooCommerce Stripe Payment Gateway”. Then, click Install Now and activate the plugin.
1.1.1. Integrate WooCommerce with Stripe for Test Mode
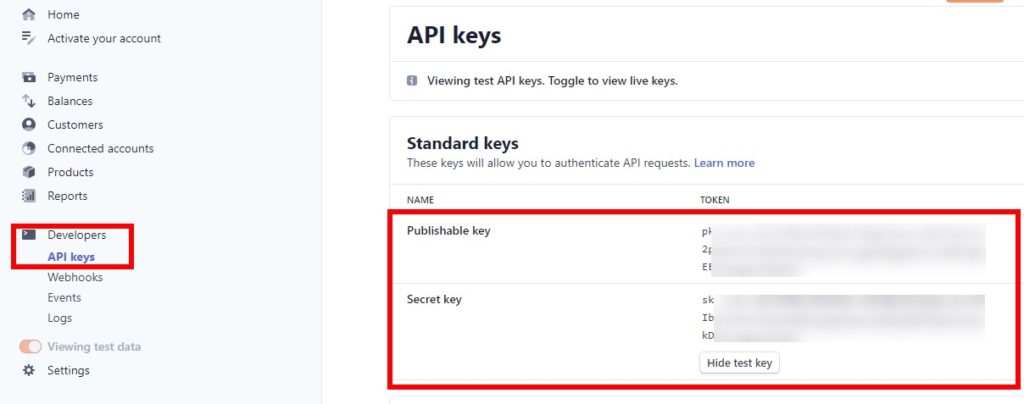
After you have successfully installed and activated the plugin, you need to set it up for test mode and get your API keys. For that, you need to go to your Stripe account and open the Developers > API keys.
You will see the Publishable and Secret keys of your Stripe account here. Copy both keys.
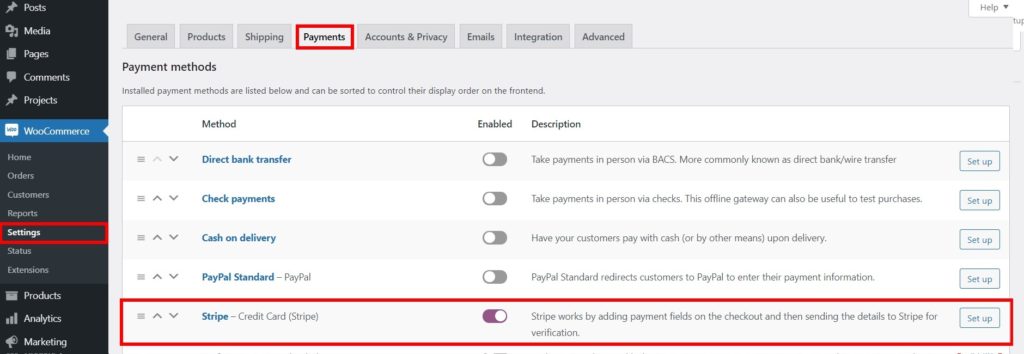
After that, go to WooCommerce > Settings and open the Payments tab from your WordPress dashboard. You will see all the payment methods available for your website. Enable the toggle for the Stripe – Credit Card payment method and click Set up.
If you have already set up Stripe, all you need to do is press the Manage button.
You will be redirected to the Stripe options for WooCommerce. Here, check the Enable Test Mode option and paste the publishable and secret keys that you’ve just copied from the Stripe dashboard to the Test Publishable Key and Test Secret Key respectively.

After that, click Save Changes.
1.1.2. Test the WooCommerce Orders with Stripe
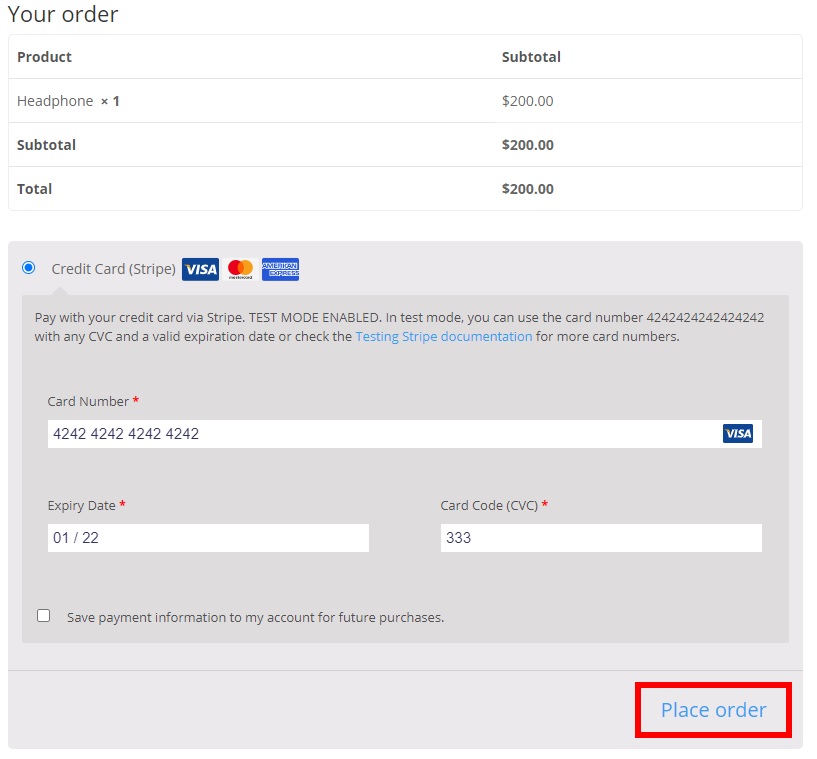
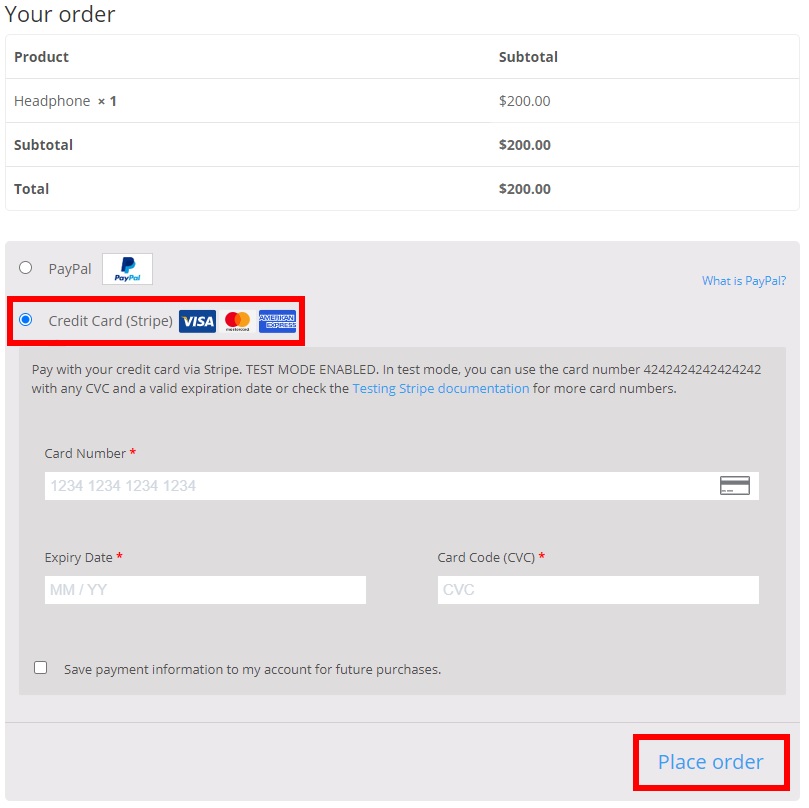
After you have set up Stripe for test mode, it’s time to test your WooCommerce orders. To do that, go to your website’s front end and purchase any product. Add any product to the cart and proceed to the checkout page. Add all the necessary billing details and then include the credit card details for Stripe too.
Since this is just a test, you can just enter any valid information for it. For example, for the credit card, you can enter “4242424242424242”. Similarly, you can enter any valid date and CVC code as well.
After you have filled in all the information, press Place Order to continue.
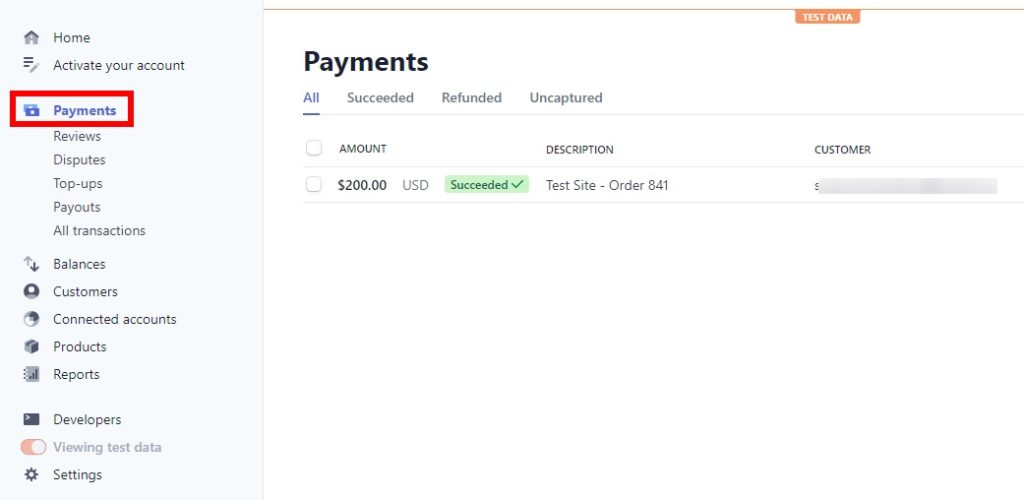
Now go to your Stripe dashboard and open the Payments tab. You should see the order you’ve just placed. If that’s the case, it means that the orders paid through Stripe work perfectly, so you can start selling your products with Stripe as your payment gateway.
To make your website live, go to WooCommerce > Settings and open the Payments tab from your WordPress dashboard. Then manage the Stripe – Credit Card gateway, uncheck the “Enable Test Mode” option and fill in the necessary details. Once you finish, remember to save the changes.
For more information about this, you can have a look at our detailed guide on how to integrate WooCommerce with Stripe.
1.2. WC Order Test

If you want a plugin to check the checkout process on your WooCommerce store, the WC Order Test is an excellent choice for you. It’s a simple and easy-to-use tool that doesn’t require any API keys or payment gateways set up. All you need to do is install and activate the plugin and enable the test option to test the WooCommerce orders.
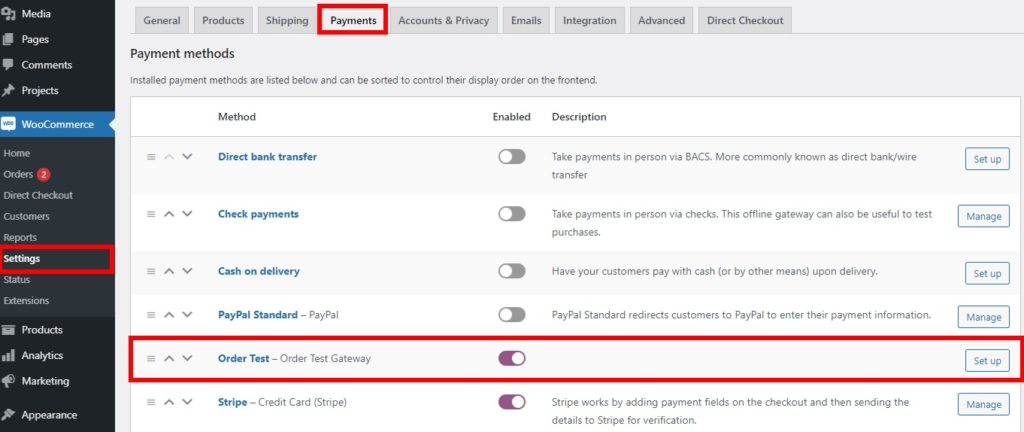
After that, go to WooCommerce > Settings and open the Payments tab. Here, you will see that there is a new payment gateway option called Order Test – Order Test Gateway. Enable it and click Set up.
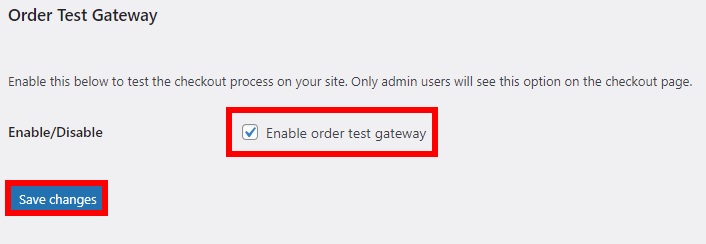
There is only one option with this test gateway which is to Enable order test gateway. Tick the box for this option and press Save changes.
Now you’re ready to test the orders for your products. Go to your store’s front end, add any one of your products to the cart and proceed to checkout. Fill in all the required billing information and at the bottom of the page, you will be able to see the option for Order Test Gateway.
Note that this option will be only available if you are logged in as an admin. Select it and click Place order to continue.
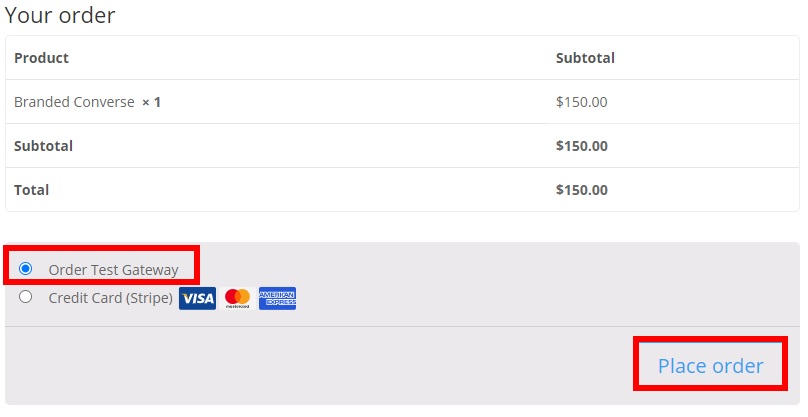
After that, it will show that your order has been received along with all the necessary order details. Check the information to make sure that it’s correct and if it is, it means that your WooCommerce orders work well.
Additionally, you can check it by going to WooCommerce > Orders. Just make sure that you write down the order number correctly so it’s easier to find.
1.3. PayPal (PayPal Sandbox)
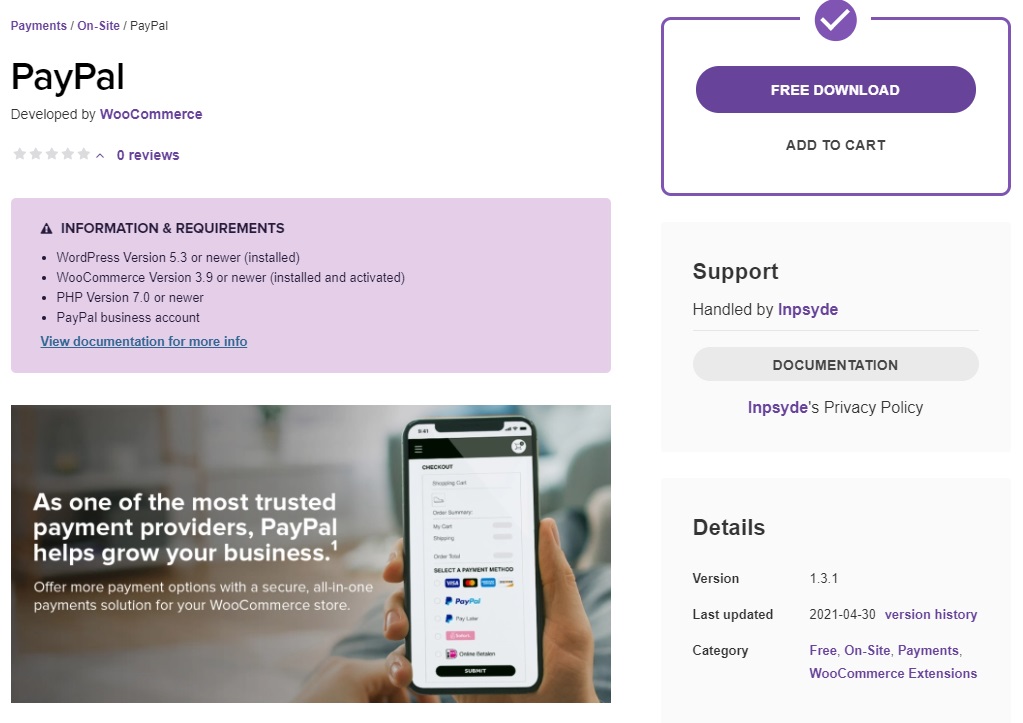
PayPal is one of the most popular payment gateways that you can easily integrate with a WordPress website and use to test WooCommerce orders.
PayPal is included in WooCommerce by default with PayPal Standard, but to place test orders you’ll need a PayPal Sandbox account from the PayPal Developer website.
1.3.1. What is a PayPal Sandbox Account?
A sandbox is a testing environment that is provided by a system (preferably software) without any cost. It allows you to build or test various functionalities of the system before you make them live on your website. This helps you find issues and fix them to make sure everything works properly.
PayPal also provides you with a sandbox to test on your website, but to use it you need to create a sandbox account from their developer website. So before you can test WooCommerce orders on your store, let’s see how to create the PayPal Sandbox account.
1.3.2. Create a PayPal Sandbox Account
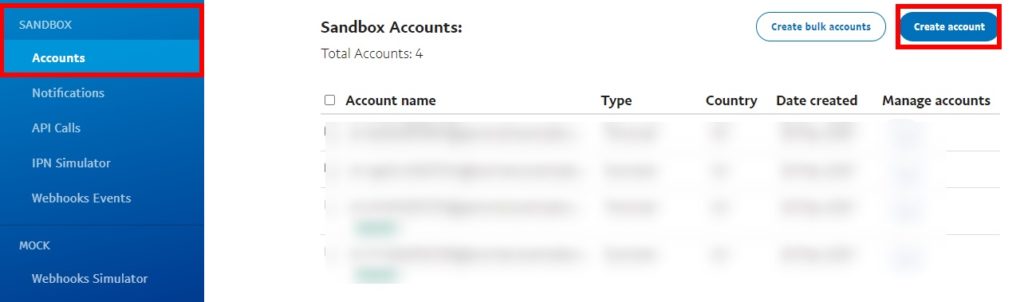
Go to the official PayPal developer website and sign in using your PayPal account. After that, you will be redirected to the PayPal Developer dashboard.
Here, go to Sandbox > Accounts and press Create account.
A popup will appear asking you whether you want a business (merchant) or a personal (buyer) account along with country/region. For test purposes, we will need both the merchant as well as the buyer’s email, so if you select the business account first, select your country/region and press Create. Then, repeat the process and create a personal sandbox account.
NOTE: Make sure that the country/region matches with the default currency of your store to avoid orders being set to pending payments.

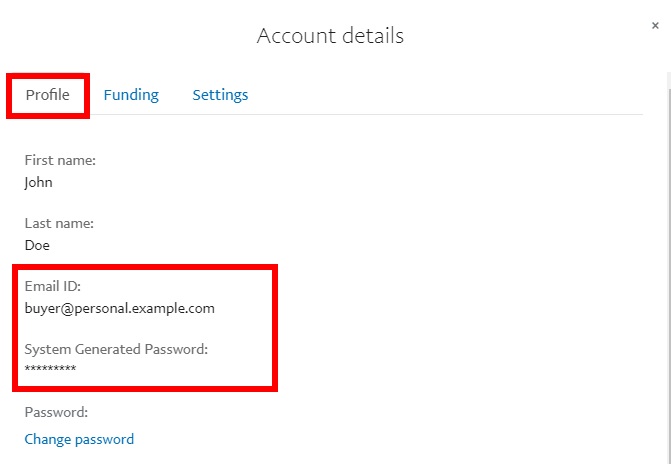
After that, click the Options button on the Manage Accounts section for the newly created sandbox account and select View/edit account.
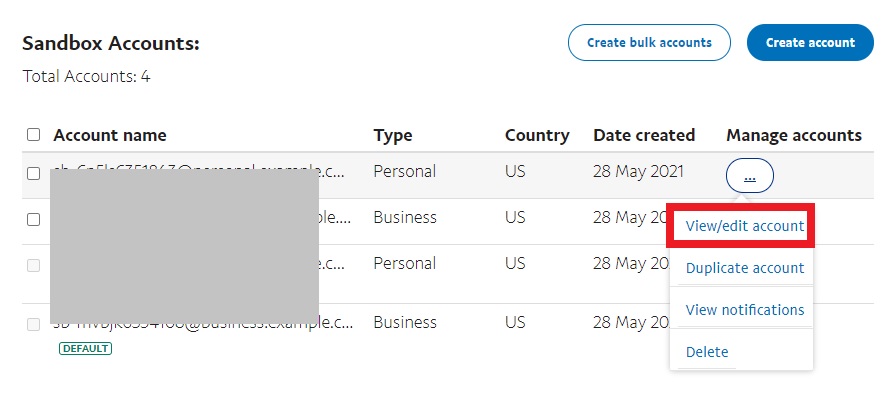
It will show you all the account details of the sandbox account. Under the Profile tab, you will see the email address and password of both the Buyer as well as Merchant accounts. Copy both email IDs and passwords and place them somewhere handy as you will need them to test the WooCommerce orders in the coming steps.
1.3.3. Enable PayPal Sandbox
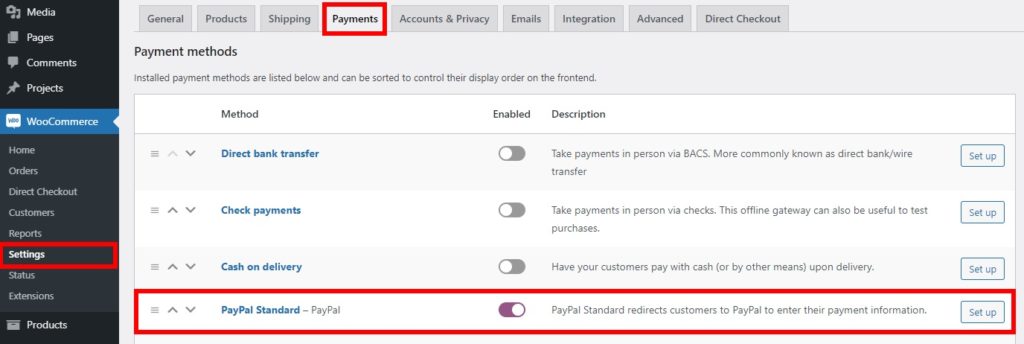
Now go to WooCommerce > Settings and open the Payments. Then, enable the PayPal Standard gateway and click Set up if you haven’t set up PayPal for your website. If you have already set up PayPal, press Manage.
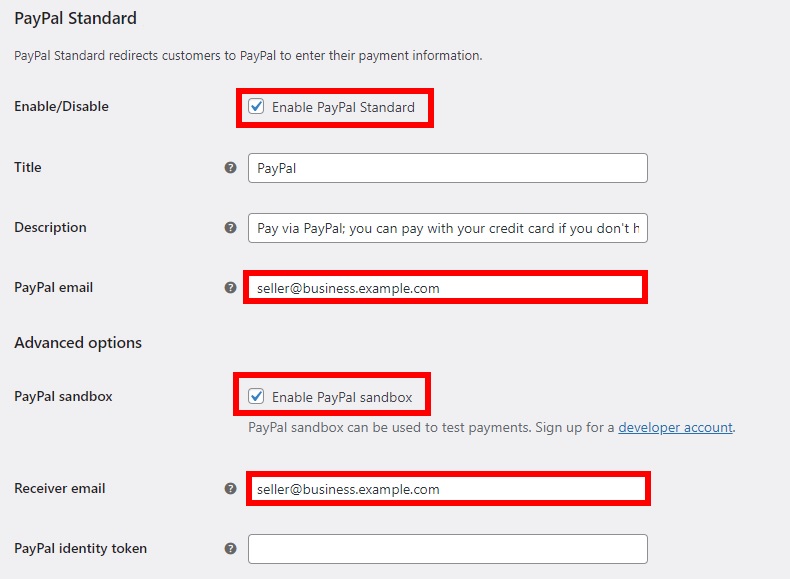
First, you need to enable PayPal Standard, so check the Enable PayPal Standard option and add the PayPal business (merchant) email on the PayPay email and Receiver email. Finally, check the Enable PayPal sandbox option and save the changes.
1.3.4. Test the WooCommerce Orders with PayPal
Now you can proceed to test the order with PayPal Sandbox from your website. You need to either continue by opening your public online store on another web browser or on an incognito tab.
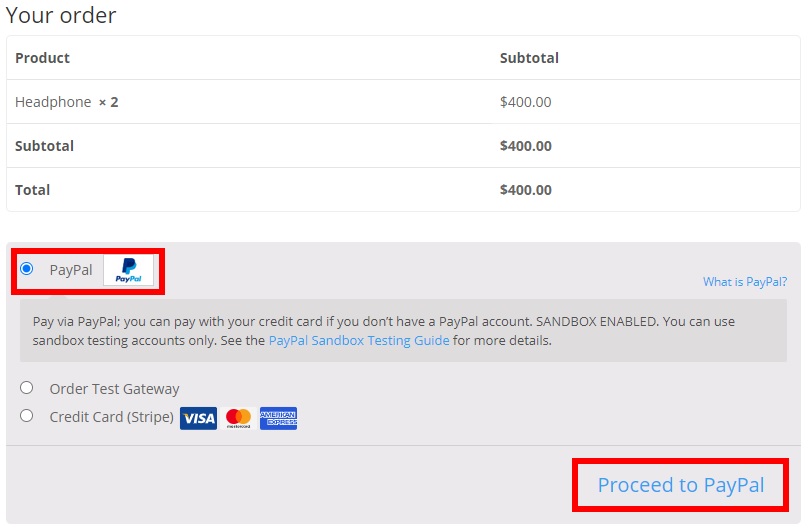
Then add any product to the cart and proceed to checkout. After you enter all the necessary billing details, select PayPal as the payment method and click Proceed to PayPal to continue with the payment.
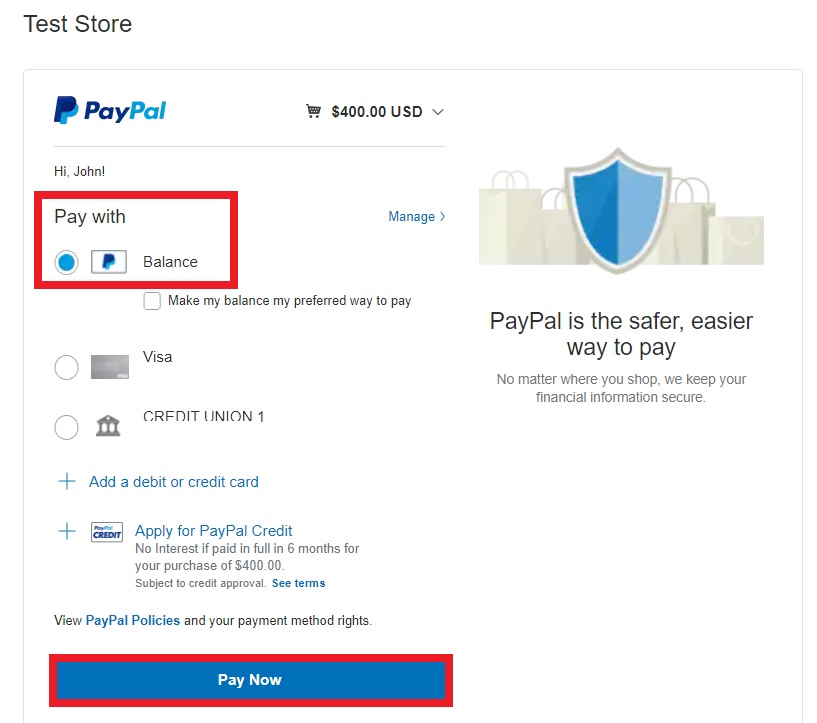
Since you are running sandbox mode, you will be redirected to the PayPal sandbox website to confirm the order. Enter the email address of the personal (buyer) sandbox account and log in to PayPal.
Then, select Pay with a PayPal balance and press Pay Now to pay with the sandbox buyer account.
You will see a screen that confirms your payment and that your order is placed.
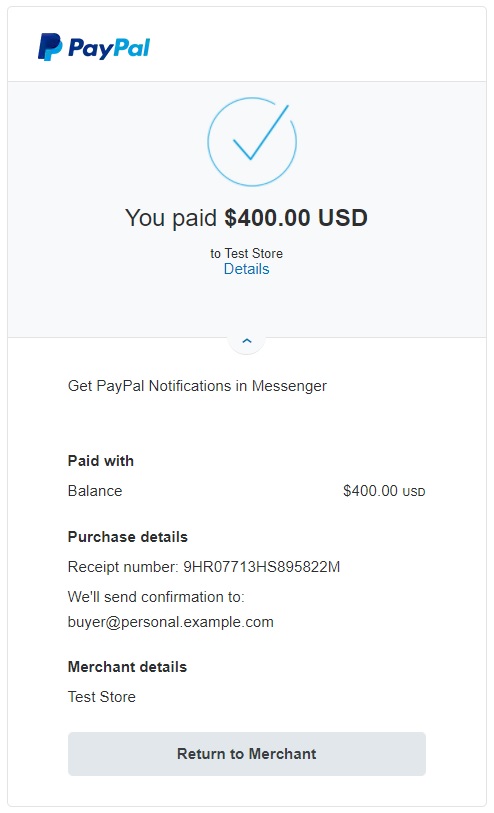
To make sure that everything works correctly, you can log into the PayPal sandbox with the sandbox merchant account and check the Recent Activity section on your dashboard. If you see the new transaction there, it means that everything is working correctly and you can start using live transactions for your website through PayPal.
To do that, in your WordPress dashboard go to WooCommerce > Settings > Payments and click Manage for PayPal Standard. Then uncheck the Enable PayPal Sandbox option, enter the necessary details for your own PayPal account, and save the changes.
That’s how you can test your WooCommerce orders with PayPal!
For more information, check out our step-by-step guide on how to integrate WooCommerce with PayPal.
2. Test WooCommerce Orders from WooCommerce Dashboard
If you don’t want to install any plugins or enable testing modes, the easiest method to create test orders is by enabling cheques from the WooCommerce dashboard.
Cheques are usually used for physical transactions as an easy alternative for cash, so there won’t be any online transactions in this process.
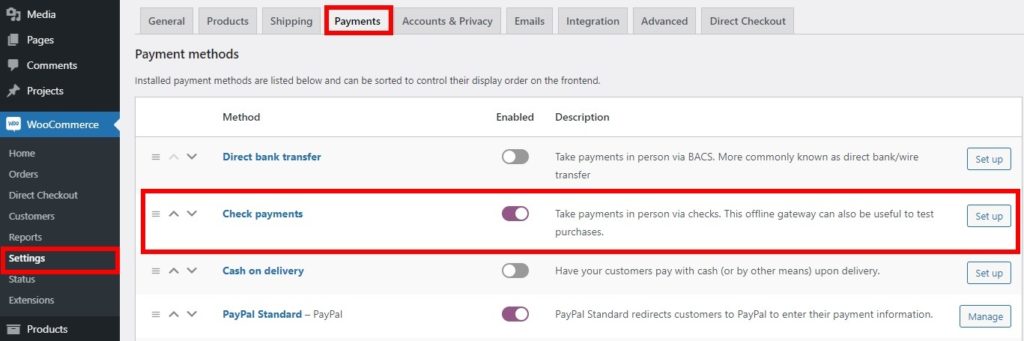
To enable cheques, in your WordPress dashboard go to WooCommerce > Settings and open the Payments tab. There, enable the toggle for Check payments and press Set up or Manage if you have used cheques before on your store.
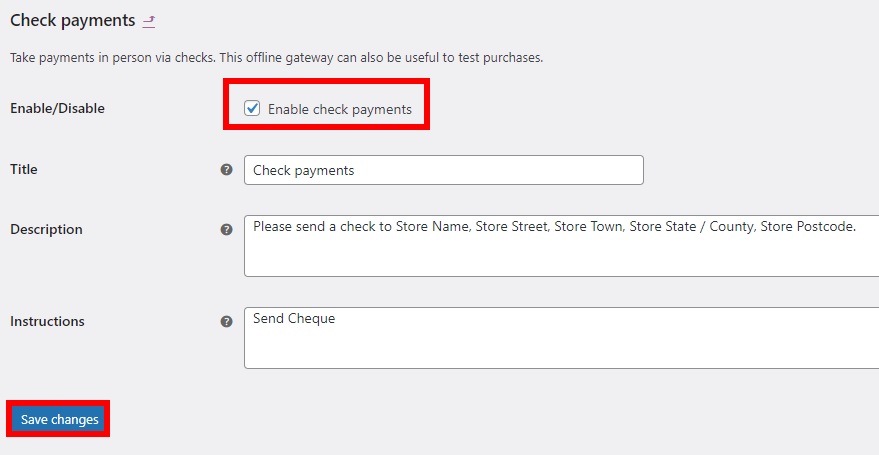
Tick the box to enable the check payments and enter the necessary details for title, description, and instructions if required. Then, press Save changes.
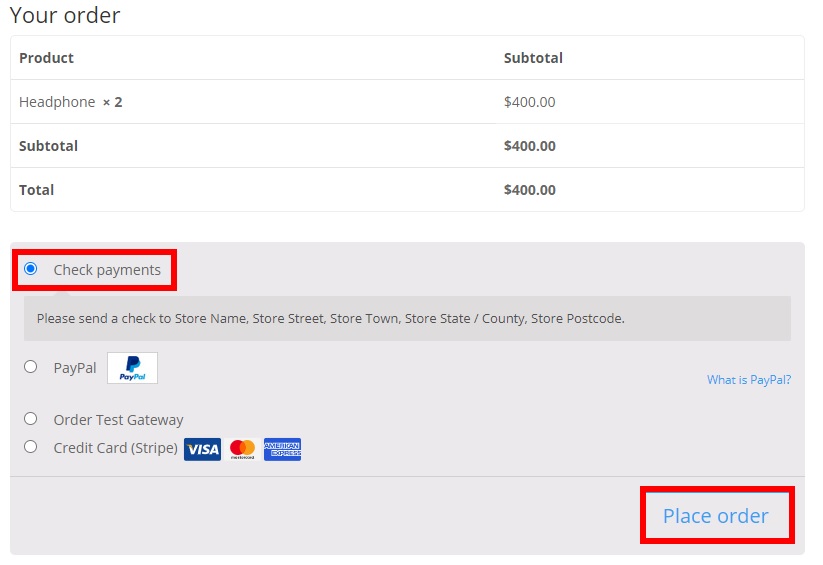
Now go to your store’s front end, add a product to the cart and proceed to the checkout page. Enter the necessary billing details, select Check payment as the payment method, and press Place order to confirm your purchase.
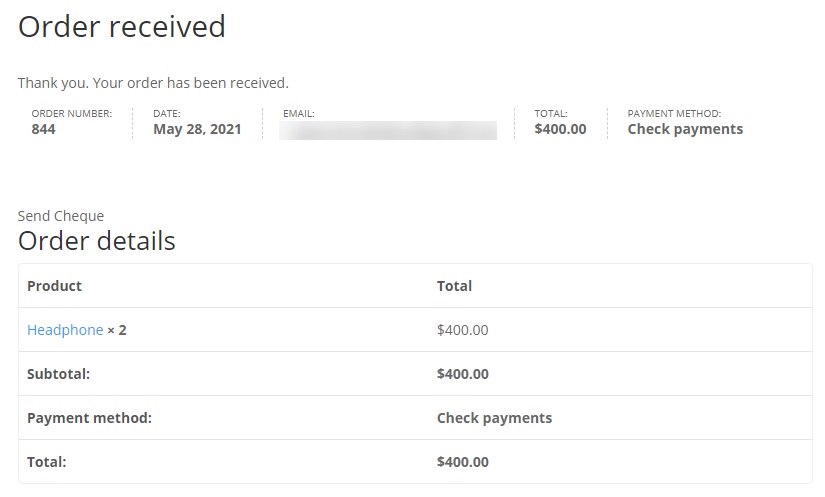
You will be redirected to your placed order. As mentioned earlier, this process doesn’t include any online transaction, so if you can see that your order is successfully received with the correct details, your orders and transactions will work without issues on your website.
3. Test WooCommerce Orders with Real Transactions and Refunds
If you don’t want to spend your time with any testing modes, plugins, or additional payment methods, you can use real transactions to test WooCommerce orders as well. This means that you will make a real transaction from your own account and then give a refund as soon as the order is confirmed.
However, it’s worth noting that we don’t recommend this approach because it involves more risk. Even if you want to go ahead with this method, we recommend you only do it if you are the website owner and want your online store to go live immediately. Keep in mind that if there are any bugs or problems with your website orders, you might not get your payment back as a refund until it’s fixed. So it’s better to add a product with a very low price or free for testing purposes.
By default, you can either use a direct bank transfer or PayPal if you have a PayPal account. If you have already set up Stripe, you can use it as well.
Now without any further ado, let’s see how to test orders in WooCommerce with real transactions.
3.1. Make a Real Transaction
To make a real transaction, go to the WooCommerce > Settings and open the Payments tab. Select the payment gateway you want to use, enable it, and press the Set up or Manage button for the selected payment method.
For this tutorial, we will use Stripe as it is one of the easiest payment gateways to test orders, but the process is similar regardless of the payment gateway you choose.
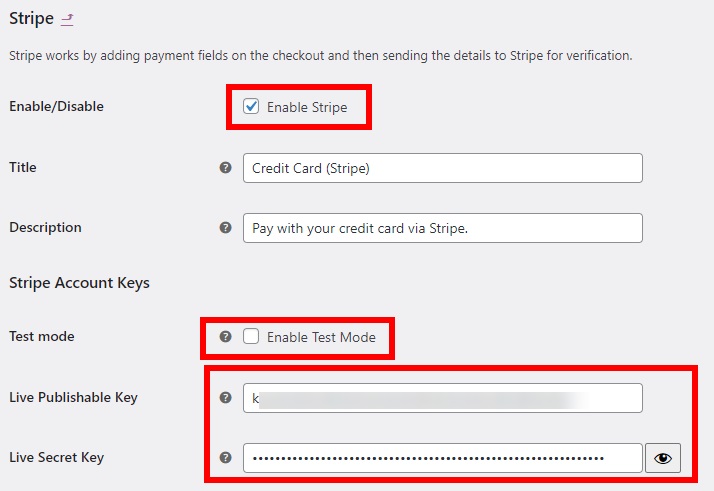
As we chose Stripe, we tick the Enable Stripe option to enable it as our payment gateway. Then, add the API keys from your Stripe account as shown in the Stripe gateway plugin method and other details for your account. As we will test live transactions, make sure you uncheck the Enable Test Mode option.
Now go to your store’s front end and add a product to the cart. Once again, we recommend you add a very cheap or free product. Then, proceed to the checkout page and add your billing details.
Finally, select the payment gateway you want to use. In this case, we’ll use Stripe. Add all the required information and place the order.
If you are redirected to the order page with all the correct information, it means that your orders and transactions work perfectly on your website and you can start selling products on your store.
3.2. Test Refunds for the Real Transaction
The real transaction that you just made was to test the WooCommerce orders. To get your payment back, you will need to give yourself a refund. To make the process easier, make sure you write down your Order ID/number.
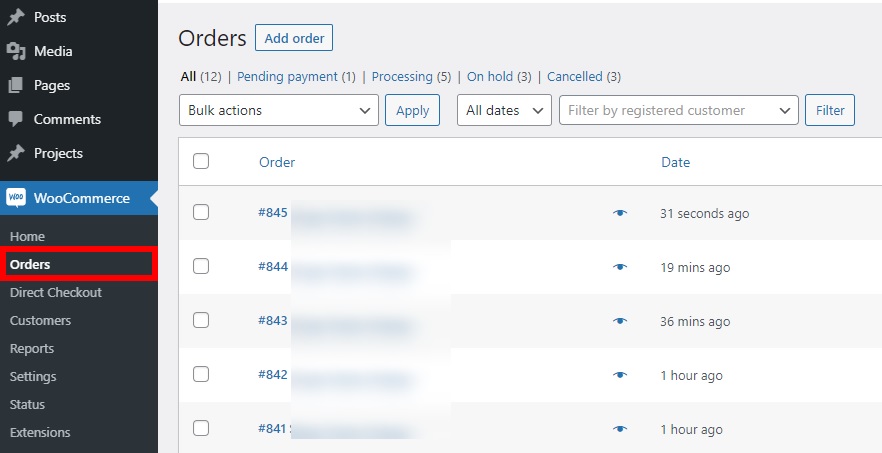
To get your refund, go to WooCommerce > Orders and click on the order you’ve just made, ensuring that the Order ID matches the order you’ve just placed.
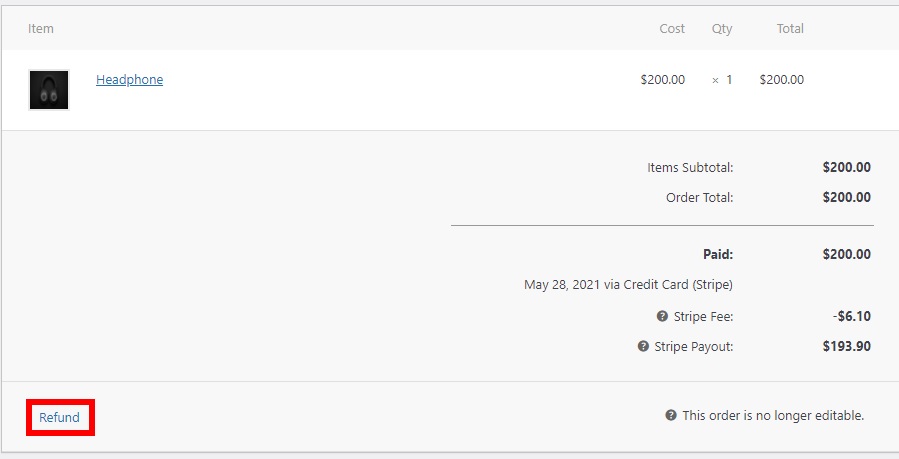
In the Item section, click on the Refund button.
After that, enter the total refund amount and select Refund via Stripe to complete the refund.
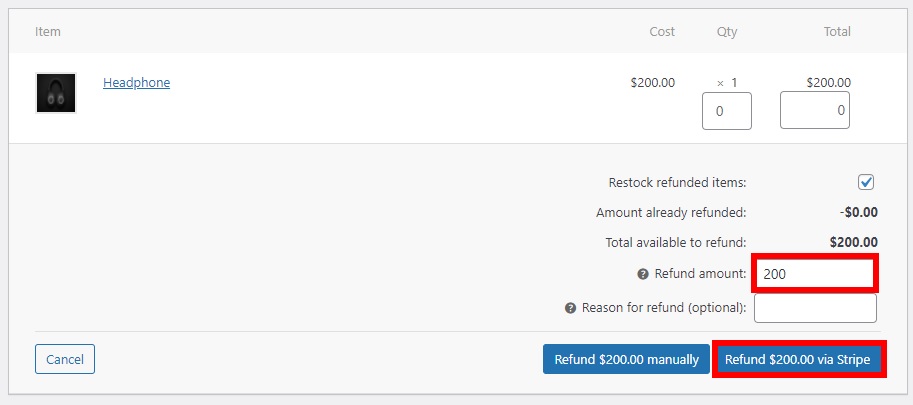
The final refund button will depend on the payment gateway that you have used. For example, if you have used PayPal, the option will be Refund via PayPal.
If the payment is refunded into your account, you can be sure that both the live transactions as well as refunds work flawlessly on your WooCommerce store.
Keep in mind that some payment gateways may take some hours or days to process the refund so you may need to wait to get your money back.
Bonus Tip: Disable Checkout Fields to Test WooCommerce Orders Quickly
When you test the WooCommerce order, you might need to add the billing or shipping details during checkout. If you do several tests this can be annoying and make you lose valuable time because you’ll need to enter the details every time. In this section, we will show you how you can disable unnecessary fields during checkout when testing orders to help you save some time.
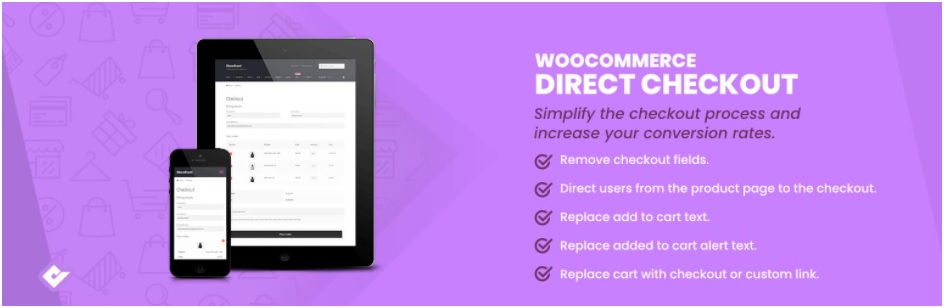
The best way to remove checkout fields is to install the WooCommerce Direct Checkout plugin. It’s a freemium plugin that has a lot of features to manage the checkout and boost conversion rate. To disable checkout fields, you can use the free version.
In your WordPress dashboard, go to Plugins > Add New and search for WooCommerce Direct Checkout. Then, install and activate it.
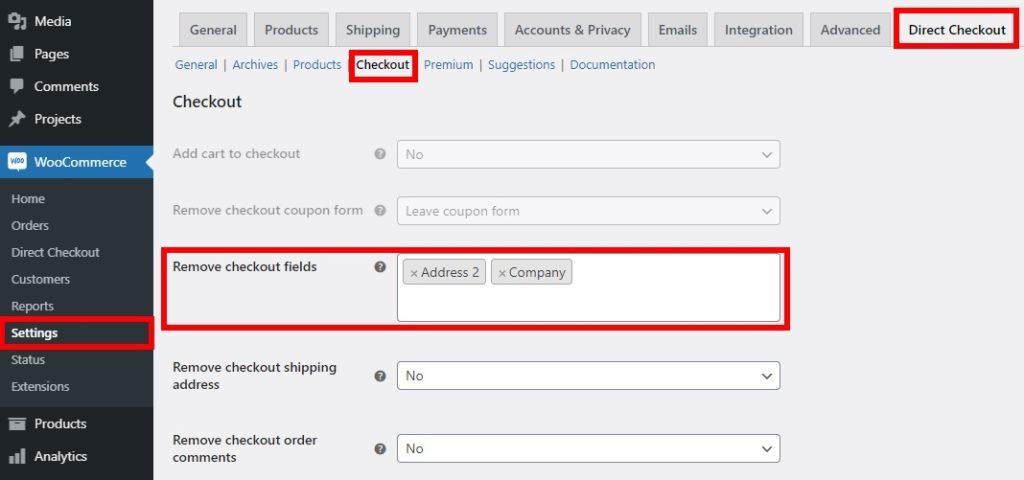
After that, go to WooCommerce > Settings and under Direct Checkout, open the Checkout tab. Here, you can select the fields you want to remove from the checkout page. Select the fields you want to remove in the Remove checkout fields box to speed up the test process and save the changes.
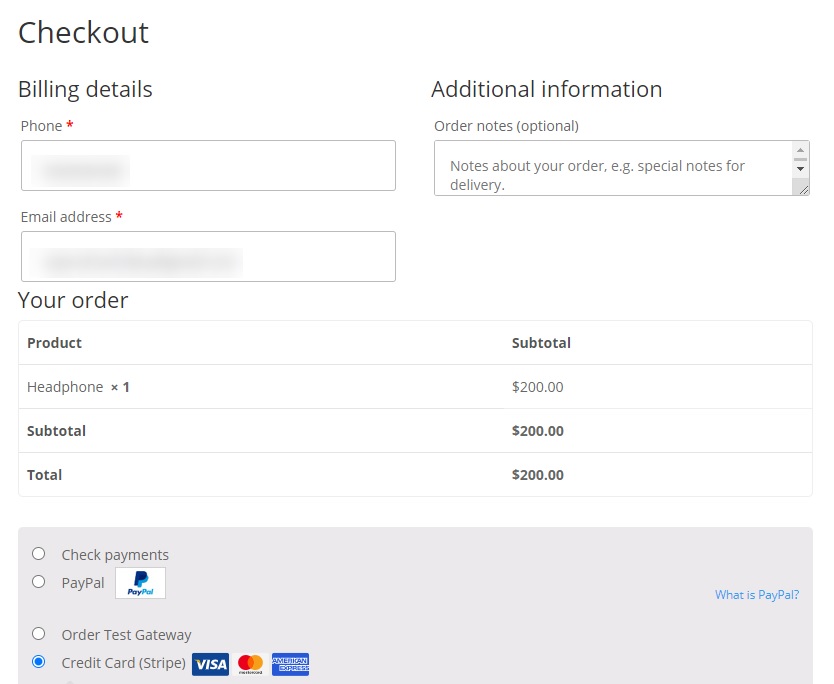
Now check your store from the front end and you will see that the checkout fields aren’t displayed on the checkout page. This way, you can just fill in a few fields on the checkout page and save a lot of time when testing WooCommerce orders.
Once you finish testing, remember to add the fields you want to include on the checkout page before you set your store to live.
Most users abandon their carts during checkout because the process is too long and complicated, so we recommend keeping your checkout as simple as possible to increase conversion rates. For more information about this, have a look at our guide on how to remove checkout fields.
Conclusion
All in all, placing test orders before your store goes live is a good idea to make sure that the checkout process runs smoothly and there aren’t any issues. Testing orders ensures that every transaction is registered correctly and, as a result, your customers will trust in your service and you will avoid complaints and refunds.
In this guide, we’ve shown you different methods to test WooCommerce orders. They are all effective and get the job done, so choose the one that best suits your requirements and the payment gateway you use.
The easiest way to test orders is to enable cheques on the WooCommerce dashboard. Alternatively, you can use dedicated plugins and enable test modes depending on the payment gateway you use. Finally, you can use real transactions and then refund the payment immediately. This is the riskiest method, so we don’t recommend it.
We hope that you found this guide useful and can test WooCommerce orders without any issues.
For more guides to improve your store, have a look at these posts:
