How to Update WordPress Database
Looking for the best way to update your site database manually? In this guide, we’ll show you what you need to do to update the WordPress database step-by-step and when you should do it.
WordPress is one of the best CMS that allows you to create and customize your website. To make sure that your site doesn’t have any problems, you need to keep some elements up to date, and one of the most important ones is the WordPress database.
The database stores all the vital data and information of your website. This data is requested from the database and displayed on the website when required.
Before we look at how to update it, let’s better understand the importance of updating the databases and why you should do it.
Why should you update the WordPress database?
Updating the database is very important in WordPress if you frequently customize your website. It is also one of the mandatory steps when you update WordPress manually.
Additionally, even though WordPress is one of the best website building platforms, your website might encounter one or more issues throughout its life. For example, we’ve previously seen how to fix WordPress update failed error, what to do when the dashboard doesn’t load or when you face the missed schedule issue. But if the issue you face is related to the WordPress database, you might lose a big chunk of vital data.
The good news is that you can solve most of the problems with the database by repairing it or updating it. To make sure that you don’t lose any data and can fix any issues, let’s see how to update a WordPress database.
How to Update the WordPress Database
As mentioned earlier, you need to update the WordPress database only when your website faces problems or when you’ve made core changes to it. In most cases, if your database needs to be updated, WordPress will automatically detect it and let you know.
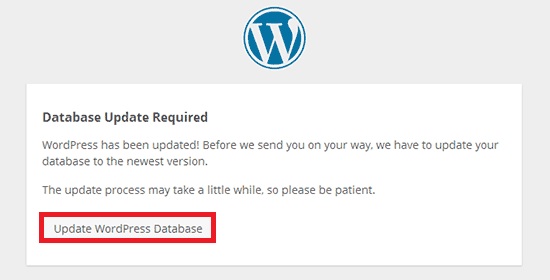
Let’s take the example of updating WordPress manually on your website. WordPress might ask you to update the database after you’re updated the required WordPress files. In that case, a dialog box will appear and tell you that you need to update your database.
Then, all you have to do is click Update WordPress Database and your database will be updated automatically. This process may take some time to complete depending on the size of your database and your internet connection.
After the process finishes, your database should be updated and ready to go.
However, in some cases, you won’t get this alert and you’ll need to check for updates manually.
Check Updates for WordPress Database
To check if there’s an update available for your WordPress database, all you have to do is visit the path wp-admin/upgrade.php on your website URL.
For example, if you enter the URL www.yourdomain.com/wp-admin/upgrade.php on your web browser, it will open the upgrade details page. Make sure you change “yourdomain” with your actual domain.
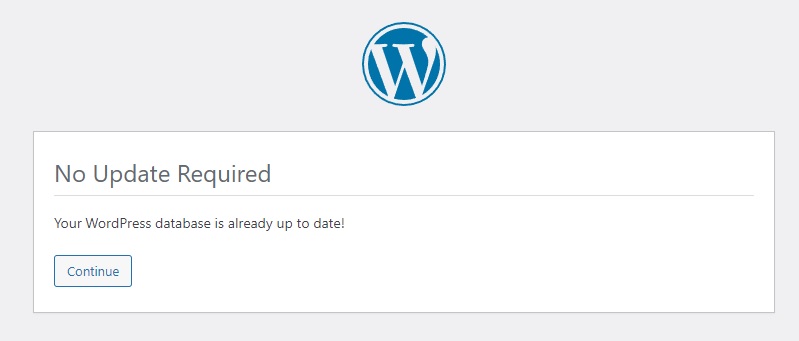
When you go to that page, you will see if you need to update the WordPress database. If your database is up to date, you will see a message stating that no update is required. You can go back to your website by clicking Continue.
Otherwise, there will be a message informing you that you need to update your database.
However, sometimes WordPress will say that your database is up to date when it’s not and it might even lock you out of your admin dashboard. If you encounter this issue, have a look at our tutorial about how to fix the “No Update Required” WordPress loop.
Update WordPress Database Configuration Settings
Sometimes, you might need to update the WordPress database configuration settings after updating the database. One of the most common issues is the Error establishing a database connection.
This usually happens when the information in the wp-config.php file is incorrect, so your website isn’t able to connect to the database. In this case, you need to update the WordPress database configuration settings. Let’s see how to do it.
Before we start, make sure you create a backup of your website and database. Since we will edit some core files, it’s always a good idea to have a backup in case something goes wrong, so you can restore your site without losing any information.
1. Find the Correct Database Information
To find the correct database settings and credentials, access your site’s cPanel. If you don’t have access to it, contact your hosting company or the website admin. Then, go to the official website of cPanel and log in to your account.
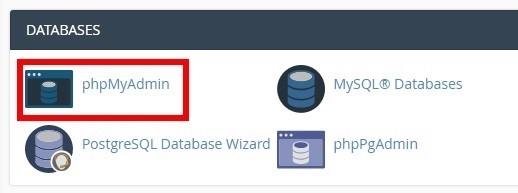
After that, scroll to the Databases section and go to phpMyAdmin. The phpMyAdmin page will open along with all the databases of your site.
Select the database of your current website and expand it to see all the tables of the database. Now, note the prefix on the Table column.
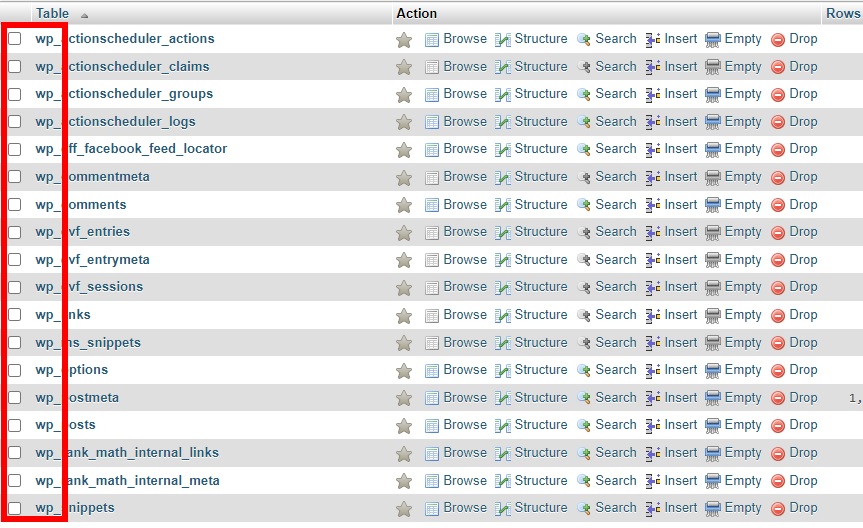
Since you are using WordPress it’s most likely to be “wp_” by default.
Now go to the cPanel dashboard, head to the Databases section, and click on MySQL Databases to see all the available MySQL databases.

Then, locate the database that you are using under Current Databases. Finally, write down the username and password for the database as you’ll need them in the next step.
2. Update the wp-config.php file
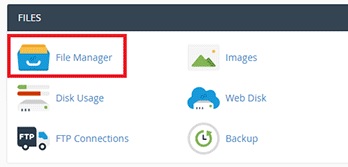
After you have noted all the required credentials and information for your database, you’ll need to update it to the wp-config.php file. To do this, in the cPanel, go to Files > File Manager and navigate to the file directory where WordPress is installed.
You will find the wp-config.php file here. To update it, you need to edit it.
Open the file, find the DB_NAME setting, and replace it with the name of the database of your website. For example, if the name of your database is “example_wp”, you have to update the setting as follows:
define( 'DB_NAME', 'example_wp' );
After that, you need to update the username and password of the database. You can do this with the DB_USER and DB_PASSWORD settings. For example, if the database username and password are “wp_username” and “wp_password”, you should update the settings like this:
/** MySQL database username */
define( 'DB_USER', 'wp_username' );

/** MySQL database password */
define( 'DB_PASSWORD', 'wp_password' );
Also, make sure that the host setting at DB_HOST is set to localhost:
define( 'DB_HOST', 'localhost' );
Finally, update the table prefix of your database that you noted earlier as follows:
$table_prefix = 'wp_';
In this case, “wp_” is the table prefix. If your WordPress database has a custom prefix, adjust the code accordingly.
Finally, save the file, load your website and you will be able to see that there is a database connection and that your site loads. That’s it! This is how you can update the WordPress database configuration settings.
This is also helpful for other situations. For example, it’s one of the solutions you can apply when the WordPress login is not working.
How to Fix the WordPress Database Update Required Loop
Similar to the database connection error, the WordPress database update required loop is also one of the most common issues in the database update process. In this error loop, initially, you will be asked to update your WordPress database. But when you click on the prompt to update, you will either see the white screen of death or the webpage will stop loading.
If this happened to you, don’t panic. In this section, we’ll show you a quick fix. For this, you have to make sure that the db_version value of both your database and the WordPress version.php file are the same.
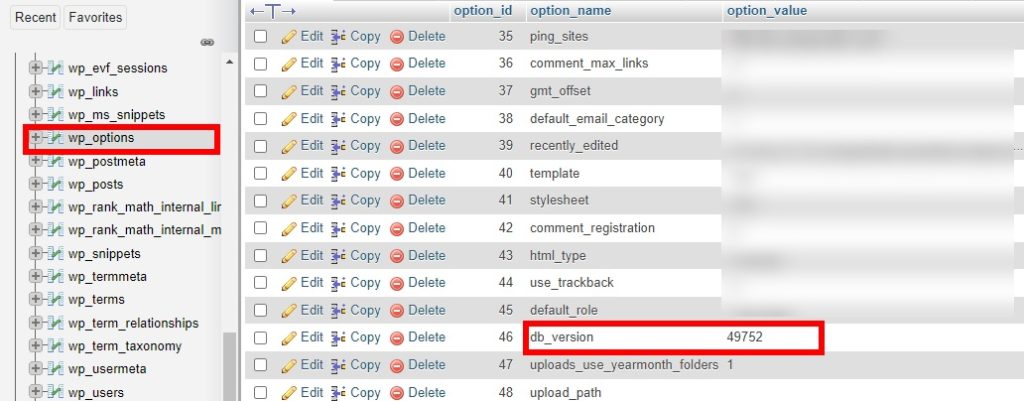
After checking that, you need to access the website database from the cPanel. Sign in to cPanel and head to Databases > phpMyAdmin. Then, select your database, open the wp_options table, and note the option_value for the option_name “db_version” in this table.
After that, open the File Manager from the cPanel and navigate to the /wp-include/ directory of your WordPress website. There, locate and open the version.php file and check the db_version setting. It will be represented by something similar as follows:
$wp_db_version = 49752;
Make sure that both the values of the db_version are the same as that of the database. If they’re not, change it in the version.php file and save it.
Alternative fix: Navigate to the /wp-content/ directory from the File Manager in the cPanel dashboard. You will see the object-cache.php file here. Simply delete or rename the file and you should be able to get rid of the WordPress database update required loop.
If after this you are still having issues with this error loop, look for theme and plugin conflicts by updating them. Alternatively, you can try deactivating them in bulk and then activate them one by one to find the one that’s causing the problem.
If during the process you encounter the dreadful WSoD, check out our tutorial on how to fix the white screen of death.
Bonus: How to Update your WordPress Theme
Apart from keeping your database up to date, you must keep your theme updated too. In this section, we’ll show you how to do it. There are 3 ways to update your theme. In this post, we’ll show you the manual method, but for more information about the other two, check out our guide on how to update a theme.
To update your theme, go to your theme’s website and download the latest version in .zip format. Then, in your WordPress dashboard, go to Appearance > Themes and press Add New. Then, click Upload Theme, choose the file that you’ve just downloaded, and upload it. After that, click Install Now.

As you are updating the theme, you’ll see a message that asks you if you want to replace the existing theme files with the new ones. Replace the files and finally activate the theme.
NOTE: As you’re updating the parent theme, you won’t lose customization on your site as long as you’ve applied them to the child theme.
For more information about this process, have a look at our tutorial on how to update a WordPress theme.
Conclusion
In summary, keeping your database up to date is very important to keep your site safe and avoid losing data, especially if you frequently customize your site. Even though most times WordPress automatically lets you know when there’s an update available, you can also check for database updates manually by going to www.yourdomain.com/wp-admin/upgrade.php.
Updating it regularly is very important because any database issue can have a big impact on your site. In this guide, we’ve shown what you can do to update the WordPress database. Additionally, we’ve seen how to keep the database configuration settings up to date. This can be very helpful if you have any database connection issues after updating the WordPress database.
Finally, we’ve shown you how to fix the database update required loop.
For more information on how to fix common WordPress problems, have a look at the following posts:
- Fix the WordPress Dashboard Not Loading Issue
- WordPress Update Failed Error: How to Fix it
- How to fix WordPress permalinks
If you found this article useful, share it on social media to help your friends update their databases. Have you tried this on your site? How did it go? Let us know in the comments below.

Thank you, you saved my week-end
Best regard
Glad to hear that, you’re welcome