
How to use WooCommerce Checkout Hooks
In this guide, you will learn how to use checkout hooks in WooCommerce. We will have a look at some of the main hooks and give you some examples of what you can do with them. So, get ready to customize your checkout page and increase your conversion rates.
What are WooCommerce hooks?
Hooks are powerful functions that allow you to change or add code without having to modify core files. Hooks provide a lot of flexibility and developers use them to change WooCommerce default functionalities.
There are two different types of hook:
- Action hooks allow you to add custom code to do certain actions when an event occurs.
- Filter hooks change the behavior of an existing variable or function.
Thanks to WooCommerce hooks, developers can create highly customized solutions in a very practical and flexible way. Some of the most important hooks in WooCommerce are the checkout hooks. And if you have an online store, you’ll need to use them to customize the checkout and improve your conversion rates.
WooCommerce Checkout Hooks
Checkout hooks are just one type of the multiple hooks WooCommerce supports and they run on the checkout page. You can use these checkout hooks to edit notes, add some content before the billing fields, before order review or after the checkout form, apply some logic to increase the price or limit users by role, and much more.
WooCommerce hooks work exactly like WordPress native hooks. So, if you are familiar with WordPress hooks, mastering WooCommerce hooks will be easy.
Before we start
Before jumping to the hooks, we recommend you create a child theme. There are many tools you can use. You can check out our list of the best child theme plugins for WordPress or our detailed guide on how to create a child theme with a plugin or manually.
If this is your first time with hooks, you can simply copy these scripts and paste them directly in the functions.php file of your Child Theme. At the end of the post, you will find some examples of things you can do with checkout hooks to give you some ideas.
How to use WooCommerce Checkout Hooks?
As we saw before, there are WooCommerce action hooks and filter hooks and both of them have a similar syntax.
This is an example of an action hook:
add_action('woocommerce_after_checkout_billing_form','QuadLayers_callback_function');
function QuadLayers_callback_function(){
    # add your code here
}
Where woocommerce_after_checkout_billing_form is the hook and QuadLayers_callback_function is the function we create to add our custom scripts.
Filter hooks, on the other hand, work in the same way but they need to receive and return a parameter in the function. For example:
add_filter('woocommerce_breadcrumb_defaults','quadlayers_change_breadcrumb');
function quadlayers_change_breadcrumb( $content) {
$content .= "QuadLayers";
return $content;
}
List of checkout hooks for WooCommerce
There are many WooCommerce hooks you can use on the checkout page. Some of the main ones are:
- woocommerce_before_checkout_form
- woocommerce_checkout_before_customer_details
- woocommerce_checkout_billing
- woocommerce_before_checkout_billing_form
- woocommerce_checkout_shipping
- woocommerce_before_order_notes
- woocommerce_after_order_notes
- woocommerce_checkout_after_order_review
- woocommerce_checkout_after_customer_details
- woocommerce_review_order_before_cart_contents
- woocommerce_review_order_before_shipping
- woocommerce_review_order_after_order_total
- woocommerce_checkout_order_review
- woocommerce_review_order_before_submit
- woocommerce_review_order_before_payment
- woocommerce_review_order_after_submit
- woocommerce_review_order_after_payment
- woocommerce_after_checkout_form
All of them have self-explanatory names. If you want to have a look at the full list of WooCoommerce hooks, check out this documentation. And to see how each hook works, have a look at this post.
For example, let’s say you want to add some content after the billing form and before the shipping section title. You would use something like this:
add_action(‘woocommerce_after_checkout_billing_form’,’QuadLayers_callback_function’);
function QuadLayers_callback_function(){
echo ‘here goes the content text or html’;
}
In this case, we are just adding some text, but you can add complex HTML structures and create your custom logic with PHP functions. Let’s have a look at some examples to give you some ideas on how to make the most of the WooCommerce checkout hooks.
How to customize the checkout page with WooCommerce hooks
Here, we’ll show you some examples of what you can do to customize the checkout page using WooCommerce hooks on your site.
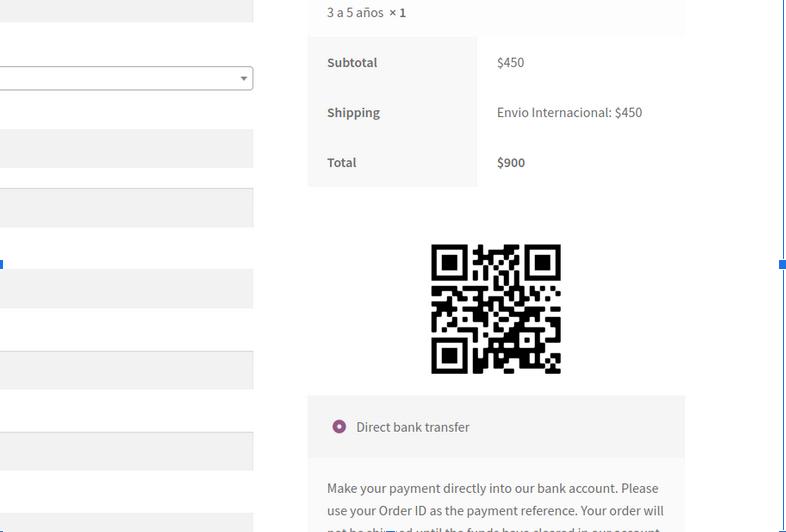
Add an image to the order review
You can add an image to the order review page. In this case, we have added a QR code but you can include other images, an animated GIF, or background images.
add_action('woocommerce_review_order_before_payment','example_callback');
function example_callback( ) {
    echo '<img src="https://quadlayers.com/wp-content/uploads/2020/06/frame.png" width="200px" height="200px" style="margin:auto">';
}
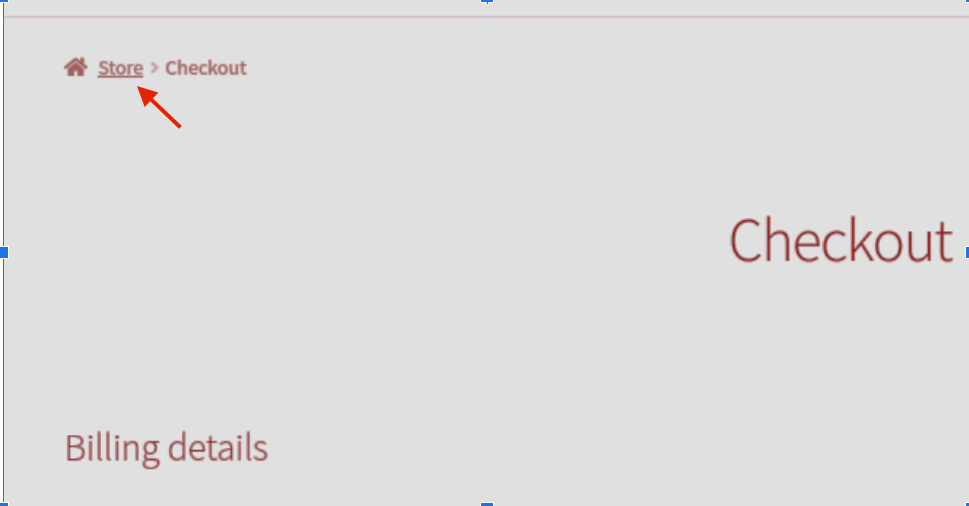
Change breadcrumbs in the checkout page
You can prevent users from navigating back to the home page by editing the breadcrumbs. In this example, we will show you how to change the Home text in the breadcrumb for Store.
add_filter( 'woocommerce_breadcrumb_defaults', 'quadlayers_change_breadcrumb' );
function 'quadlayers_change_breadcrumb'( $default ) {
    $default['home'] = 'Store';
    return $default;
}
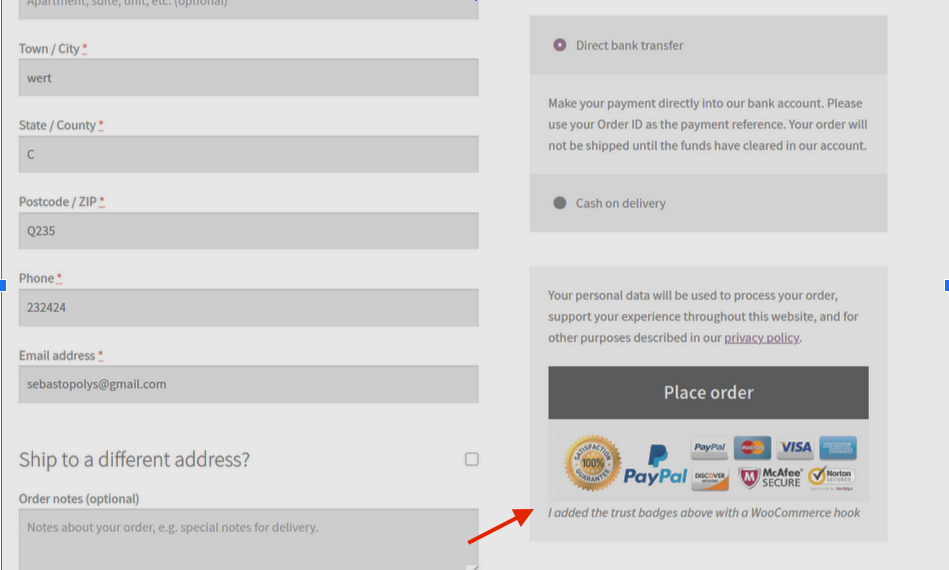
Display trust badges next to the Place Order button
The WooCommerce checkout hooks offer some great options to build trust and give customers peace-of-mind when they are about to purchase. By showing trust badges right next to the Place order button, you can improve your conversion rates, and build confidence around your brand.
add_action( 'woocommerce_review_order_after_submit', 'quadlayers_trust_badges' );
function quadlayers_trust_badges() {
    echo '<div class="trust-badges">
    <img src="https://www.pngitem.com/pimgs/m/19-197703_transparent-secure-checkout-png-best-trust-badges-for.png">
    </div><div class="trust-badge-message"><i>I added the trust badges above with a WooCommerce hook</i></div>';
}
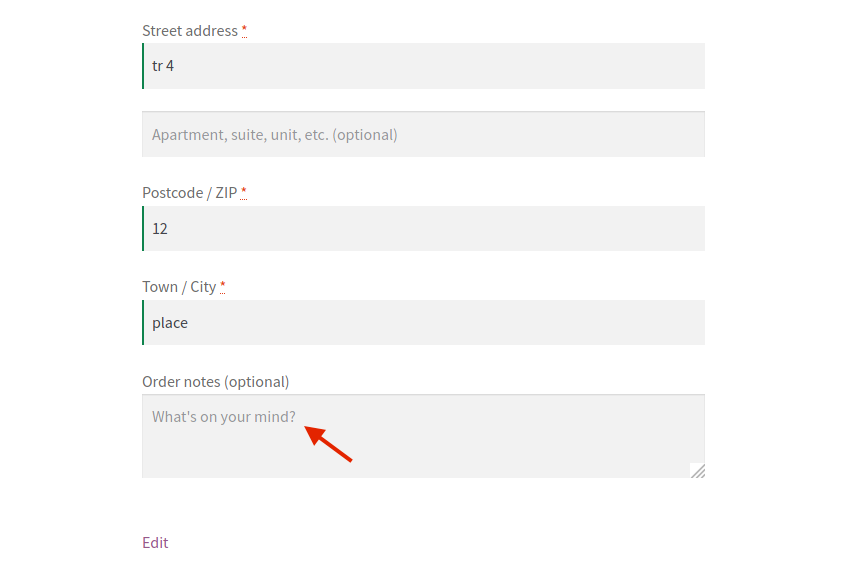
Edit existing checkout fields
The best way to fully customize the checkout page is by editing labels and the placeholders of fields. In this example, we are going to edit the label for first name and placeholder of the order note using the woocommerce_checkout_fields hook.
add_filter( 'woocommerce_checkout_fields' , 'quadlayers_labels_placeholders', 9999 );
function quadlayers_labels_placeholders( $f ) {
	$f['billing']['billing_first_name']['label'] = 'What\'s your name?';
	$f['order']['order_comments']['placeholder'] = 'What\'s on your mind?';
	return $f;
}
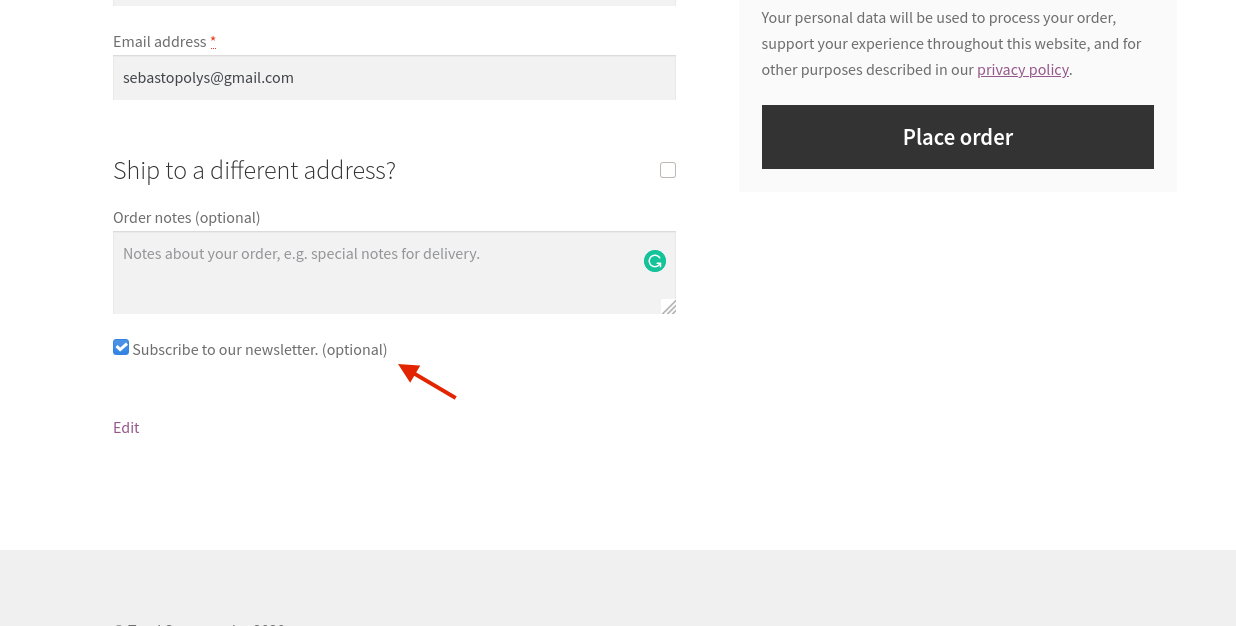
Add a custom checkout field
Finally, here’s a more complex example. We will show you how to create a new custom field that allows customers to subscribe to your newsletter on the checkout. For that, we’ll use two hooks: one to display the field to subscribe, and another one to save the state of the button in the database (whether it was checked or not).
add_action( 'woocommerce_after_order_notes', 'quadlayers_subscribe_checkout' );
add_action( 'woocommerce_checkout_update_order_meta', 'quadlayers_save_function' );

// insert checkbox in woocommerce checkout
function quadlayers_subscribe_checkout( $checkout ) {
	woocommerce_form_field( 'subscribed', array(
		'type'	=> 'checkbox',
		'class'	=> array('misha-field form-row-wide'),
		'label'	=> ' Subscribe to our newsletter.',
		), $checkout->get_value( 'subscribed' ) );
}
// save field value
function quadlayers_save_function( $order_id ){
	if( !empty( $_POST['contactmethod'] ) )
		update_post_meta( $order_id, 'contactmethod', sanitize_text_field( $_POST['contactmethod'] ) );
	if( !empty( $_POST['subscribed'] ) && $_POST['subscribed'] == 1 )
		update_post_meta( $order_id, 'subscribed', 1 );
}
Customize the checkout page with plugins
If you’re not comfortable using hooks, you can also customize your checkout page using plugins. There are many tools out there but we recommend these two:
- Checkout Manager for WooCommerce: With more than 70,000 active installations, this is one of the most popular checkout plugins for WooCommerce. Checkout Manager allows you to customize, add, edit, and delete fields on the checkout page. It has a free version and 3 premium plans that start at 20 USD.
- Direct Checkout for WooCommerce: With this freemium tool, you can simplify the checkout process and increase your conversion rates. You can shorten the purchase process redirecting your customers from the product page directly to the checkout. Direct Checkout has a free version and premium plans that start at 20 USD (one-time payment).
For more information on how to use these plugins and improve the checkout page, check out our detailed guide.
Conclusion
All in all, with WooCommerce hooks you can customize your checkout page and increase conversions rates. Here, we’ve shown you some examples of how to use these hooks to personalize different sections of your checkout. However, there’s much more you can do! So, we encourage you to play around with them and unleash your creativity.
For more examples and information on how to customize the WooCommerce checkout page, check out this step-by-step guide.
Let us know in the comments section below if you have any questions. And if you enjoyed the read, please share this post on social media!
