
WooCommerce Tax Exempt: The Full Guide
Are you looking for a guide to better understand tax-exempt transactions? Taxes can have a big impact on your revenue, so they’re something that you should consider to make the most of your store. In this WooCommerce tax-exempt guide, we’ll tell you everything you need to know about this topic.
WooCommerce is one of the most popular platforms when it comes to eCommerce stores. It offers a wide variety of options for product sales, customer convenience, and website flexibility. On top of that, it also comes with a tax-exempt feature that can be very useful when used smartly.
Before we go through how to enable tax-exempt on your store, let’s better understand what tax-exempt means in the WooCommerce context.
What is Tax Exempt in WooCommerce?
Tax exemption refers to the transactions or sales that are free from taxes at a federal, state, or local level. And in WooCommerce, tax exemption usually refers to the tax-free transactions for customers when they purchase a product or service during checkout.
The tax exemption in WooCommerce may be applied to the customers depending on the products they acquire as well as their postal codes or tax numbers. If the tax exemption is enabled for the customer due to the postal code or tax numbers, it is mainly due to the state or region that they are located.
Sometimes, store owners can include tax exemption in their products or services too. These might include products sold to the government, medical devices, or food items among others.
WooCommerce Tax Exempt Guide
There are two main ways to enable WooCommerce tax-exempt to your customers:
- With Plugins
- Programmatically
In the following section, we will explain each method step-by-step.
Before we start, make sure that you have properly set up WooCommerce on your website and remember to enable the taxes.
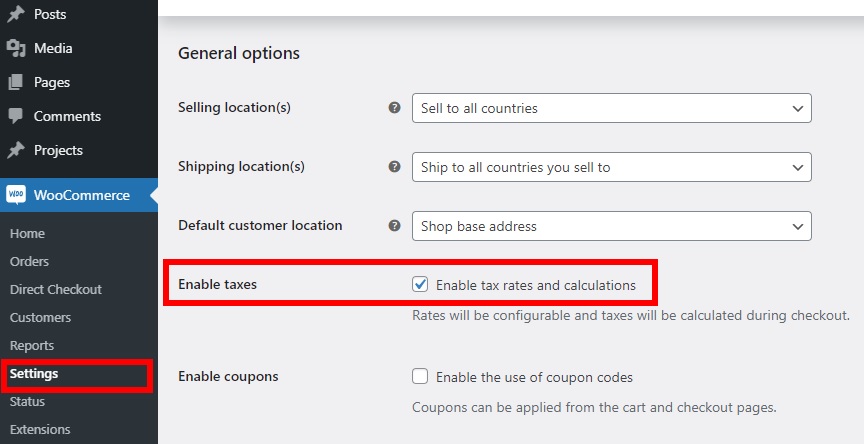
If you haven’t enabled done it yet, do it now before you move to the next step. In your WordPress dashboard, head to WooCommerce > Settings and select the Enable taxes option in the General tab.
Once that’s done, let’s see how to enable tax-except products in your store.
1. WooCommerce Tax Exempt with Plugins
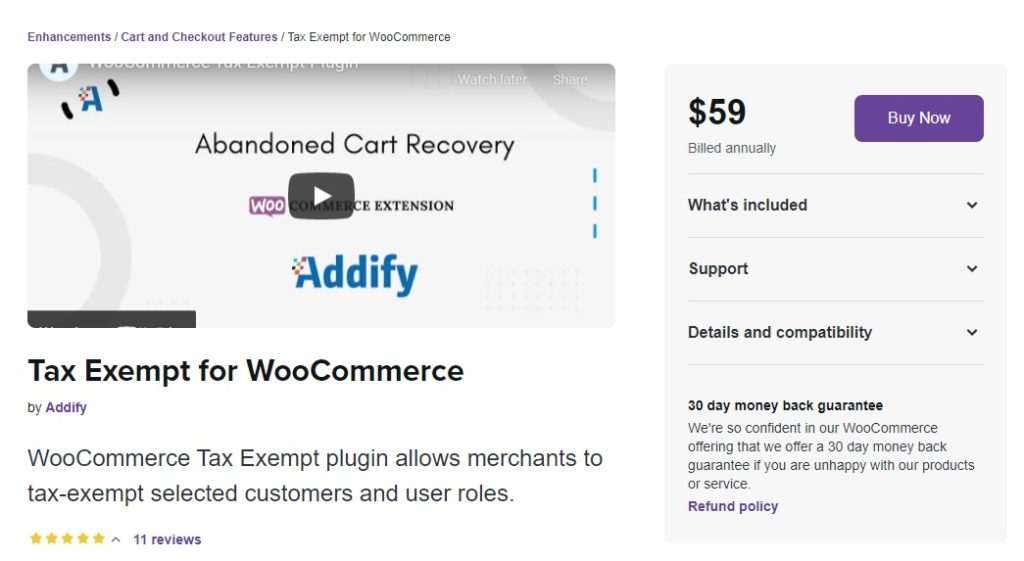
The easiest way to enable WooCommerce tax-exempt is by using a plugin. There are many tools to help you do so, but for this tutorial, we have selected WooCommerce Tax Exempt. It is a premium plugin that you can buy from the official WooCommerce website for 59 USD and will help you customize the tax exemption options for your store. Additionally, you can also review tax-exempt reports or enable tax exemption to specific customers if needed.
1.1. Install and activate the Plugin
Since this is a plugin that you get from the official WooCommerce website, you’ll need to install it manually.
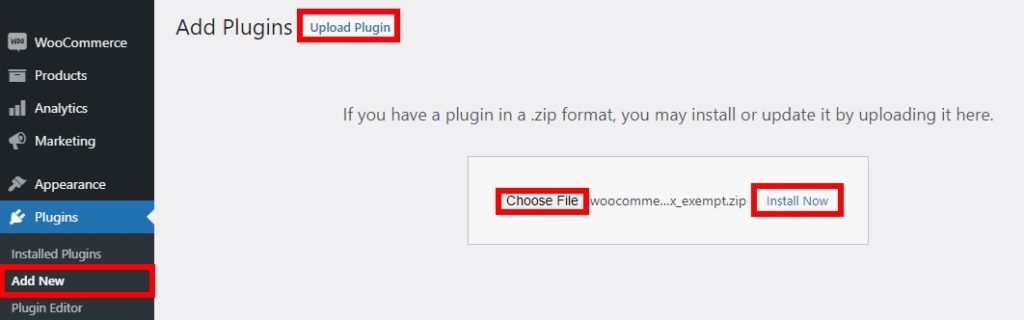
First, you have to place your order and download the .zip file. Then, in your WordPress dashboard, go to Plugins > Add New and click Upload Plugin.
Now, you need to choose the .zip file that you’ve just downloaded and press Install Now. After the installation is complete, activate the plugin.
If you need any more details regarding the installation, you can have a look at our guide on how to install a WordPress plugin manually.
1.2. Configure WooCommerce Tax Exempt for Customers
After you have activated the plugin, your customers can request to claim the tax-exempt. The logged-in customers can do so on the checkout page before they place the order. By default, the link is at the bottom of the checkout page, but you can edit the location to suit your needs.
This tool allows you to provide the link to both guest and logged-in users. Here, we will show you how to display the link for guest users so all your website visitors can benefit from it.
First, navigate to WooCommerce > Tax Exemption. You will be presented with all the options you can change through the plugin. Click Guest Users Settings and tick the Show tax exemption option.
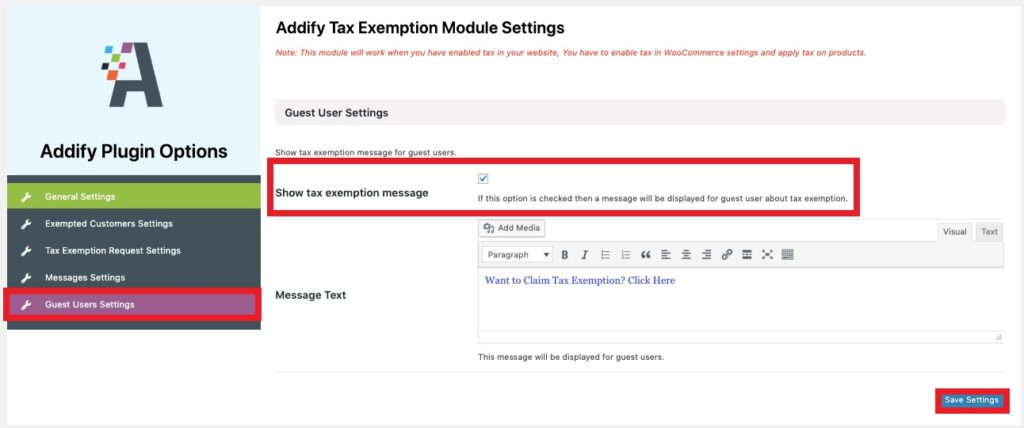
You can also edit the message. Just don’t forget to save settings after you are done.
Now if you check the front end, you’ll see the tax-exempt link on the checkout page.
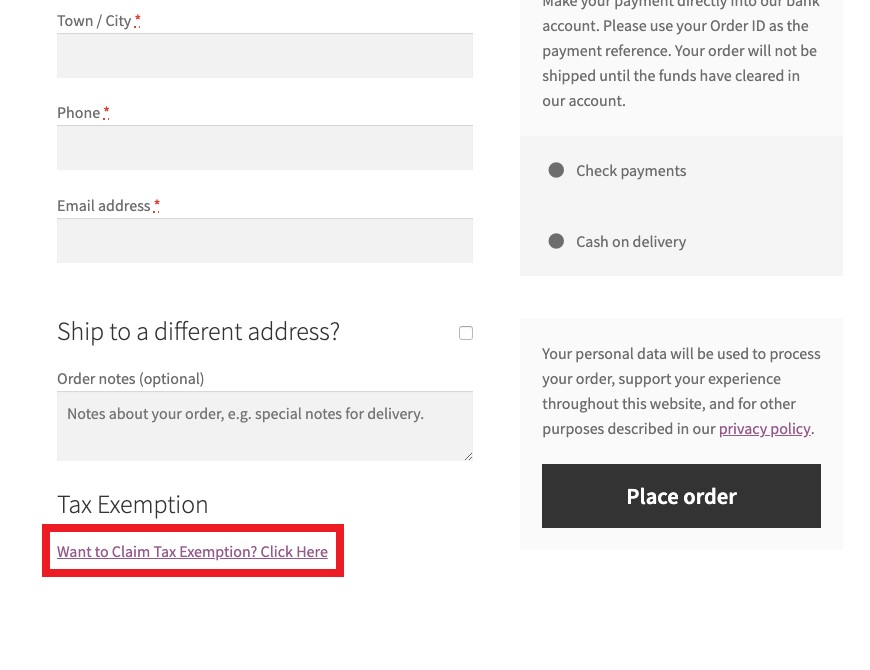
If a shopper press the link, they will have to log in or create a new account and fill up a form to request the tax exemption. This form will be on the dedicated section on the customers’ WooCommerce “My Account” page.
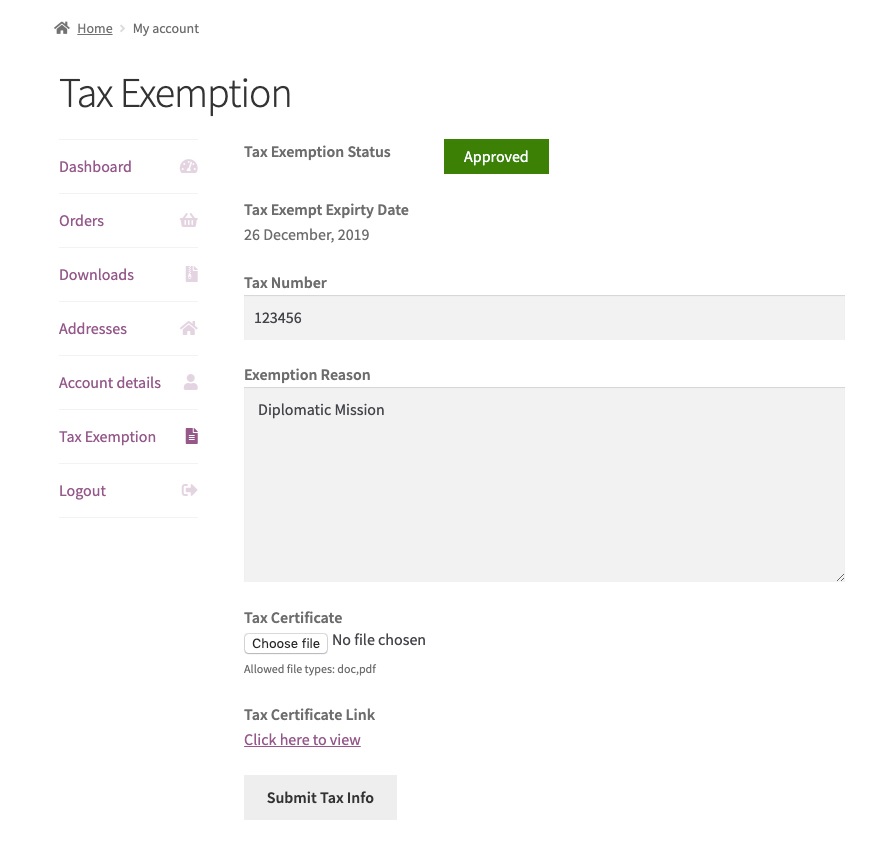
1.3. Set Tax Numbers for WooCommerce Tax Exempt as Admin
You also need to set the tax number to be exempt as an admin to make sure that your customers get the tax exemption. To do that, go to Users > Profile and navigate to the Tax Exempt section. Then, add the tax number, the reason that you want to exempt your customers, and set Tax-exempt status to Approved.

Set an expiration date and once you finish all the changes Update the profile.
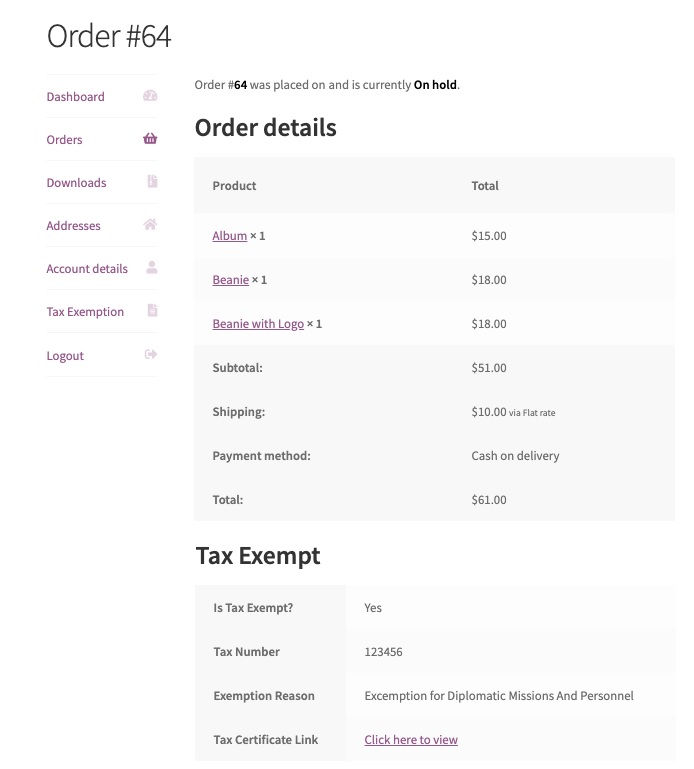
Once your customer requests for WooCommerce are tax-exempt, you can see the data under Orders from the “My Account” page. If they enter the exact tax number for the exemption, they will be approved for WooCommerce tax-exempt. The report will also appear here and your customers will be reported with the tax-free transactions.
Most tax-exemption plugins are paid. However, if you want to try a free tool, check out EU VAT Assistant. It’s more limited than the paid tools but it’s a good start to discount VAT from your products.
If you don’t want to use plugins, you can enable tax exemption in WooCommerce with a bit of coding.
2. Programmatic Guide for WooCommerce Tax Exemption
If you have coding skills, you can also enable WooCommerce tax-exemptions programmatically. In this section, we’ll give you some code snippets that you can paste into your website files. Even though you can simply copy and paste these snippets, we recommend that you have a basic understanding of coding to be able to edit the code.
As we’ll edit some core files, before we start, we recommend you backup your website and create a child theme or use a child theme plugin. This way, you make sure that you will be able to recover a stable version of your site in case something goes wrong when editing the core files. Once you’ve done this, you’re ready to enable tax exemption for your customers based on users and roles.
2.1. Tax Exempt Users
If you want to activate WooCommerce tax exemption based on users, you can set a specific postal or ZIP code. All you need to do is go to Appearance > Theme Editor in your WordPress dashboard and open the functions.php file.
Then, add the following code snippet at the end.
add_action( 'woocommerce_checkout_update_order_review', 'quadlayers_taxexempt_checkout_based_on_zip' );
function quadlayers_taxexempt_checkout_based_on_zip( $post_data ) {
        WC()->customer->set_is_vat_exempt( false );
        parse_str( $post_data, $output );
        if ( $output['billing_postcode'] === '12345' ) WC()->customer->set_is_vat_exempt( true );
}
In this case, we’re enabling the tax exemption only when the zip code is 12345. Make sure that you customize the ZIP code in the snippet. Then, Update the file.
2.2. Tax Exempt Roles
You can also assign various user roles for tax exemption. Once again, all you need to do is open the functions.php file from Appearance > Theme Editor and paste the following code snippet.
<?php
add_filter( 'init', 'wc_tax_exempt_user_roles' );
function wc_tax_exempt_user_roles() {
     if ( ! is_admin() ) {
          global $woocommerce;
          if ( current_user_can('distributor') {
               $woocommerce->customer->set_is_vat_exempt(true);
          } else {
               $woocommerce->customer->set_is_vat_exempt(false);
          }
     }
}
?>
In this case, we’re applying a tax exemption (VAT) when the user is an admin or distributor, but you can add, remove, or edit these roles according to your needs.
More information about this snippet here.
How to Set Up Tax-Exempt Products
Apart from enabling tax-exemptions for your customers, you can do the same for your WooCommerce products. This can be useful to make it more convenient for both you and your customers.
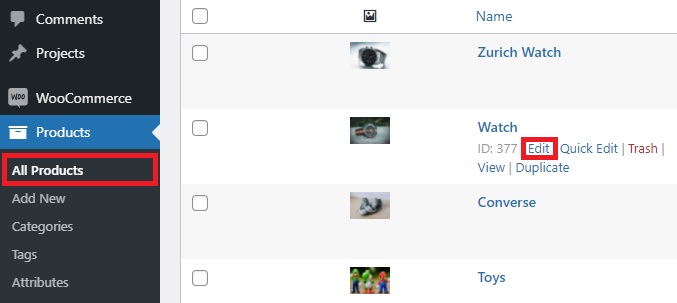
And the best part is that it’s a very quick and easy process that doesn’t require any plugins or code snippets. In your WordPress admin dashboard, go to Products > All Products and press Edit on the product you want to tax-exempt. If you have a hard time finding the product, you can search for it from the search bar.
You will be redirected to the edit product page. Here, you need to change the Product data to a Variable product first. Then, set the Tax class as Zero rate in the General section and Update the product.

That’s it! Now when your customers add that specific product to the cart, the tax exemption will be enabled during checkout.
Bonus: How to Set Up Automated Taxes
So far we’ve seen several tax-exemption options in WooCommerce that you can use in your store. But there’s more you can do!
Setting up automated taxes can help you save a lot of time since it automatically calculates the taxes during the checkout process. And the best part is that you can enable this option from your WooCommerce dashboard.
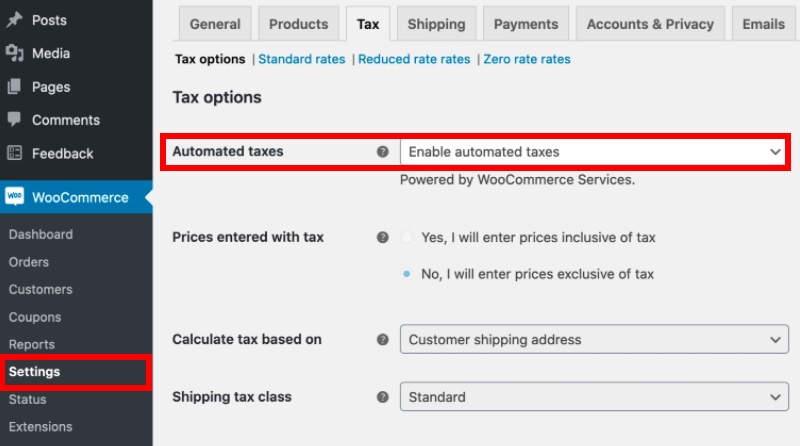
You can find the Automated taxes option during the installation process, but you can enable it afterward.
Simply go to WooCommerce > Settings and open the Tax tab. Here, you will find the Automated taxes option. Select Enable automated taxes from the dropdown and save the changes.
That’s it! Your customers will be provided with the automatically calculated taxes when they checkout.
Bonus Fix: Enable Automated Taxes not working
To make sure that the automated taxes are working on your WooCommerce store, there are some things that you can do. These are some of the solutions to the most common issues that users miss out on that may cause the automated taxes not to work properly.
When the enable automated taxes option doesn’t work, try this:
1. JetPack Installation
Make sure that the JetPack plugin is installed and activated on your website. This is because WooCommerce uses JetPack to authenticate each request and charge credit cards. If your website isn’t connected to JetPack, it won’t be able to authenticate the request and may create issues with automated taxes.
2. Country Restrictions
Even if you have installed and activated JetPack, the automated taxes might not work due to your location. The automated taxes work with stores based in the United States, Australia, United Kingdom, Canada, Austria, Belgium, Bulgaria, Croatia, Cyprus, Czech Republic, Denmark, Estonia, Finland, France, Germany, Greece, Hungary, Ireland, Italy, Latvia, Lithuania, Luxembourg, Malta, Netherlands, Poland, Portugal, Romania, Slovakia, Slovenia, Spain, and Sweden.
So if your business isn’t located in any of these countries, the automated taxes probably won’t work. For more information about this, check out this link.
Conclusion
All in all, in this WooCommerce tax-exempt guide, we’ve seen how helpful it can be to enable tax-free transactions for your customers depending on their postal codes or tax numbers. We have shown two different ways to enable tax exemption in your store:
- Using plugins
- Programmatically
Using a plugin is the fastest way to enable and customize the tax exemption options on your website. It’s worth noting that most tools are paid, but there are also a few free plugins. Alternatively, if you have coding skills, you can enable tax exemption programmatically based on users and roles.
Additionally, you have learned how to set up tax-exempt products that can help you boost sales of certain items. Finally, we’ve seen how to set up automated taxes and how to fix some of the most common issues you may face with them.
Was this tax exemption guide useful? Is there anything else we should add? Let us know in the comments below!
Here are some other articles that might be interesting for you:

This is obviously one great post. Thanks for the valuable information and insights you have so provided here. I find it very interesting and well thought out and put together. I hope to read your work in the future.
Thank you Sphia
Thanks for sharing this amazing content. Your information is really very outstanding to read. Keep it up and best of luck with your future updates.
Thank you!
Thanks for the information, highly appreciated!
Hi,
Is there a simple way to exempt some specific products (based on tag or category) for specific countries instead of creating a specific tax class that would be a near-duplicate and not easy to maintain ?
thanks