3. Activation
Here we will explain how to install and activate WooCommerce Autocomplete Orders PRO in your WordPress site.
1: Download the autocomple-woocommerce-orders-pro.zip file from your account.
2: Open your website’s WordPress admin panel at mysite.com/wp-admin/.
3: In the WP dashboard, go to Plugins > Add New.
4: Click Upload Plugin, at the top of the screen.
5: Click the Choose File button, use the pop-up window to look for the autocomple-woocommerce-orders-pro.zip file, and select it.
6: Go to Plugins > Installed Plugins and click the Activate button under the WooCommerce Autocomplete Orders PRO section in the plugins list.
3.1. Install WooCommerce Autocomplete Orders Free
The WooCommerce Autocomplete Orders PRO extends the free version of the plugin that you can find in the WordPress repository.
1: After installing WooCommerce Autocomplete Orders PRO, you may see a red alert in your admin dashboard to directly install the WooCommerce Autocomplete Orders Free.
2: Press the Install WooCommerce Autocomplete Orders button.
3: After the installation, you’ll see a new button to activate the plugin. Click the Activate button and you’re good to go.
3.2. Activate License
Here we will show you how to activate the license for your WooCommerce Autocomplete Orders PRO plugin.
1: After installing WooCommerce Autocomplete Orders PRO and WooCommerce Autocomplete Orders Free, you’ll see a new section in the WordPress admin dashboard.
2: Go to the license tab in WooCommerce / Autocomplete Orders / License
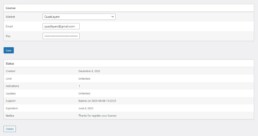
3: Now you have to include your license and activation email and then press the Save Changes button.
Go to the license tab in your QuadLayers account and then copy and paste your license key and email activation.
