
How to add CSS to WordPress: 5 Methods
Do you want to apply CSS and edit your site’s style? If so, this post is for you. In this guide, we’ll show you different ways to add CSS to WordPress so you can customize your website and make an impression on your visitors.
Even though WordPress has plenty of themes and templates that you can use, if you want to change the appearance of your site, you’ll end up adding CSS code sooner or later.
Adding CSS to a website is quite easy. We’ve previously seen how to apply CSS using the browser developer tool but there are other ways. All these different methods have pros and cons, so it can be hard for beginners to understand which is the best way to add CSS for their specific situation. That’s why in this guide, we’ll show you different ways to add CSS style to a WordPress website.
How to add CSS to WordPress
There are several ways to apply CSS style to a WordPress site:
- Via the Theme Customizer
- Editing child theme files
- Uploading your own CSS file
- Apply CSS to the header with hooks
- Add CSS to the backend
Let’s have a look at each method, so you can choose the most appropriate one for you.
NOTE: We aren’t going to explain in detail the structure of CSS in this post, so we recommend you have a basic understanding of CSS to be able to follow this guide without any issues.
As a previous step to applying CSS, we recommend you use the browser developer tool to find specific HTML elements that you want to change. If you aren’t sure how to do that, have a look at our guide on how to apply CSS using the browser developer tool.
1) Apply CSS with the Theme customizer
The easiest and fastest way to add custom CSS code to WordPress is by inserting it in the Additional CSS editor of the theme customizer. This is the inbuilt WordPress CSS editor and it’s present on all websites by default. However, keep in mind that some themes and plugins might disable this feature.
To apply your CSS using the theme customizer, go to your dashboard and head to Appearance > Customize > Additional CSS to open the CSS editor. There, you’ll see the CSS code of your site and you’ll be able to add your code.
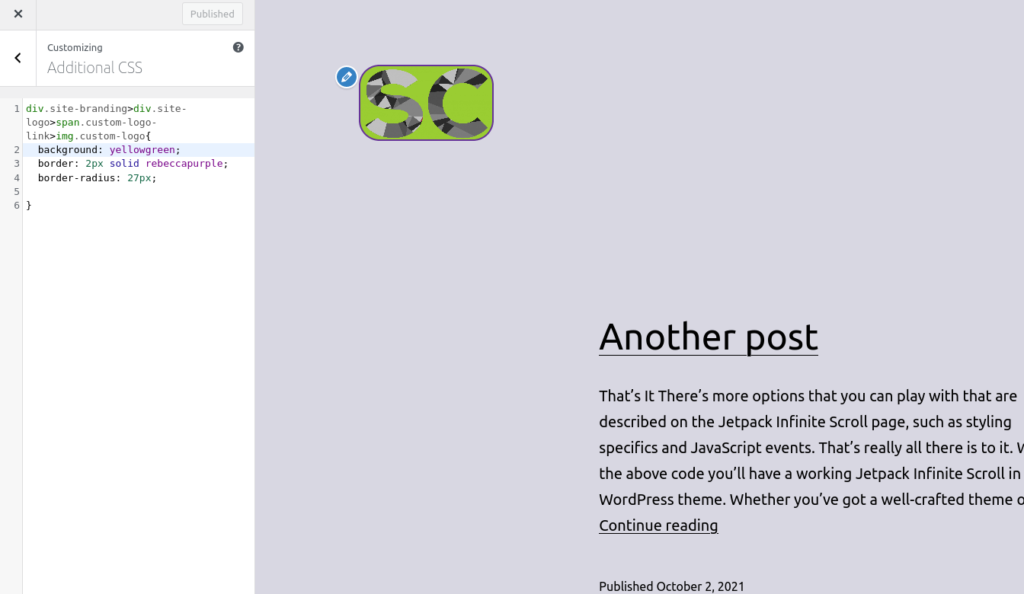
One of the biggest advantages of this method is that you can preview the result of CSS customization in real-time on the right side of the screen.
Once you add your code, it will be saved on the database in the *_posts table, under the custom_css post type. Even though you can apply all kinds of customization here, it’s not a recommended practice for a large list of CSS rules because of performance.
2) Editing Child theme files
Another way of adding CSS style to WordPress is to edit the CSS files of the child theme. This method has better performance than applying code directly from the Customizer because it loads without the need of retrieving it from the database.
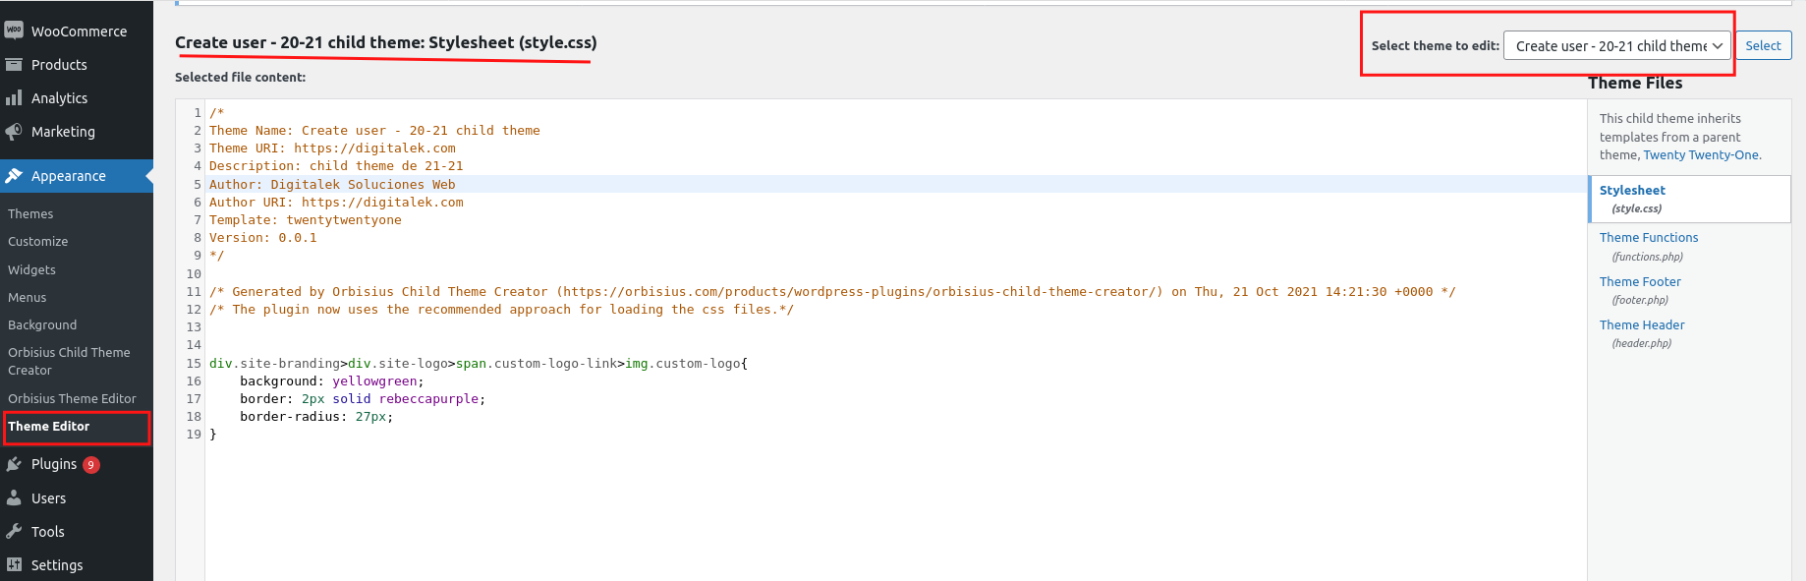
Most child themes have a style.css file, so you can simply add your custom CSS there. To find the style.css file of your child theme, in your WordPress dashboard go to Appearance > Theme Editor. Then press the dropdown on the top right, select your child theme, and click on the style.css file as shown below.
If your child theme doesn’t have a style.css file or any other file with a .css extension, you can create it and apply it as described in the next section.
Alternatively, some child themes have a CSS folder with several files in it. If that’s your case, make sure you edit the correct style.css file.
3) Upload your own CSS file
If you want to add large custom CSS code to WordPress, it’s a good practice to have it in a separate file and upload it to your website files on the server. Let’s see how to do it step-by-step.
3.1) Create the CSS file using a code editor
To do this, you need to use a code editor like Visual Studio Code, Sublime text, or any other that supports CSS files.
Create a new file with the CSS extension and paste your code there. In this example, we’ve named the file my-styles.css.
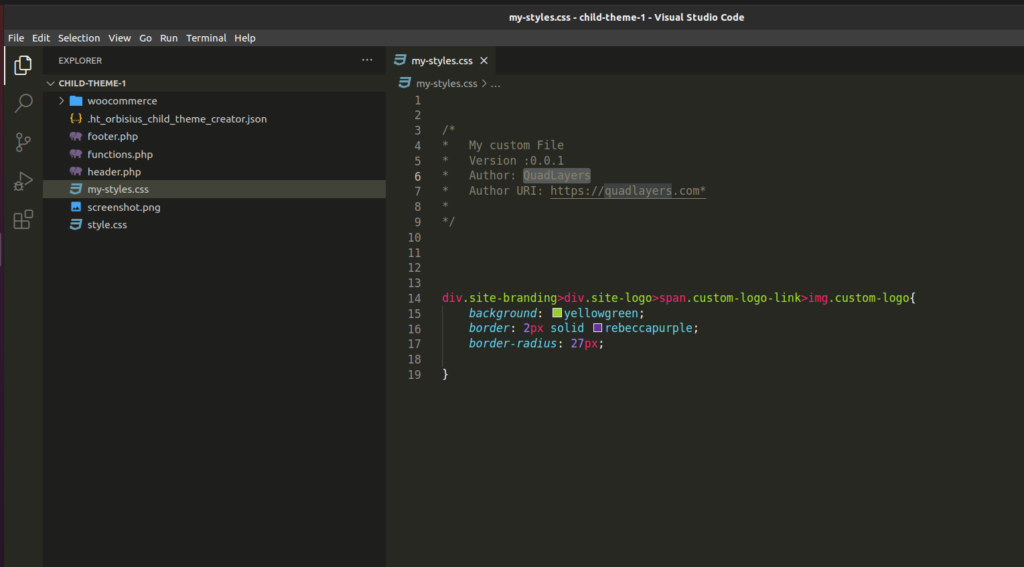
After you paste your code, save the file, and continue with the next step.
3.2) Upload the file to the Child Theme folder
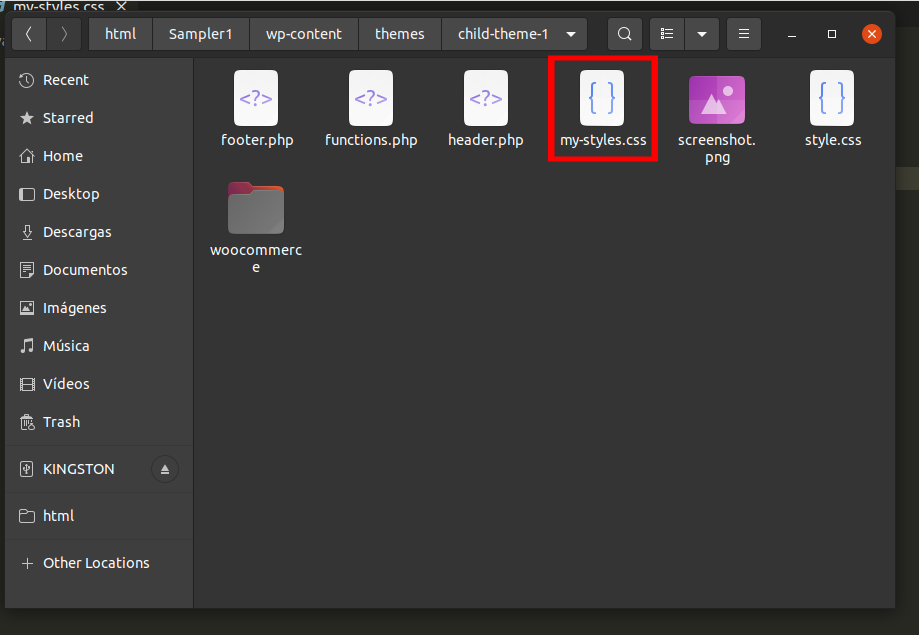
If your child theme has a CSS directory, just copy and paste your file there. Alternatively, you can also upload it right in the main child theme directory. Don’t worry about the location in the child theme folder, we will target the file path in the next step.
Now use the cPanel or an FTP client like FileZilla to upload the file.
If you are on a localhost server, you can simply copy and paste the file in the child theme folder located in the public folder of your localhost server.
Following our example, we’ll paste our my-styles.css file in the child theme.
3.3) Enqueue your custom .CSS file
Now you need to enqueue your custom CSS file on the functions.php file of your child theme to make it work. Paste the following PHP script after any code present in the functions.phpfile.
function my_styles() {
wp_register_style( 'my-styles', get_stylesheet_directory_uri() . '/my-styles.css');
wp_enqueue_style( 'my-styles');
}
add_action( 'wp_enqueue_scripts', 'my_styles' );
Make sure that the newly created file is called properly by the path depending on where the file is located in the theme directory. Also, remember to change the name of the file (my-styles.css in this example).
You can use the following snippet to check whether the path is correct or not.
add_action('wp_head',function(){
echo get_stylesheet_directory_uri() . '/my-styles.css';
});
That’s it! That’s how you can apply CSS to WordPress by uploading your own CSS file.
4) Apply CSS to the header section using a hook
If you have some coding skills, you can also add CSS to your site using hooks.
The wp_head()hook is very useful when developing websites. Although it is not recommended to use it to include a script in the <head> HTML tag, it allows you to make quick tests and debug.
If you are working with multiple CSS stylesheets or on complex websites and something isn’t working as expected, you can add your CSS code right in the <head> section using this hook.
add_Action('wp_head','my_head_css');
function my_head_css(){
echo "<style>
.site-branding{
    background: red;
    width: 200px;
    padding: 11px;
    border-radius: 23px; }
</style>
";}
For example, with this script, we’re changing the heading size, background color, border, and padding.
This way you can make sure that the CSS script is applied to the frontend over any other CSS file, or included in the website in any other way.
5) Add CSS to the backend
Finally, there’s one more way to add CSS style to WordPress. You can apply custom CSS to the backend using the admin_head() hook as follows:
add_Action('admin_head', 'my_custom_fonts');
function my_custom_fonts() {
echo '<style>
#adminmenu{
    background: #602e93;}
</style>';
}
In this example, we’re changing the background color (#602e93).
Method 4 and 5 can be very useful and can help you save time by inserting a CSS script right in the <head> HTML section. However, it is not a recommended practice and you shouldn’t use this method for applying styles permanently.
Conclusion
All in all, with a bit of CSS you can customize the appearance of your site. Adding CSS is easy but there are several ways to do it, so it can be hard to know which method you should use.
In this tutorial, we’ve shown you five different methods to add CSS to your WordPress site:
- Via the Theme Customizer
- Editing child theme files
- Uploading your own CSS file
- Apply CSS to the header with hooks
- Add CSS to the backend
Each method has its pros and cons. For example, adding CSS from the theme Customizer is easy and comes with a real-time preview. However, it’s not a recommended practice for a large list of CSS rules. Alternatively, you can edit the files of your child theme or upload your own CSS file to your child theme.
Even though it is not recommended a recommended practice, you can use hooks to include a script in the <head> HTML tag to make quick tests and debug your site.
Have you added CSS to your website? Which method did you use? Do you know of any other method that we should include? Let us know in the comments below!
