5. Add new fields
WooCommerce Checkout Manager allows you to include custom fields to the checkout page in the Billing, Shipping, and Additional fields sections.
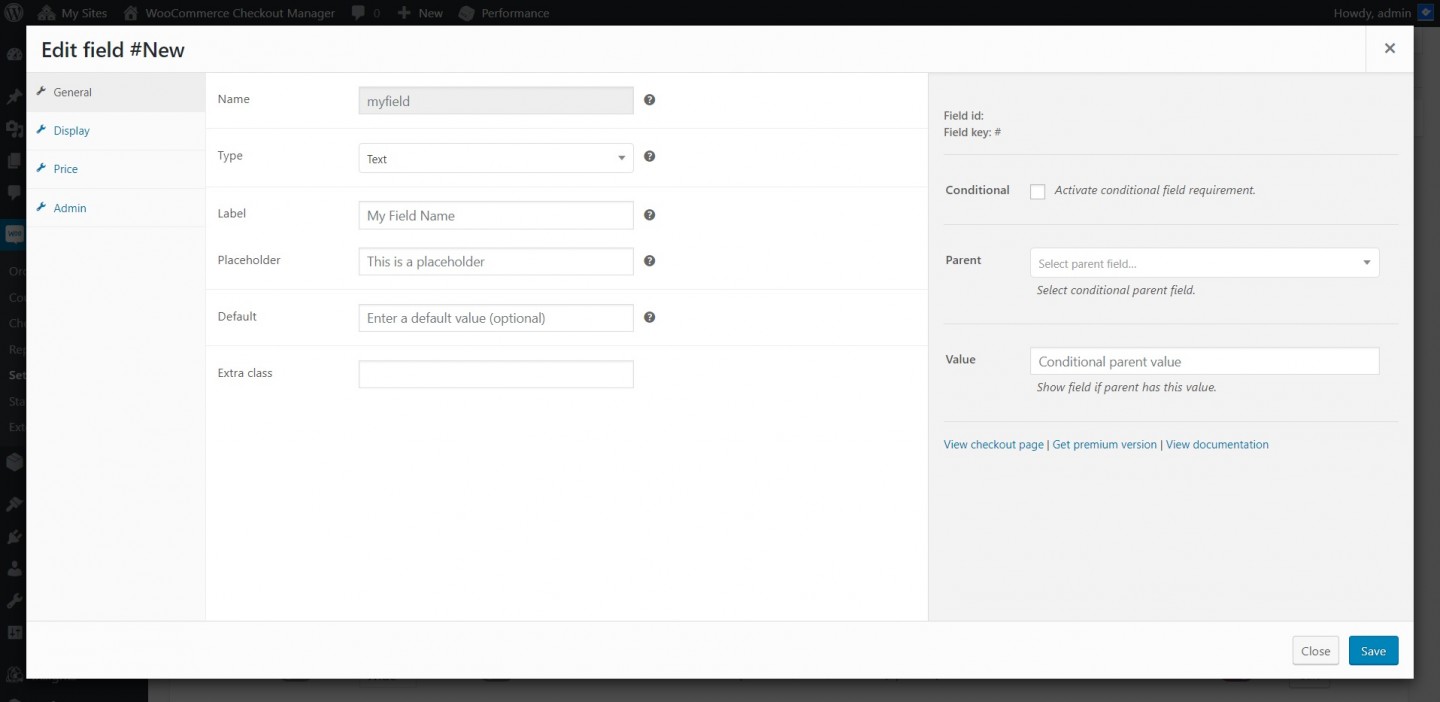
5.1. Add a new a field to the checkout page
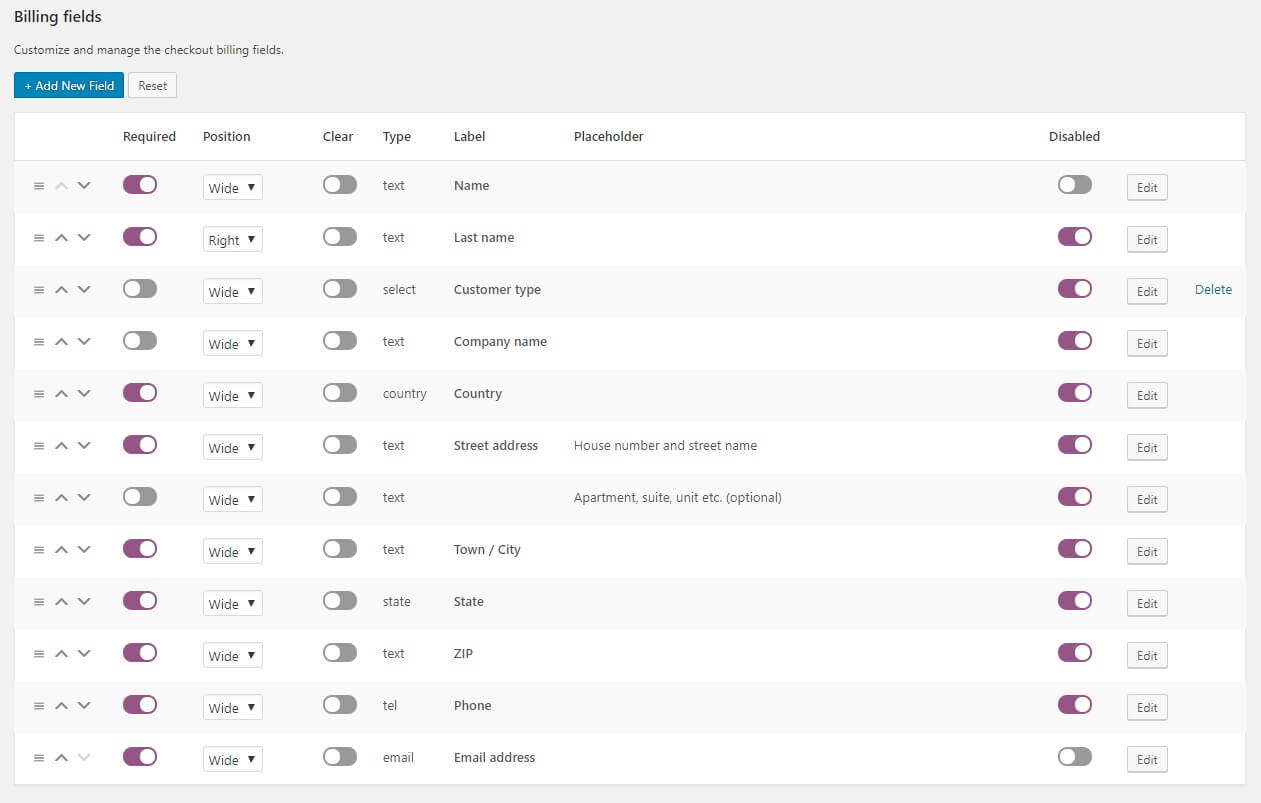
1. In your WordPress admin, go to WooCommerce > Checkout > Billing.
2. Press the Add New Field button.
3. Make sure you complete the field label and placeholder.
4. Select the field type.
5. Click Save Changes.
You can select between any of the avialable field types. Once you select the field type, the modal panel will be reloaded to display the field type settings.
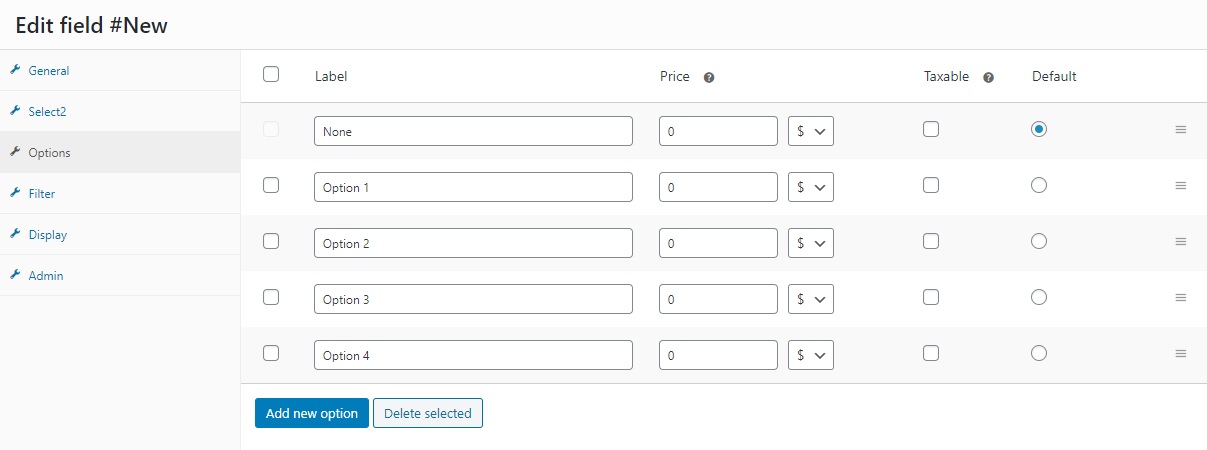
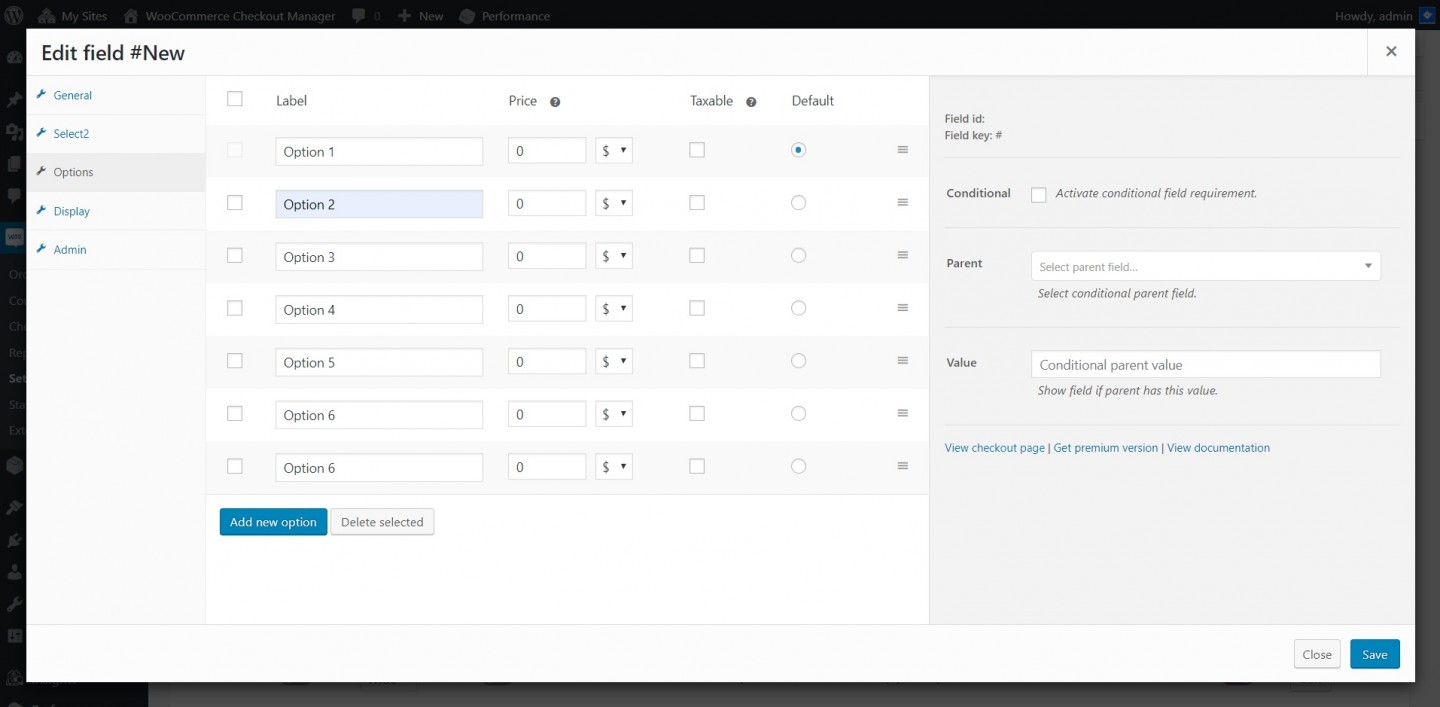
5.2. Add new field options
To select radio multiselect and multicheckbox fields, you have to include the field options.
1. First, select the field type (select, radio, multiselect, multicheckbox).
2. Then, go to the Options tab.
3. Press Add new option.
5.3. Remove fields from checkout page
You can remove a field from the checkout and My account page by clicking the disable toggle button.
5.5. Remove field from my account page
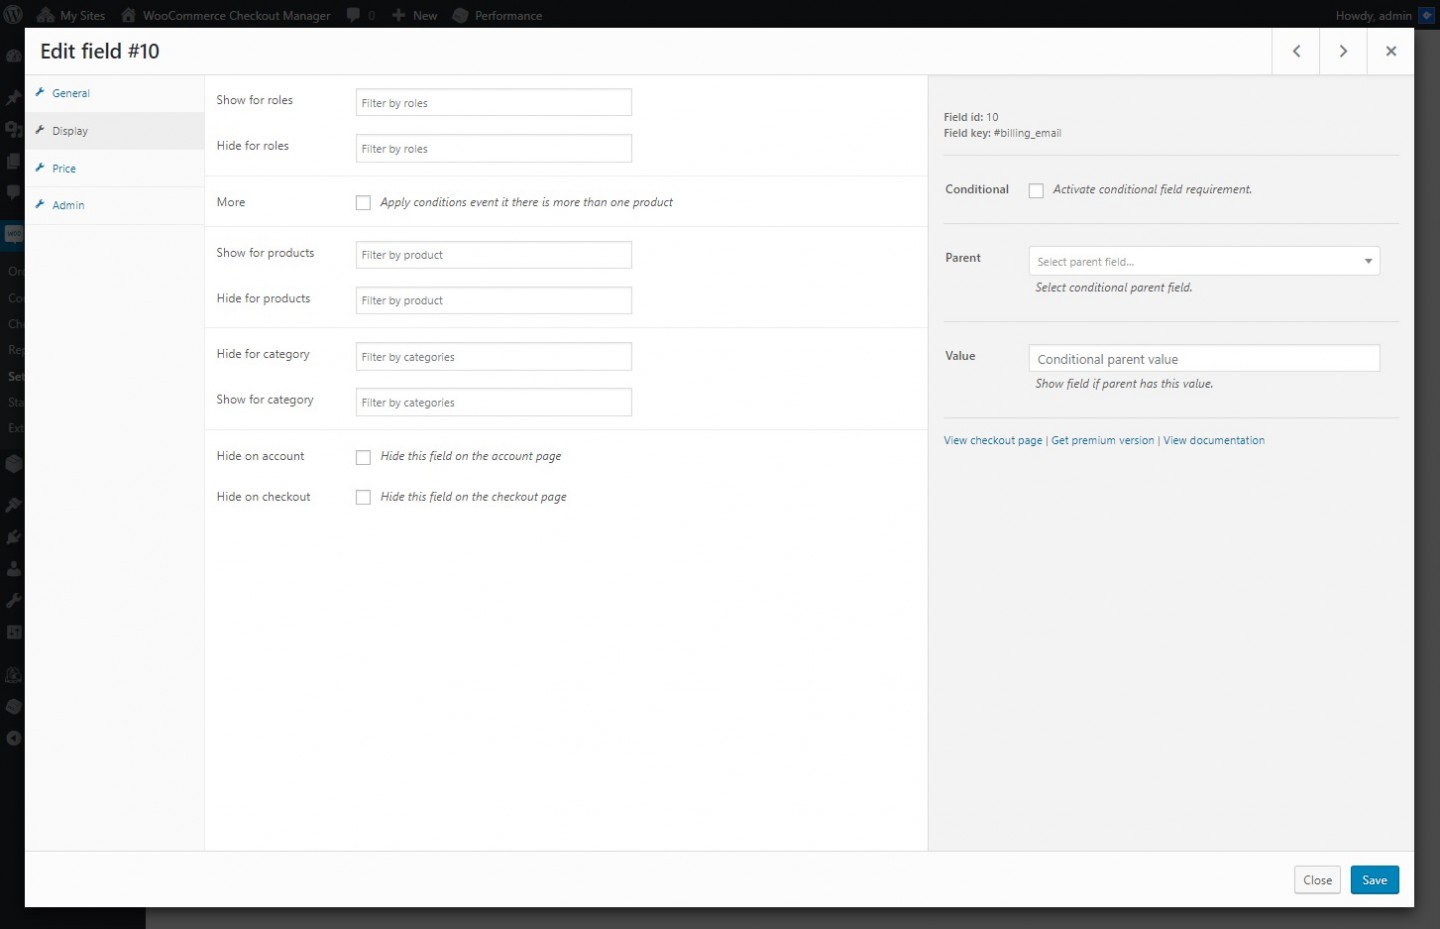
If you want to display a field only the on checkout, you can remove it from the My account page.
1. Go to the Display tab.
2. Click Hide on account checkbox.
5.4. Remove fields for specific products
You can also hide or display the field for specific products or categories.
1. Go to the Display tab.
2. Click on the show or hide for products and search by product name.
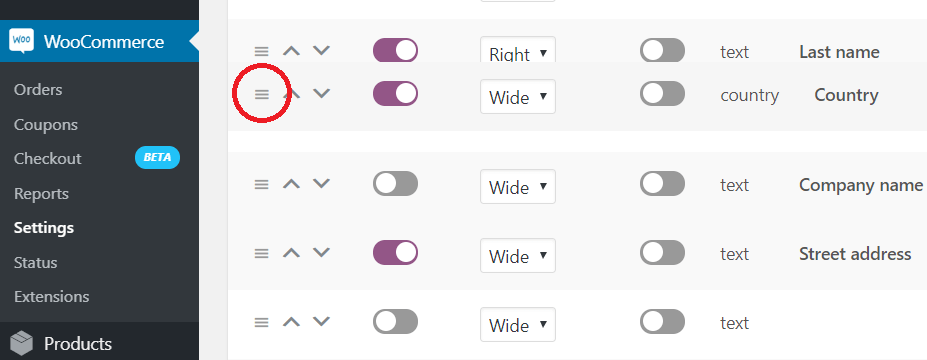
5.5. Reorder fields position
You can also change the default order of the core and custom checkout fields.
1. Click on the left side of the field you want to move.
2. With the mouse button pressed, drag and drop the field to the desired position.
3. Click Save changes button at the bottom of the page.
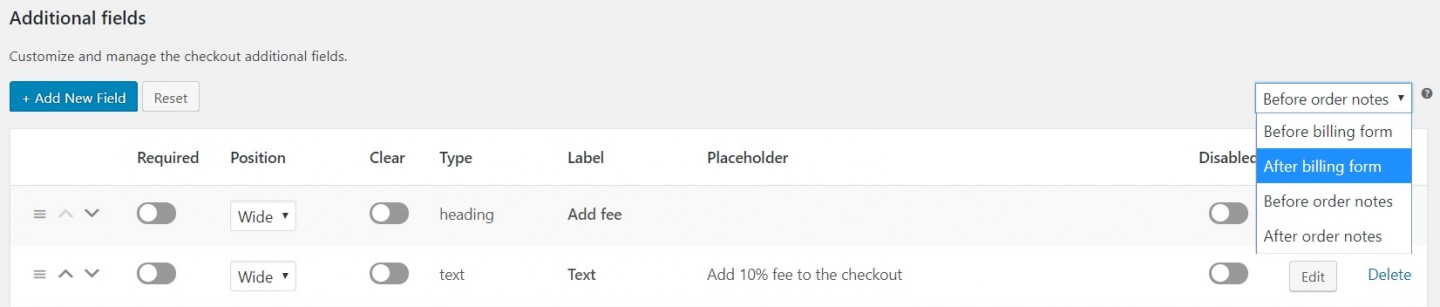
5.6. Change additional fields position
1. In your WP dashboard, go to WooCommerce > Checkout > Additional tab.
2. Then go to Select at the right top corner.
3. Select the position.
4. Press Save changes.
5.7. Create a select field with empty default
1. In your WordPress dashboard, go to WooCommerce > Checkout > Billing/Shipping/Advanced.
2. Press the Add New Field button.
3. Make sure you complete the field label and placeholder.
4. Select the Select field type.
5. Go to Options.
6. Create an option with None name and select it as default.