How to Fix Facebook and Instagram oEmbed Issue
Displaying Facebook and Instagram posts on a WordPress website is something most bloggers do. Unfortunately, if you need to do the same with your WordPress installation, you might get some errors. But we are here to help! This article will teach you how to correctly fix Facebook and Instagram oEmbed issues.
What Are oEmbed Issues and How Do They Work in WordPress?
Let’s assume you need to embed a video, a Facebook post, or an Instagram gallery. Then, you might need to rely on HTML for the structure or PHP to add more functions to the section, and CSS for designing the area. However, if you are not a web developer and do not know how to use codes to embed things into the WordPress installation, oEmbed is a perfect way.
WordPress uses this function to import content through a third-party website’s URL. In that case, there is no need to write a single line of code for displaying a photo or video from any social media website. As an example, let’s take the example of a Twitter embed.
Inside the Gutenberg editor, you will see the Embed block. You can use that to insert a URL and embed a post inside the editor.
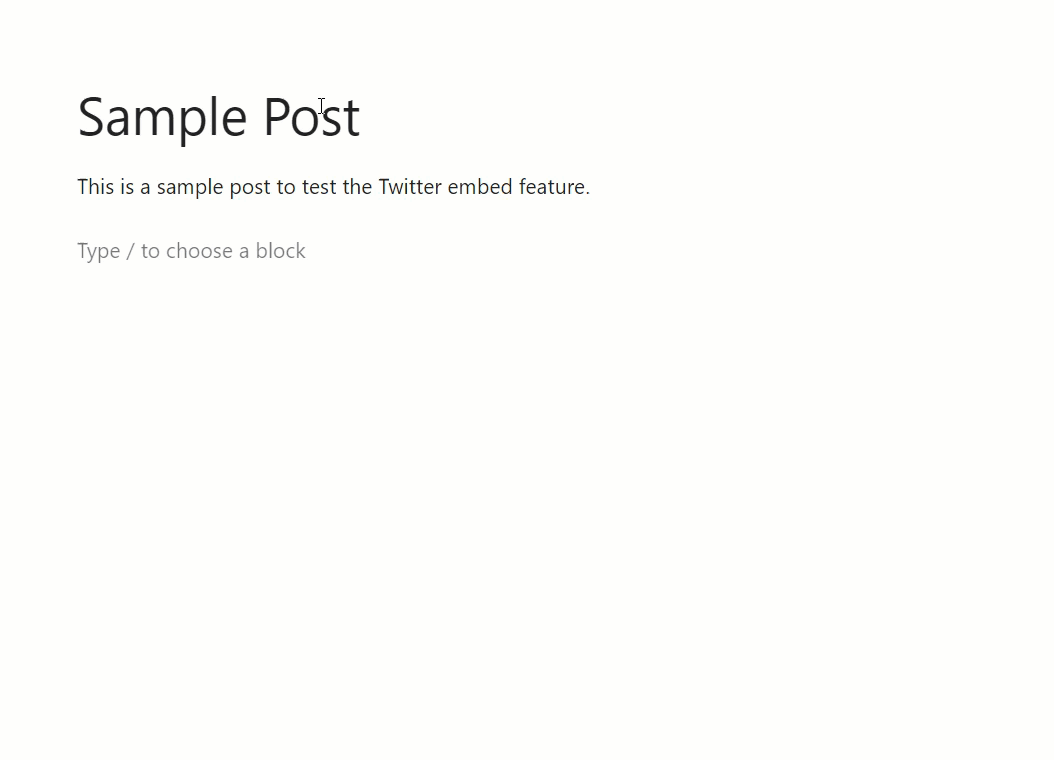
This way, you can display content from third-party websites inside your WordPress installation. Likewise, you can fetch content from these sites and display it on your WordPress installation.
- YouTube
- Giphy
- TikTok
- WordPress plugins repository
- SoundCloud
and so on.
Now, you know about oEmbeds. Next, let’s see why Facebook and Instagram oEmbed stopped working.
Why Did Facebook and Instagram oEmbed Stop Working?
Facebook decided to shut down its old oEmbed endpoints a few months back. In their Facebook for developers article, they stated this:
By October 24, 2020, developers must leverage a user, app, or client token when querying Graph API for user profile pictures via UID, FB OEmbeds and IG OEmbeds. Developers should provide a user or app token when querying for profile pictures via a UID or ASID, though client tokens are supported as well. Please visit our changelog for User Picture, Facebook OEmbed and Instagram OEmbed for details on how to start calling these Graph API endpoints today.
These days, if you need to display some oEmbeds from Facebook or Instagram inside your WordPress website, multiple tasks are required. First, you have to use a Facebook developer account. Then register a Facebook app and generate an app ID.
Once you have done that, enable the oEmbed inside the app. After that, register the client token and app token. Finally, mark the Facebook app as live. If you have done these tasks, you can still display embeds through Gutenberg or Classic Editor.
But as you thought, this is not beginner-friendly, and it will take some time to complete. So the best way to fix the issue is by using a plugin. And we have got the best tools to help you.
How to Fix Facebook and Instagram oEmbed Issue
The best way to fix the Facebook and Instagram oEmbed issue is by using a plugin. Here, we have got four different plugins that you can use to fix the issues:
- oEmbed Plus
- Smash Balloon Facebook
- Smash Balloon Instagram
- Jetpack
Below, we will cover each method using all of these four plugins separately. So, you can choose your preferred option from there.
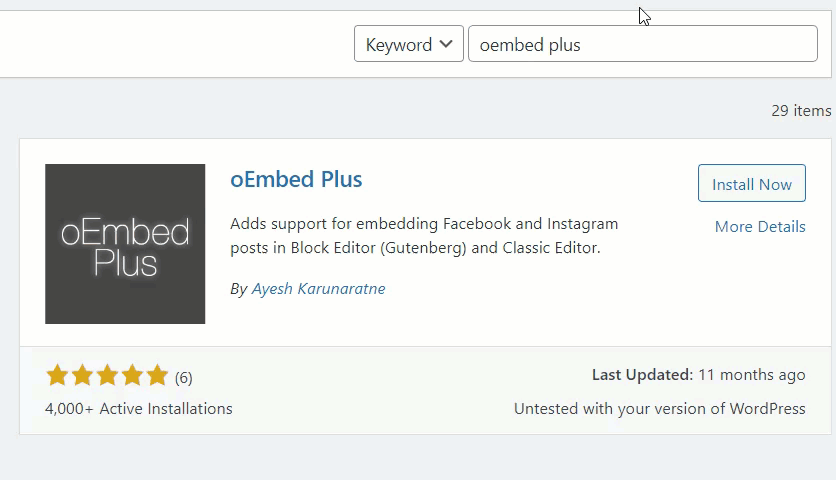
1. oEmbed Plus
If you are looking for a simple solution to fix Facebook and Instagram issues, we have the oEmbed Plus plugin. It is a free plugin that is available on the official WordPress plugins repository.
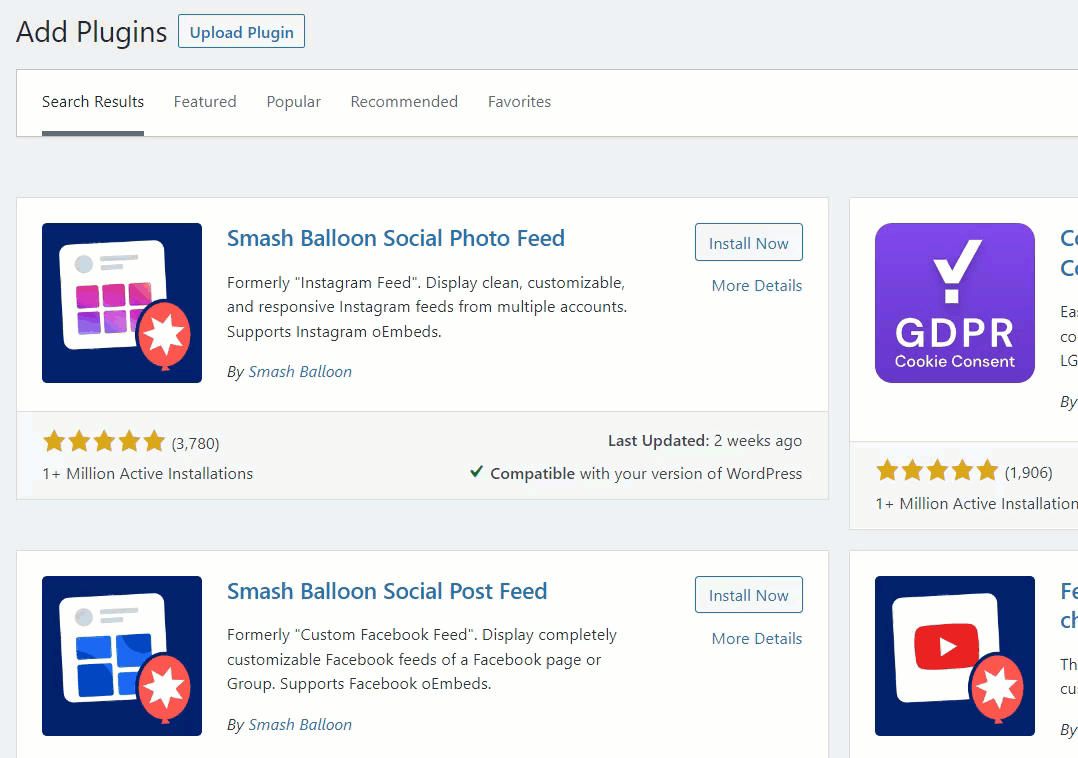
The first thing you have to do is install and activate the plugin on your WordPress installation. Just go to Plugins > Add New from your WordPress dashboard and search for the plugin. Then, click on Install Now to install the plugin and Activate it after the installation is complete.
The plugin comes with very minimal settings. So, you don’t have to make any further changes after you activate the plugin. The tool will automatically turn your usual Facebook and Instagram links into embeds within no time.
Since most of the work is done by the plugin itself, it does save a lot of your time. This is the perfect solution for you if you want to get the oEmbod issue fixed promptly.
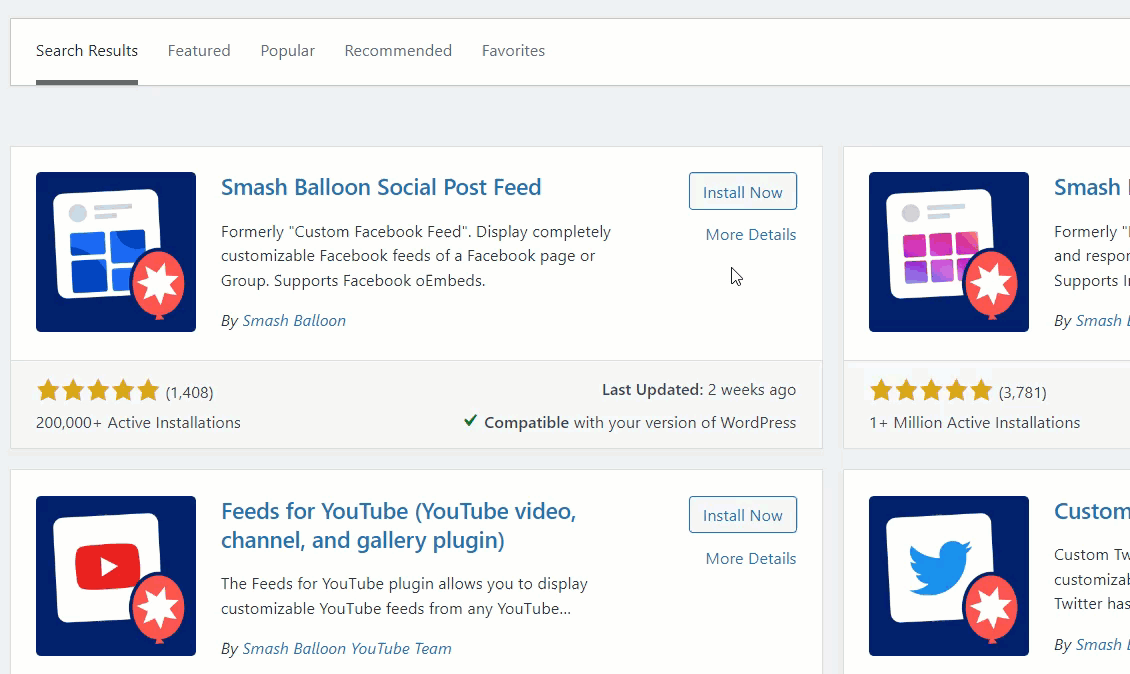
2. Smash Balloon Facebook
There are a number of dedicated plugins if you want to specifically fix just the Facebook oEmbed issue as well. One of such plugins is Smash Balloon Social Post Feed (formerly known as Smash Balloon Facebook). It allows you to integrate your website with Facebook and also helps in solving various issues related to it.
But to start using it, you need to install and activate the plugin first.
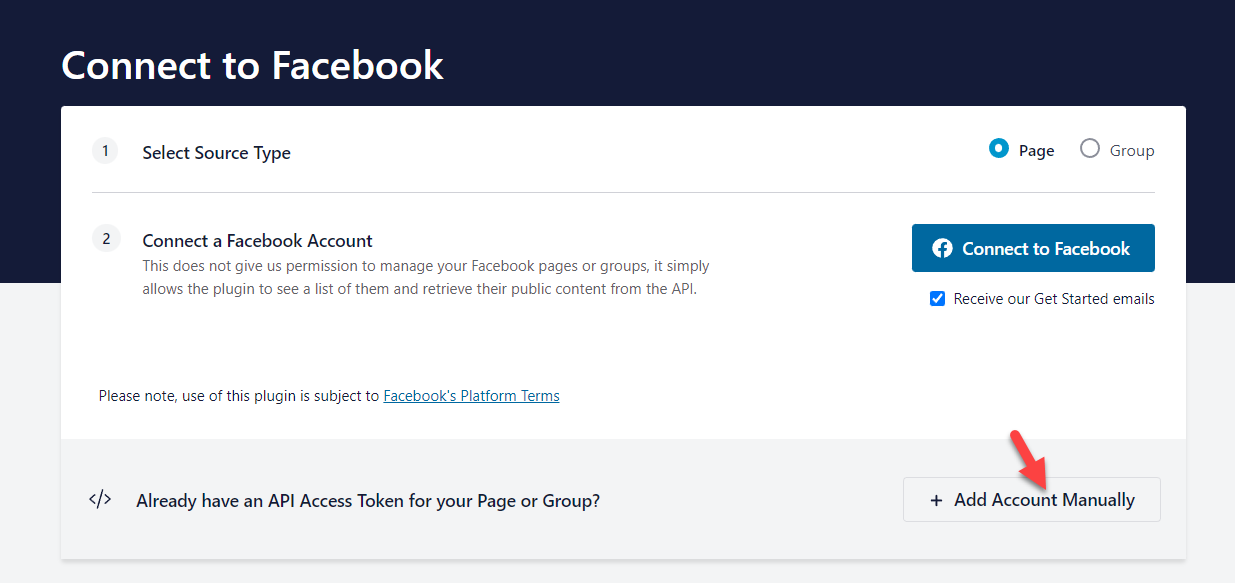
After the plugin is activated, you have to go to Facebook Feed > Settings from your WordPress dashboard. Under sources, you can add your own Facebook page or group.
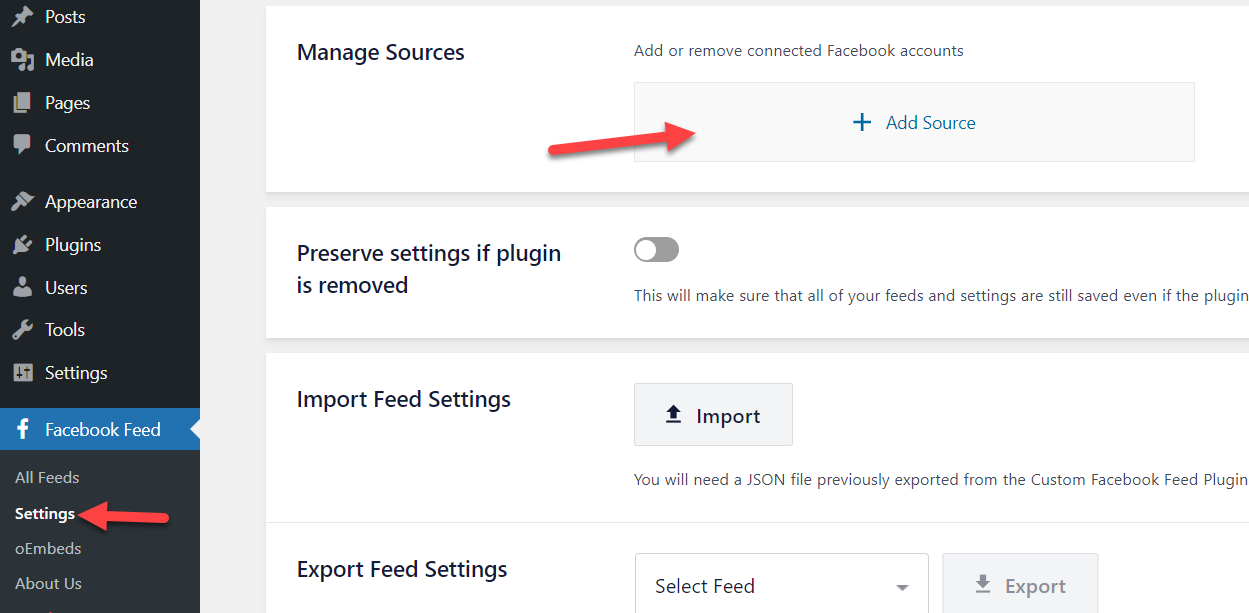
If you have generated an API key manually, you can choose to do so to add an account to the website. Or else, you can connect to Facebook directly by signing in through Smash Balloon.
After connecting the page/group, you have to go to the Facebook Feed > oEmbeds and enable it.

This way, you can fix Facebook oEmbed issues using the plugin from Smash Balloon.
3. Smash Balloon Instagram
Similar to the Facebook oEmbed issues, you can also use a specific plugin to solve these issues for Instagram in specific. If so, the Smash Balloon Social Photo Feed plugin can be the perfect tool for you.
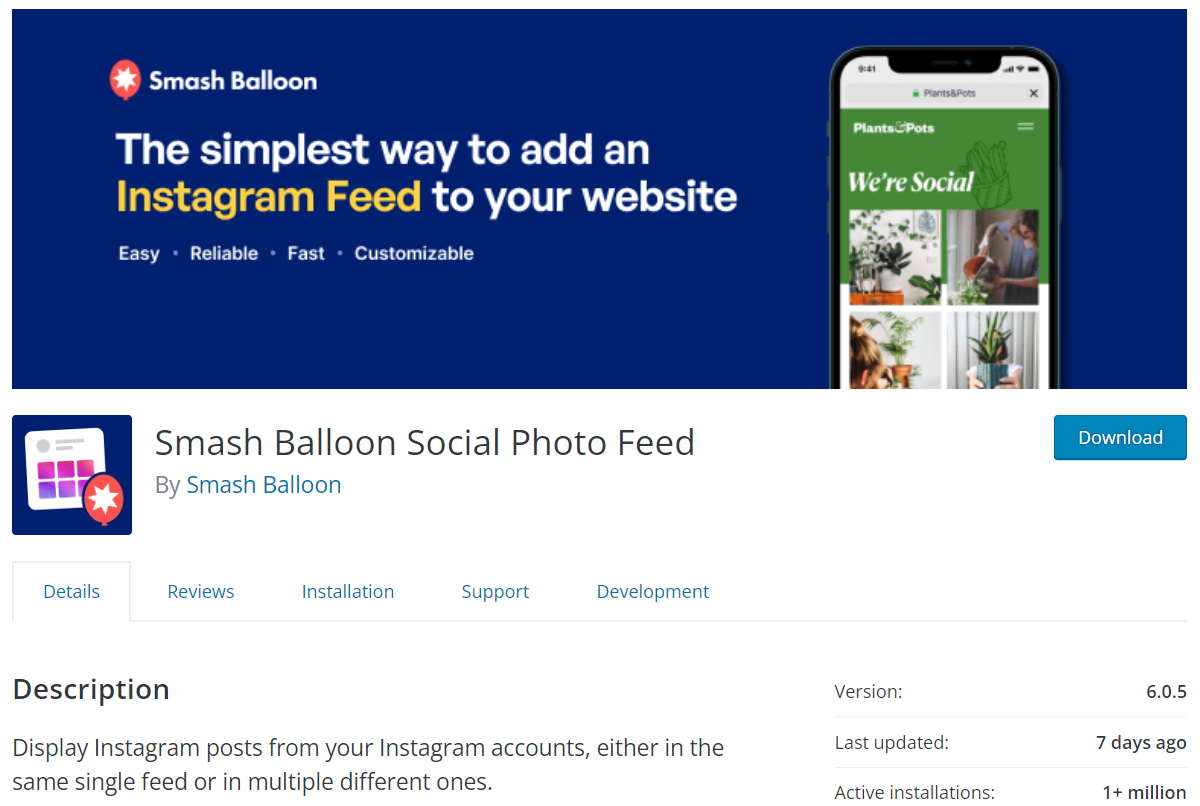
It is another WordPress plugin created by the same developer but for Instagram users. The plugin is free to use and comes with a simple setup. So let’s look at how to use the Smash Balloon Instagram plugin to fix Instagram API issues.
The first thing you need to do is, install and activate Smash Balloon on your WordPress installation.
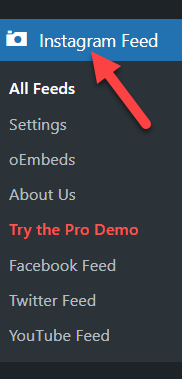
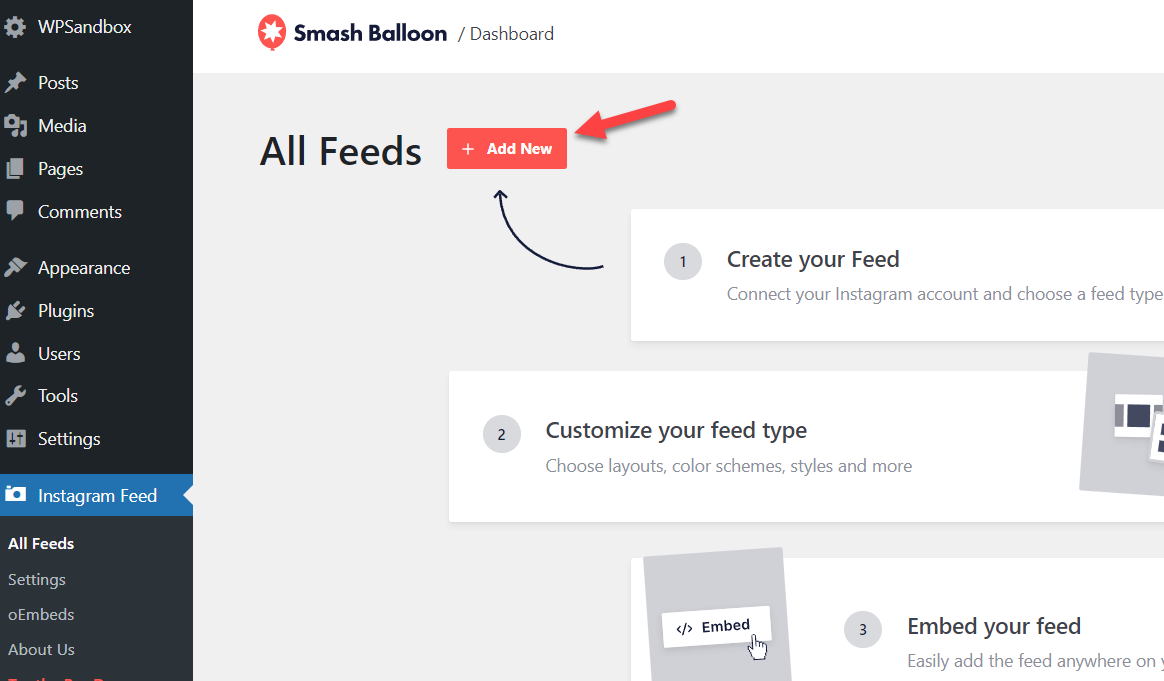
Once you have activated the plugin, you can see the plugin’s settings on the left-hand side of the WordPress admin panel.
If you check the settings, you will not have a feed by default. So what you need to do is create a new one.
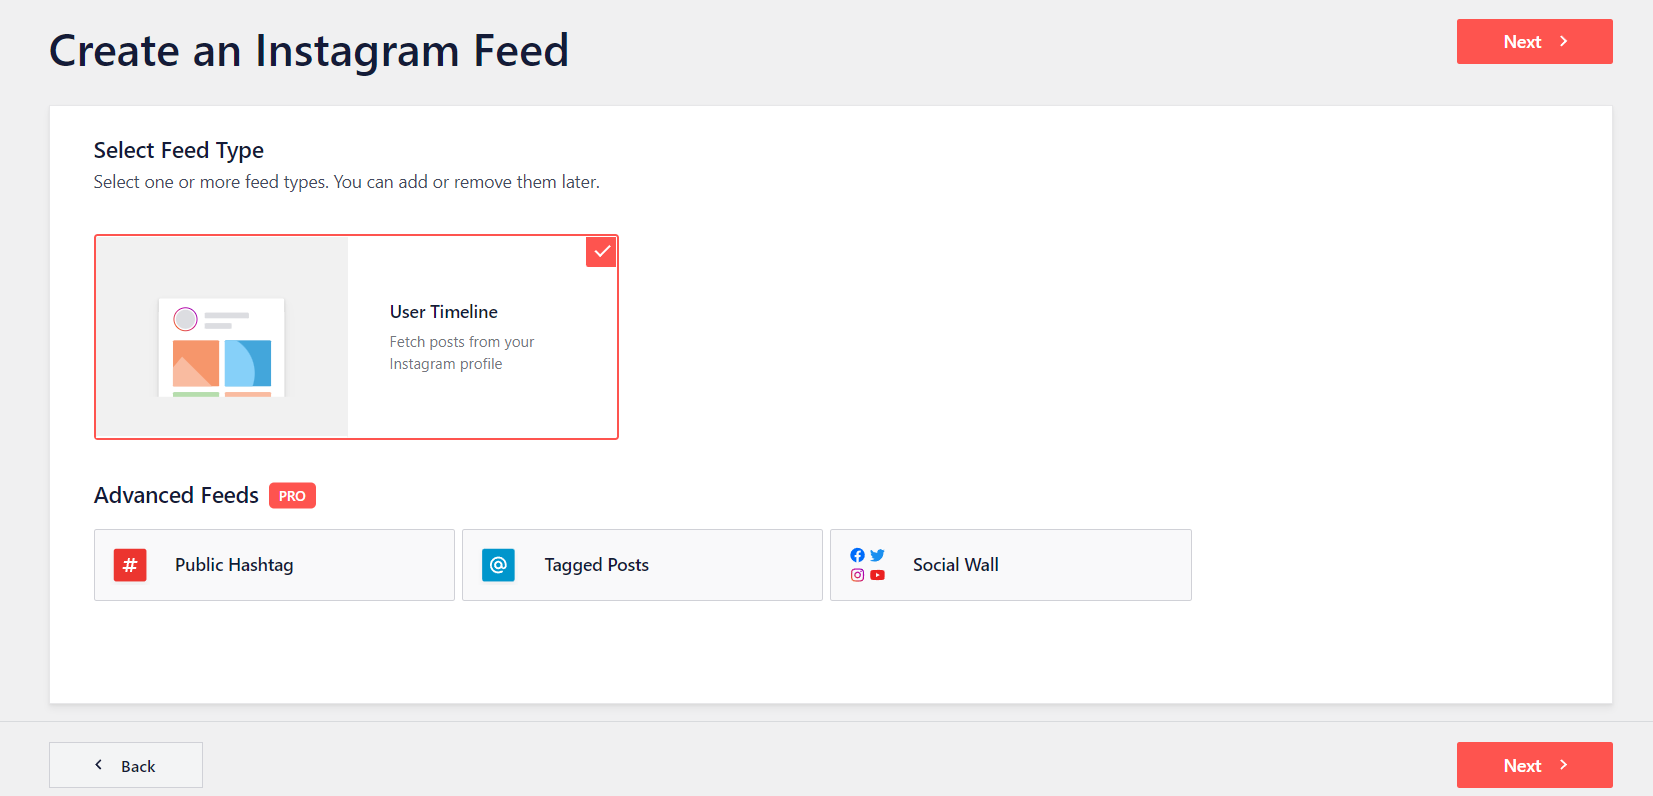
Next, you have to choose a feed type.
As of now, the free version plugin only allows user timeline as the feed type. On the other hand, if you use the premium version of the Smash Balloon Instagram feed plugin on your WordPress installation, you will get additional feed types like a public hashtag, tagged posts, and social wall. So here, we will be picking User Timeline.
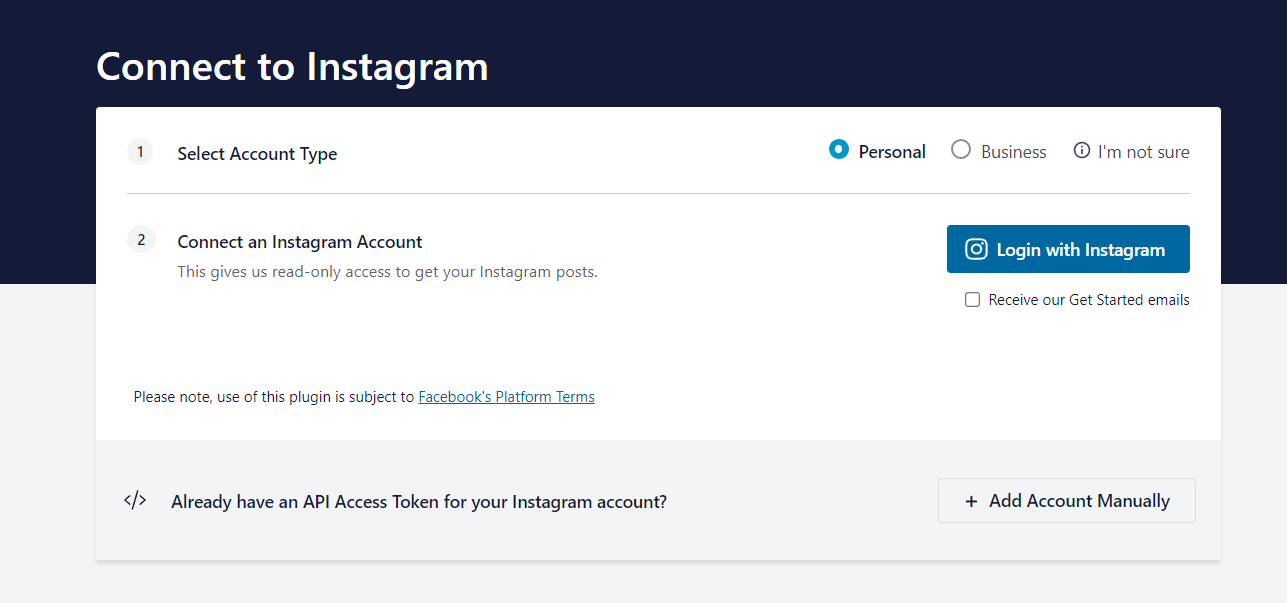
The plugin will ask you to connect a source on the next page.

Now, the plugin will redirect you to the official website. From there, you can connect your Instagram account. You can choose your account type (personal/business) and establish a connection. On the other hand, you can enter it if you have already generated an API key.
After connecting your Instagram account, go to the oEmbeds section in the plugin settings.
You will see an option to enable oEmbeds serving through Instagram Feed by Smash Balloon.

You can directly paste the Instagram links inside your blog posts, and the Smash Balloon plugin will take care of the embed.
That’s it. This way, you can fix your Instagram API issue. Then, you can leave the settings like that and have an uninterrupted Instagram-WordPress connection.
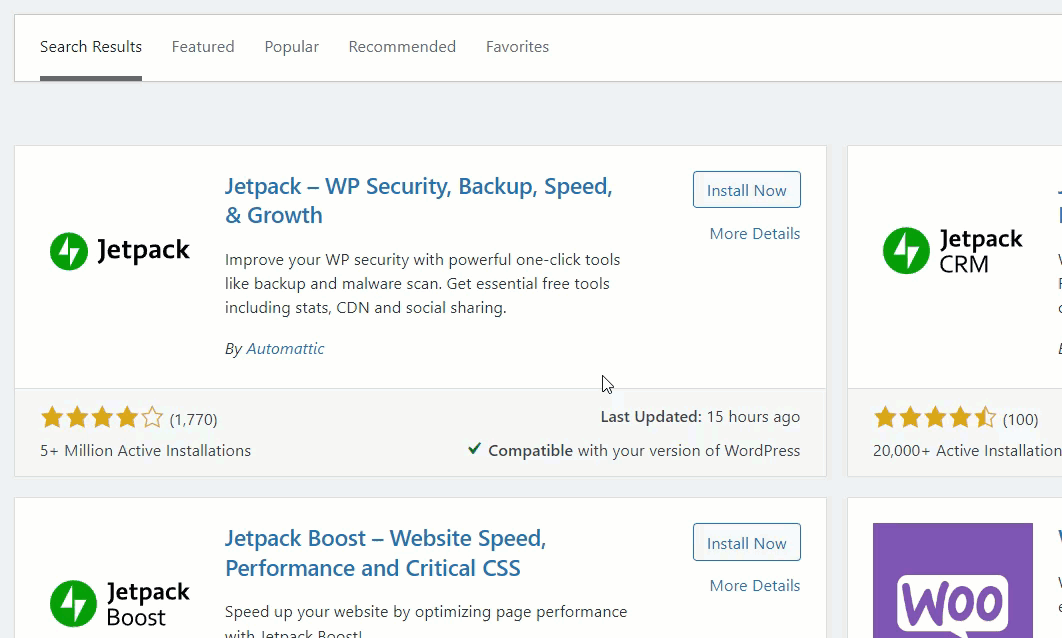
4. Jetpack
If you have been working with WordPress for a while, you probably know Jetpack. Jetpack is an excellent tool to enhance your WordPress website’s features. We even covered a review of the tool with the main features, pricing, and so on. In addition, Jetpack comes with a plug-and-play feature for oEmbeds. Here, we will show you how to install and activate Jetpack.
Once you have logged in to your WordPress installation, go to the add new plugins section. There, search for Jetpack, install, and activate.
Once you have activated the plugin, you need to complete the authentication. Then, by connecting your WordPress.com account with the plugin, you can start using it and enable/disable the features.
From now on, Jetpack will take care of the oEmbed. So you can use this on both Gutenberg and Classic Editor.
This way, you can use Jetpack to manage your oEmbed.
How to Clear oEmbed Cache In WordPress?
When you embed a YouTube video, Twitter tweer, or anything similar, your web server will generate a cached copy of the content and store them locally. This will help your website visitors see the content almost instantly after the page loads and helps you with an optimized speed and performance.
But storing too many oEmbed in the web server is not suitable for the website. Another thing to keep in mind is when the YouTube video or Tweet gets a modification/update; the existing cached data won’t be up to date. So we have to clear the oEmbed cache in WordPress to fix this issue.
As of right now, there are no caching plugins available to clear the oEmbed cache. So, we have to use the web server’s control panel to do the task. Here, we will give you a summary of how to clear the cache.
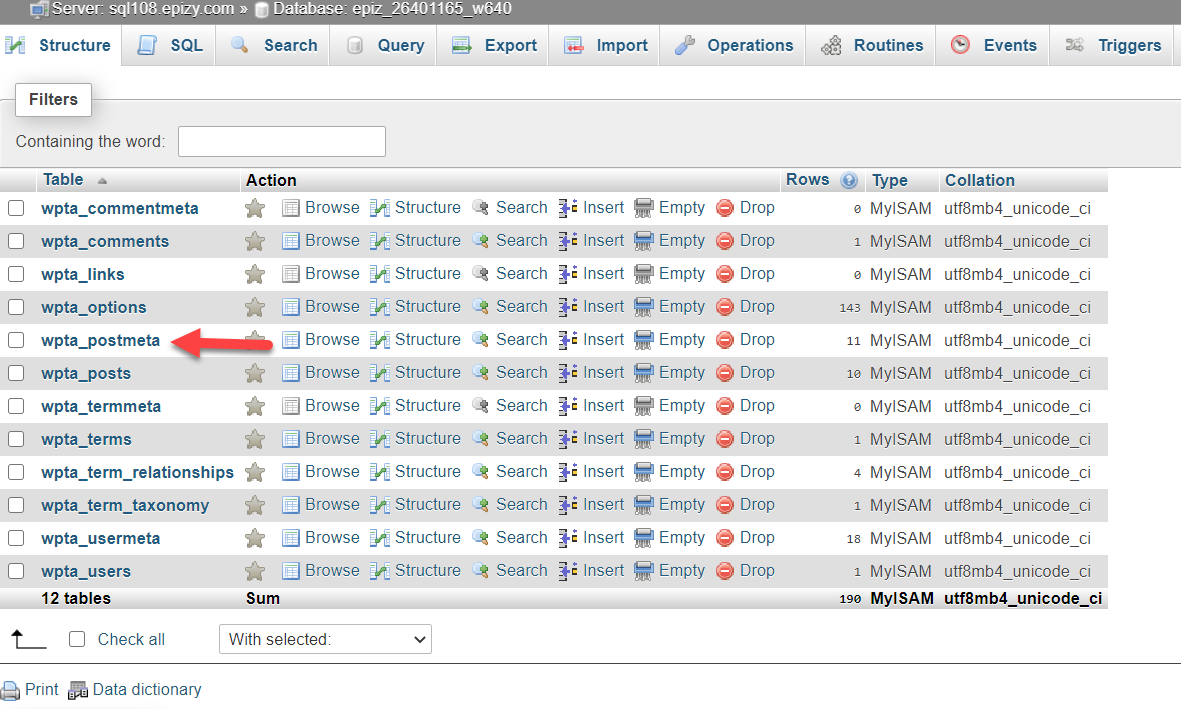
The very first thing you need to do is open the cPanel. For example, when you use a Linux-based web hosting provider such as shared hosting, you will see a cPanel similar to this—open PHPMyAdmin.

On the other hand, if you are a customer of any premium managed WordPress hosting providers like Kinsta or WP Engine, you will see the PHPMyAdmin button right inside your account dashboard.

In the PHPMyAdmin section, go to postmeta.
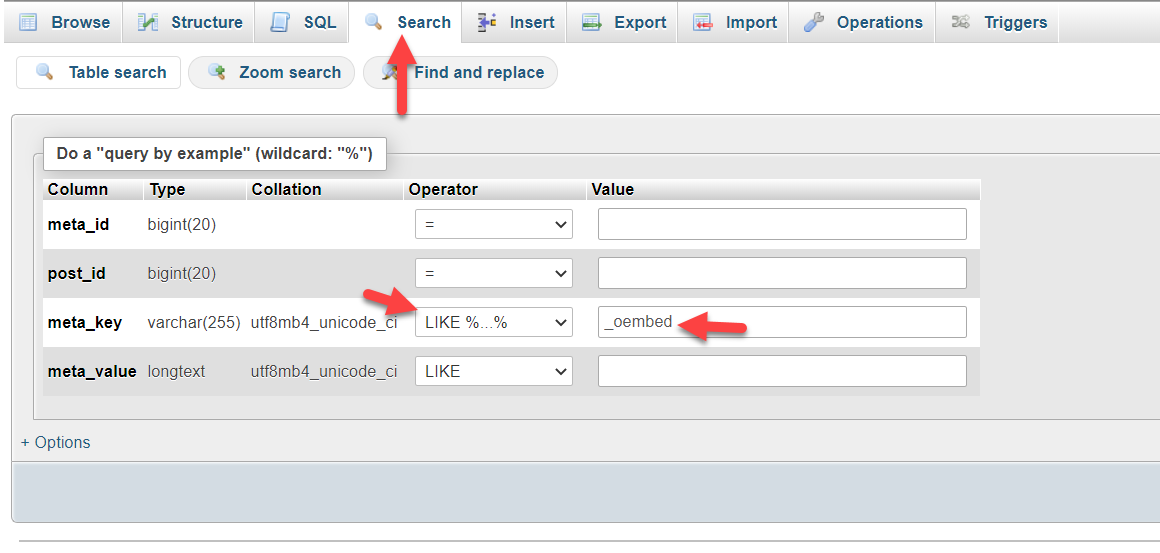
After that, open the search feature there. You should set the meta_key as LIKE %…% from the dropdown. And in the Value field, set the value as _oembed. After that, click the Go button.
You will see all the oEmbed cache stored on your database on the next screen. You can select them all and delete them from the entire database.
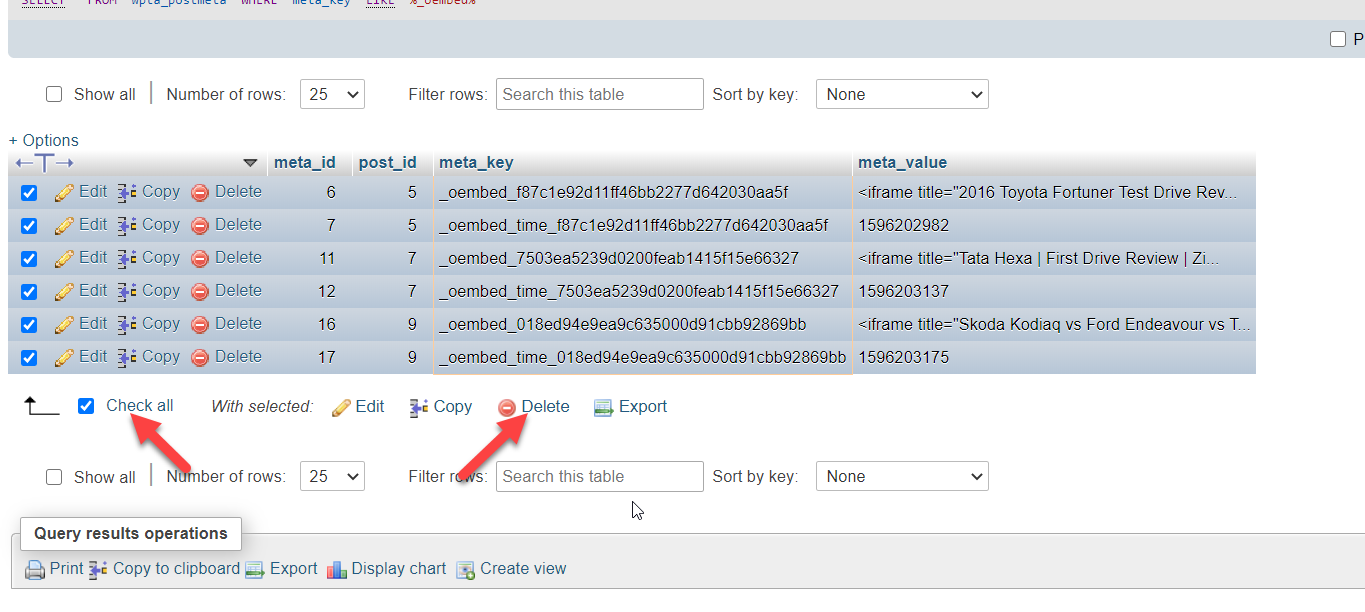
That’s it. This way, you can fetch the most updated content from the sources.
If you need a dedicated article, feel free to check this one.
Conclusion
So this is how you can fix Facebook and Instagram oEmbed issue. As you can see above, there are mainly four methods available. They are:
- oEmbed Plus
- Smash Balloon Facebook
- Smash Balloon Instagram
- Jetpack
When you need a simple solution to fix both Facebook and Instagram issues, you should use the oEmbed plus WordPress plugin. It comes with no additional configurations, and you can solve the problem right away after activating the plugin.
Next, you can use the Smash Balloon Facebook and Smash Balloon Instagram plugins to fix the Facebook issue and Instagram issues individually. On the other hand, if you are already using JetPack to protect your website from spam or attacks, you do not need to use additional plugins. Jetpack got your back, and you can enable/disable the features according to your interest.
You can check out our blog archive for more relevant articles. Meanwhile, here are some of our articles that you might find interesting:
