
How to Integrate Google Maps with WordPress?
If you run a physical store, wouldn’t it be great if you could add Google Maps to your site? In this guide, you will learn how to integrate Google Maps with WordPress and make the most of your website.
In such an interconnected world, Google has been one of the largest empires to make its presence known everywhere. Among its multiple utilities that we use every day such as Gmail, Google Drive, or Google Search, Google Maps has earned its reputation as one of the most useful web mapping services of all time. Launched in 2005, this navigation tool developed by Google offers users various choices, including satellite images, aerial photography, street maps, and real-time traffic conditions. It’s no wonder that Google Maps is used by over 1 billion world citizens monthly in 2020.
Knowing how great the service is and how many people use it daily, adding Google Maps to your WordPress site can have countless benefits for your business.
Why add Google Maps to your site?
Even though it may seem like a no-brainer, before doing anything to your beloved website, let’s better understand the benefits of integrating Google Maps with WordPress.
- Data doesn’t lie: Of all the people who use navigation apps on smartphones, 67% use Google Maps. The other 33% is split among 3 other applications with each accounting for just a small percentage. According to the survey, the main reason why people choose Google Maps as their preferred navigation app is clear directions, which accounts for 25%.
- Boost local SEO: Embedding Google Maps on your site gives you an advantage in terms of SEO. Simply put, if your flower shop’s website, for example, has a map, people searching for the keyword “flower” might see your website on the search results.
- Speed: No other company can match the speed of Google services. This tech giant gives great power to all its utilities, including Google Maps. So, if you base your website’s map on Google, you will enjoy the fastest loading time any map could ever have.
Now that we better understand some of the main benefits of adding Google Maps to your WordPress site, let’s have a look at how to do it.
How to Connect Google Maps with WordPress
There are 3 main ways to connect Google Maps with WordPress:
- Embed Google Maps Manually
- Via Widgets
- With Plugins
Let’s have a look at what each one has to offer and when you should use one or the other.
1. Manually Embed Google Maps in WordPress
Ths is the easiest and fastest method to integrate Google Maps with WordPress. Even though it is quite easy to display the map on your website with this technique, you’ll need some basic HTML and Javascript knowledge to customize it to your liking. So, if you are confident with your HTML skills, or just need a basic map without any customizations, this method is a great option for you.
Step 1: Go to Google Maps
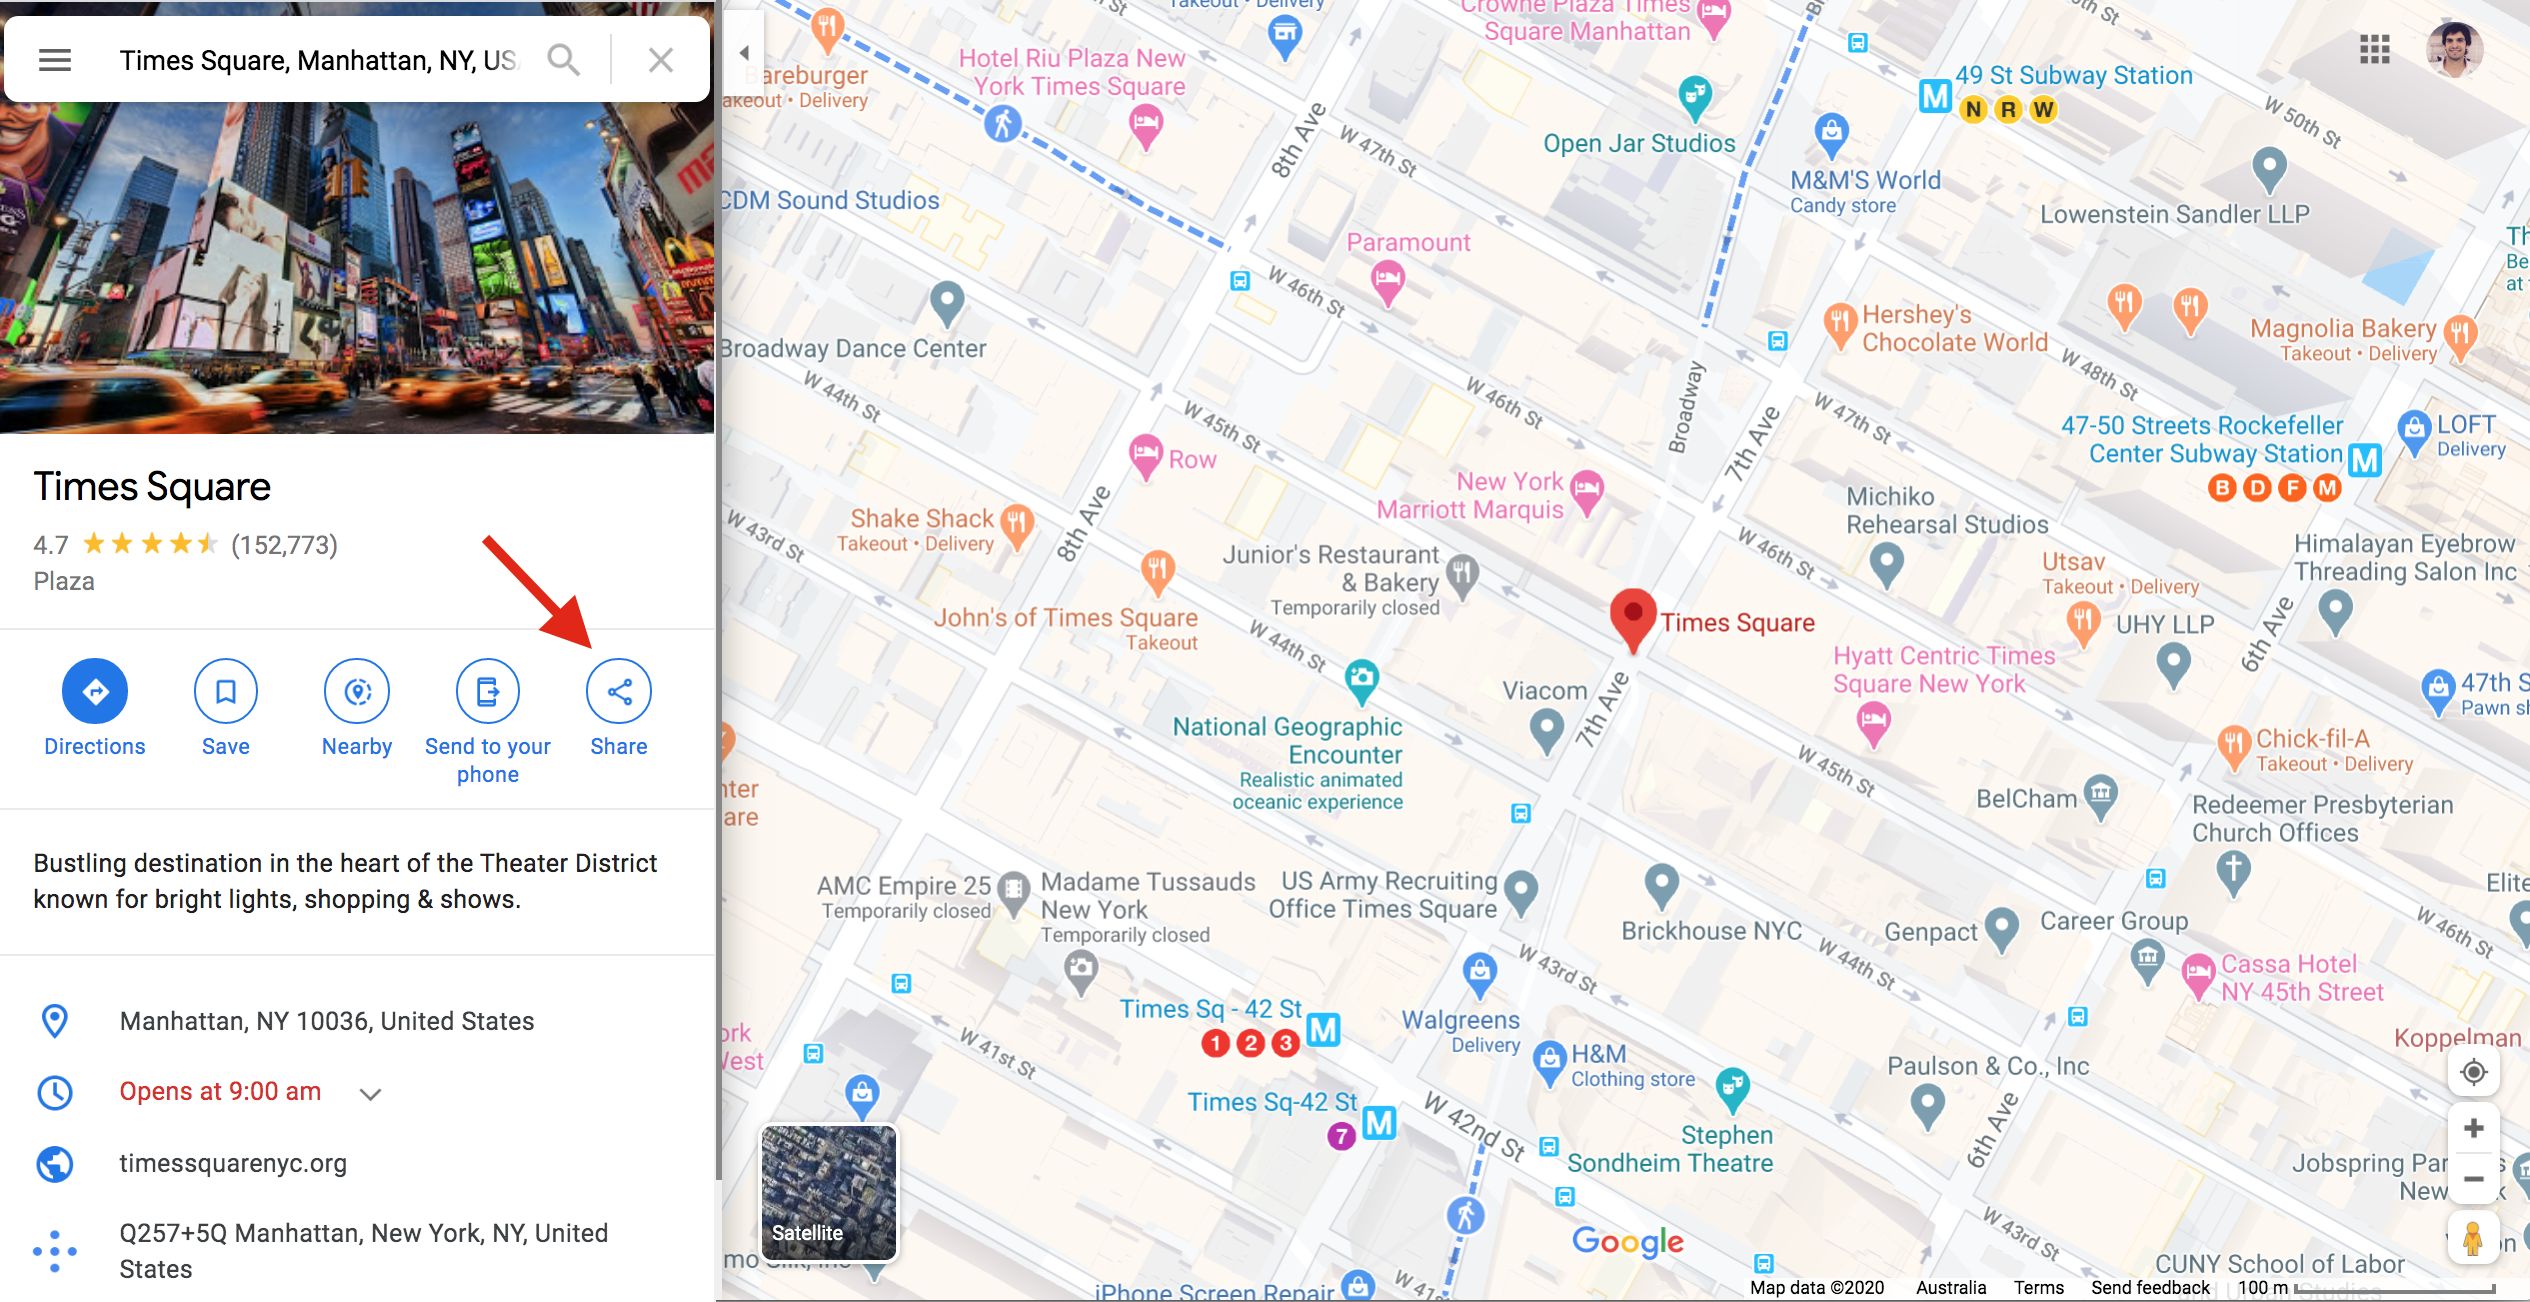
In this step, I will assume that Google Maps already has the location you want to embed. If you want to share your business location, for example, make sure you have submitted it to Google Maps. As you have it on Maps, simply type the location and choose the type of display you want (map, satellite, or terrain).
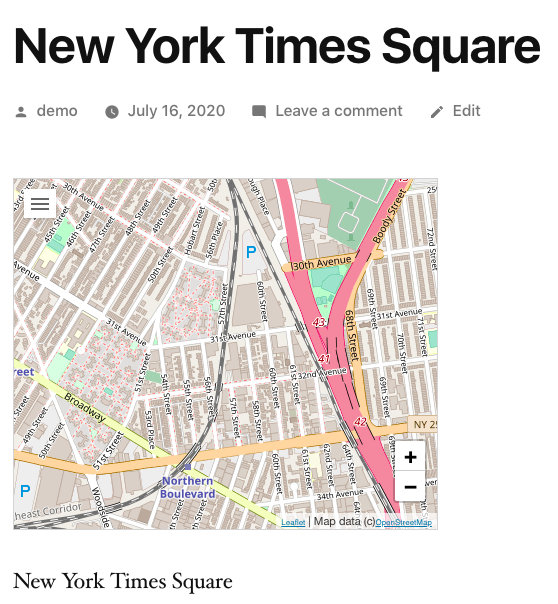
For example, if the location you want to display is Times Square in New York and you want to show the satellite view, all you need to do is click Share.
Step 2: Get the HTML code
After clicking Share, you will see a box with two tabs. Switch to the Embed a Map tab and copy the HTML code.
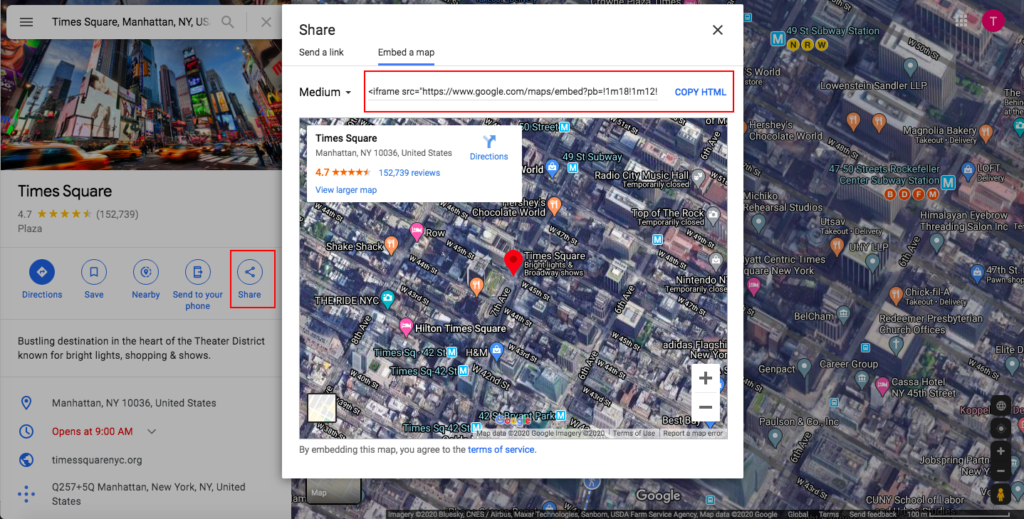
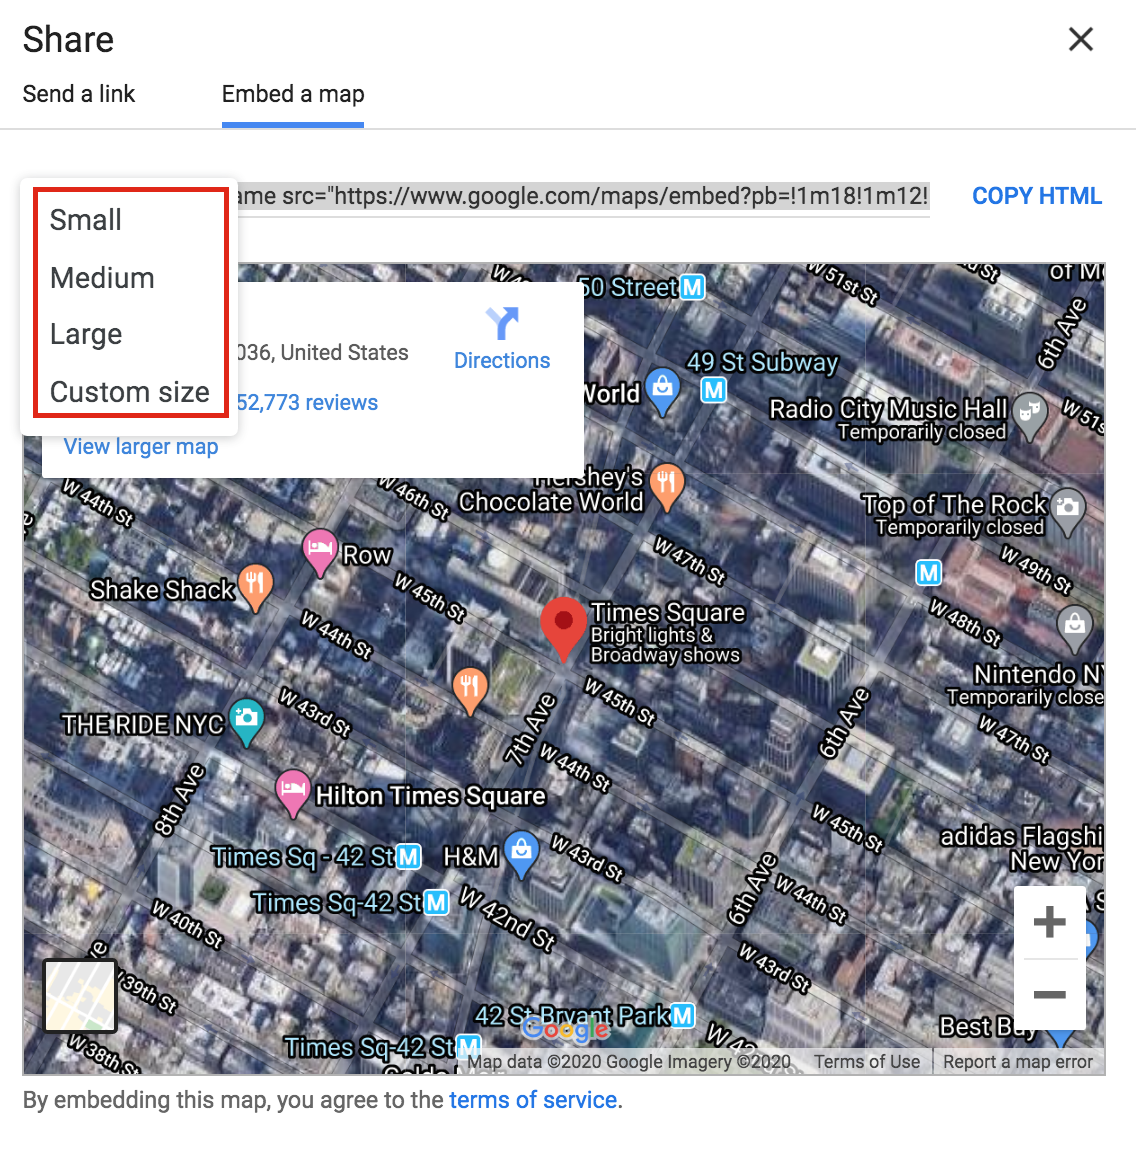
In this step, you can also choose the size of your map. As you can see from my example, the default setting is Medium size but you can change it to small, large, or even custom size.
Step 3: Embed the code to your page/post
Once you have the HTML code, go to your WordPress admin dashboard and decide where to embed the map. In our example, we will insert the code in a new post. So, we’ll click Add New and go to the customizer interface. Depending on your page builder, you might see a different-looking screen but the options will be similar. Here, we’ll name the post and insert the map into the available block.
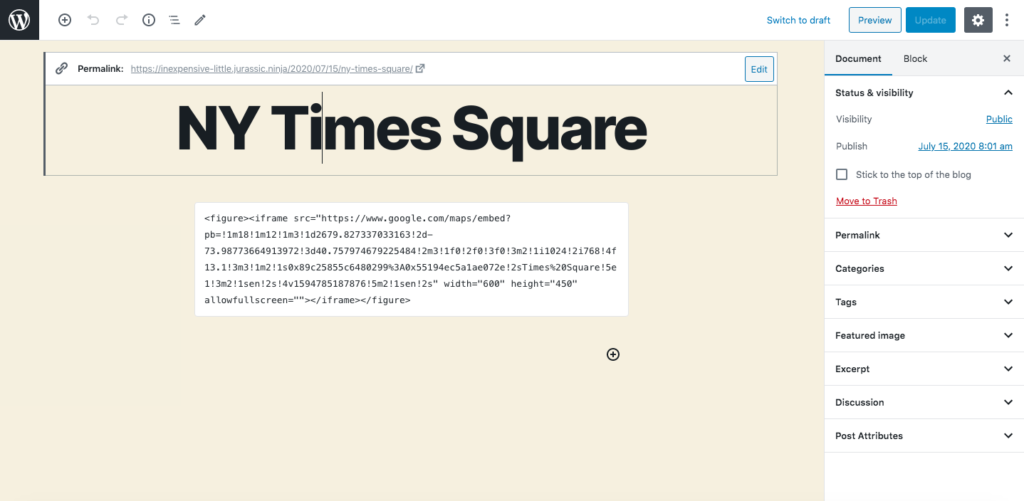
Then, we have to publish the post and what we get is this:
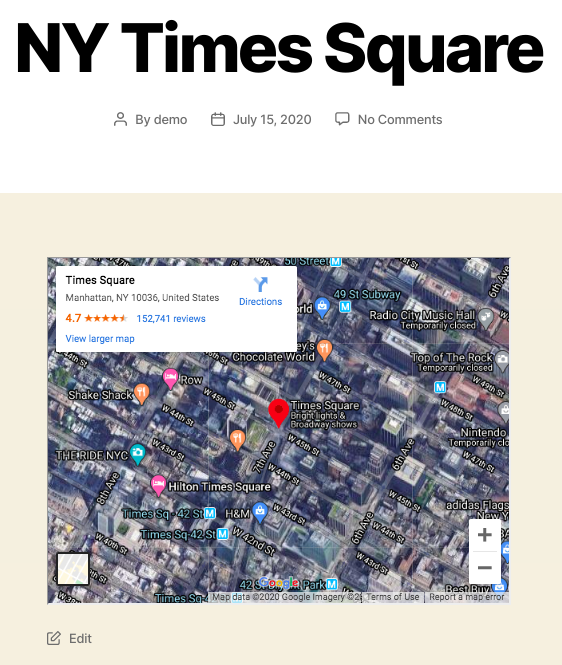
Short and sweet, isn’t it? This method is one of the most common ones because it’s very fast and beginner-friendly. You can also add some customizations to the map with a bit of coding but even if you don’t customize it, you get a good-looking and functional map on your site.
2. Embed Google Maps in WordPress with Widgets
Using widgets is another easy practice to display Google Maps on your WordPress website. Widgets are popular since they’re convenient and easy to use. However, please note that there’s also a downside. Widgets can only appear on specific areas of your site, usually footers and sidebars, depending on the theme you use. This also means that you can’t embed a map in your pages/posts.
So, if you want to display a map in the footer or sidebar, this is how to do it.
Step 1: Install and Activate Google Maps Widget Plugin
For this method, you’ll need to download and install Google Maps Widget plugin. After that, go to your WordPress admin dashboard > Plugins > Add New. Then, upload the .zip file you have just downloaded and activate it. If you’ve done that correctly, you will get a thank-you note from the plugin.
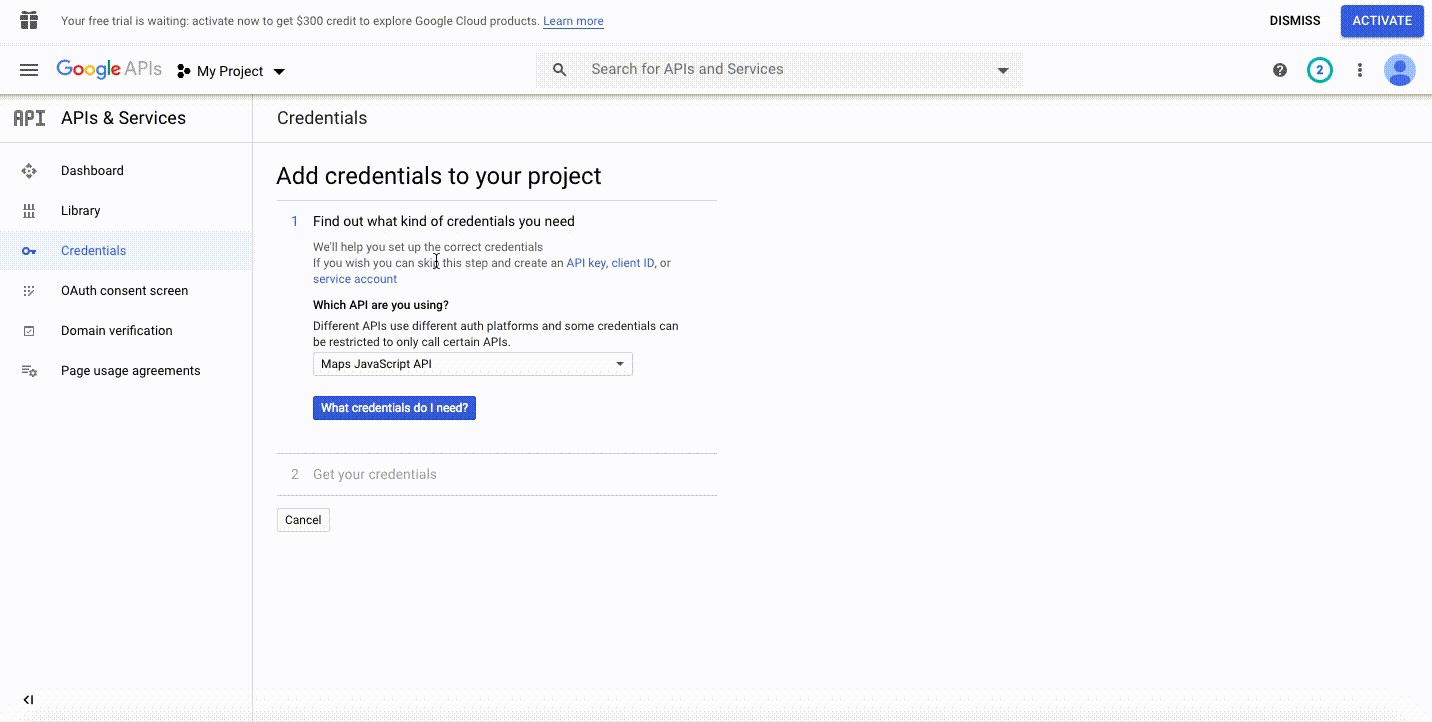
Step 2: Get API Key from Google Maps
An API key is essential for your map to function properly. So, visit the Google Developers Console and choose to Create a project from the dropdown. Then, click Agree and continue. After that, you will go to the Add credentials to your projects page. Click API key, give it a name and click Create.
Then, copy the API key you have just created.
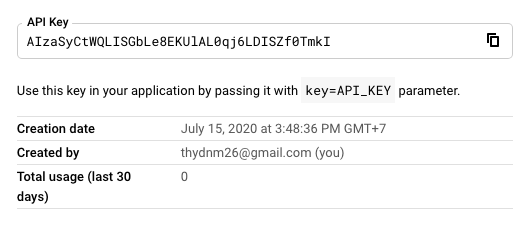
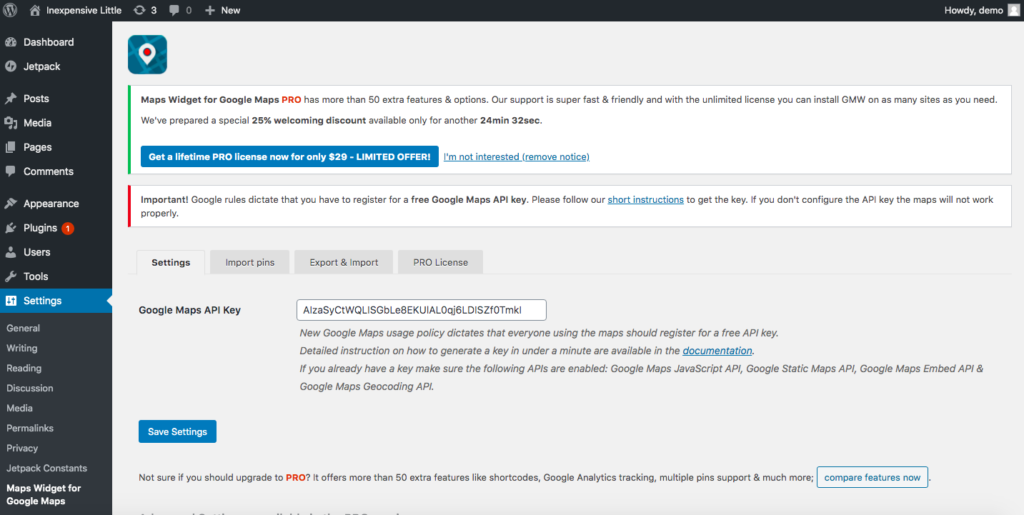
Now, go back to the settings page of Google Maps Widget plugin, and paste the API key and hit the Save button
Step 3: Display Google Maps
Then, go to Appearance > Widgets, find the Google Maps Widget, place it where you want, and click Add Widget.
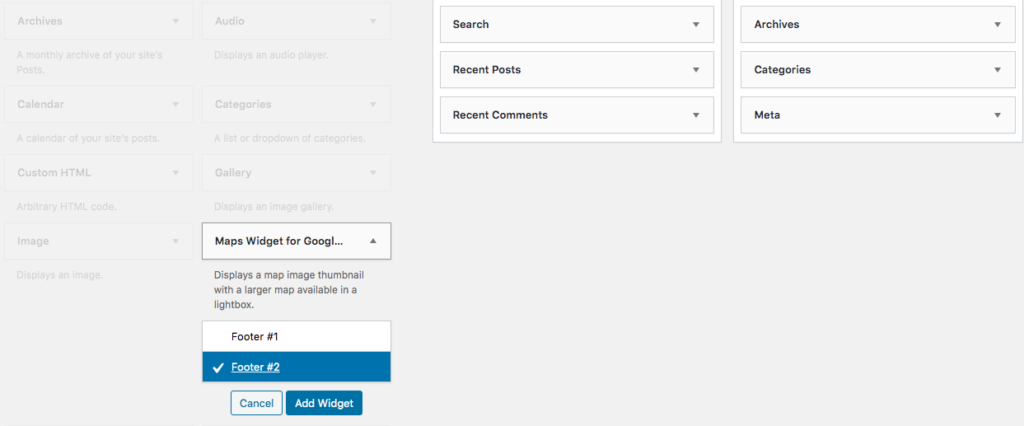
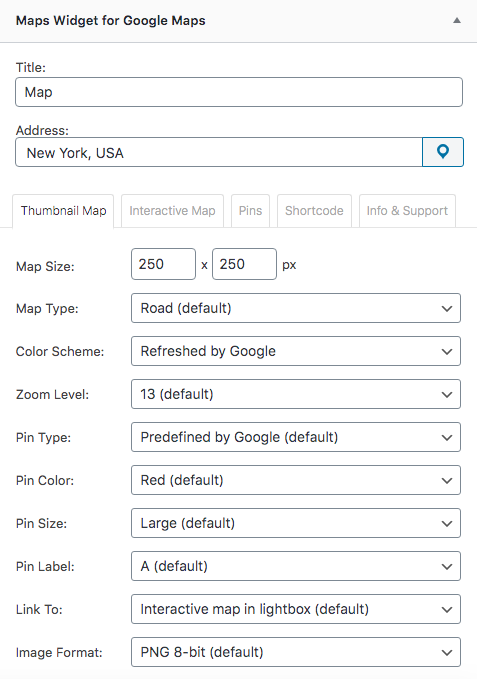
Then, you will see a pop-up where you can enter the address and modify several options including map size and type, pin color and size, label, and more.
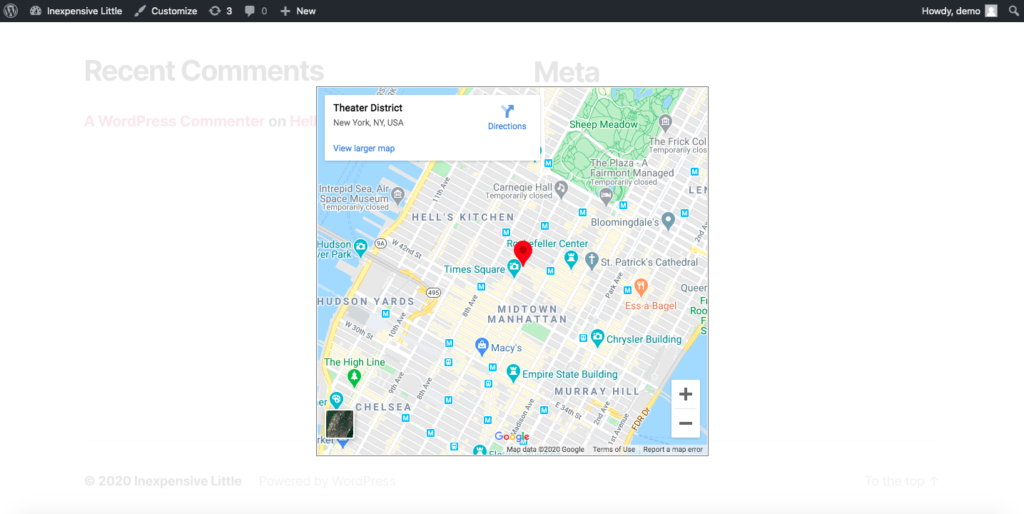
When you are ready, click Save and then check your map on the front end.
This method has a few extra steps because it involves installing a plugin and getting the API but it provides some basic customization options. On the other hand, as it’s a widget, you will only be able to display it on specific areas of your site.
3. Integrate Google Maps with WordPress using Plugins
The two previous methods are excellent options to display your business location or any kind of static location. However, if maps play an important role in your WordPress site or you need to include multiple maps in one post/page, then plugins are a better choice. To help integrate Google Maps with WordPress using plugins, many developers have joined the race. In this thread, we will introduce to you MapPress Maps for WordPress, one of the best tools for this purpose out there.
So, to add Google Maps to your WordPress site with plugins, you have to:
Step 1: Install and Activate MapPress Maps for WordPress Plugin
Download the MapPress Maps for WordPress plugin for free onto your PC/laptop, and then activate it.
Step 2: Add New Posts with Maps
After that, add a new post/page from your WordPress admin dashboard. You can also edit published posts to add a map. After finishing the titles and content of the post, scroll down to see what MapPress can do.
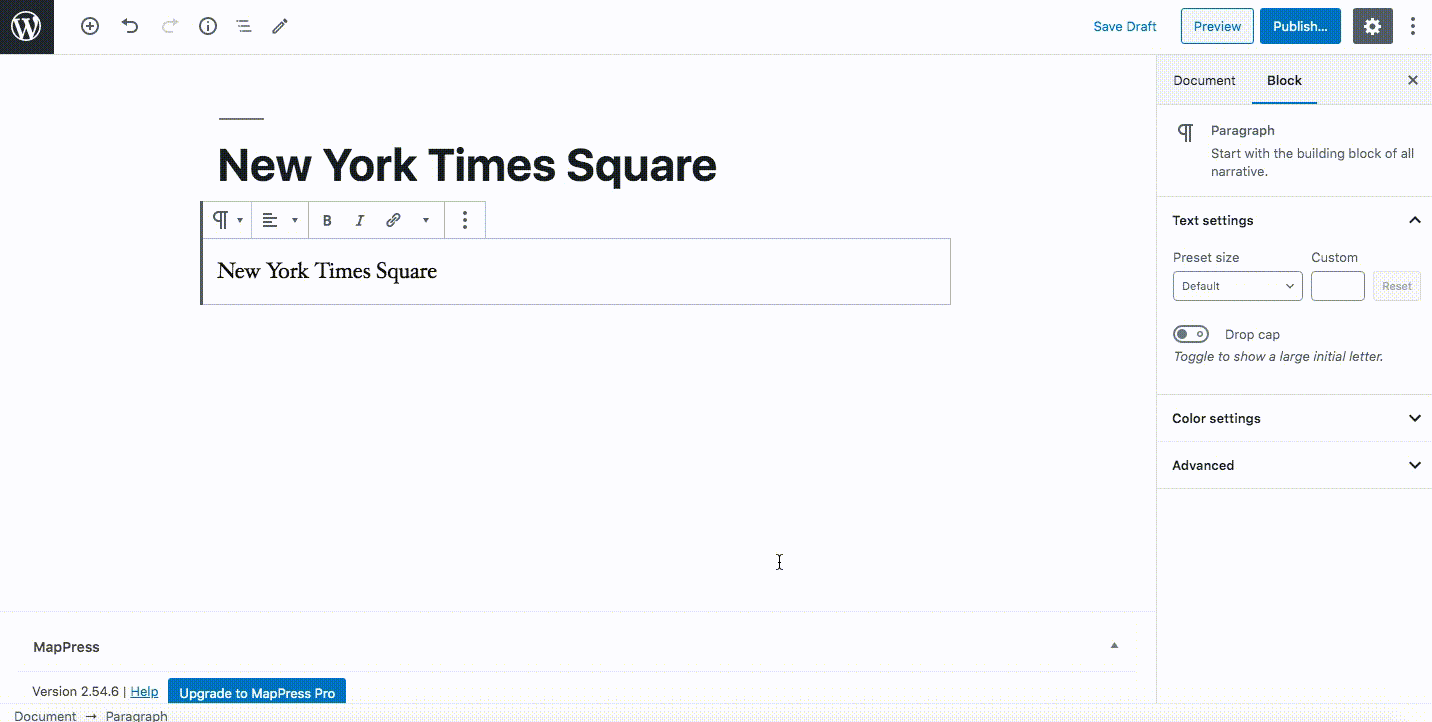
After naming your map and entering a location, click Save and publish the post. You will get a post with an interactive map on the front end.
This plugin also allows you to add unlimited maps and customize the map. From the MapPress settings, you can change the settings as well as how the maps are displayed. There are many options to edit, such as map type, map controls and alignment, post types, where to get directions from, Street View, and many others.
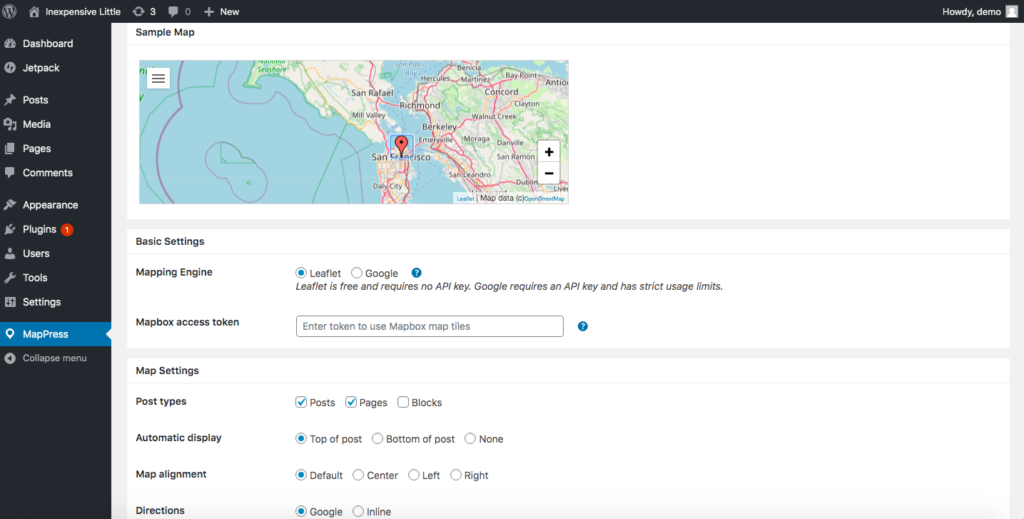
MapPress also has a pro version that starts at 49.95 USD and includes mashup maps, widgets, custom marker icons, and other functionalities. However, if you just want to include interactive Google Maps on your site, the free version should be enough.
Conclusion
In conclusion, adding Google Maps to your WordPress website will do a lot of good to your business, from providing a useful tool to your users to improving your SEO results. However, since there are a couple of methods available, which one should you choose?
Before you integrate Google Maps with your site, you must consider some relevant business factors carefully. For example, if you only need to display a map on the sidebar or footer so that customers know your location, using widgets is a practical choice. If, on the other hand, you want to show maps in some specific posts and pages, you can embed them manually. Finally, if your business deals with locations and maps a lot, the MapPress plugin is your best option.
Finally, if you want to increase your productivity and make the most of your site, you can check out some of our guides:
- How to integrate your site with Google Calendar
- Embed Trello Boards and Cards in WordPress
- How to Embed Calendly in WordPress?
- Connect Eventbrite with WordPress
Do you have any questions regarding how to integrate Google Maps with your WordPress site? Don’t hesitate to write to us in the comments below!

I have done much research on this topic that how to integrate google maps with WordPress but didn’t find anything valuable. I think you have written very reseachful article with all the basic information. Thanks for the informative article.
Thank you, Priya!
Is there any way to get this Map as a background to a page with full length say width 100% n height 100% something like that??
Thanks for posting a valuable and informative blog.