
Jetpack AI Assistant: Everything You Need to Know
Do you want to know about Jetpack AI assistant? If you are looking for a complete guide, check out this post!
Have you ever considered writing blog posts with a bit of help?
No, we are not talking about getting help from a content writer or something similar. We are talking about getting help using the latest technology.
AI (Artificial Intelligence) is a topic of discussion these days. If you are involved in a tech-related industry, you know how ChatGPT by OpenAI and Bard by Google are helping millions of people.
But as bloggers, can we use these AI tools to work for us?
The answer is yes!
Jetpack recently released an AI assistant to help you write blog posts based on user input. So if you need to publish stunning content without much hassle, the tool will be helpful.
If you need to know how the writing tool created by Jetpack will be helpful, keep reading this article. Here, we will show you how to use the tool to write content that stands out from the crowd.
But before we explain how to use the tool, let’s see what is unique about Jetpack’s AI assistant and explore it a bit.
What Is Jetpack AI Assistant Tool
If you have been in the blogging and WordPress sphere for a while, you probably know what Jetpack is. It is a feature-rich WordPress plugin created by the Automattic team. Some of the useful products available in the Jetpack plugin are:
- Malware scanning
- Backups
- Analytics
- Uptime monitor
- Disable/enable comments
- Widget options
And so on.
Recently, Jetpack introduced a new feature called AI writing assistant. As the name says, the new tool will help you generate content on the go without any trouble.
Usually, most WordPress AI content writer plugins ask for an OpenAI API key in the plugin’s configuration page. The API key will be used to generate content using ChatGPT.
In Jetpack’s case, you do not need to generate any keys, and Jetpack won’t rely on third-party AI platforms to write content.
You can directly start generating content from the Gutenberg editor, making the tool easy to use. Apart from everything we mentioned above, you will also have the option to change the tone of the generated text.
The AI assistant comes with a lot more features. We will be talking about it later in this article.
Now you know what Jetpack’s AI assistant tool is. Next, let’s see how to use the Jetpack AI assistant tool to generate content.
How to Use the Jetpack AI Assistant Tool
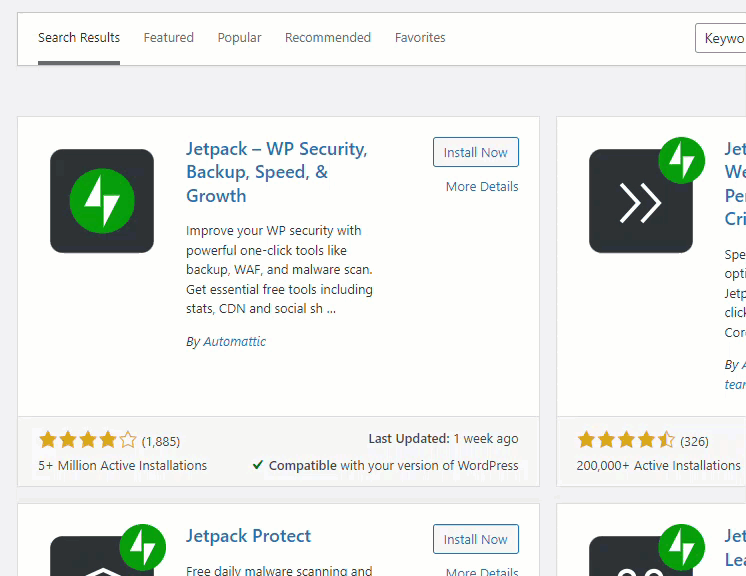
The first thing you need to do is, install and activate the Jetpack plugin on your website.
1. Installation and Activation
Next, connect Jetpack with your WordPress.com account.
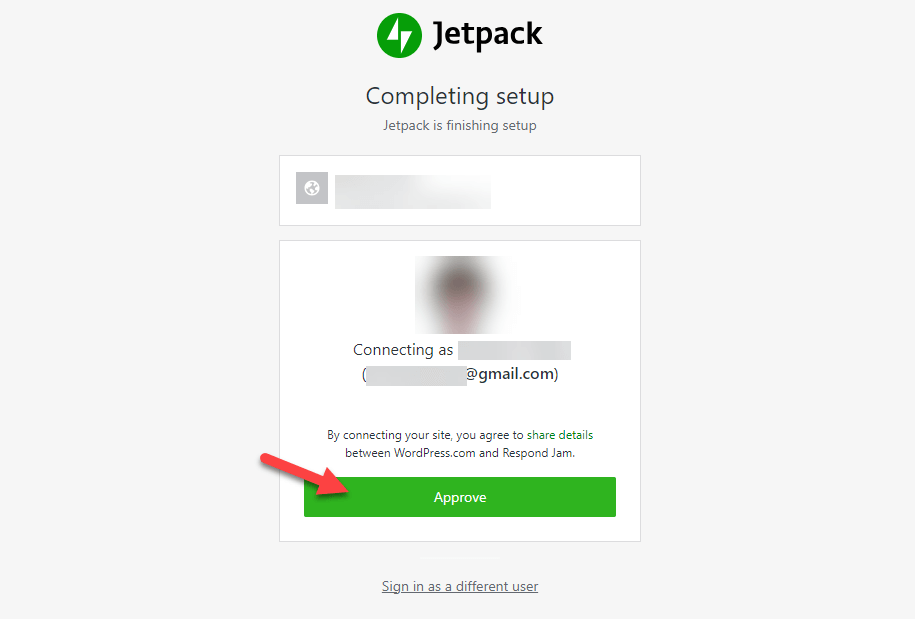
Once you have connected the plugin with your WordPress.com account, you can start using it. If you have already configured the plugin, you can skip these steps.
2. Working with AI
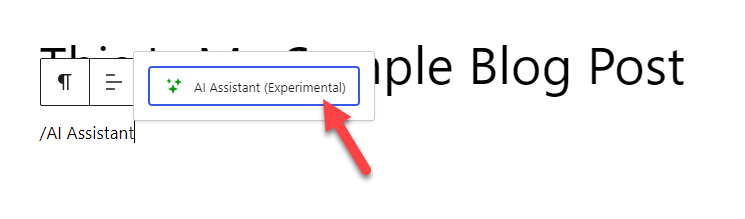
Now, open the Gutenberg editor. You can start writing a new blog post or edit an existing one. Here, I will be creating a new blog post.
Now, search for the AI Assistant block and add it to the editor.
The block comes with minimal options.
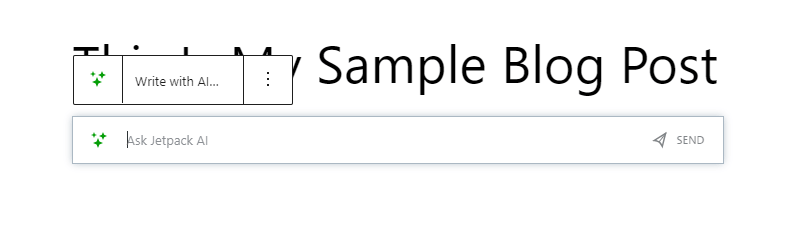
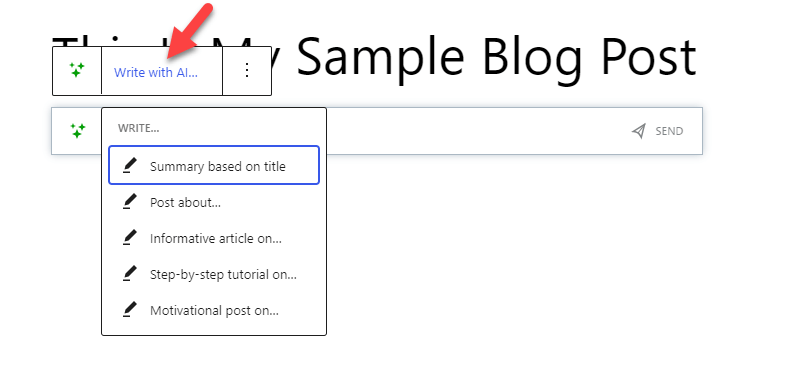
All you need to do is type in what you need to write about in the field and send it. If you can’t think of anything and need inspiration, click the Write with AI button to show you some sample commands.
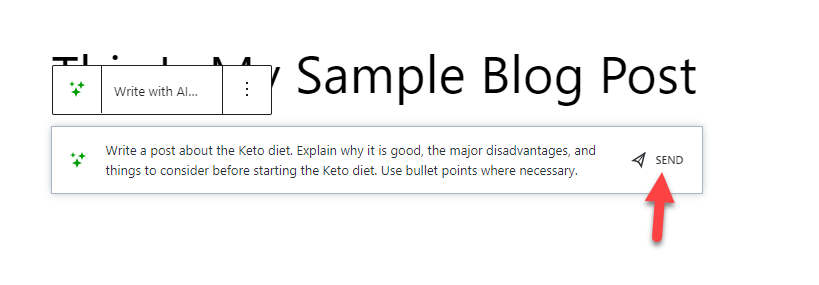
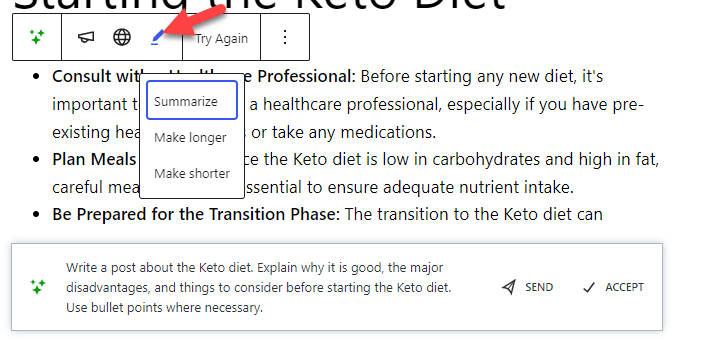
For this demo, we are going to write about the Keto diet.
3. Generating Content
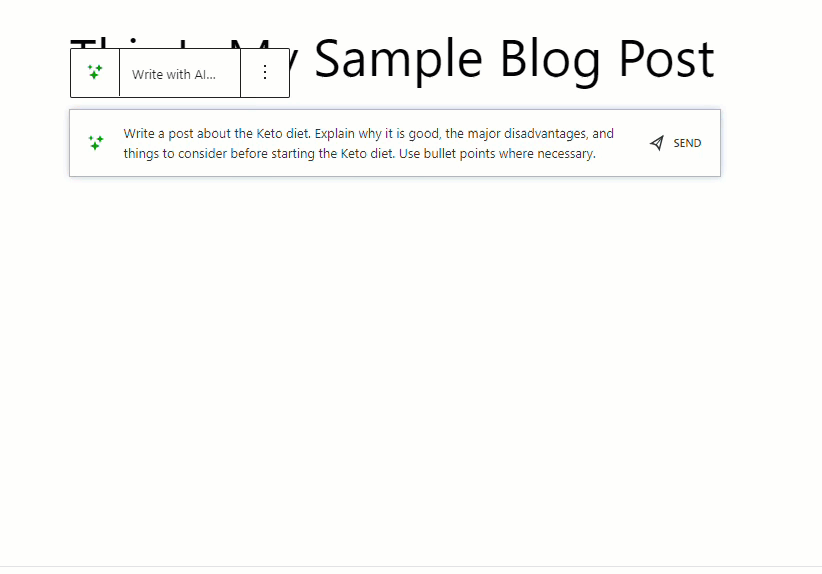
So the request will look like this:
Within a few seconds, the tool will start generating content.
The tool can take a few seconds or minutes to complete the task based on your input. When you are comfortable with the generated text, you can click Accept.

If you click Accept, the content will be added to the editor. If the content generated is not up to mark, click Try Again.
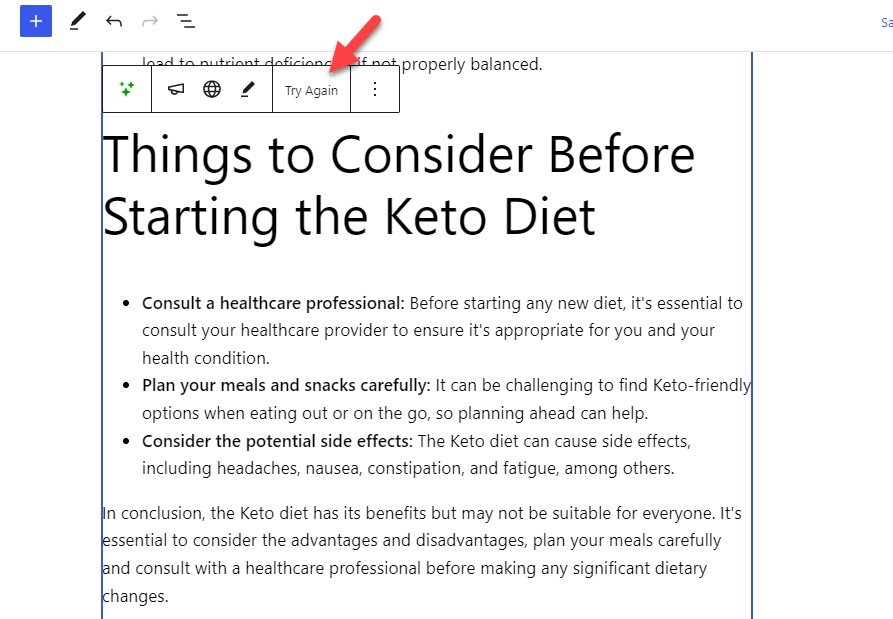
Once you click Try Again, Jetpack will generate another version of the text. You can do the process until you get a stunning article.
3. Plugin Settings
The other three options available in the block are:
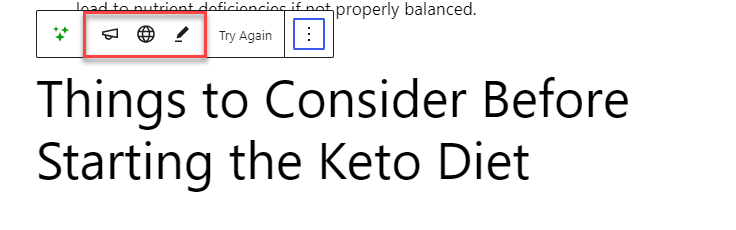
- Change tone
- Translate
- Improve
Let’s see what each option has to offer to tweak the content.
3.1) Tone Management Settings
The first one is tone management.
By default, the tool will generate a response in a formal tone. Using the first option, you can change the style of the answer. The development team has combined multiple tones in the plugin, such as:
- Formal
- Informal
- Optimistic
- Humorous
- Serious
- Skeptical
Etc.
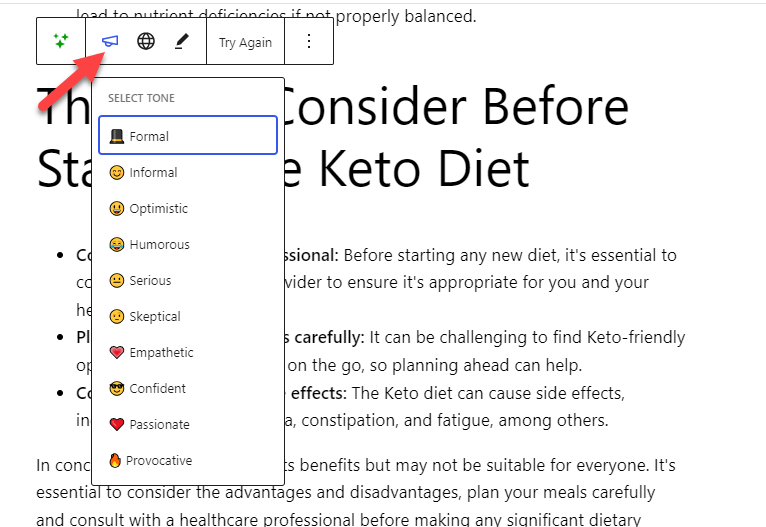
Here, we are going to change the tone to informal. Within seconds, the tool generated another response with the selected style.
3.2 Translation Settings
The next one on the list is the translation option. As the name says, this option can translate your content into any other language like:
- Spanish
- French
- German
- Italian
- Portuguese
- Russian
And so on.
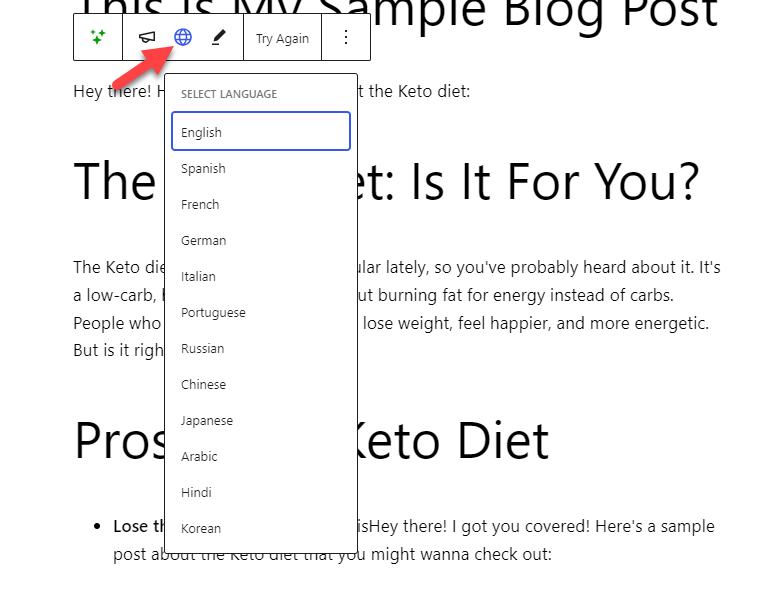
Jetpack will identify and use your website’s primary language to deliver the requested content by default. With the translation feature, you can transform the generated content into more than ten languages.
The translation option will be helpful if you are running a multilingual blog.
3.3 Improve Settings
Finally, the improve option will help you make the generated text longer or shorter or create a summarized version.
You can generate as many responses as you need. If you are comfortable with the generated content, click Accept, and it will be added to the editor. Now, you can start tweaking the text manually and make it perfect.
That’s it!
This is how you can use the Jetpack AI assistant tool to create content for your blog. The next big question we will answer is how much it costs.
Free AI Writing Credits – Pricing
Jetpack’s AI assistant has two pricing options.
- Free – $0/month – 20 requests (total)
- Premium – $10/month – high volume requests
You can use the free version of the tool to test multiple features. It comes with every feature. The only downside is you’ll only get 20 requests. Once you have used the total quota, you should upgrade to a premium plan to use the tool.
The premium version is highly recommended for content websites. By paying $10 a month, you can remove the restriction on the quote. You will also get priority support if you are a premium customer.
Pros and Cons JetPack AI Assistant
We will show you the major advantages and disadvantages of Jetpack’s AI assistant tool.
Pros
- Easy to configure
- No additional tools required
- Won’t cause performance issues
- Fast responses
- Translation option
- Multiple tones to choose from
- Improve the content with a single mouse click
Cons
- Need a human to verify the generated data
- The free version has a limited quote
- The option to create images can be a good addition
Jetpack AI vs. Jasper.ai
Jasper.ai is one of the top AI-based content writing platforms available. This section will show you a quick comparison between both tools.
Since Jetpack is new in the AI writing market, the tool will take a couple of weeks/months to improve.
Frequently Asked Questions
Let’s look at some frequently asked questions regarding Jetpack’s AI writing assistant tool.
No.
The AI assistant is an in-built feature of the Jetpack plugin. Once you have activated and connected Jetpack with your WordPress.com account, you can start using the AI assistant. If you are not seeing it in your editor, update the plugin to the latest version.
Using the AI assistant feature of Jetpack won’t affect the performance. You can turn off the Jetpack modules you are not using to optimize the speed. Plus, always compress your mages and configure a caching plugin to make your website faster.
Jetpack AI assistant can help you fix basic spelling and grammar errors. But we highly recommend using any grammar checker tools to scan for mistakes.
The AI assistant will only work on the Gutenberg editor. We recommend switching to Gutenberg and testing the feature if you still use the Classic Editor.
It is a freemium tool. The free version allows you to generate up to 20 responses. Later, you can upgrade to a premium version by spending $10 monthly.
Conclusion – Jetpack AI Content Writing Plugin
If you need to rank your content higher in search engine result pages, invest your time creating stunning content or invest your money in someone who can help you write blog posts.
When you do not have time or money to spend on your business, relying on an AI content writer would be the feasible option. Since so many AI content writers are available, choosing the right tool might take time and effort.
As you can see in this article, Jetpack’s new AI assistant feature is handy for everyone. Without any technical knowledge, you can start generating content for your business with a few mouse clicks.
There are no dedicated dashboards or copy-paste tasks. You can directly generate well-written content right from the WordPress Gutenberg editor.
While Jetpack’s AI assistant is a new tool, the features are pretty basic. As they update the plugin in the future, we might see more unique features and integrations for the AI assistant.
Have you tried any AI assistants to write content for your website?
If you haven’t, will you start using AI to write blog posts for you?
In the comments, let us know how you plan your content writing strategy.
